HID Black Magic Hella Conversion
 09-12-2011, 03:05 PM
#1
JK Enthusiast
Thread Starter
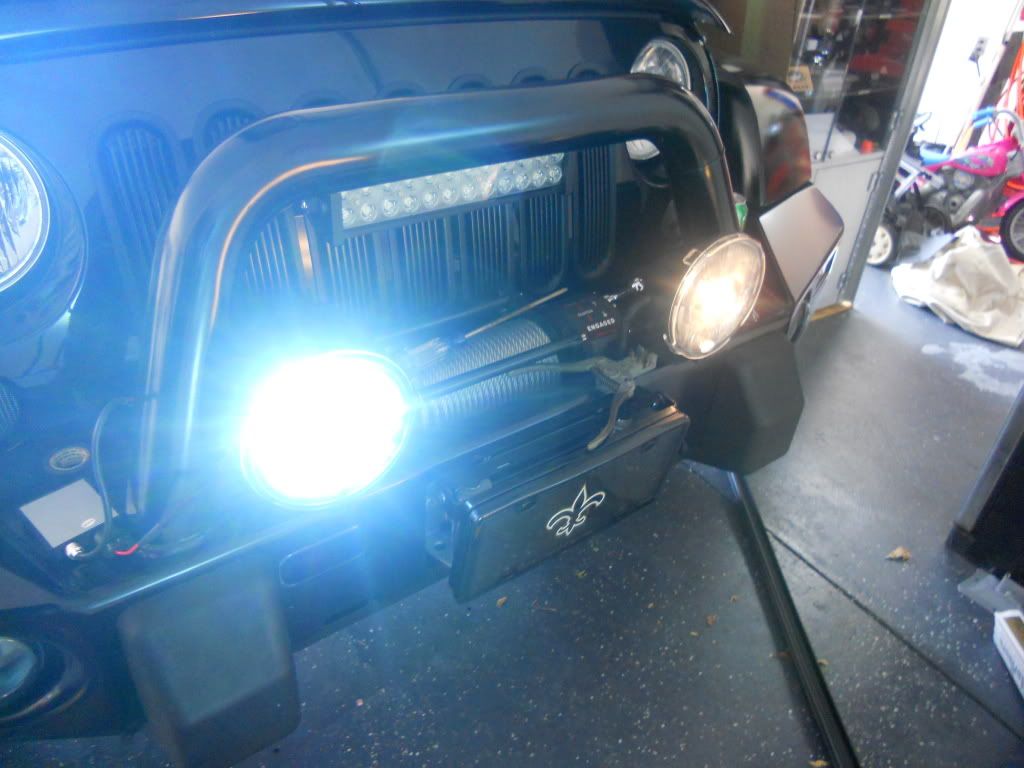
I searched the internet everywhere to find a how to find a How to Covert Hella 500 Black Magic Lights to HID & came up with nothing so I decided to do a write up on my own. My Black magic lights were allready installed on my jeep wrangler so I did this mod with them still attached.
Tools needed:
Phillips screw driver
Needlenose
Drill
Drill Bits
Wire Stripper
Wire crimper
Electrical Tape
Razor
Items you need to purchase:
H3C HID Bulb & Ballast (I used a 6000k, but color choice of lighting is up to you)
Black Silicone
Wire connectors/Wire Tap
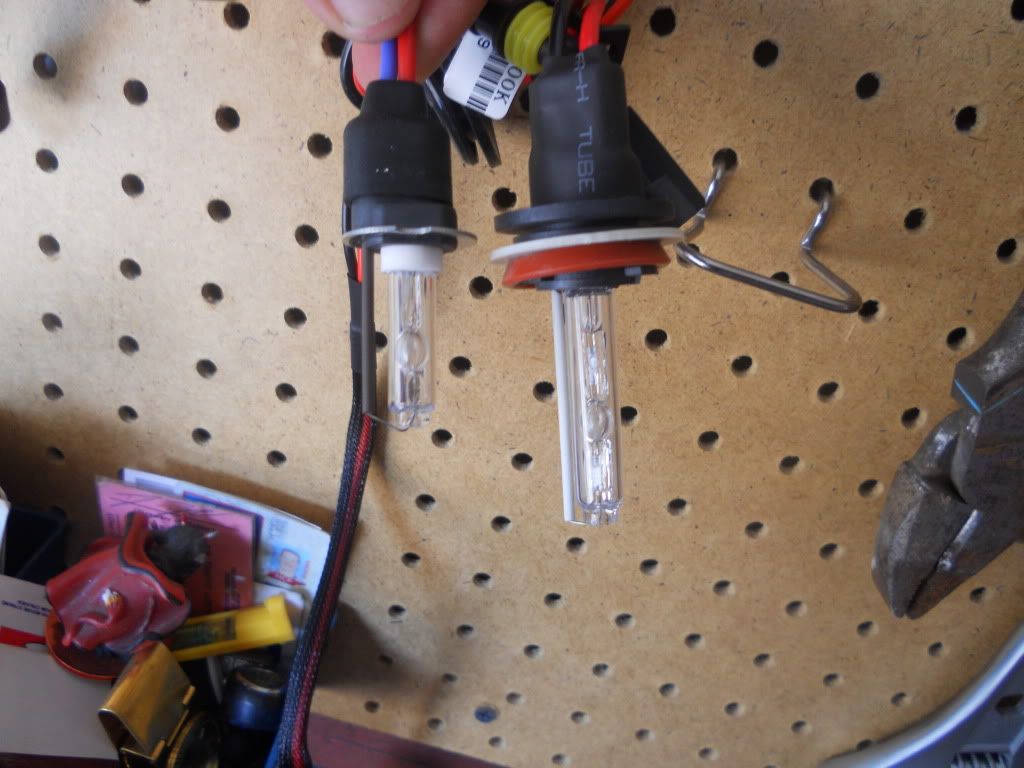
The hella black Magics come with a H3 bulb, but a standard HID H3 bulbe is too long to fit into the light Housing due to the black material inside the light, & the housing is thinner than a standard off road light. See picture below to see the difference between a H3 Bulb & a H3C (Compact) Bulb
Start by using a phillips head screw driver to remove the single screw on the bottom of the light.
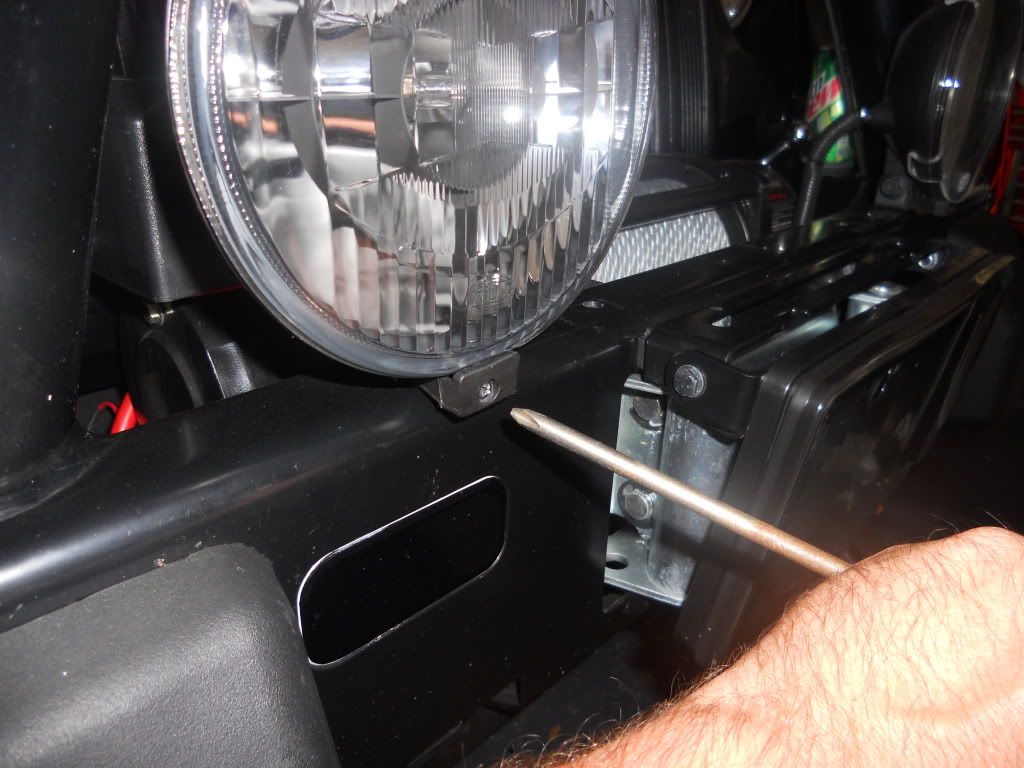
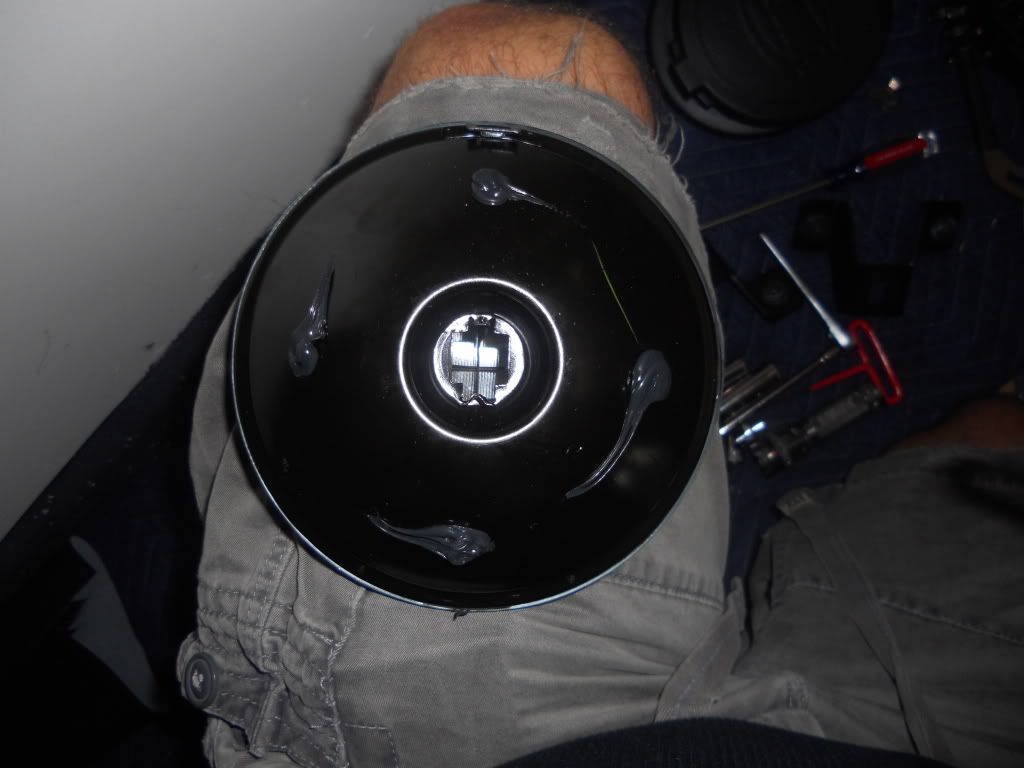
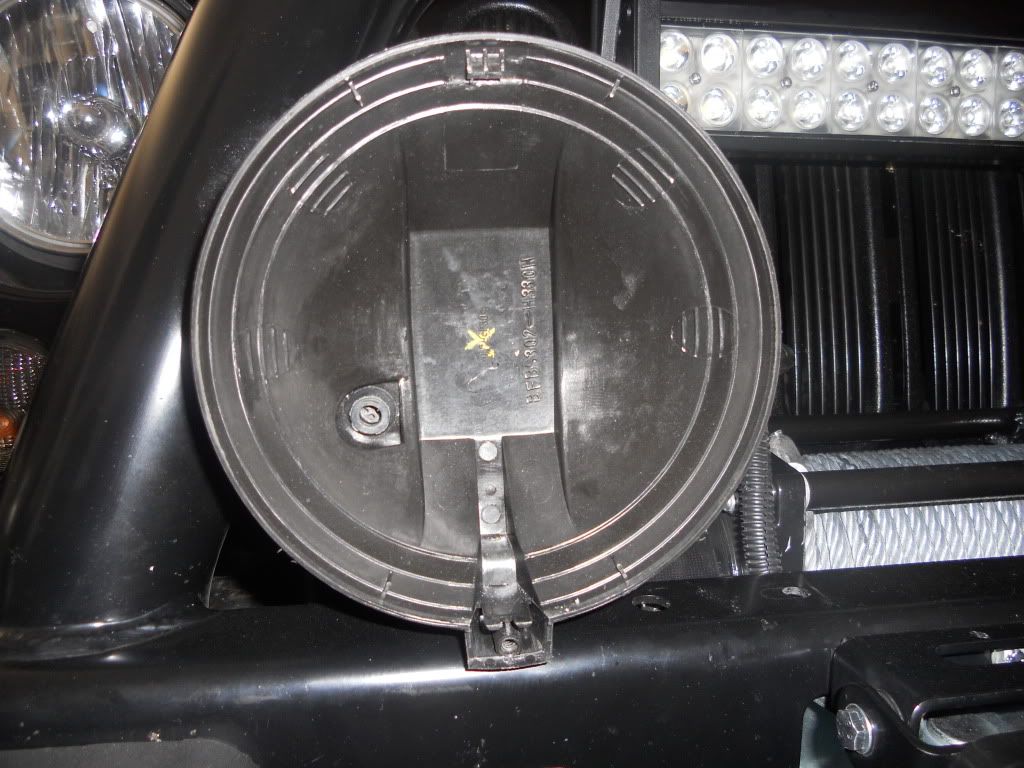
Once the screw is removed the full light housing will be able to be fully removed from the casing.
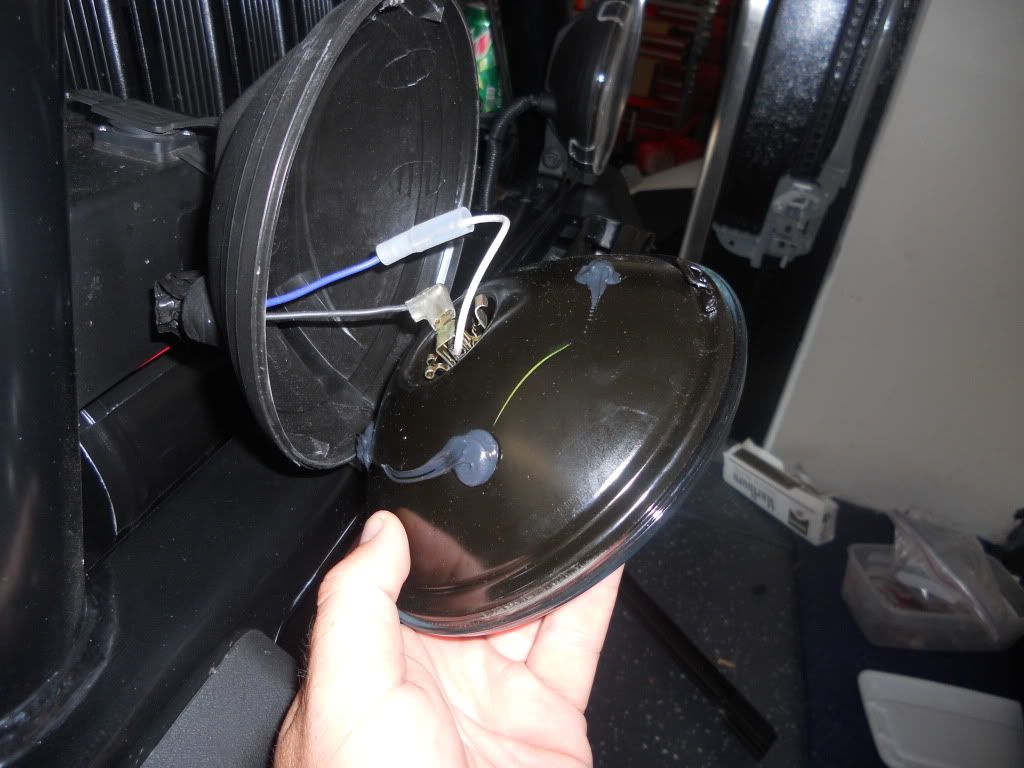
Unplug & remove the bulb. Then using a needle nose pull one side of the bracket & remove it from the Light.

It should now look like this.
Next place your H3C bulb into the light. I then placed a small zip tire around the connectors tightly to hold to bulb into place. (Note that 1 side of the bulb has a rounded section, the other a squared section. Install accordingly for a tight fit.)
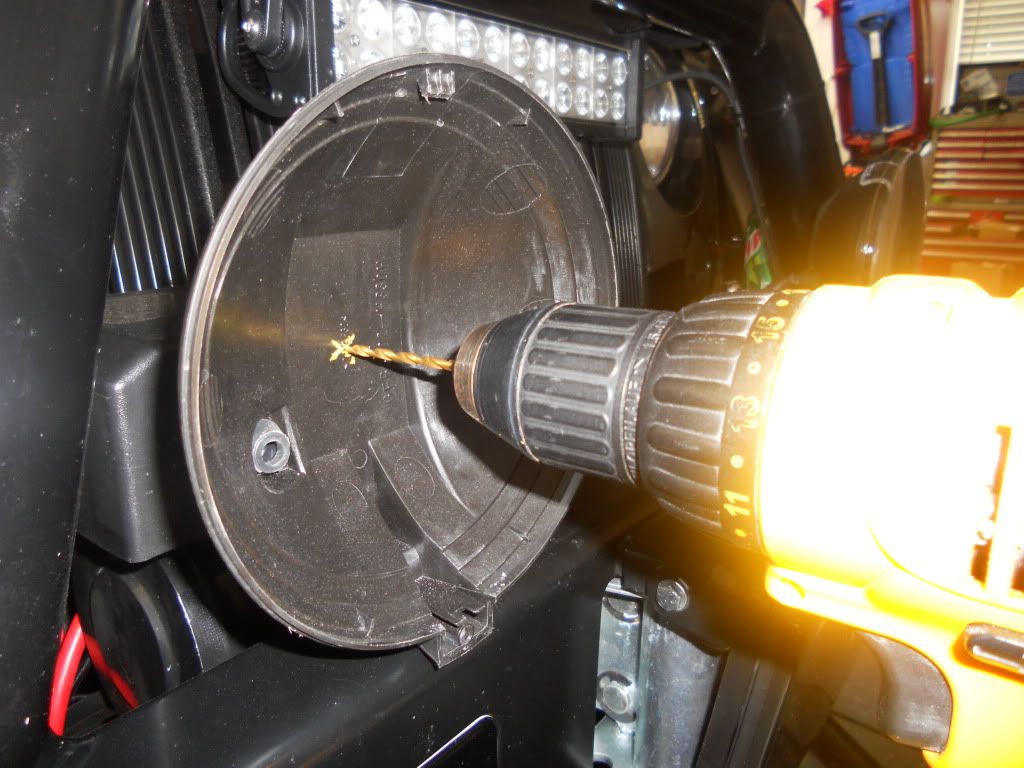
Next cut the power & ground wire & pull them out of the rubber grommet on the back.
Next you will need to drill a hole but make sure of where the back of the HID bulb touched against the plastic housing
It should be dead center. I marked it with a grease pencil so you can see where I'm going to drill.
I then drilled a hole in the plastic housing. I started out with a small hold and worked my way up in size until I got the size hole I needed.
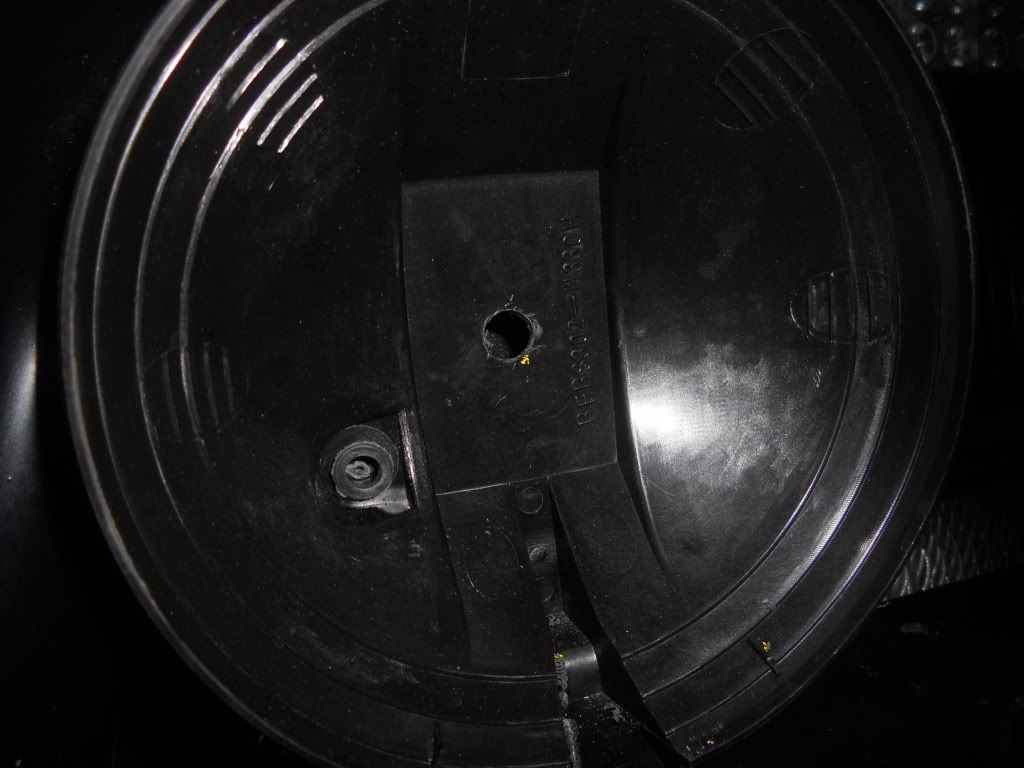
Now that your hole is drilled you need to make sure the large connector on the HID (the red wire) will fit. I drilled a smaller hole under the large hole & then used a razor knife to nick it so the lip on the connector would fit
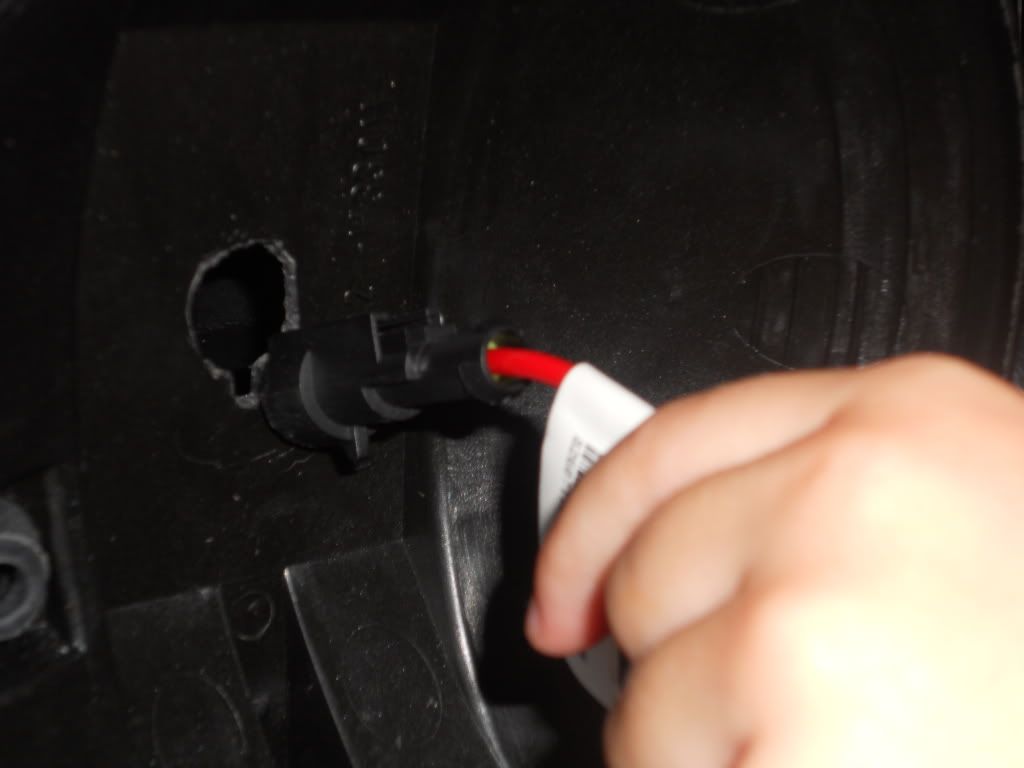
I then wrapped the wires on the HID bulb with electrical tape to help keep the wires looking as clean as possible
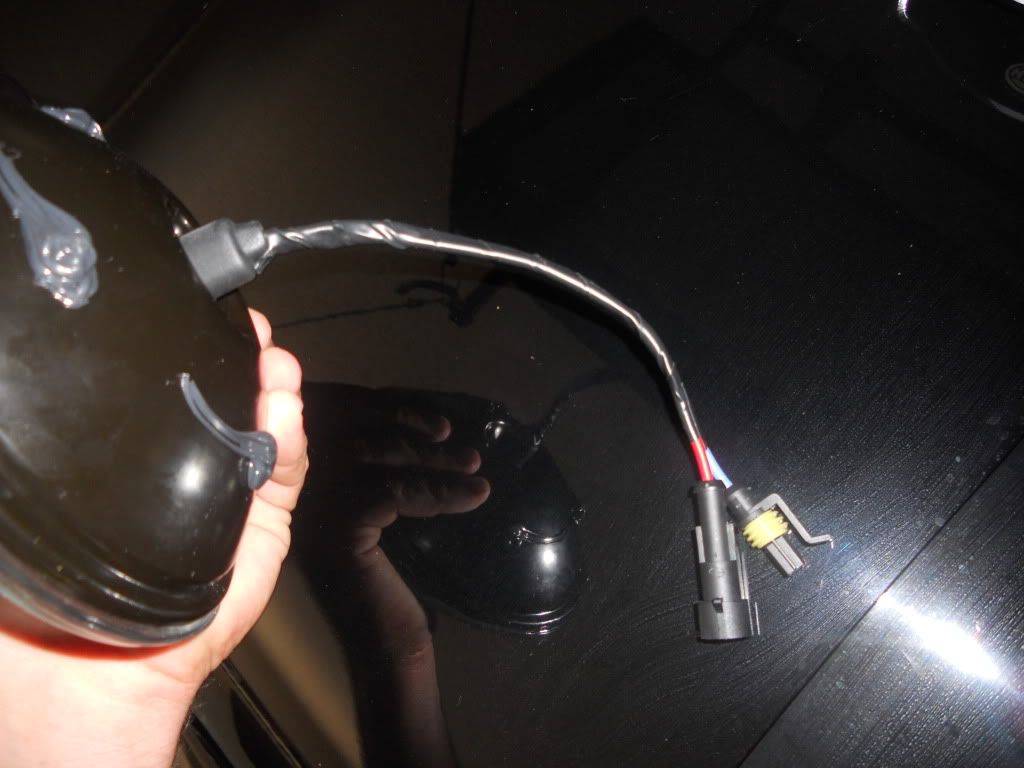
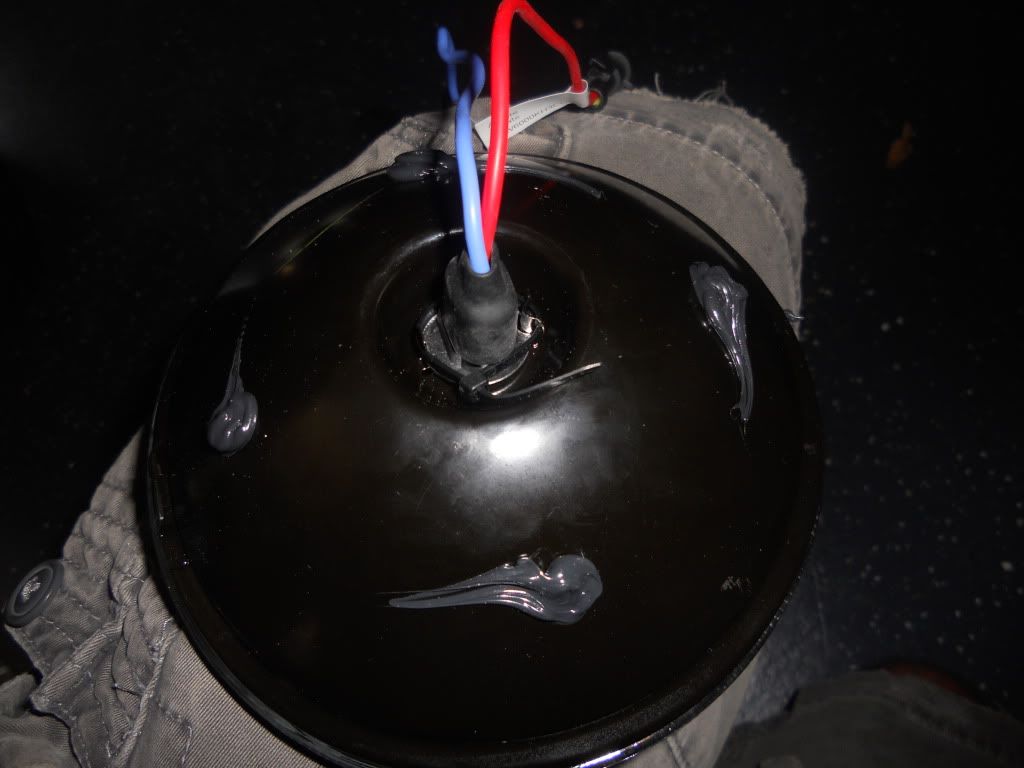
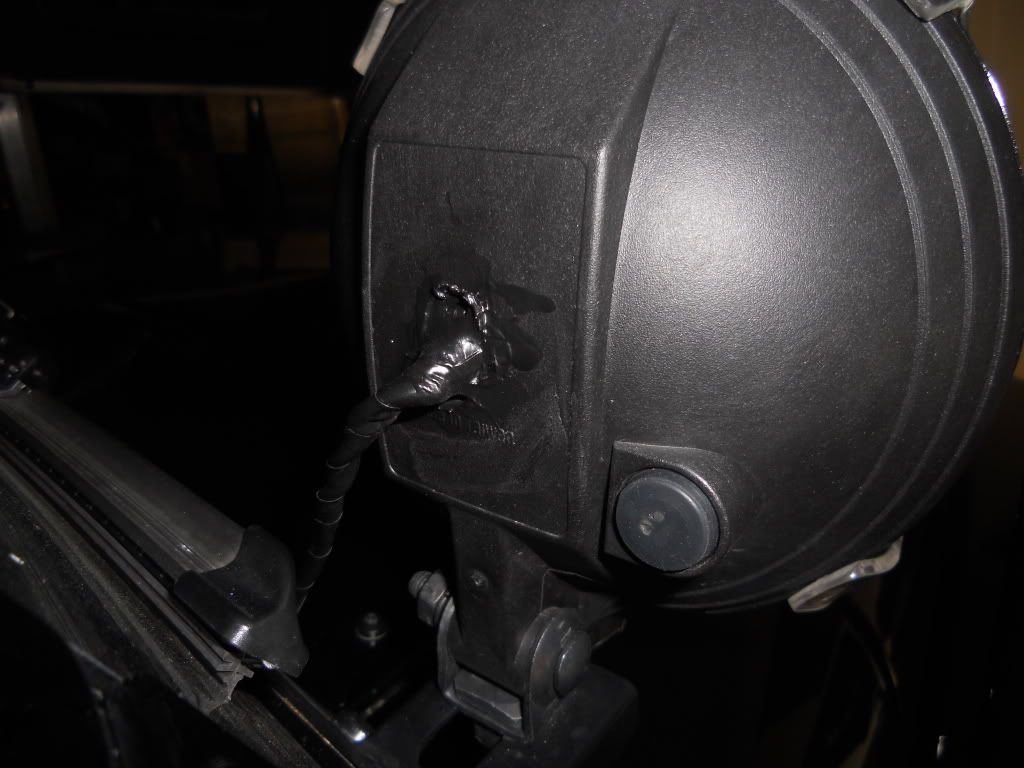
Then place the 2 plastic connectors on the HID bulb / light & run them through the plastic housing. Pull the wires all the way through & replace the light & put the phillips screw/holder back on & tighten them up. Your driving light should be totally back together now & the back should look like this.

The ballast positive / negative wires came with a male wire connector so I then crimpped a female connector onto the power & ground wire I allready had ran for the lights.
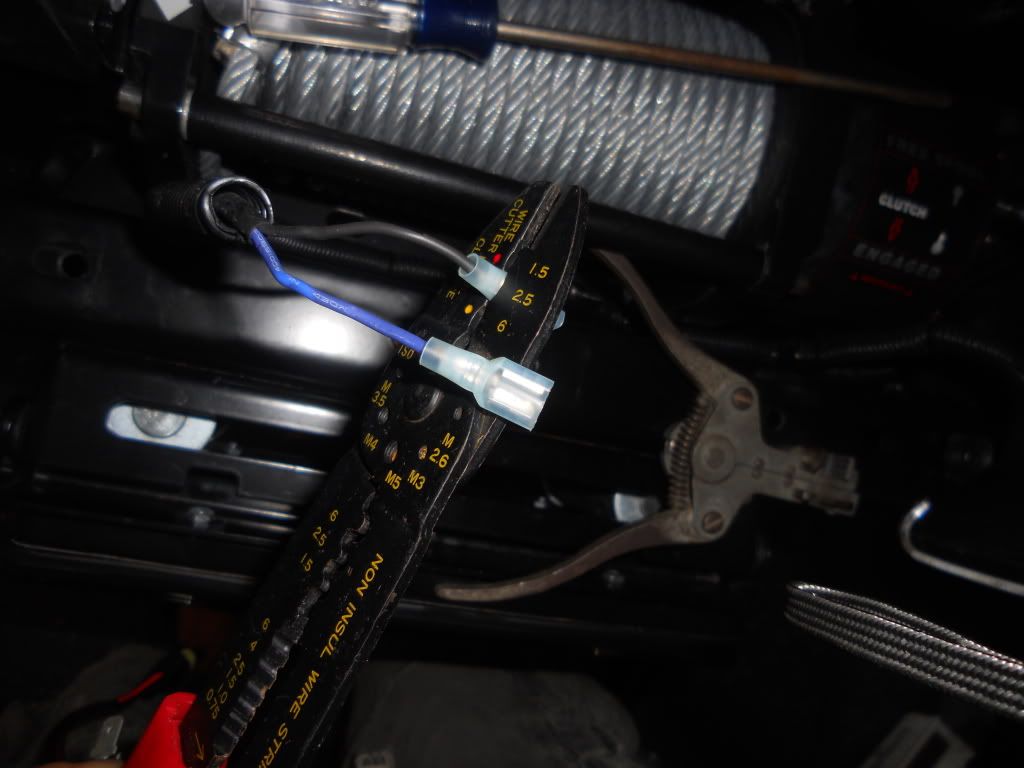
Then connect the power & ground wires together. On the ballast red is positive, Black Is negative. On the wire that come with the light kit The blue wire is negative & the black wire is positive
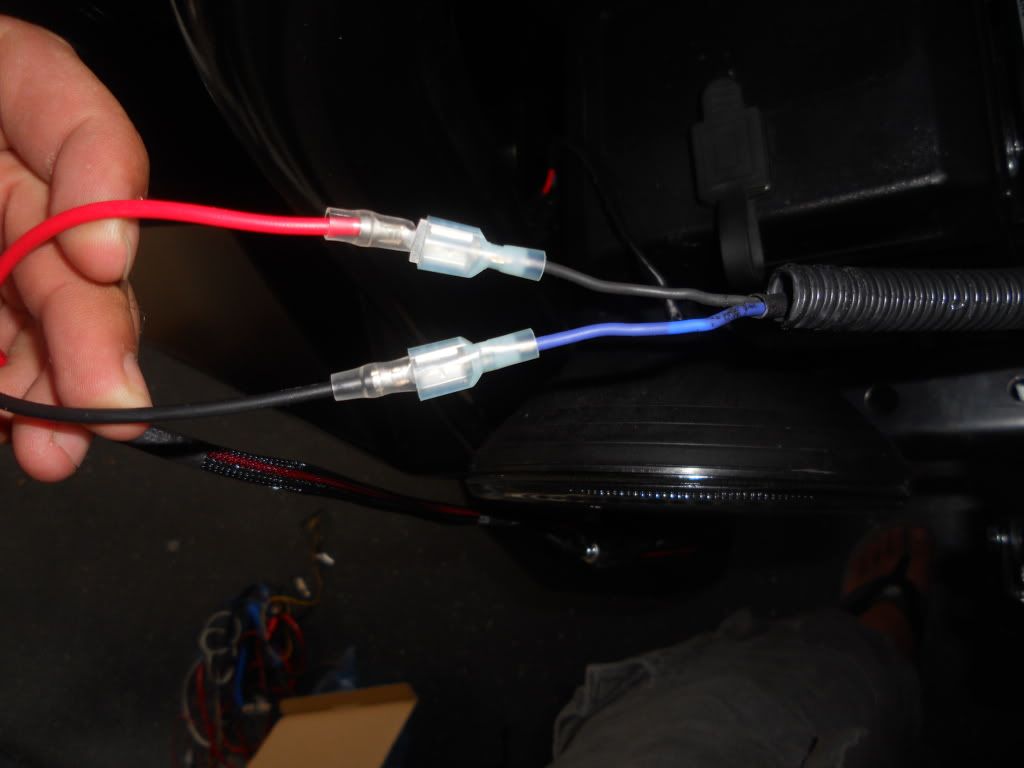
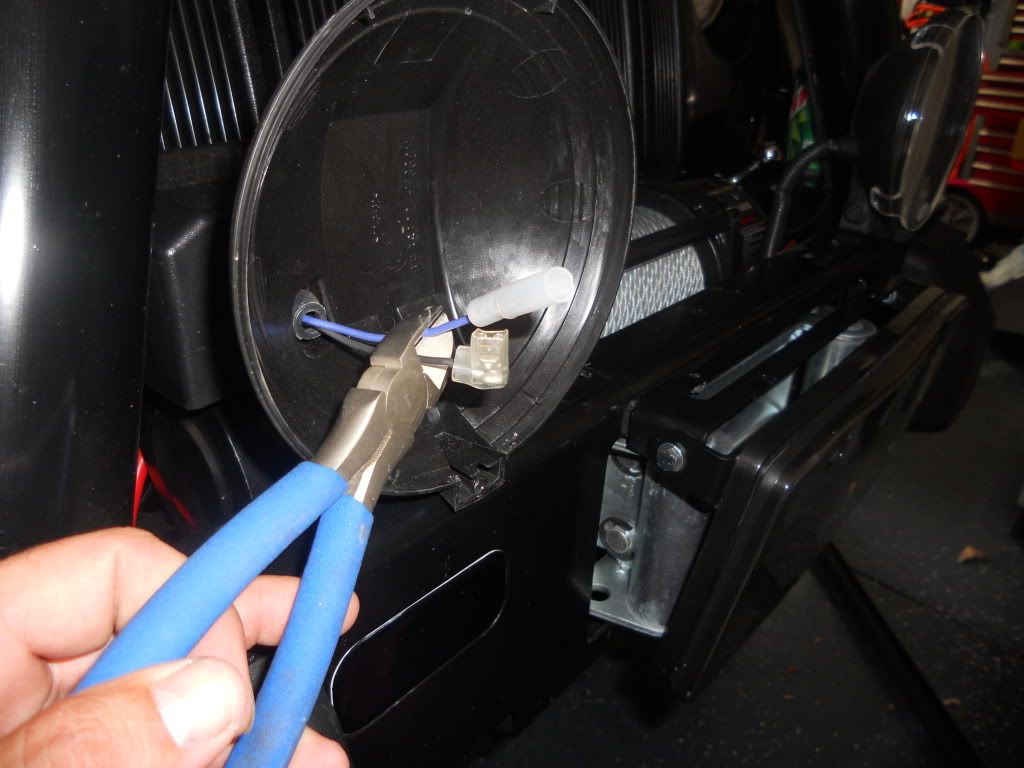
Use elctrical tape on the wires you just connected to avoid a short & keep them protected
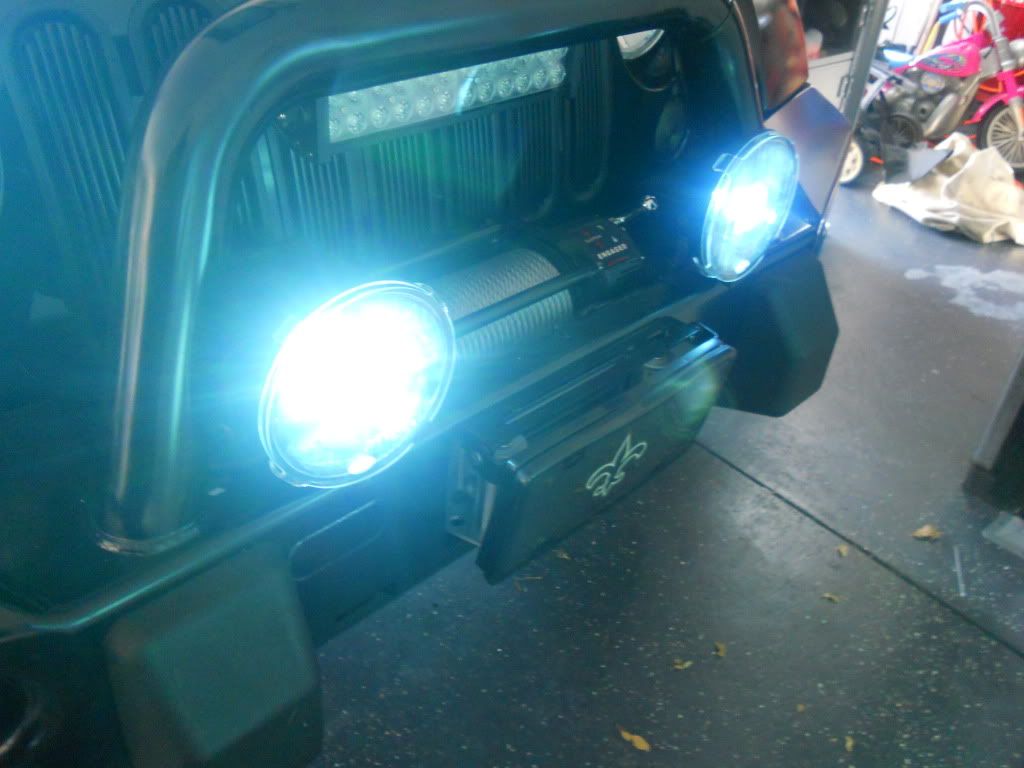
You should be able to test your light now to make sure you connected everything correctly
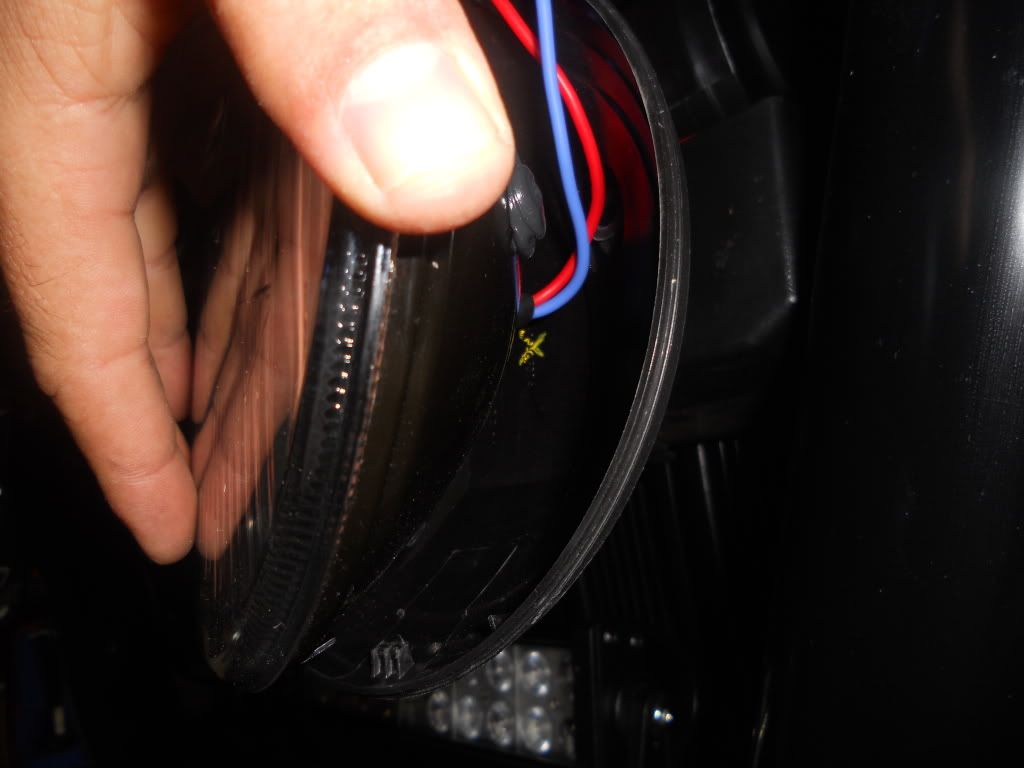
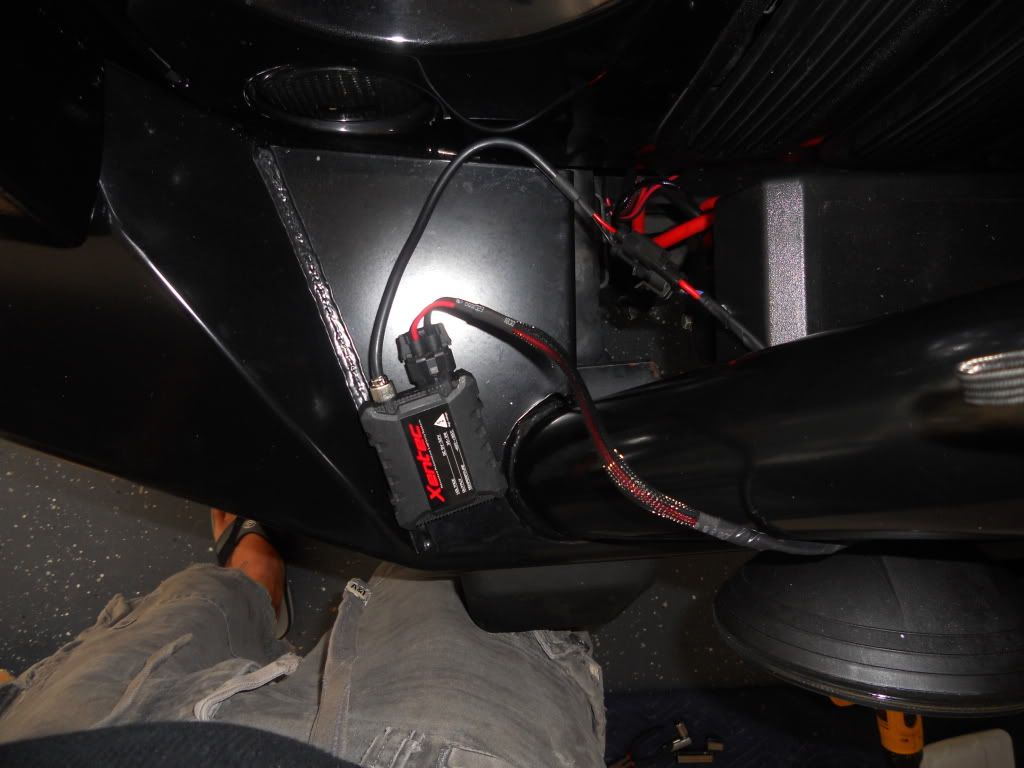
I used the black silicone next to fill in around the hole in the back of the housing to seal it & keep water from getting in. The silicone is easily removeable for bulb replacement, but you will have to re apply black silicone again after a bulb replacement.
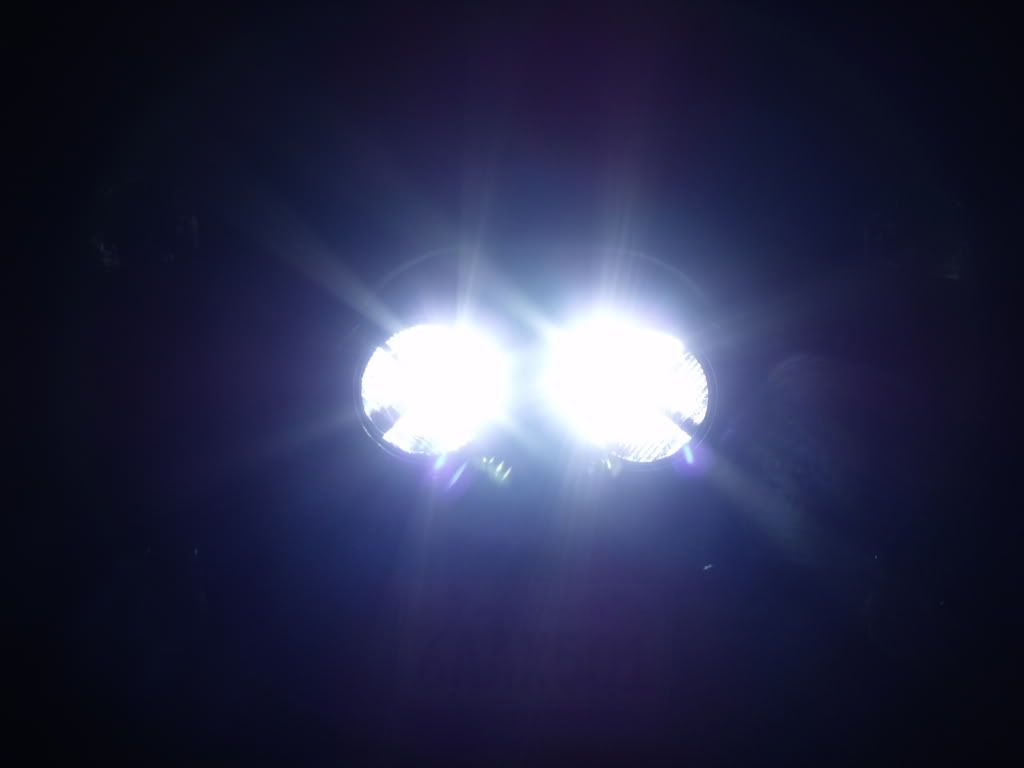
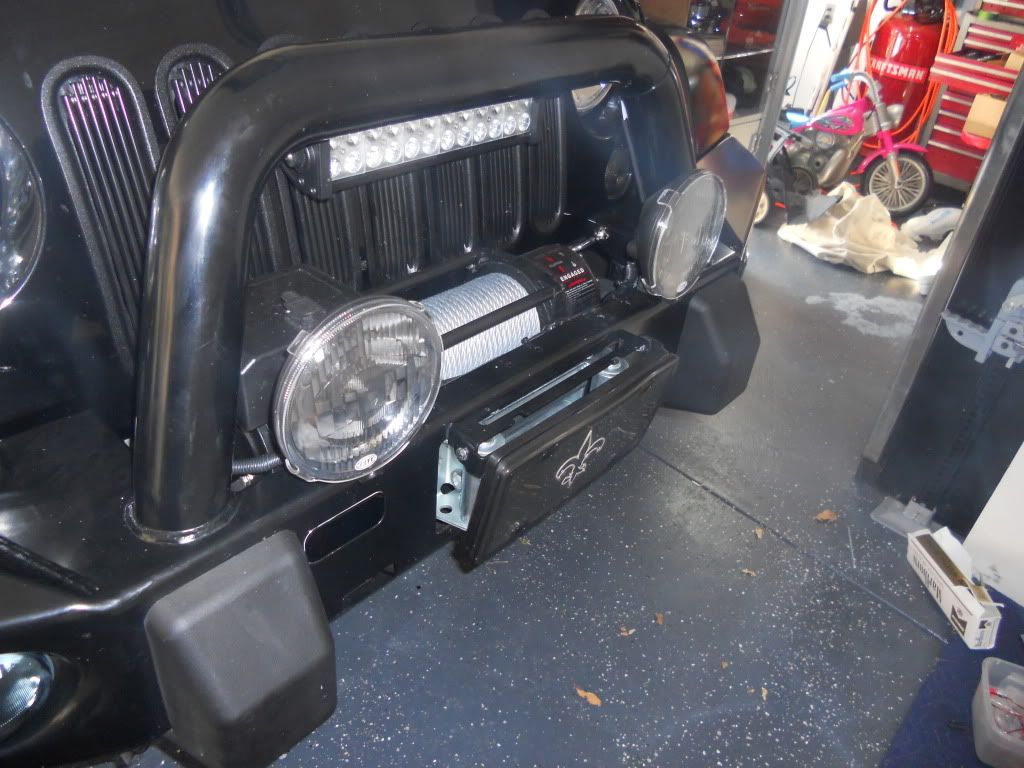
Now that your done here is what it looks like. I did all 4 of my Black Magic Hella Lights, Headlights & foglights.
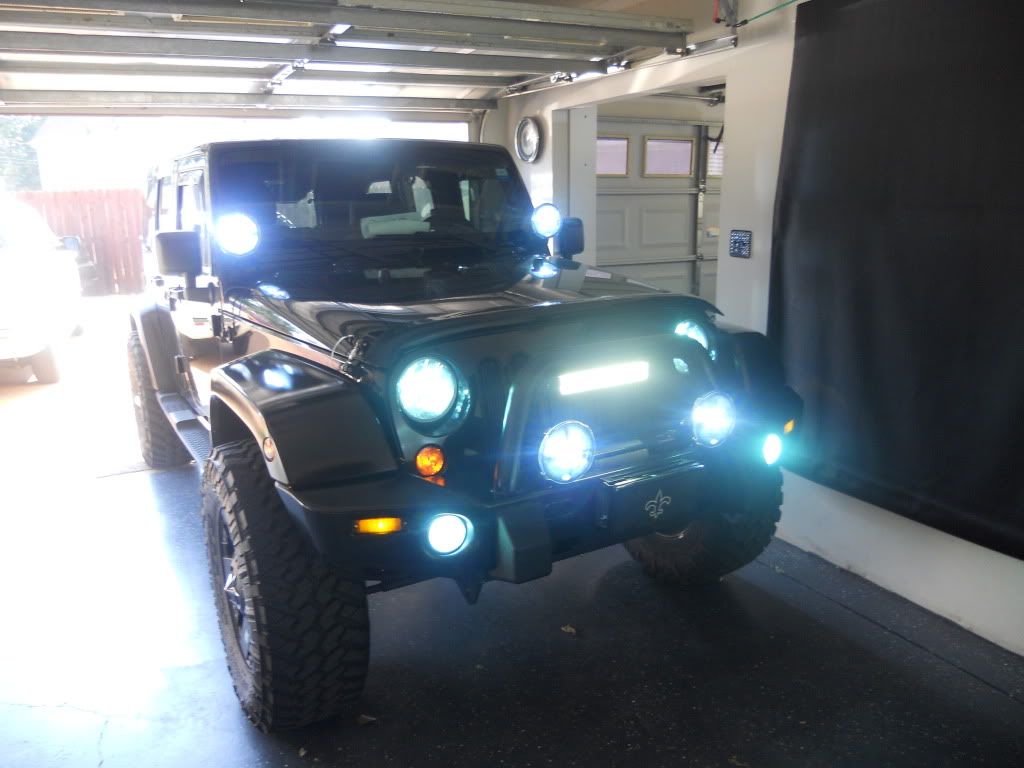
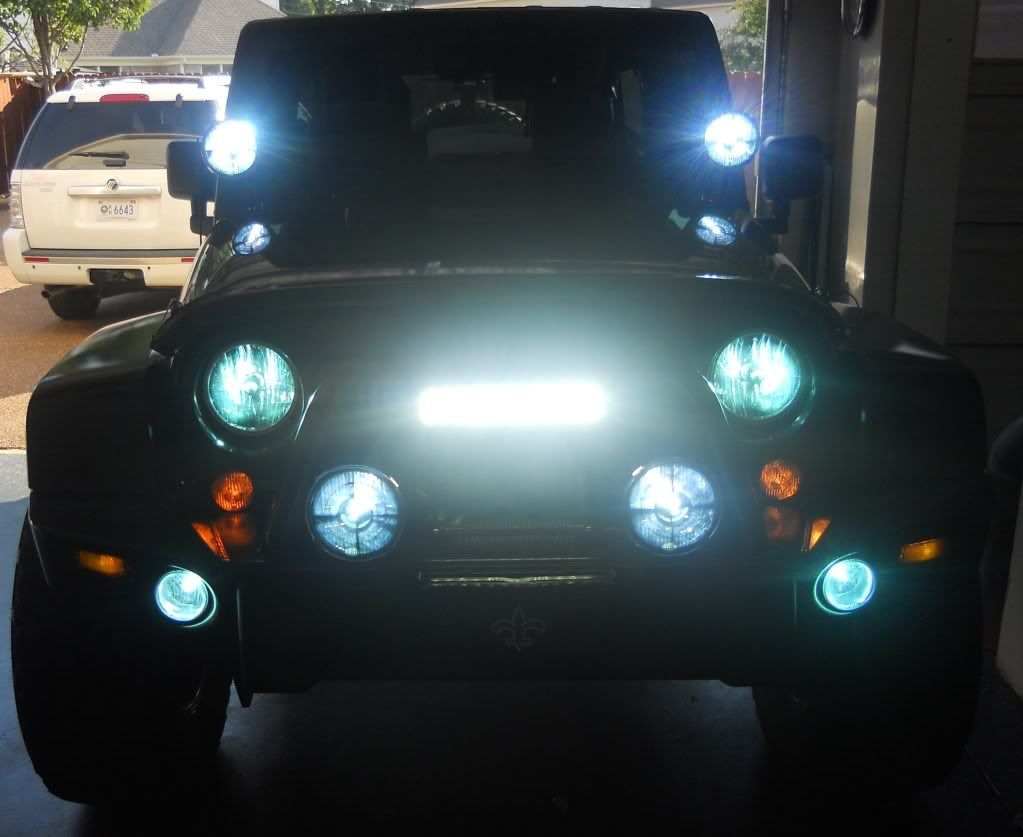
This same conversion will work for most other driving lights, but you shouldn't have to buy a compact bulb or dill a hole in the housing.
Tools needed:
Phillips screw driver
Needlenose
Drill
Drill Bits
Wire Stripper
Wire crimper
Electrical Tape
Razor
Items you need to purchase:
H3C HID Bulb & Ballast (I used a 6000k, but color choice of lighting is up to you)
Black Silicone
Wire connectors/Wire Tap
The hella black Magics come with a H3 bulb, but a standard HID H3 bulbe is too long to fit into the light Housing due to the black material inside the light, & the housing is thinner than a standard off road light. See picture below to see the difference between a H3 Bulb & a H3C (Compact) Bulb
Start by using a phillips head screw driver to remove the single screw on the bottom of the light.
Once the screw is removed the full light housing will be able to be fully removed from the casing.
Unplug & remove the bulb. Then using a needle nose pull one side of the bracket & remove it from the Light.
It should now look like this.
Next place your H3C bulb into the light. I then placed a small zip tire around the connectors tightly to hold to bulb into place. (Note that 1 side of the bulb has a rounded section, the other a squared section. Install accordingly for a tight fit.)
Next cut the power & ground wire & pull them out of the rubber grommet on the back.
Next you will need to drill a hole but make sure of where the back of the HID bulb touched against the plastic housing
It should be dead center. I marked it with a grease pencil so you can see where I'm going to drill.
I then drilled a hole in the plastic housing. I started out with a small hold and worked my way up in size until I got the size hole I needed.
Now that your hole is drilled you need to make sure the large connector on the HID (the red wire) will fit. I drilled a smaller hole under the large hole & then used a razor knife to nick it so the lip on the connector would fit
I then wrapped the wires on the HID bulb with electrical tape to help keep the wires looking as clean as possible
Then place the 2 plastic connectors on the HID bulb / light & run them through the plastic housing. Pull the wires all the way through & replace the light & put the phillips screw/holder back on & tighten them up. Your driving light should be totally back together now & the back should look like this.
The ballast positive / negative wires came with a male wire connector so I then crimpped a female connector onto the power & ground wire I allready had ran for the lights.
Then connect the power & ground wires together. On the ballast red is positive, Black Is negative. On the wire that come with the light kit The blue wire is negative & the black wire is positive
Use elctrical tape on the wires you just connected to avoid a short & keep them protected
You should be able to test your light now to make sure you connected everything correctly
I used the black silicone next to fill in around the hole in the back of the housing to seal it & keep water from getting in. The silicone is easily removeable for bulb replacement, but you will have to re apply black silicone again after a bulb replacement.
Now that your done here is what it looks like. I did all 4 of my Black Magic Hella Lights, Headlights & foglights.
This same conversion will work for most other driving lights, but you shouldn't have to buy a compact bulb or dill a hole in the housing.
 09-12-2011, 03:15 PM
#3
JK Enthusiast
Thread Starter
09-12-2011, 03:16 PM
#4
JK Super Freak
Join Date: Nov 2009
Location: El Mirage, AZ
Posts: 1,861
Likes: 0
Received 0 Likes
on
0 Posts
Sweet! Thats a good thing for someone who wants HID but cant afford it till later. Would you say there is less work if it were regular hellas and not Blk magics?
 09-12-2011, 05:12 PM
#7
JK Enthusiast
Thread Starter
Yes, just use regular hid bulbs, no drilling, no silicone. Everything else would be the same. HID on ebay w/ bulbs are aroound $35.00 a set
Trending Topics
09-12-2011, 05:13 PM
#8
JK Enthusiast
Thread Starter