35" Mallcrawler to 38" Realcrawler Stone White Build
 10-30-2011, 09:54 AM
#11
JK Enthusiast
Thread Starter
Join Date: Jul 2009
Location: Clarksville, TN
Posts: 392
Likes: 0
Received 0 Likes
on
0 Posts
-Adam
 11-06-2011, 06:40 AM
#12
JK Enthusiast
Thread Starter
Join Date: Jul 2009
Location: Clarksville, TN
Posts: 392
Likes: 0
Received 0 Likes
on
0 Posts
Quick update: got news that the new rear bumper and wheels will be in on monday afternoon, so i went ahead this weekend and cut down my Rubi rails and trimmed the pinch seam. Nothing like an excuse to buy a sawzall and an angle grinder!!! 
There SHOULD be enough room for the new meats now...but its gonna be close! Hopefully should have them on by wednesday, and then be able to start the rest of the trimming/bumpstopping process lol.
-Adam
There SHOULD be enough room for the new meats now...but its gonna be close! Hopefully should have them on by wednesday, and then be able to start the rest of the trimming/bumpstopping process lol.
-Adam
11-08-2011, 05:33 PM
#13
JK Enthusiast
Thread Starter
Join Date: Jul 2009
Location: Clarksville, TN
Posts: 392
Likes: 0
Received 0 Likes
on
0 Posts
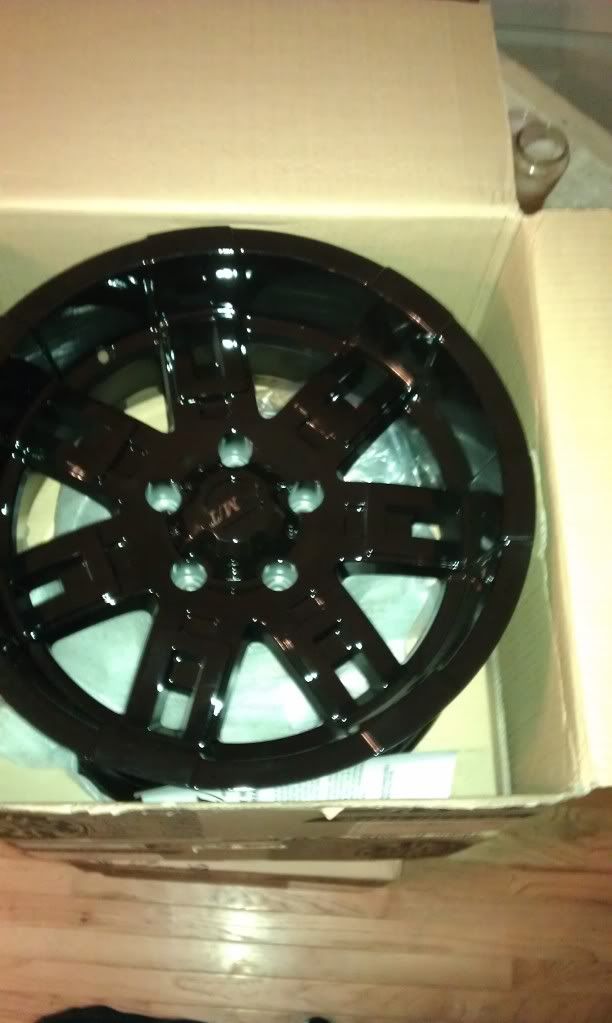
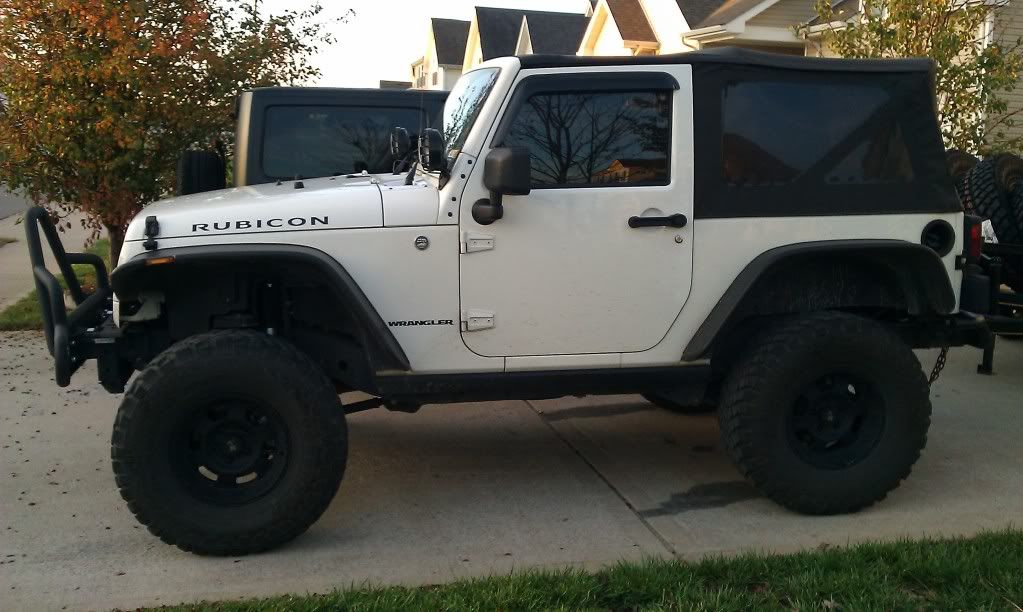
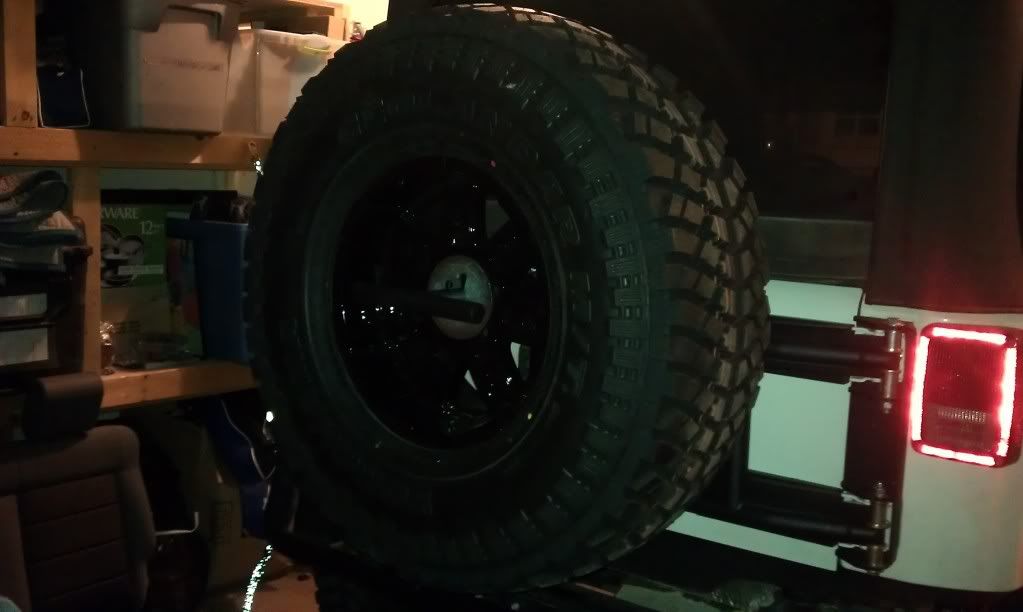
Rims and bumper got here yesterday!!! 
Ended up changing my order from the Pro Comps that i originally wanted to the Mickey Thompson SideBiters, due to what seems like a shortage in every procomp rim lol.
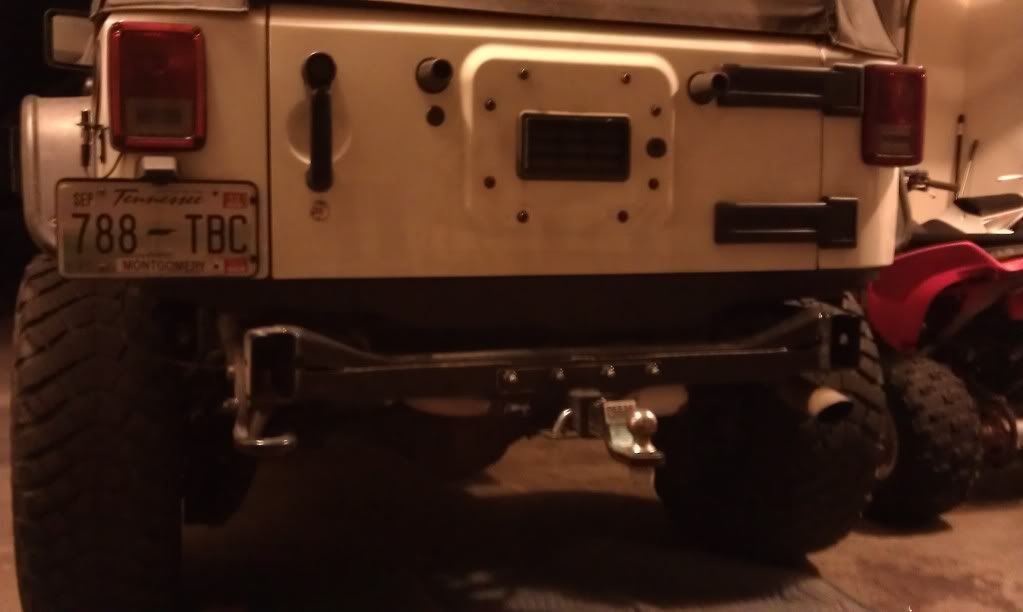
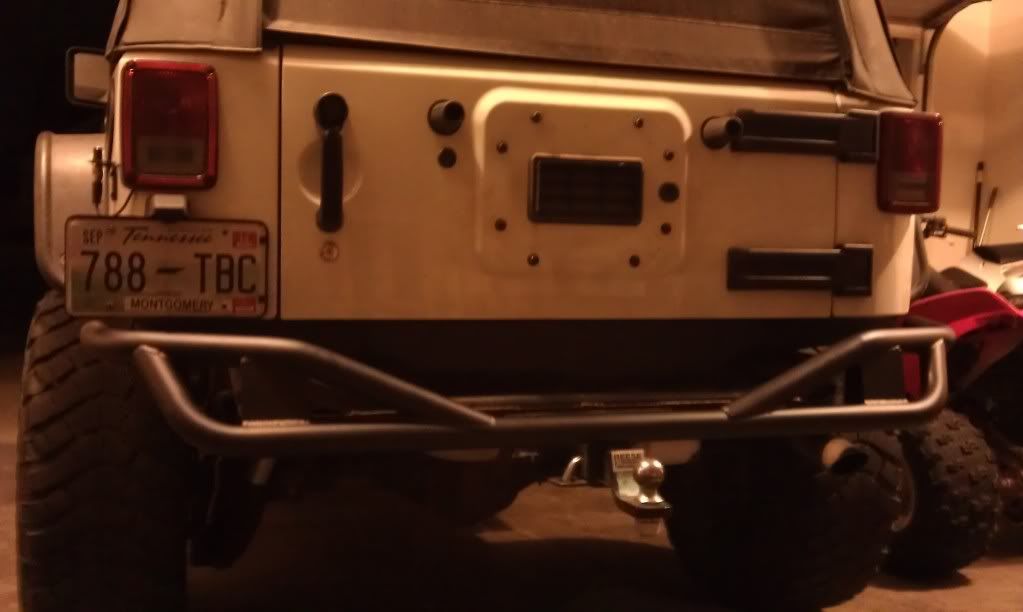
Went ahead an put on the Olympic Defender rear bumper. I decided to paint the body area below the tailgate, as i wasnt a fan of the white lower area once it was exposed
Finally, took the tires and rims in today to get them mounted!
Before:
After:
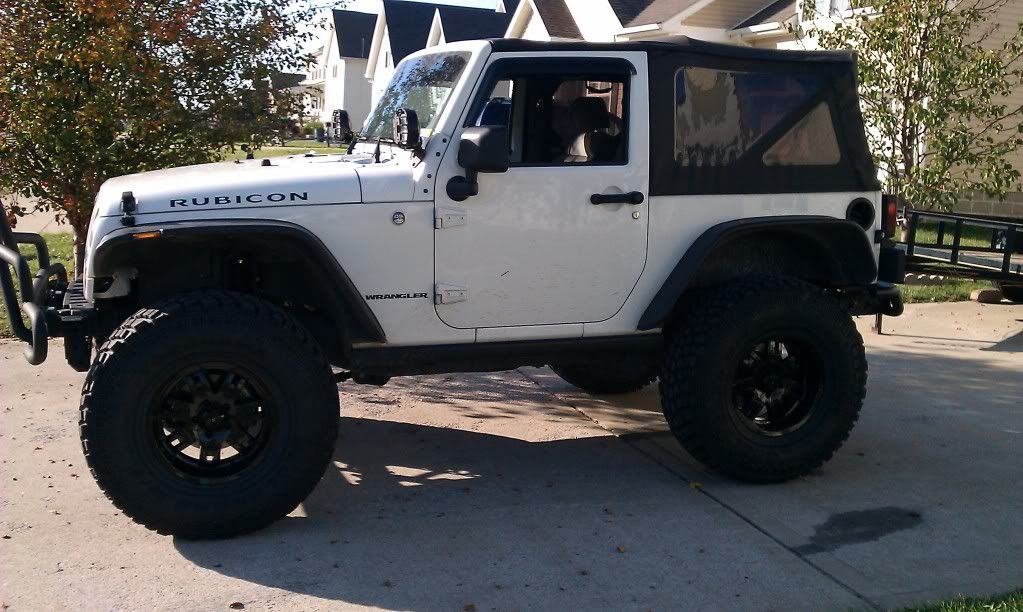
I'm not sure the pictures even do this thing justice. I am beyond happy with the way it turned out. Got stopped twice in a matter of 30 min on the way home by people wanting to ask about the tires. Rides like a dream---two of the wheels needed only ONE OUNCE to balance--blew my mind. And my gas mileage has stayed the same, if not a little better around town (Though i havent had it on the highway yet, which is where i'm assuming i'll see more loss)
The next step (other than the ORFAB carrier) is going to be a set of adjustable rear lowers (already have the uppers) and a new driveshaft so i can move the rear axle back about an inch and further from the pinch seam. May throw on a 1" bodylift just for good measure, and then it will be time to measure for bumpstops. Oh yeah---and so far no rubbing lock to lock in the front, at least while on flat ground!!!
Ended up changing my order from the Pro Comps that i originally wanted to the Mickey Thompson SideBiters, due to what seems like a shortage in every procomp rim lol.
Went ahead an put on the Olympic Defender rear bumper. I decided to paint the body area below the tailgate, as i wasnt a fan of the white lower area once it was exposed
Finally, took the tires and rims in today to get them mounted!
Before:
After:
I'm not sure the pictures even do this thing justice. I am beyond happy with the way it turned out. Got stopped twice in a matter of 30 min on the way home by people wanting to ask about the tires. Rides like a dream---two of the wheels needed only ONE OUNCE to balance--blew my mind. And my gas mileage has stayed the same, if not a little better around town (Though i havent had it on the highway yet, which is where i'm assuming i'll see more loss)
The next step (other than the ORFAB carrier) is going to be a set of adjustable rear lowers (already have the uppers) and a new driveshaft so i can move the rear axle back about an inch and further from the pinch seam. May throw on a 1" bodylift just for good measure, and then it will be time to measure for bumpstops. Oh yeah---and so far no rubbing lock to lock in the front, at least while on flat ground!!!
 11-13-2011, 08:13 PM
#17
JK Junkie
This has really come together! I love the way it sits. Let me know if you ever decide to get rid of the bushwacker flares! I've got dreams of 37s anyway... But the flexing room for the 35's would be great!
12-11-2011, 06:50 PM
#18
JK Enthusiast
Thread Starter
Join Date: Jul 2009
Location: Clarksville, TN
Posts: 392
Likes: 0
Received 0 Likes
on
0 Posts
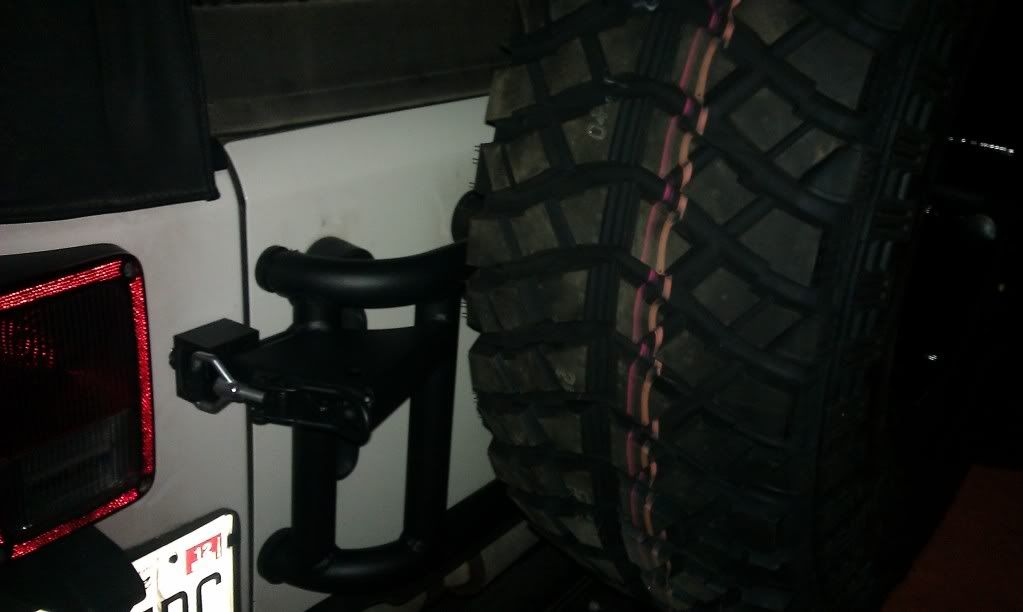
Got my ORFab Rear Non-Jerry-Can Tire Carrier in and installed...there's a million threads on it, so i didnt do a step by step, just a few finished pics. This thing is STOUT! The only complaint I have about the entire thing is I wish ORFab would separate their hardware instead of just throwing it all in a big bag lol...made for a little digging!!

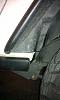
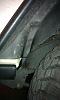
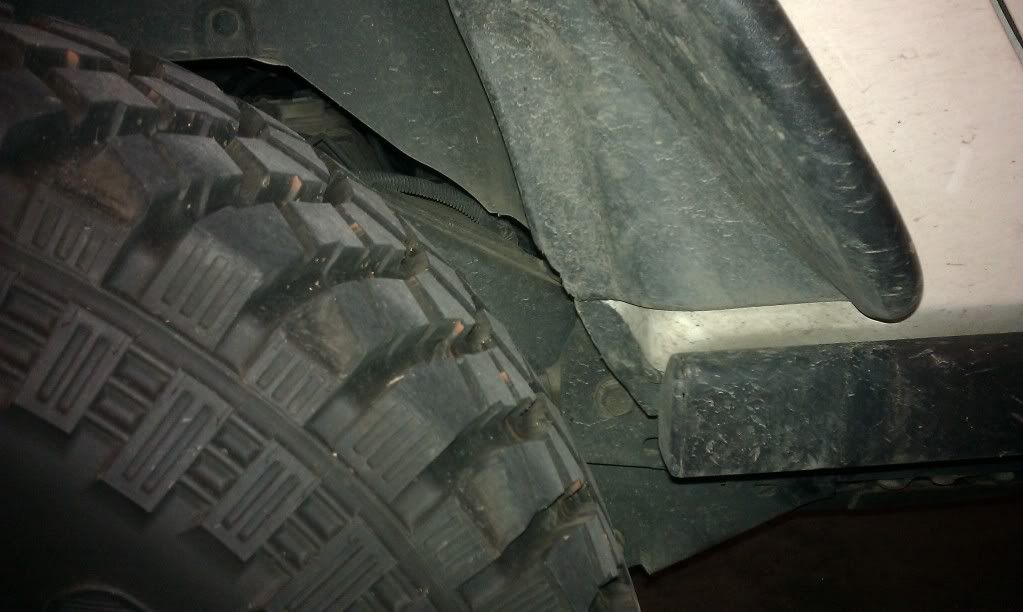
I also installed a Performance Accessories 1" Body lift to begin to address the little bit of rubbing i'm having in the rear. Here are some before and after pics, but its kinda hard to tell due to the angle of the cut fender that it moved up much lol.
Driver's before:
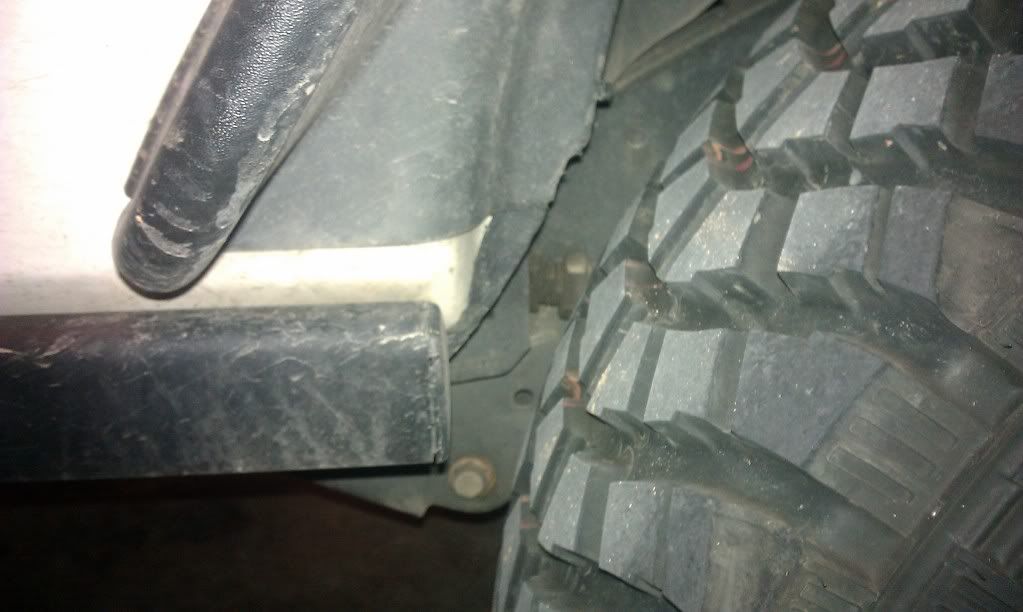
Driver's after:
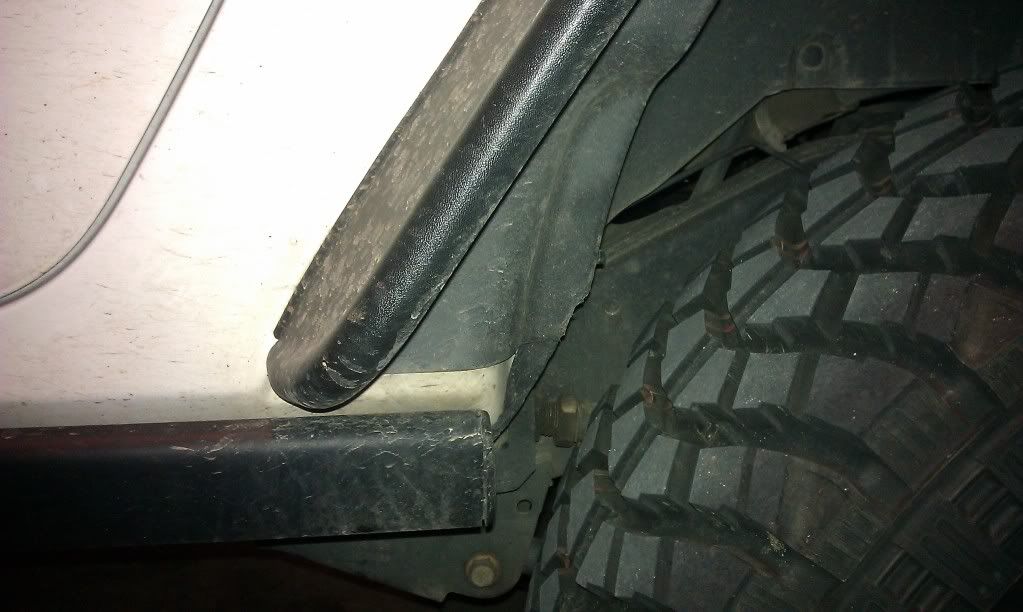
Passenger Before:
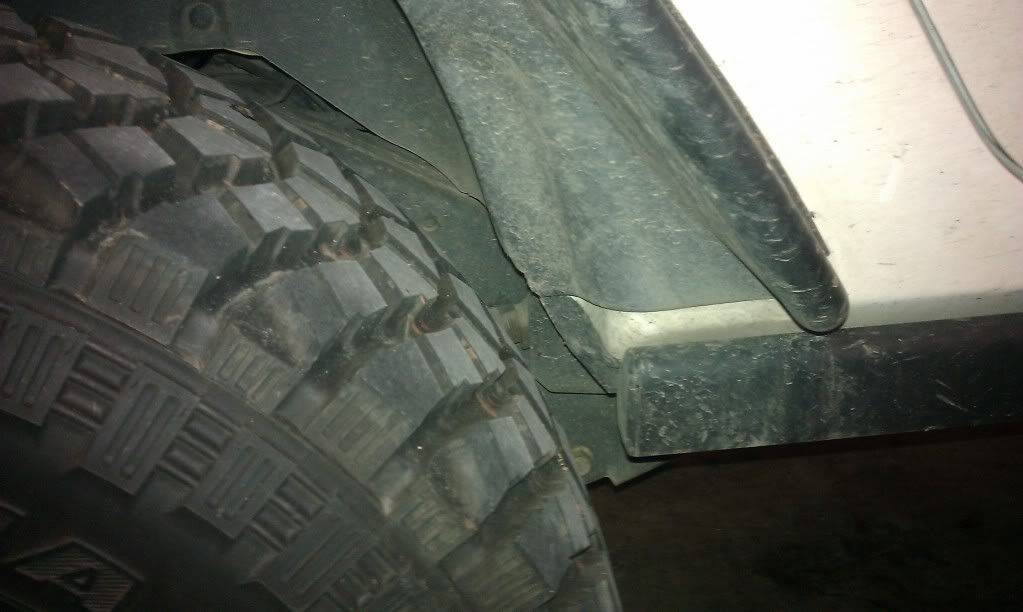
Passenger After:
NOTE: So after installing the body lift AND cutting the inner shift boot as directed, i'm still having issues with the jeep popping out of 2nd/4th/6th while driving. I've actually narrowed it down to being the OUTER shift boot, too much rubber causing too much pressure on the shifter. Instead of going with the Rough Country adapter, i ordered a new two-tone shift boot from RedlineGoods. Its leather, should eliminate the binding--and look better too! lol
Still need to get some new poser pics put together!
-Adam
I also installed a Performance Accessories 1" Body lift to begin to address the little bit of rubbing i'm having in the rear. Here are some before and after pics, but its kinda hard to tell due to the angle of the cut fender that it moved up much lol.
Driver's before:
Driver's after:
Passenger Before:
Passenger After:
NOTE: So after installing the body lift AND cutting the inner shift boot as directed, i'm still having issues with the jeep popping out of 2nd/4th/6th while driving. I've actually narrowed it down to being the OUTER shift boot, too much rubber causing too much pressure on the shifter. Instead of going with the Rough Country adapter, i ordered a new two-tone shift boot from RedlineGoods. Its leather, should eliminate the binding--and look better too! lol
Still need to get some new poser pics put together!
-Adam