WxNerd2015's Never Ending Build -
 10-14-2015, 04:09 AM
#21
JK Enthusiast
Thread Starter
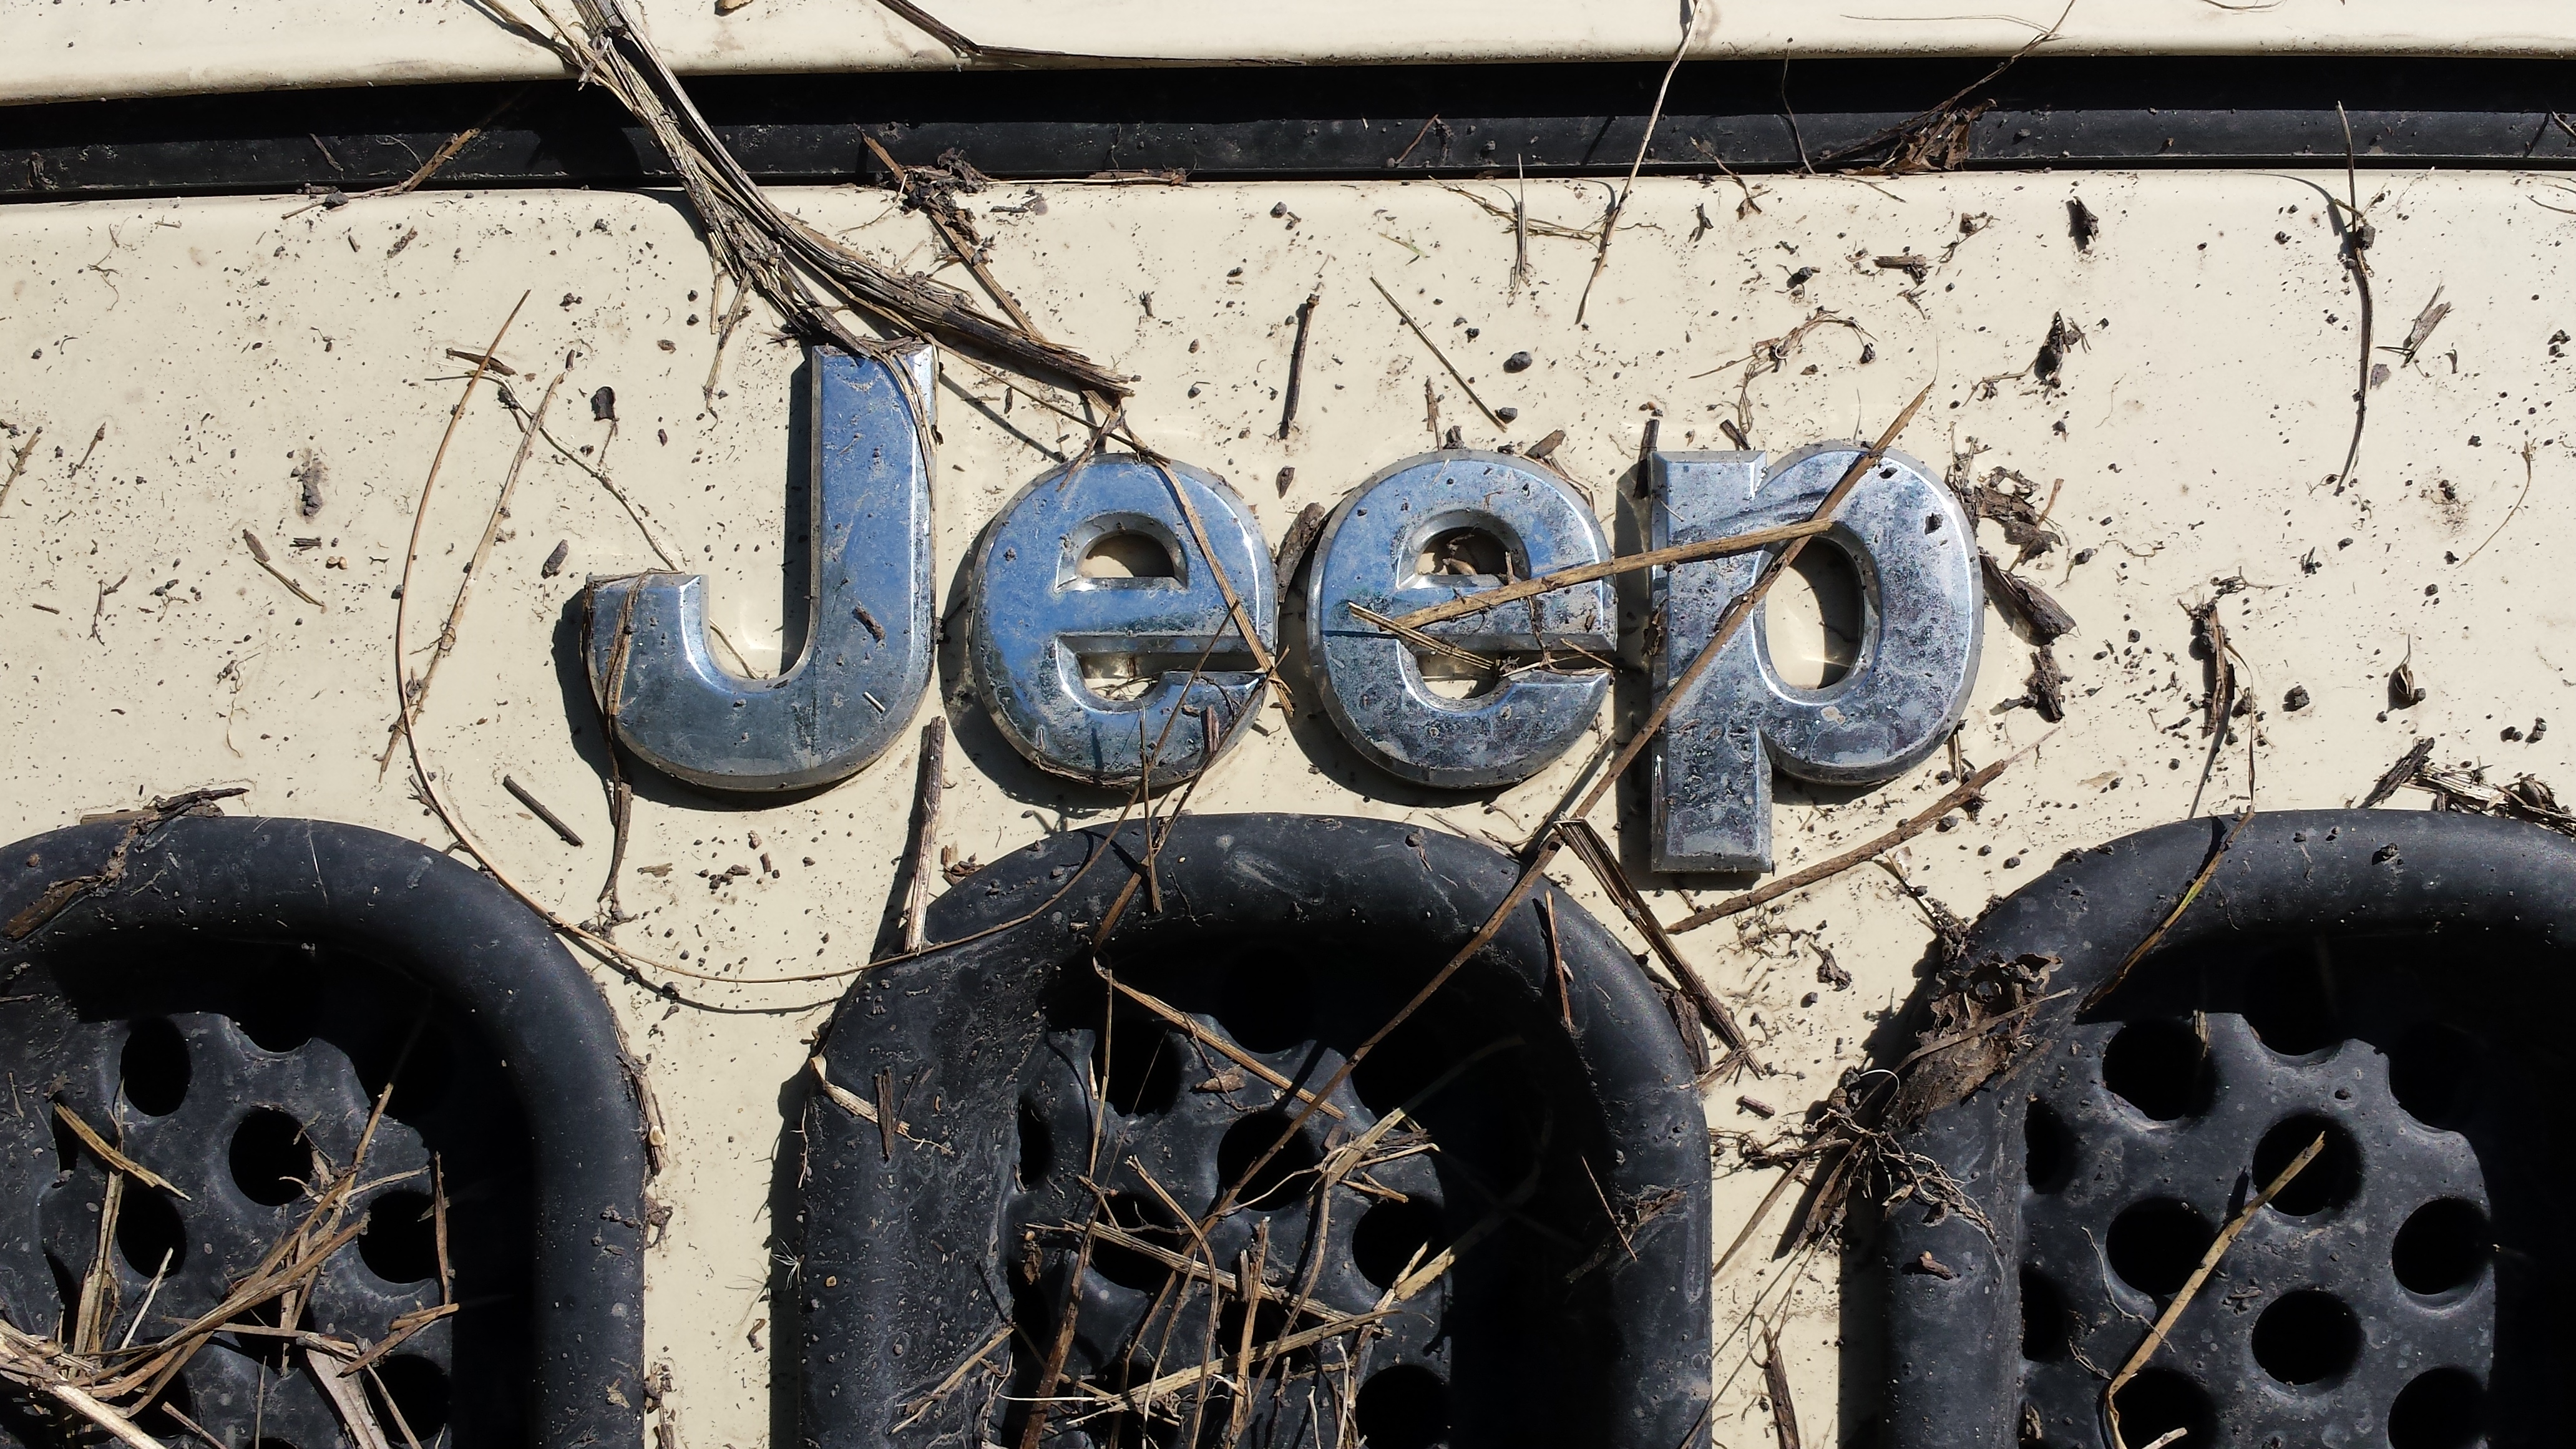
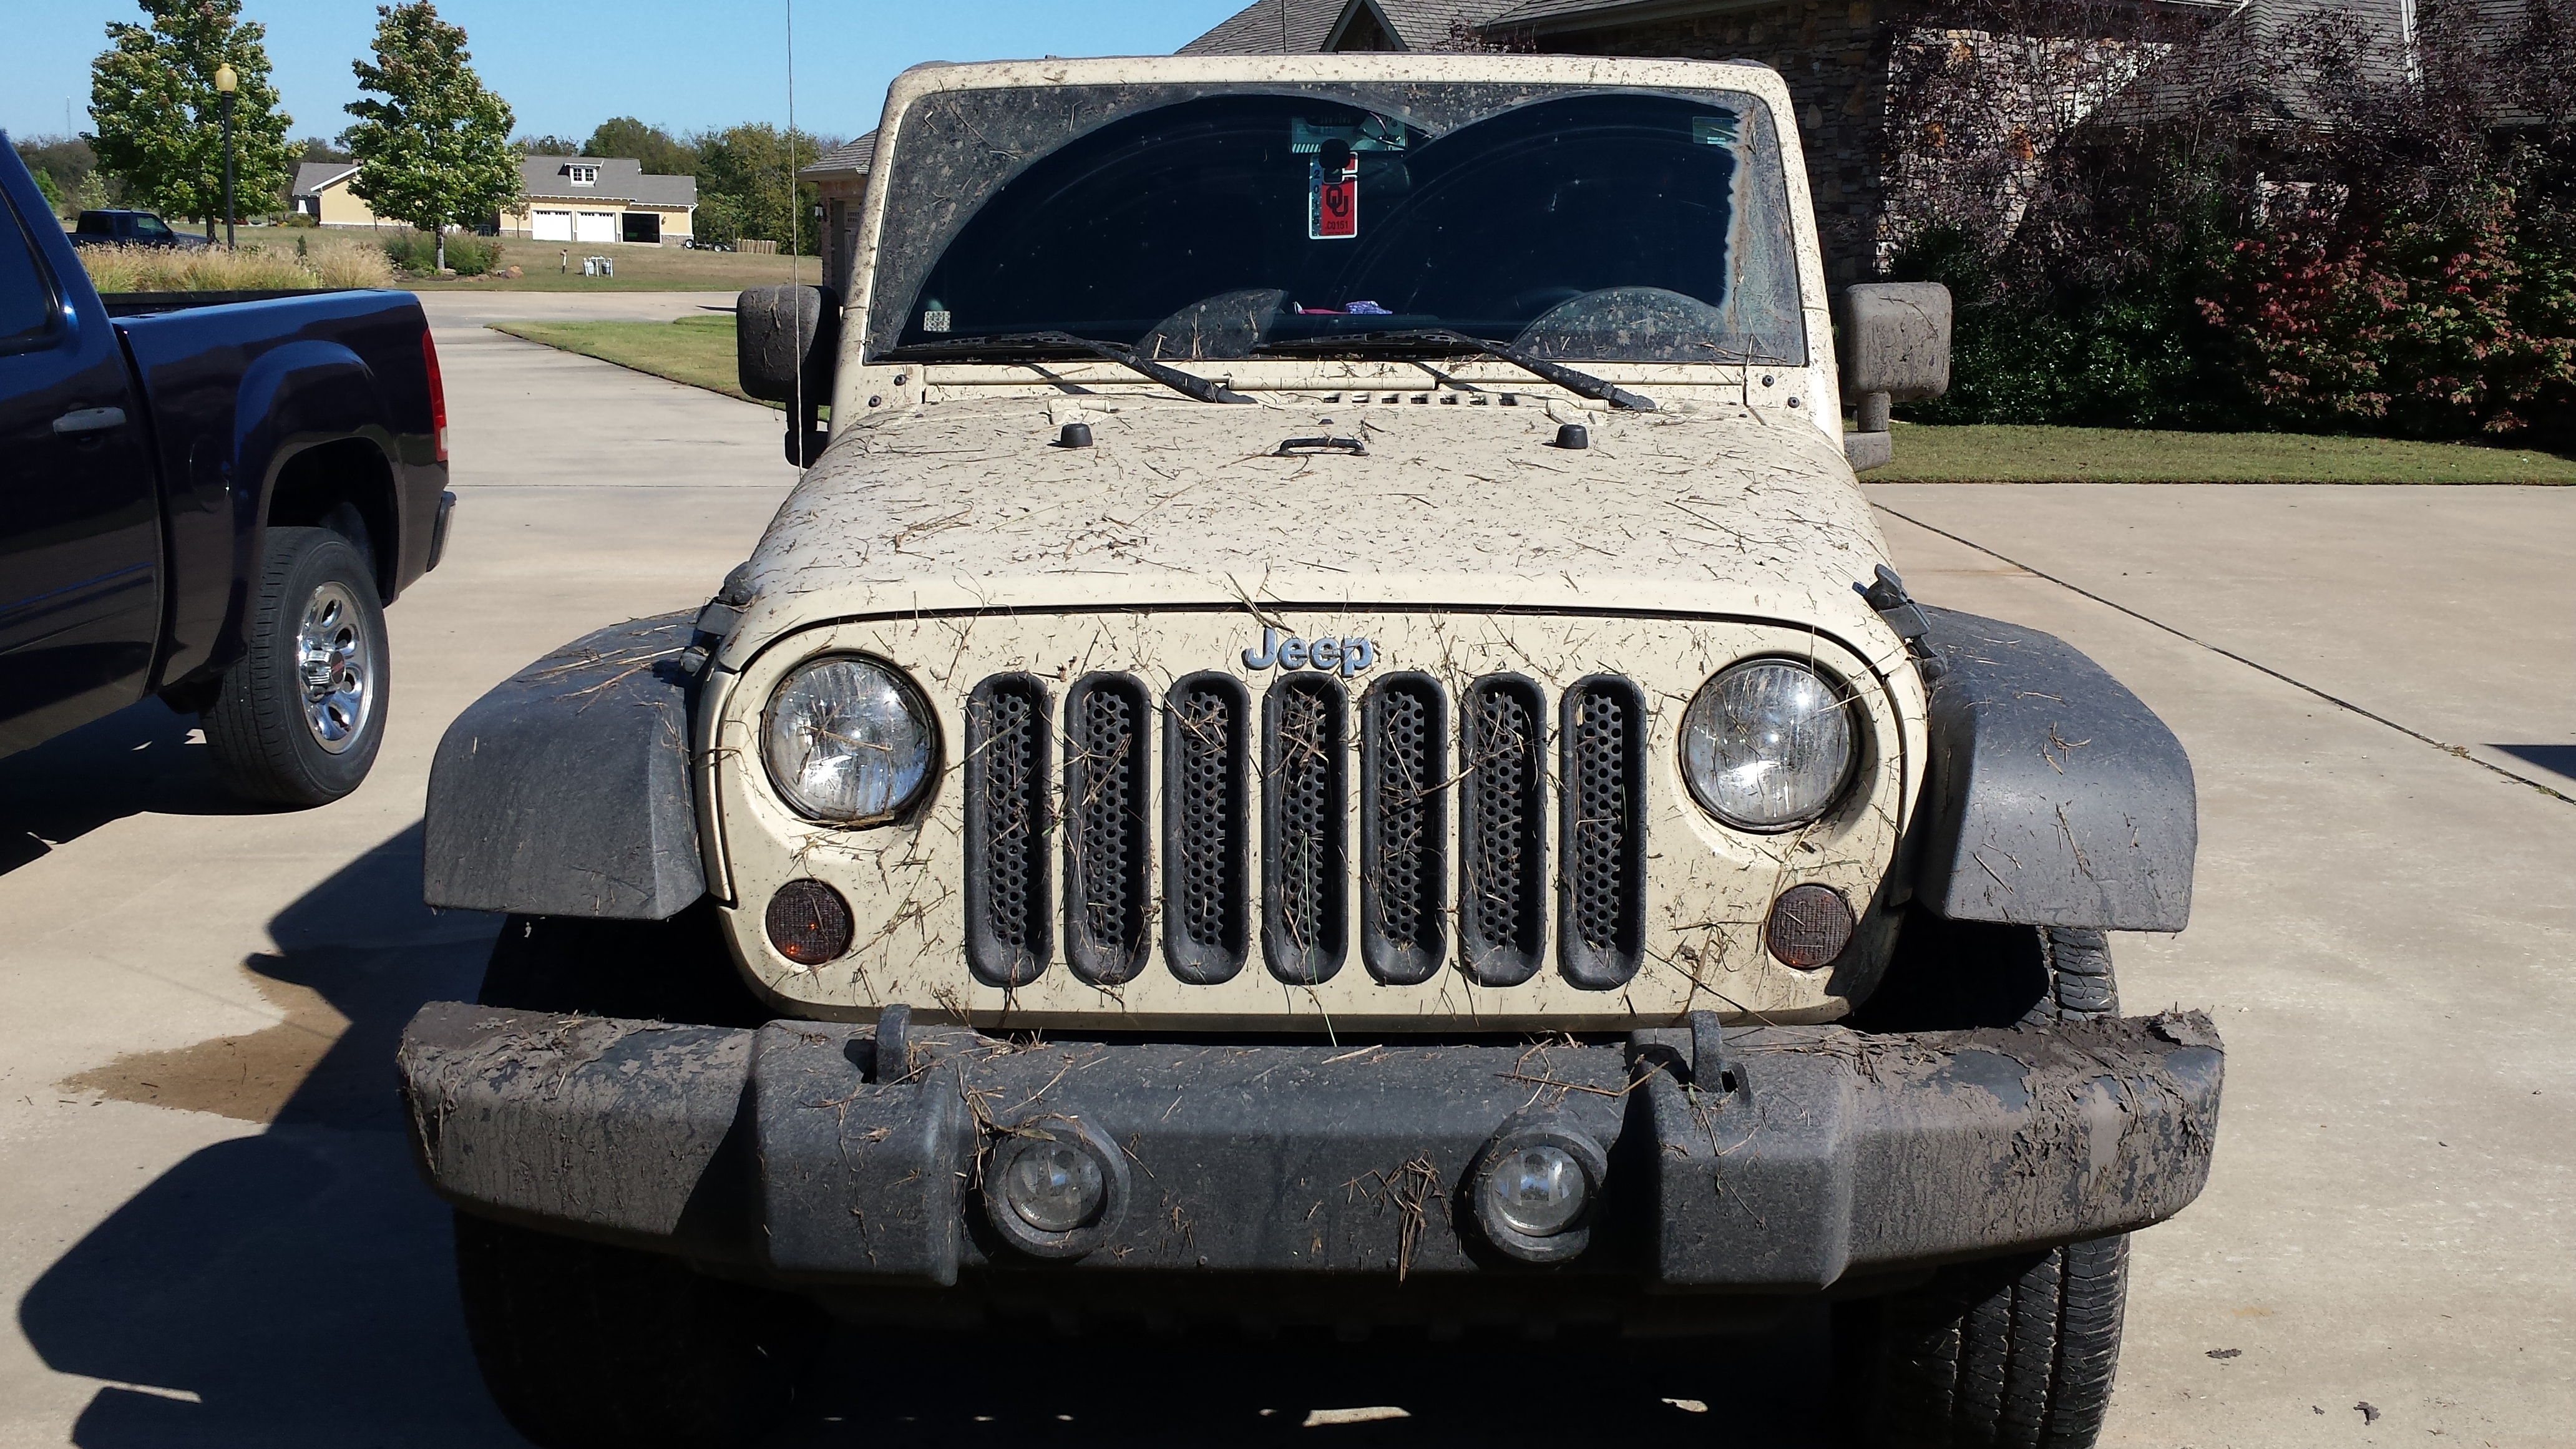
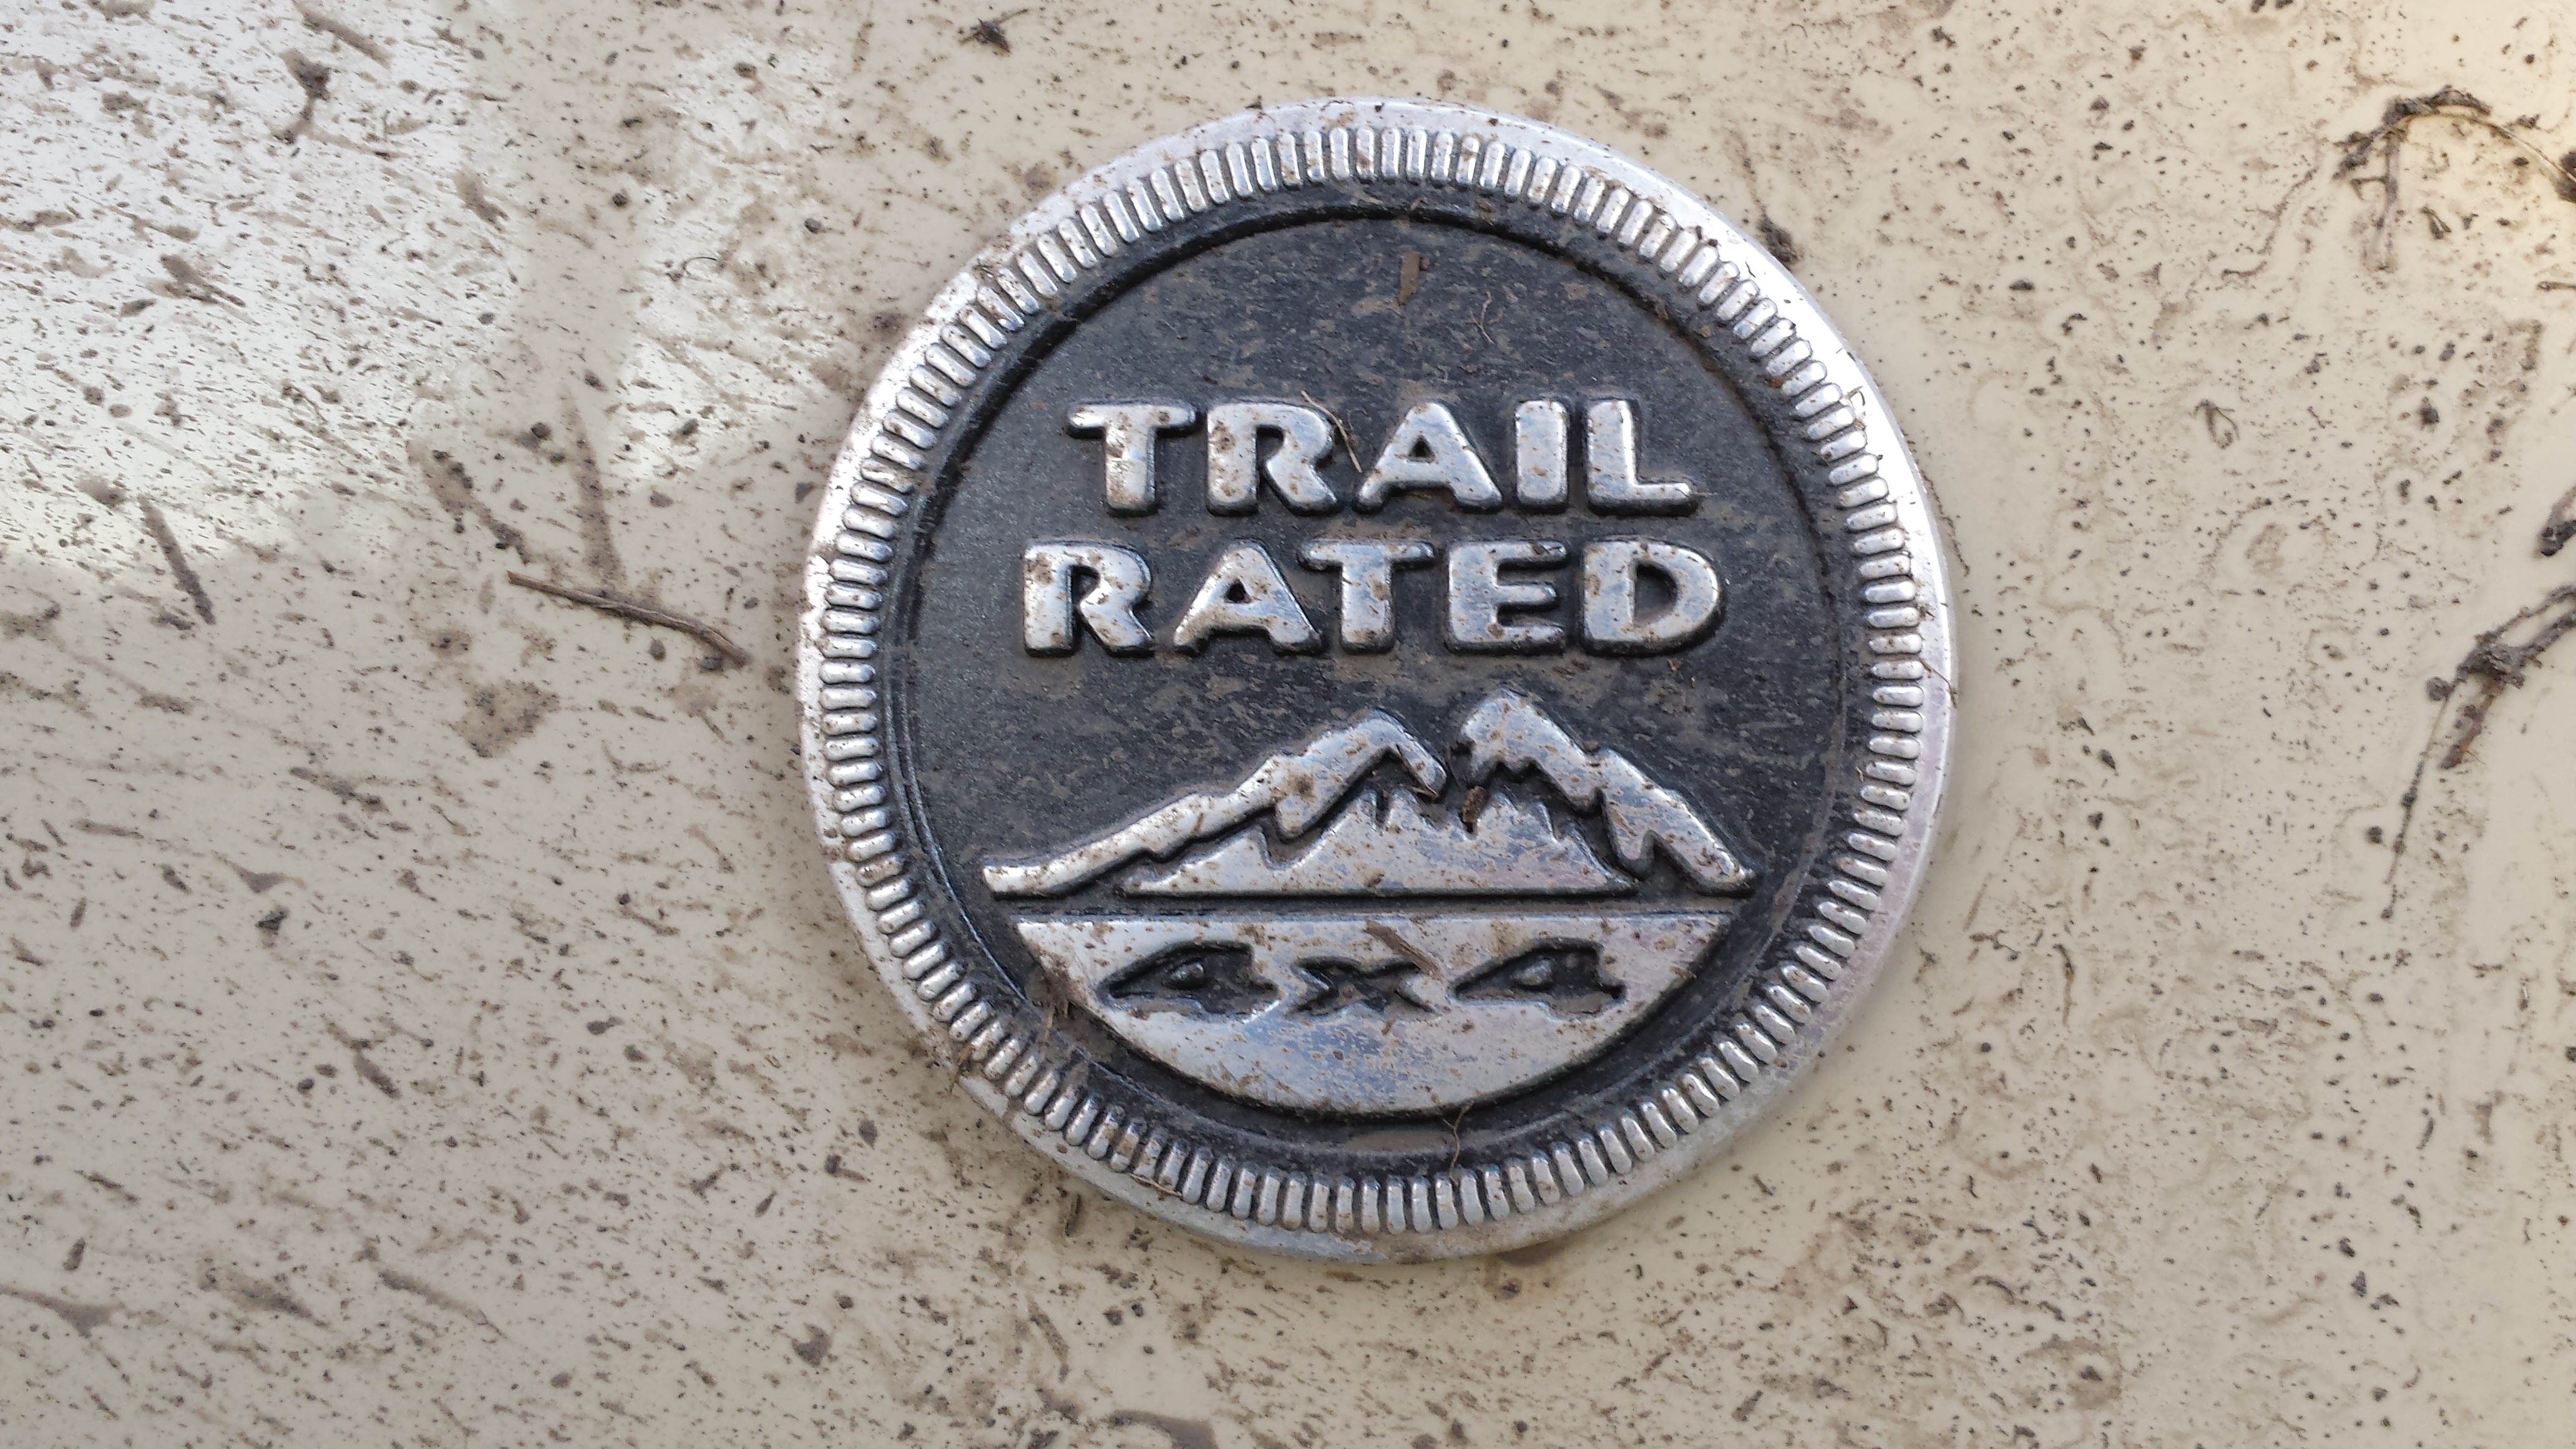
Here's a few of my pics from a bit of muddin' fun that I had back in November last year! This was down at a friends place in Bartlesville, OK! It's all fun and great to do mods and work, but you gotta have fun and enjoy it too!

 10-16-2015, 05:38 AM
#22
JK Enthusiast
Thread Starter
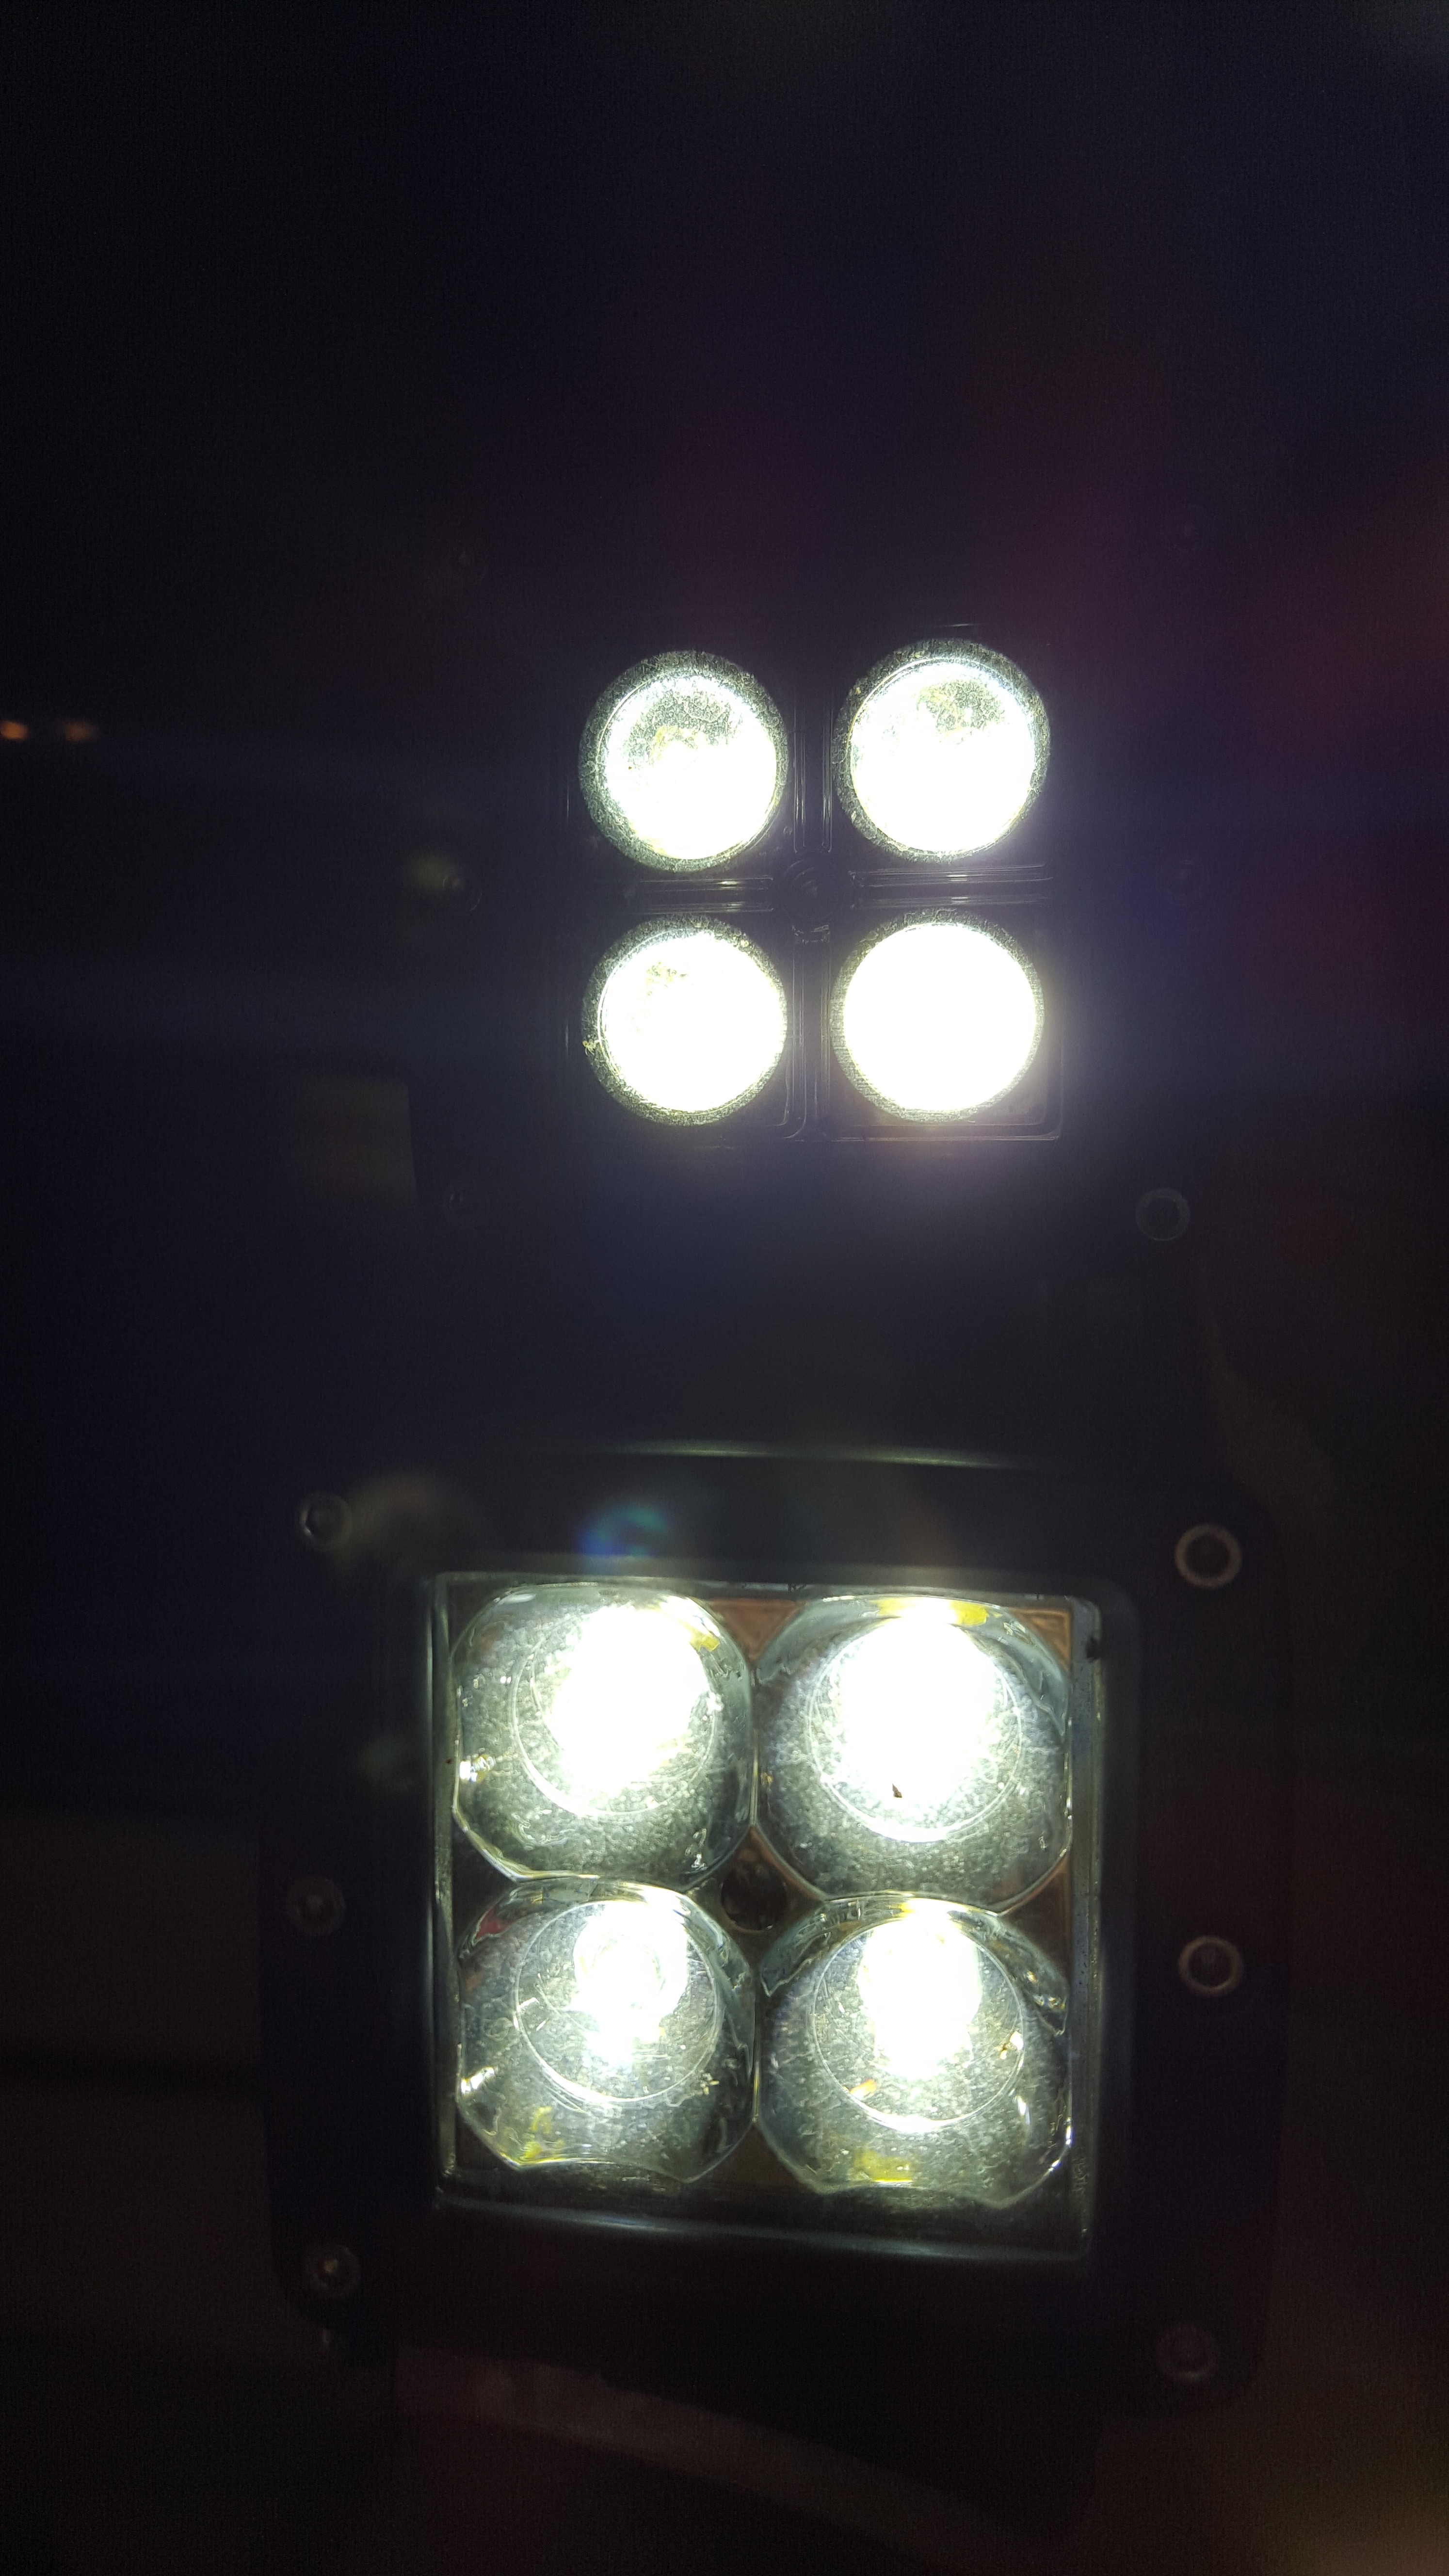
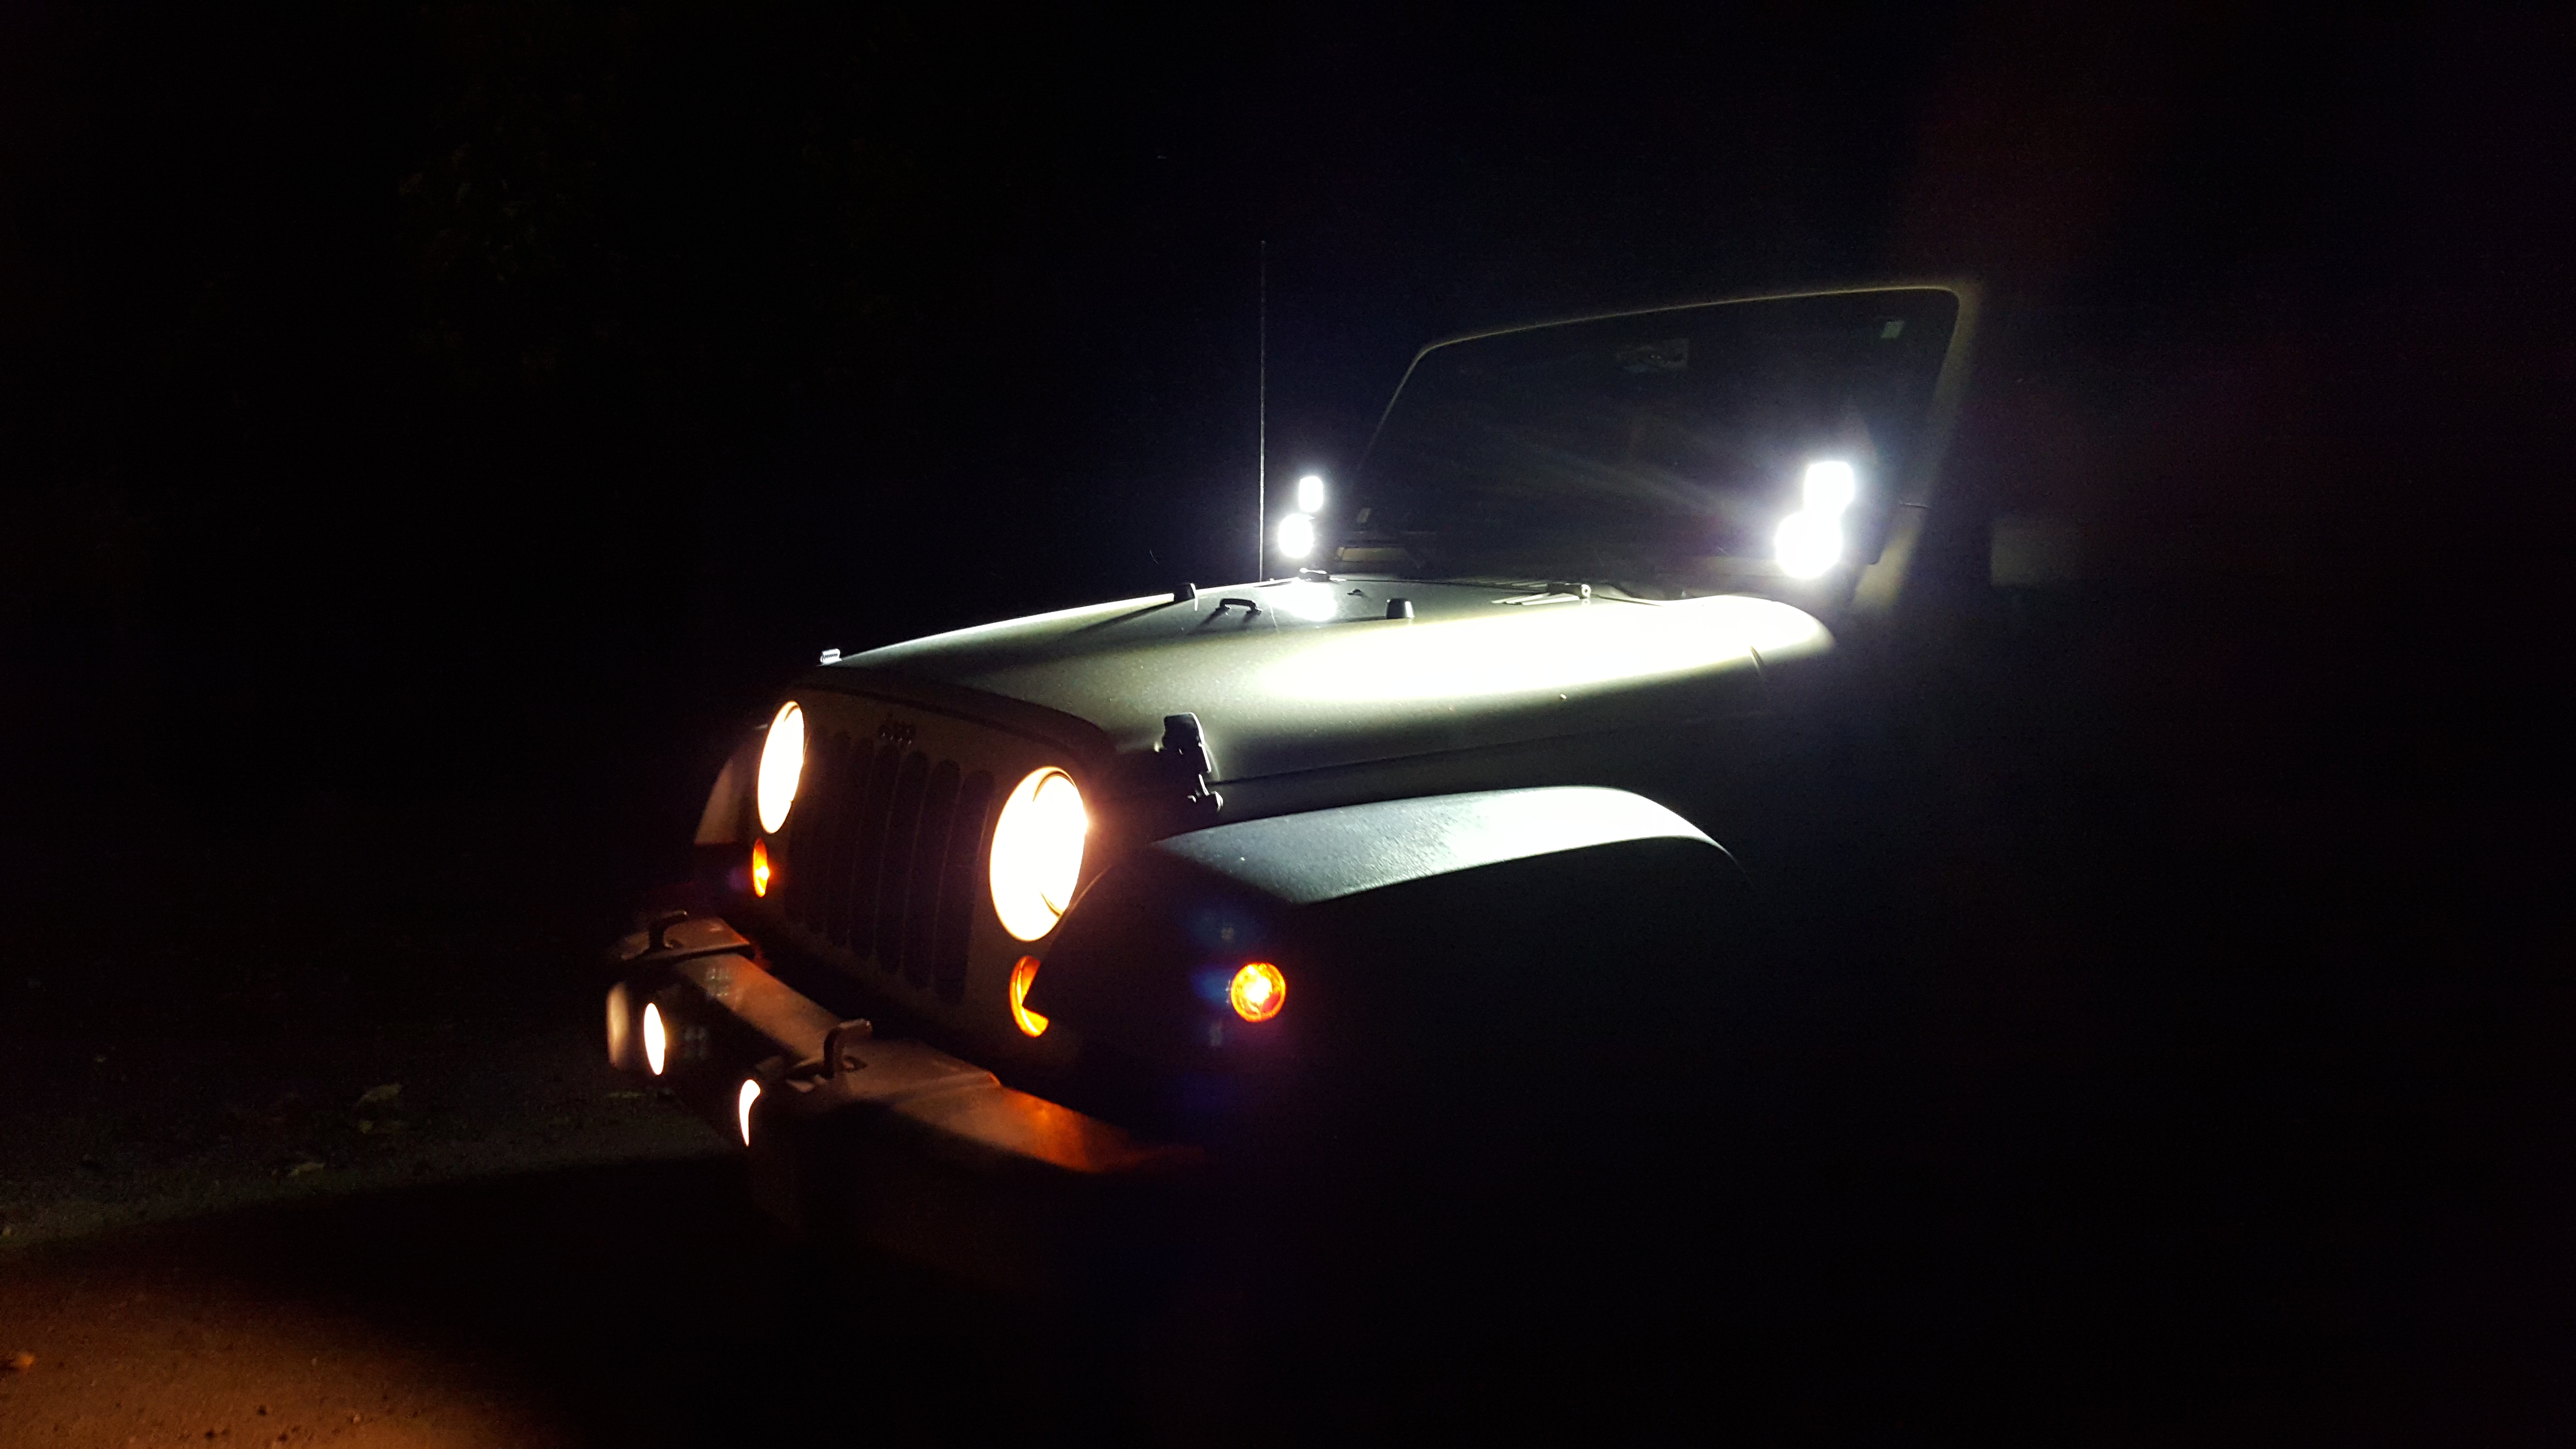
This is my next mod that I did! LED cube lights with dual Pod windshield mounts! The top are Spot beam pattern and the bottom are Flood beam pattern! Both are CREE LED lights that I was able to find on eBay for around $40-$50 a pair, and I absolutely love em! 
I did have a few install issues, but the entire mod in general cost under $200 for me, so totally affordable! I had an issue with the passenger side light bracket, as using the factory windshield bracket bolts, they barely threaded, and when tightened down, the inside part of the bracket pinched the passenger side wiper down so hard it was unmovable! So I had to do a slight modification there, but I was able to work it out with some new bolts and washers! Also, The hardware to attach the light to the bracket for the top Spot beam pattern lights was different than that that came with the bottom Flood beam pattern lights, and the bolts were too big to fit through the holes on the side! So that was a trip to Autozone to get some screws that fit into the holes to tighten the lights down. These ended up adding a few hours of work on when messing around and trying to get this to work, but I gota great deal on everything, and I absolutely love the fit and function of these lights! Here are some pics of them installed and working:
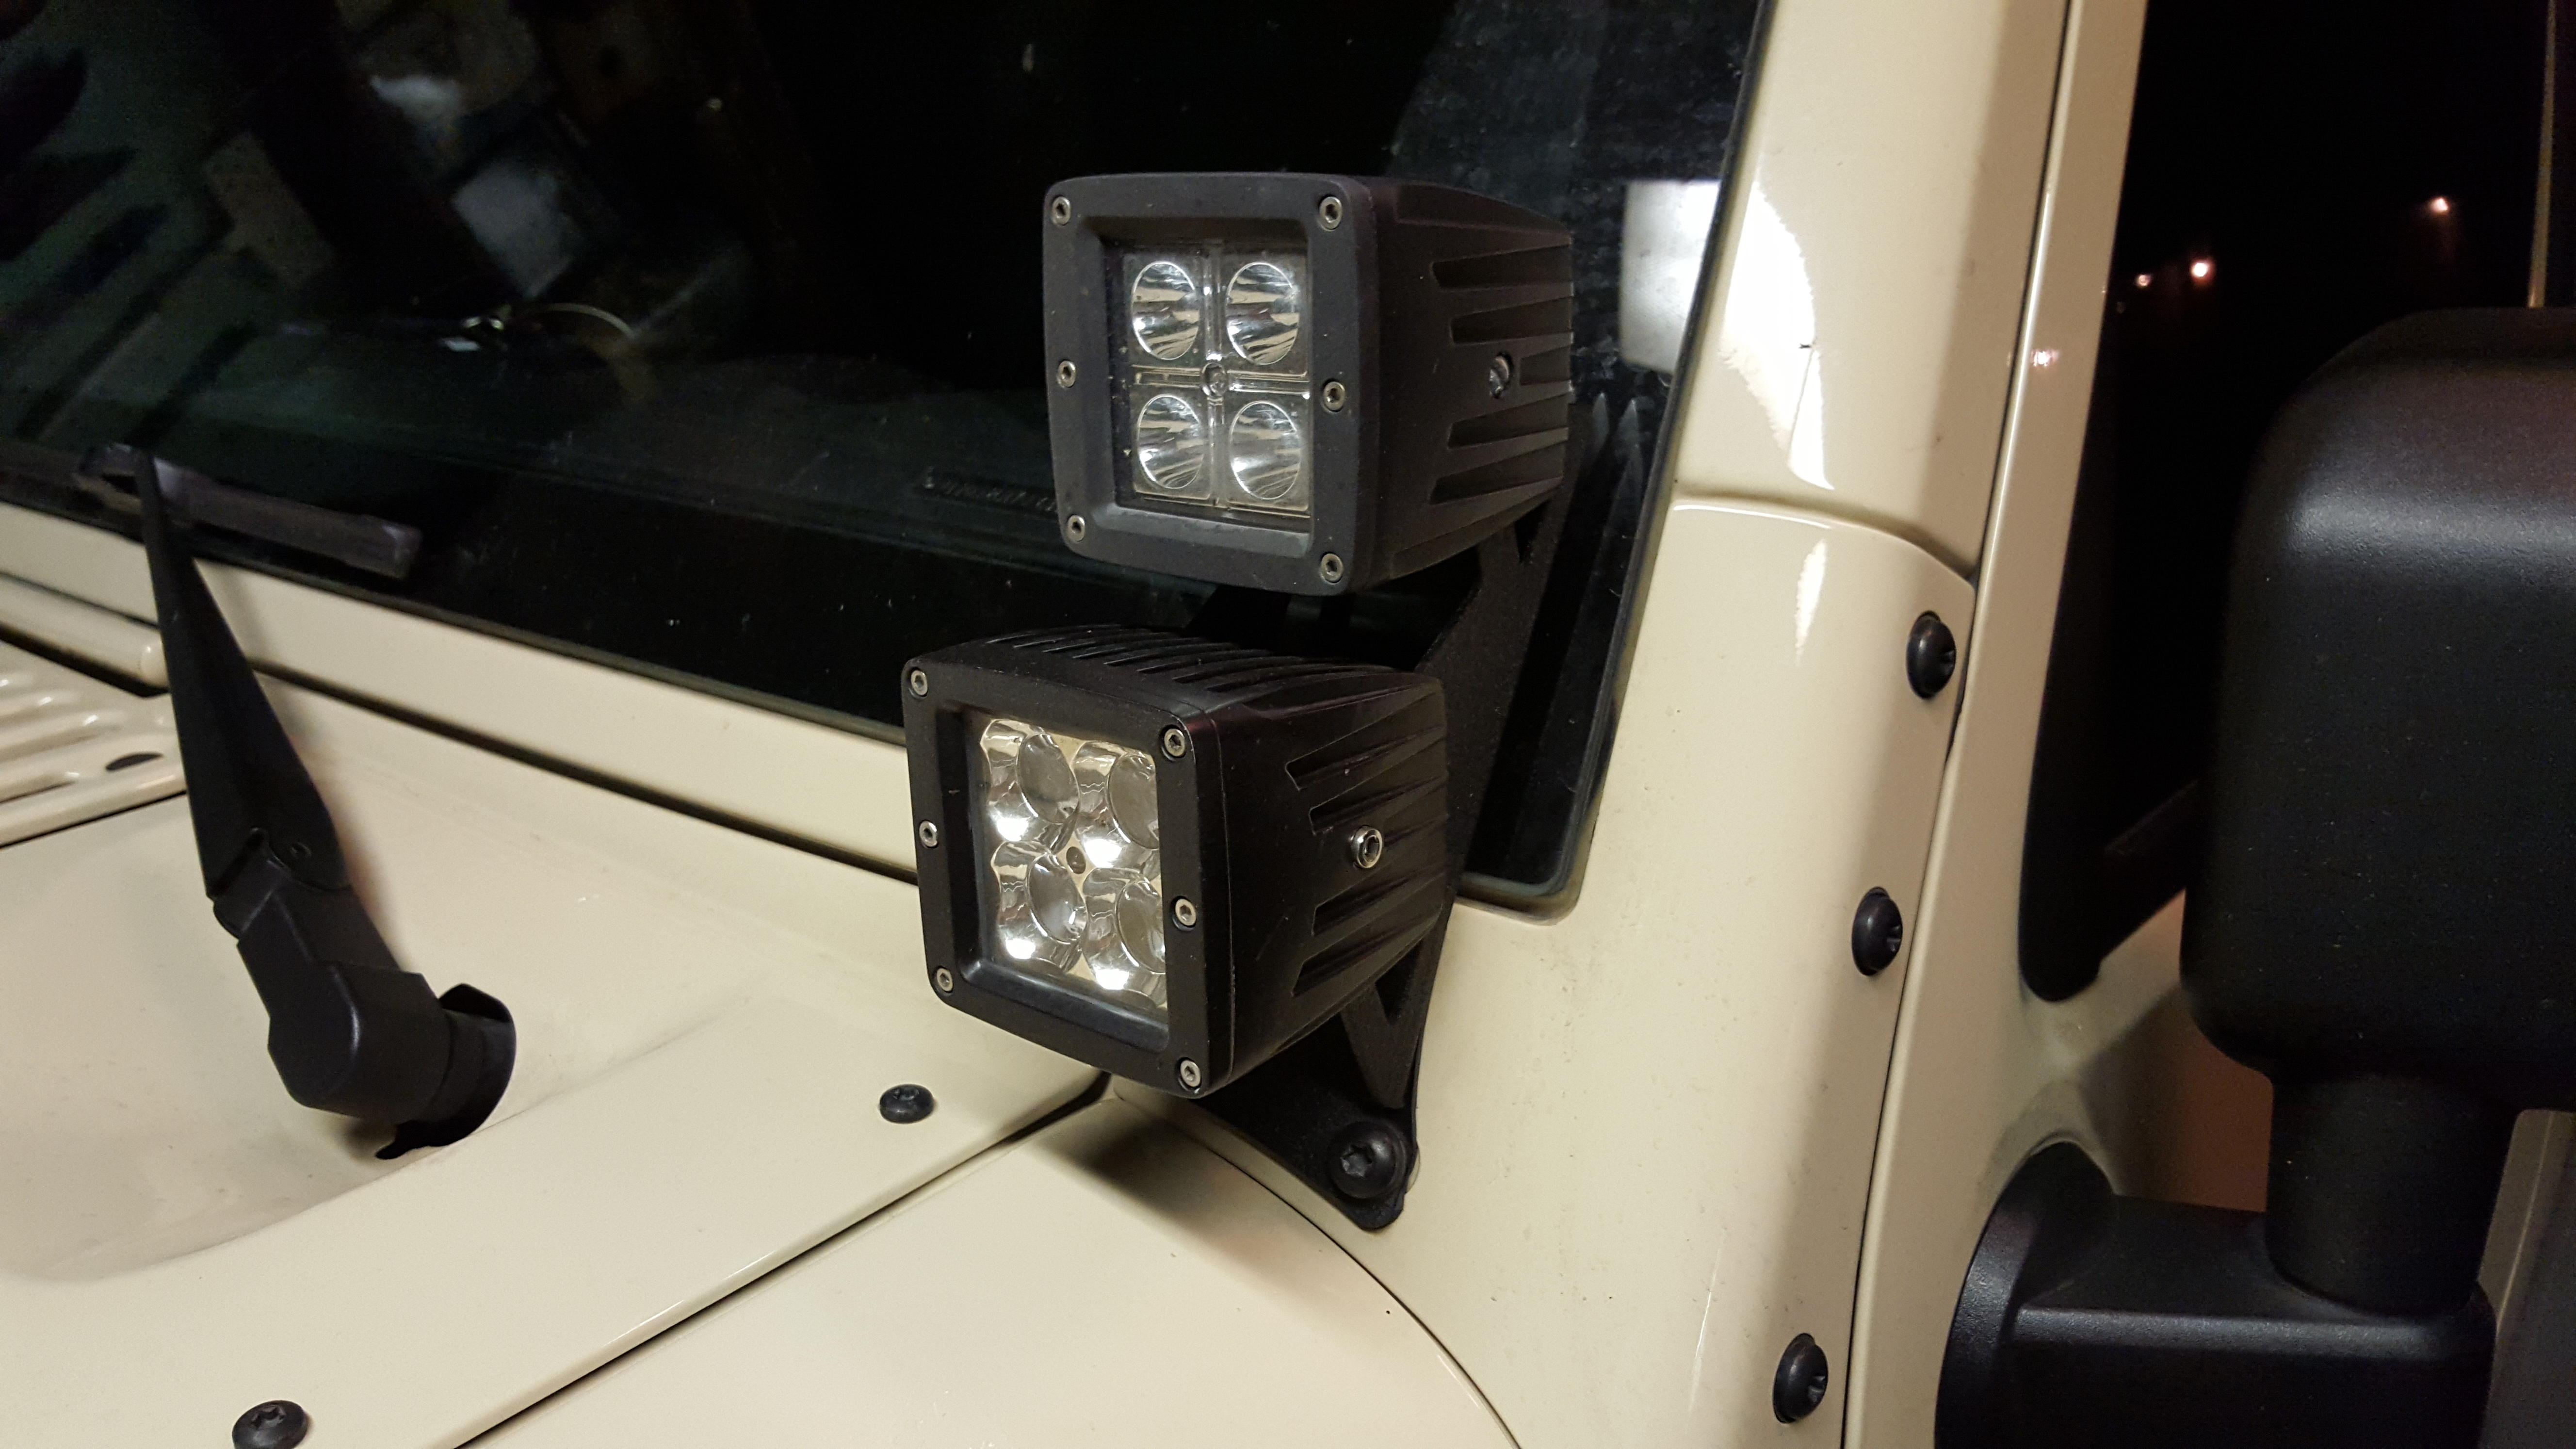
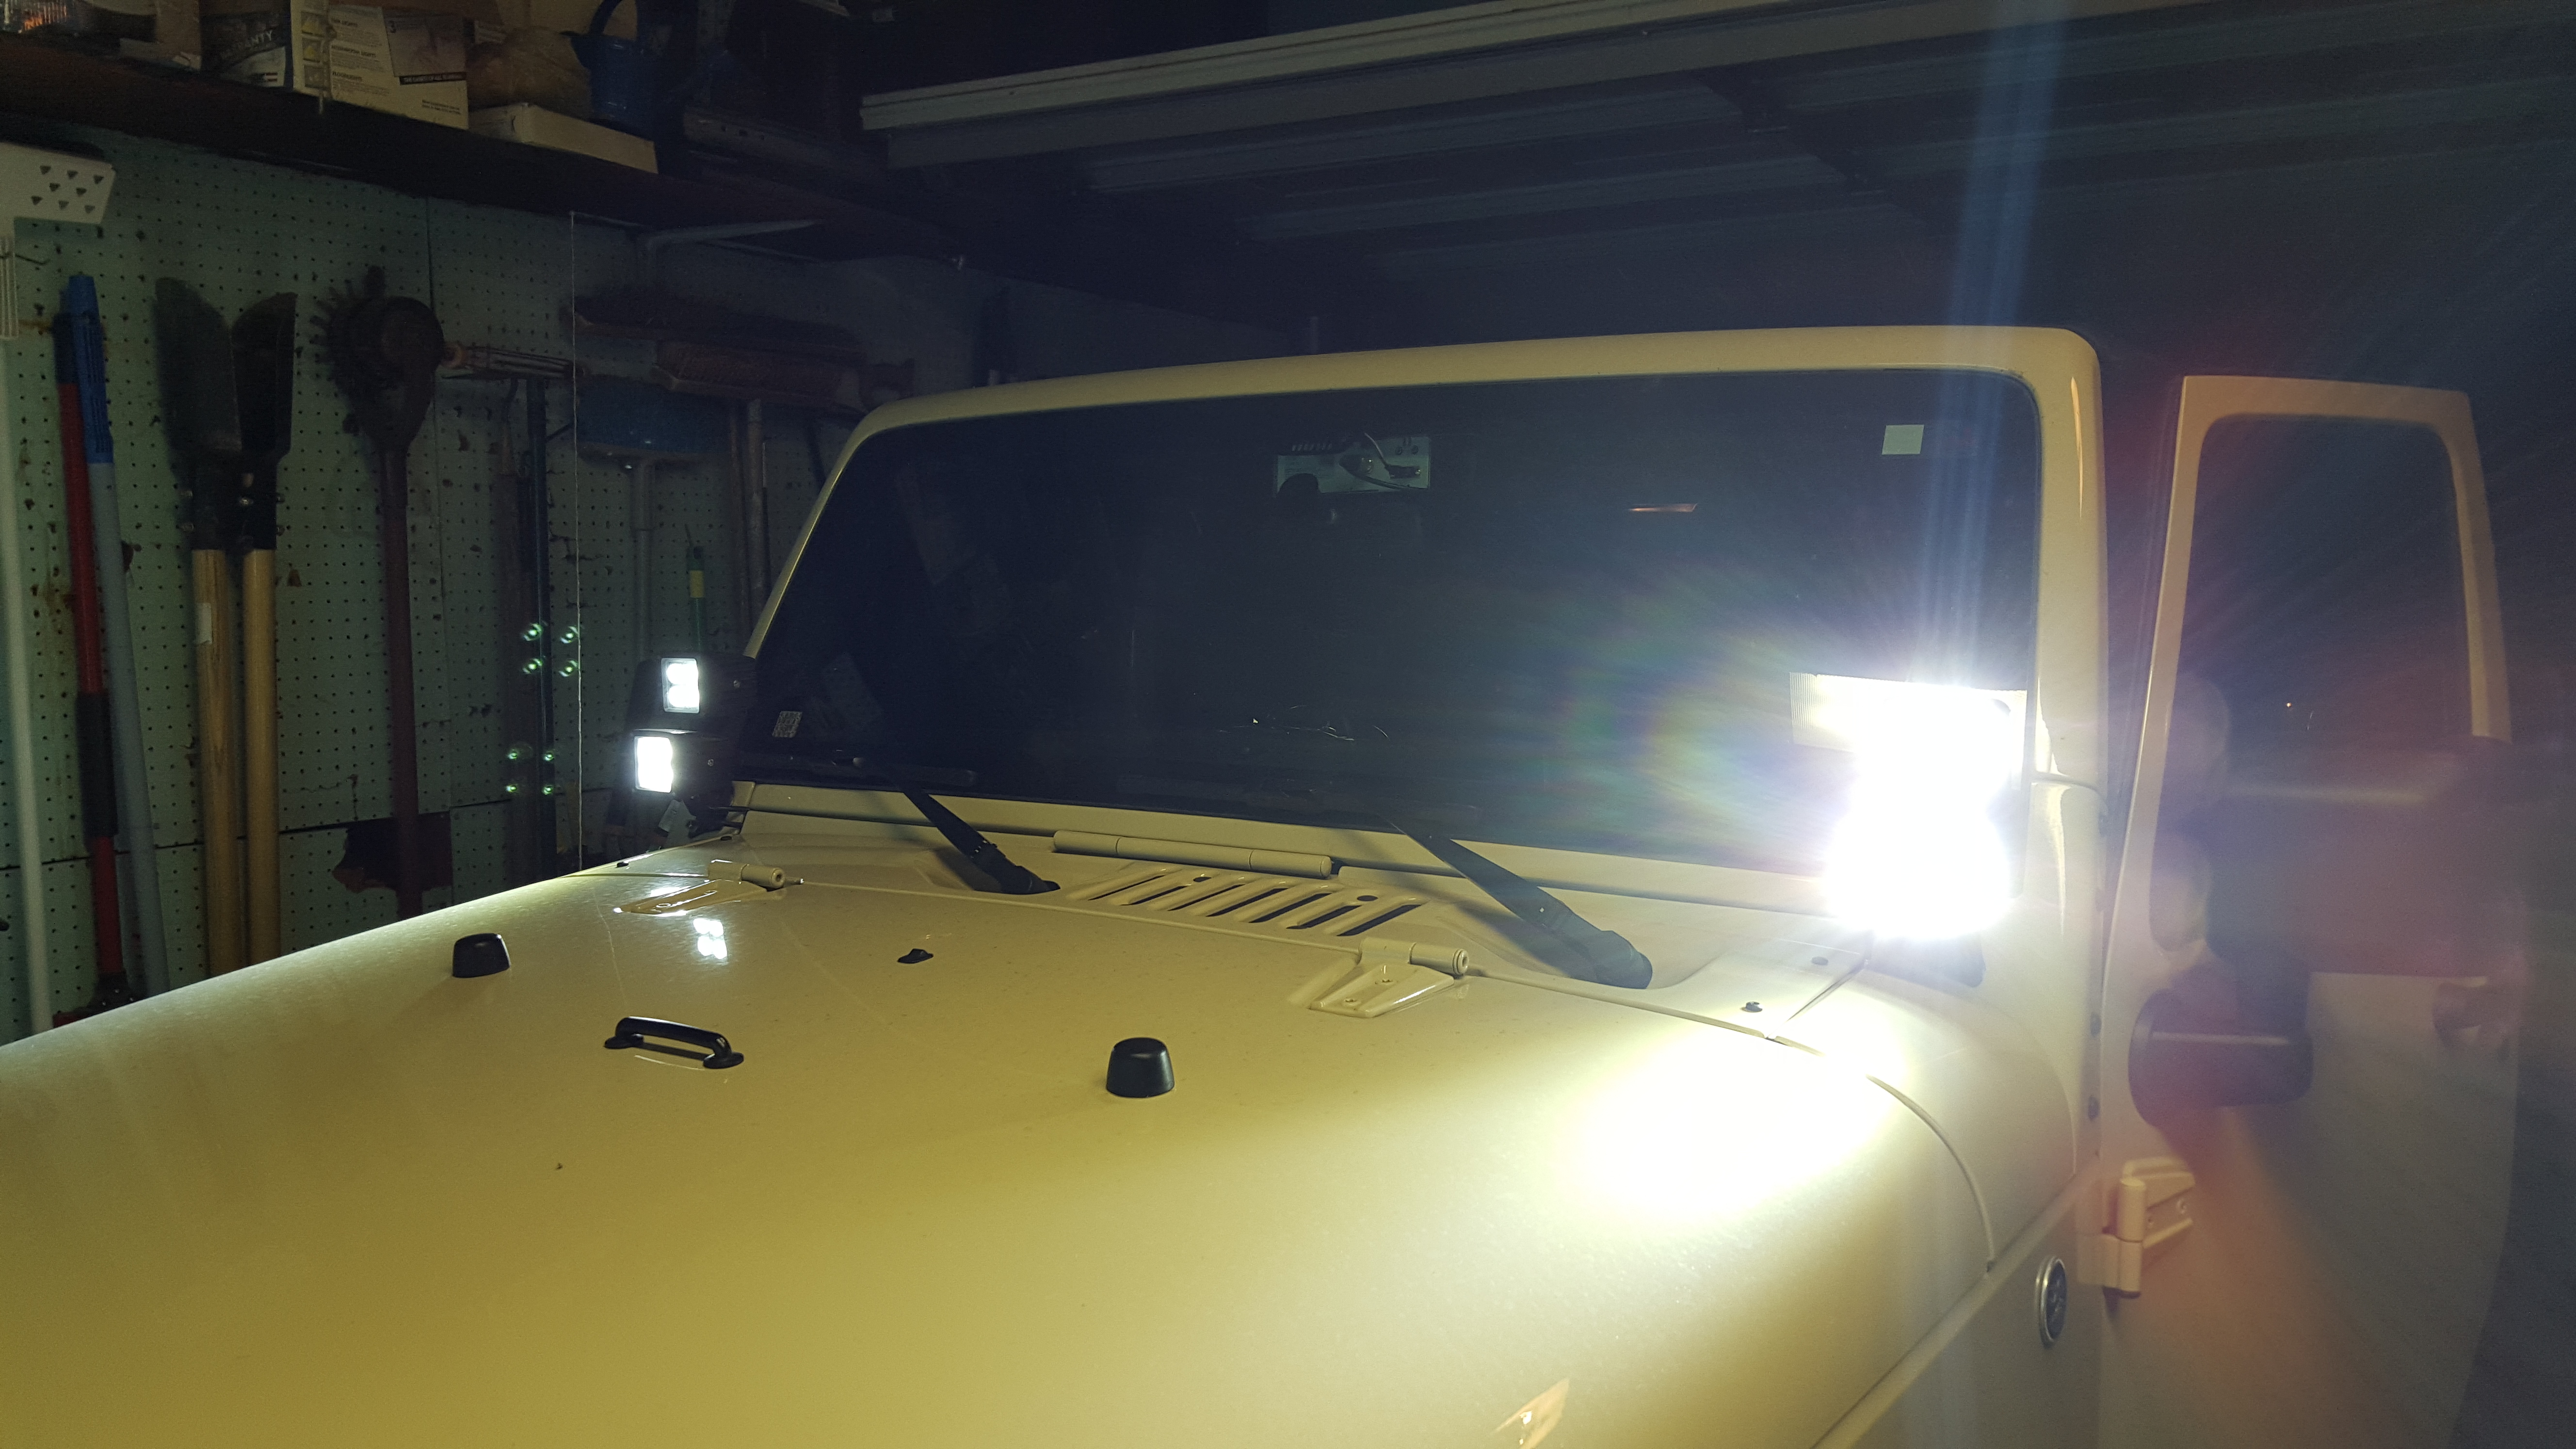

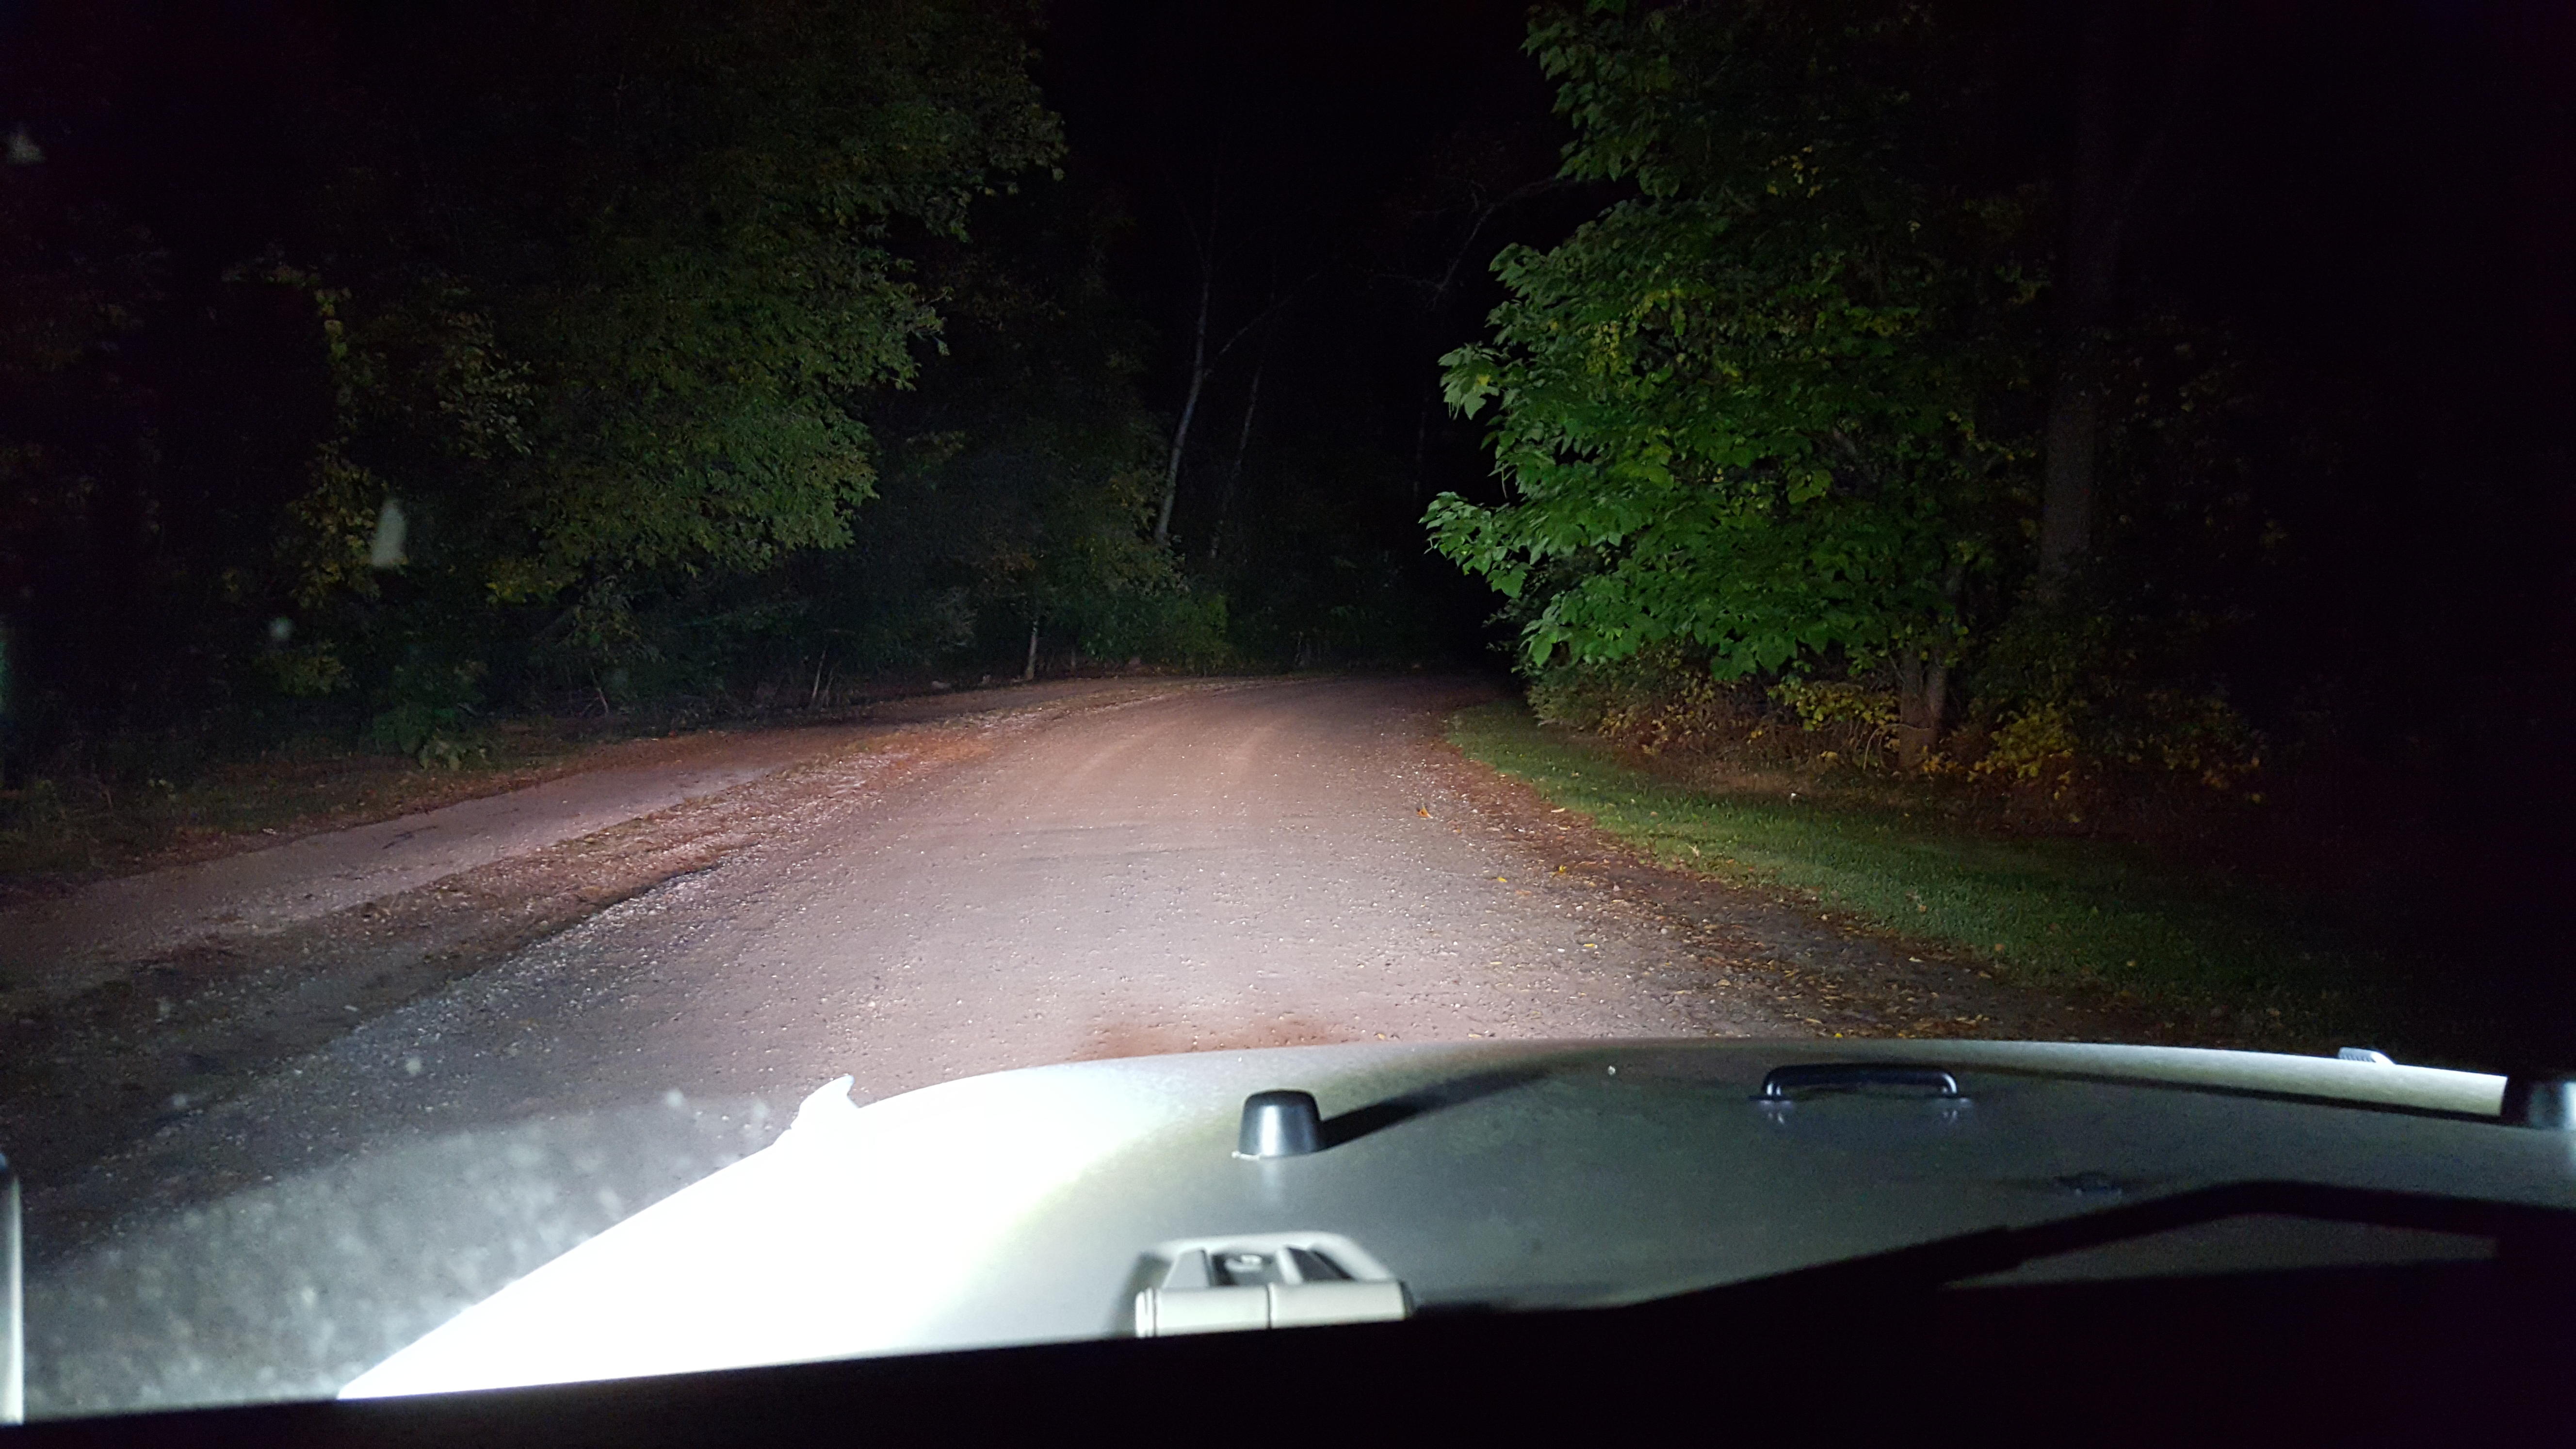
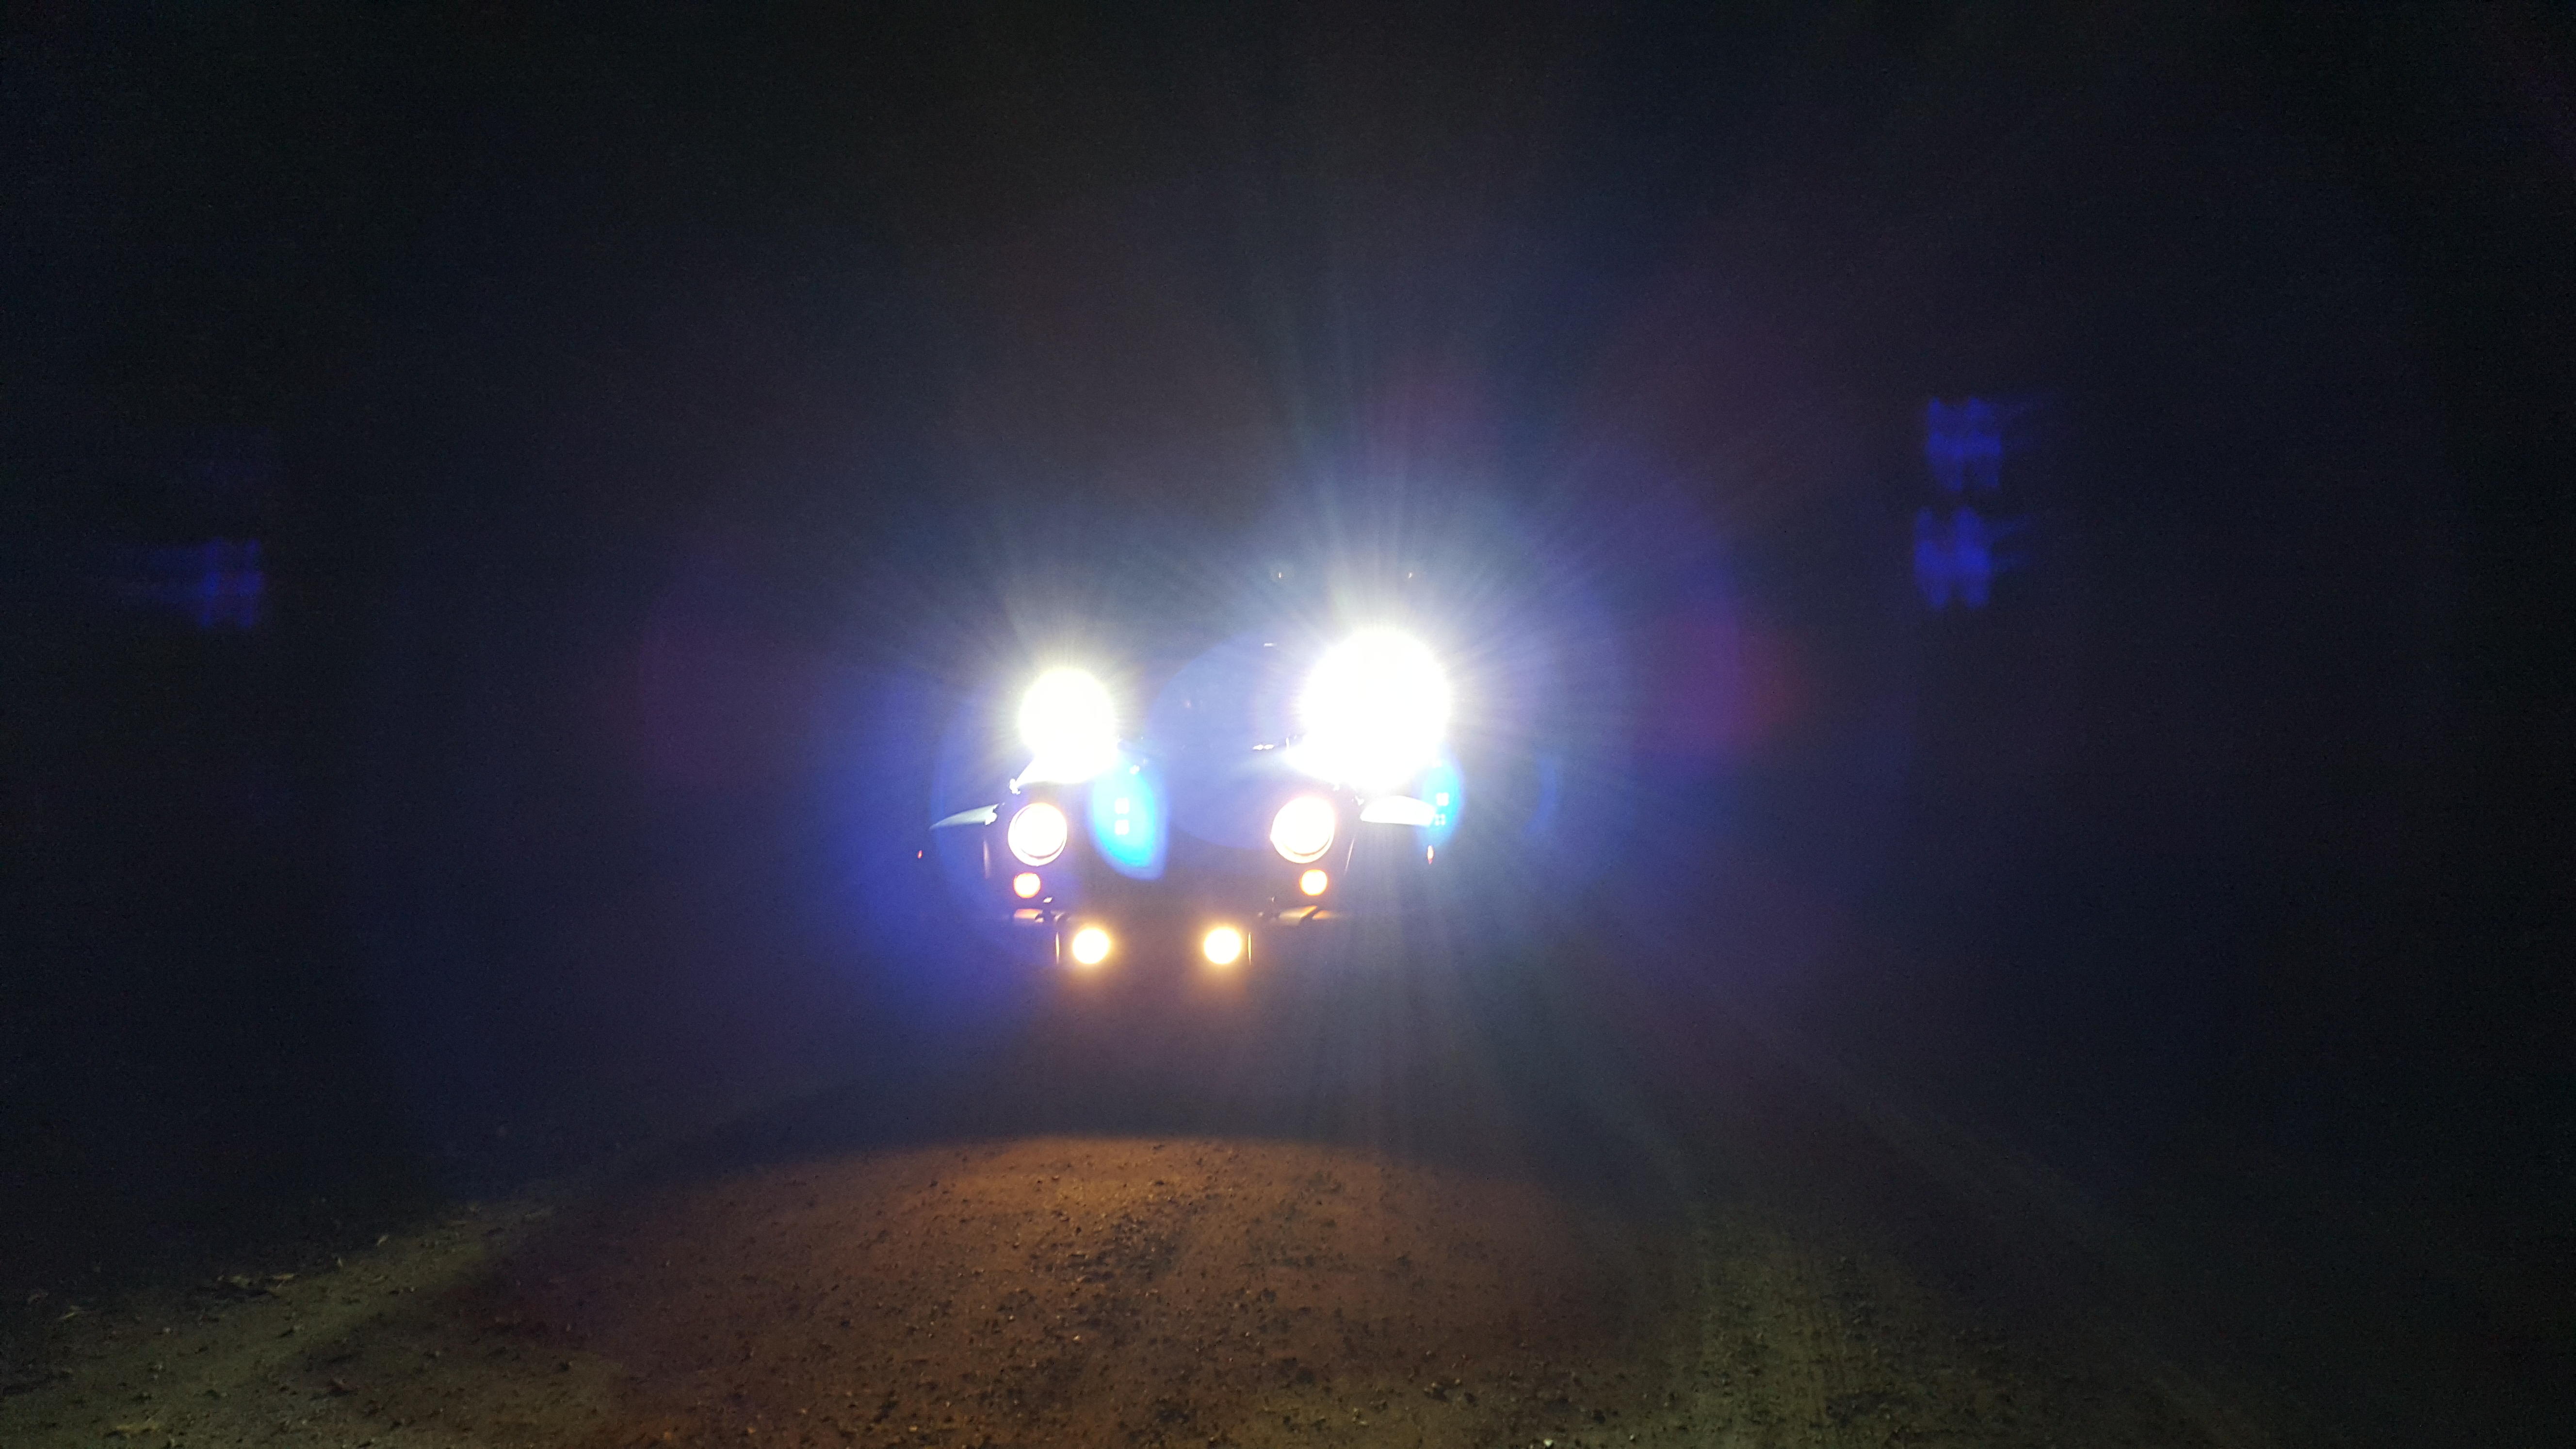
More to come on this mod as I will do a write up on the install process, as well as more detailed pics and maybe a video on how they function!
I did have a few install issues, but the entire mod in general cost under $200 for me, so totally affordable! I had an issue with the passenger side light bracket, as using the factory windshield bracket bolts, they barely threaded, and when tightened down, the inside part of the bracket pinched the passenger side wiper down so hard it was unmovable! So I had to do a slight modification there, but I was able to work it out with some new bolts and washers! Also, The hardware to attach the light to the bracket for the top Spot beam pattern lights was different than that that came with the bottom Flood beam pattern lights, and the bolts were too big to fit through the holes on the side! So that was a trip to Autozone to get some screws that fit into the holes to tighten the lights down. These ended up adding a few hours of work on when messing around and trying to get this to work, but I gota great deal on everything, and I absolutely love the fit and function of these lights! Here are some pics of them installed and working:
More to come on this mod as I will do a write up on the install process, as well as more detailed pics and maybe a video on how they function!
Last edited by WxNerd2015; 10-16-2015 at 05:40 AM.
10-16-2015, 06:51 AM
#23
JK Enthusiast
Thread Starter
Well, finally listening to the factory speakers with the windows down and top off and barely hearing it got annoying�(And the front speakers blew�a.k.a. I was trying to actually hear my music and let�s just say, no more music coming out of them!)
The factory head unit is �governed� from the factory to not allow anything over a certain db and all that stuff, I guess to use cheaper speakers and make em last longer maybe? Or maybe they have to be under a certain spec for the manufacturer? Idk? All I do know is, they were not very good! Even with the upgraded head unit, the radio itself was still governed, so anything over 18 (the max is 30) on the volume level caused the music to start to become very muffled and when it got muffled, it actually got more quiet! Plus, if you take a look at the factory speakers, they are paper thin, and just are not that great of quality. Now, I have the base audio package on my JK, not the premium audio, so I do not know if that makes it any better, but for me, I needed an upgrade badly.
So I did do a lot of my research, and I decided the best bet to go was a speaker amp and new speakers. Now I don�t need to be rattling and vibrating my whole ride, but I want to be able to hear my music with nice and clean audio, and hear it with the top down! (Cuz let�s face it, it�s a Jeep, the top is gonna be down!) So for me, I had no need or interest in adding a sub, and to be honest, I do not have the Unlimited, therefore cargo space is limited as it is and I do not want to deal with losing more space! So just solely a speaker amp and speaker upgrade was what I needed. With my research though, I am still not overly clear on all the different amps, and what each amp does, and what amps will still allow factory controls, and which amps have to be installed with a sub or you will lose base function, etc�there is a lot more to speaker amps for cars than I thought! So, instead of guessing, and maybe having this not work, as well as just all the splicing of wiring and additional running of wires and all that, I decided to just take it in. And I thought about going to the dealer, as I know there are Kicker installs from Mopar that the dealer could maybe do, but I decided to forget it cuz they would probably charge in an arm and a leg, so I went to a local audio and electronics shop for cars who is well known in the southern Michigan area and did great work on my truck before with an auto starter. The shop is called Mickey Shorr (I have linked the name I just typed to their website), and they always do great, high end, and professional work.
I did get in touch with Crutchfield about some different audio solutions, which they were extremely helpful and did provide me with some great insight, however, the only plug and play option for the Wrangler is from Kicker (which is one of the Vehicle Specific Solutions or VSS kits), included a sub, had factory plugs (so no splicing at all which was great), but it cost almost $1300, and that only include the amp and the sub and connections, no new speakers! Here is the link to that kit on Crutchfield�s site:
Kicker VSS? Powerstage? System Upgrade the factory sound system in select 2011-14 2-door Jeep Wranglers (without Infinity) at Crutchfield.com
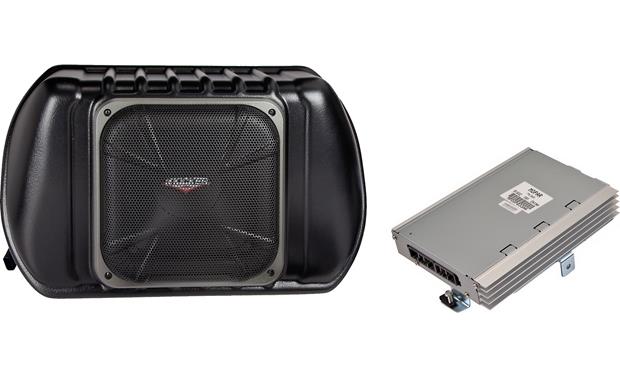
Now this was a bit much for me, and the sub was not really a priority to me! So they did provide me with another option, just for an amp, but that still cost upwards of $500 and they was still needing a lot of cutting and splicing, and still including no speakers and I would have lost some factory controls of the radio such as the audio tuning functions! So keeping the cost under $500 total, as well as keep all factory radio function and control were musts for me!
So I went to Mickey Shorr and they were having an end of the month special where install of any set of 4 speakers was free, so I figured I would give them a chance to see if they could meet my price need and still improve the audio, though to be honest, I didn�t think anyone would for that price and I would probably end up having to save up and pay up for the expensive system! Well, the guys at Mickey Shorr told me that the Kicker system could definitely be exceeded by Rockford Fosgate, as it was much higher quality, but the total they gave me was around $700. This was for 4 6 � speakers for the front dash and the sound bar, and a speaker amp. They was a heck of a lot closer to my budget, but still over. So I was about to leave, and the guys really wanted my business and asked me what price I wanted to stay below�AND HUGE SHOUT OUT to the Livonia Mickey Shorr store as they match the price I wanted exactly. So I ended up paying $400 for a Rockford Fosgate 400W 4-channel speaker amp and 4 Rockford Fosgate 6 � speakers which I am extremely pleased with�and this was installed as well as they honored their free install of everything at that price as well!
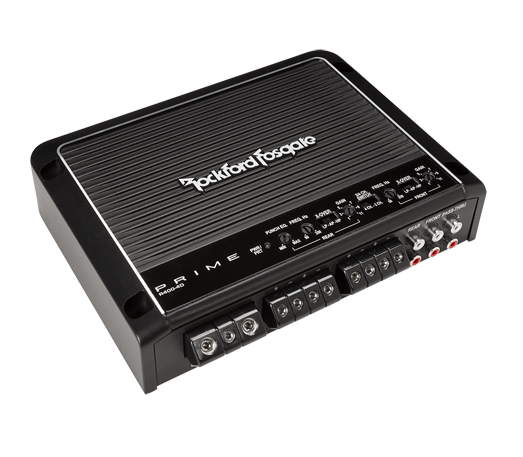
Here is the speaker amp that was installed:
PRIME Amplifiers R400-4D - 400 Watt Full-Range Class-D 4-Channel Amplifier | Rockford Fosgate�
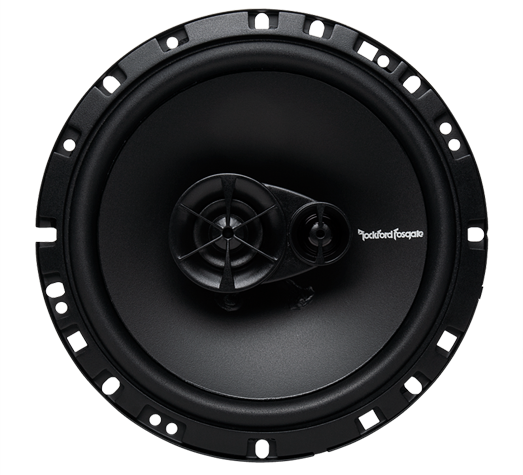
And here is the speakers that were installed:
PRIME Speakers R165X3 - 6.50" 3-Way Full-Range Speaker. | Rockford Fosgate�
And all factory radio function was kept as well as all audio controls, and it sounds S000000 much better than before and top top and 70 MPH on the expressway, I can hear my music no problem with the volume only up to 16! And the bass is much better, and no sub needed! If you want a good audio upgrade and don�t need the sub, this upgrade is great! Rockford Fosgate exceptional quality, and is a trusted manufacturer that has done this for a longtime and is known for their quality, and their product definitely did not disappoint!
The factory head unit is �governed� from the factory to not allow anything over a certain db and all that stuff, I guess to use cheaper speakers and make em last longer maybe? Or maybe they have to be under a certain spec for the manufacturer? Idk? All I do know is, they were not very good! Even with the upgraded head unit, the radio itself was still governed, so anything over 18 (the max is 30) on the volume level caused the music to start to become very muffled and when it got muffled, it actually got more quiet! Plus, if you take a look at the factory speakers, they are paper thin, and just are not that great of quality. Now, I have the base audio package on my JK, not the premium audio, so I do not know if that makes it any better, but for me, I needed an upgrade badly.
So I did do a lot of my research, and I decided the best bet to go was a speaker amp and new speakers. Now I don�t need to be rattling and vibrating my whole ride, but I want to be able to hear my music with nice and clean audio, and hear it with the top down! (Cuz let�s face it, it�s a Jeep, the top is gonna be down!) So for me, I had no need or interest in adding a sub, and to be honest, I do not have the Unlimited, therefore cargo space is limited as it is and I do not want to deal with losing more space! So just solely a speaker amp and speaker upgrade was what I needed. With my research though, I am still not overly clear on all the different amps, and what each amp does, and what amps will still allow factory controls, and which amps have to be installed with a sub or you will lose base function, etc�there is a lot more to speaker amps for cars than I thought! So, instead of guessing, and maybe having this not work, as well as just all the splicing of wiring and additional running of wires and all that, I decided to just take it in. And I thought about going to the dealer, as I know there are Kicker installs from Mopar that the dealer could maybe do, but I decided to forget it cuz they would probably charge in an arm and a leg, so I went to a local audio and electronics shop for cars who is well known in the southern Michigan area and did great work on my truck before with an auto starter. The shop is called Mickey Shorr (I have linked the name I just typed to their website), and they always do great, high end, and professional work.
I did get in touch with Crutchfield about some different audio solutions, which they were extremely helpful and did provide me with some great insight, however, the only plug and play option for the Wrangler is from Kicker (which is one of the Vehicle Specific Solutions or VSS kits), included a sub, had factory plugs (so no splicing at all which was great), but it cost almost $1300, and that only include the amp and the sub and connections, no new speakers! Here is the link to that kit on Crutchfield�s site:
Kicker VSS? Powerstage? System Upgrade the factory sound system in select 2011-14 2-door Jeep Wranglers (without Infinity) at Crutchfield.com
Now this was a bit much for me, and the sub was not really a priority to me! So they did provide me with another option, just for an amp, but that still cost upwards of $500 and they was still needing a lot of cutting and splicing, and still including no speakers and I would have lost some factory controls of the radio such as the audio tuning functions! So keeping the cost under $500 total, as well as keep all factory radio function and control were musts for me!
So I went to Mickey Shorr and they were having an end of the month special where install of any set of 4 speakers was free, so I figured I would give them a chance to see if they could meet my price need and still improve the audio, though to be honest, I didn�t think anyone would for that price and I would probably end up having to save up and pay up for the expensive system! Well, the guys at Mickey Shorr told me that the Kicker system could definitely be exceeded by Rockford Fosgate, as it was much higher quality, but the total they gave me was around $700. This was for 4 6 � speakers for the front dash and the sound bar, and a speaker amp. They was a heck of a lot closer to my budget, but still over. So I was about to leave, and the guys really wanted my business and asked me what price I wanted to stay below�AND HUGE SHOUT OUT to the Livonia Mickey Shorr store as they match the price I wanted exactly. So I ended up paying $400 for a Rockford Fosgate 400W 4-channel speaker amp and 4 Rockford Fosgate 6 � speakers which I am extremely pleased with�and this was installed as well as they honored their free install of everything at that price as well!
Here is the speaker amp that was installed:
PRIME Amplifiers R400-4D - 400 Watt Full-Range Class-D 4-Channel Amplifier | Rockford Fosgate�
And here is the speakers that were installed:
PRIME Speakers R165X3 - 6.50" 3-Way Full-Range Speaker. | Rockford Fosgate�
And all factory radio function was kept as well as all audio controls, and it sounds S000000 much better than before and top top and 70 MPH on the expressway, I can hear my music no problem with the volume only up to 16! And the bass is much better, and no sub needed! If you want a good audio upgrade and don�t need the sub, this upgrade is great! Rockford Fosgate exceptional quality, and is a trusted manufacturer that has done this for a longtime and is known for their quality, and their product definitely did not disappoint!
10-19-2015, 11:59 AM
#24
JK Enthusiast
Thread Starter
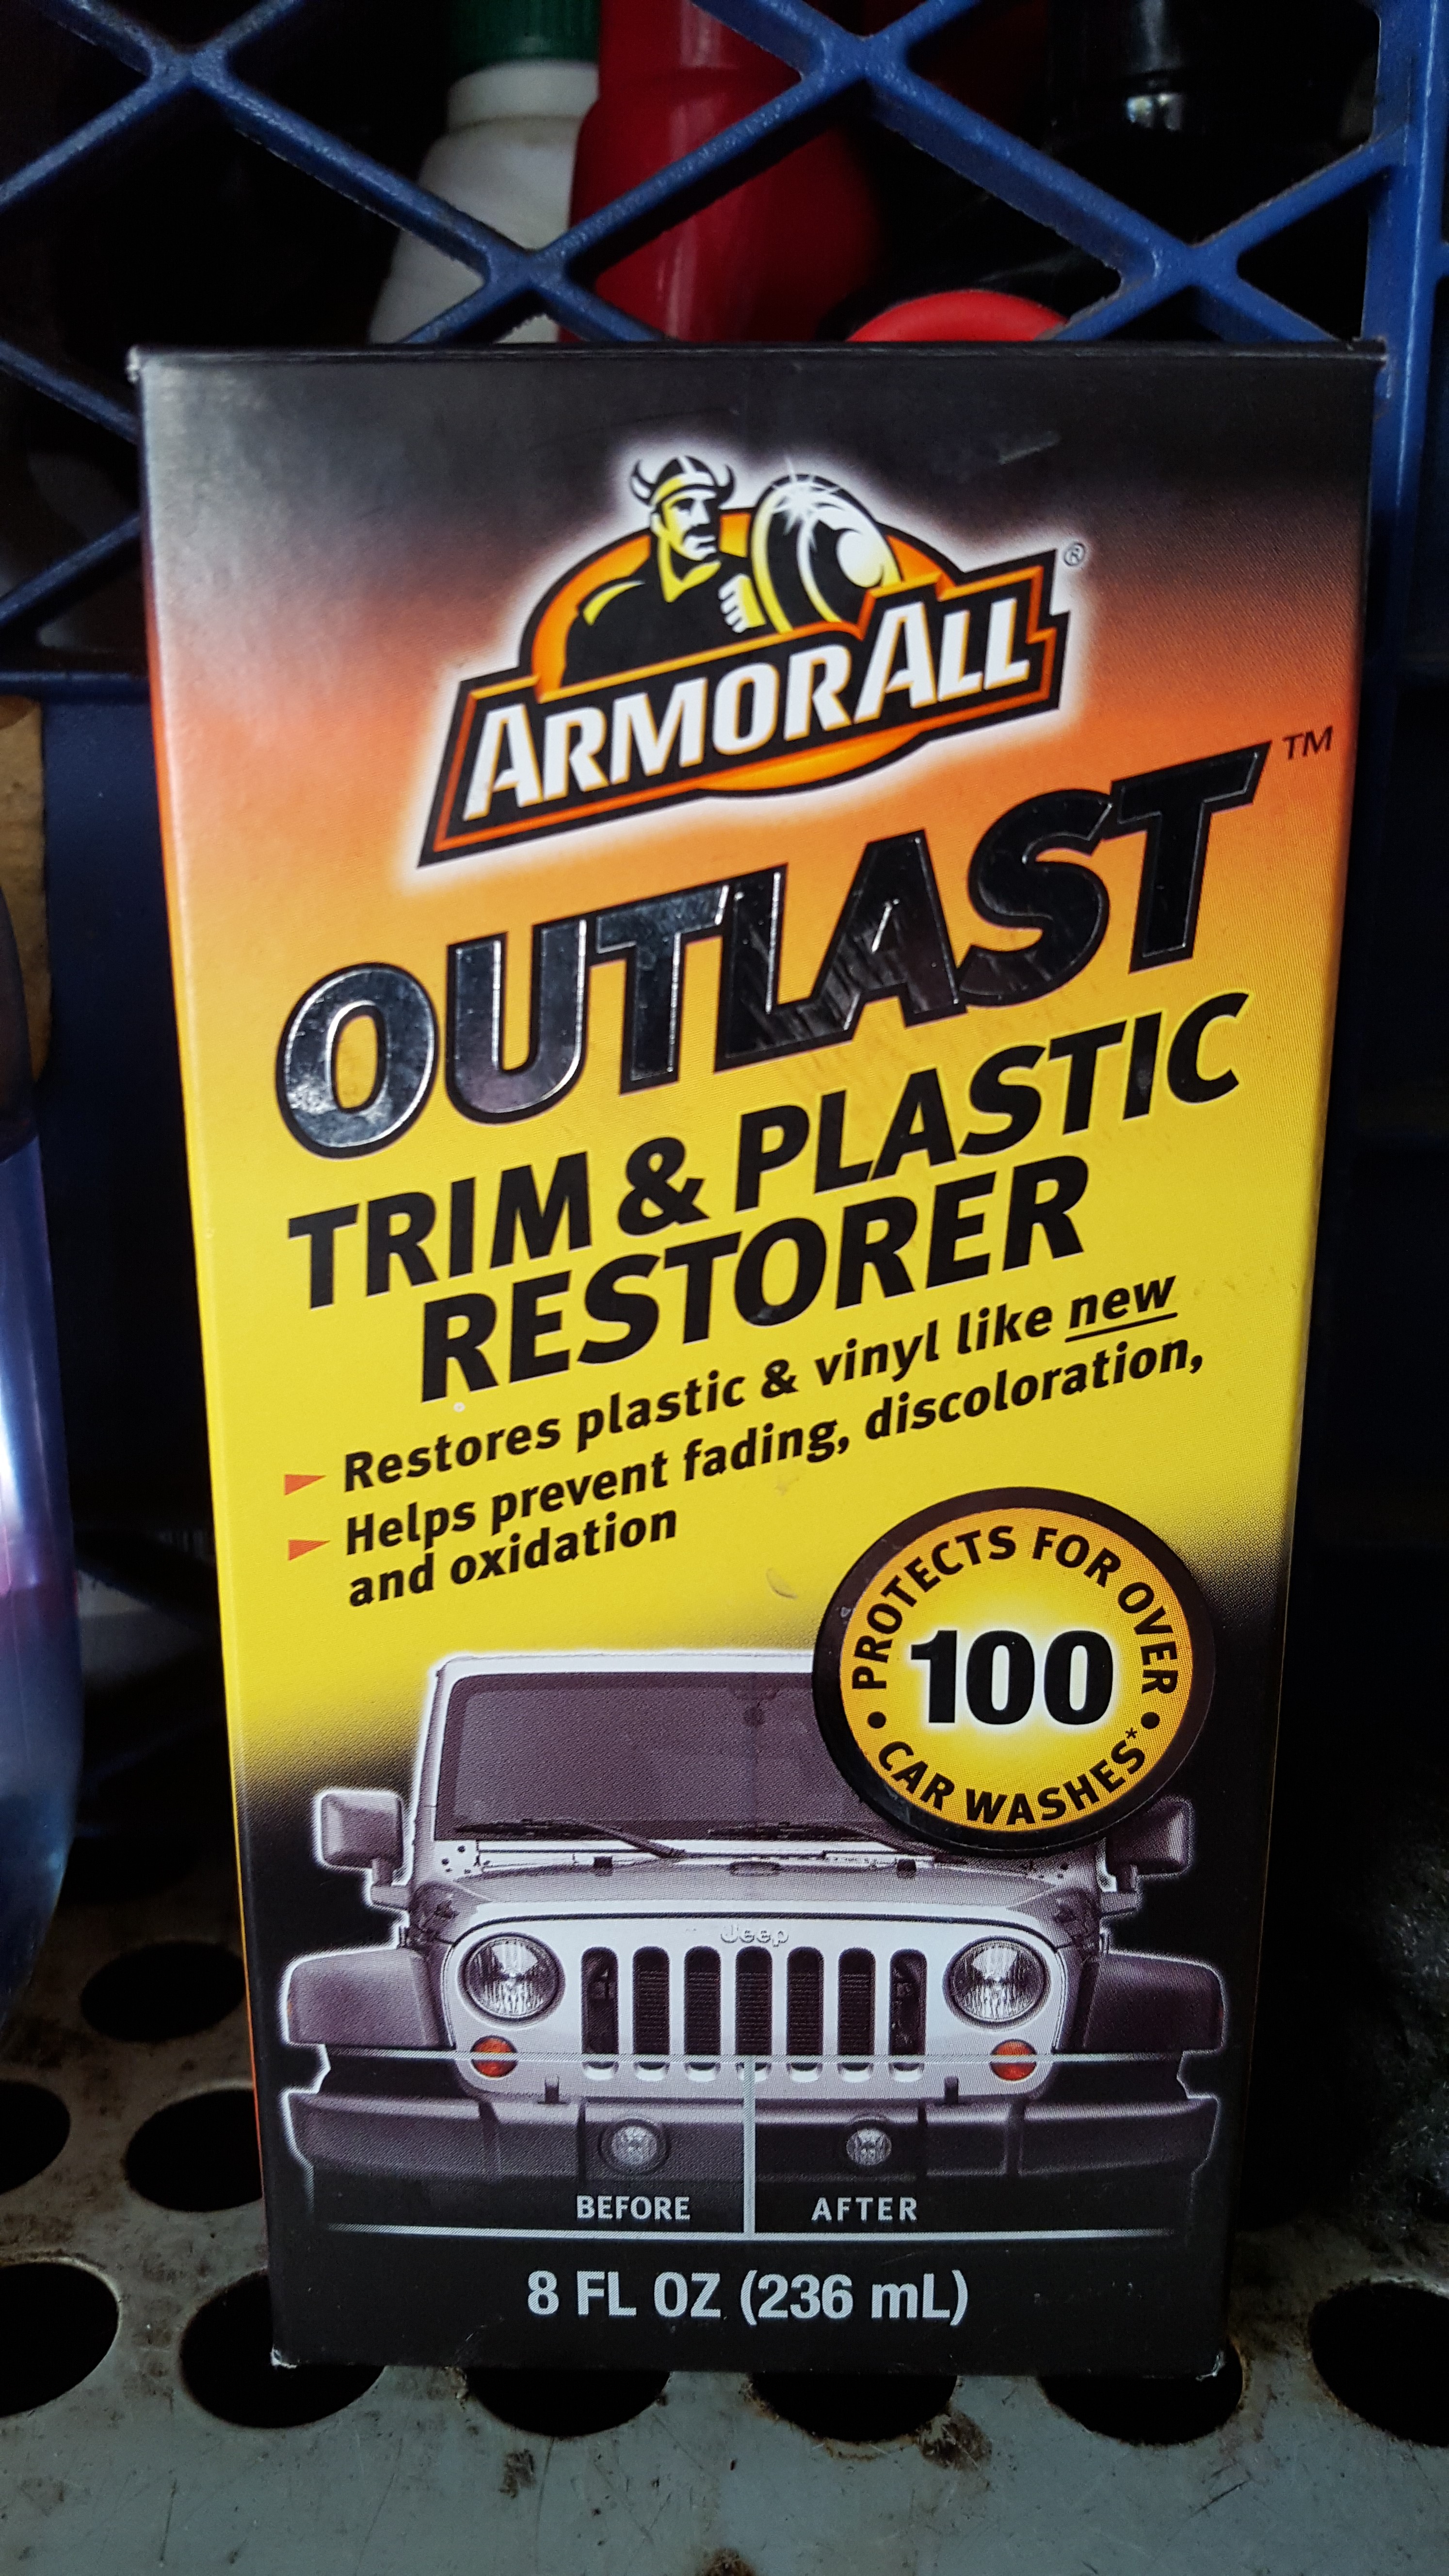
Just a couple quick little tips and tricks to help keep all looking and running good on your Jeep! First off, if you still have your stock fenders/bumpers/mirrors/door handles/rear door hinges/fuel cap area/rubber stoppers on the hood/etc. then it is good to make sure that you take care of those pieces to make sure that your Jeep is looking the best and they will last (or at least until you upgrade!). Every so many washes, I use the Armor All Trim/Plastic Restorer to get the rest of the dirt and what not off the plastic so it doesn't soak in, and it also prevents the UV damage and all that and keep the vendors and other trim looking brand new! (And so it's ready to go for the next adventure!)
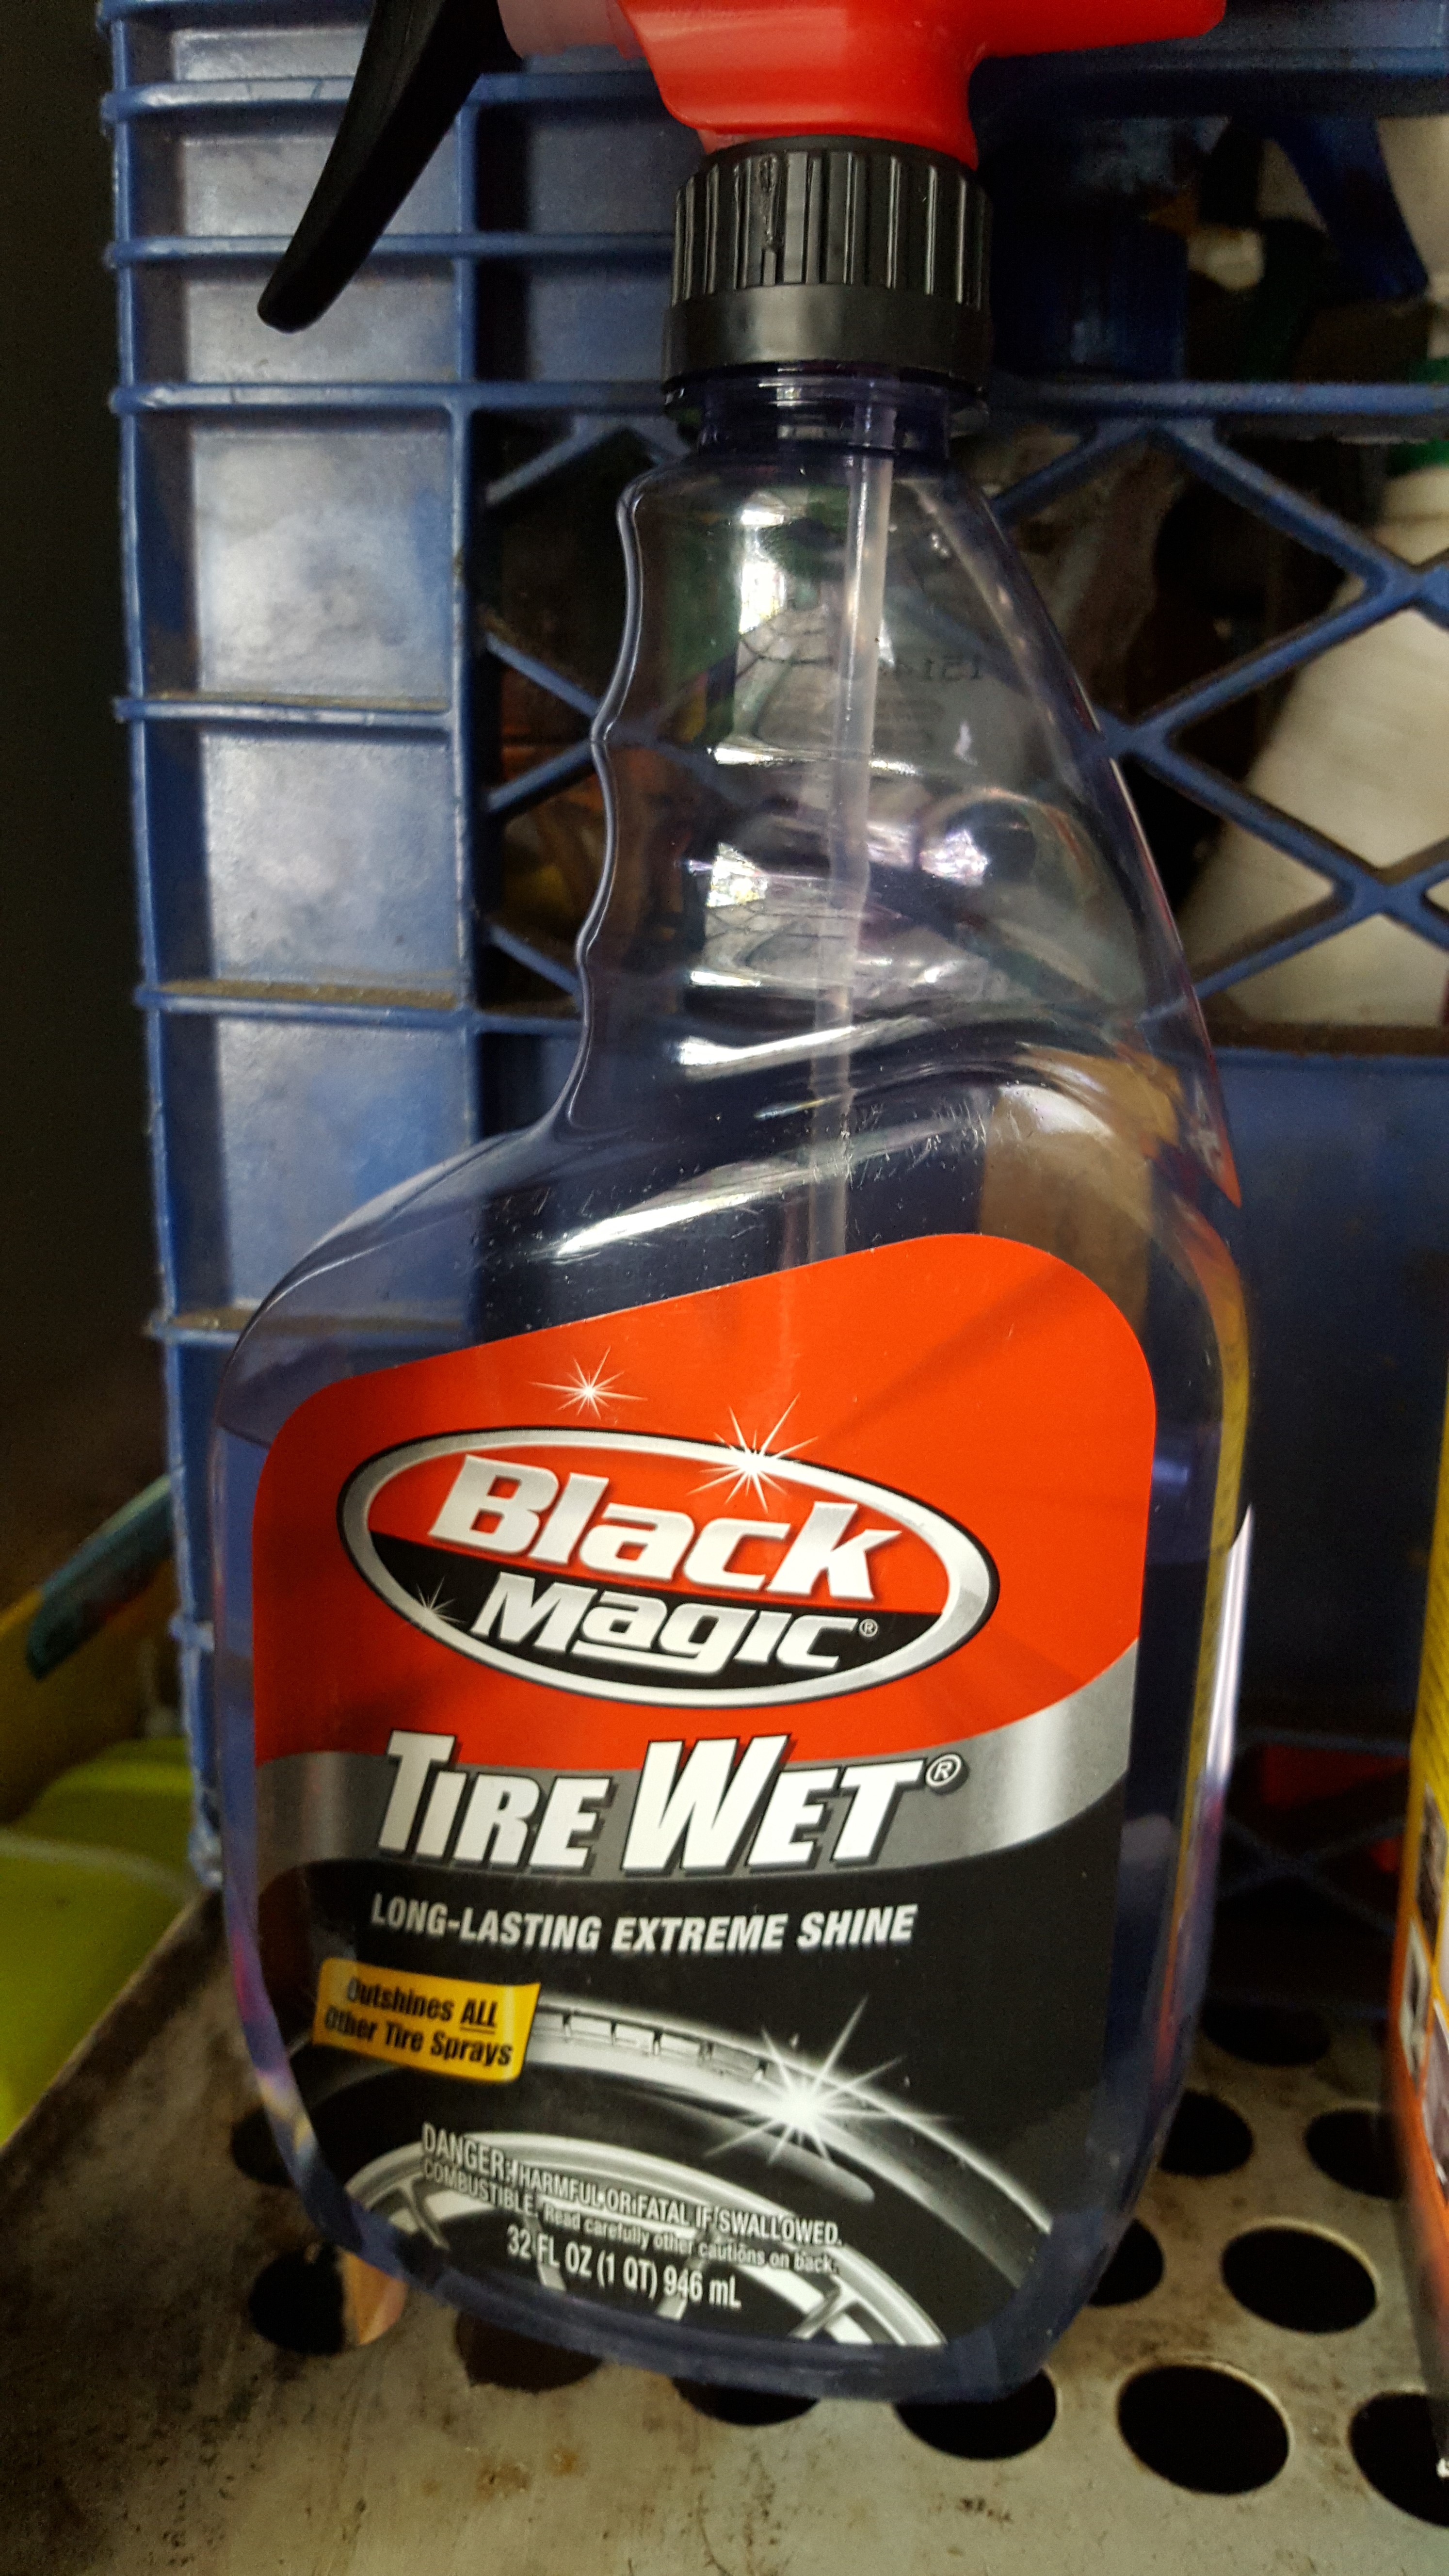
The other small tip I have is to help protect your tires (including the spare!)! Every so many washes I also spray on the Black Magic Tire Shine to protect the tires and keep them looking nice and prevent the weird stain marks you can get sometimes! It's also very important to make sure that the spare is protected too as that one is the most exposed tires which you need to make sure is in good condition if ever needed! You don't want to have a situation where you need the spare and it's been exposed to the sun too much and become dried out or a situation like that!
Now I know these aren't typically things that most Jeep owners worry about, but just a couple of tips that I have learned that help your vehicle last longer with no worries!
10-20-2015, 10:02 AM
#25
JK Enthusiast
Thread Starter
Just wanted to further my posts on the 730N RHR radio that I had installed to everyone more info on the radio itself, along with the functions and how it works! So if you are thinking you can get one, then you can be fully informed on the functions of the RHR! I will post a video of it working soon, but here are some pictures of the functions!
When the radio receives power once you turn the ignition on, you will first see the Jeep splash screen. Then, as long as the radio if off, it will load to the radio off screen, which usually will just display the time, like this:


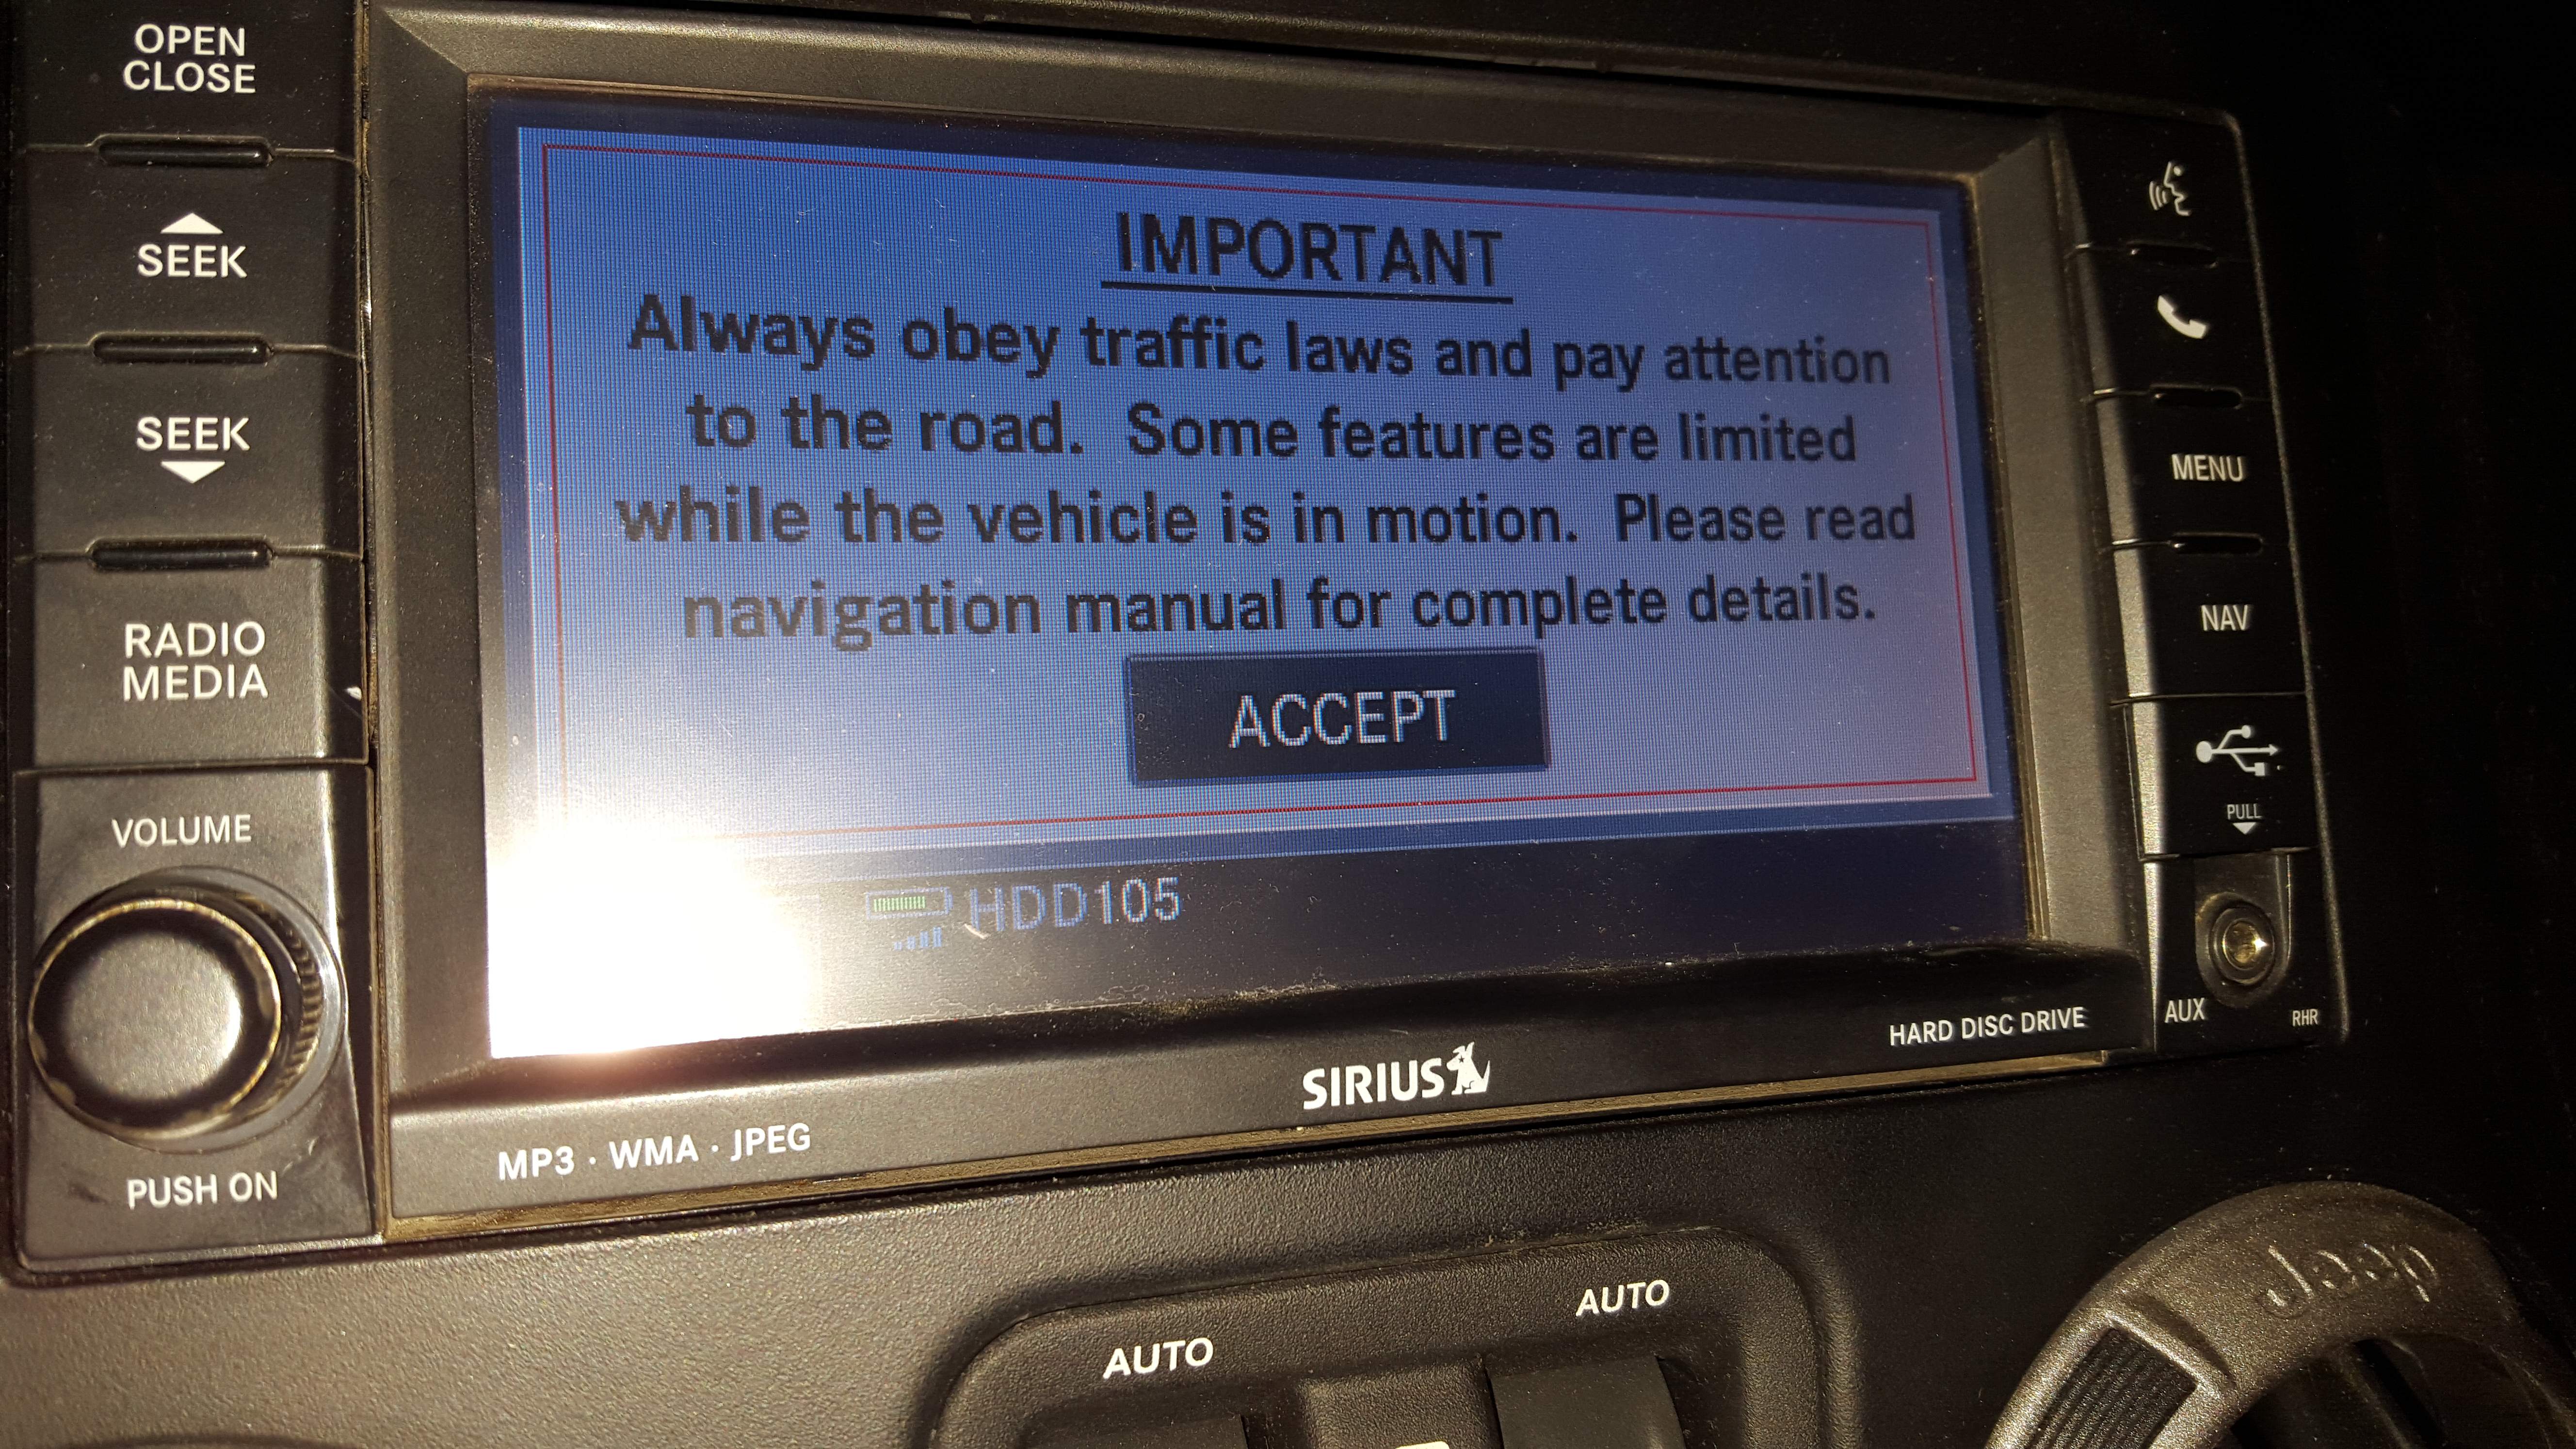
If you then want to turn the radio on, you press the volume knob in, and (if you have no lock pick system installed on your radio) then you will see the warning/disclaimer about vehicle in motion inputs and all that. The screen will look like this:
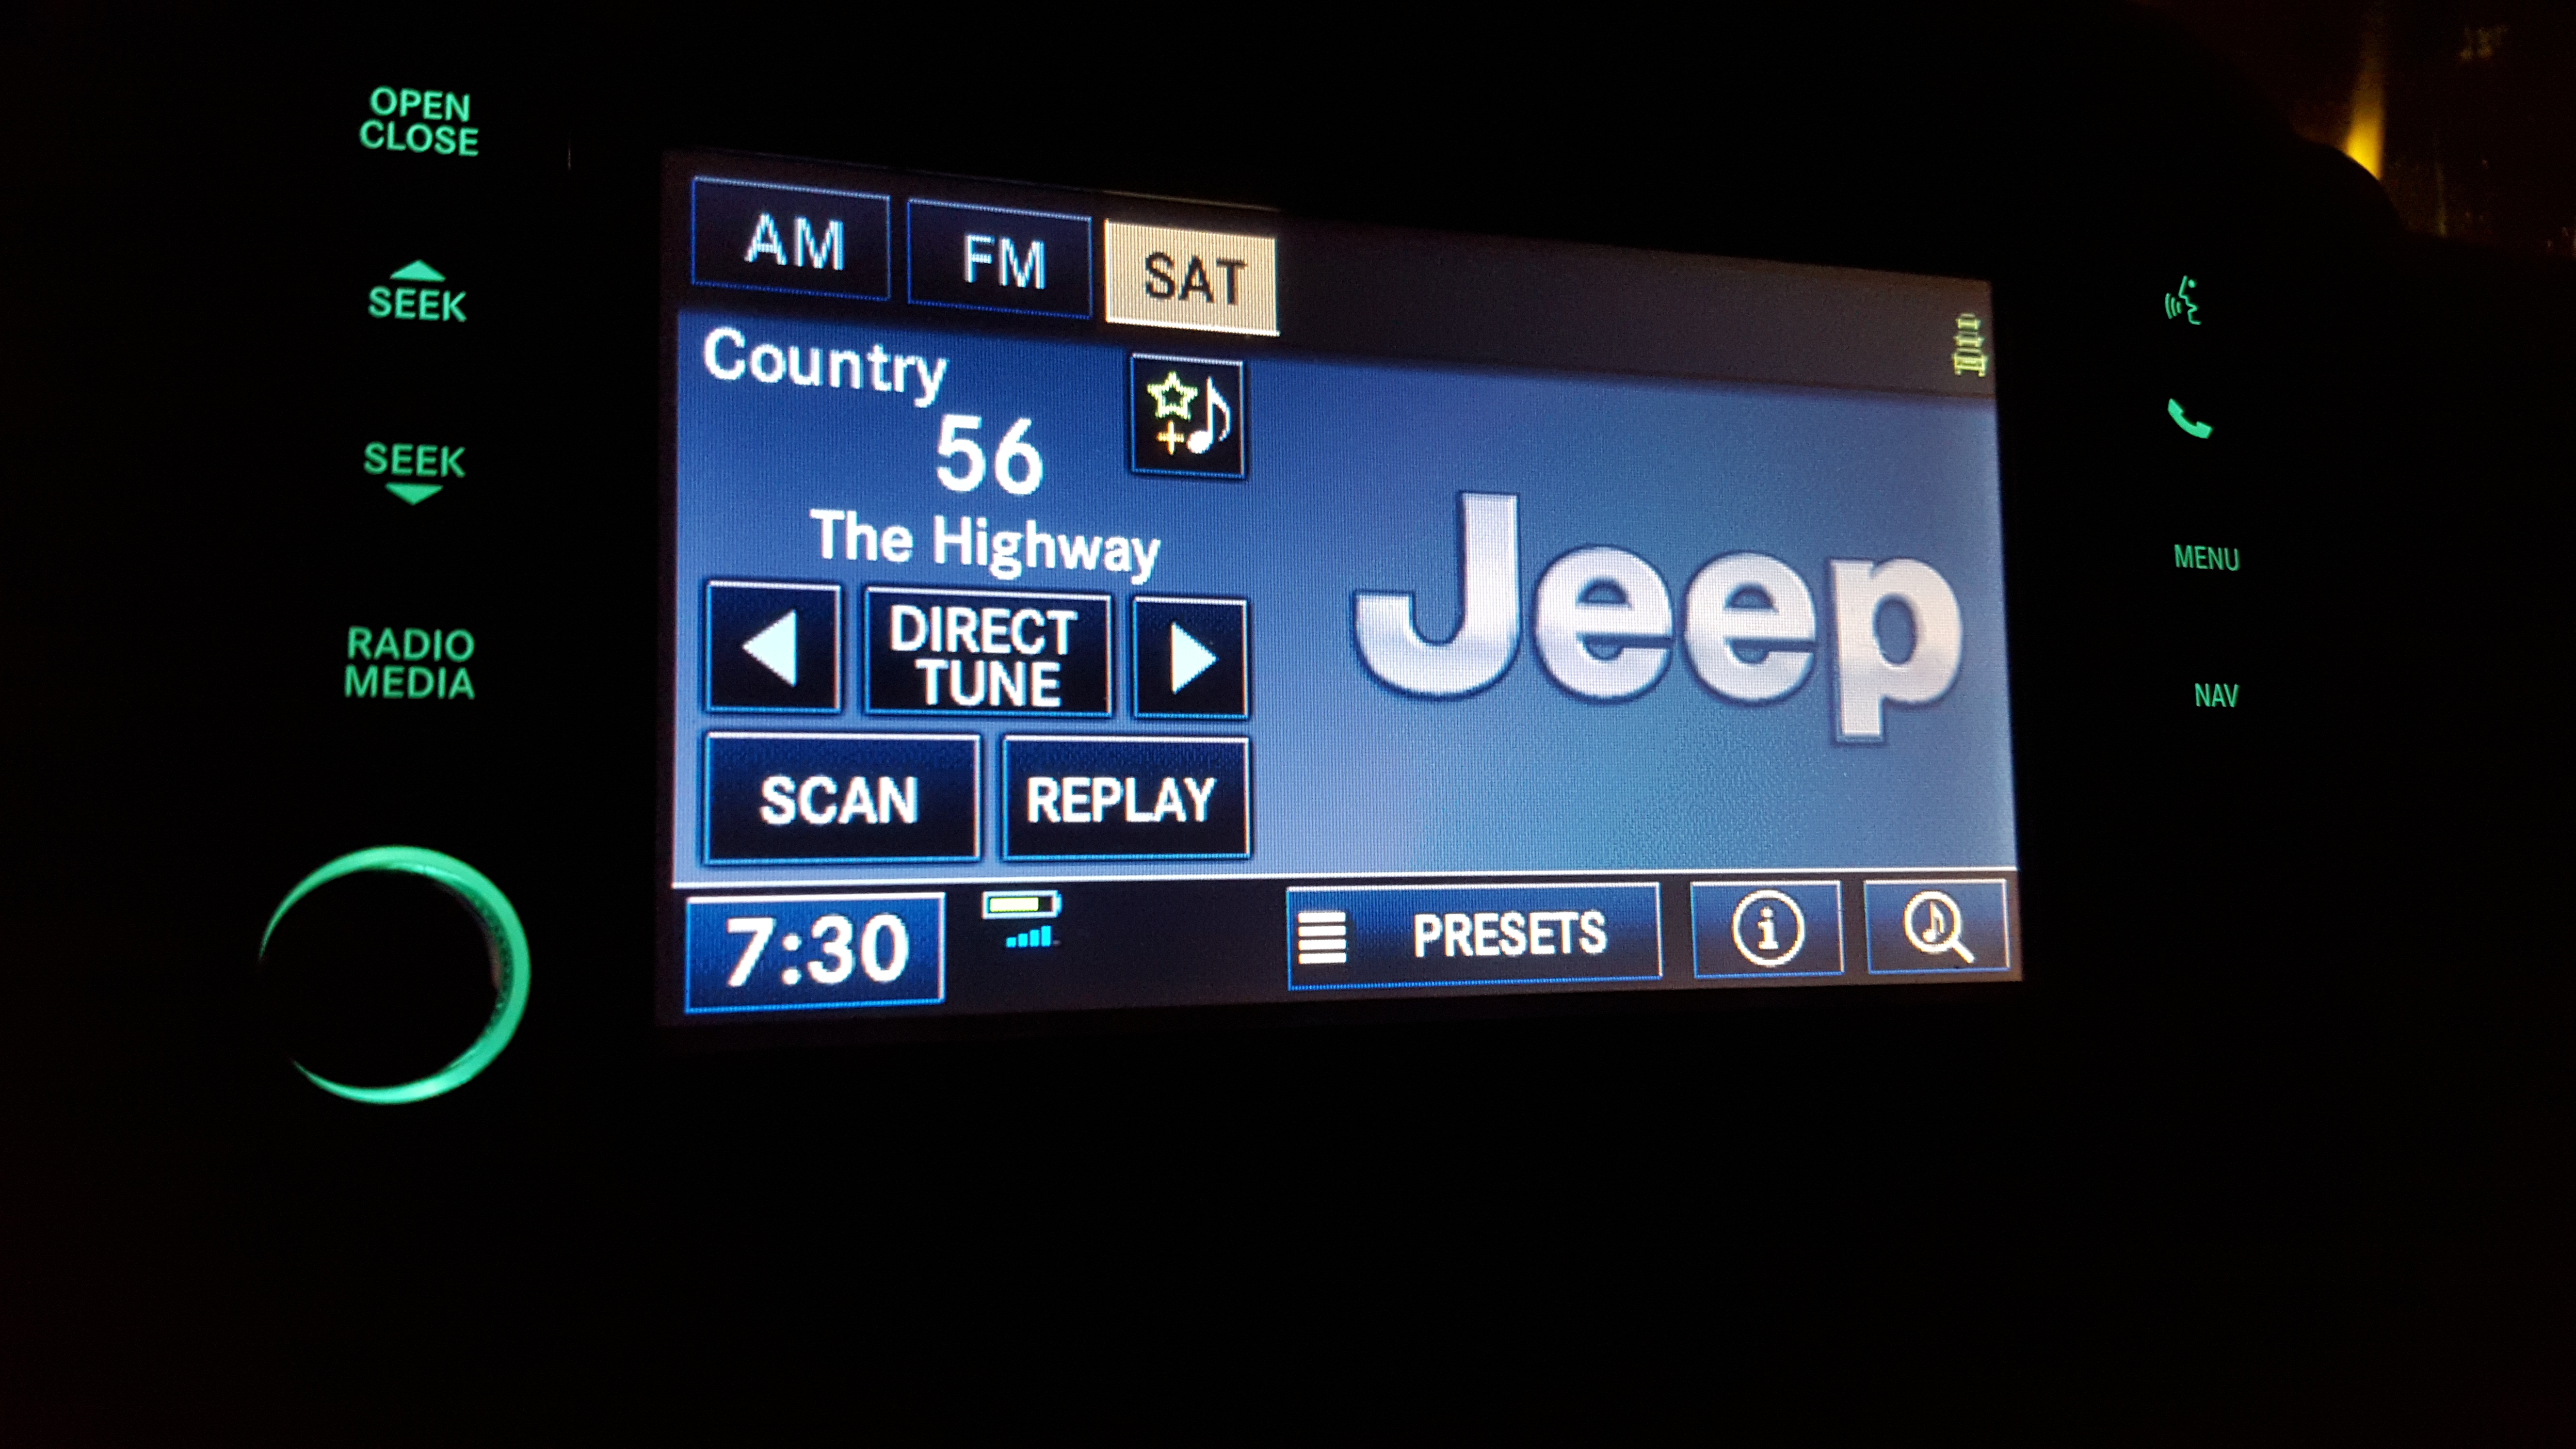
Then the radio will then load into which ever radio or nav screen it was last on. For me, that is the split screen with audio on the left, and the navigation screen on the right:

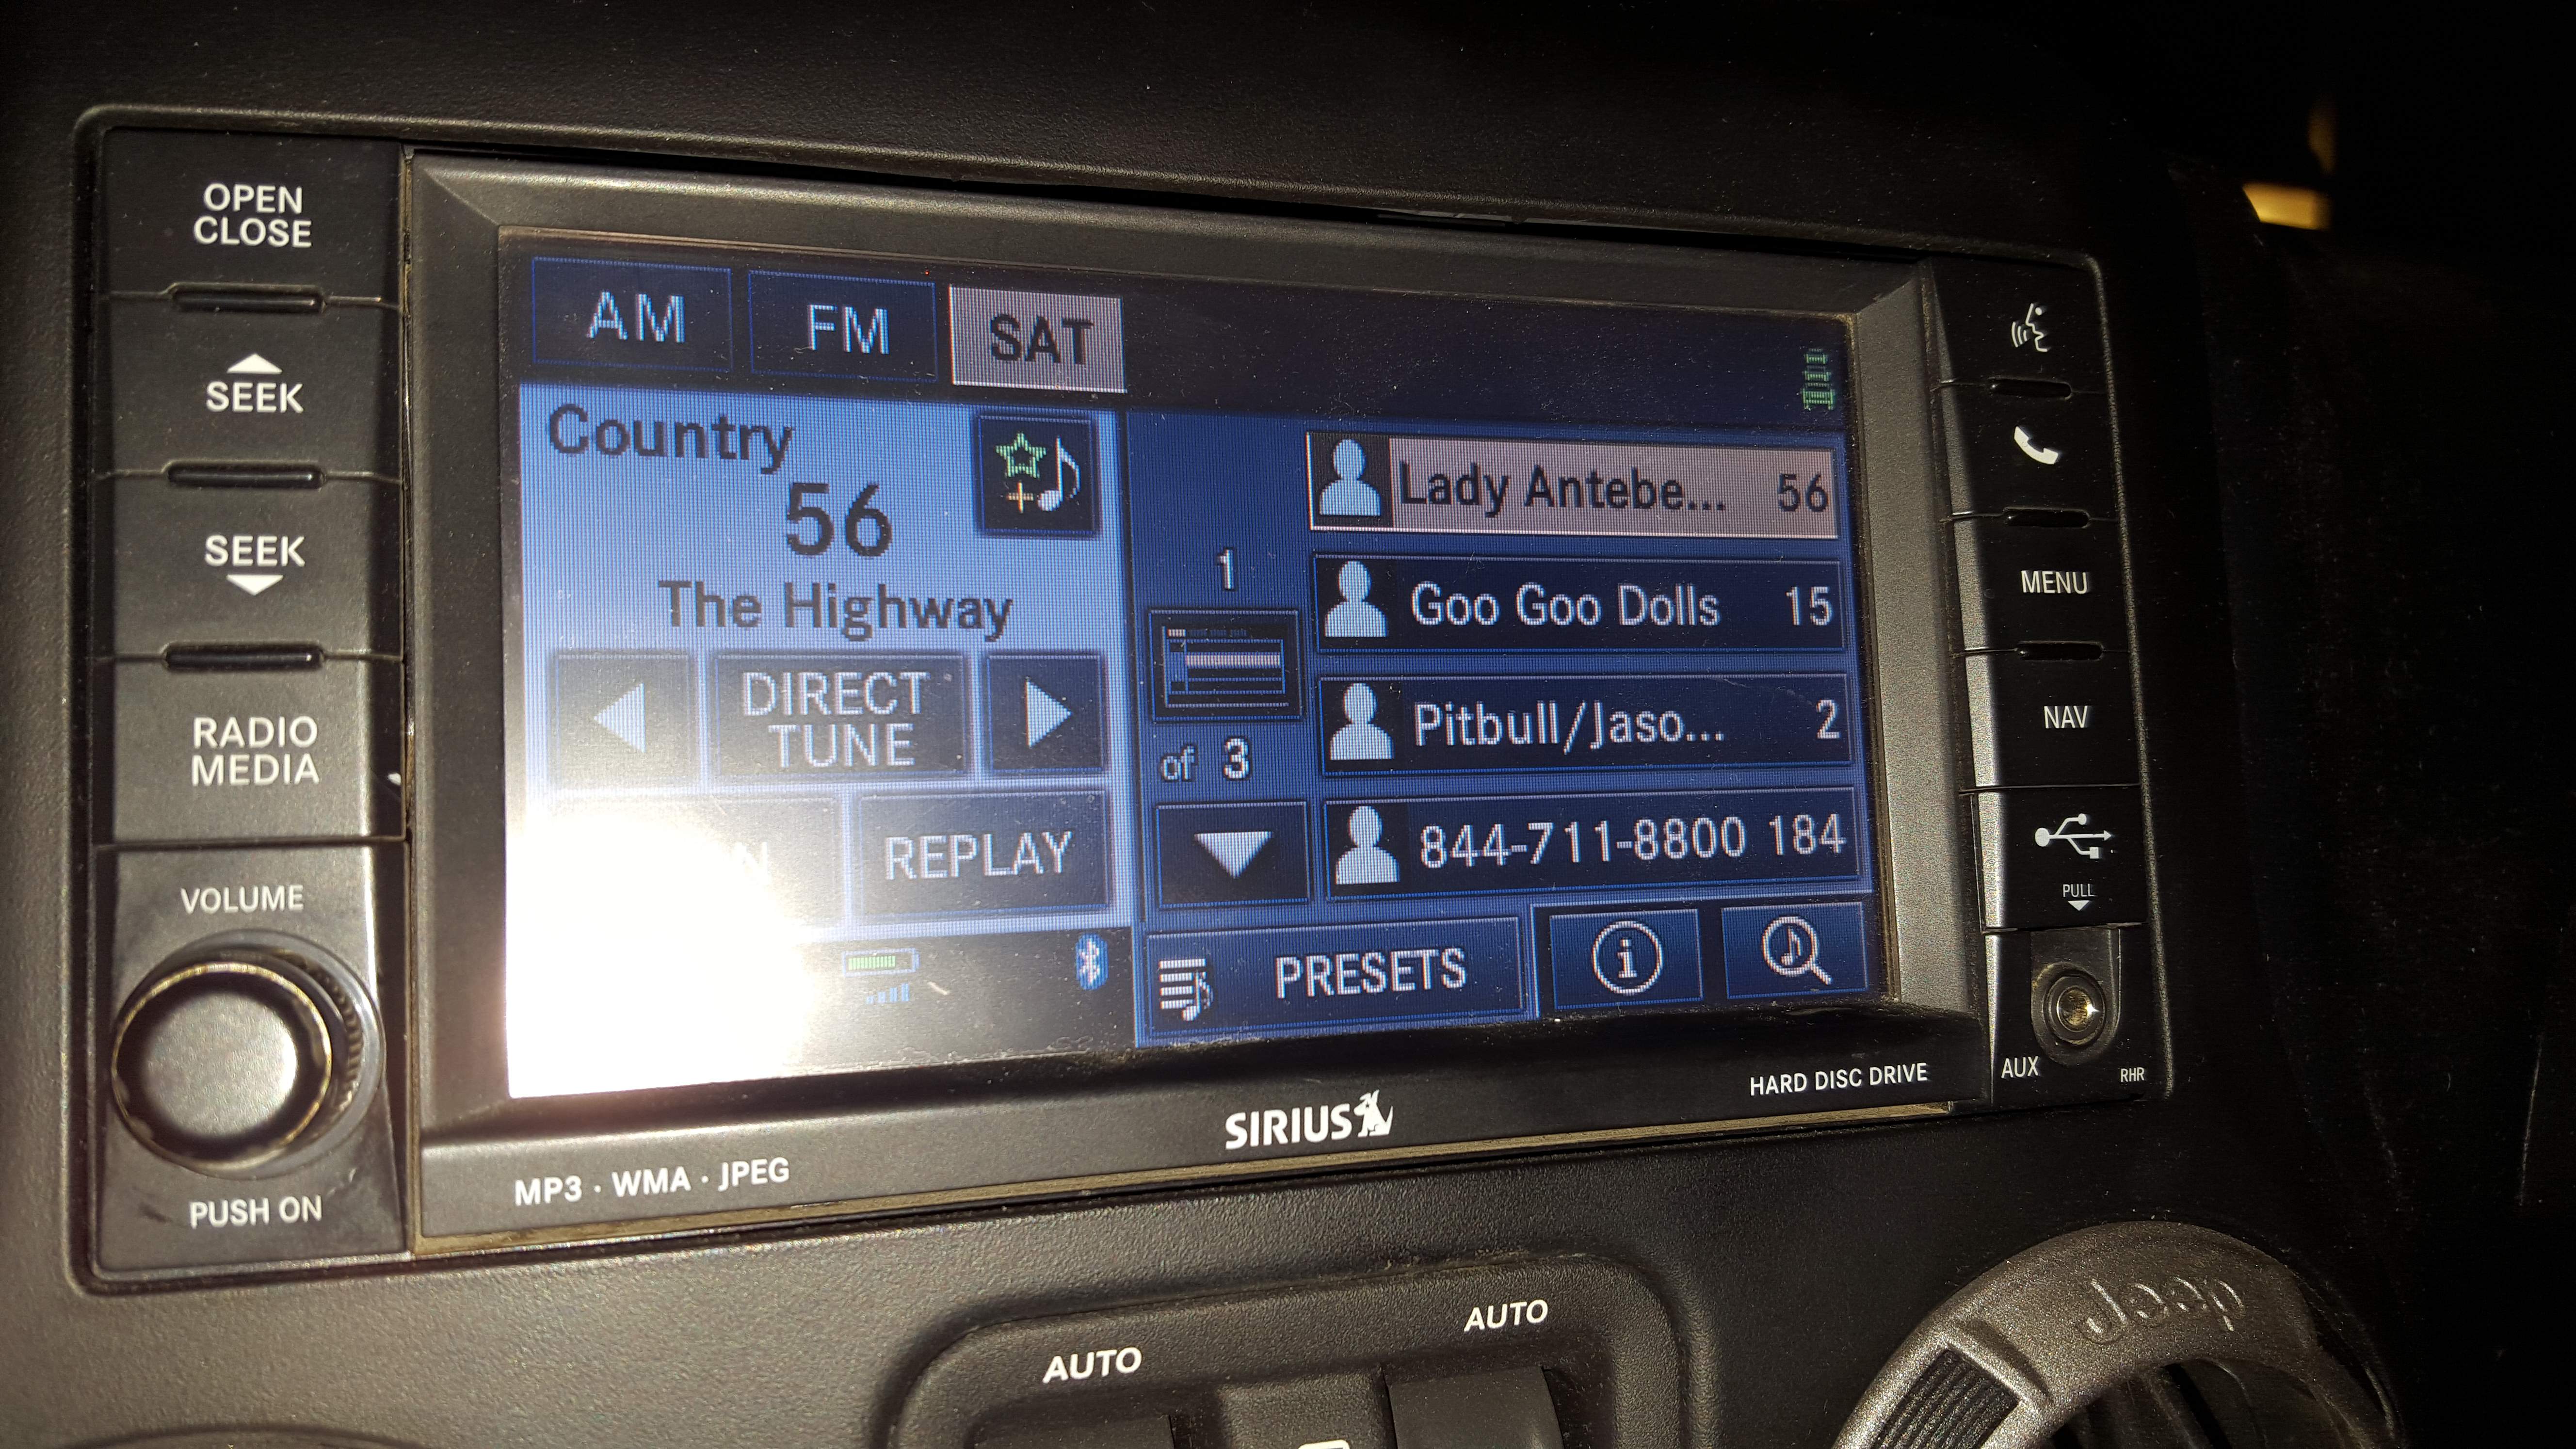
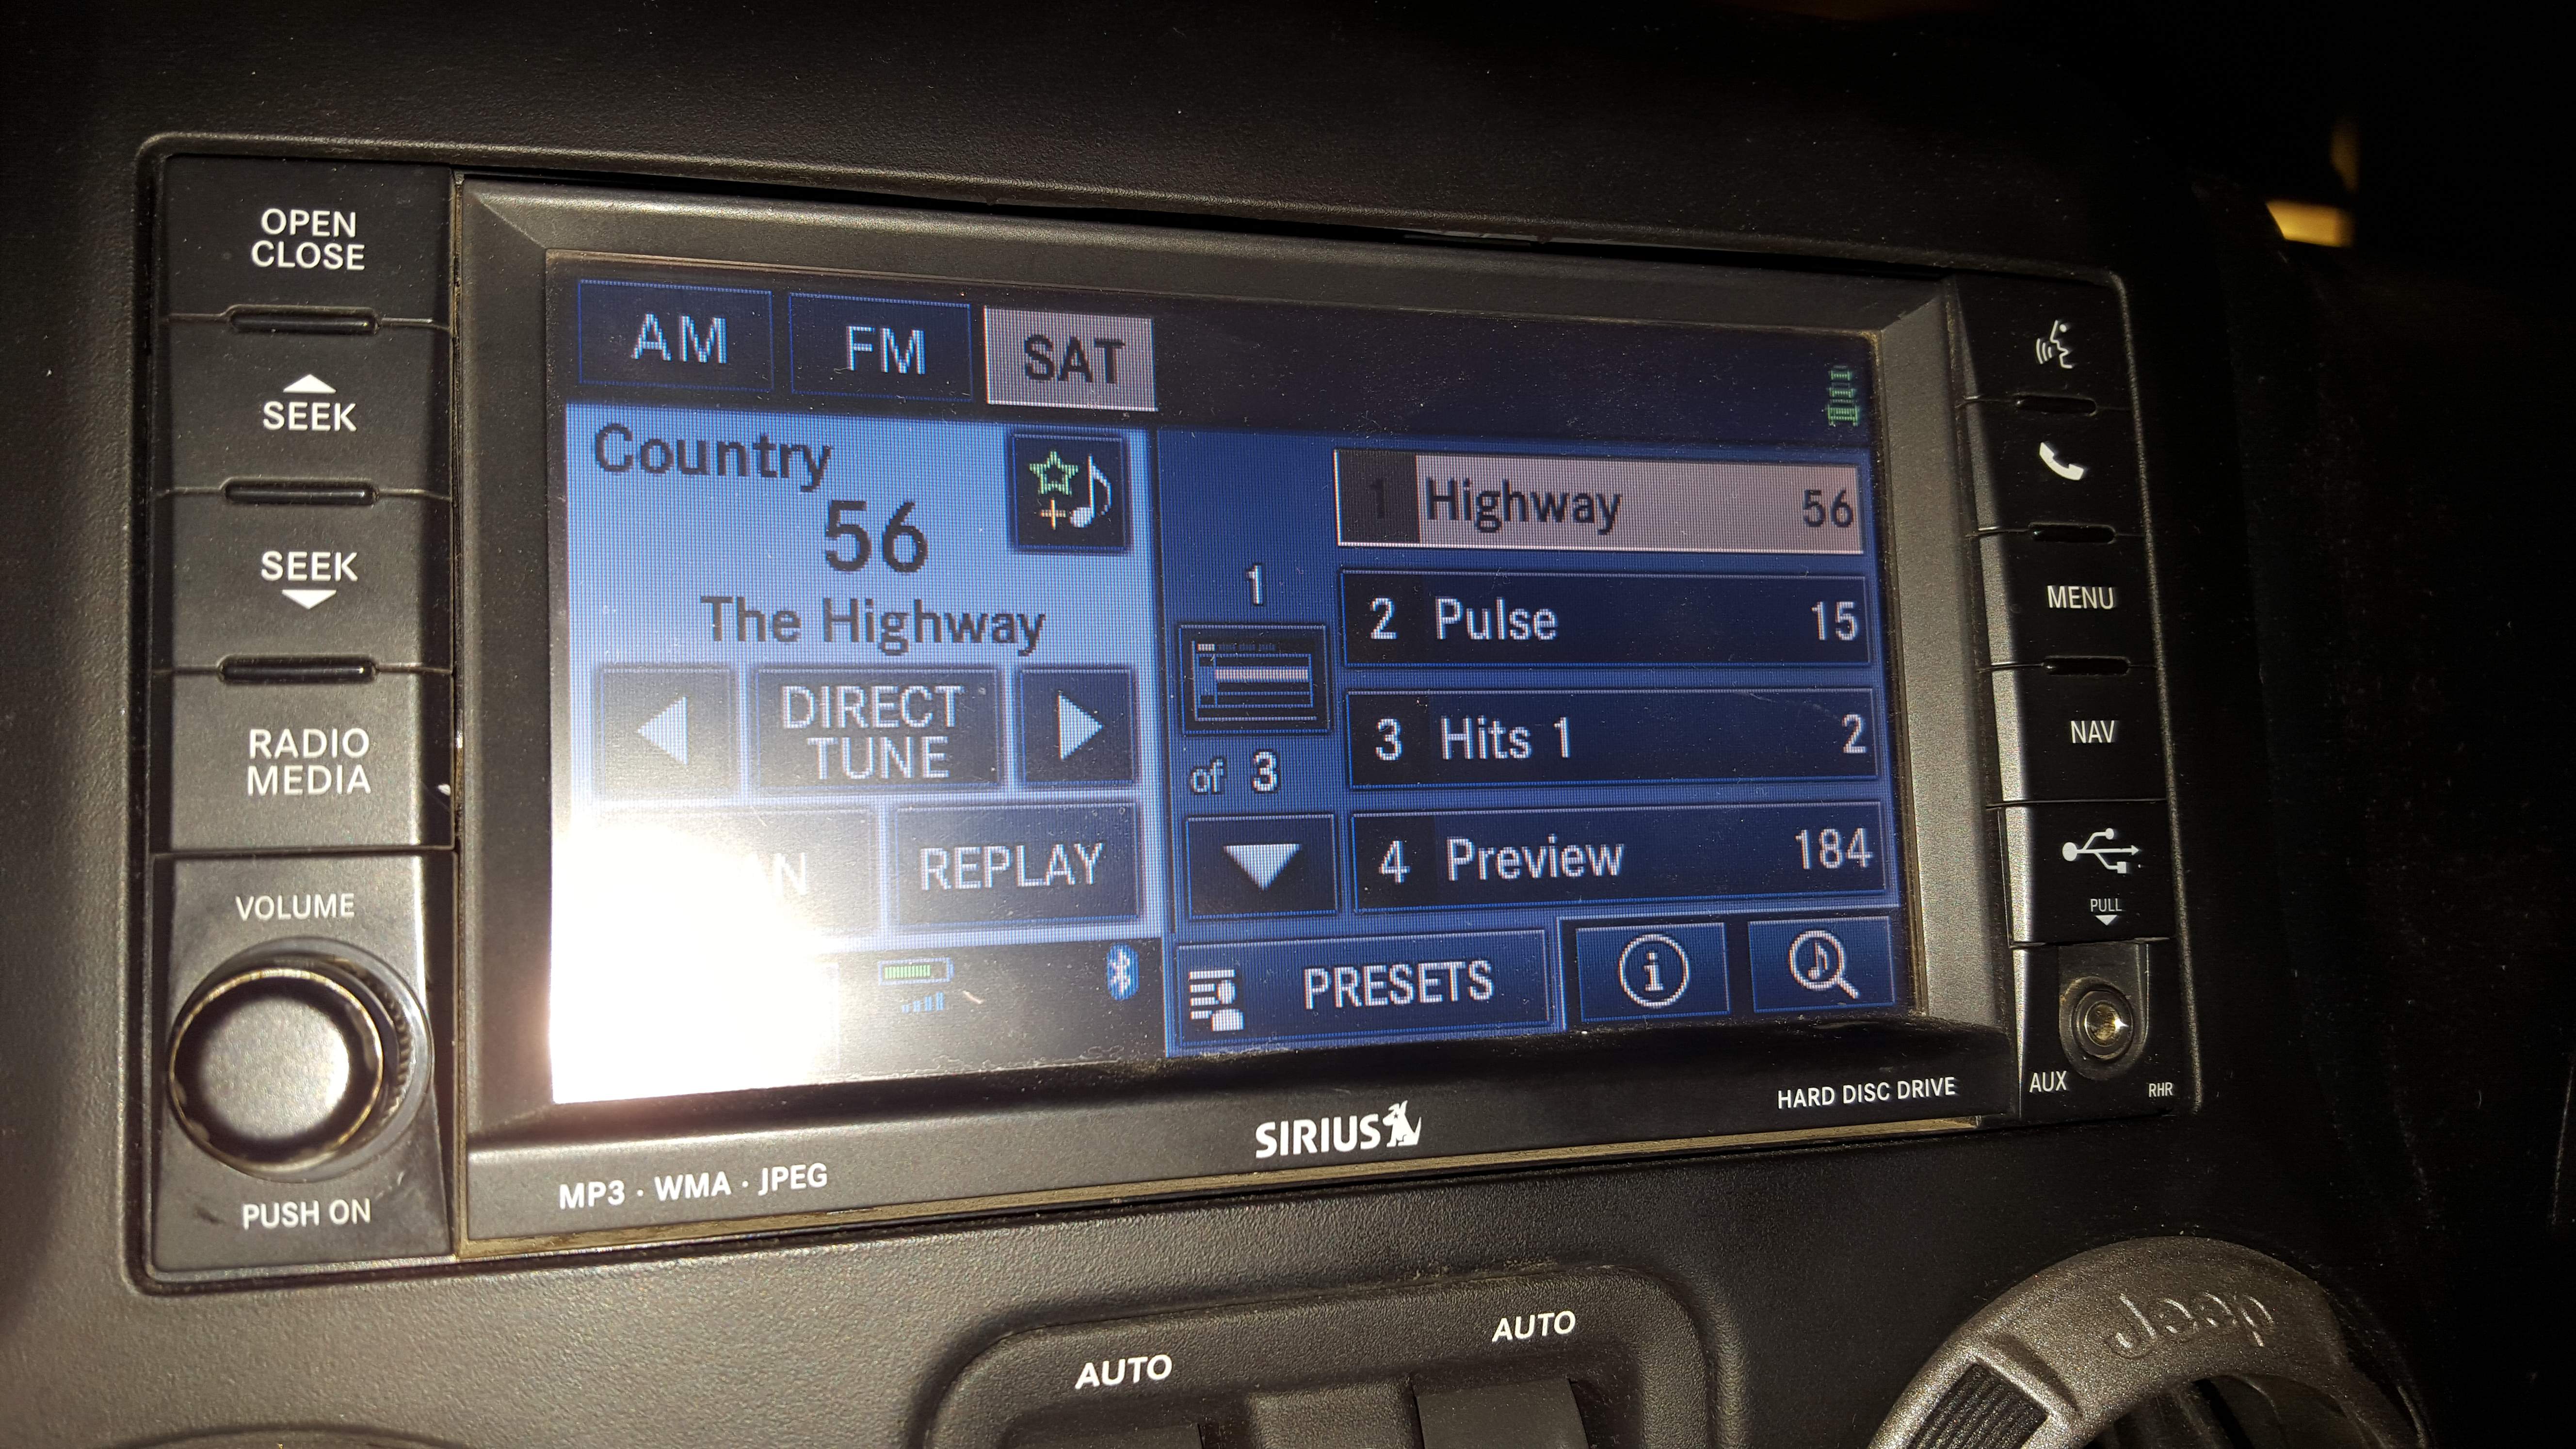
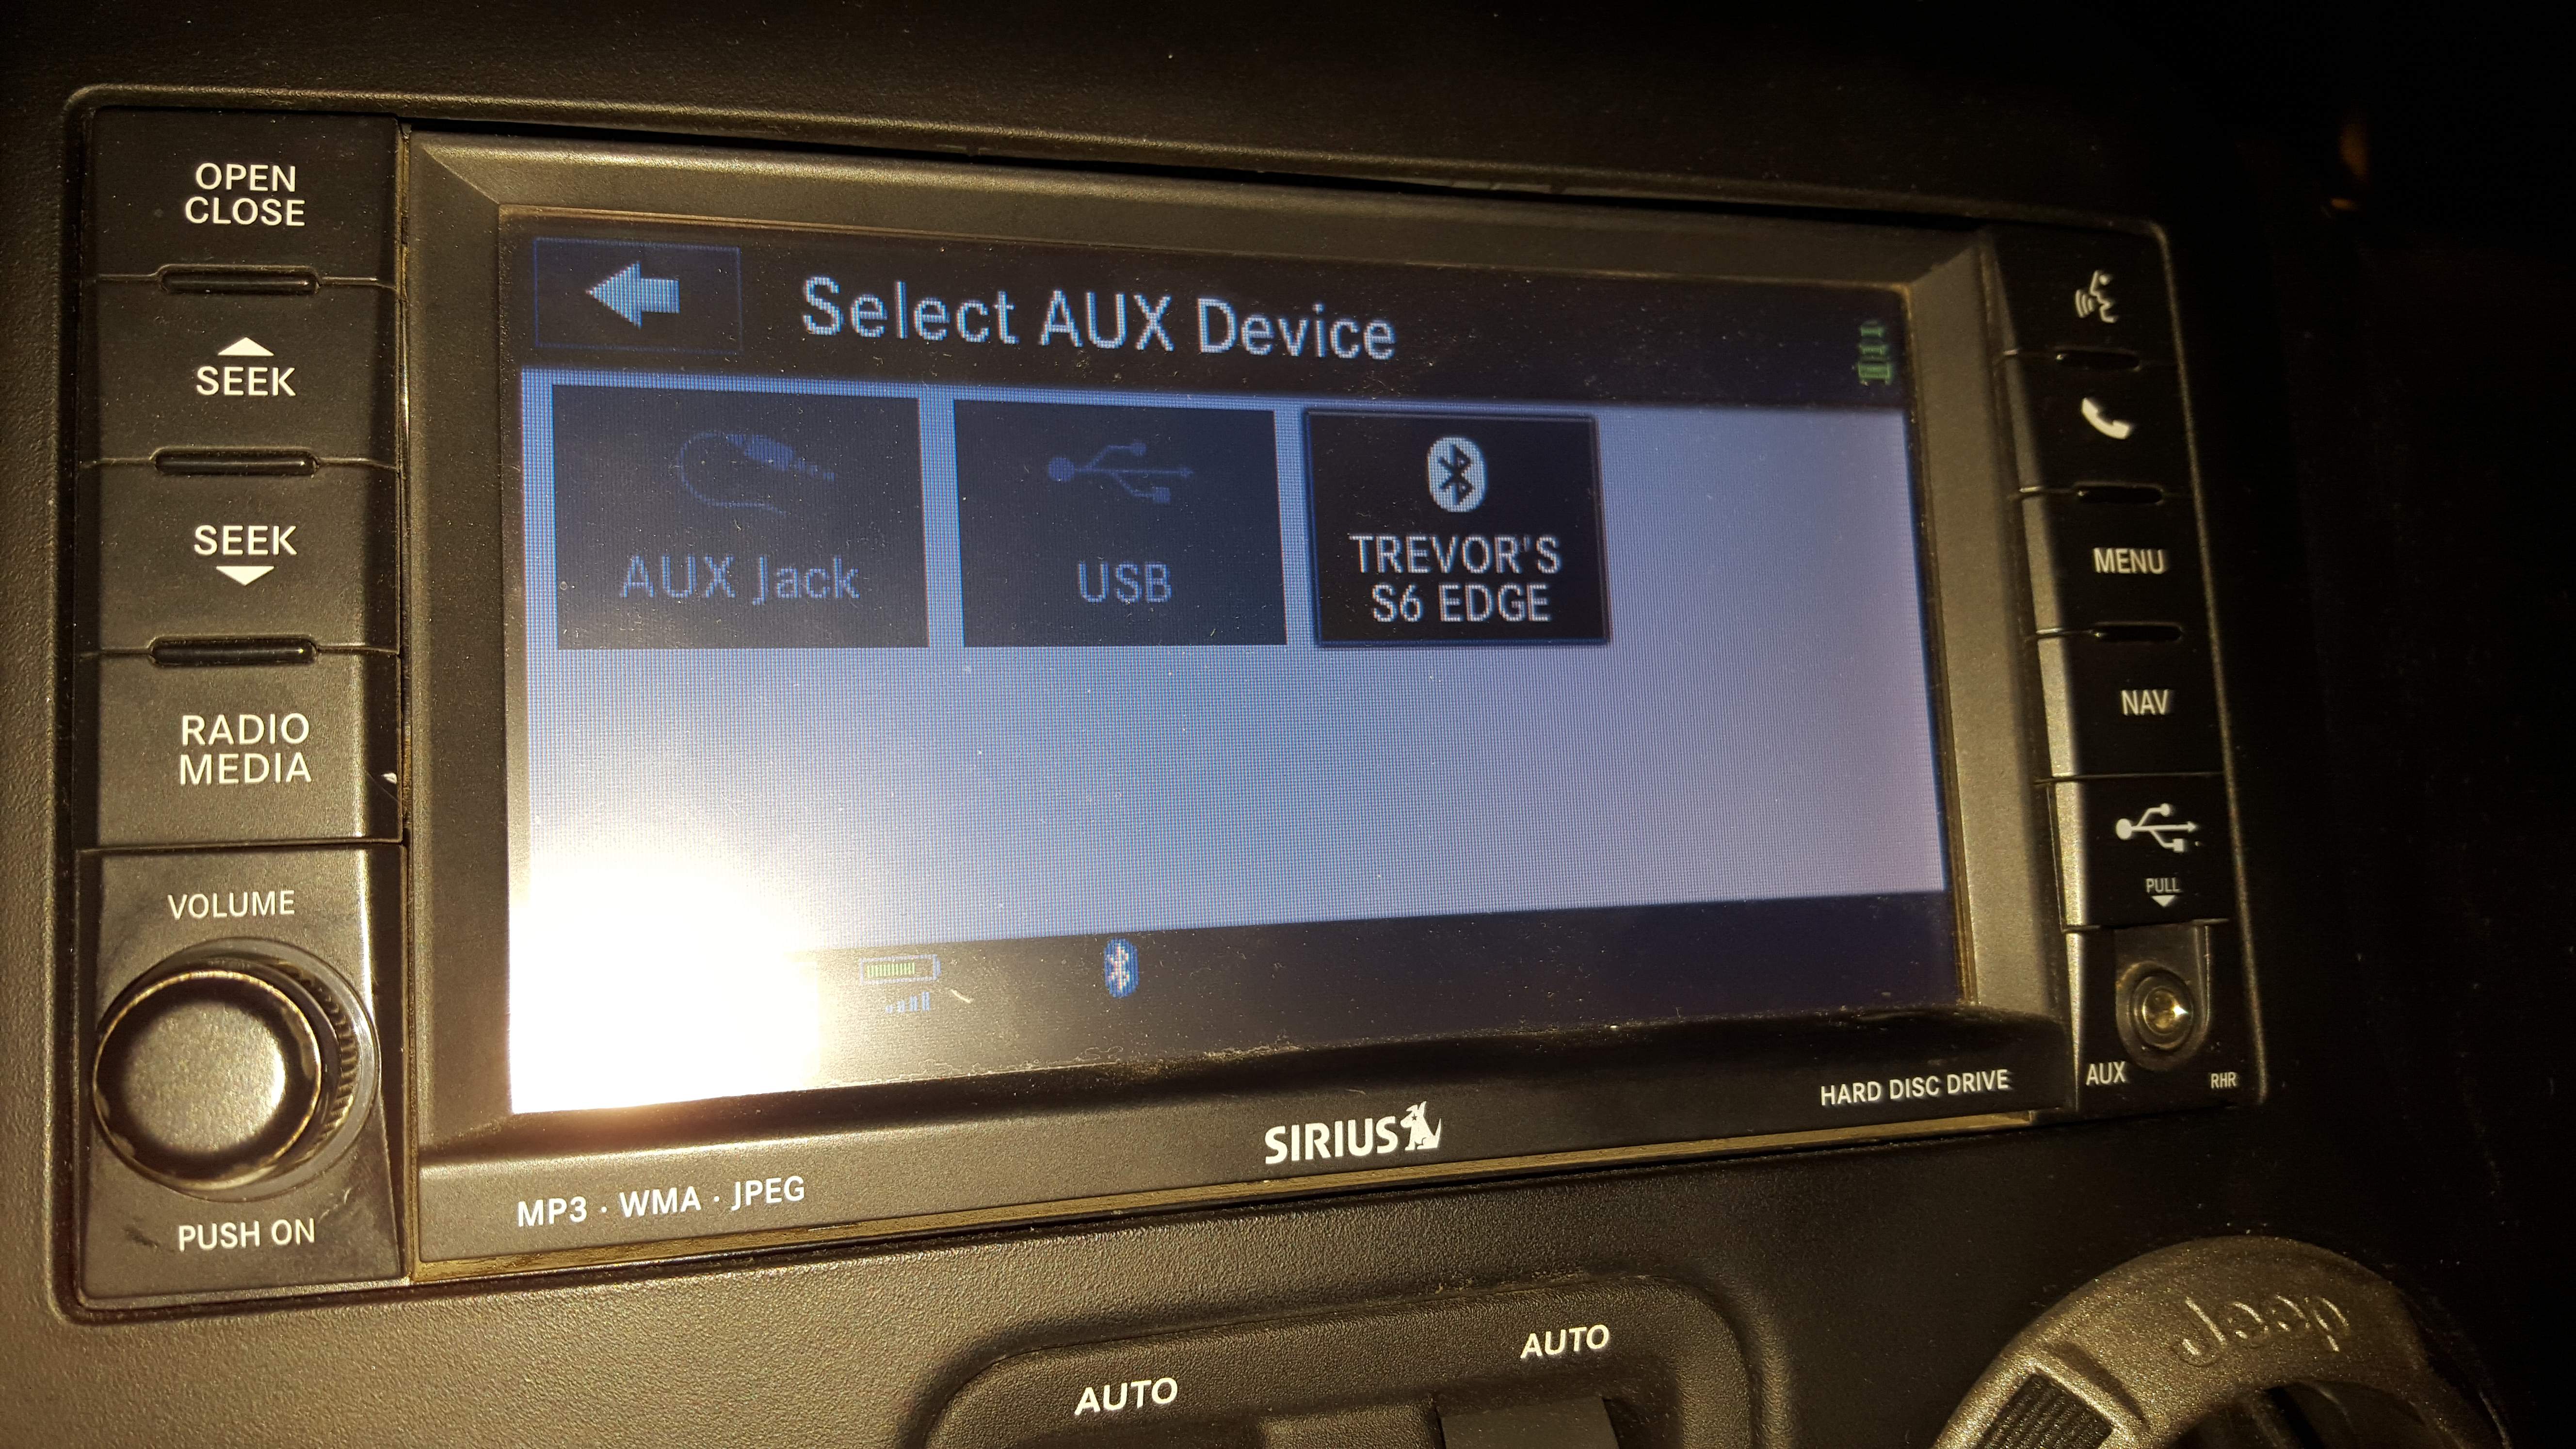
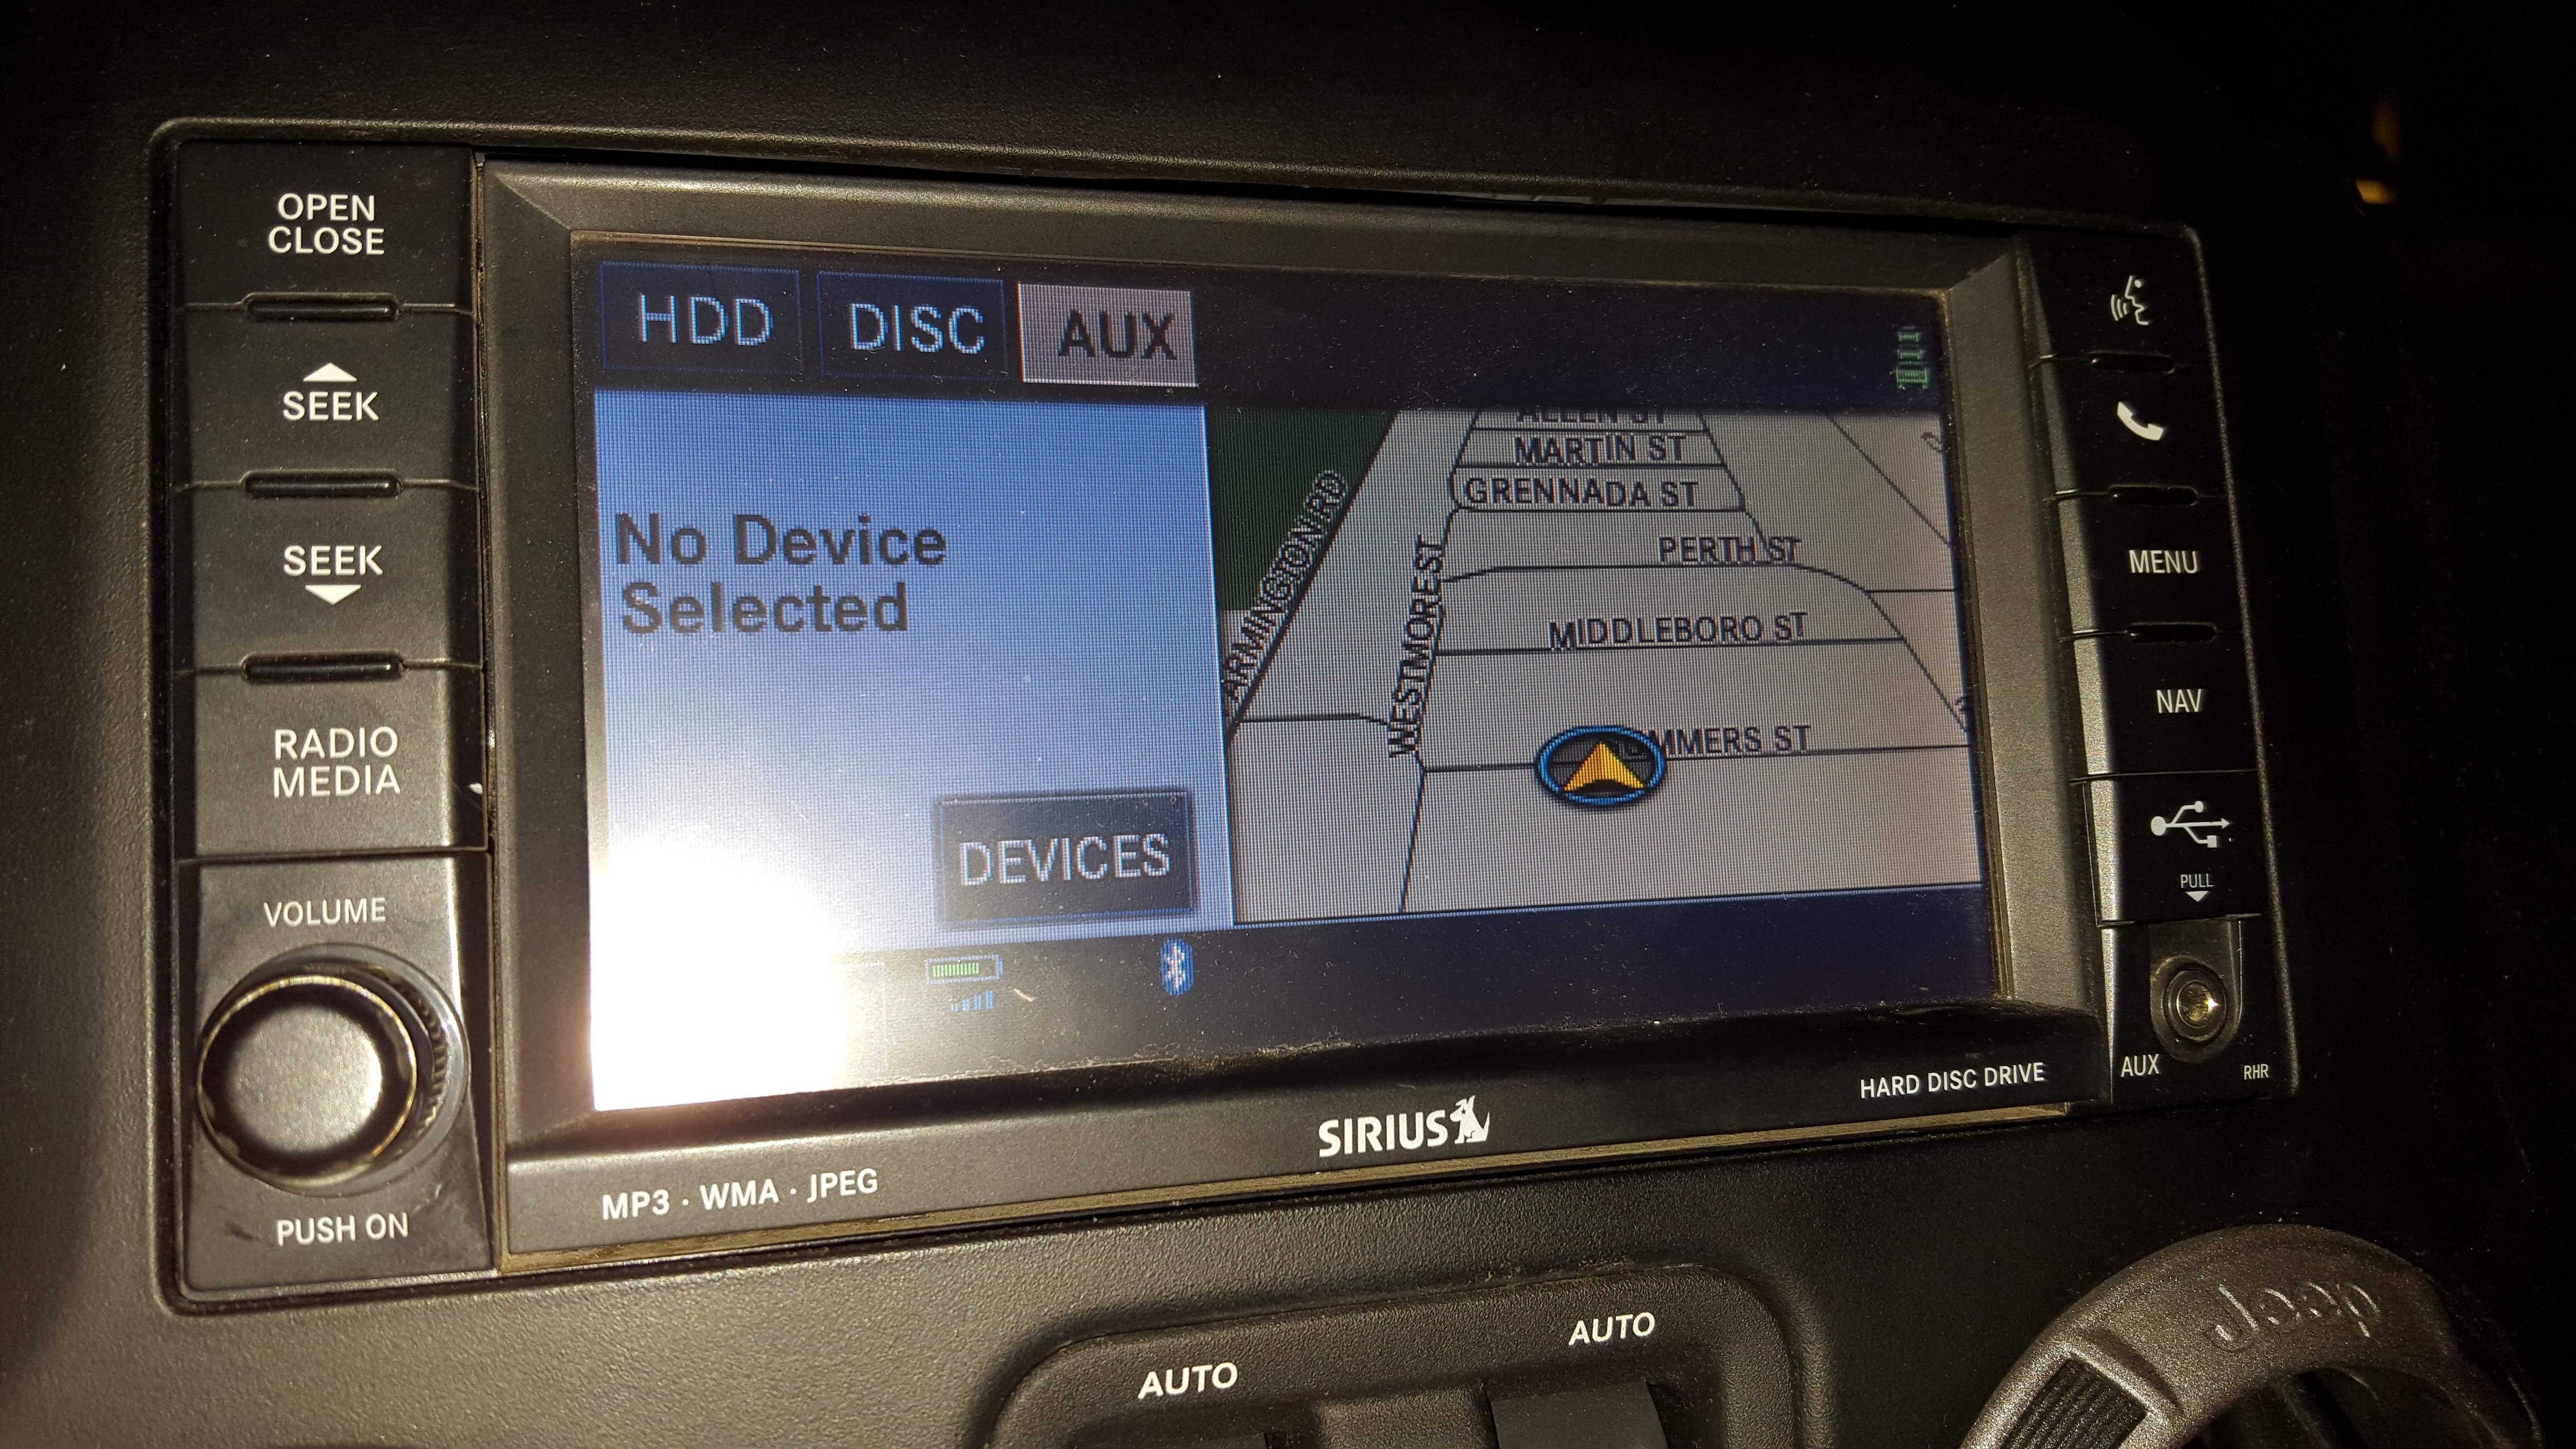
From there, you have the option to change the volume (but only when there is actually audio playing), you can seek through tracks, change radio station, change radio functions (You have AM/FM, Satellite, Hard Drive, USB, AUX, CD/DVD), click the nav screen to go into navigation, and use the UConnect functions on the radio! Here are some images of those functions in action:


When the radio receives power once you turn the ignition on, you will first see the Jeep splash screen. Then, as long as the radio if off, it will load to the radio off screen, which usually will just display the time, like this:
If you then want to turn the radio on, you press the volume knob in, and (if you have no lock pick system installed on your radio) then you will see the warning/disclaimer about vehicle in motion inputs and all that. The screen will look like this:
Then the radio will then load into which ever radio or nav screen it was last on. For me, that is the split screen with audio on the left, and the navigation screen on the right:
From there, you have the option to change the volume (but only when there is actually audio playing), you can seek through tracks, change radio station, change radio functions (You have AM/FM, Satellite, Hard Drive, USB, AUX, CD/DVD), click the nav screen to go into navigation, and use the UConnect functions on the radio! Here are some images of those functions in action:
10-20-2015, 10:22 AM
#26
JK Enthusiast
Thread Starter
The next feature it took me a long time to figure out! This would be the dimming/night function of the radio! For some reason, Chrysler made this extremely difficult to figure out, but the trick is to have the dash light dimmer turned to the right level! When dimmed, the radio will look like this:
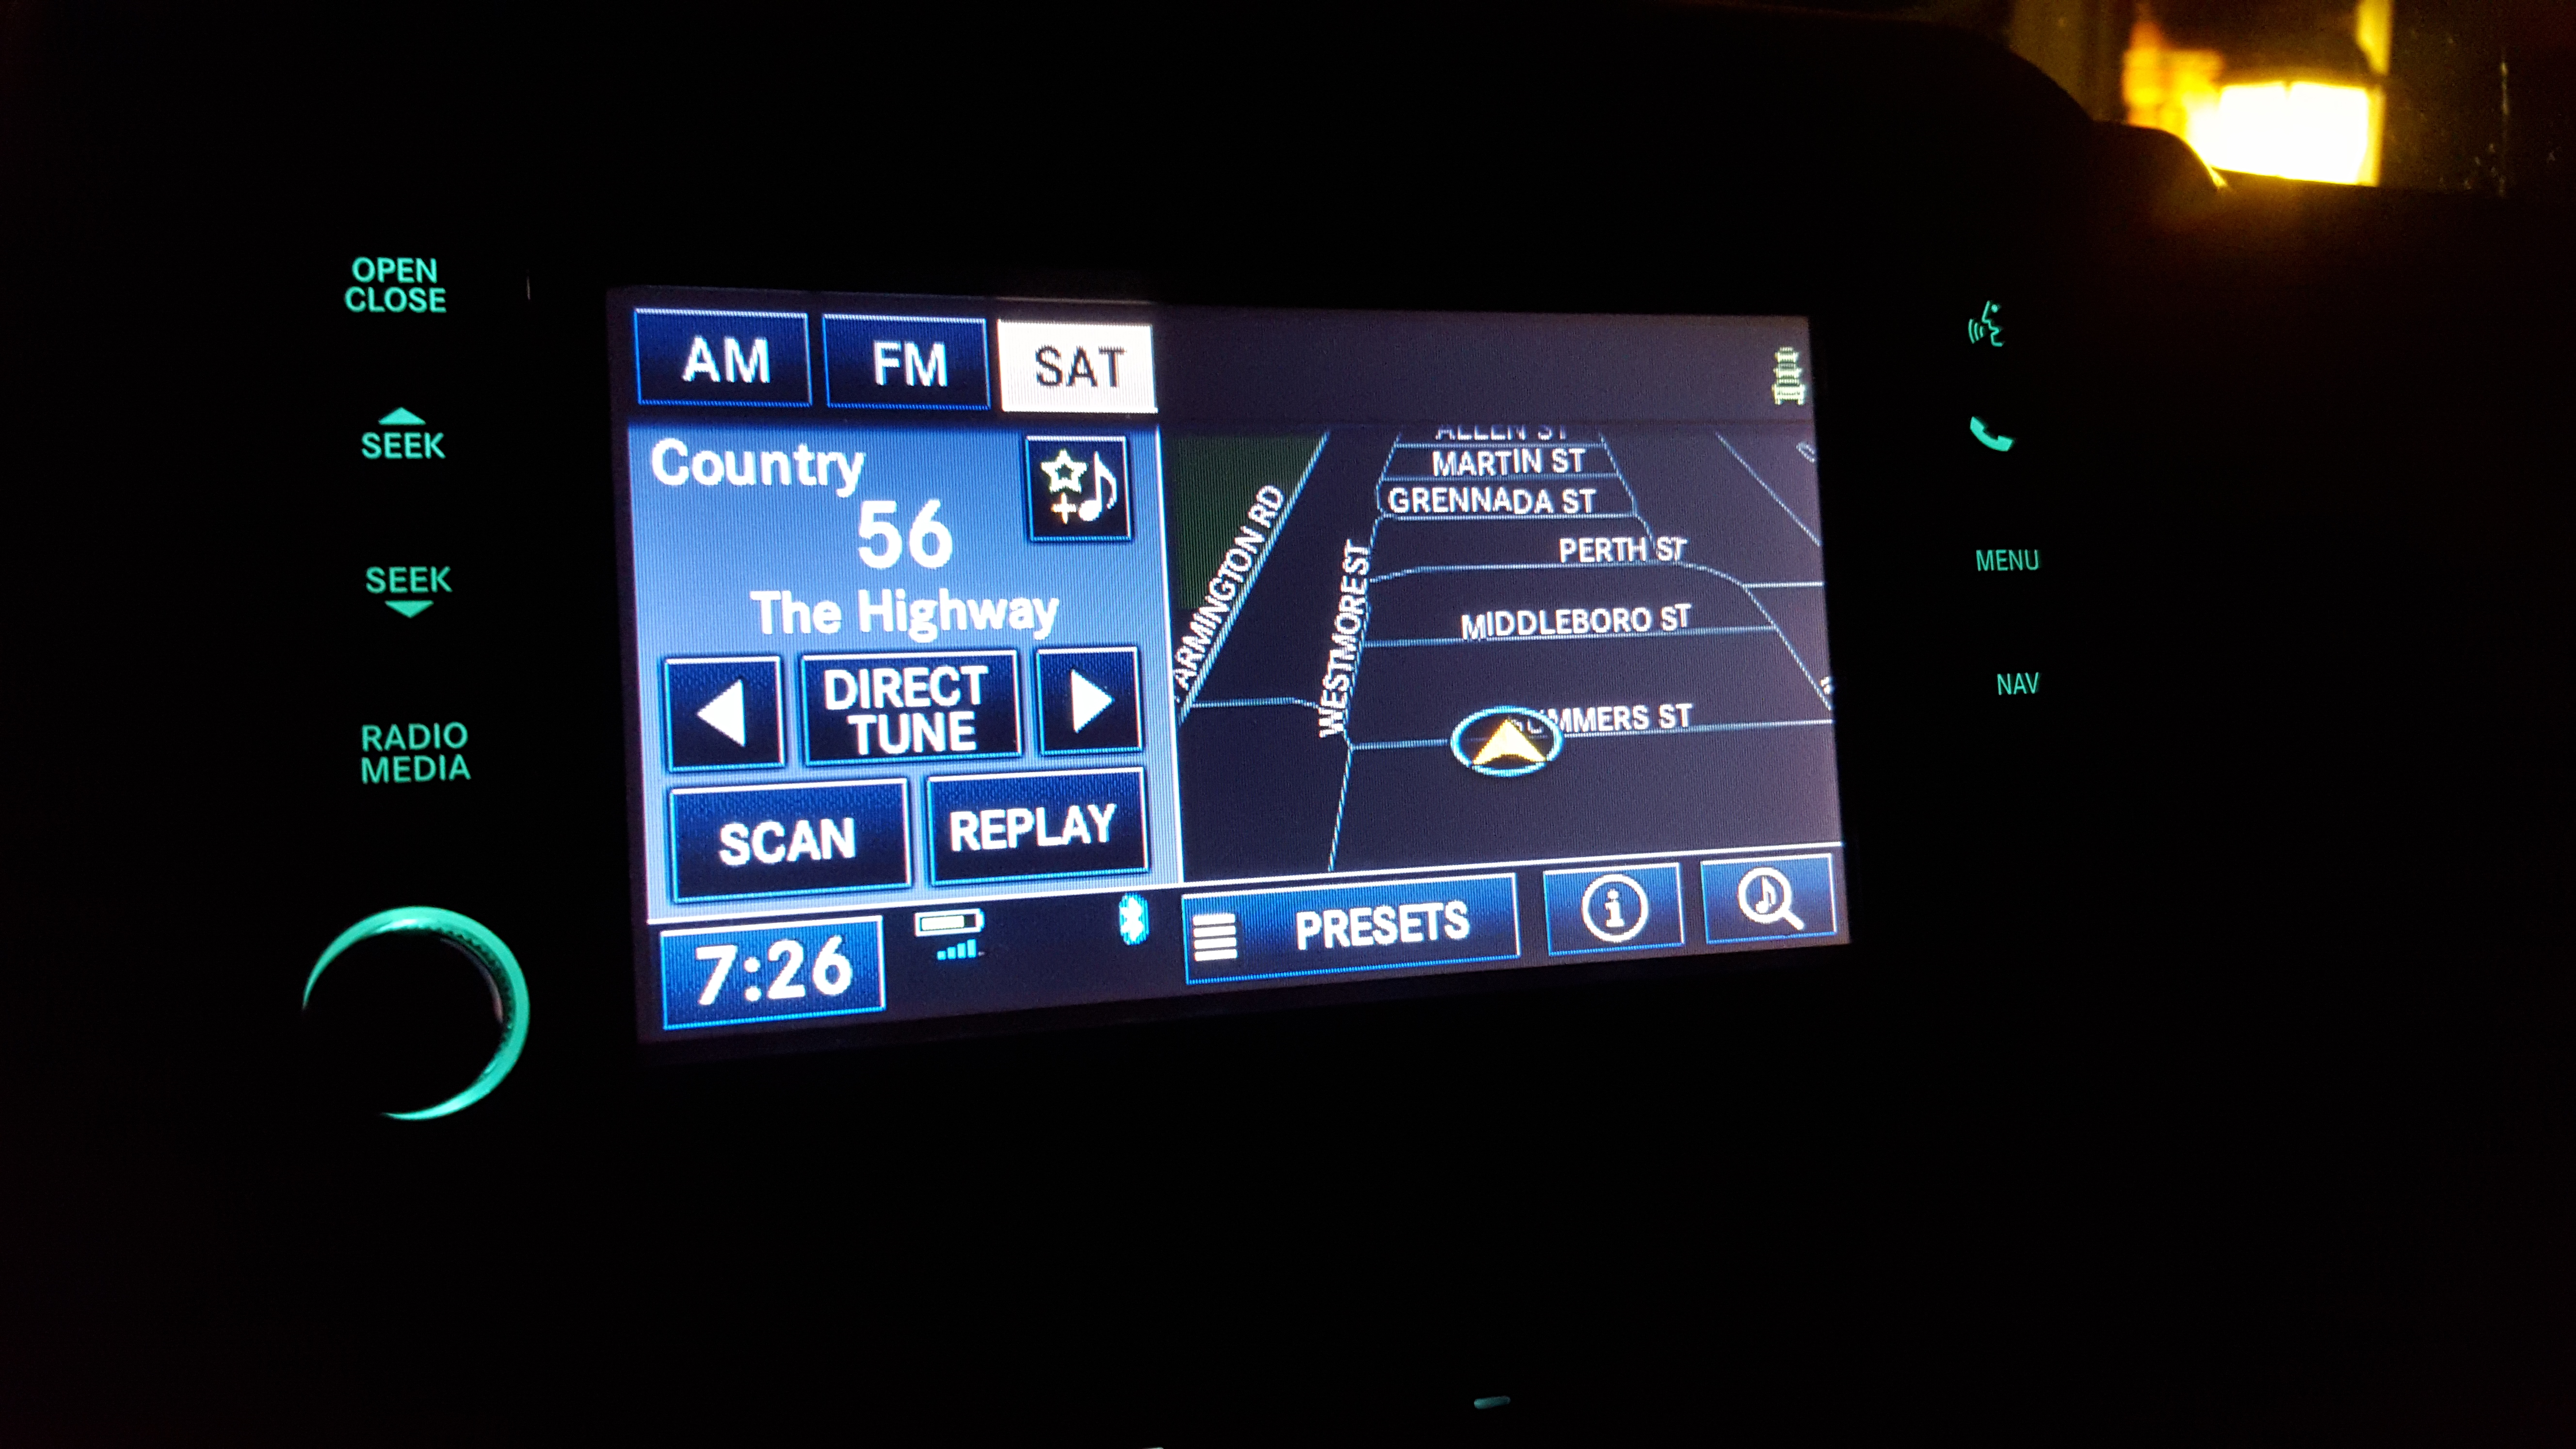
To get the radio to switch to the night colors functions which is seen above, you have to make sure that the dash light dimmer switch is at least one setting below the normal/locked dash dim setting (or at least one dimmer setting below the brightest):

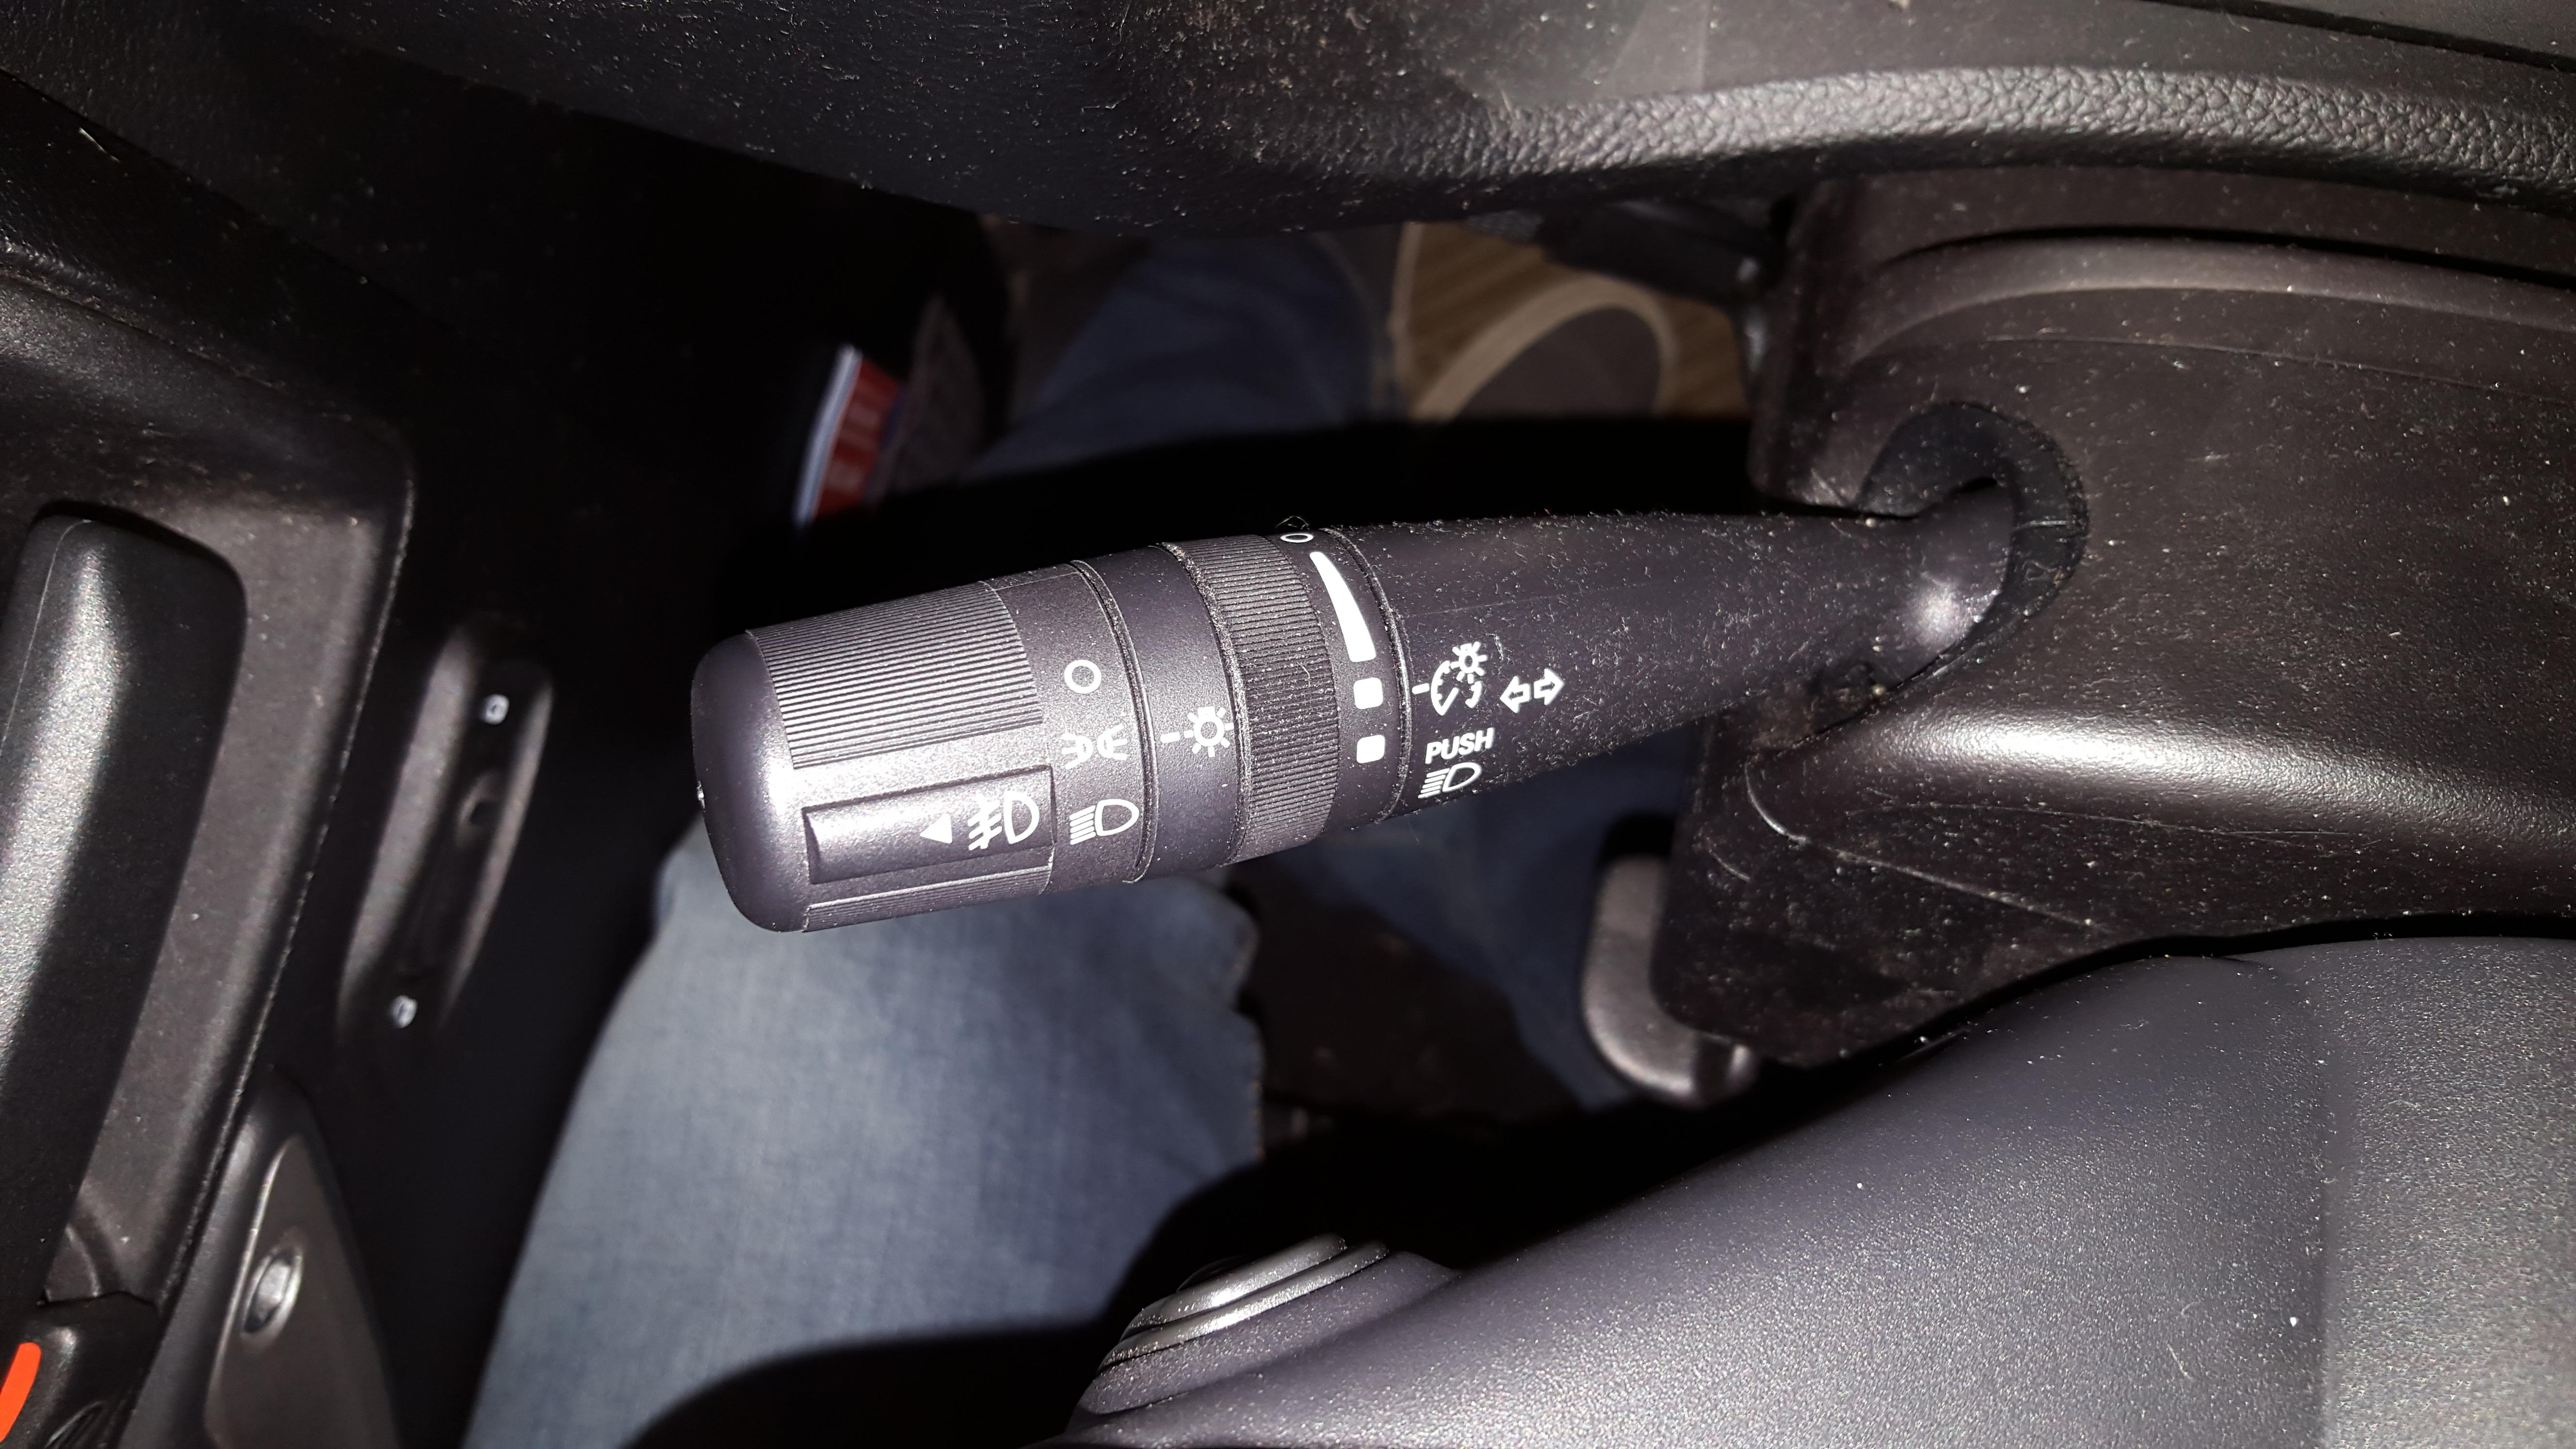
You want to have the dimmer setting set to the first picture, not the second picture setting!
Next, if you press the UConnect button on different screens, you will get different options. When you press the UConnect button, there will be a short tone to prompt you to speak, and your options that you can say will appear on the screen, like this:


Next, if you press the open/close button, the screen will flip down to show the CD/DVD slot which you can then insert a CD or DVD:

To get the radio to switch to the night colors functions which is seen above, you have to make sure that the dash light dimmer switch is at least one setting below the normal/locked dash dim setting (or at least one dimmer setting below the brightest):
You want to have the dimmer setting set to the first picture, not the second picture setting!
Next, if you press the UConnect button on different screens, you will get different options. When you press the UConnect button, there will be a short tone to prompt you to speak, and your options that you can say will appear on the screen, like this:
Next, if you press the open/close button, the screen will flip down to show the CD/DVD slot which you can then insert a CD or DVD:
10-20-2015, 10:46 AM
#27
JK Enthusiast
Thread Starter
The next functions that I want to share are when you enter into the menu area of the radio. To do this, you press the menu button, and then this screen shows up:

The first feature in here is if you subscribe to Sirius and have the Sirius Travel Link subscription, then you can hit the Travel Link soft key and enter the next menu:

There are some great features in here like getting your weather forecast, fuel prices based on location with price and fuel type, sports scores and alerts, movie theaters with times, locations, etc. But for me, my favorite feature is what showed up after I did an update to the firmware on my radio, which is the weather map! This shows your location over laid over radar maps. It also will show front locations, different zooms, tropical weather updates, and a few other things! The radar maps look like this:
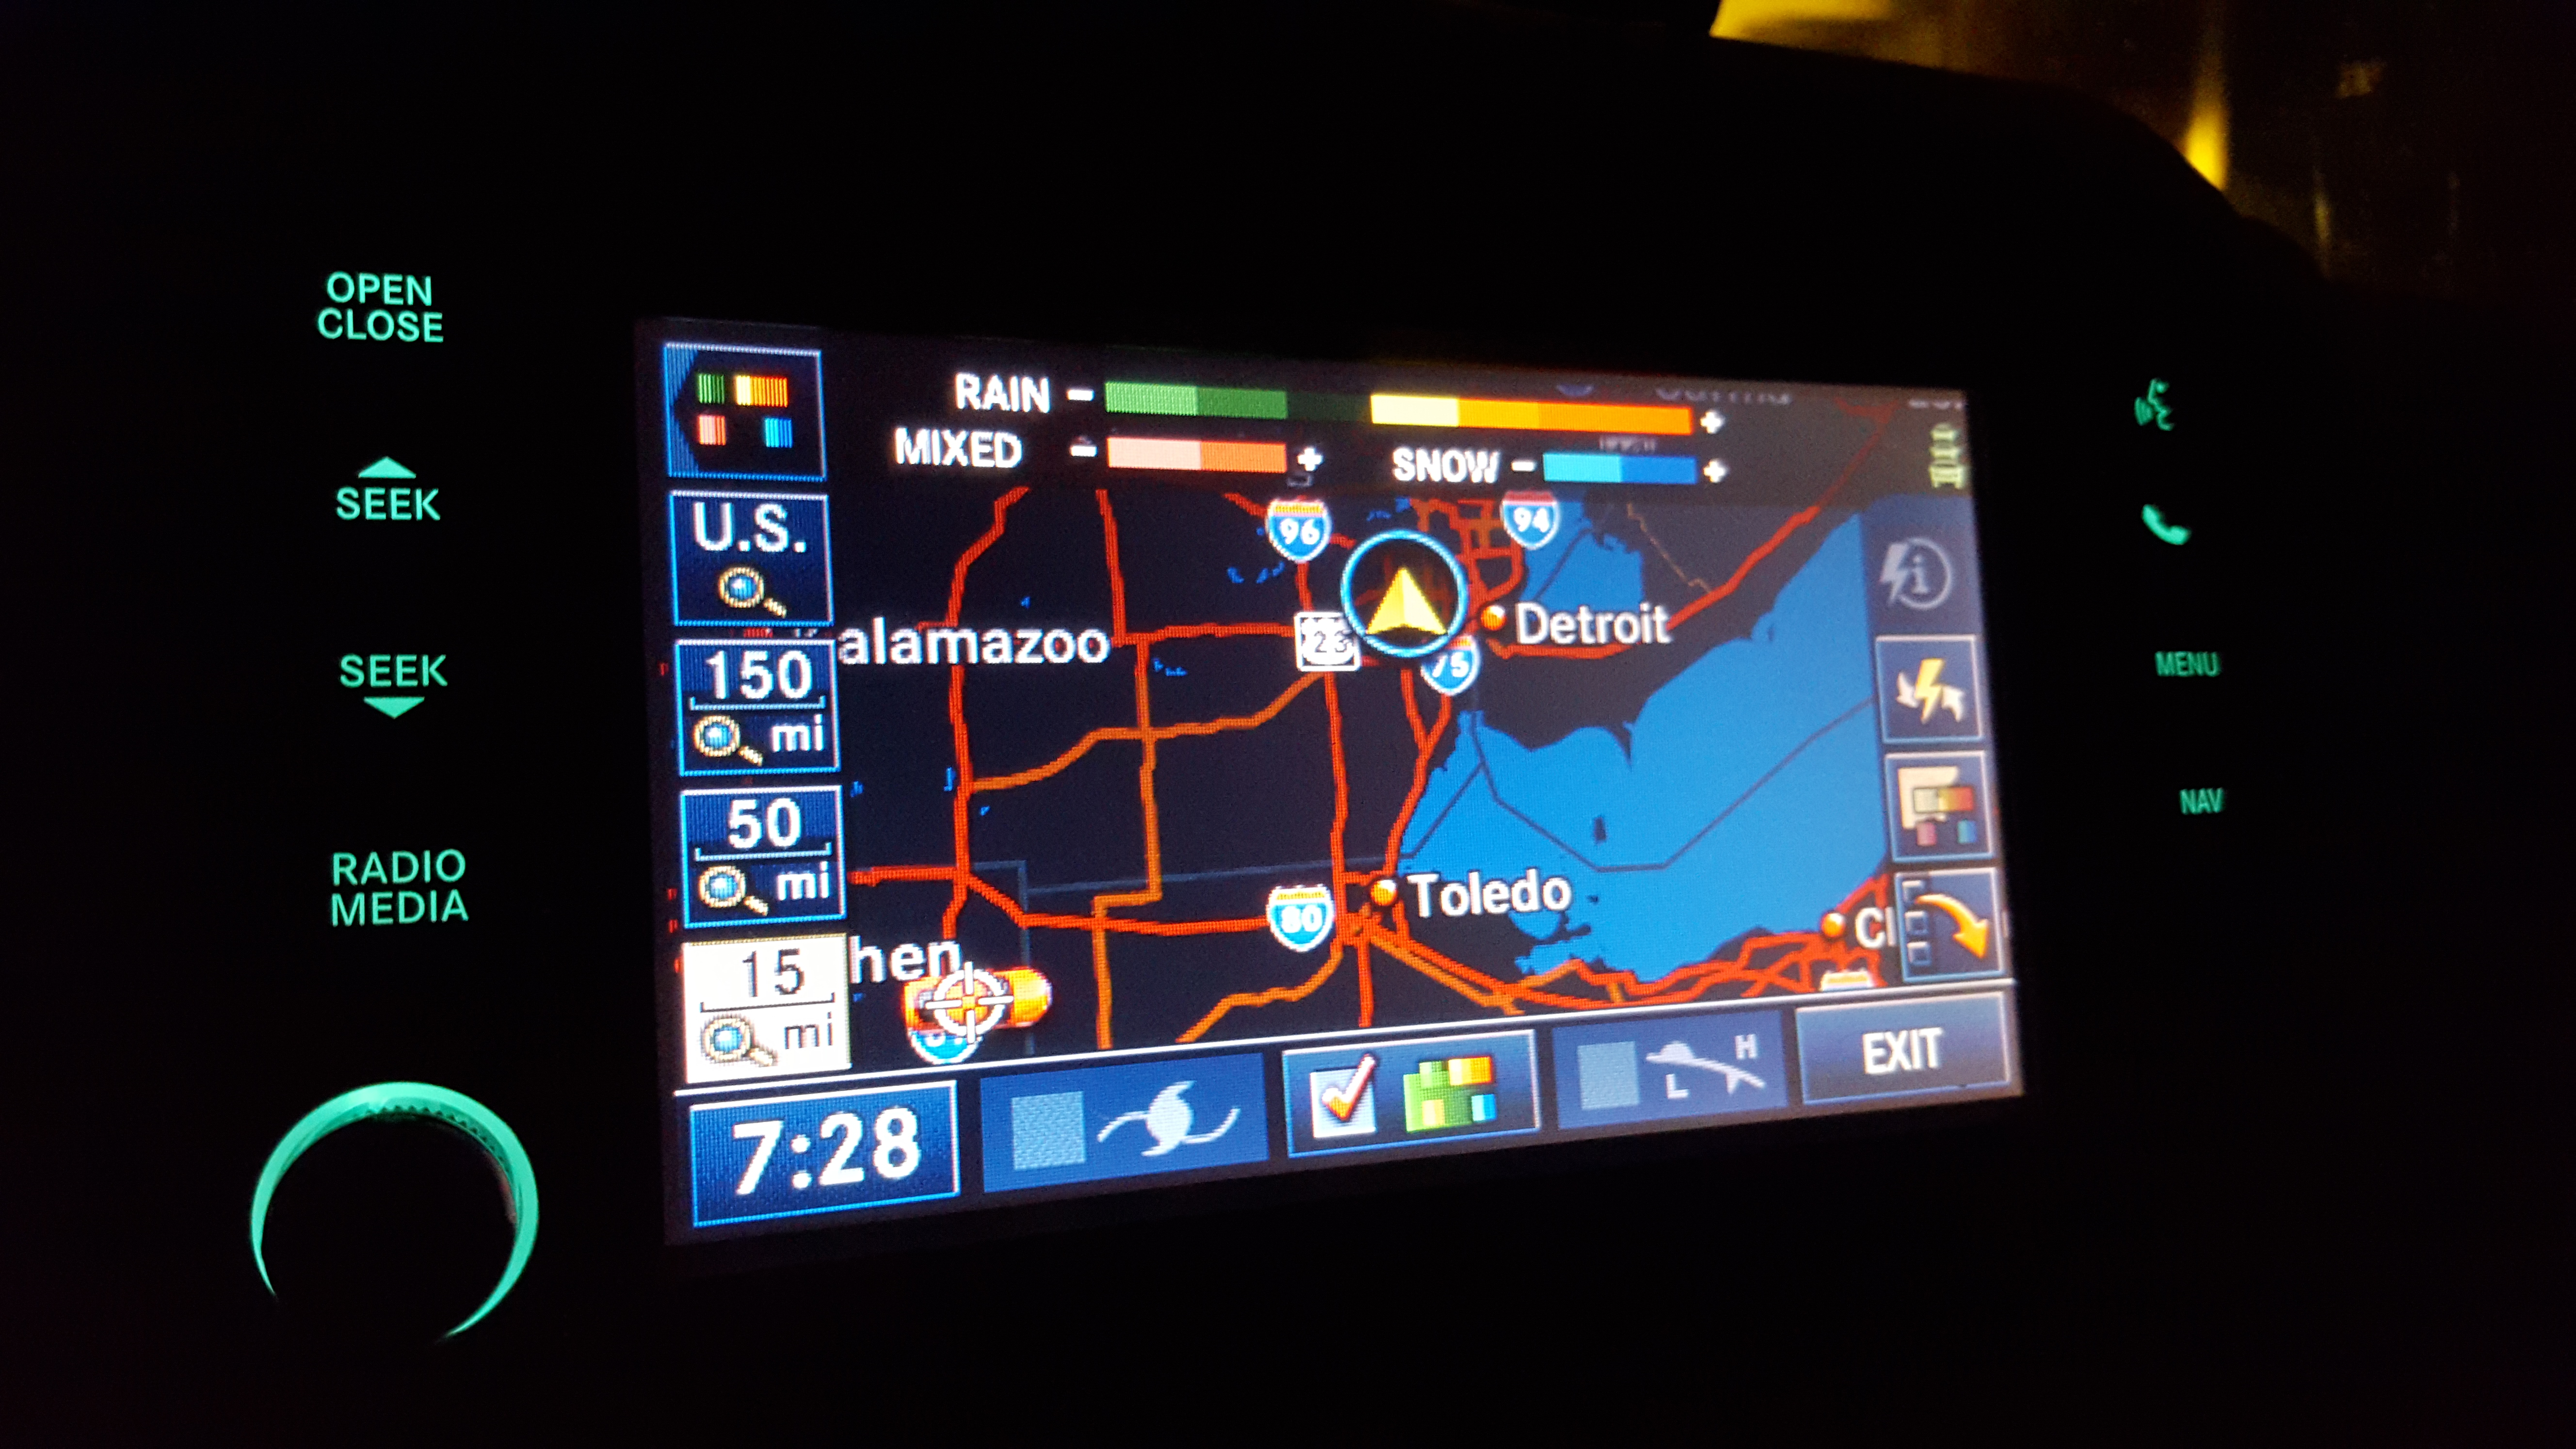

Another function, if you subscribe to it is the Sirius Traffic functions. This feature is very handy as it overlays the traffic patterns onto the regular GPS map so you can see where there may be traffic issues and go around it. Also, if you have Sirius Traffic, then when you have a route active on the GPS, it will update for serious traffic issues for you to get around without having to deal with backups! But from the menu page, if you click on traffic updates from there, it will take you to a more detailed screen on traffic updates and you can see details on specific issues and where they are relative to you!

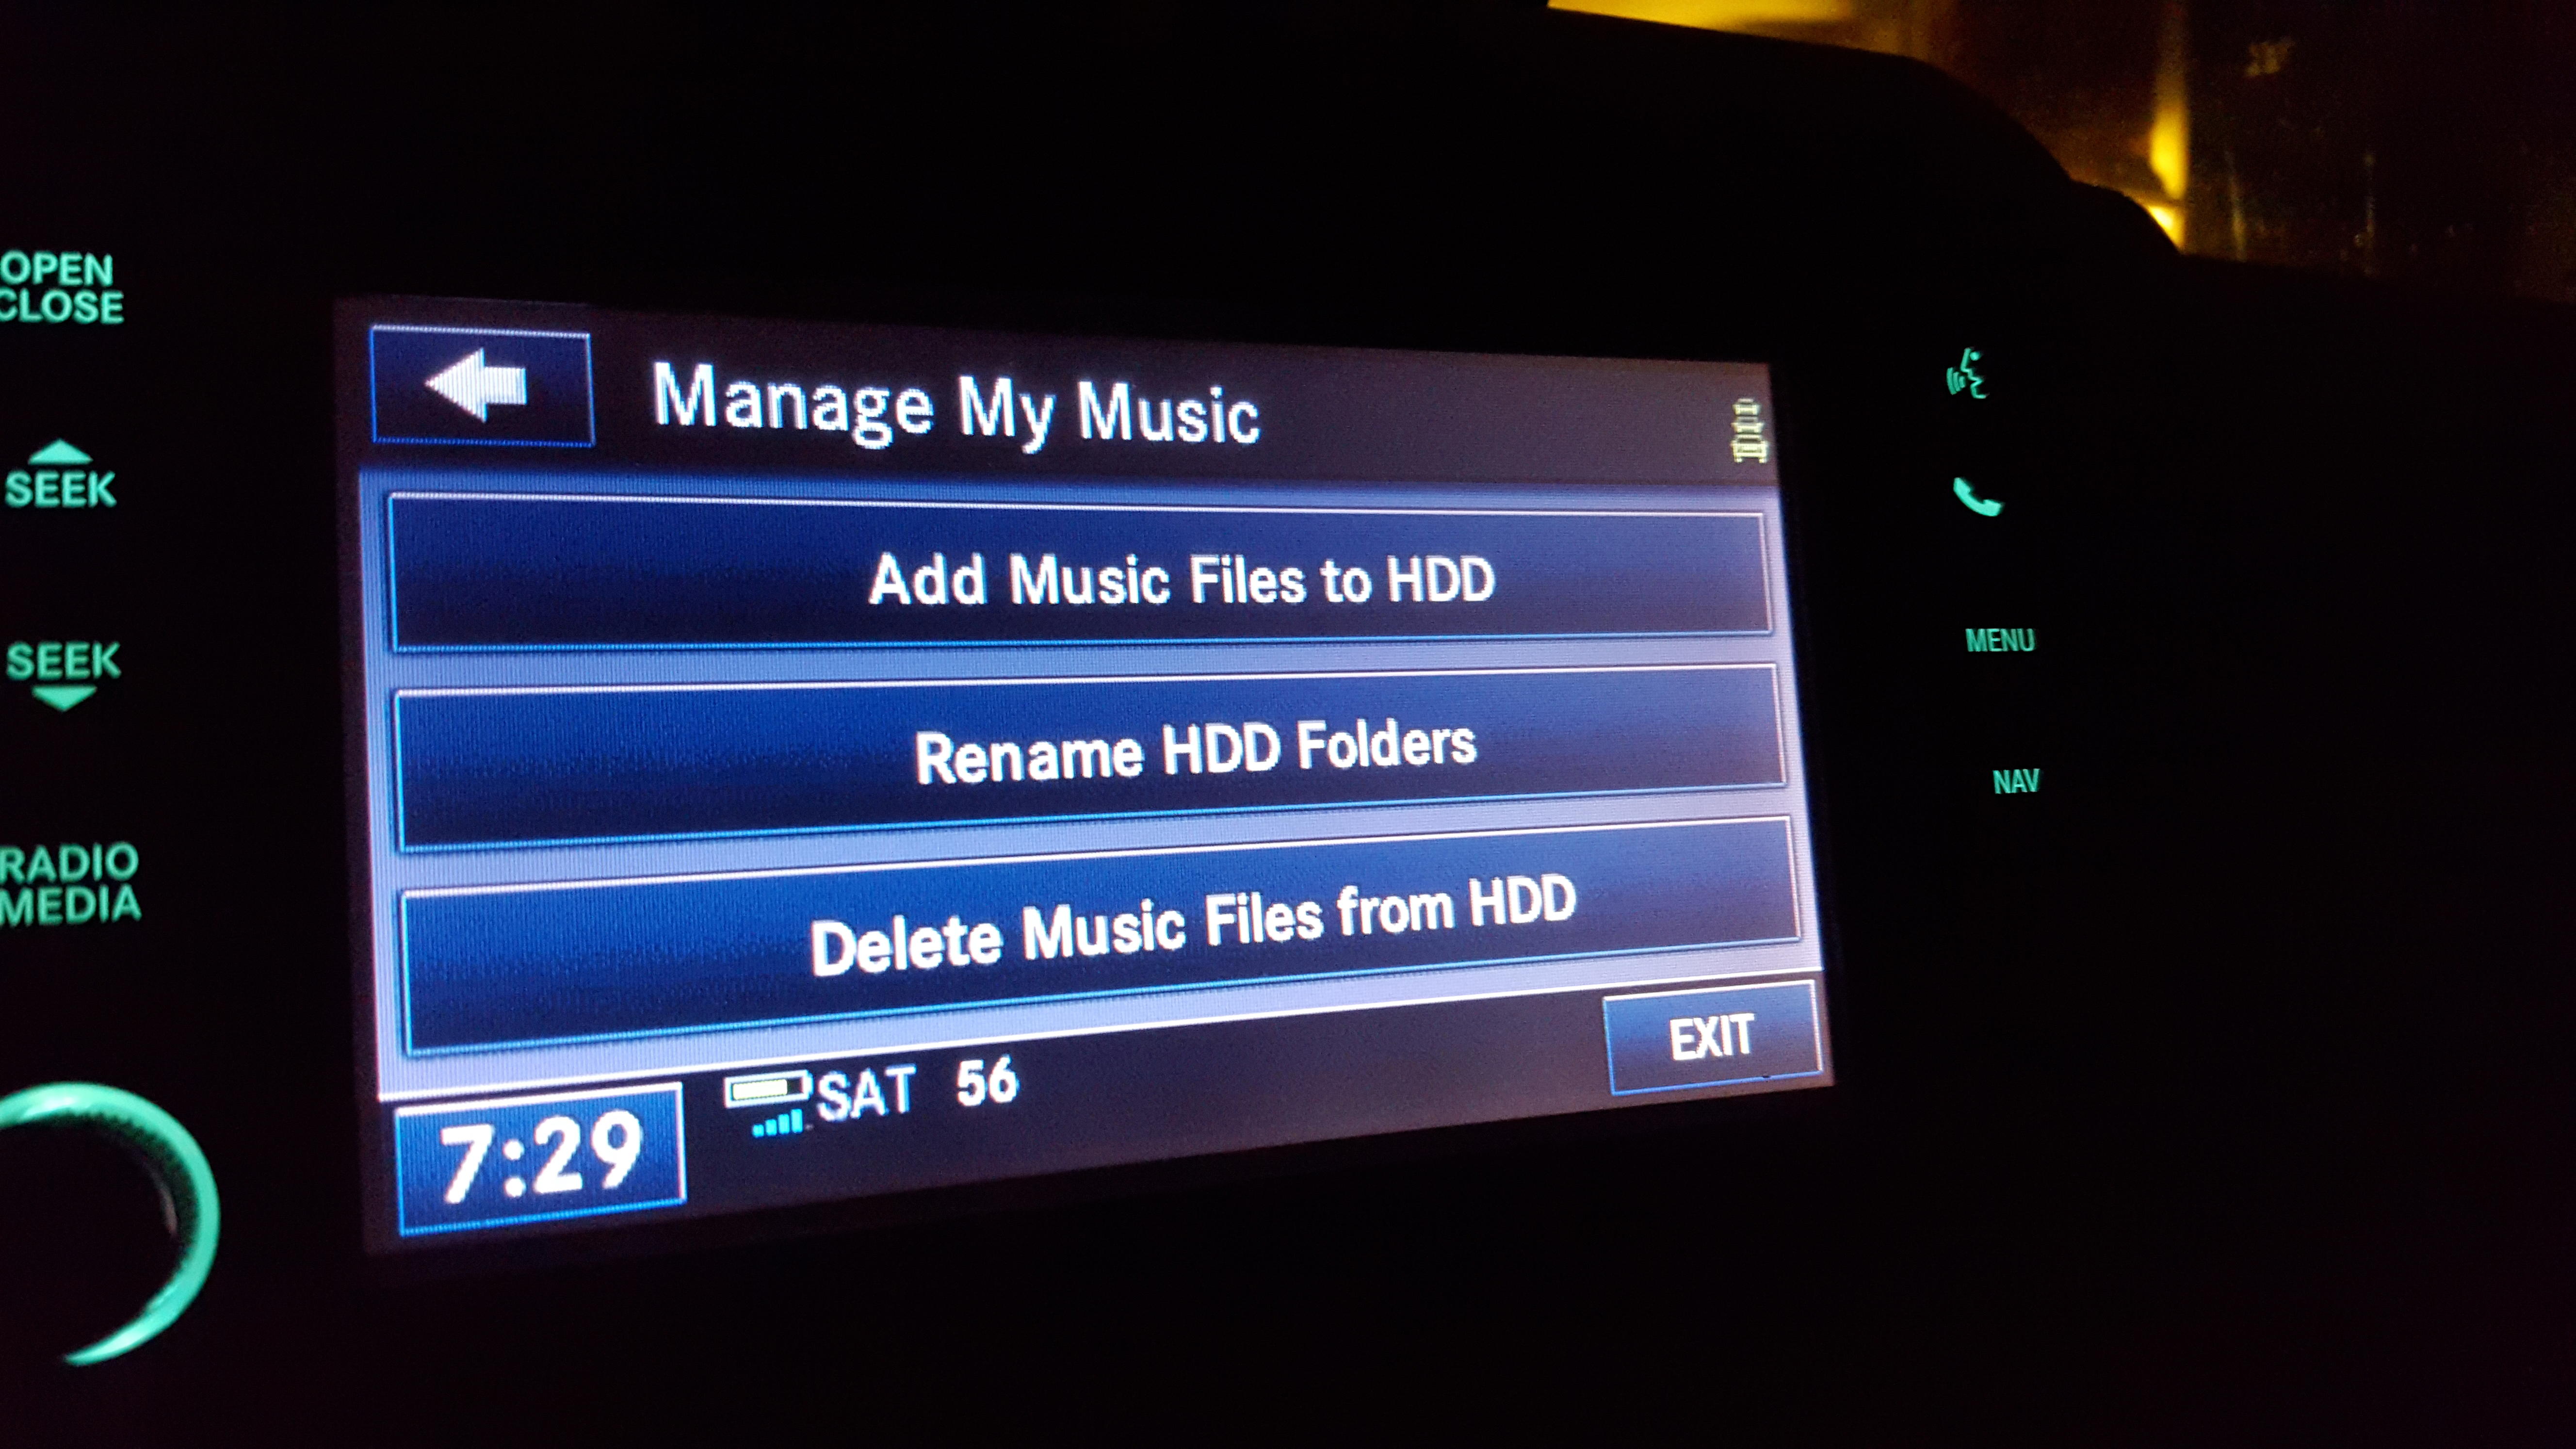
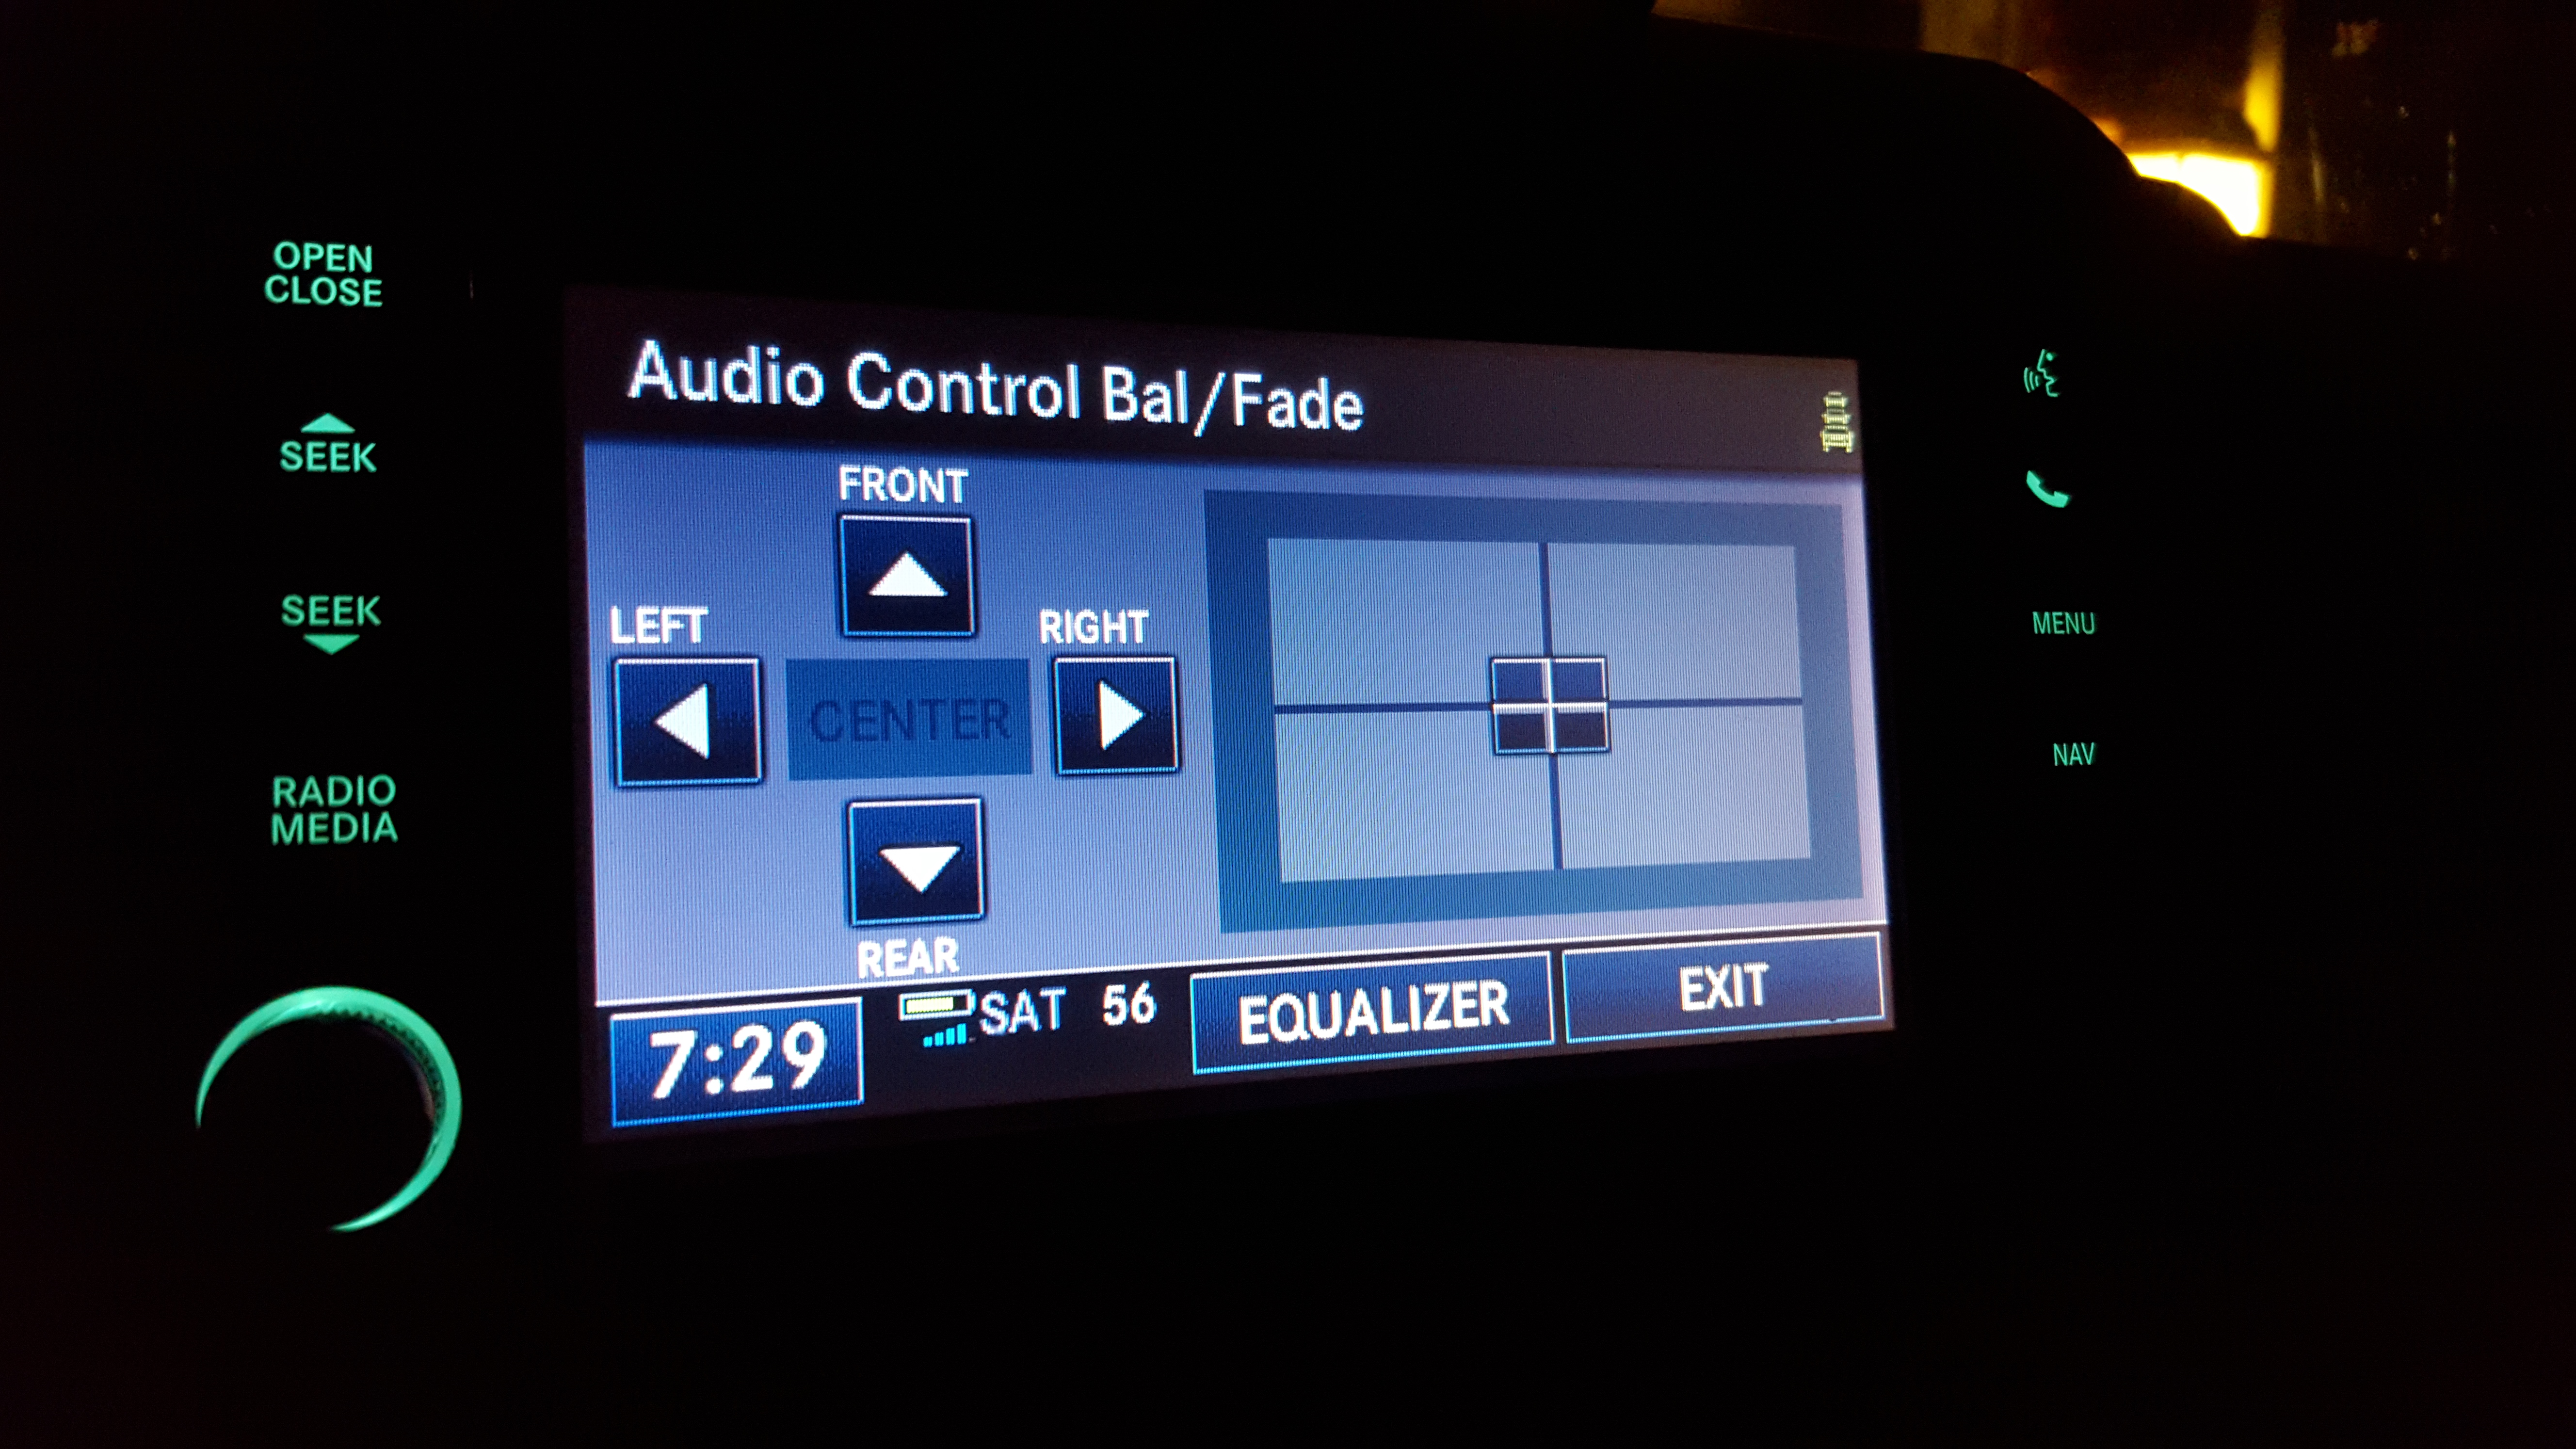
A few other functions that are accessible from that menu are the audio tuning controls where you have balance and fade, as well as bass, treble, mid-range, as well as managing your hard drive where you can have audio files, pictures, and some other stuff stored! Personally, I absolutely love the HDD for adding music so I don't even have to take the time to plug my phone or iPod in! Here's some picture of those screens below:


The first feature in here is if you subscribe to Sirius and have the Sirius Travel Link subscription, then you can hit the Travel Link soft key and enter the next menu:
There are some great features in here like getting your weather forecast, fuel prices based on location with price and fuel type, sports scores and alerts, movie theaters with times, locations, etc. But for me, my favorite feature is what showed up after I did an update to the firmware on my radio, which is the weather map! This shows your location over laid over radar maps. It also will show front locations, different zooms, tropical weather updates, and a few other things! The radar maps look like this:
Another function, if you subscribe to it is the Sirius Traffic functions. This feature is very handy as it overlays the traffic patterns onto the regular GPS map so you can see where there may be traffic issues and go around it. Also, if you have Sirius Traffic, then when you have a route active on the GPS, it will update for serious traffic issues for you to get around without having to deal with backups! But from the menu page, if you click on traffic updates from there, it will take you to a more detailed screen on traffic updates and you can see details on specific issues and where they are relative to you!
A few other functions that are accessible from that menu are the audio tuning controls where you have balance and fade, as well as bass, treble, mid-range, as well as managing your hard drive where you can have audio files, pictures, and some other stuff stored! Personally, I absolutely love the HDD for adding music so I don't even have to take the time to plug my phone or iPod in! Here's some picture of those screens below:
10-21-2015, 05:23 AM
#28
JK Enthusiast
Thread Starter
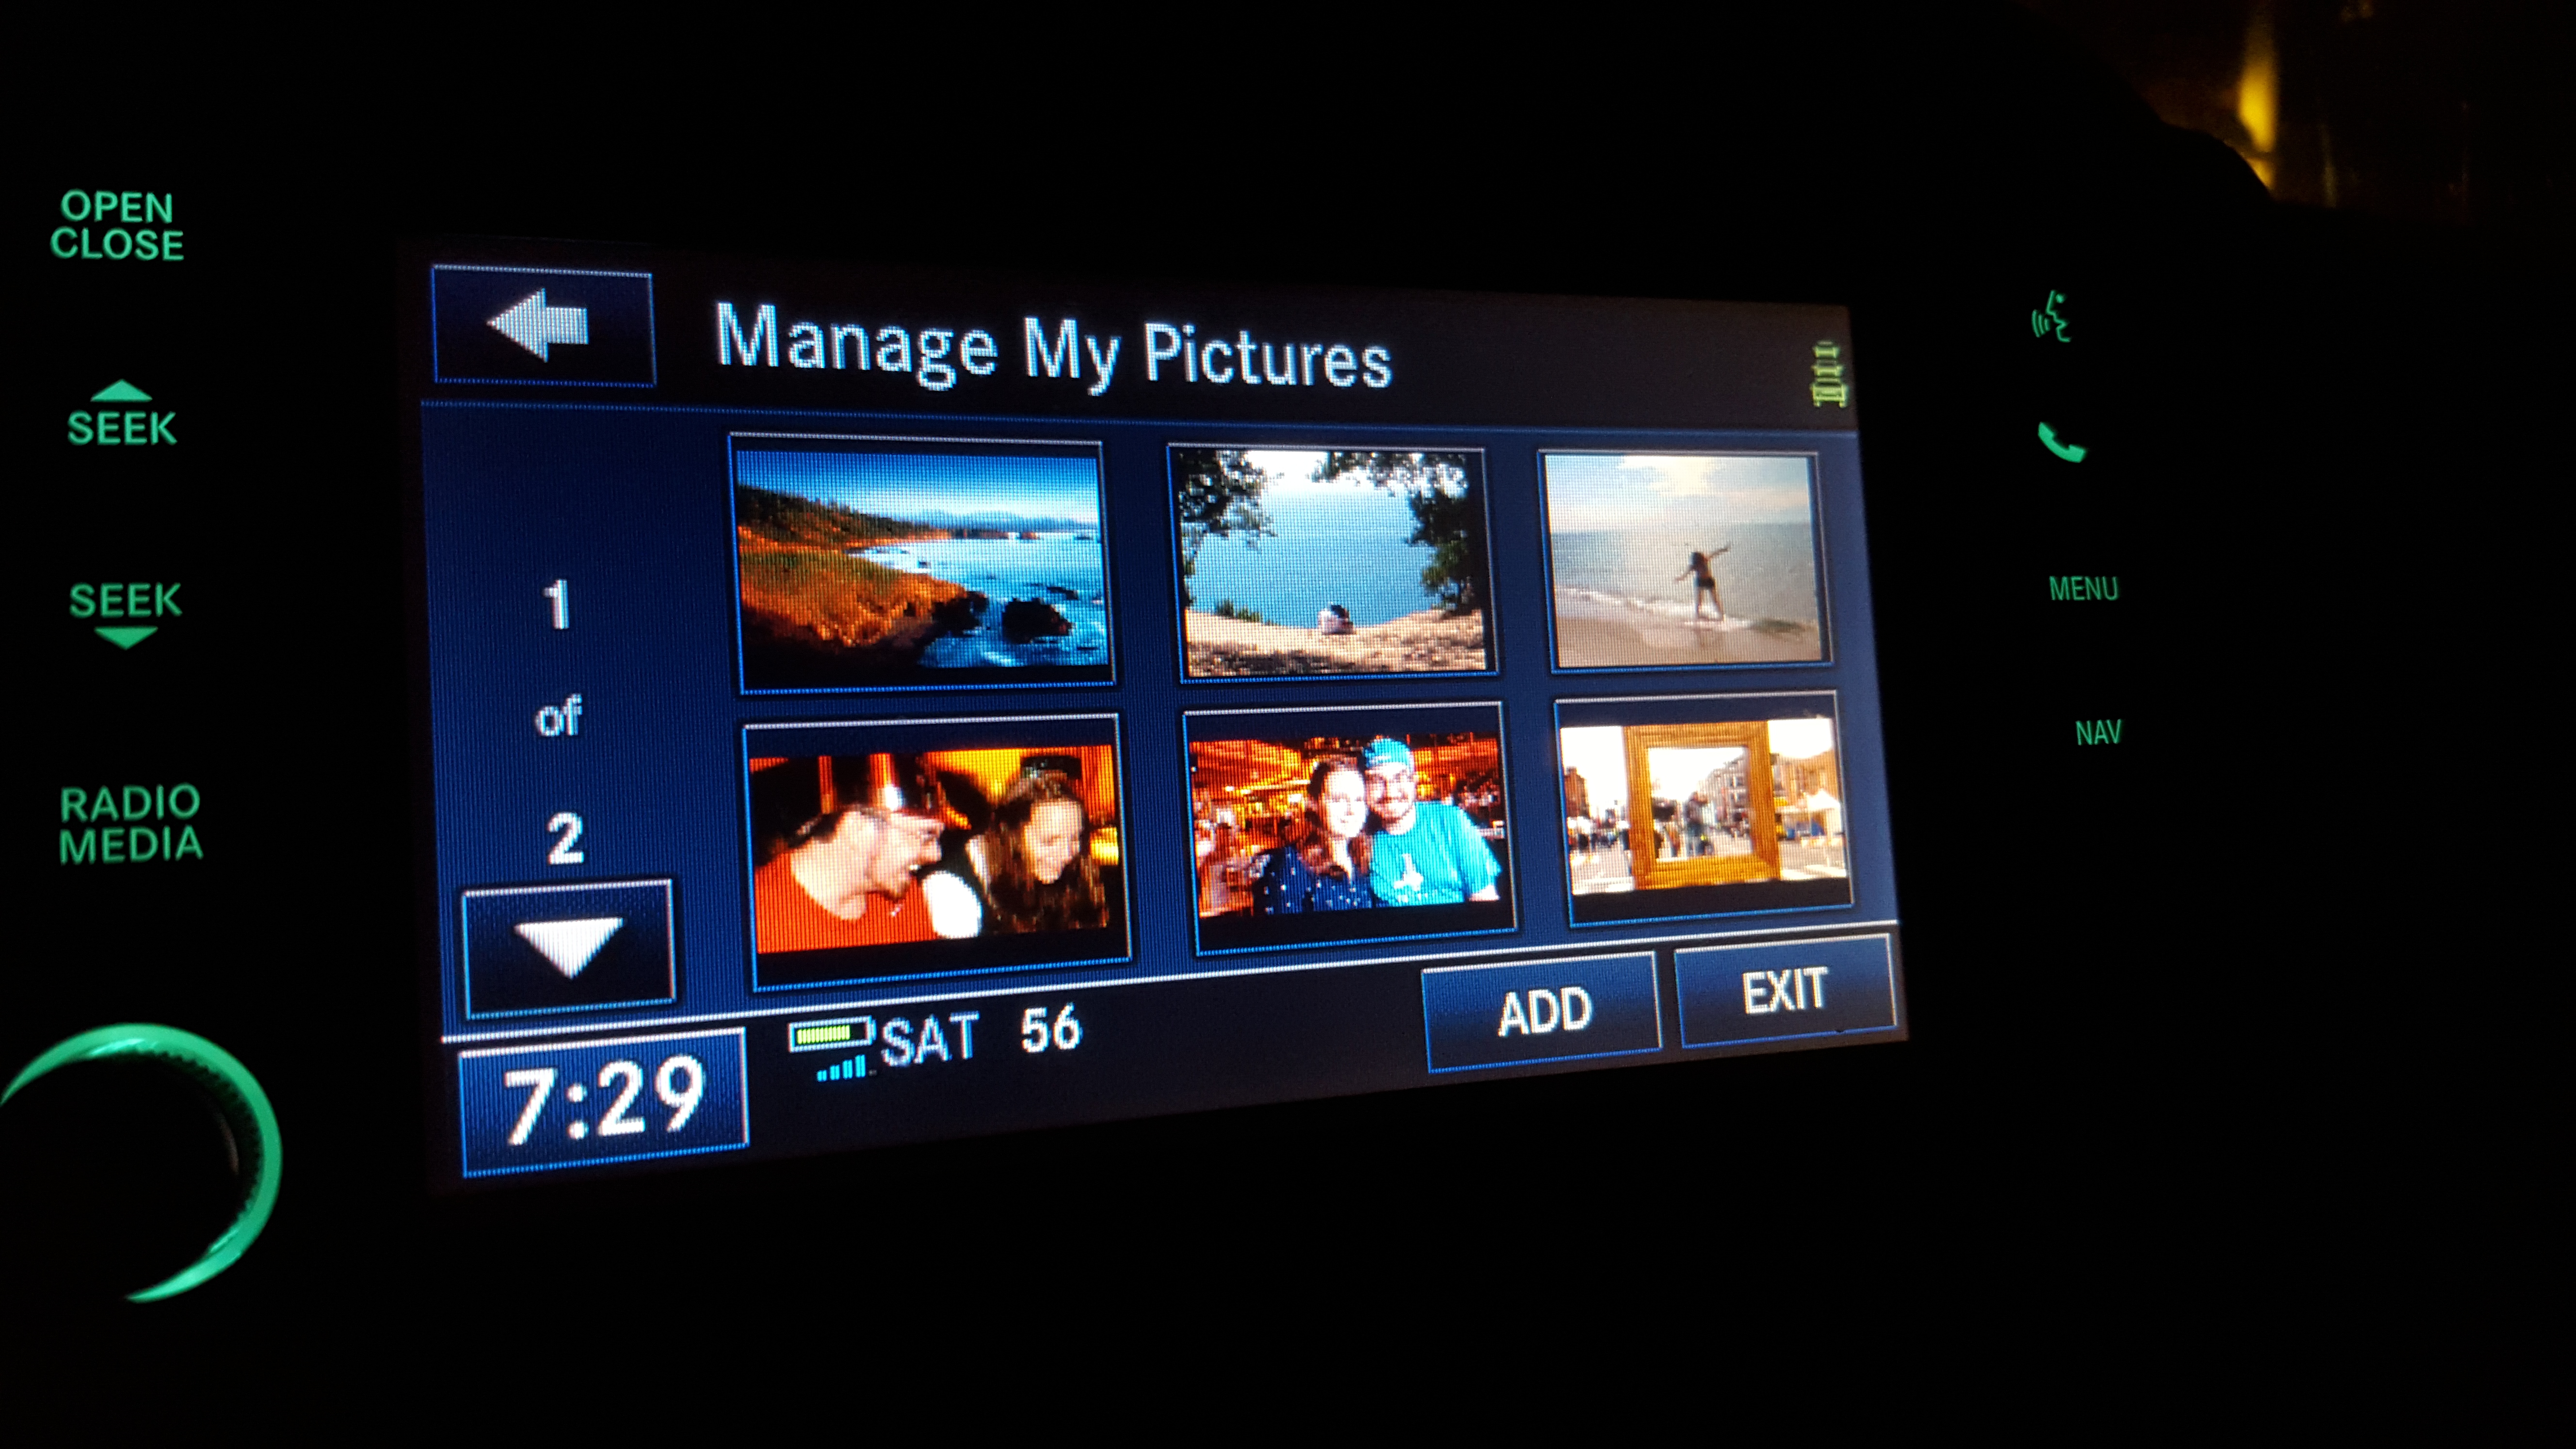
Just a few remain tips left for me to tell about this radio. Once again, from the menu home screen, there are a few other possible things to edit/change with the radio, such as what shows up on the right half of the screen when in radio/audio mode. This can be selected on the right edge of the menu screen. From here you can select map view (which I have mine set to), Jeep Splash Screen, am uploaded picture, or you can have the screen go completely off!
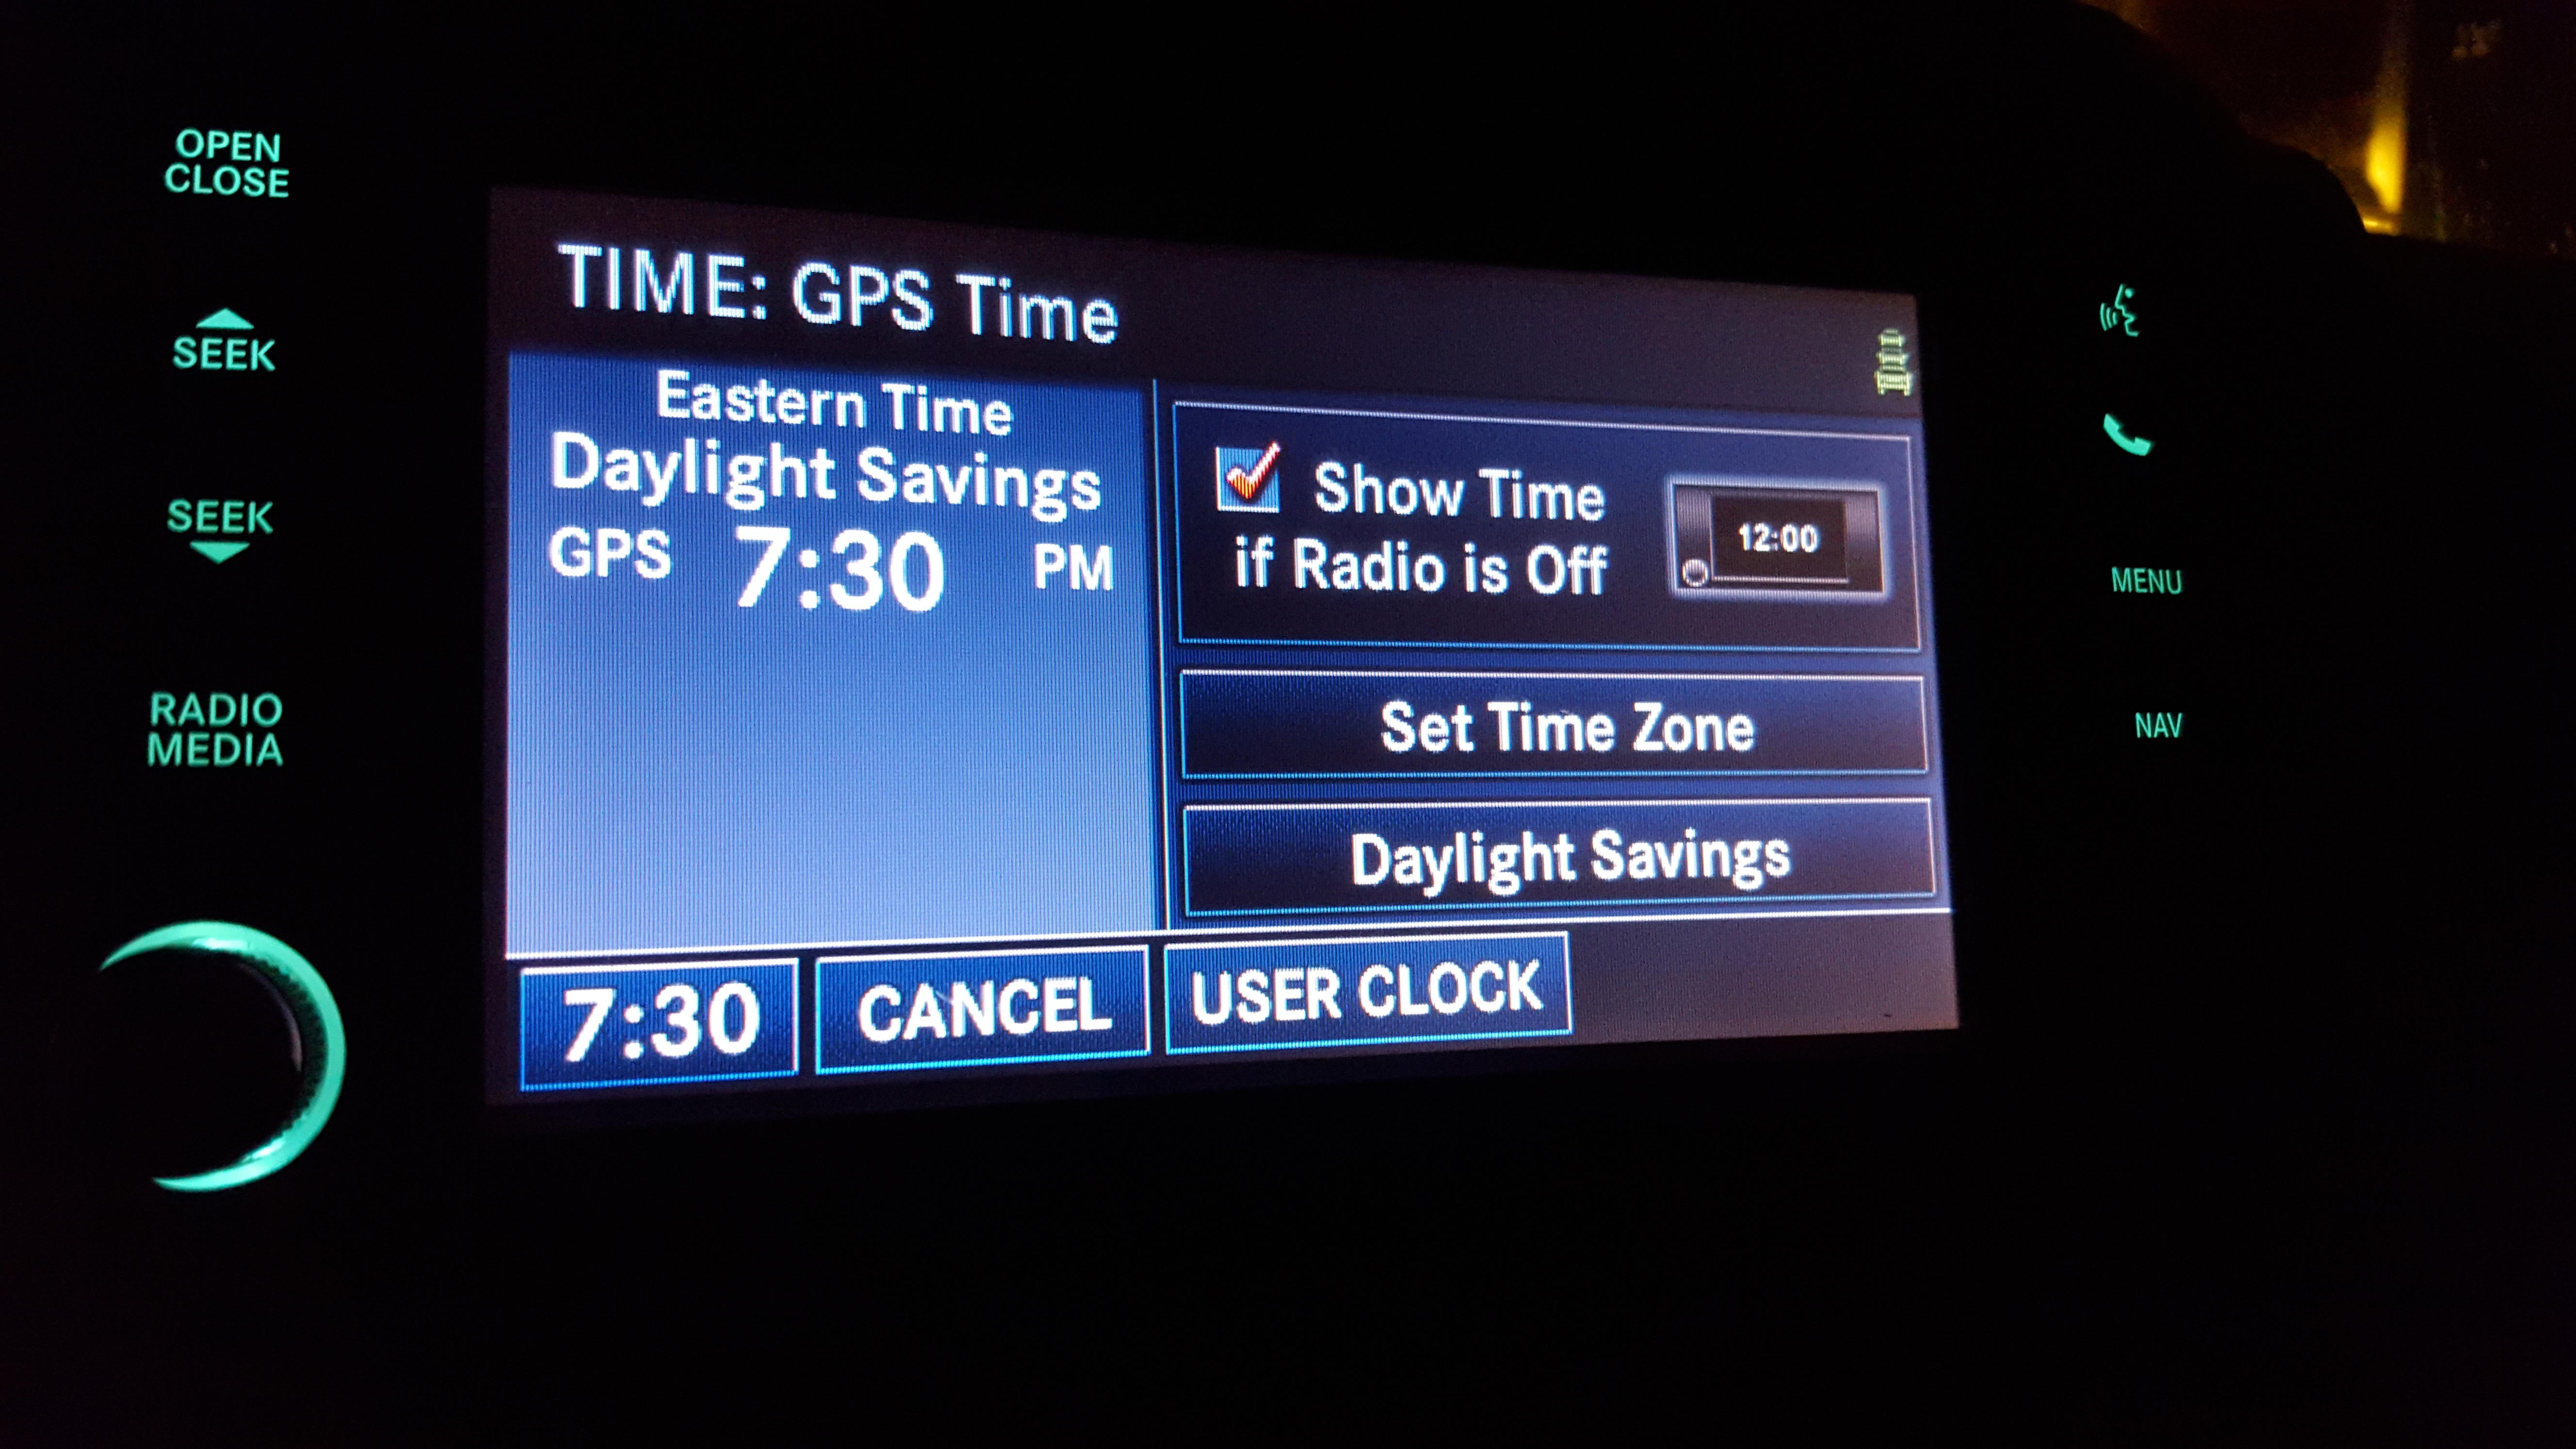
You can also access the menus such as checking the version of software/firmware/gracenote/etc. that the radio is currently operating on, as well as managing the hard drive, changing the time zone, voice recognition settings, pairing a bluetooth device, feedback settings, and a few other settings as well! The clock can also be adjusted if you click the clock directly on the screen, it will take you to the same screen as the menu time set does. Here are a few pics starting with the main and then sub screens:


And lastly in all the major functions and to conclude all the tips and tricks I can think of at the moment, I will cover the navigation functions. When you go to the navigation screen, there are a few ways to get there. You can either press the NAV hard key on the right side of the radio, or click on the map on the right side of the touch screen. The NAV key will take you to the navigation menu, and clicking on the map will pull the map up full screen! Your view will look something like this:
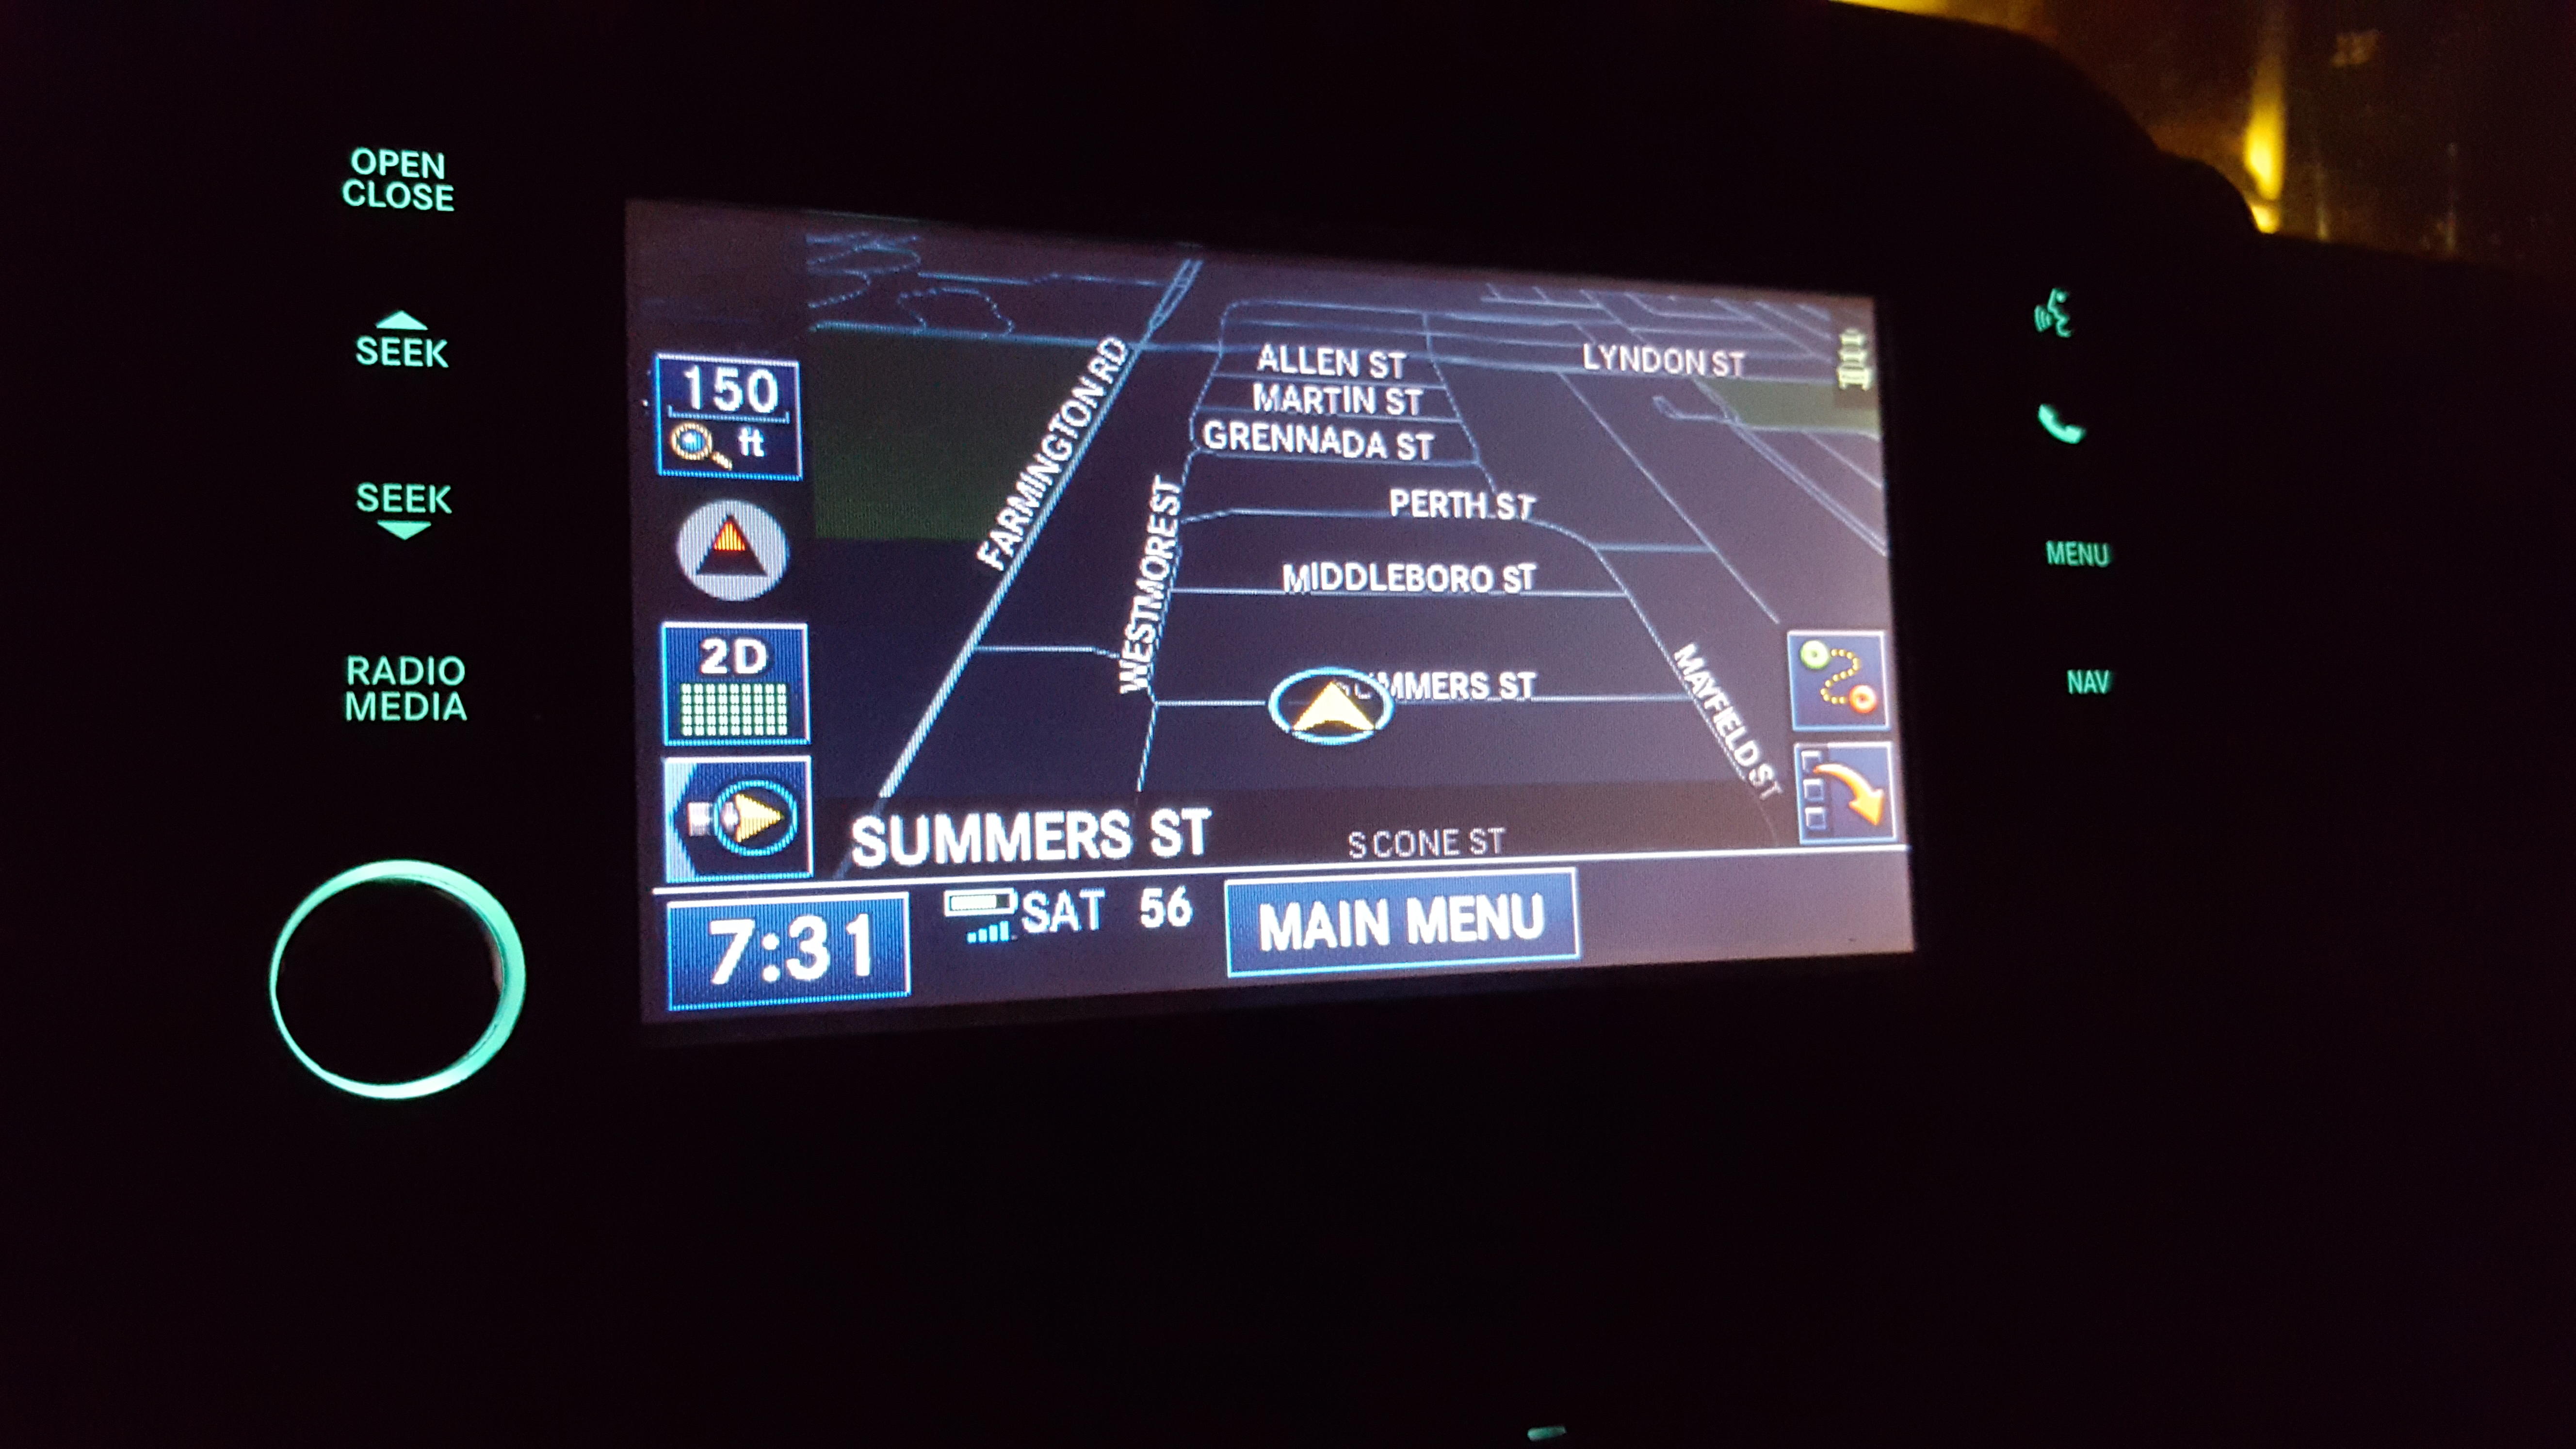
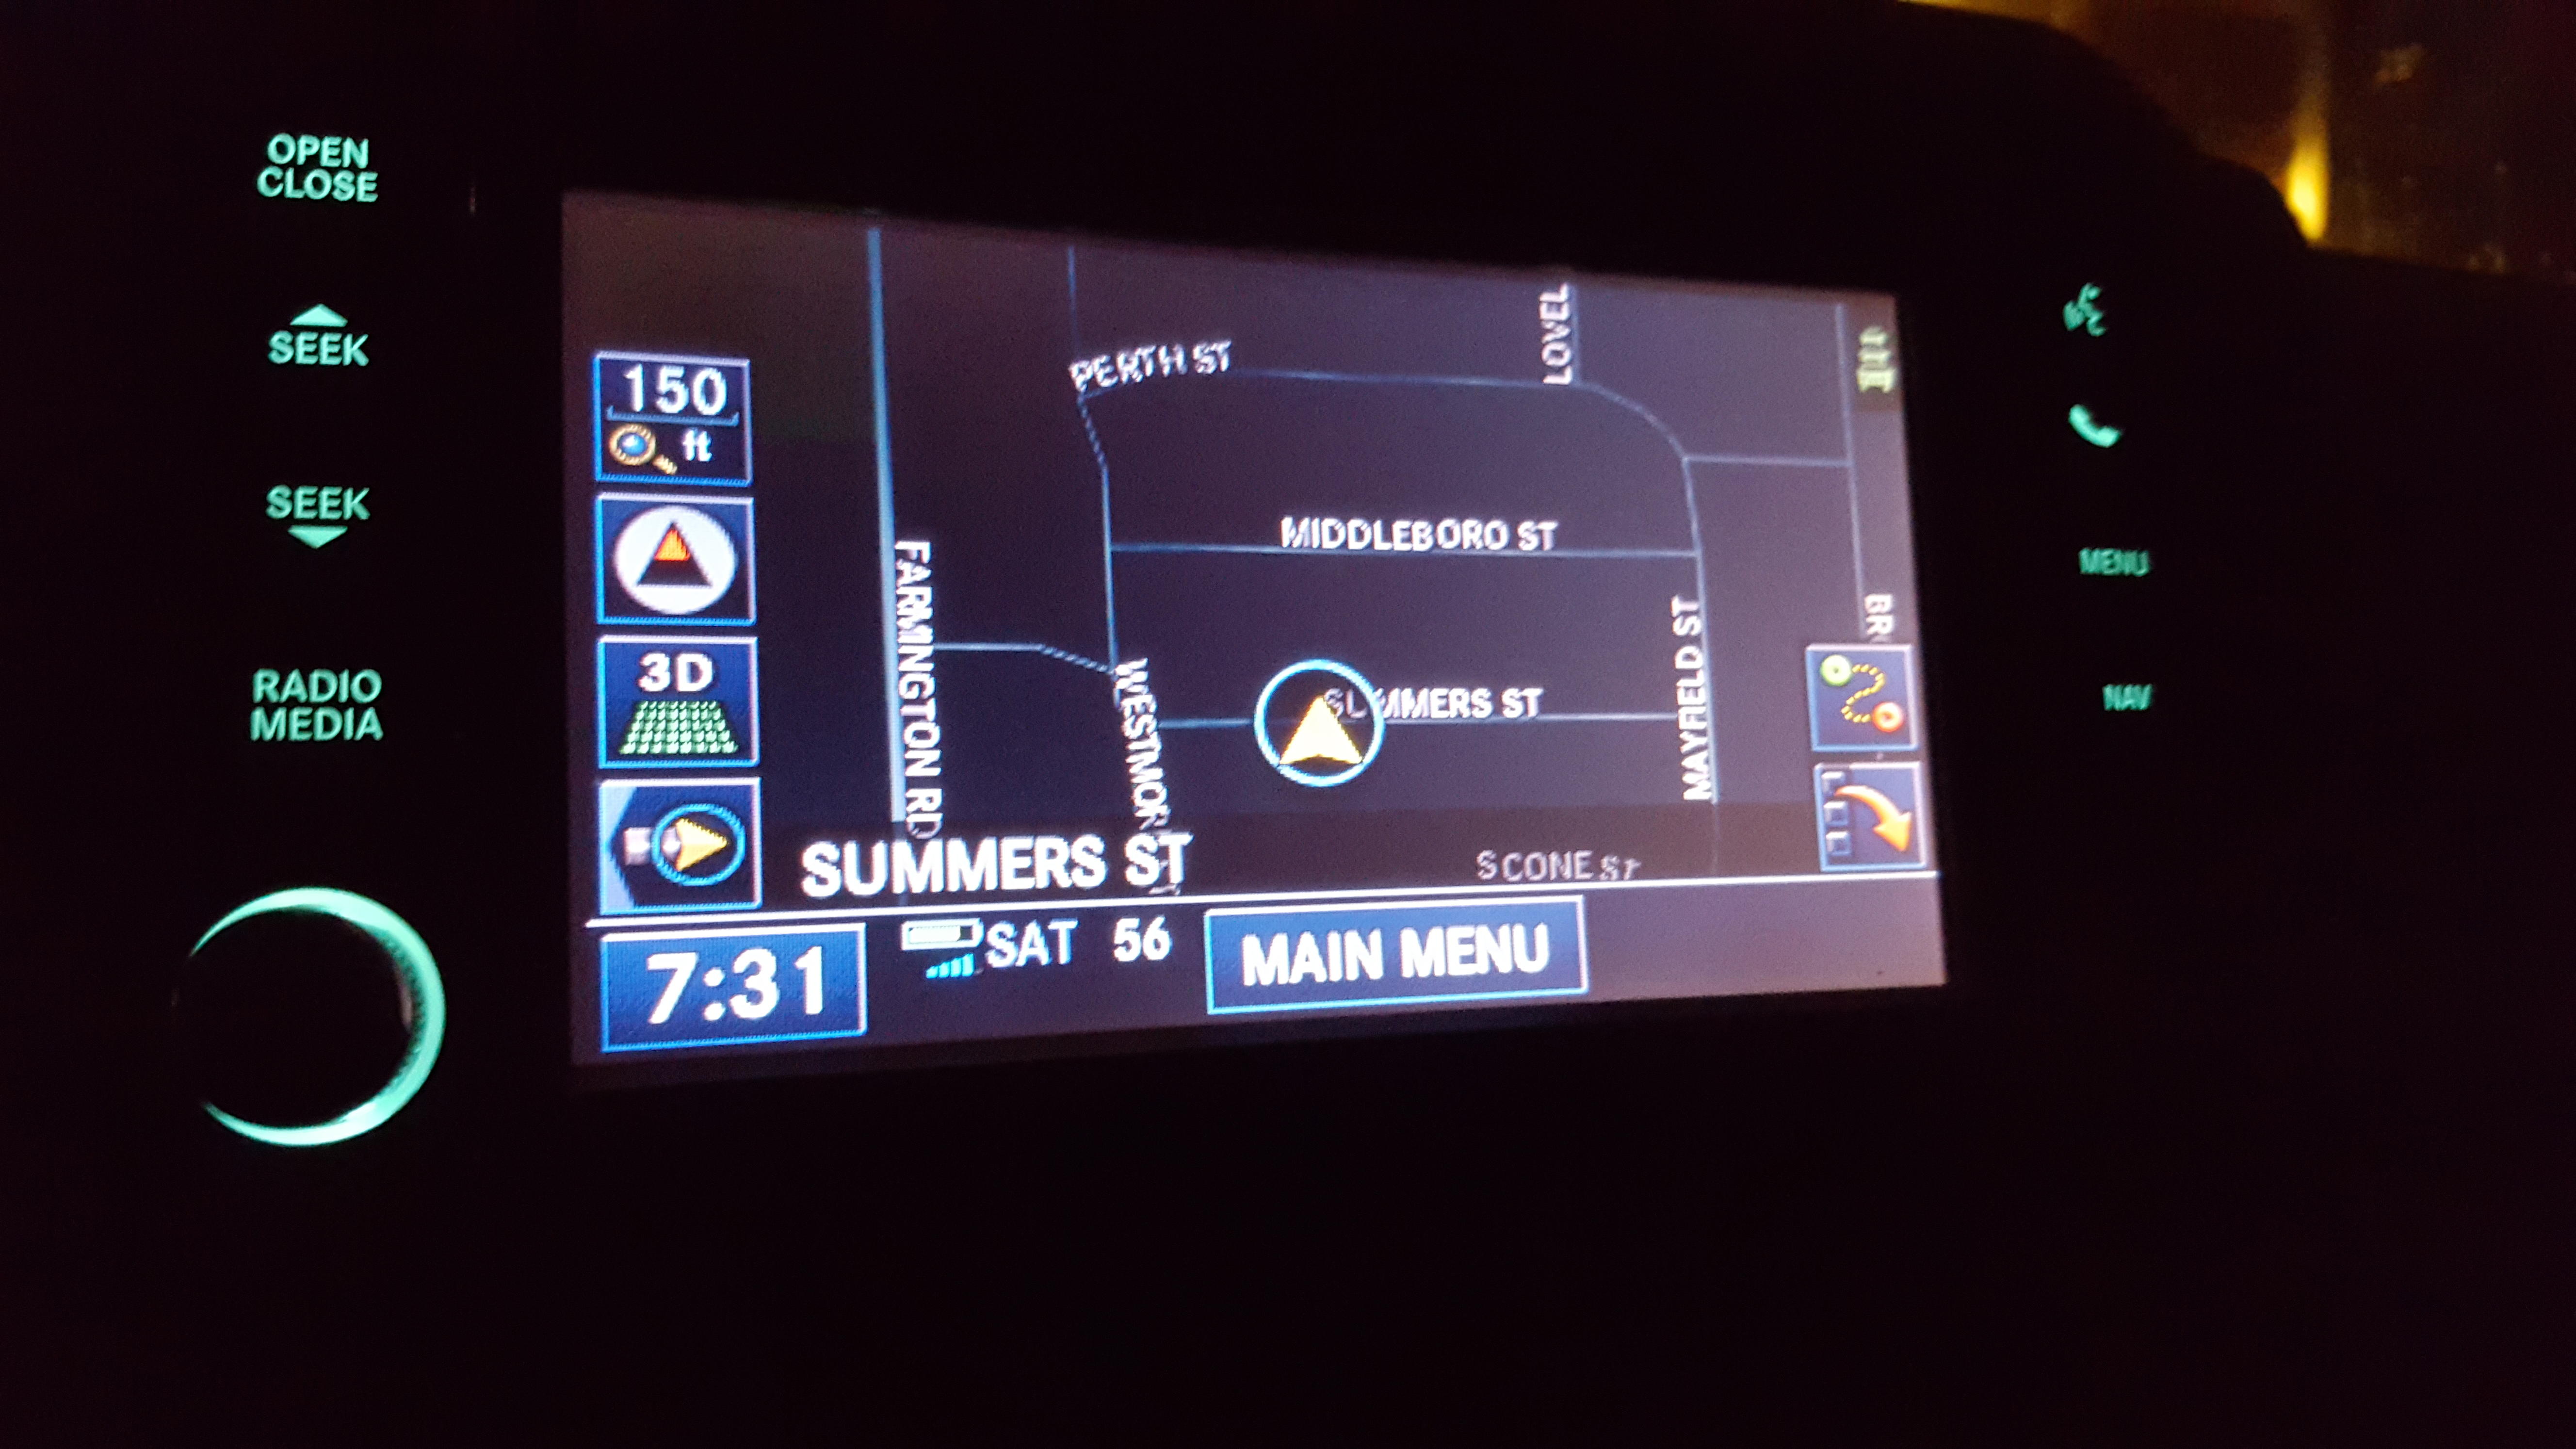
There are a few map preference selections tat you can make on the map view screen such as your zoom, what shows up on the screen, always north or always behind, your option to go to the nav menu, and the ability to switch between the 2D and 3Dviews. I personally like the 3D view as you can see a bit further ahead, but to each their own! So the above pic is the 3D view, and below is the 2D map view!
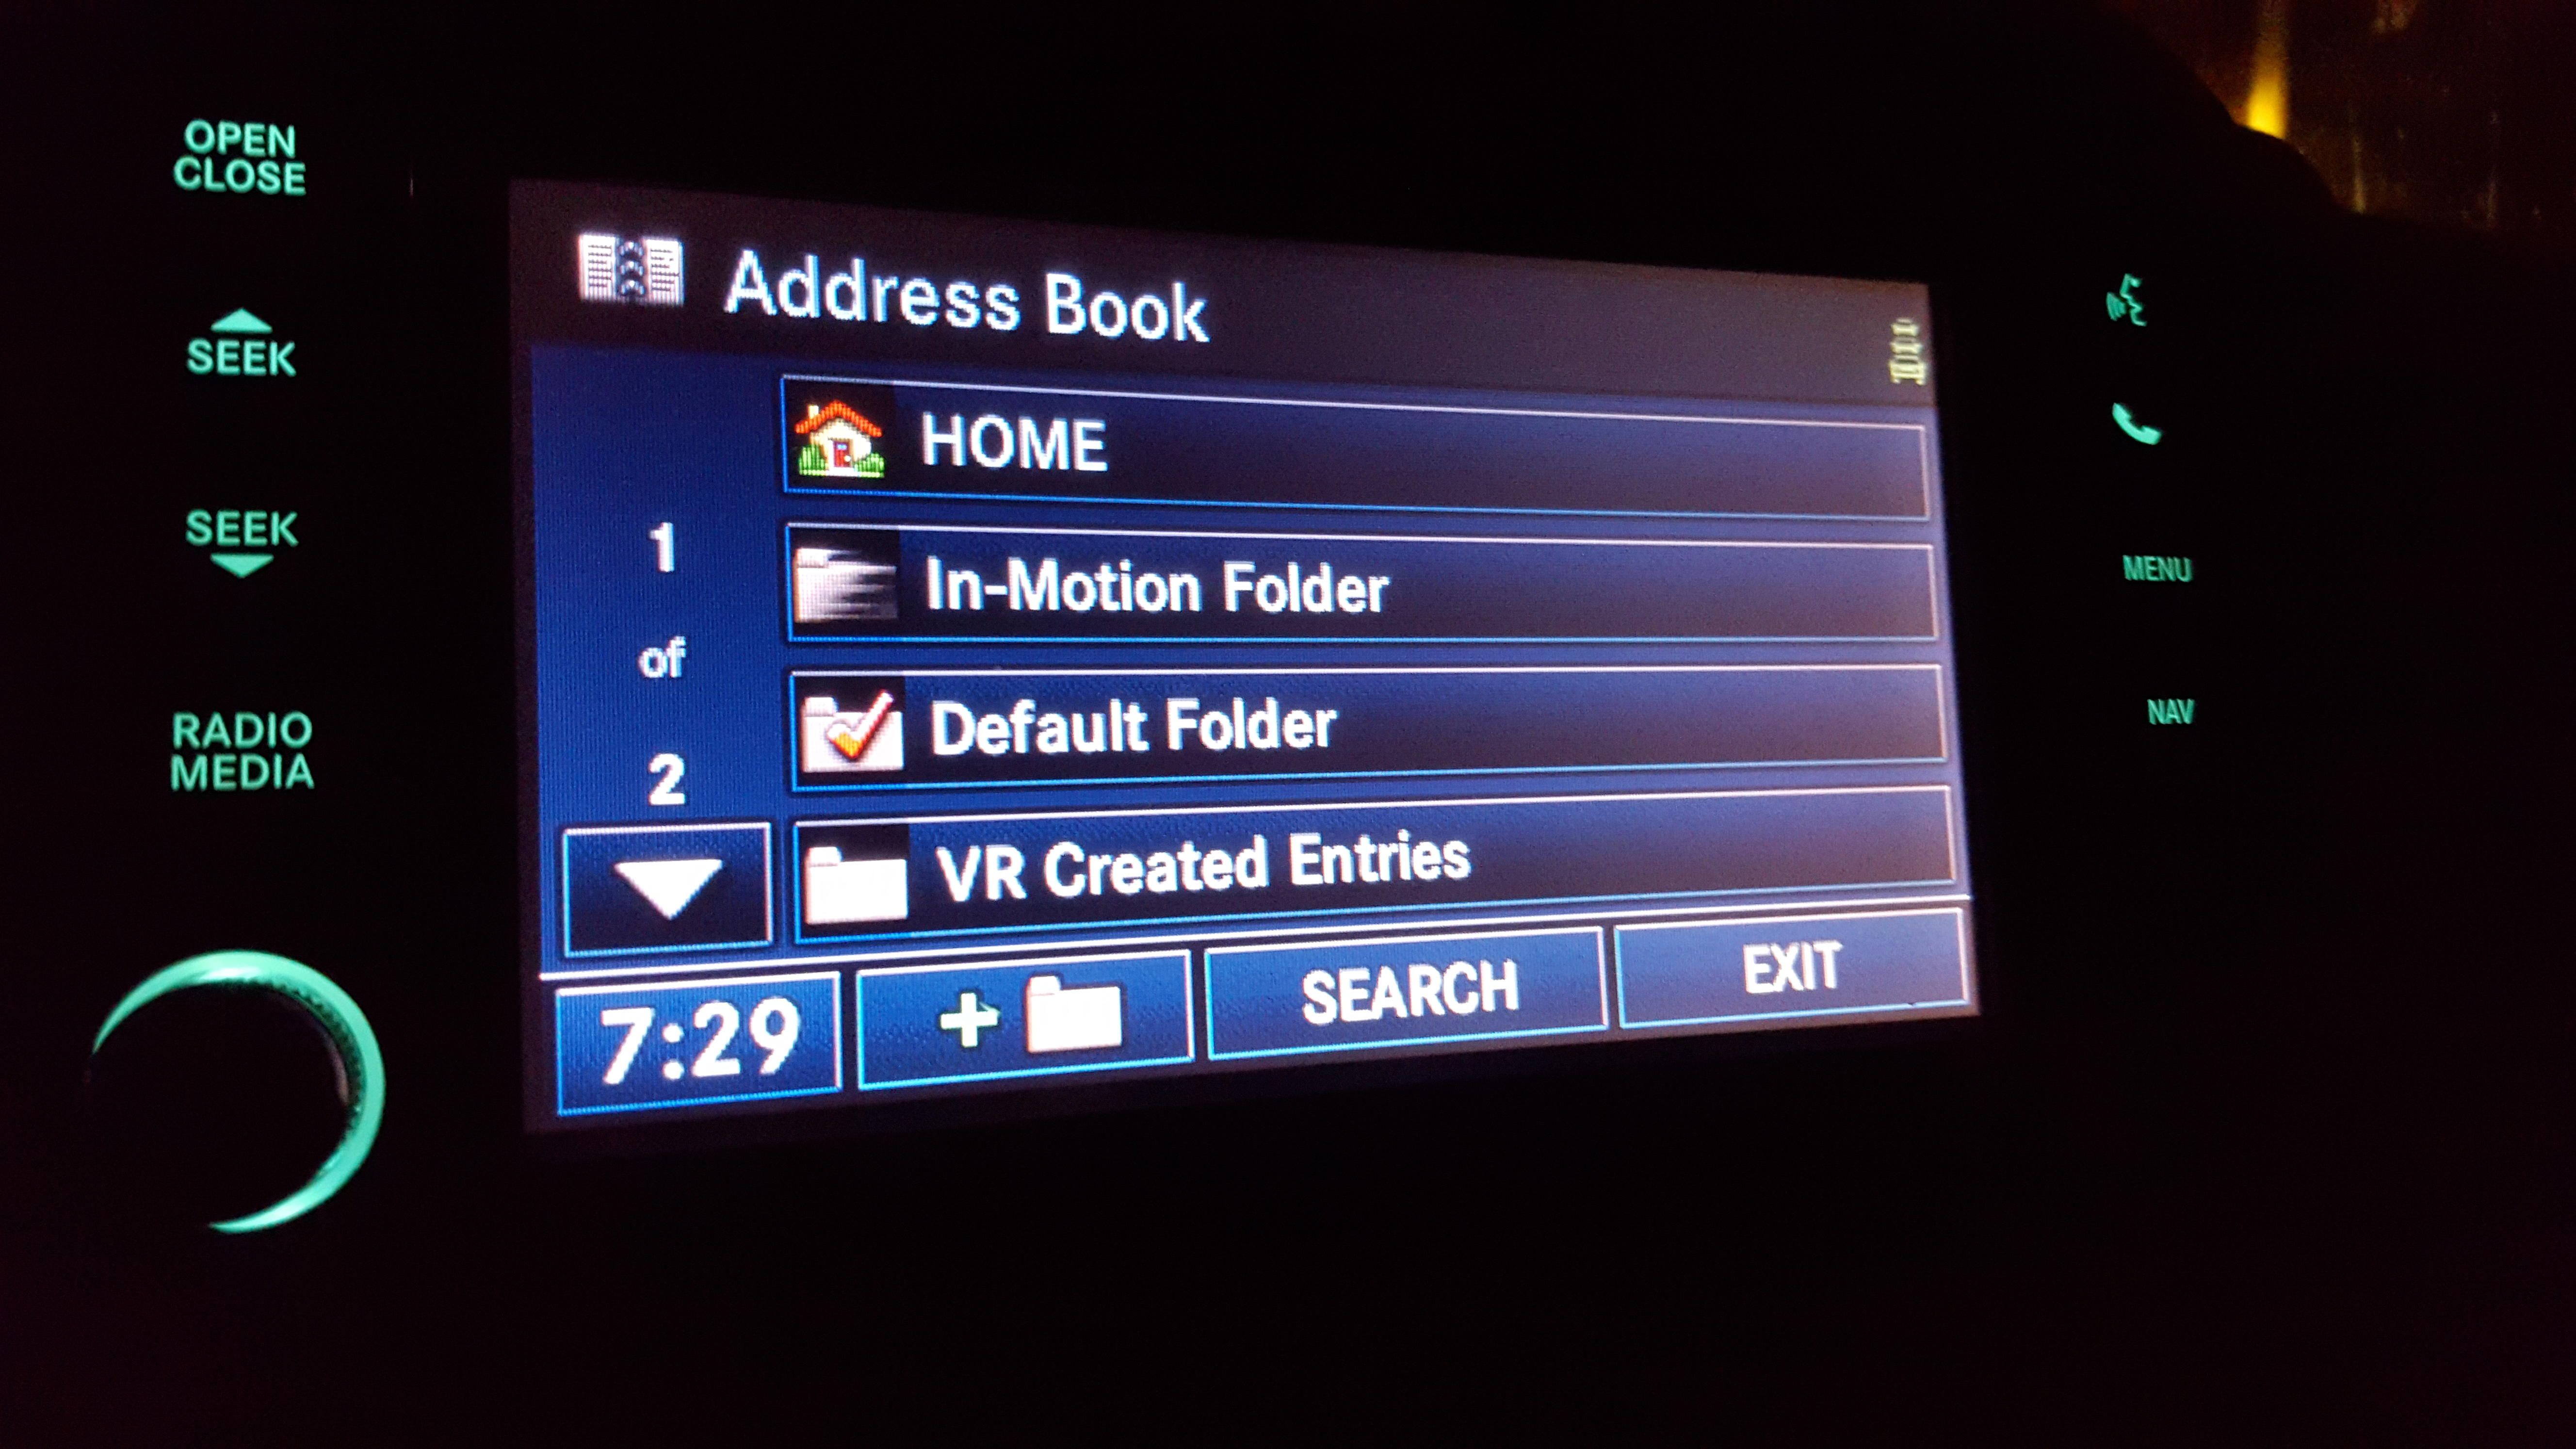
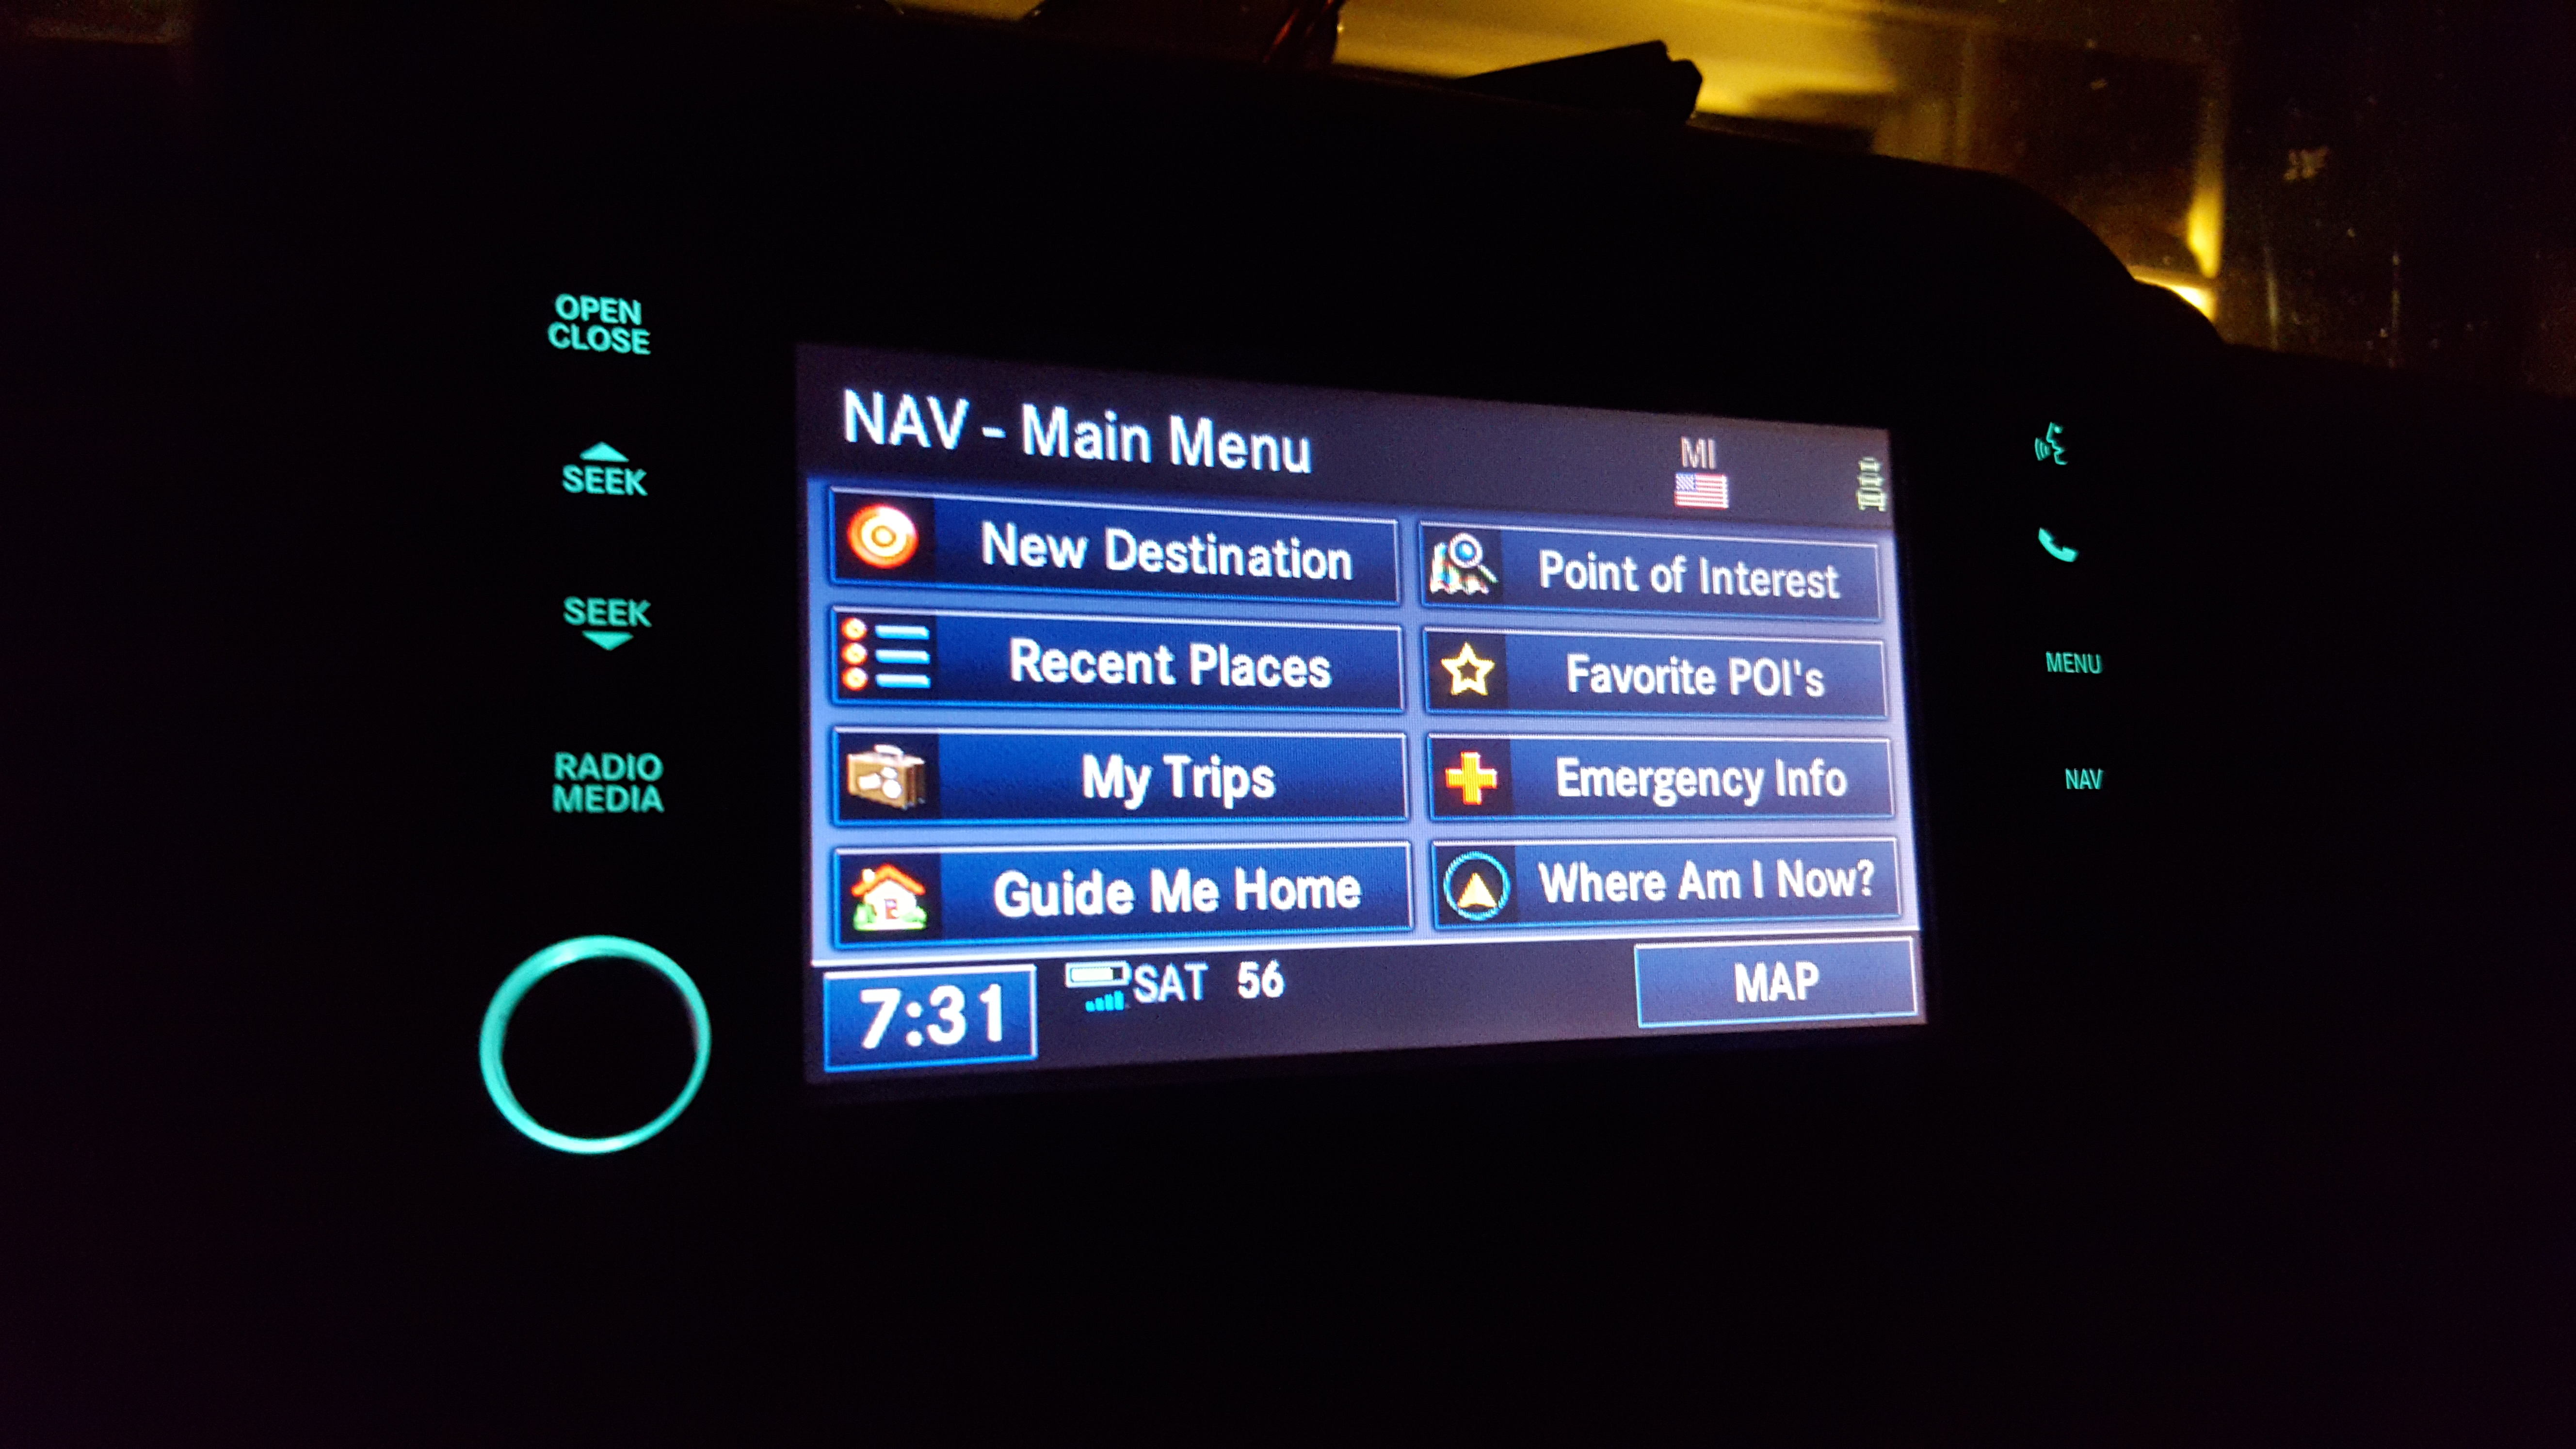
Then, from the navigation menu page, you can access all sorts of different info, such as where am I now (which displays lat. and long. of current location), guide me home (where you can store your home address for quick access to being guided home), you cane find points of interest, you can save favorites, you can create and save whole trips with multiple destinations, you can get emergency info, you can find your recently routed places, and of coarse, destination entry. The destination entry screen is shown below, followed by the where am I now function:


From the destination entry screen, you can see all the different options of how to route you and whatever inputs you would like or you may have to get to your destination! There is even a saved trails button, where your GPS can "drop breadcrumbs" for trails/paths/trips can save them so you can find your way back, as well as saving them for possible future trips! Once a destination is entered, the radio will screen back to the full map view screen with directions now showing and your route highlighted. (Just a couple quick tips and ideas. One, the volume of the voice on the nav can only be adjusted when it is speaking. And two, when the nav is giving a direction, the voice only comes out of the driver side front speaker, so it is focused on only the driver, and no one else. So, say there is music playing, the music will continue to play at the correct volume through all the speakers except the driver front speaker which will switch over to the nav voice to speak, and when it is done, it goes back to whatever it was doing before. I personally like this feature and think it is a pretty neat idea!) Here is what the screen looks like with an active route:

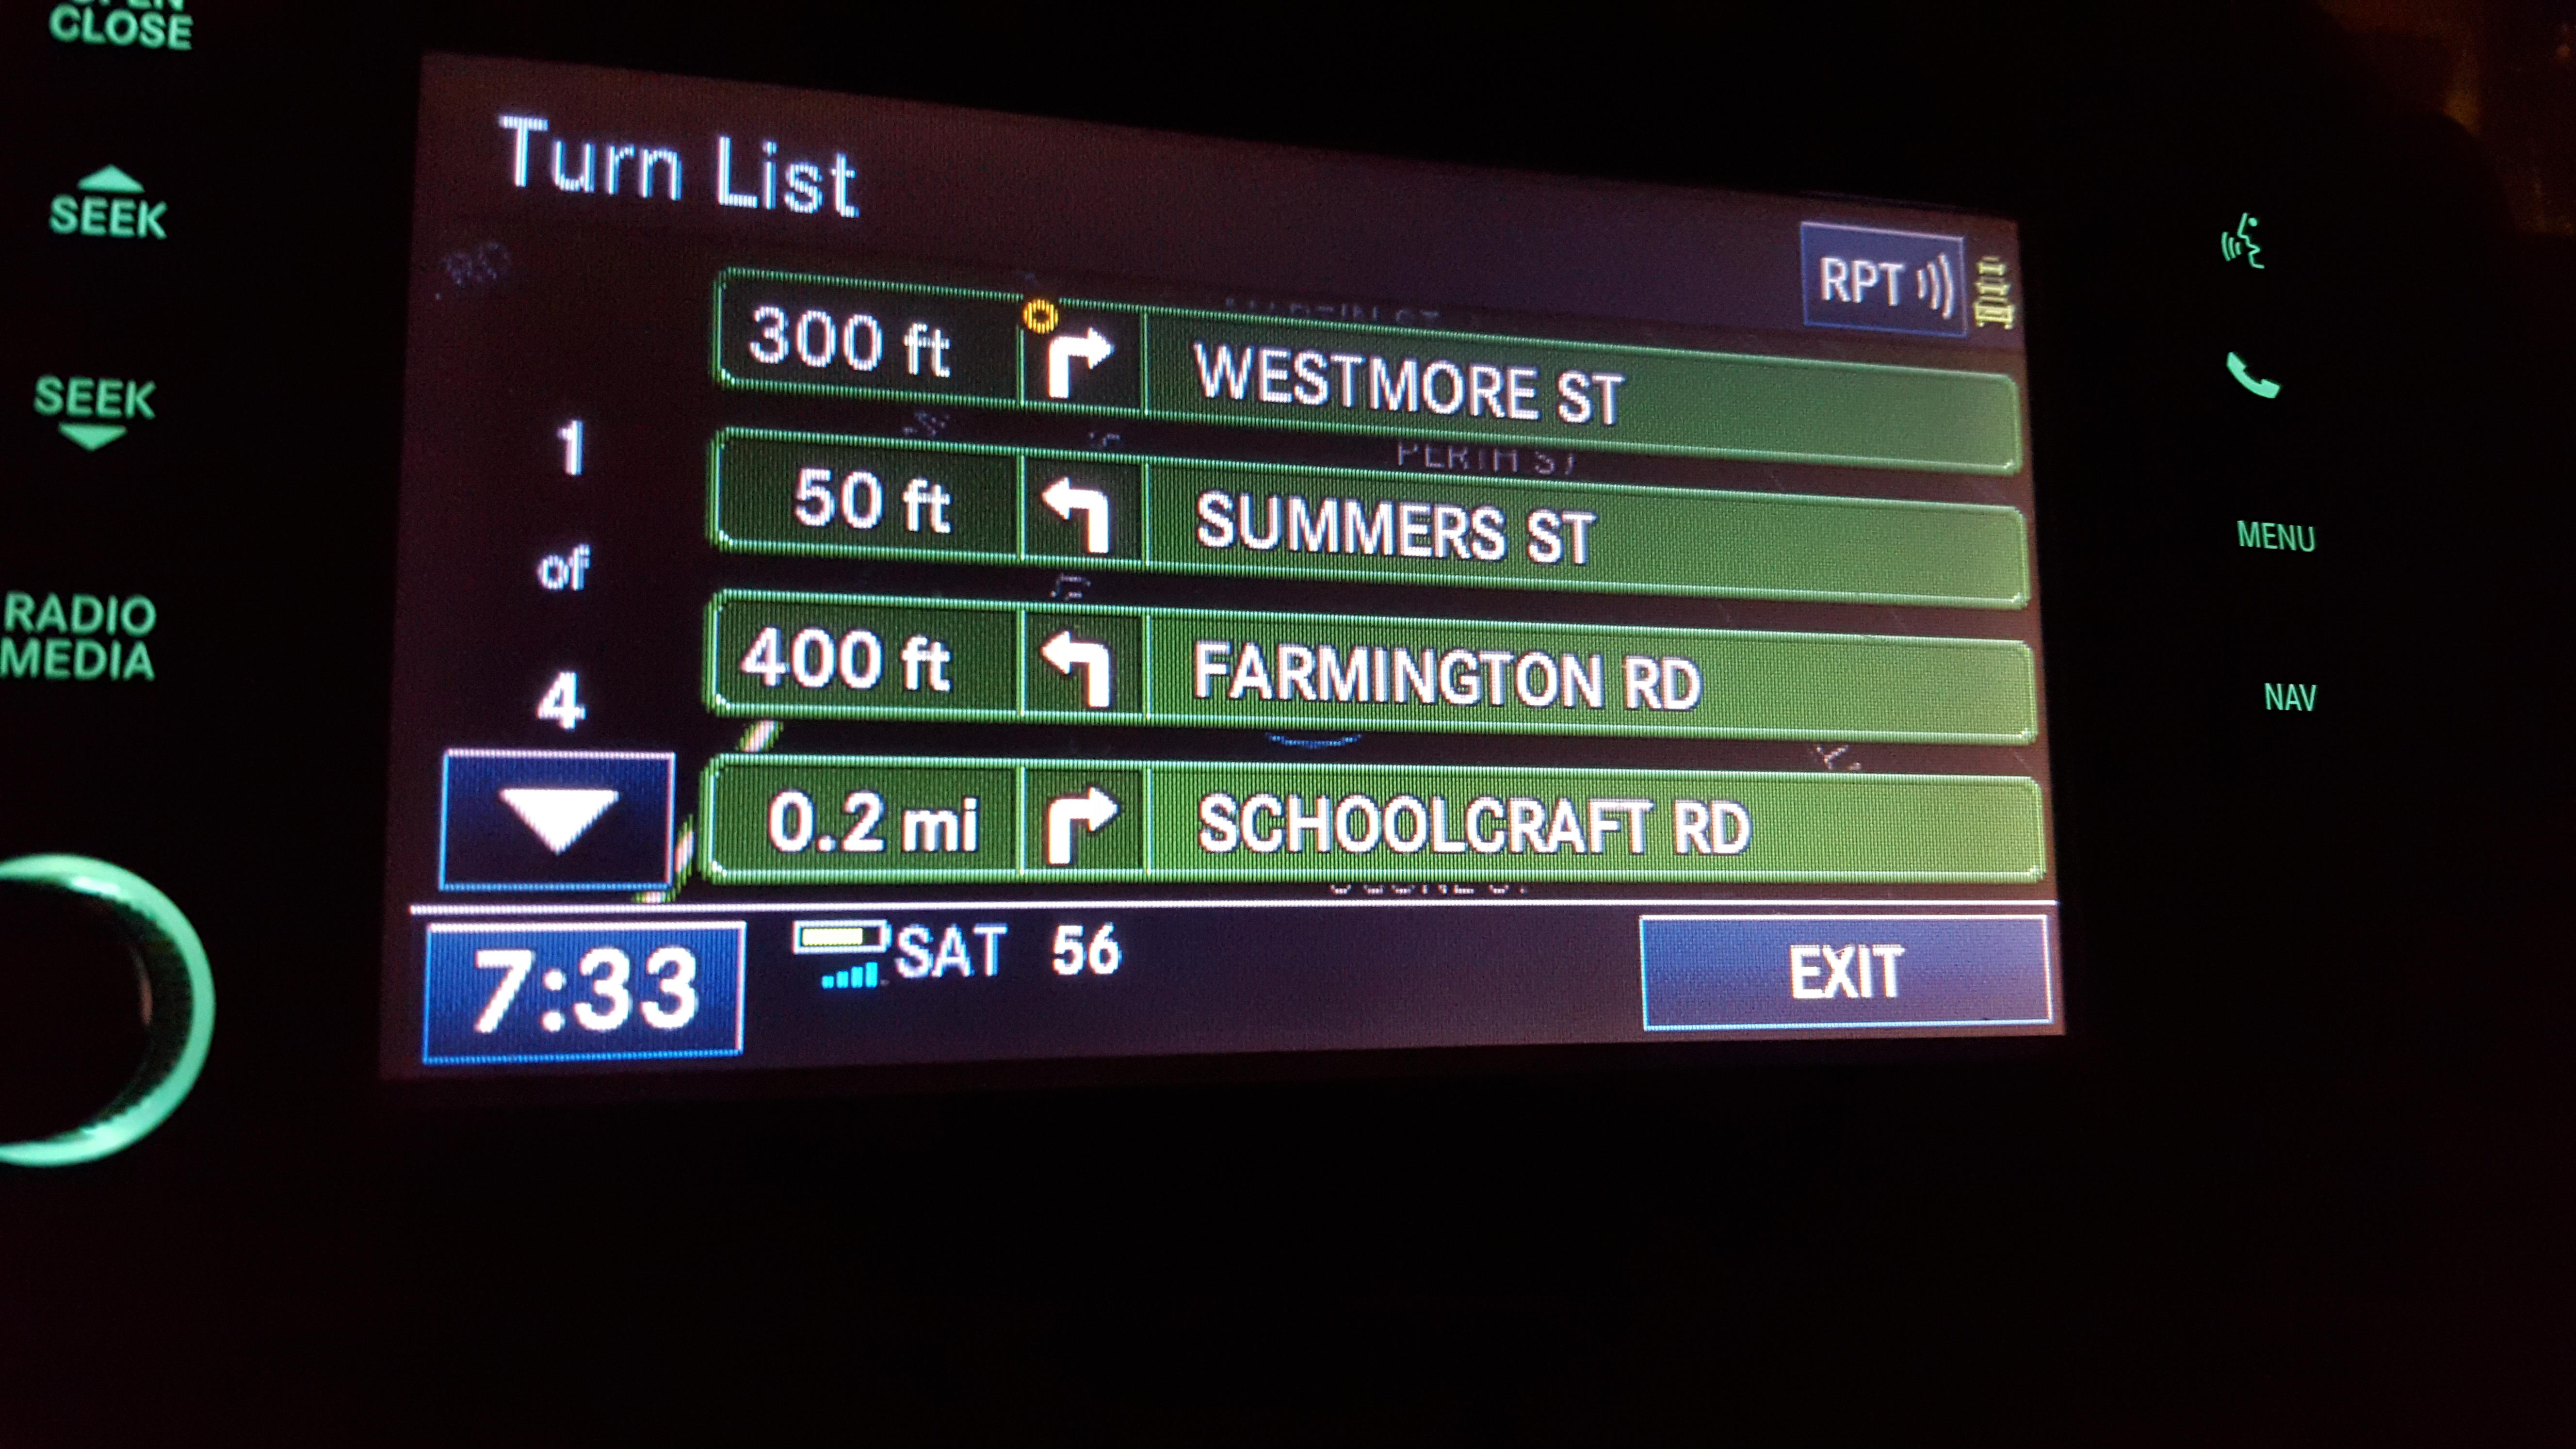
You also have a few options from this screen as well during an active route as well as right before you hit go to start the route. You are able to select the kind of route you want, such as no toll roads, or fastest route, you can see alternate routes that are not as fast, and a few other things. Then, once the route is active, you have the option to add in a detour, find nearby points of interest (POIs), see the destination you input, save the destination, and view the turn list instead of just viewing the map! Some of those functions can be seen in the pictures below:


So that is all the tips and tricks that I can think of with the RHR 730N Chrysler radio installed in a 2011 Jeep Wrangler! Let me know if you have any questions or if there is anything else I did not show that you may be wondering about! Thanks!
You can also access the menus such as checking the version of software/firmware/gracenote/etc. that the radio is currently operating on, as well as managing the hard drive, changing the time zone, voice recognition settings, pairing a bluetooth device, feedback settings, and a few other settings as well! The clock can also be adjusted if you click the clock directly on the screen, it will take you to the same screen as the menu time set does. Here are a few pics starting with the main and then sub screens:
And lastly in all the major functions and to conclude all the tips and tricks I can think of at the moment, I will cover the navigation functions. When you go to the navigation screen, there are a few ways to get there. You can either press the NAV hard key on the right side of the radio, or click on the map on the right side of the touch screen. The NAV key will take you to the navigation menu, and clicking on the map will pull the map up full screen! Your view will look something like this:
There are a few map preference selections tat you can make on the map view screen such as your zoom, what shows up on the screen, always north or always behind, your option to go to the nav menu, and the ability to switch between the 2D and 3Dviews. I personally like the 3D view as you can see a bit further ahead, but to each their own! So the above pic is the 3D view, and below is the 2D map view!
Then, from the navigation menu page, you can access all sorts of different info, such as where am I now (which displays lat. and long. of current location), guide me home (where you can store your home address for quick access to being guided home), you cane find points of interest, you can save favorites, you can create and save whole trips with multiple destinations, you can get emergency info, you can find your recently routed places, and of coarse, destination entry. The destination entry screen is shown below, followed by the where am I now function:
From the destination entry screen, you can see all the different options of how to route you and whatever inputs you would like or you may have to get to your destination! There is even a saved trails button, where your GPS can "drop breadcrumbs" for trails/paths/trips can save them so you can find your way back, as well as saving them for possible future trips! Once a destination is entered, the radio will screen back to the full map view screen with directions now showing and your route highlighted. (Just a couple quick tips and ideas. One, the volume of the voice on the nav can only be adjusted when it is speaking. And two, when the nav is giving a direction, the voice only comes out of the driver side front speaker, so it is focused on only the driver, and no one else. So, say there is music playing, the music will continue to play at the correct volume through all the speakers except the driver front speaker which will switch over to the nav voice to speak, and when it is done, it goes back to whatever it was doing before. I personally like this feature and think it is a pretty neat idea!) Here is what the screen looks like with an active route:
You also have a few options from this screen as well during an active route as well as right before you hit go to start the route. You are able to select the kind of route you want, such as no toll roads, or fastest route, you can see alternate routes that are not as fast, and a few other things. Then, once the route is active, you have the option to add in a detour, find nearby points of interest (POIs), see the destination you input, save the destination, and view the turn list instead of just viewing the map! Some of those functions can be seen in the pictures below:
So that is all the tips and tricks that I can think of with the RHR 730N Chrysler radio installed in a 2011 Jeep Wrangler! Let me know if you have any questions or if there is anything else I did not show that you may be wondering about! Thanks!
10-22-2015, 04:46 AM
#29
JK Enthusiast
Thread Starter
Just another quick tip/trick for those of you with hard tops!
Let's admit it, it is nice to have a hard top too for your Jeep (especially if you live in the northern states where winter does actually happen ), and it's much better having the hard top factory installed from Jeep, and then add a soft top later! Cuz the other way around is a huge pain and hassle and you still may be missing some options that you could have had from the factory! But oneof the pains is, you have to disconnect the power and washer fluid lines from the hard top that are running to the wiper and heater on the rear window if you actually want to run it topless (which it's a Jeep, of coarse you want to run topless!
  ) but then you got these random wires just dangling around, and one with liquid iin it that could end up all over stuff! Now the best option would be to somehow "cap" the washer fluid line to make sure none leaks out (or in case you accidentally hit the switch). This is just a suggestion, however I have not hit it yet with m hard top off, so as long as you are to too forgetful, then you should be good!
No to the loose wire issue, now if it's just a quick run with the top off and you are not really concerned with where the wires go, then the quickest and easiest way to deal with the wires is to just tuck then back towards the front under the side of the tub (where you set the top on screw it in to to fasten it to the Jeep). That's the quickest and easiest, however I have found after a little bit they find their way out of there and are once again loose! Plus, by tucking them horizontally, some of the remaining washer fluid in the end of the line leaked out (I never hit the button, just some remained in the line) as usually the lines are kept vertical but once turned, the remaining fluid leaked out! The second option is a bit more secure and if you will have the hard top off for a while, go ahead and separate the plastic trim around the rear roll bar and then tuck the wires into the panel, as they fit completely inside and are totally secured and out of the way! No more worries on that! Except that you still get the run out of washer fluid from the line unless you cap it as it is sitting horizontal! Plus, that is more wear and tear on plastic trim pieces which are only so strong, and the more you move and flex them, the closer you get to breaking them, so be careful with that too! And lastly, this is the idea that I used! I went ahead and tucked the lines inside the roll bar cover which is easy to access, they are secure, and they are sitting vertical, so no worries on the washer fluid running out! And once the hard top goes back on for winter, they are just a quick pull from the roll bar cover and good to go! Thanks for reading! Here are a few pictures of my set up!


Let's admit it, it is nice to have a hard top too for your Jeep (especially if you live in the northern states where winter does actually happen
), and it's much better having the hard top factory installed from Jeep, and then add a soft top later! Cuz the other way around is a huge pain and hassle and you still may be missing some options that you could have had from the factory! But oneof the pains is, you have to disconnect the power and washer fluid lines from the hard top that are running to the wiper and heater on the rear window if you actually want to run it topless (which it's a Jeep, of coarse you want to run topless! ) but then you got these random wires just dangling around, and one with liquid iin it that could end up all over stuff! Now the best option would be to somehow "cap" the washer fluid line to make sure none leaks out (or in case you accidentally hit the switch). This is just a suggestion, however I have not hit it yet with m hard top off, so as long as you are to too forgetful, then you should be good!No to the loose wire issue, now if it's just a quick run with the top off and you are not really concerned with where the wires go, then the quickest and easiest way to deal with the wires is to just tuck then back towards the front under the side of the tub (where you set the top on screw it in to to fasten it to the Jeep). That's the quickest and easiest, however I have found after a little bit they find their way out of there and are once again loose! Plus, by tucking them horizontally, some of the remaining washer fluid in the end of the line leaked out (I never hit the button, just some remained in the line) as usually the lines are kept vertical but once turned, the remaining fluid leaked out! The second option is a bit more secure and if you will have the hard top off for a while, go ahead and separate the plastic trim around the rear roll bar and then tuck the wires into the panel, as they fit completely inside and are totally secured and out of the way! No more worries on that! Except that you still get the run out of washer fluid from the line unless you cap it as it is sitting horizontal! Plus, that is more wear and tear on plastic trim pieces which are only so strong, and the more you move and flex them, the closer you get to breaking them, so be careful with that too! And lastly, this is the idea that I used! I went ahead and tucked the lines inside the roll bar cover which is easy to access, they are secure, and they are sitting vertical, so no worries on the washer fluid running out! And once the hard top goes back on for winter, they are just a quick pull from the roll bar cover and good to go! Thanks for reading! Here are a few pictures of my set up!
10-22-2015, 04:55 AM
#30
JK Enthusiast
Thread Starter
Stay tuned! There will be a write up on installation, as well as a review, of the Bestop Trektop NX which I installed earlier this summer and has been on my Jeep for about 3 months now! I'll cover the install as well as some cool features, tips/tricks to get the most from your top, as how well it has worked!
Also, I am looking into some new modifications, such as swapping my rearview mirror for one with the homelink buttons (as I like the more OEM feel and the ease of swapping), a lift kit (looking into swaping stock shocks from 14s/56s to 18s/59s and swapping the stock shocks from one that came out of a brand new Rubi and then a 2" AEV Spacer lift), Upgrading most of the bulbs to LEDs from SuperBrightLEDS.com, TruckLite LED Headlights (probably the heated ones, as I do live in Michigan where we do get winter and I love heading Up North all the time in Winter), and swapping the temp controls for the automatic temp controls! And that is just a short list!
Man...I need more money and more time...
Also, I will continue to post little tips and tricks about the JKs that I have found too! Hope this stuff helps y'all out and is an interesting read! Thanks!