BlackWidowJK One Ton Build

 02-27-2016, 07:03 AM
#22
JK Jedi

To answer the question you asked me you should do the longer coils though I don't know what weights you are working with as well as the end goal. Check your front driveshaft as it will be the limiting factor on your front droop. I think you are going to find with 16" shocks you will not be able to use the full range but should still be able to use them. You will also find out that when you have one wheel stuffed and the other at full droop you are going to have clearance issues with those tires due to the axle rotation throwing the tires into the shock bodies and frame.
Good luck with the build.
Good luck with the build.
05-11-2016, 08:27 PM
#23
JK Newbie
Thread Starter
Join Date: Nov 2010
Location: Chicago, IL
Posts: 22
Likes: 0
Received 0 Likes
on
0 Posts
So, April was a big month. Spent almost every hour of everyday prepping the Jeep for Jeep Beach. Which, didnt end up happening because my truck broke down the day before we were supposed to leave...
ANYWHOM...
For the first time in a long while, I got to drive the Jeep. PROGRESS!
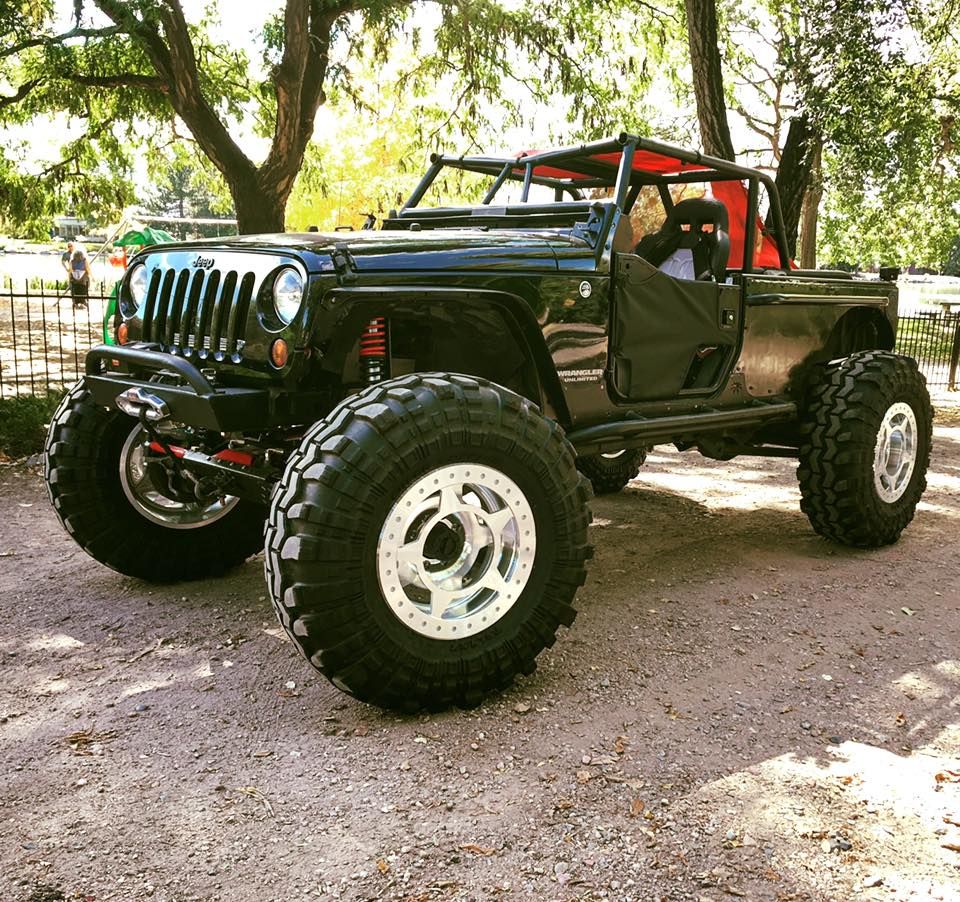
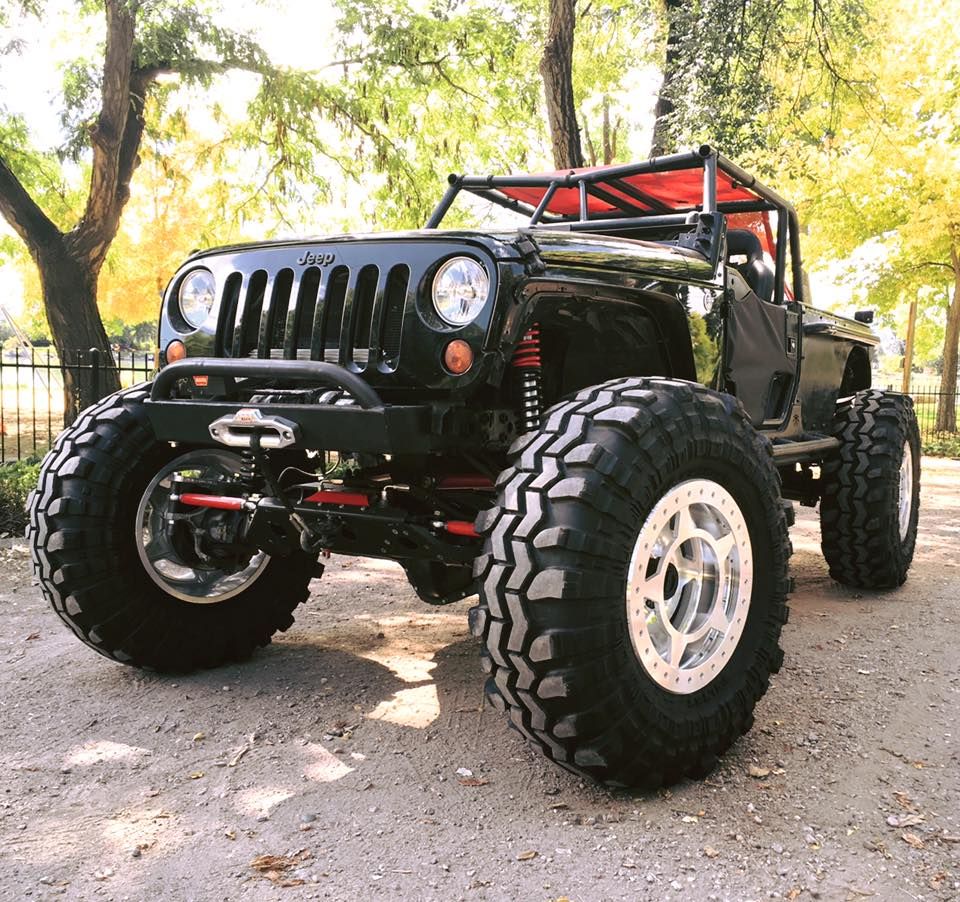
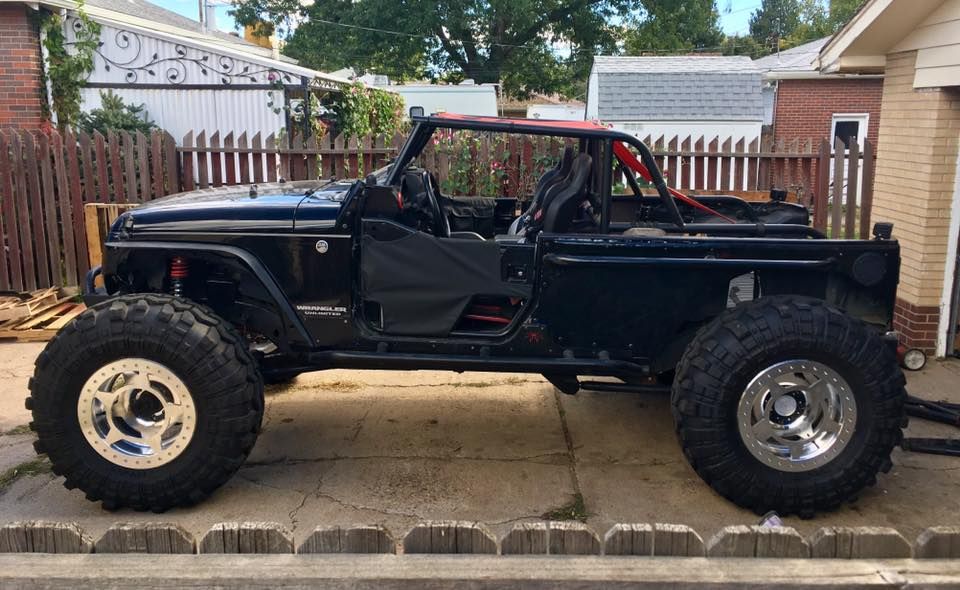
Got some shots of how she sits at this point.
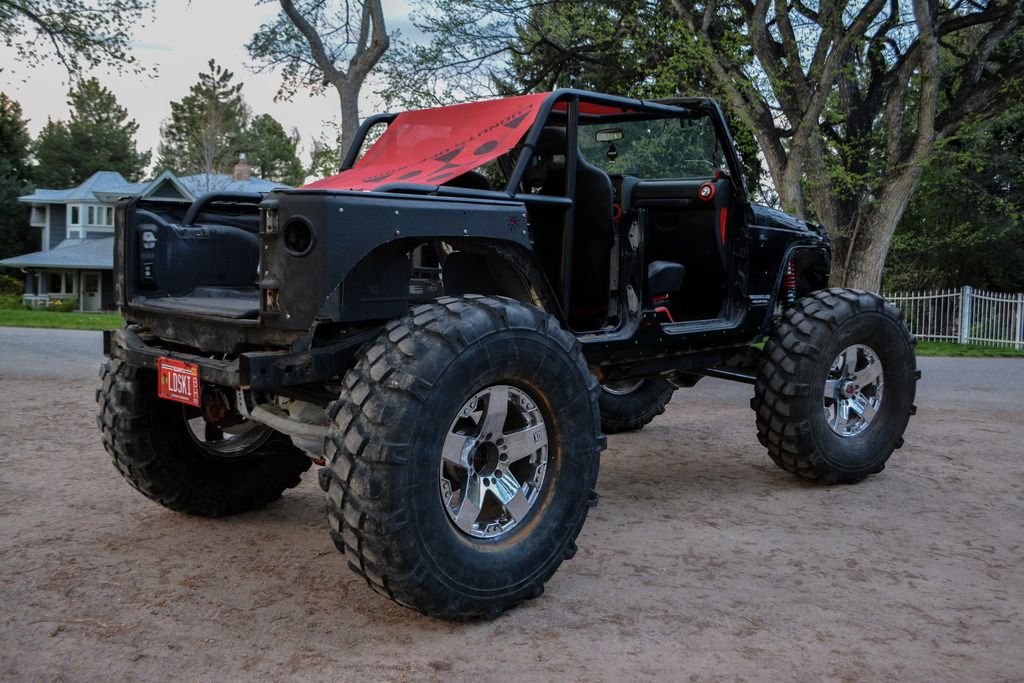
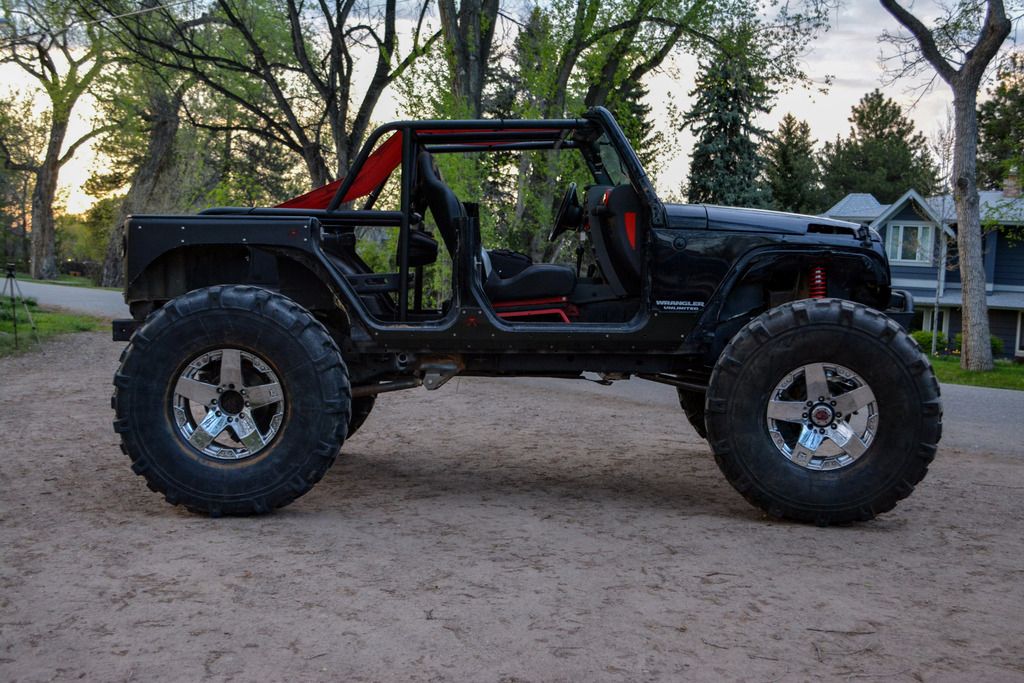
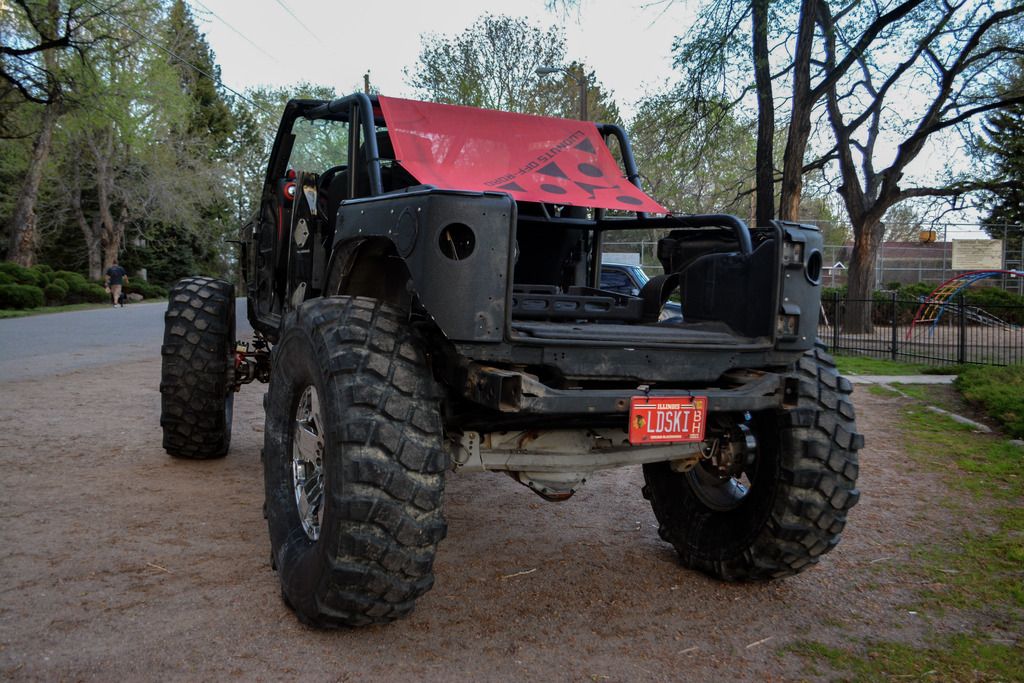
Now, some info about these chrome delights....
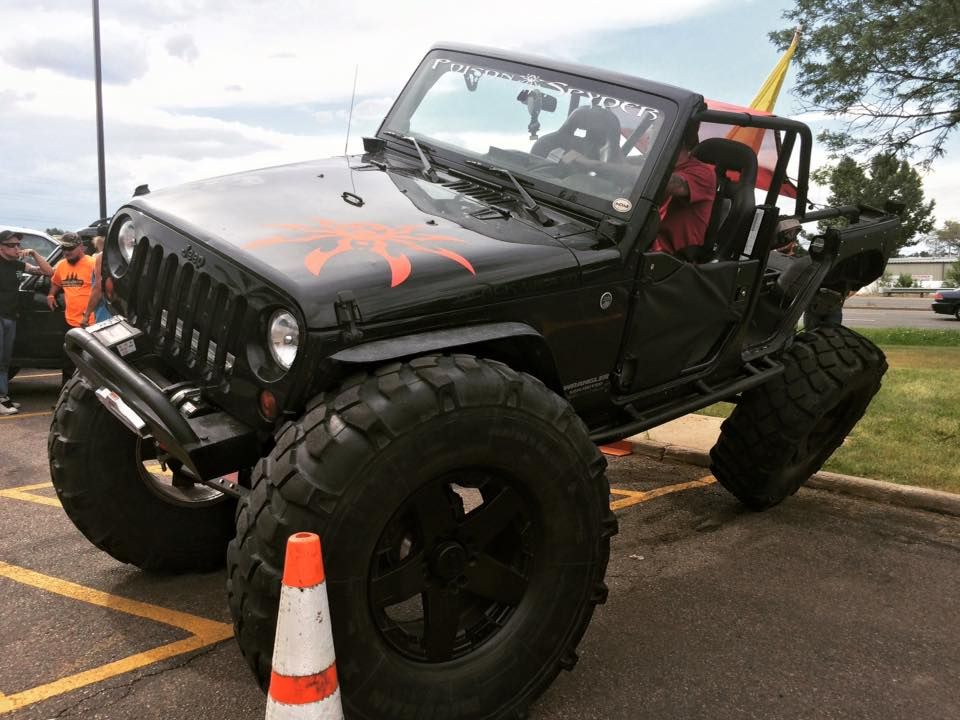
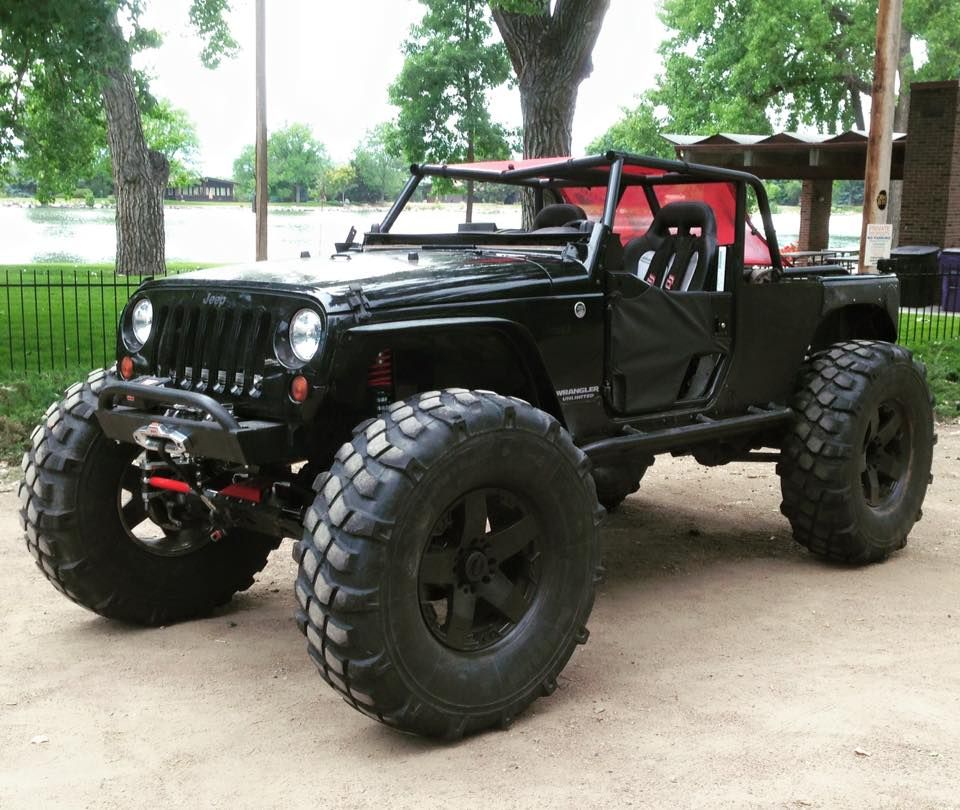
My previous beadlocks were a DIY that i bought attached to the tires, well, when i was airing them up, the weld snapped in half and blew up. Ended up getting a concussion for a week. The welds werent bad, it happened because the bead of the tire is about 1.5" thick and it caused the beadlock to cone and well, just ripped the weld. So these were for sale locally, and i needed something for Jeep Beach. I am painting them black and they are in NO way permanent. 20" beadlocks arent cheap...
Second, I swapped out my brawler rockers for body armor for the time being. These ones ARE in fact green, so i am going to paint them gloss black and probably weld on some rock rails/steps, since the itty bitty GF is having trouble jumping in.
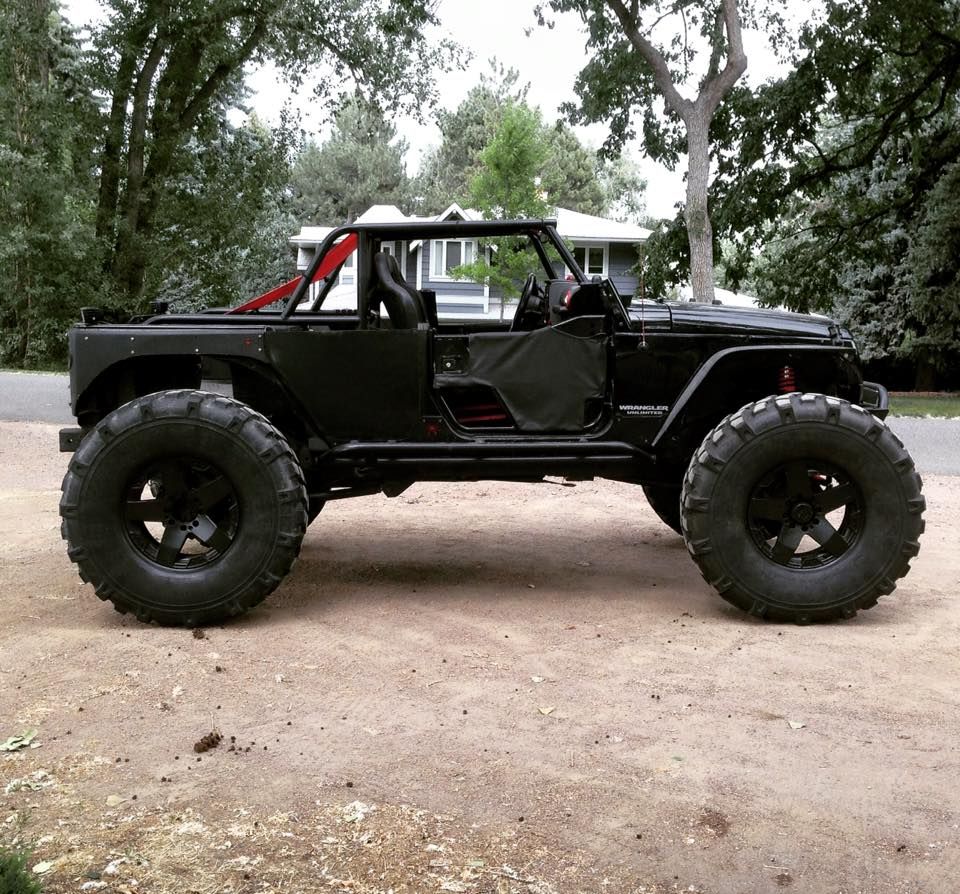
As for the rollcage, I wanted something that is similar to the JK8, but Im not paying $30k for parts. SOOOOO, im deleting the back door opening and made this cage. The cage is not done, as i still have have more bracing to do. It was just "enough" for Jeep Beach. The rollcage also sits 2" lower than stock, i did this so that 1. more weight lower, since this Jeep is already so tall. 2. i dont plan to keep the windshield on all the time, so it'll be better to have it sit lower. (more than enough headroom). i have to add an A pillar and windshield spreader bars as well as many more body to frame mounts.
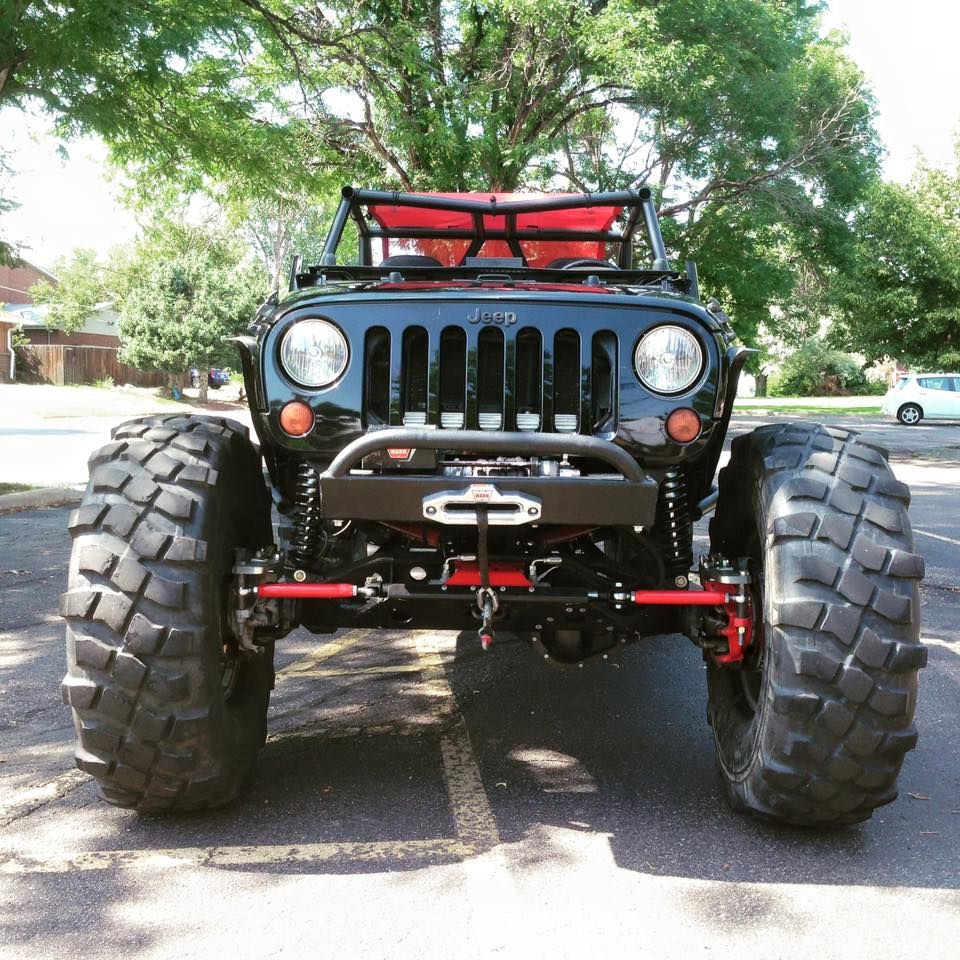
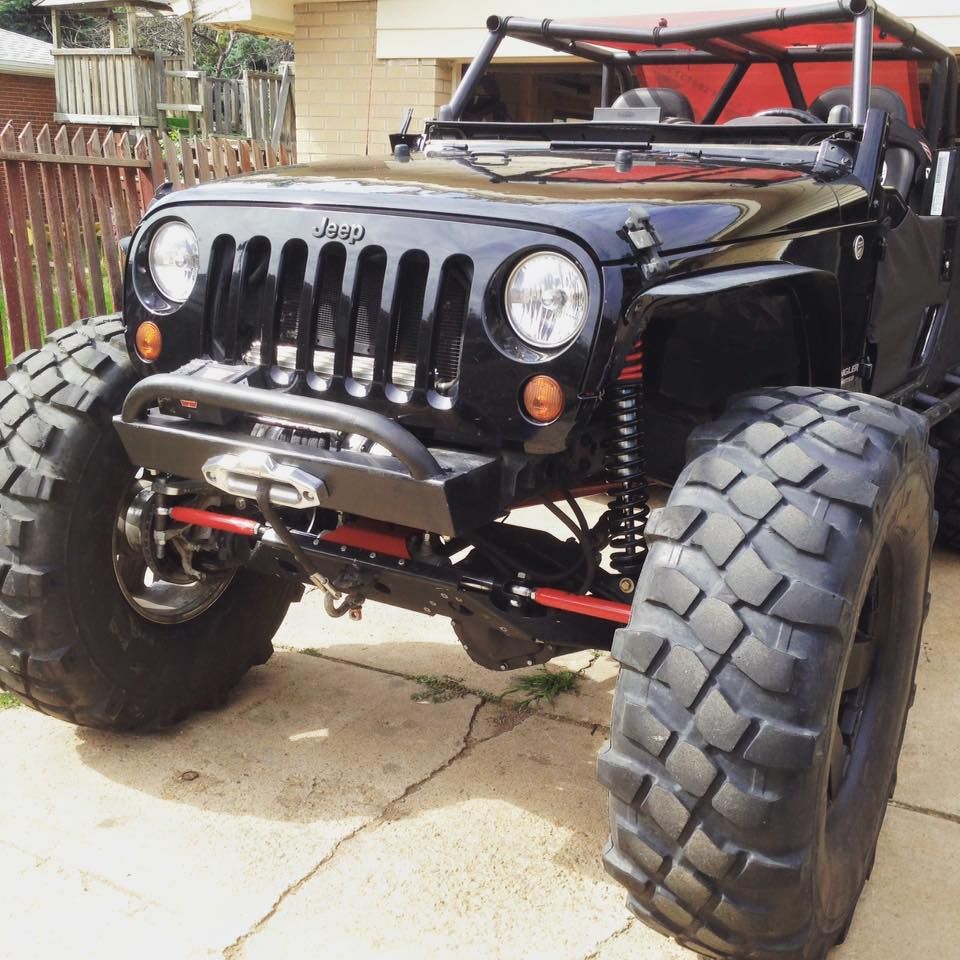
I also went ahead and made my own front bumper. I used to have the PSC BFH bumper, and i loved it, but i didnt want the winch sitting on top of the bumper and blocking air through the grill. SO, i went ahead and made something that has my winch sit low and out of the way. My tires also stick past the bumper by an inch, so, WOO to that. It's made from 1/4" base and 3/16" everything else. Still have to add 1 more bolt on each side that will line up to the PSC bolt holes. I also went and added 2" tubing with 1/8" wall to add that extra "something" and to also cover that bit of winch you can still see.
Also got the steering welded up, and boy, 2.5" full hydro is AMAZING. i can turn the 46" tires at 0 psi with MY PINKY FINGER! Because full hydro doesnt recenter anymore, i am going to do an aftermarket steering wheel. Yes, i understand the airbag concern.
also, GOT RID OF THE ANGRY EYES, WHAT WHAT.
Video Update:
https://www.youtube.com/watch?v=dnqy9YtwNX0
ANYWHOM...
For the first time in a long while, I got to drive the Jeep. PROGRESS!
Got some shots of how she sits at this point.
Now, some info about these chrome delights....
My previous beadlocks were a DIY that i bought attached to the tires, well, when i was airing them up, the weld snapped in half and blew up. Ended up getting a concussion for a week. The welds werent bad, it happened because the bead of the tire is about 1.5" thick and it caused the beadlock to cone and well, just ripped the weld. So these were for sale locally, and i needed something for Jeep Beach. I am painting them black and they are in NO way permanent. 20" beadlocks arent cheap...
Second, I swapped out my brawler rockers for body armor for the time being. These ones ARE in fact green, so i am going to paint them gloss black and probably weld on some rock rails/steps, since the itty bitty GF is having trouble jumping in.
As for the rollcage, I wanted something that is similar to the JK8, but Im not paying $30k for parts. SOOOOO, im deleting the back door opening and made this cage. The cage is not done, as i still have have more bracing to do. It was just "enough" for Jeep Beach. The rollcage also sits 2" lower than stock, i did this so that 1. more weight lower, since this Jeep is already so tall. 2. i dont plan to keep the windshield on all the time, so it'll be better to have it sit lower. (more than enough headroom). i have to add an A pillar and windshield spreader bars as well as many more body to frame mounts.
I also went ahead and made my own front bumper. I used to have the PSC BFH bumper, and i loved it, but i didnt want the winch sitting on top of the bumper and blocking air through the grill. SO, i went ahead and made something that has my winch sit low and out of the way. My tires also stick past the bumper by an inch, so, WOO to that. It's made from 1/4" base and 3/16" everything else. Still have to add 1 more bolt on each side that will line up to the PSC bolt holes. I also went and added 2" tubing with 1/8" wall to add that extra "something" and to also cover that bit of winch you can still see.
Also got the steering welded up, and boy, 2.5" full hydro is AMAZING. i can turn the 46" tires at 0 psi with MY PINKY FINGER! Because full hydro doesnt recenter anymore, i am going to do an aftermarket steering wheel. Yes, i understand the airbag concern.
also, GOT RID OF THE ANGRY EYES, WHAT WHAT.
Video Update:
https://www.youtube.com/watch?v=dnqy9YtwNX0
 06-13-2016, 10:56 AM
#25
JK Newbie
Thread Starter
Join Date: Nov 2010
Location: Chicago, IL
Posts: 22
Likes: 0
Received 0 Likes
on
0 Posts
Some updates.
Axles and suspension painted. Bought a set of Bestop Tube doors. Plastidipped the wheels black.
Fabbed up some temporary shock mounts in the rear. I dont intend to stick with coil/shock set up and will be going to coilovers (hence the cut holes in the body in the rear).
Also bought a set of PSC body armor pieces last month, and fabbed them into a set of rockers. I will be boat siding the new rocker add ons to the bottom of the frame so they had my new cage mounts and body mounts.

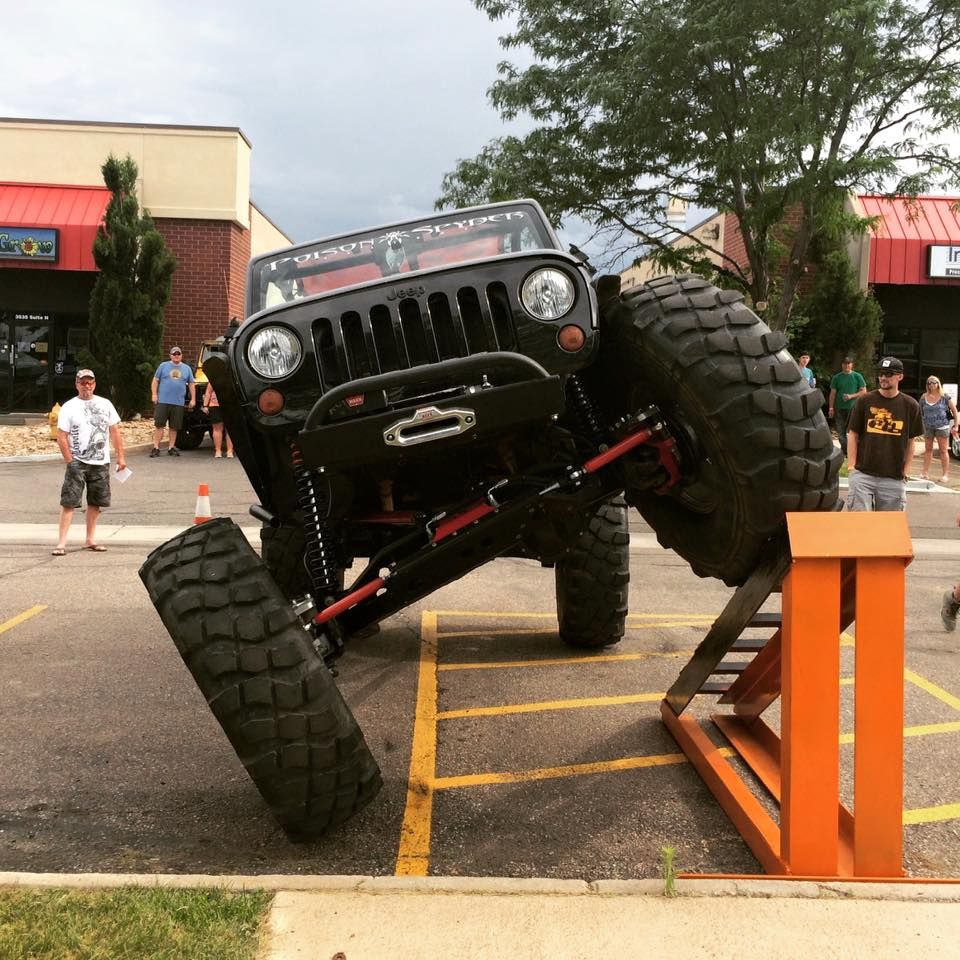
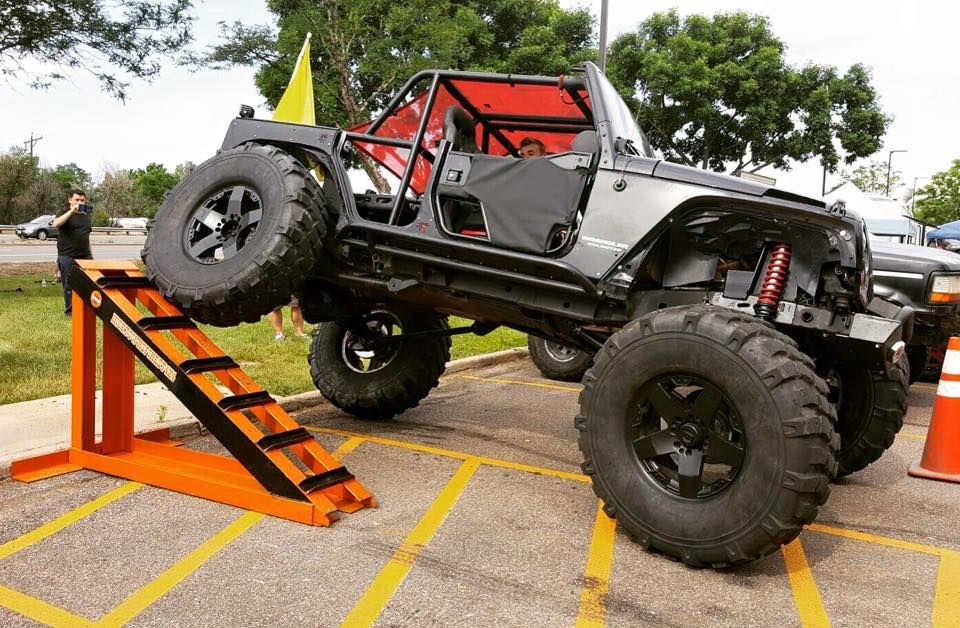
Also finally got to do some flex testing. Maxed out the ramp at 46" and still had more travel to go. Front coilovers have about 2" of uptravel left, but my driveshaft is hitting my upper control arm at that point. But since i am lowering the Jeep 2-3", it will even out well i think. Rear has no bump stops, it is just using the stock shocks i through on there so it wouldnt bounce so much while riding. they are limiting the rear in up travel, as the tire could sit 1.5" higher. but there are no other clearance issues for the rear. This all allowed me to find areas in the suspension that need tweaking.
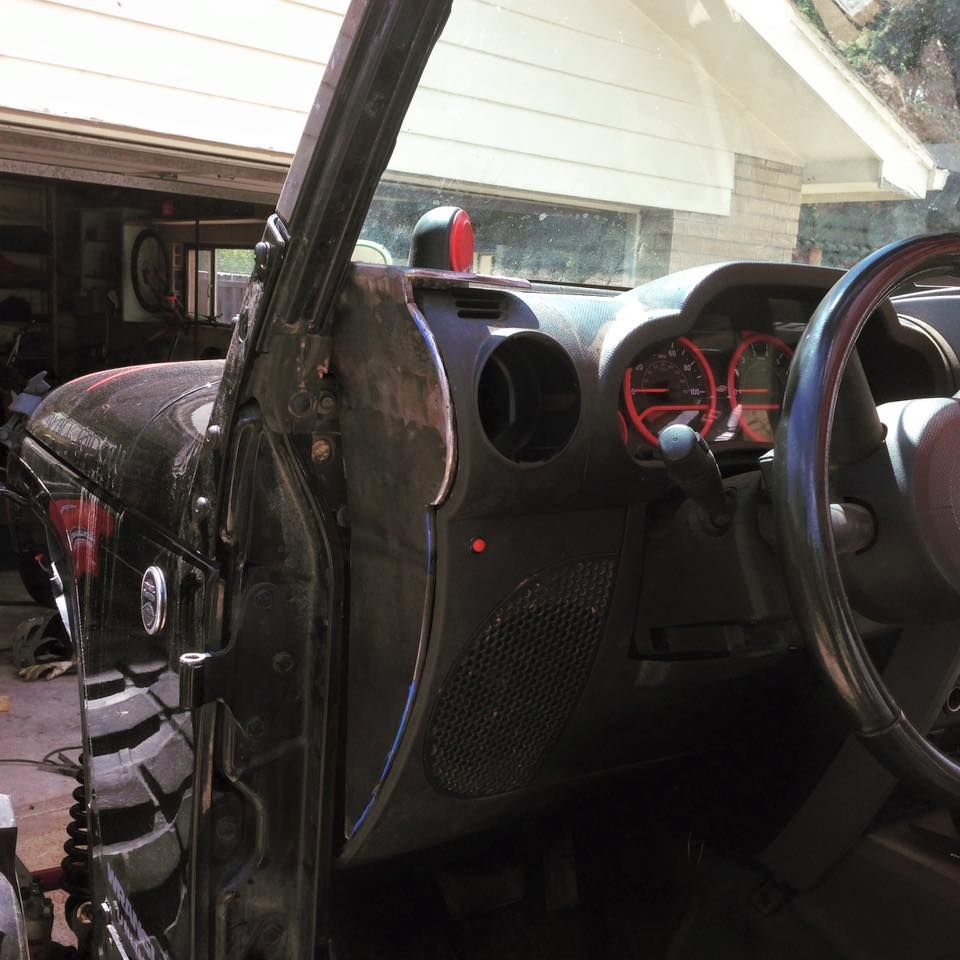
Ive also been working some ideas for the rollcage A-pillar. I wanted something clean and hidden, so i started to create this piece to replace the dash side cover, it would mount to the door seams, as well as to the floor and then to the frame. I would then have the A pillar tubing from the upper base plate to the cage top. and then a windshield spreader bar. It just takes quite a while to cut the 1/4" and shape it to fit nicely.
then theres the idea of instead of having the top piece horizontal, keep it vertical and have the spreader bar weld in there. and then the A pillar tube would notch to the spreader bar at the ends.
Axles and suspension painted. Bought a set of Bestop Tube doors. Plastidipped the wheels black.
Fabbed up some temporary shock mounts in the rear. I dont intend to stick with coil/shock set up and will be going to coilovers (hence the cut holes in the body in the rear).
Also bought a set of PSC body armor pieces last month, and fabbed them into a set of rockers. I will be boat siding the new rocker add ons to the bottom of the frame so they had my new cage mounts and body mounts.
Also finally got to do some flex testing. Maxed out the ramp at 46" and still had more travel to go. Front coilovers have about 2" of uptravel left, but my driveshaft is hitting my upper control arm at that point. But since i am lowering the Jeep 2-3", it will even out well i think. Rear has no bump stops, it is just using the stock shocks i through on there so it wouldnt bounce so much while riding. they are limiting the rear in up travel, as the tire could sit 1.5" higher. but there are no other clearance issues for the rear. This all allowed me to find areas in the suspension that need tweaking.
Ive also been working some ideas for the rollcage A-pillar. I wanted something clean and hidden, so i started to create this piece to replace the dash side cover, it would mount to the door seams, as well as to the floor and then to the frame. I would then have the A pillar tubing from the upper base plate to the cage top. and then a windshield spreader bar. It just takes quite a while to cut the 1/4" and shape it to fit nicely.
then theres the idea of instead of having the top piece horizontal, keep it vertical and have the spreader bar weld in there. and then the A pillar tube would notch to the spreader bar at the ends.
08-09-2016, 09:48 AM
#27
JK Newbie
Thread Starter
Join Date: Nov 2010
Location: Chicago, IL
Posts: 22
Likes: 0
Received 0 Likes
on
0 Posts
Made some progress on the A pillars. Got the tubes and brackets cut and welded. Theyre currently bolted to the pinch seam as well as run down to the floor board, then to the frame. going to add a beefy 1/4" gusset connecting the vertical tube to the horizontal AND vertical part of the body mount for added strength. I still have to cap off the tube ends. I'm going to put a "cone" cap on it, cause they look NEAT! and the windshield will still fit with everything, though i dont plan to use the windshield anymore. (goggles and a face mask work great when driving 60mph).
I will be adding a windshield spreader bar as well as 2 vertical nodes soon.
I was also having some steering issues with the full hydro. My jeep was all over the road and bump steer was terrible. I had taken the pinion angle off of, well, you know, the pinion. bad idea. it was showing 10* at the pinion, but i learned (thanks to D3 OffRoad) that my actual caster was at 0.8*. so yea, that explains the steering issue. It is currently at 7.2* and is much better and now my driveshaft clears the upper control arm better when stuffed.
I also finally sealed off the rear door openings. 16 gauge (or 12, i cant remember) and welded it to the outer body panels. I am going to make a piece of 1/8" steel to "extend" off of the corners all the way to the B pillars to hide any deformities and make it one smooth solid piece.
Currently. I am working on the rear suspension. Swapping out the temporary coil and shock mounts and upgrading to coilovers. I was in debate on 16" (Same as front) or 18" coilovers. but since i plan to run 42s or 43s and have the jeep sit another 3" lower (suspension), a 16" would be the perfect amount. I will also make that rear corner body armor piece once i get a set of 43s to test (or buy) so that i can cut them to fit the tire exactly.
The Jeep is driving great on road and is daily driven. I recently learned that the guys who mounted my tires....dropped something inside the tire. i was rotating it the other day and heard a noise of something fall and move ... neat ...
Here is a video of the most recent walk around.
https://www.youtube.com/watch?v=M4iQ8XrKWCk
10-04-2016, 09:40 AM
#28
JK Newbie
Thread Starter
Join Date: Nov 2010
Location: Chicago, IL
Posts: 22
Likes: 0
Received 0 Likes
on
0 Posts
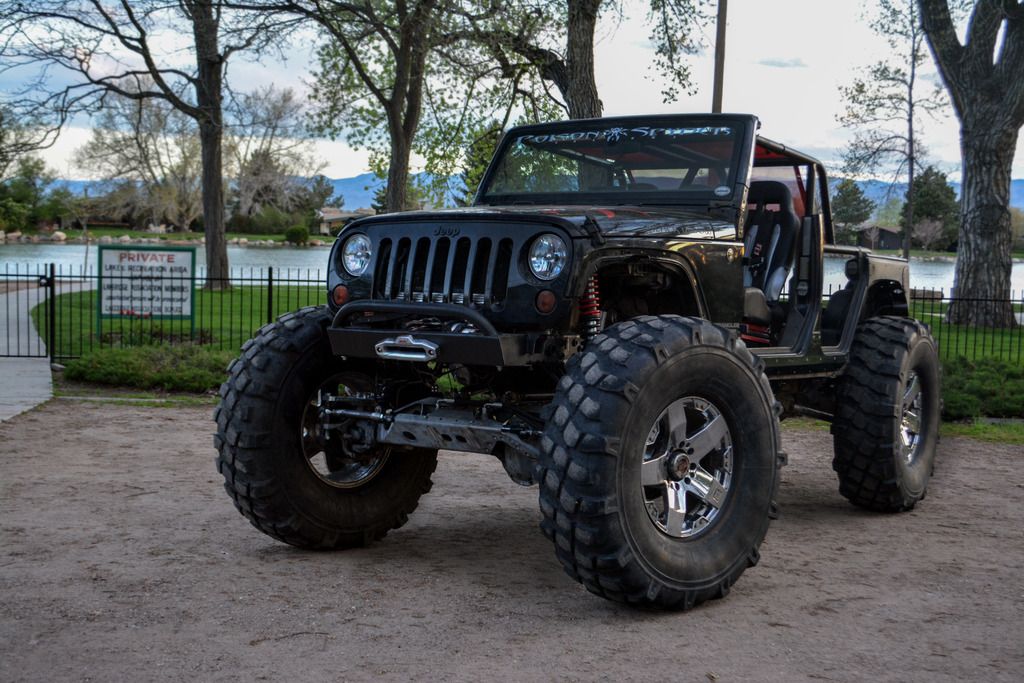
September Video update
https://www.youtube.com/watch?v=xv1kZCalzuk New 43" Interco Swampers and 20" Spyderlock Beadlocks. Extended the rear corner armor to the factory B pillar and added a rub rail. Will be lowering the rear 4" and the front 1". This will give me 5" of usable up travel in the front and 6" in the rear. Which gives me 11" of down travel up front and rear ___. (no shocks or coilovers in the rear at the moment). I removed the rear shocks from their previous location because it didnt work with the height I'm wanting. I can achieve more up travel in the front if i remove the factory "cross member" under the radiator and put my own in it's place, but i will see if thats necessary once i get the height dialed in. The rear will also have a couple hundred more lbs of weight, so that will affect height. (spare tire, tools, driver and passenger, shenanigans)
Still have a ways to go for everything until it is trail ready. progress is progress.
Last edited by ludski; 10-04-2016 at 09:42 AM.