Preparing and Painting a TOTL Innovations Fiberglass Hood
 11-08-2014, 08:25 PM
#1
JK Enthusiast
Thread Starter
Join Date: Aug 2007
Location: Ft. Irwin, CA (But Willamsburg VA is home)
Posts: 378
Likes: 0
Received 1 Like
on
1 Post
I am in the process of installing a TOTL Innovations heat reduction hood on my 2007 Rubicon. I chose the TOTL hood because it has a reputation as the best heat reduction hood currently on the market. This is important, as my JK has a V8 conversion and the heat generated from the new power plant has been enough to cause TIPM issues. So........ got a new hood.
The hood itself is made of fiberglass and costs a decent amount of $$. That said, I decided to save some cash by attempting to finish and paint the hood myself. I've built and painted plastic models before and sprayed Raptor Liner on the hardtop and interior, but I've never prepped and painted a full-fledged body panel in factory paint...... till now. So, I decided to document the process and show that automotive painting at home is not a stupid idea, but rather an economical solution for those wishing to explore new boundaries in the automotive world.
BTW, Allan from TOTL is top-notch regarding customer service and provided awesome support and updates when I purchased this hood.
Here's a history concerning what has been done so far. As I type this, the clearcoat on the new hood is curing in the garage.
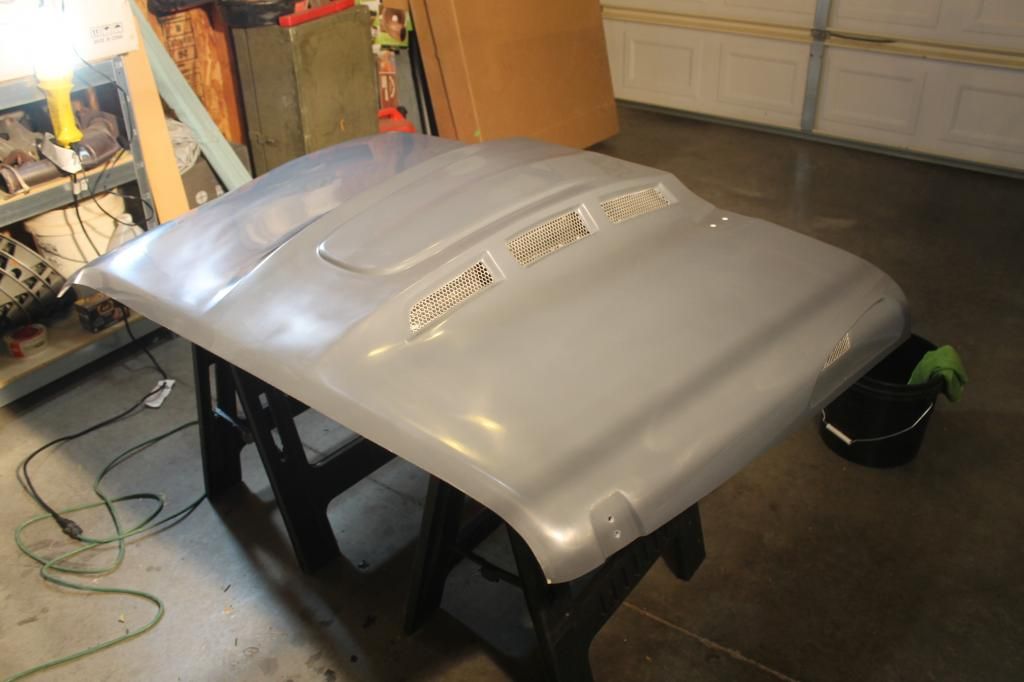
TOTL Innovations heat reduction hood. It arrived less than a week after ordering. Weight: 25lbs. Delivered by semi. It looked pretty nice out of the box.
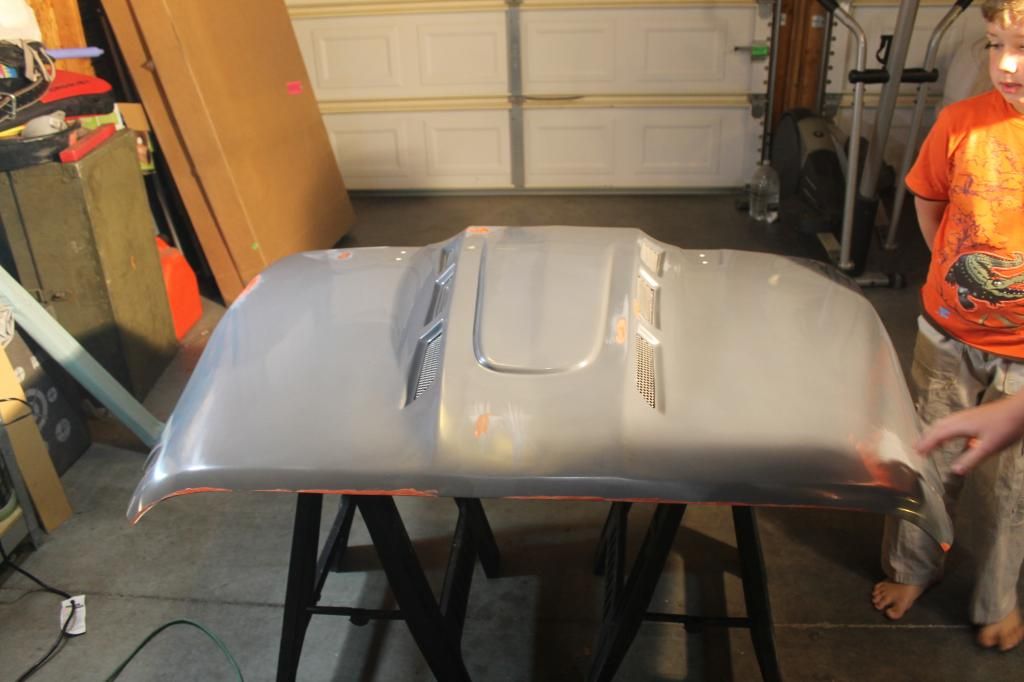
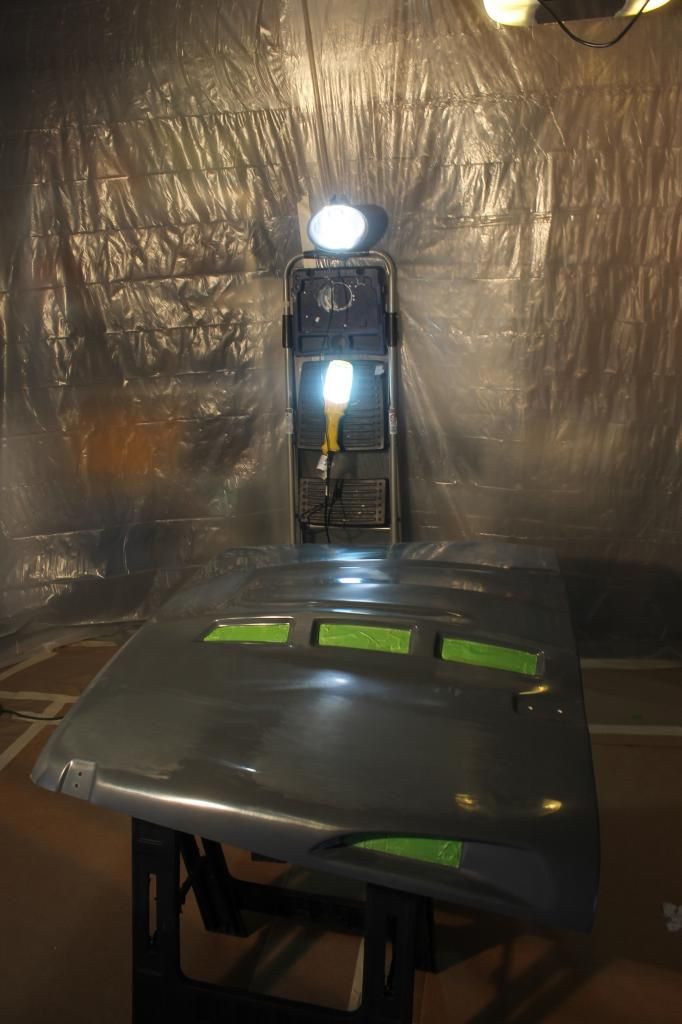
After placing the hood on two plastic sawhorses and giving it a close inspection, there were several areas that needed attention. Nothing major. A couple chips, some scratches, areas where the gelcoat was rough, etc. I began by filling imperfections with Bondo red finishing glaze. After application, I sanded the Bondo smooth with 400 grit paper. I followed this with a wet-sand of 1500 and finally 2000 grit paper. The total process took about 4-hours over the course of three evenings.
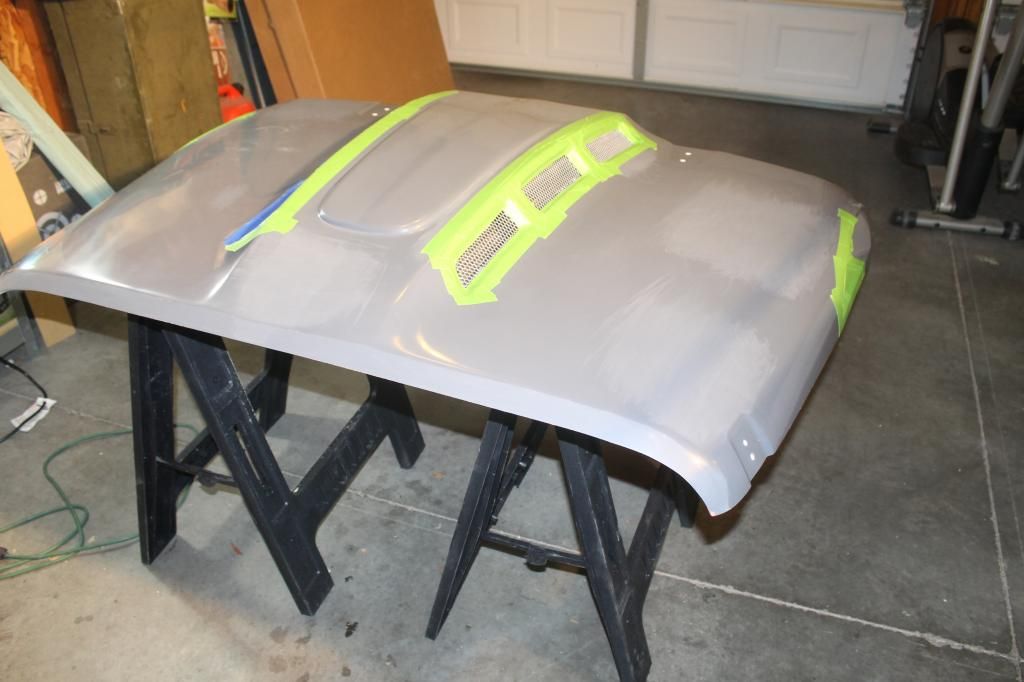
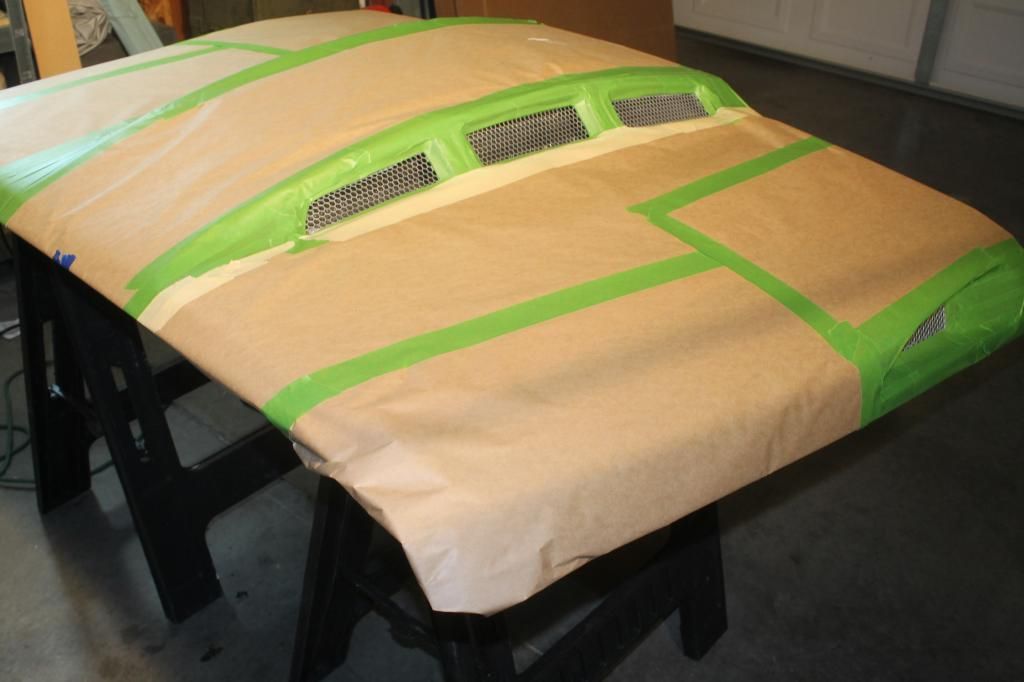
The functional vents are covered by a bare-steel chicken wire patterned mesh. My Jeep theme is Rescue Green and Black, so silver vents would look "odd". I masked the hood and shot the vents first with Rustoleum self-etching primer and then 3 coats of BBQ-safe high heat black paint.

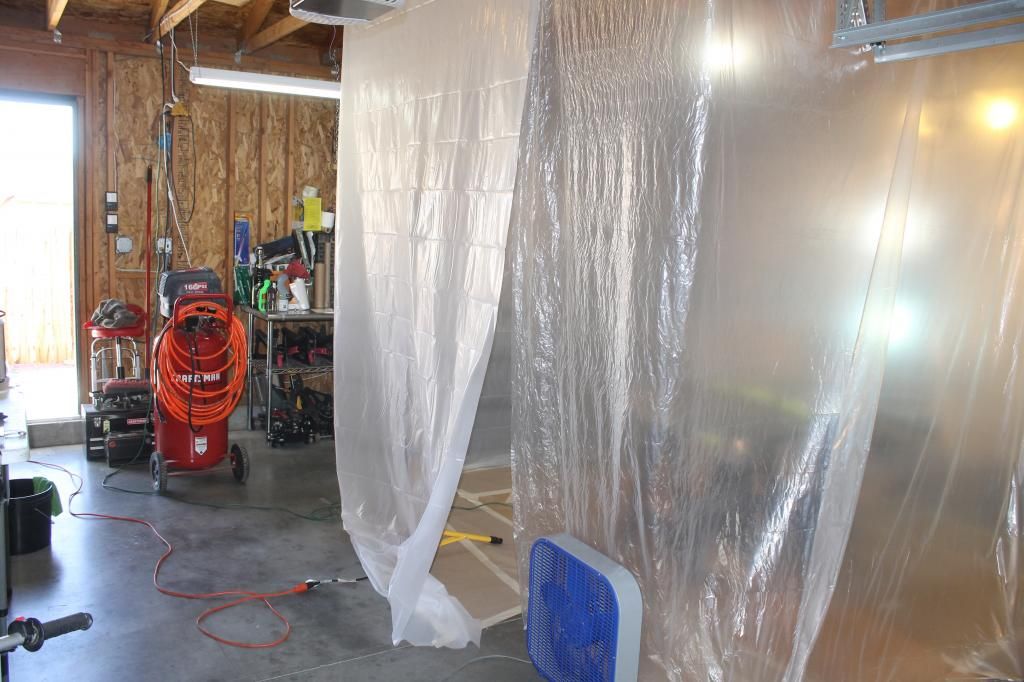
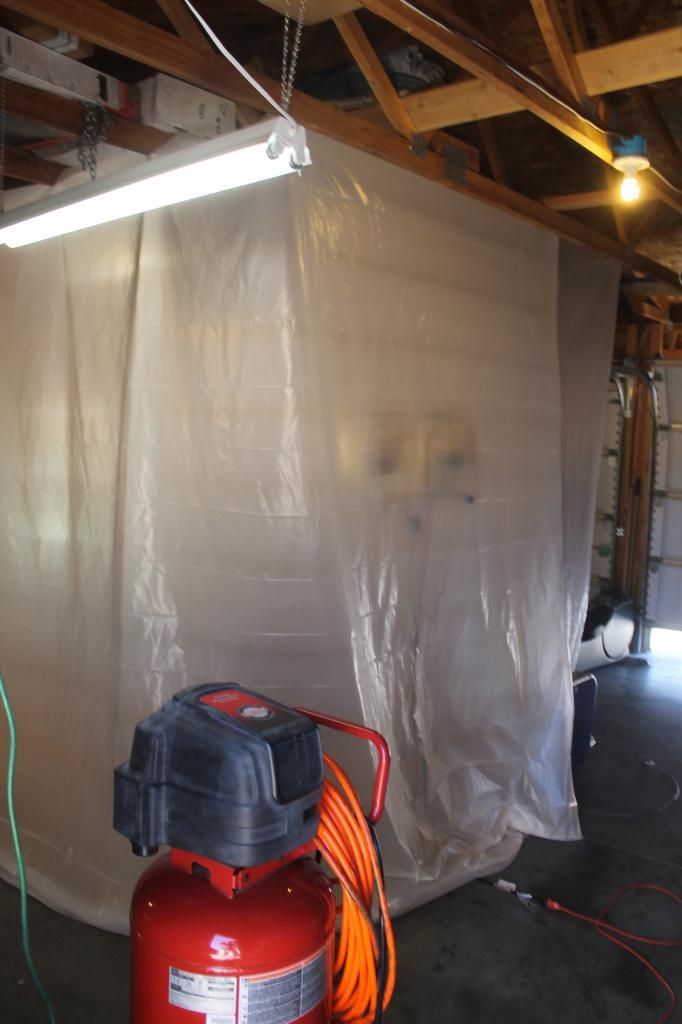
Once the bodywork was complete, I proceeded to create a paint booth in my garage. I created my "booth" using 1mm and 4mm 10x25' plastic sheeting stapled to the ceiling of my garage. The floor was created with cardboard and some masking paper.
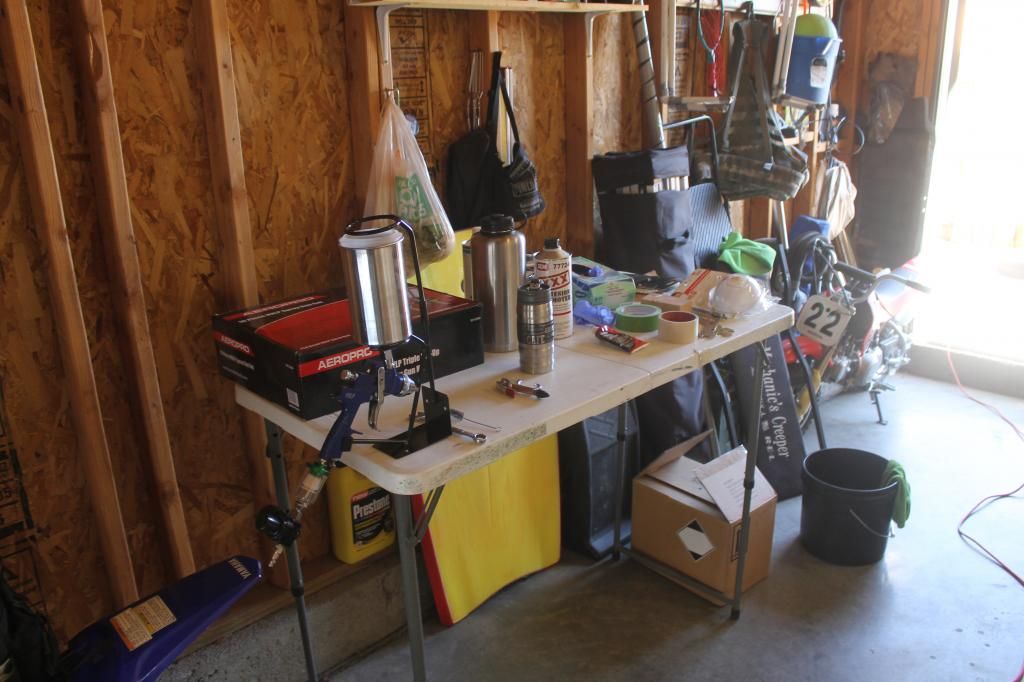
I set up a "work station" in the garage outside the paint booth to place the materials needed to paint the hood.

Here's the gun I used. I purchased the gun, paint, and supplies from the same guys that sell the Raptor Liner kits on EBay.
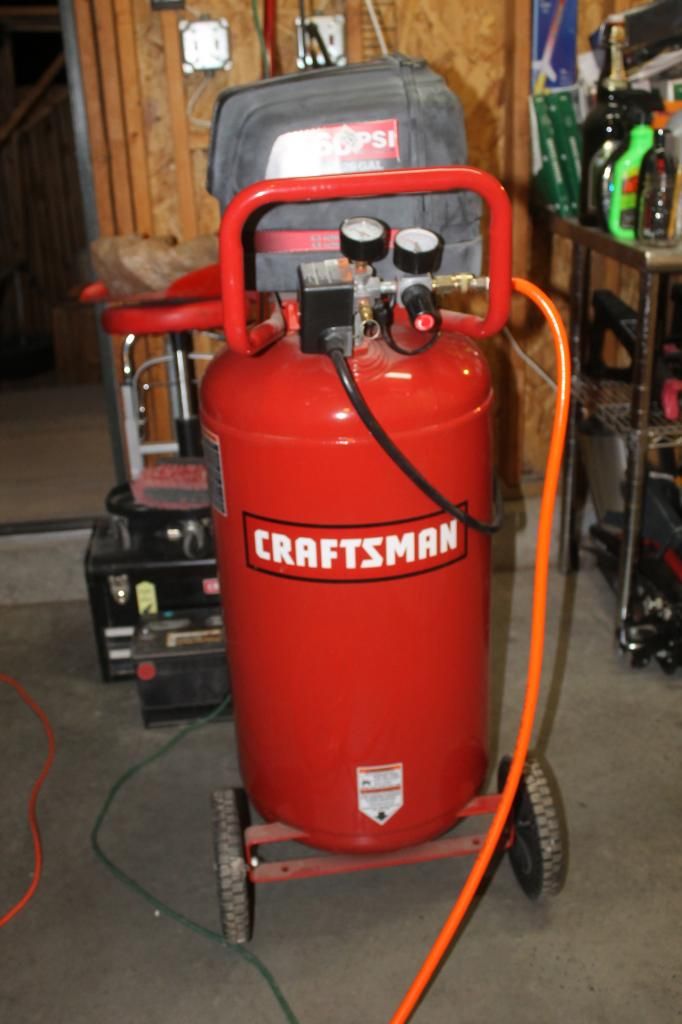
Here's the compressor I used. It's a 33Gal Craftsman. I wouldn't recommend going too much smaller than this, as it is air volume, not air pressure, that is the critical component in proper paint delivery.
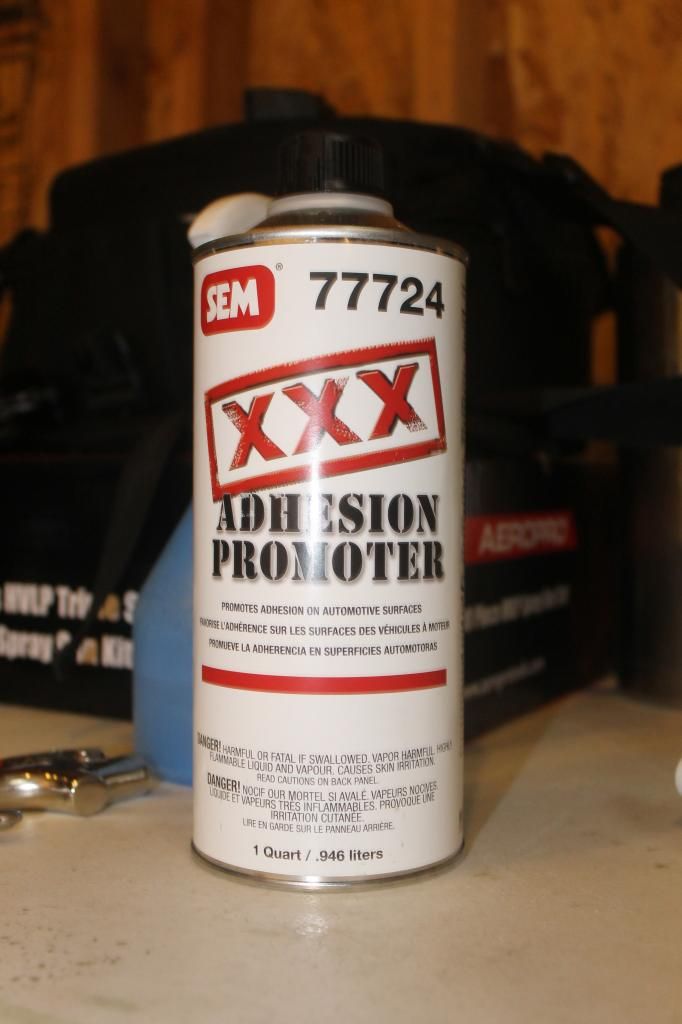
The first stage of the paint was to apply an adhesion promoter. This is the equivalent of primer, but is designed for fiberglass gelcoats. It softens the gelcoat surface and provides a better medium for the color coat (basecoat) to stick to. The first coat is "misted" with the compressor air pressure set to 34PSI. After 5-minutes a thicker "wet-coat" was applied. This was allowed to set for 15 minutes before applying the first coat of color.
Prior to applying the adhesion promoter, I washed the hood with dish detergent to remove grease and wiped the surface with a tack rag. In addition, I used a spray bottle filled with water and misted bot the plastic sheeting and floor of my "spray-booth" to minimize dust contamination. This was especially important, as I live in the Mohave Desert.
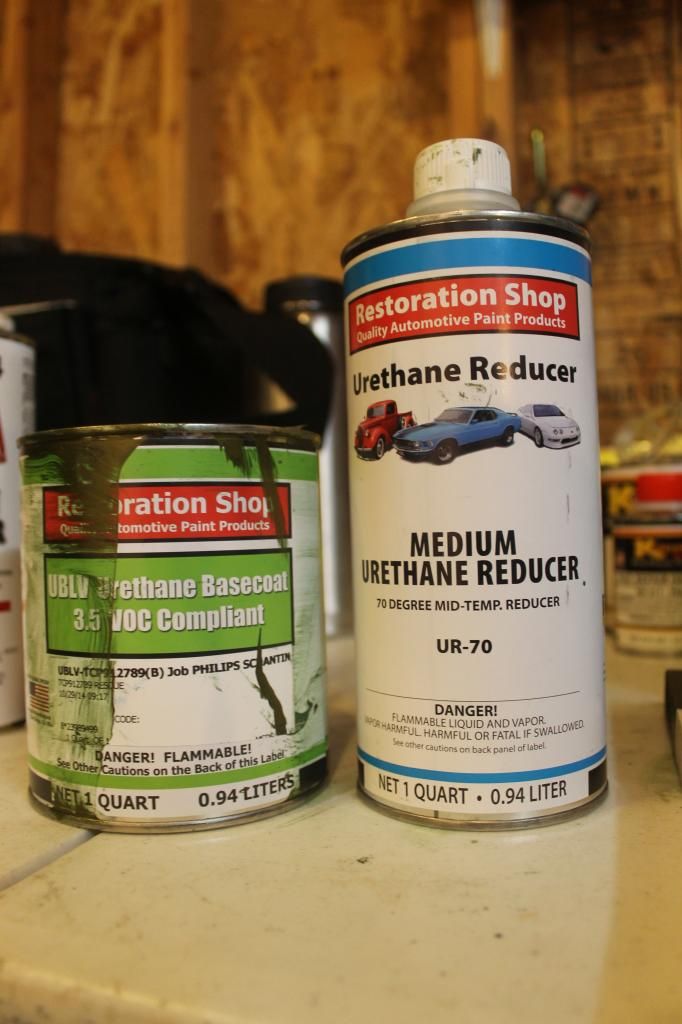
The color coat is a two-part Urethane. It is mixed in a 2:1 ratio of paint to reducer. I applied a total of 4 coats.
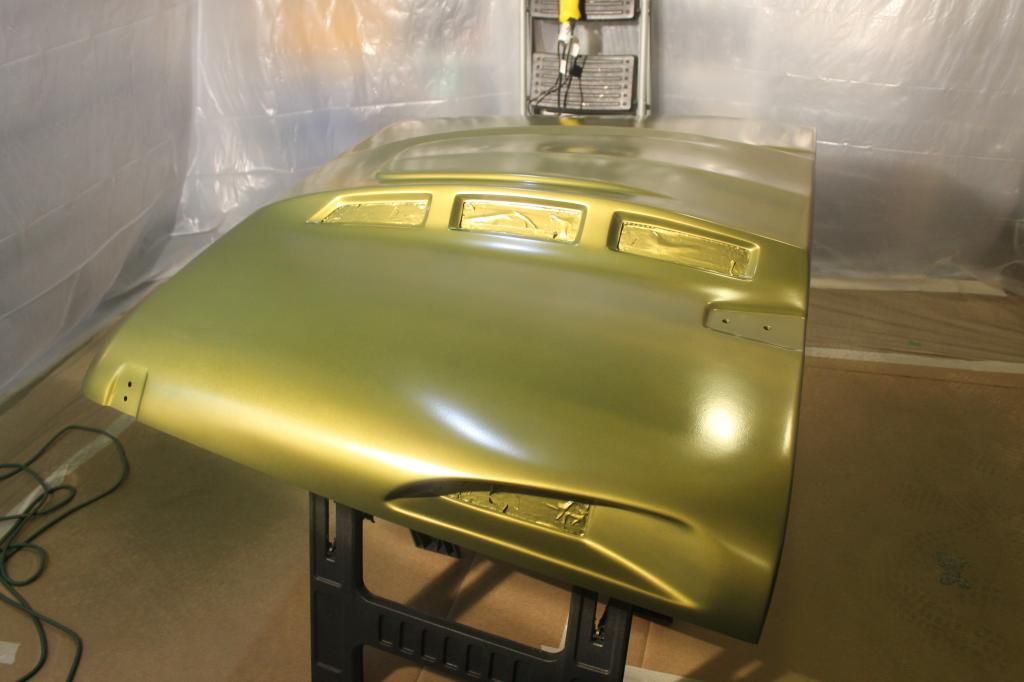
I will admit, spraying Rescue Green was a challenge. It is a metallic paint. Thus, it is very difficult to apply this color without creating "tiger stripes." I applied the paint at 34PSI with the air gun approximately 6" from the surface while utilizing 50% overlap and 10 minutes between coats. The basecoat dries quickly..... 15min. It dries to a semi-gloss sheen.
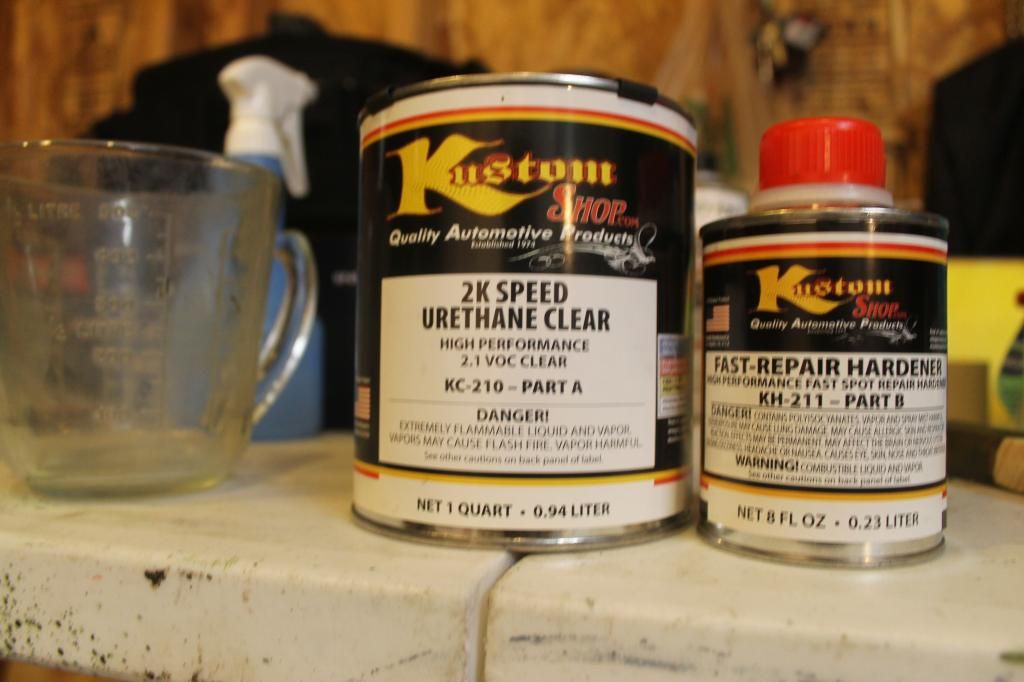
The clearcoat. The basecoat (or color coat) does nothing more than provide the pigment no the hood. It is not durable or weather resistant. The clearcoat is very weather resistant and is the coat that gives the paint a glossy sheen. The clear I used is a 2-part urethane. It's mixed in a 4:1 ratio of clear to hardener. This is NASTY stuff. You need to wear a mask while spraying. A particle separator or cheap paint mask from the local hardware store won't cut it. I started with one of those and was greeted with the smell of fumes. I switched to a full filter charcoal canister mask. That worked well. The fumes given off by the clearcoat are a derivative of cyanide and without protection will cause symptoms similiar to nerve-agent poisoning.
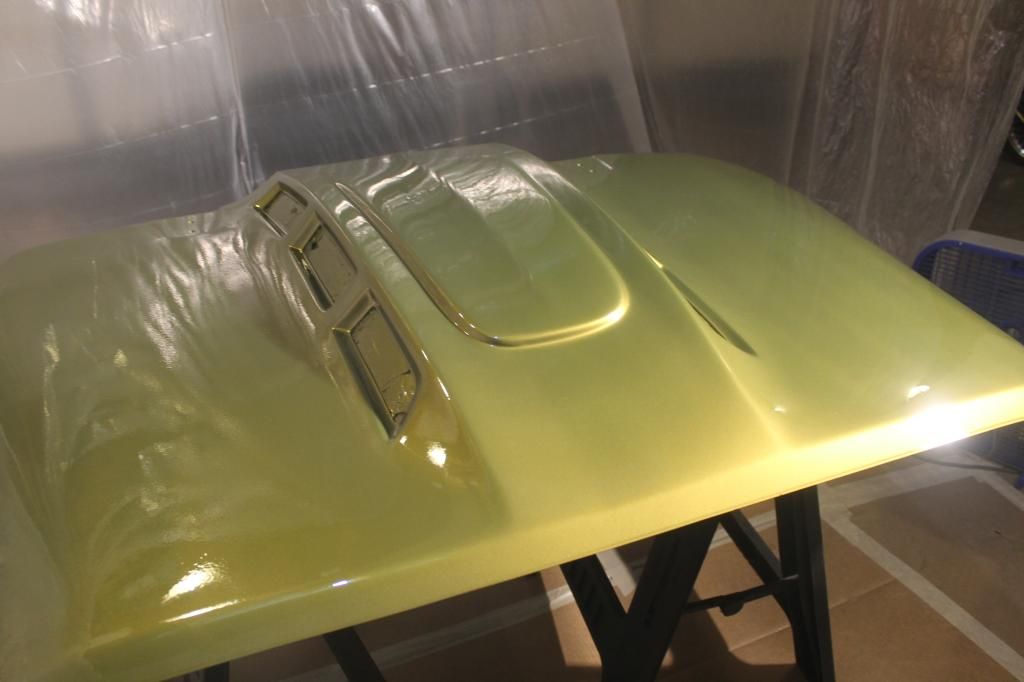
Clearcoat applied. I began with a mist coat of clear. This was followed 5-minutes later with a "wet-coat". I finished with a final thick "wet-coat" another 15 minutes later. The clear takes several hours to dry. Overnight to feel hard to the touch and 7 full days for maximum cure.
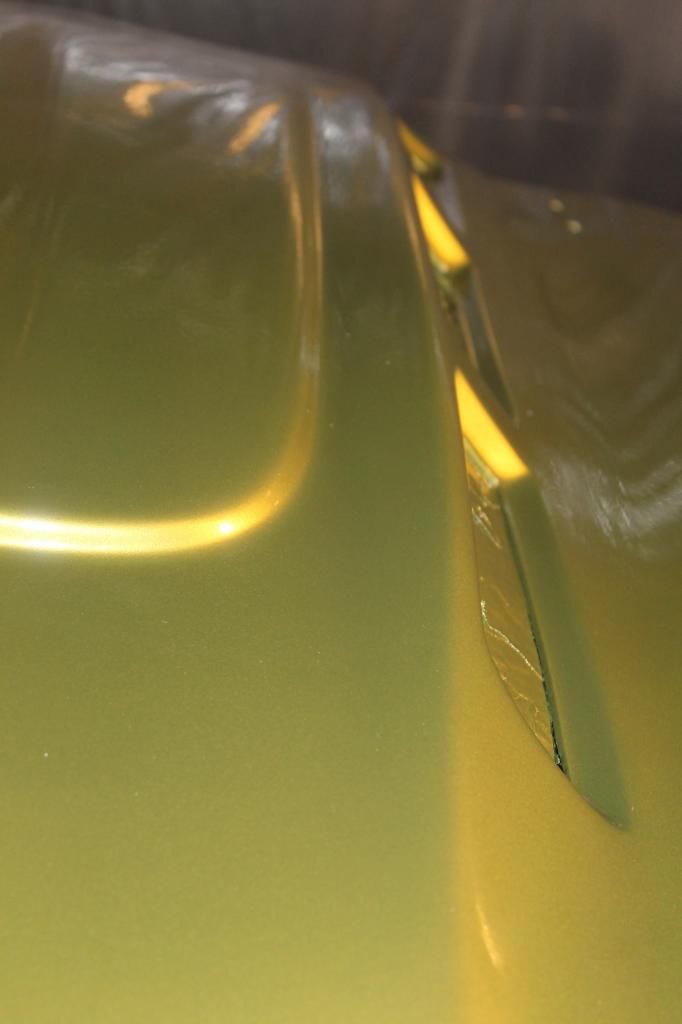
It's got some orange peel, but overall, I'm pretty happy with the result. Four days of work and $280 total investment (including the $90 gun kit) and I have a factory paint matched aftermarket hood.
I still have to paint the underside of the hood + install. i'm also going to wet-sand the outside of the hood and hit it with some rubbing compound to reduce the orange peel and increase the shine. Looking for all to be complete by the end of this coming week. Will post pics of the final result
The hood itself is made of fiberglass and costs a decent amount of $$. That said, I decided to save some cash by attempting to finish and paint the hood myself. I've built and painted plastic models before and sprayed Raptor Liner on the hardtop and interior, but I've never prepped and painted a full-fledged body panel in factory paint...... till now. So, I decided to document the process and show that automotive painting at home is not a stupid idea, but rather an economical solution for those wishing to explore new boundaries in the automotive world.
BTW, Allan from TOTL is top-notch regarding customer service and provided awesome support and updates when I purchased this hood.
Here's a history concerning what has been done so far. As I type this, the clearcoat on the new hood is curing in the garage.

TOTL Innovations heat reduction hood. It arrived less than a week after ordering. Weight: 25lbs. Delivered by semi. It looked pretty nice out of the box.

After placing the hood on two plastic sawhorses and giving it a close inspection, there were several areas that needed attention. Nothing major. A couple chips, some scratches, areas where the gelcoat was rough, etc. I began by filling imperfections with Bondo red finishing glaze. After application, I sanded the Bondo smooth with 400 grit paper. I followed this with a wet-sand of 1500 and finally 2000 grit paper. The total process took about 4-hours over the course of three evenings.

The functional vents are covered by a bare-steel chicken wire patterned mesh. My Jeep theme is Rescue Green and Black, so silver vents would look "odd". I masked the hood and shot the vents first with Rustoleum self-etching primer and then 3 coats of BBQ-safe high heat black paint.


Once the bodywork was complete, I proceeded to create a paint booth in my garage. I created my "booth" using 1mm and 4mm 10x25' plastic sheeting stapled to the ceiling of my garage. The floor was created with cardboard and some masking paper.

I set up a "work station" in the garage outside the paint booth to place the materials needed to paint the hood.

Here's the gun I used. I purchased the gun, paint, and supplies from the same guys that sell the Raptor Liner kits on EBay.

Here's the compressor I used. It's a 33Gal Craftsman. I wouldn't recommend going too much smaller than this, as it is air volume, not air pressure, that is the critical component in proper paint delivery.

The first stage of the paint was to apply an adhesion promoter. This is the equivalent of primer, but is designed for fiberglass gelcoats. It softens the gelcoat surface and provides a better medium for the color coat (basecoat) to stick to. The first coat is "misted" with the compressor air pressure set to 34PSI. After 5-minutes a thicker "wet-coat" was applied. This was allowed to set for 15 minutes before applying the first coat of color.

Prior to applying the adhesion promoter, I washed the hood with dish detergent to remove grease and wiped the surface with a tack rag. In addition, I used a spray bottle filled with water and misted bot the plastic sheeting and floor of my "spray-booth" to minimize dust contamination. This was especially important, as I live in the Mohave Desert.

The color coat is a two-part Urethane. It is mixed in a 2:1 ratio of paint to reducer. I applied a total of 4 coats.

I will admit, spraying Rescue Green was a challenge. It is a metallic paint. Thus, it is very difficult to apply this color without creating "tiger stripes." I applied the paint at 34PSI with the air gun approximately 6" from the surface while utilizing 50% overlap and 10 minutes between coats. The basecoat dries quickly..... 15min. It dries to a semi-gloss sheen.

The clearcoat. The basecoat (or color coat) does nothing more than provide the pigment no the hood. It is not durable or weather resistant. The clearcoat is very weather resistant and is the coat that gives the paint a glossy sheen. The clear I used is a 2-part urethane. It's mixed in a 4:1 ratio of clear to hardener. This is NASTY stuff. You need to wear a mask while spraying. A particle separator or cheap paint mask from the local hardware store won't cut it. I started with one of those and was greeted with the smell of fumes. I switched to a full filter charcoal canister mask. That worked well. The fumes given off by the clearcoat are a derivative of cyanide and without protection will cause symptoms similiar to nerve-agent poisoning.

Clearcoat applied. I began with a mist coat of clear. This was followed 5-minutes later with a "wet-coat". I finished with a final thick "wet-coat" another 15 minutes later. The clear takes several hours to dry. Overnight to feel hard to the touch and 7 full days for maximum cure.

It's got some orange peel, but overall, I'm pretty happy with the result. Four days of work and $280 total investment (including the $90 gun kit) and I have a factory paint matched aftermarket hood.
I still have to paint the underside of the hood + install. i'm also going to wet-sand the outside of the hood and hit it with some rubbing compound to reduce the orange peel and increase the shine. Looking for all to be complete by the end of this coming week. Will post pics of the final result
Last edited by Schantin; 11-08-2014 at 08:29 PM.


