Rear Bumper DIY Style


 03-22-2014, 06:46 AM
#32
JK Enthusiast
Join Date: May 2012
Location: Modesto, Ca
Posts: 426
Likes: 0
Received 0 Likes
on
0 Posts
Many thanks to kylelever for sharing his bumper model. It made me get motivated to do mine. 
https://www.jk-forum.com/forums/atta...5&d=1395189340
https://www.jk-forum.com/forums/atta...5&d=1395189340
04-04-2014, 10:40 AM
#34
JK Enthusiast
Thread Starter
Join Date: Oct 2013
Location: Jasper, GA
Posts: 162
Likes: 0
Received 0 Likes
on
0 Posts
Nice MIggs! I hope mine looks that good when finished. 
Sorry for the drop off on this project guys. I have been waiting for the spare tire insert to get formed. I finally got that done this week so Im hoping to get back rolling on it. I actually milled the slots on the mounting brackets a little more this morning. Ill get some pics posted next week after I get the insert welded in place.
Many thanks to kylelever for sharing his bumper model. It made me get motivated to do mine.
https://www.jk-forum.com/forums/atta...5&d=1395189340
https://www.jk-forum.com/forums/atta...5&d=1395189340
04-09-2014, 11:58 AM
#35
JK Enthusiast
Thread Starter
Join Date: Oct 2013
Location: Jasper, GA
Posts: 162
Likes: 0
Received 0 Likes
on
0 Posts
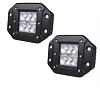
Made a little progress this week. Did another test fit this morning. It is sitting a little low for my taste so Im going to weld some spacers in for it to sit on. Other than that, just a lot of grinding and finishing to be done on the insert. Once that is finished Ill get the holes cut for the lights and the clevis mounts.
Im thinking of these lights. Anybody have an experience with them?
Amazon.com: Nilight 2PCS 18W 3x3 Dually Flush Mount CREE LED Light Lamps Dually D2 Off Road 4X4 4WD Jeep Truck F150 Tacoma Bumper 3" Flood: Automotive
Im thinking of these lights. Anybody have an experience with them?
Amazon.com: Nilight 2PCS 18W 3x3 Dually Flush Mount CREE LED Light Lamps Dually D2 Off Road 4X4 4WD Jeep Truck F150 Tacoma Bumper 3" Flood: Automotive
04-09-2014, 12:46 PM
#36
JK Freak
Join Date: Jan 2012
Location: Oldtown, NC
Posts: 533
Likes: 0
Received 0 Likes
on
0 Posts
04-09-2014, 05:46 PM
#37
JK Enthusiast
Thread Starter
Join Date: Oct 2013
Location: Jasper, GA
Posts: 162
Likes: 0
Received 0 Likes
on
0 Posts
Yes sir it does. Thanks for the link! Was worried for a minute that it would be too large with the 5" spec, but the measurements are actually the same.
05-23-2014, 11:57 AM
#38
JK Enthusiast
Thread Starter
Join Date: Oct 2013
Location: Jasper, GA
Posts: 162
Likes: 0
Received 0 Likes
on
0 Posts
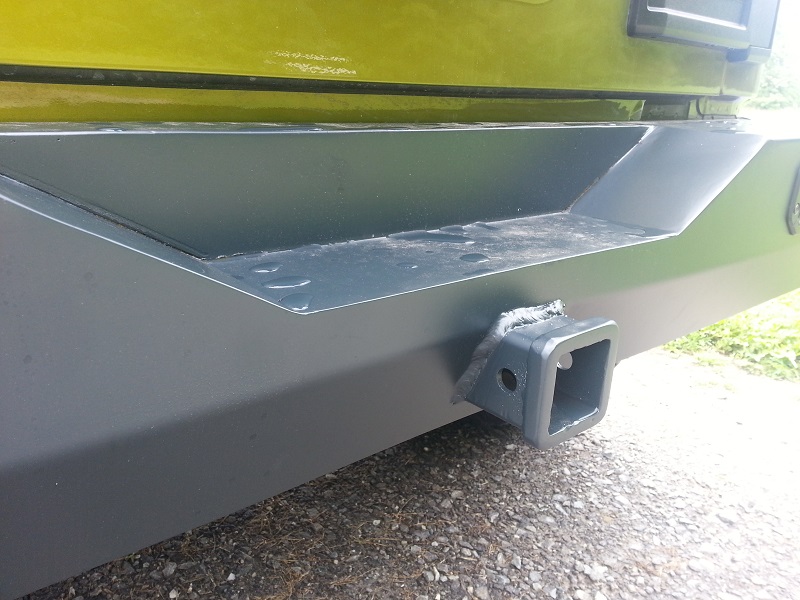
Well it doesnt look like much, but progress is being made. The Mounts are welded in place, as well as the shackle mounts. I am going to have a friend weld the front of the shackle mounts as his welds looks better than mine. I have started cutting a whole for the receiver hitch. Would like to have that done next week so I can finish designing the ends. Slowly moving along here.

06-16-2014, 09:50 AM
#39
JK Enthusiast
Thread Starter
Join Date: Oct 2013
Location: Jasper, GA
Posts: 162
Likes: 0
Received 0 Likes
on
0 Posts
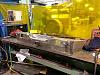
Ends came in Friday from our other facility. Needed a laser to cut the shape and we dont have one where I am located. Went with a little simpler design than the RSE bumper. Got them welded on this morning and started finishing today at lunch. Goal is to get it out to paint on Friday and install the lights and wiring this weekend. Not sure if I can make that or not.
06-24-2014, 12:50 PM
#40
JK Enthusiast
Thread Starter
Join Date: Oct 2013
Location: Jasper, GA
Posts: 162
Likes: 0
Received 0 Likes
on
0 Posts
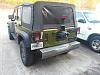
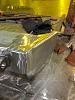
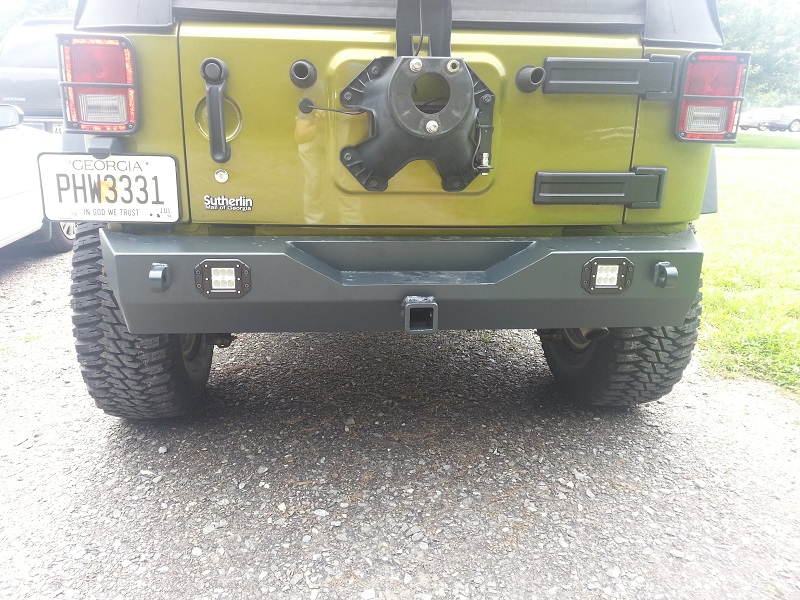
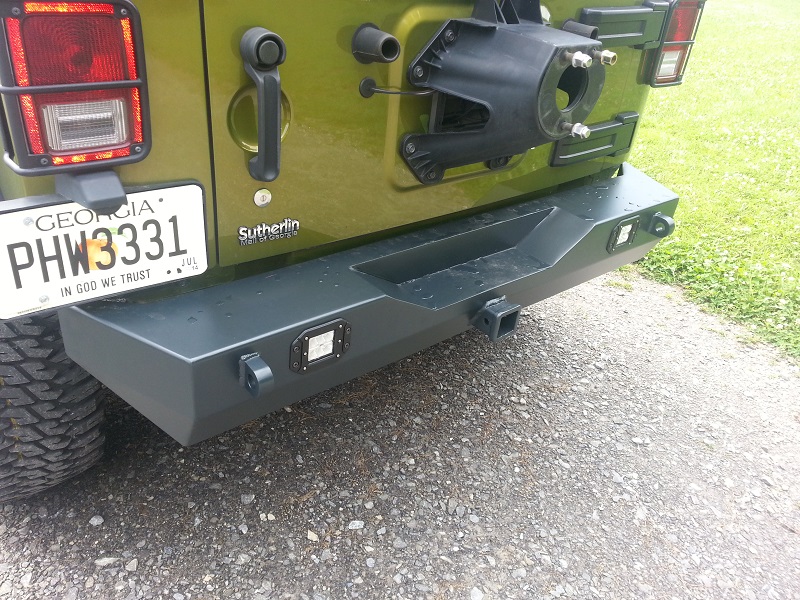
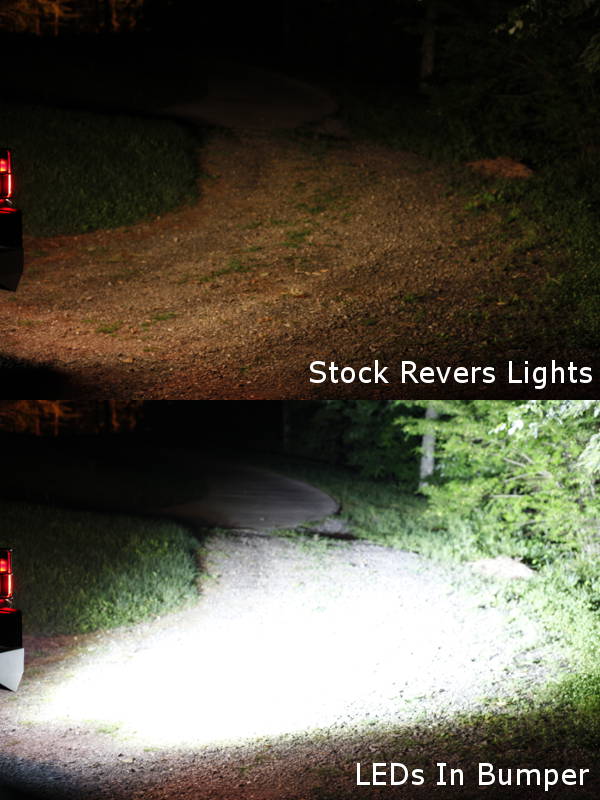
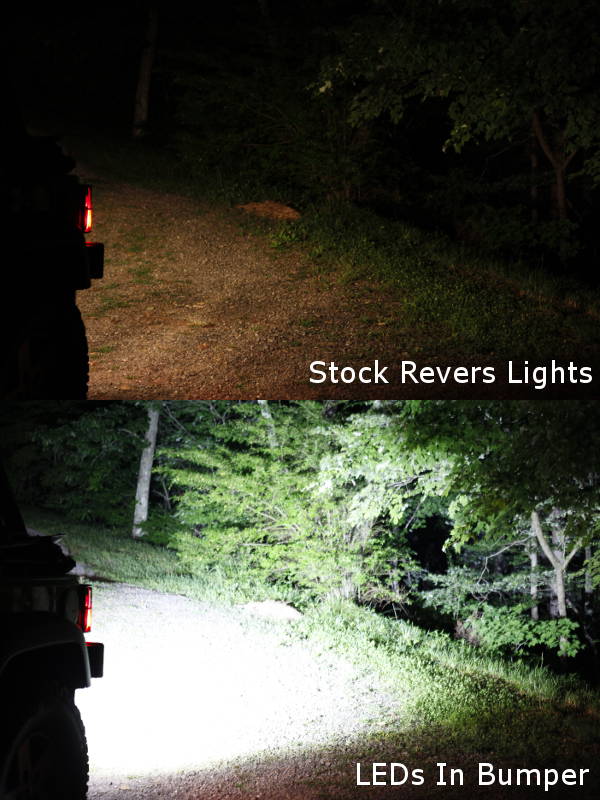
It is finished. It went to paint Friday. The color is supposed to be a flat black one of our customers uses. It looks more gray to me than anything. I cant complain, it was free. I may end up hitting it with Raptor liner in a few months. Installed the lights Sunday evening with jbBouknight. If you want something wired, that man can do it right. The lights are a Rigid Flush Mount Dually knock off from Amazon. Brand is NiLights. Quality seem good for $89/ pair. All in all I am really happy with the way it turned out. Ill update my Sketchup files with the exact dimensions so if you want the model feel free to shoot me a PM.

Last edited by kylelever; 06-24-2014 at 12:59 PM.