Rear Camera Mount Project Finished!
 04-13-2007, 07:29 PM
#1
JK Enthusiast
Thread Starter
Join Date: Feb 2007
Location: Edison NJ
Posts: 456
Likes: 0
Received 0 Likes
on
0 Posts
Hey Guys
This time I decided to wire up a back up camera.
It’s hard for me to judge to the distance with the spare so I figured why not make it easier since I have the screen up for DVD movies anyway.
The first thing I couldn’t decide on was the LOCATION!! I wanted it in the center of the Jeep rear somewhere. I thought of the bumper- the hitch- the 3rd brake light….
Then I read some guys wanted to have the camera point through the spokes. I thought that was a good idea. But then I though that’s an easy spot for someone to reach in and rip it off.
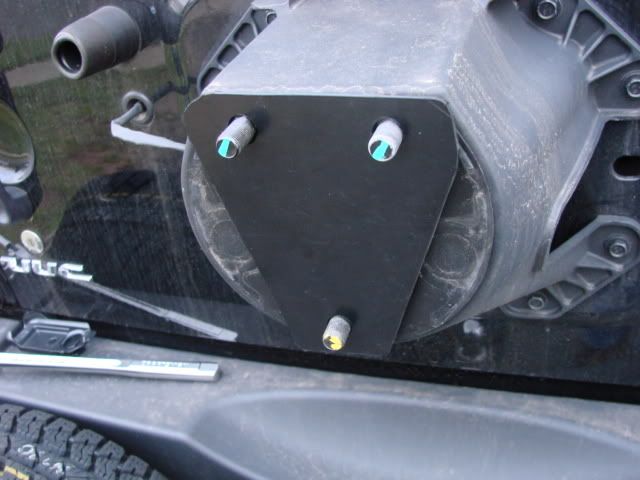
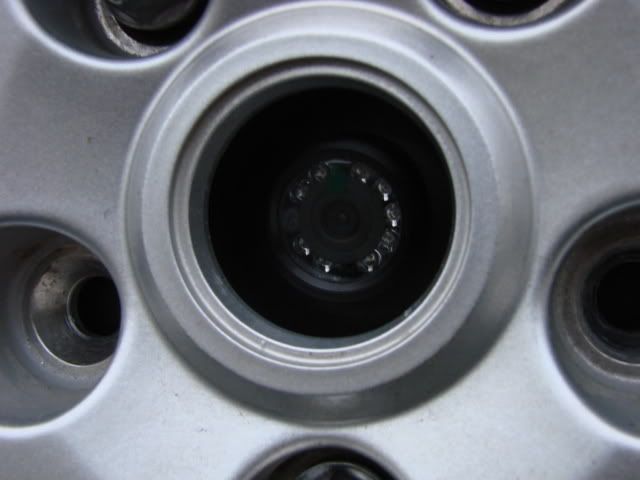
Then it hit me!! Use the center cap space!!
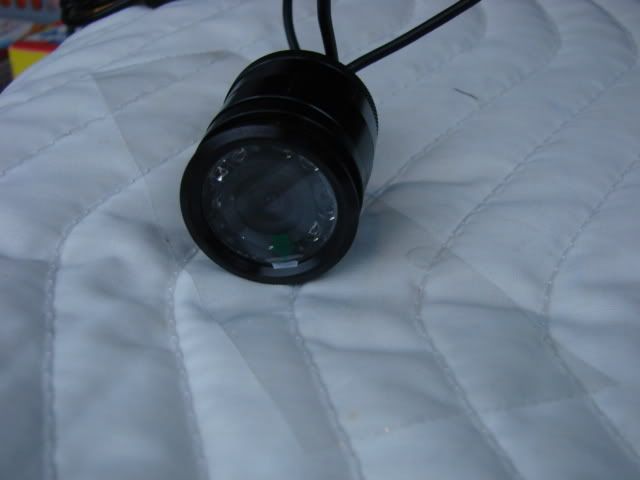
I bought the camera off ebay- USA BackUp Rear View Reverse Color Night Vision Camera
Item number: 130098109494 $79
REMEMBER I DID THIS- THIS IS HOW I DID IT - If YOU do it and MESS UP ANYTHING ITS YOUR FAULT!!!
OK Now-
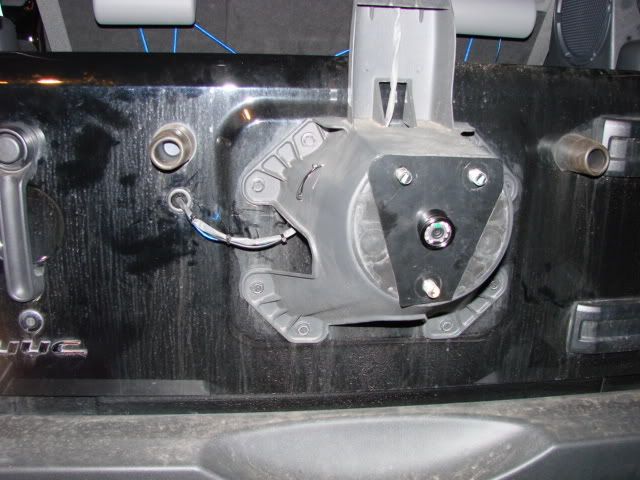
I used a piece of ABS- Cut it into a triangle shape. I placed it on the back of the rim and traced the three mount holes with a pick tool (Sharp pointed screwdriver) and drilled them out.
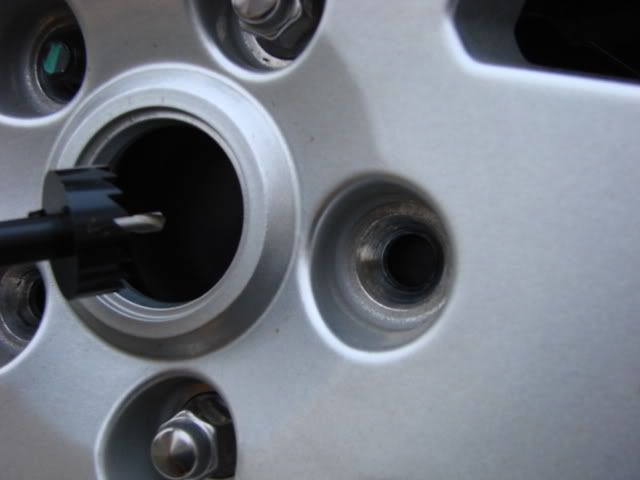
Next I mounted the rim and drilled the camera hole- Camera came with the hole saw!! And mounted the camera aiming down.


Next I took two trim pieces off the inside tailgate. The Right panel is removes on the left side of the panel- there are 2 clips upper and lower left side. And the wire panel across the tailgate comes off prying the bottom out.
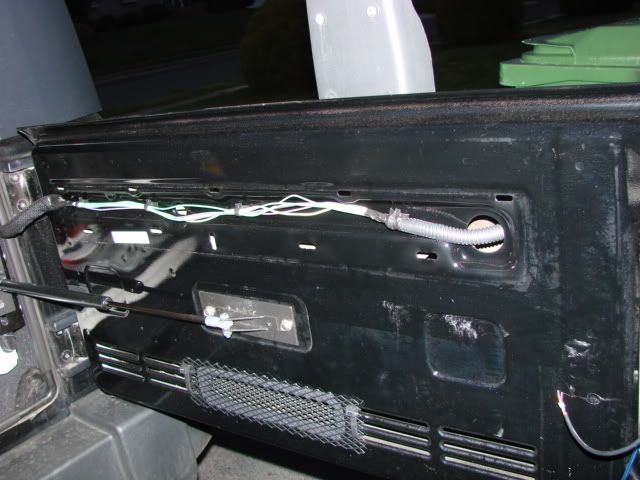
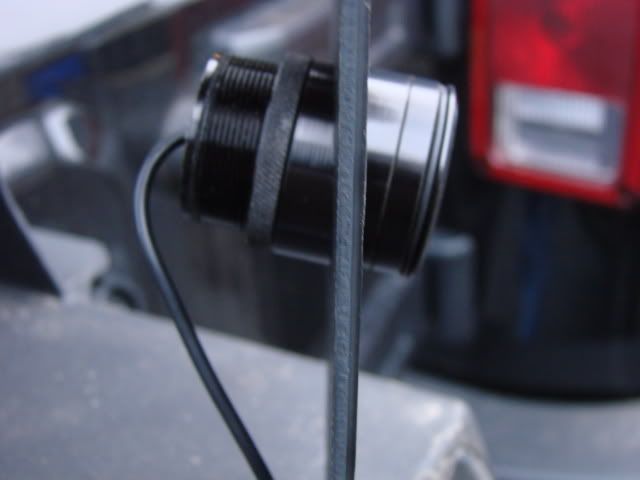
I drilled 2 holes in the tire carrier to hold the wires for the camera
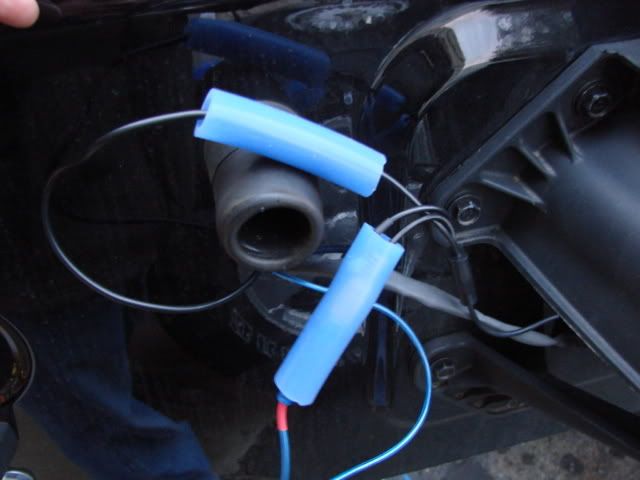
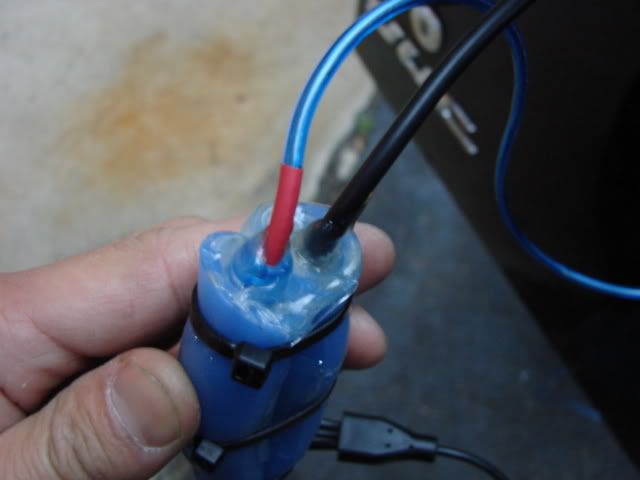
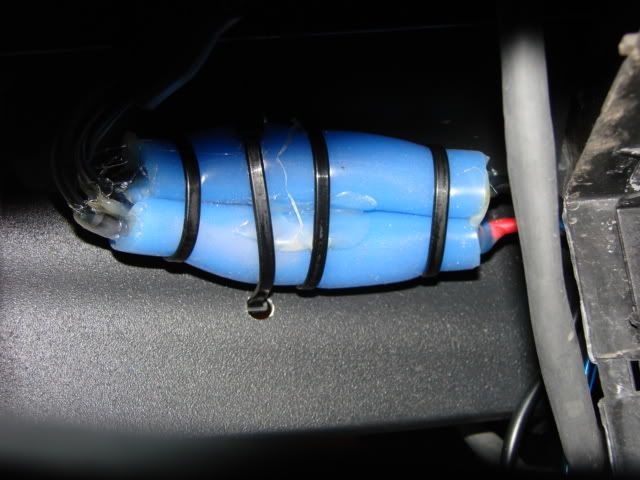
I used a silicone tube to put the wires through to keep moisture and water out then hot glued the ends.
This time I decided to wire up a back up camera.
It’s hard for me to judge to the distance with the spare so I figured why not make it easier since I have the screen up for DVD movies anyway.
The first thing I couldn’t decide on was the LOCATION!! I wanted it in the center of the Jeep rear somewhere. I thought of the bumper- the hitch- the 3rd brake light….
Then I read some guys wanted to have the camera point through the spokes. I thought that was a good idea. But then I though that’s an easy spot for someone to reach in and rip it off.
Then it hit me!! Use the center cap space!!
I bought the camera off ebay- USA BackUp Rear View Reverse Color Night Vision Camera
Item number: 130098109494 $79
REMEMBER I DID THIS- THIS IS HOW I DID IT - If YOU do it and MESS UP ANYTHING ITS YOUR FAULT!!!
OK Now-
I used a piece of ABS- Cut it into a triangle shape. I placed it on the back of the rim and traced the three mount holes with a pick tool (Sharp pointed screwdriver) and drilled them out.
Next I mounted the rim and drilled the camera hole- Camera came with the hole saw!! And mounted the camera aiming down.
Next I took two trim pieces off the inside tailgate. The Right panel is removes on the left side of the panel- there are 2 clips upper and lower left side. And the wire panel across the tailgate comes off prying the bottom out.
I drilled 2 holes in the tire carrier to hold the wires for the camera
I used a silicone tube to put the wires through to keep moisture and water out then hot glued the ends.
 04-13-2007, 07:29 PM
#2
JK Enthusiast
Thread Starter
Join Date: Feb 2007
Location: Edison NJ
Posts: 456
Likes: 0
Received 0 Likes
on
0 Posts
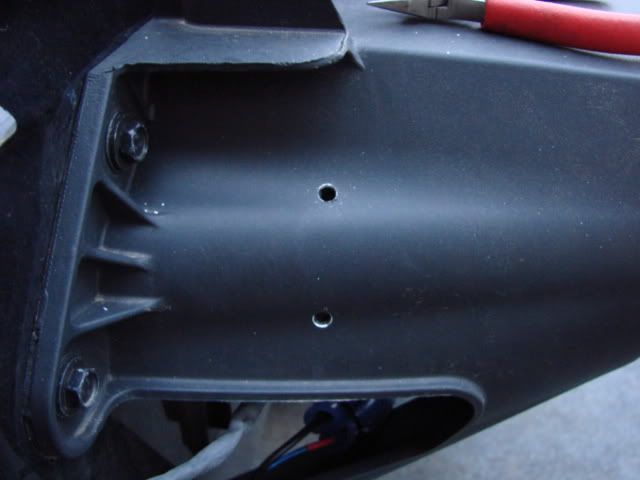
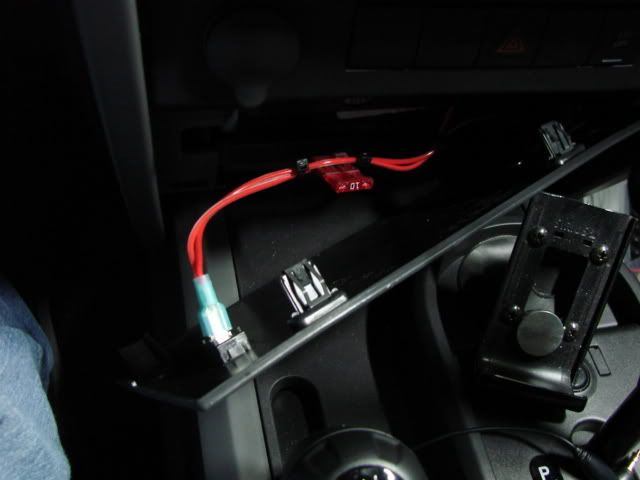
Now I pulled out the grommet from the outside of the tailgate. I cut the wire for the 3rd brake light so I can have the grommet by itself. I cut the extended part of the grommet because the RCA wire was to hard to push through. I used WD40 to help it through.
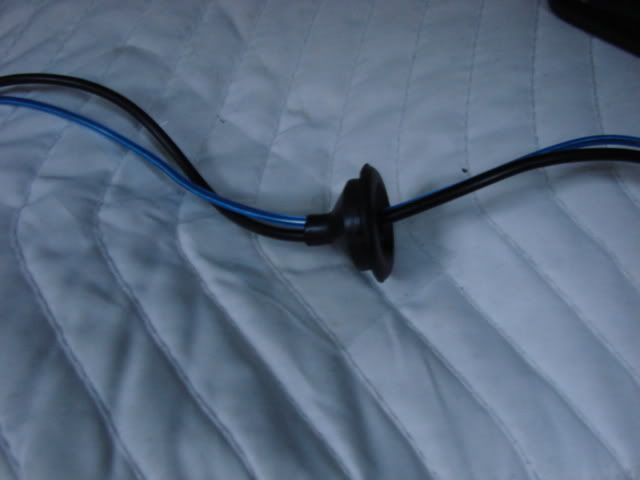
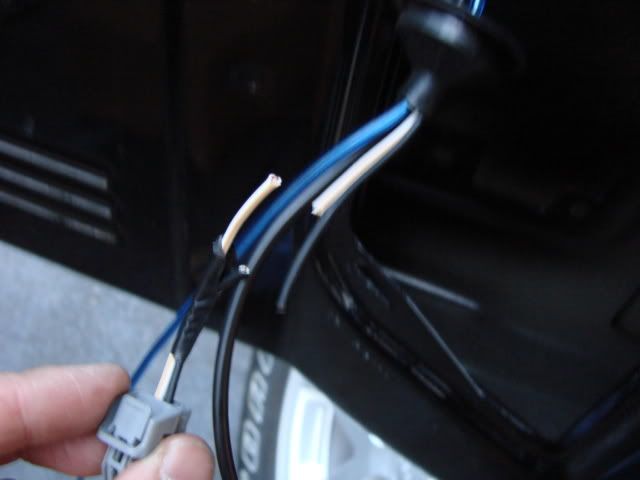
I then connected the 3rd brake wires back and ran the RCA and Power/Ground wire following the tailgate wires.
Here what the finished look-
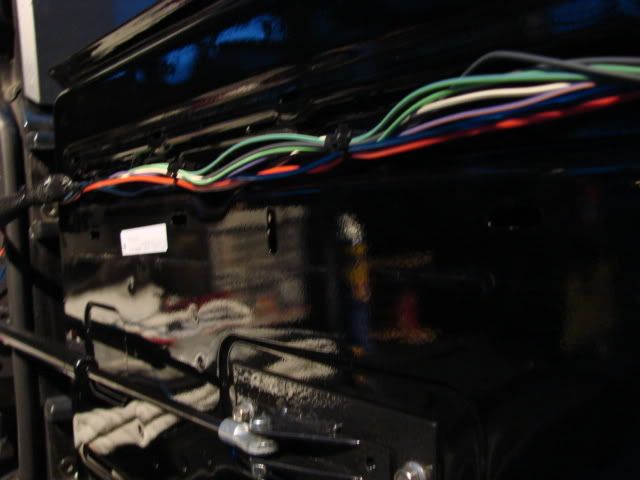
I ran the wires down the right side of the JK tucking under the carpet and plastic sills. I grounded the ground on the chassis ground on the front passenger side kick wall. There are 2 factory ground points there.
The RCA I ran up to my Display panel and the power wire I mounted on the bottom panel. I had to make sure there was enough room there because its tight.
Then I switched it on.
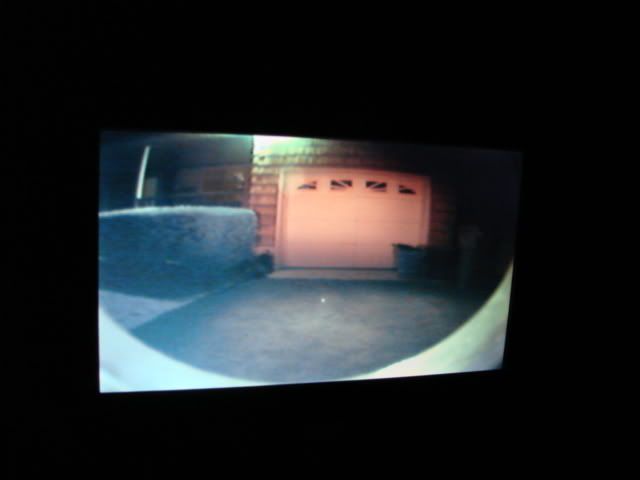
All in all it took me about 2.5 hours. Thank God I had the monitor already up.
https://www.jk-forum.com/forums/jk-write-ups-39/my-full-dvd-monitor-write-up-part-1-a-3904/
I then connected the 3rd brake wires back and ran the RCA and Power/Ground wire following the tailgate wires.
Here what the finished look-
I ran the wires down the right side of the JK tucking under the carpet and plastic sills. I grounded the ground on the chassis ground on the front passenger side kick wall. There are 2 factory ground points there.
The RCA I ran up to my Display panel and the power wire I mounted on the bottom panel. I had to make sure there was enough room there because its tight.
Then I switched it on.
All in all it took me about 2.5 hours. Thank God I had the monitor already up.
https://www.jk-forum.com/forums/jk-write-ups-39/my-full-dvd-monitor-write-up-part-1-a-3904/
04-13-2007, 08:39 PM
#3
JK Enthusiast
Join Date: Mar 2007
Location: Staten Island, NYC
Posts: 325
Likes: 0
Received 0 Likes
on
0 Posts
Your nuts! Great job wish i could do all that, but i would go nuts with that monitor up there, i like everything tucked away and factory looking. I was looking into a double din pioneer nav/dvd player but a little pricey for me now, with all the components (xm traffic, sirius rear cam, bluetooth)...ONE DAY!!!!
Again mike thanks for everything.... Where are you going to mount the satellite dish?:toung:
Again mike thanks for everything.... Where are you going to mount the satellite dish?:toung:
04-13-2007, 09:27 PM
#5
JK Newbie
Join Date: Dec 2006
Location: Richmond, Virginia
Posts: 33
Likes: 0
Received 0 Likes
on
0 Posts
Looks like you added a strut to keep the boot open. What are the stats on it...compressed/extended length, max weight?
I would think a strong wind would snap what appears to be a very small rod.
Thanks
I would think a strong wind would snap what appears to be a very small rod.
Thanks
04-14-2007, 03:39 AM
#6
JK Enthusiast
Thread Starter
Join Date: Feb 2007
Location: Edison NJ
Posts: 456
Likes: 0
Received 0 Likes
on
0 Posts
https://www.jk-forum.com/forums/jk-write-ups-39/tailgate-shock-project-done-4622/
Last edited by DBB888; 04-14-2007 at 04:55 AM.
04-14-2007, 10:05 AM
#7
JK Super Freak
Join Date: Jan 2007
Location: Arkansas / Alabama
Posts: 1,157
Likes: 0
Received 0 Likes
on
0 Posts
Awesome man... thanks for sharing that with us. I bought the exact same camera about 3 months ago but have not installed my screen yet. I had planned to mount the camera on my cargo rack, which is not installed yet either. This may make me reconsider my mounting options. I also bought another one of those cameras and I am going to make a long cord and a magnetic mount for it so I can position it for whatever need arises. Did you do a write up for your screen? I am gonna have to do a serch now! 
Yup... you are. I thought it was you who customized that monitor. Great job, man!
Yup... you are. I thought it was you who customized that monitor. Great job, man!
Last edited by USAF_GroundRat; 04-14-2007 at 10:07 AM.
Trending Topics
04-16-2007, 06:01 AM
#10
JK Enthusiast
Thread Starter
Join Date: Feb 2007
Location: Edison NJ
Posts: 456
Likes: 0
Received 0 Likes
on
0 Posts
Awesome! THanks!!- By the way today I saw that with the rain storm I needed to drill a hole for drainage.
Last edited by DBB888; 04-17-2007 at 04:17 PM.