Rugged Ridge Snorkel Install (Lot of Pics)
 08-04-2012, 02:22 PM
#1
JK Super Freak
Thread Starter
Join Date: Jul 2011
Location: Goodyear, Arizona
Posts: 1,567
Likes: 0
Received 0 Likes
on
0 Posts
Let me start off by saying this: I know there are already PDF instructions from Rugged Ridge available online. I am writing this for another perspective and hopefully show some better photos of things not seen before. Some of what I do is not "in-order" and may be different from what Rugged Ridge suggests. This is just my version of the work. If you have any questions about the install feel free to ask via here or a message; I will be more than happy to help you however I can. The instructions from Rugged Ridge do the job well, this write-up below will help those questioning the work required before making the commitment to buy the kit. So, here we go:
Cost: Snorkel kit: I paid $268, usually find them for $215.
RTV: $8
Glue (if you use it) $4
Time: ~6 hours. I am saying 6 to give time for multitasking and such. It could probably be done in 3-4 hours, but I did it in 6 throughout 3 days. Started on a Thursday evening doing the parts removal, worked a little Friday here and there doing paint, fender cutting, and installing 1/2 the snorkel, and finished Saturday morning with re-installing the fender, rock rail, and rest of the snorkel.
Tools: Drill and bits
Torx T-40, T30, and T-50
Ratches
Angle grinder with cutting wheel or rotary tool (Dremmel) with cutting wheel
RTV
Allen Wrench Set
Putty Knife
Paint
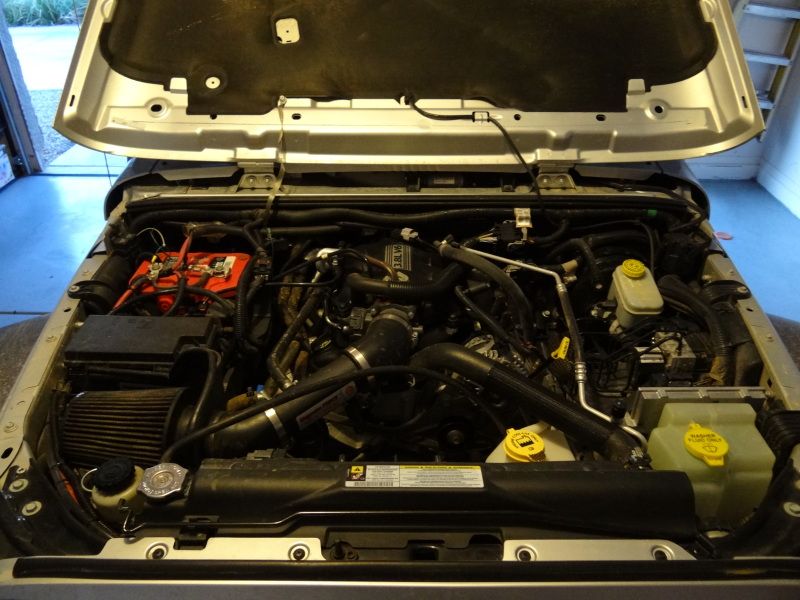
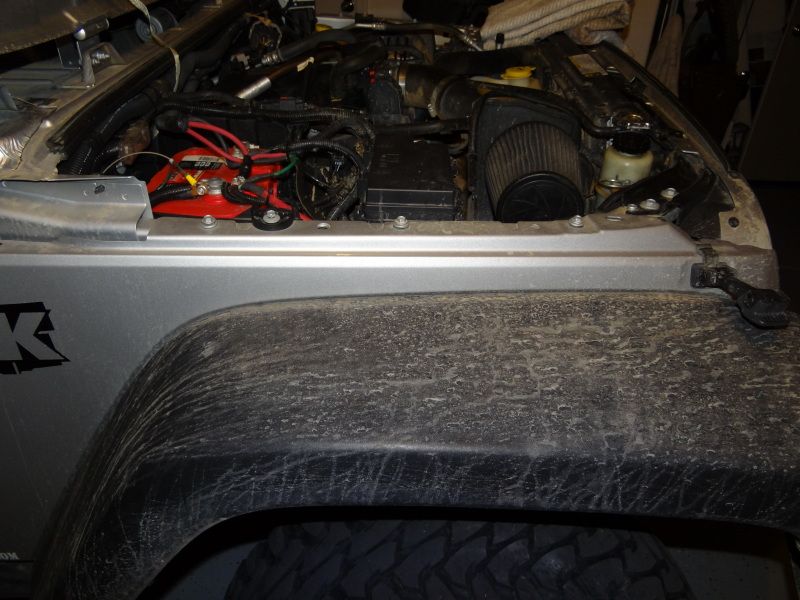
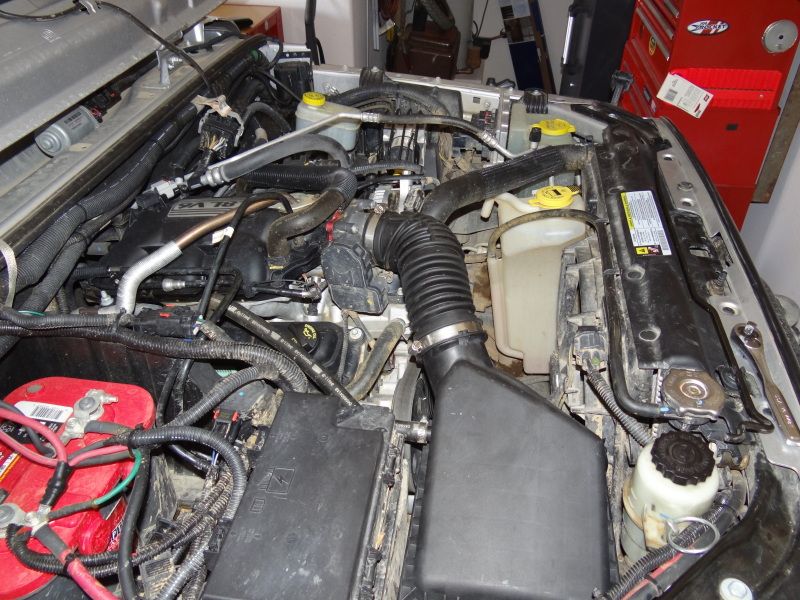
Here is how my Jeep looked at the beginning under the hood with the AFE CAI:
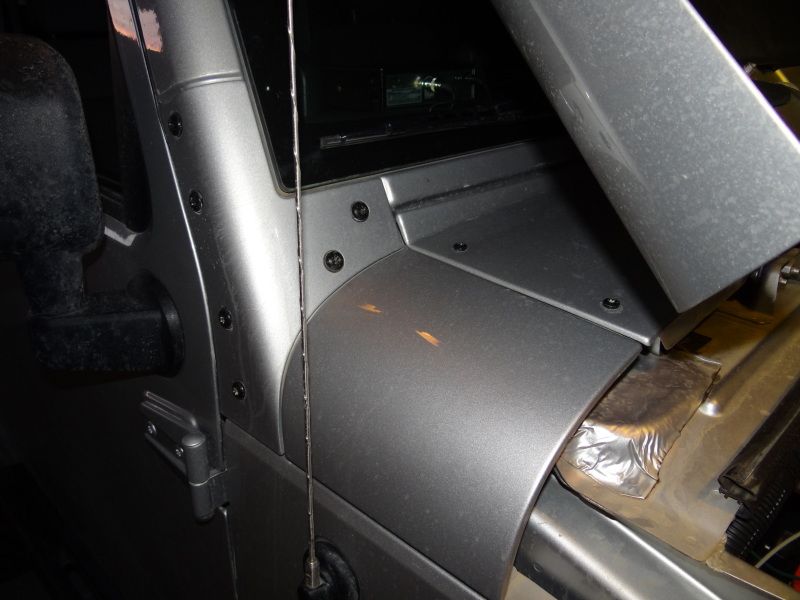
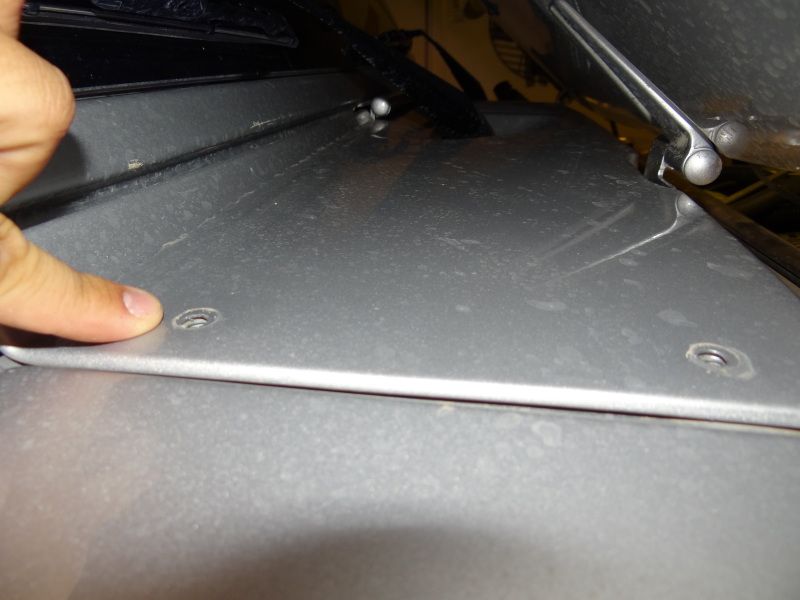
Step 1: Remove the passenger side windshield bracket. Six T-40 bolts hold it in.
Step 2: Remove the 4 T-30 bolts holding the cowl down:
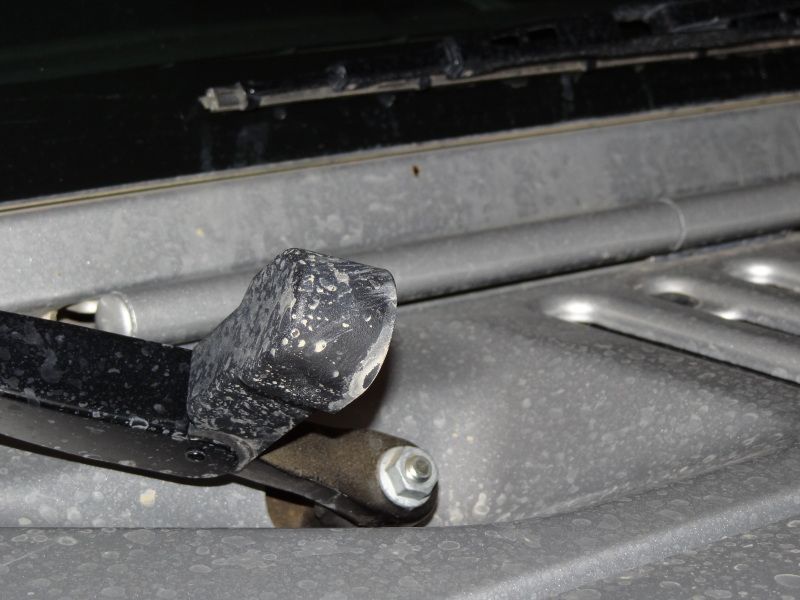
Step 3: Remove the wiper blades. They are 1/2" nuts, one per blade/arm. The covers over the nuts are just plastic clips, I recommend removing one side then the other: they're not difficult to pop off. The arm assembly may to some work to remove. Be careful: they're spring loaded.
Step 4: Remove pop-up the plastic retaining clips for the cowl. They'll be reused so don't go crazy on them.
Step 5: Remove the cowl: remember there are two tabs that slide into/above the firewall. Be aware of them so that you do not break them.
Step 6: Remove the door. Taking the door off makes the work a lot easier. If you have never taken the door off, under each hinge is T-50 nut. Remove the two, one for the upper hinge and one for the lower hinge. If you have electric windows, lower it before disconnecting the electrical. Remove the door strap and then the electrical plug buy pushed the red tab over and pressing on the tab on the lowest point of the connector that goes to the door.
Step 7: Remove the 4, 10mm top fender bolts.
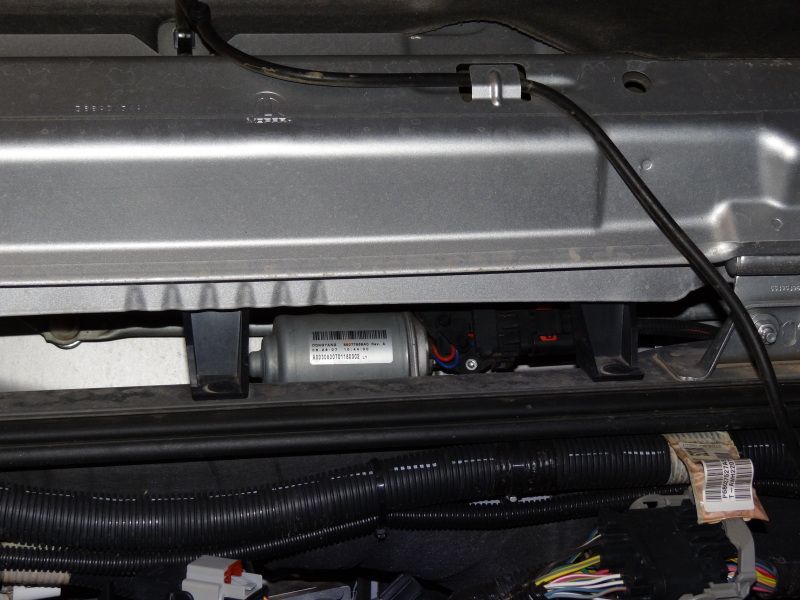
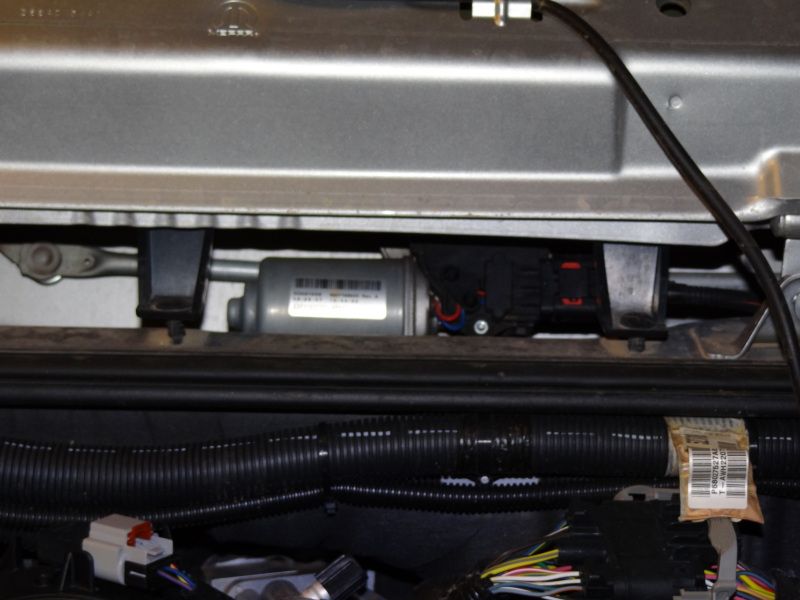
Step 8: Remove the 2, 10mm inner cowl bolts.
Step 9: Remove the 5, 10mm inner fender bolts.
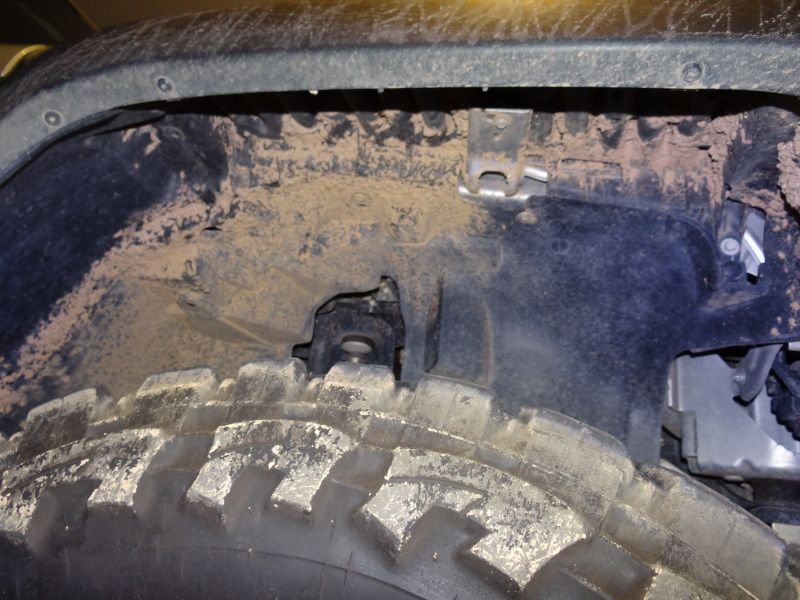
Step 10: Remove rock rails if necessary. If you cannot remove the pinch bolts in step 11, this step is required. Tools and process differ depending on the rails you have.
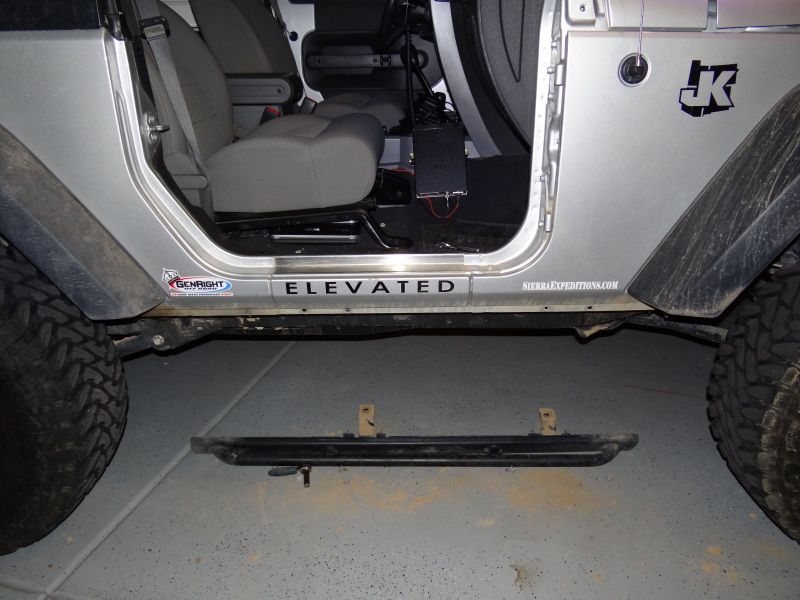
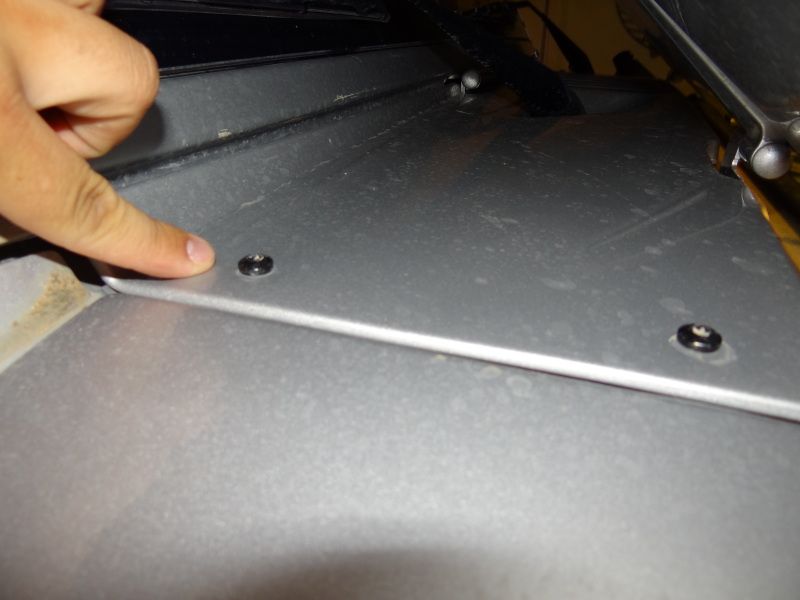
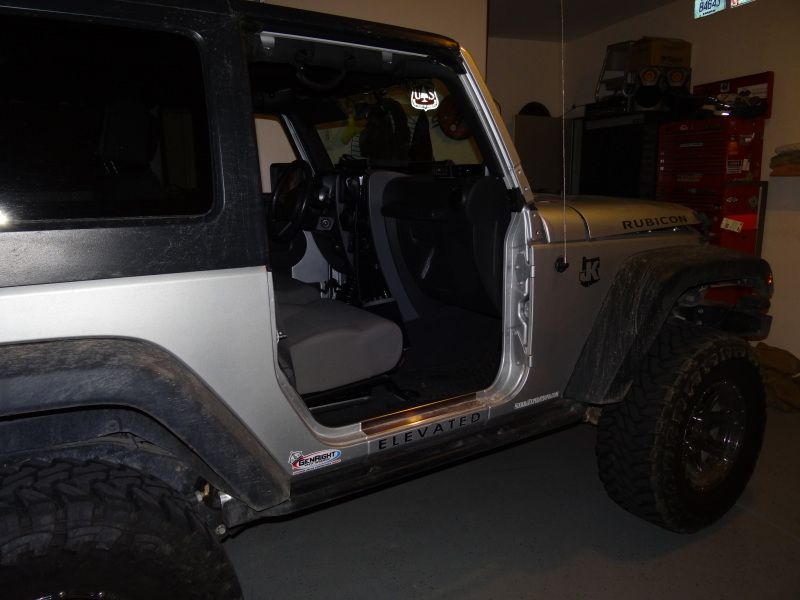
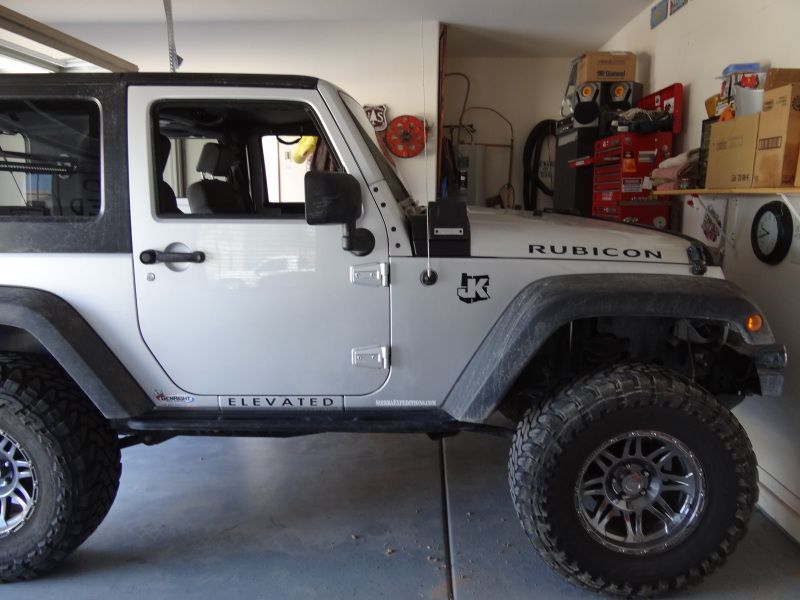
Step 11: Remove inner fender bolts. You may leave them in place if you wish. There are two: one in front of the "Elevated" decal you see, and one between the two door hinges. There are also two pinch fender bolts at the bottom of the fender, one just below the front fender and the other about a foot back.
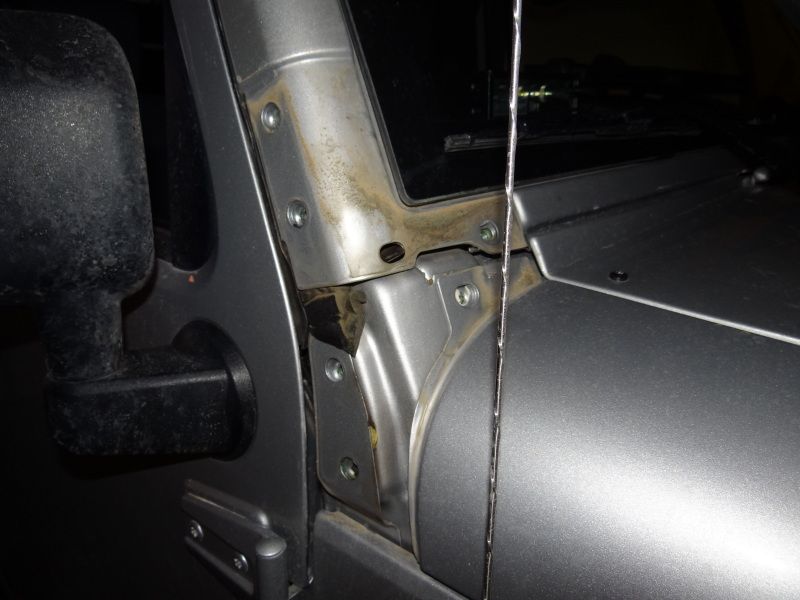
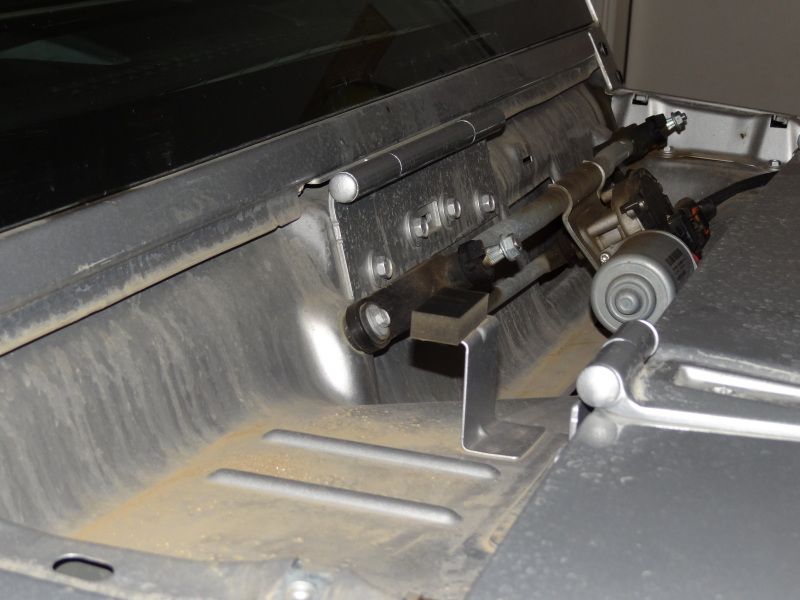
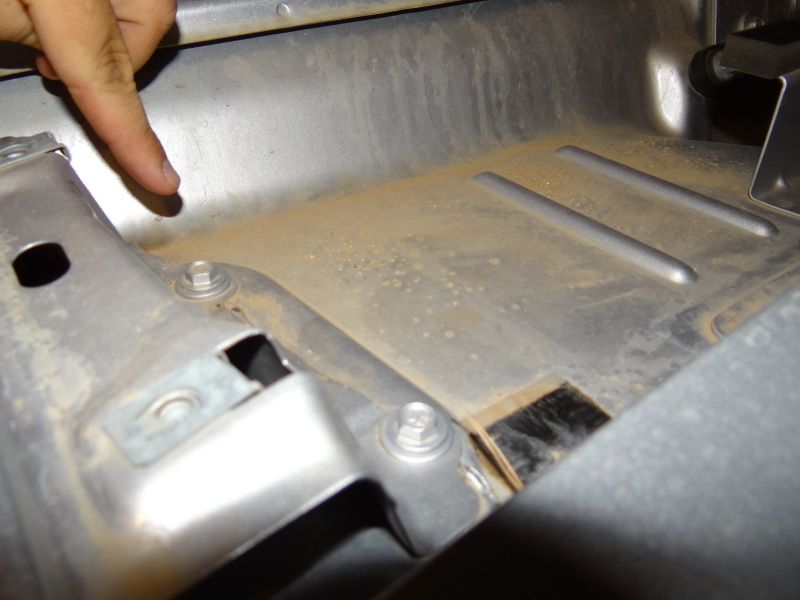
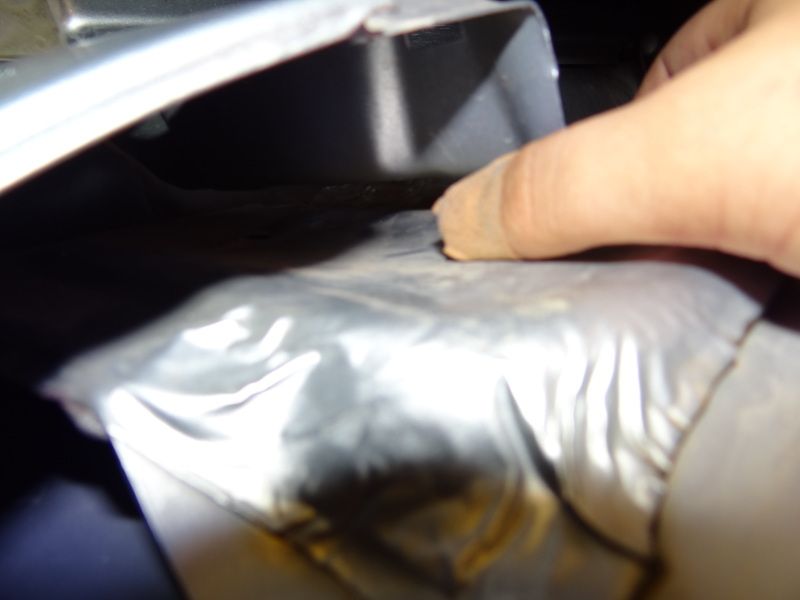
Step 12: Break-free the top cowl from the body if adhered. It can easily be done with a putty knife.
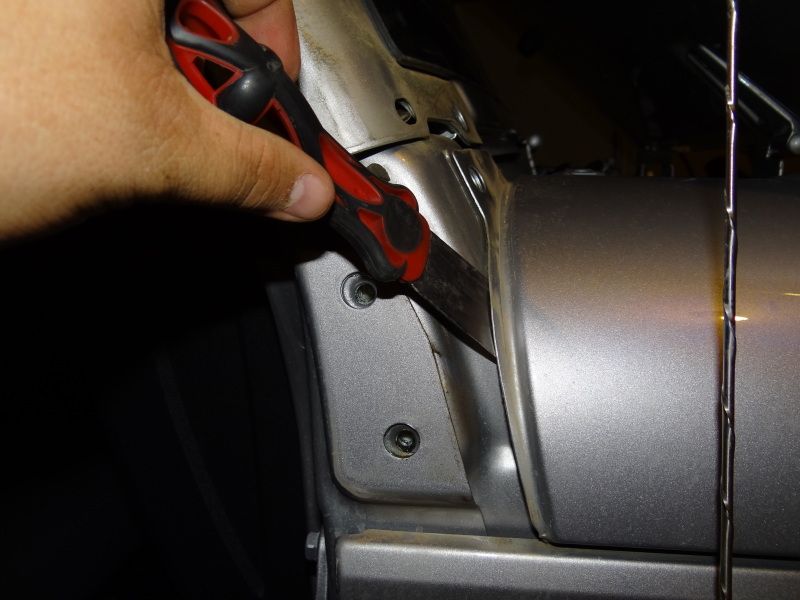
If the inner, upper cowl is stuck below the the foil-looking metal, wear gloves when removing it. It is very sharp and will cut you like it did me:
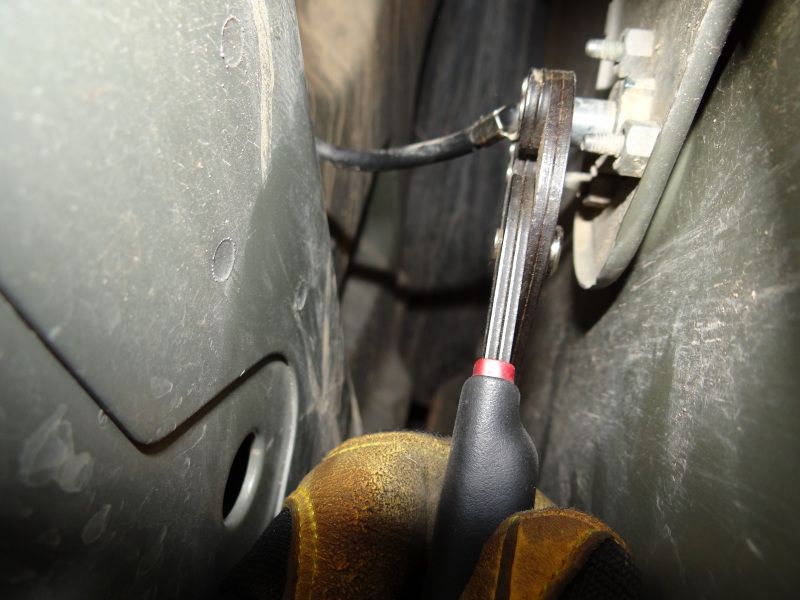
Step 13: Disconnect the antenna cable inside the fender. Most people say just pull hard to remove it. I found it safer and easier to use channel locks to get it off. It worked very well.
Cost: Snorkel kit: I paid $268, usually find them for $215.
RTV: $8
Glue (if you use it) $4
Time: ~6 hours. I am saying 6 to give time for multitasking and such. It could probably be done in 3-4 hours, but I did it in 6 throughout 3 days. Started on a Thursday evening doing the parts removal, worked a little Friday here and there doing paint, fender cutting, and installing 1/2 the snorkel, and finished Saturday morning with re-installing the fender, rock rail, and rest of the snorkel.
Tools: Drill and bits
Torx T-40, T30, and T-50
Ratches
Angle grinder with cutting wheel or rotary tool (Dremmel) with cutting wheel
RTV
Allen Wrench Set
Putty Knife
Paint
Here is how my Jeep looked at the beginning under the hood with the AFE CAI:
Step 1: Remove the passenger side windshield bracket. Six T-40 bolts hold it in.
Step 2: Remove the 4 T-30 bolts holding the cowl down:
Step 3: Remove the wiper blades. They are 1/2" nuts, one per blade/arm. The covers over the nuts are just plastic clips, I recommend removing one side then the other: they're not difficult to pop off. The arm assembly may to some work to remove. Be careful: they're spring loaded.
Step 4: Remove pop-up the plastic retaining clips for the cowl. They'll be reused so don't go crazy on them.
Step 5: Remove the cowl: remember there are two tabs that slide into/above the firewall. Be aware of them so that you do not break them.
Step 6: Remove the door. Taking the door off makes the work a lot easier. If you have never taken the door off, under each hinge is T-50 nut. Remove the two, one for the upper hinge and one for the lower hinge. If you have electric windows, lower it before disconnecting the electrical. Remove the door strap and then the electrical plug buy pushed the red tab over and pressing on the tab on the lowest point of the connector that goes to the door.
Step 7: Remove the 4, 10mm top fender bolts.
Step 8: Remove the 2, 10mm inner cowl bolts.
Step 9: Remove the 5, 10mm inner fender bolts.
Step 10: Remove rock rails if necessary. If you cannot remove the pinch bolts in step 11, this step is required. Tools and process differ depending on the rails you have.
Step 11: Remove inner fender bolts. You may leave them in place if you wish. There are two: one in front of the "Elevated" decal you see, and one between the two door hinges. There are also two pinch fender bolts at the bottom of the fender, one just below the front fender and the other about a foot back.
Step 12: Break-free the top cowl from the body if adhered. It can easily be done with a putty knife.
If the inner, upper cowl is stuck below the the foil-looking metal, wear gloves when removing it. It is very sharp and will cut you like it did me:
Step 13: Disconnect the antenna cable inside the fender. Most people say just pull hard to remove it. I found it safer and easier to use channel locks to get it off. It worked very well.
 08-04-2012, 02:23 PM
#2
JK Super Freak
Thread Starter
Join Date: Jul 2011
Location: Goodyear, Arizona
Posts: 1,567
Likes: 0
Received 0 Likes
on
0 Posts
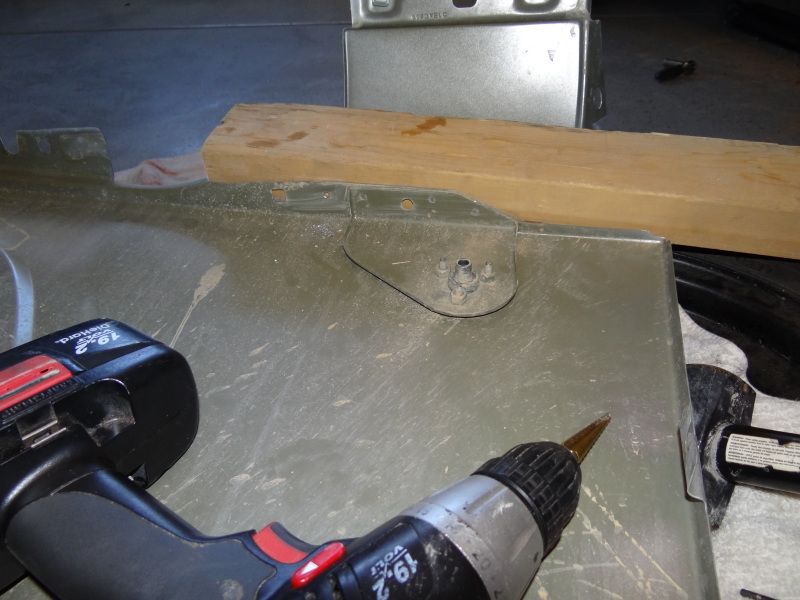
Step 14: Start drilling out the 4 welds that connect the fender to the upper cowl. It is recommended to use a wood block against the metal where the drill will exit the sheet metal to reduce the chance of damage.
Step 15: Cut the fender using the stencil provided. Sadly, I do not have any pics on this: I forgot to take any. Add the trim provided or add your own like I did. Pics at the end of that trim I used.
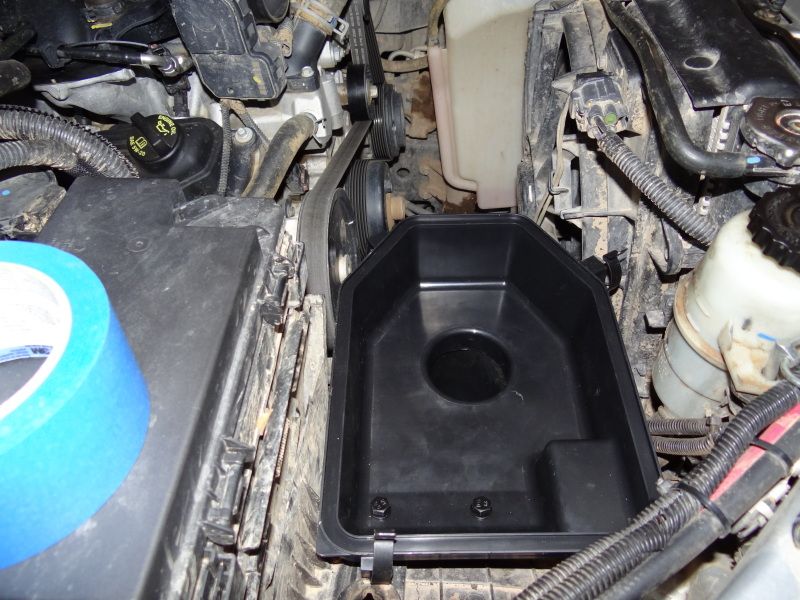
Step 16: Remove any aftermarket intake such as a CAI. Also, remove the lower and upper box of the stock intake, the tube from the throttle body can be left in place. The lower box can be installed for test fitting.
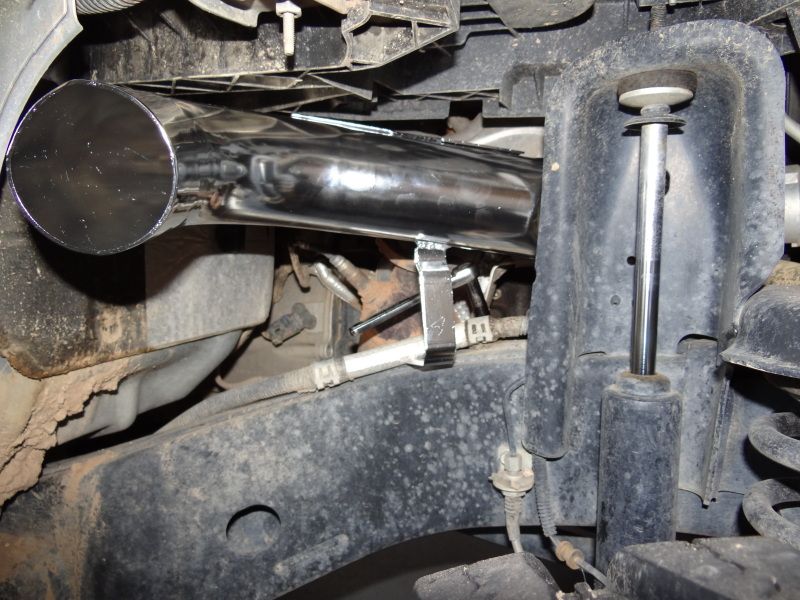
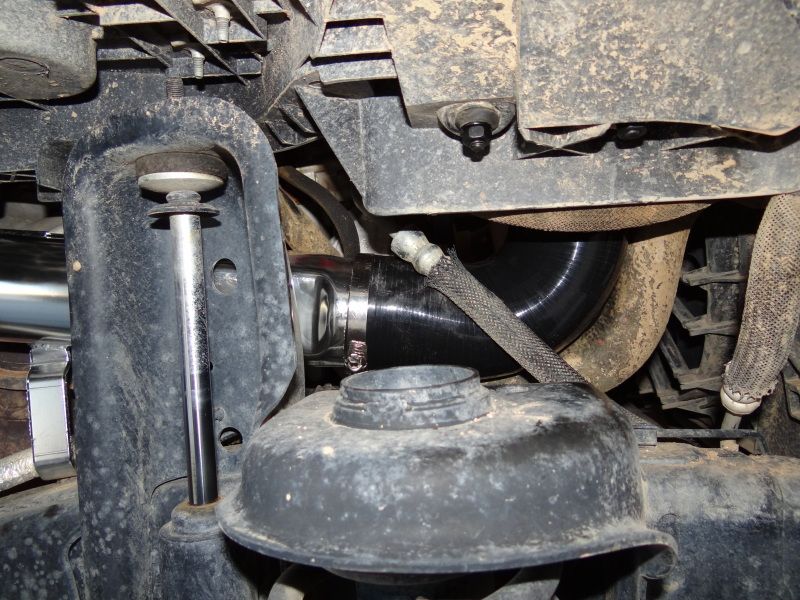
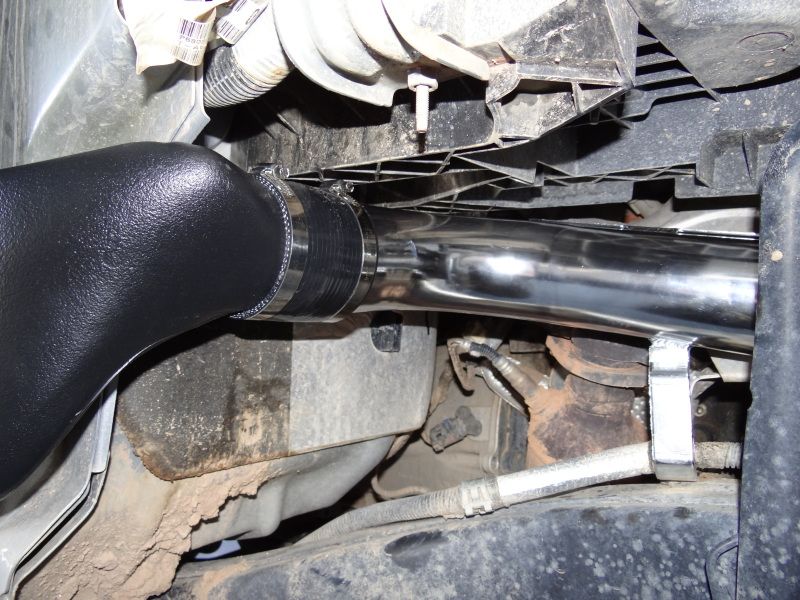
Step 17. Install aluminum tube under the power steering hard line. Tube bracket is attached to the bolt holding the wiring loom in the frame.
Step 18: Install 90 elbow from air box to aluminum tube. Trim as needed, take your time. Put RTV on connections if your chose to. I only did it at the elbow/air box connection. Rugged Ridge suggests RTV at all connections.
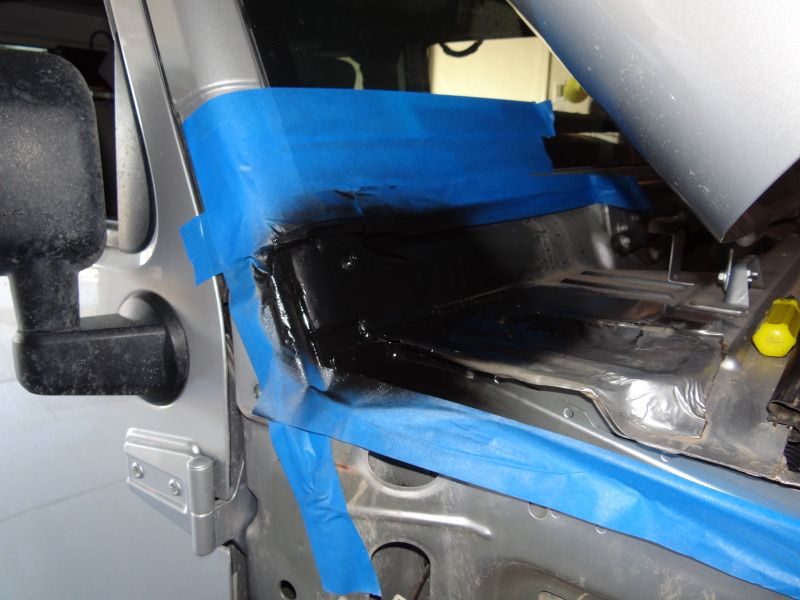
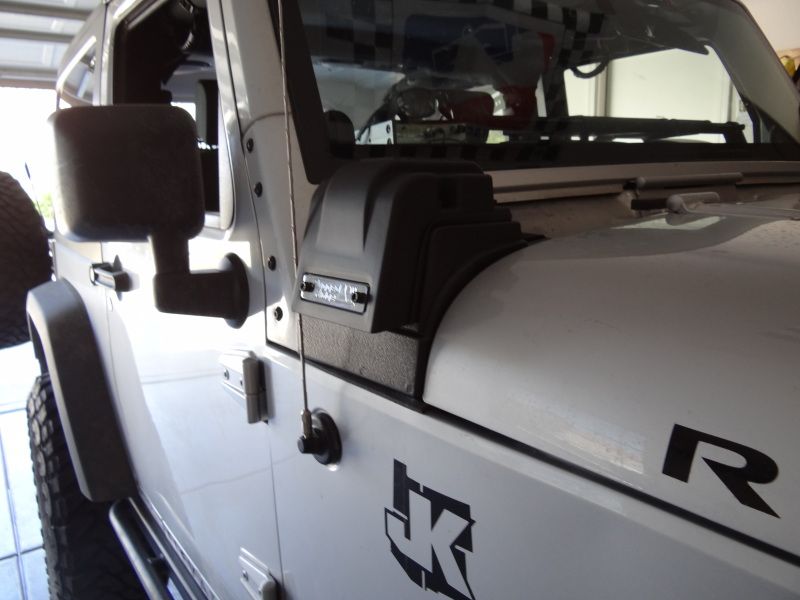
Step 19: Paint are on passenger side where upper cowl was. This is used to help "blend" the snorkel in and make the small gap less noticeable.
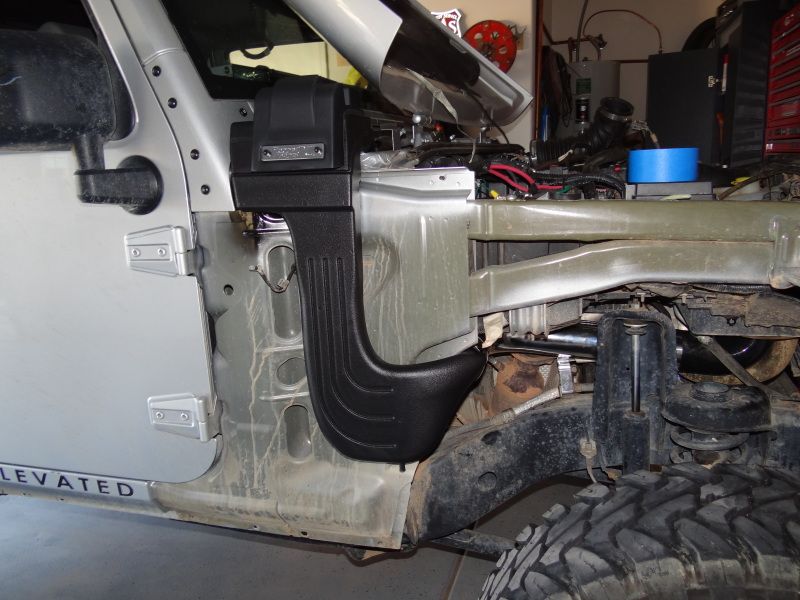
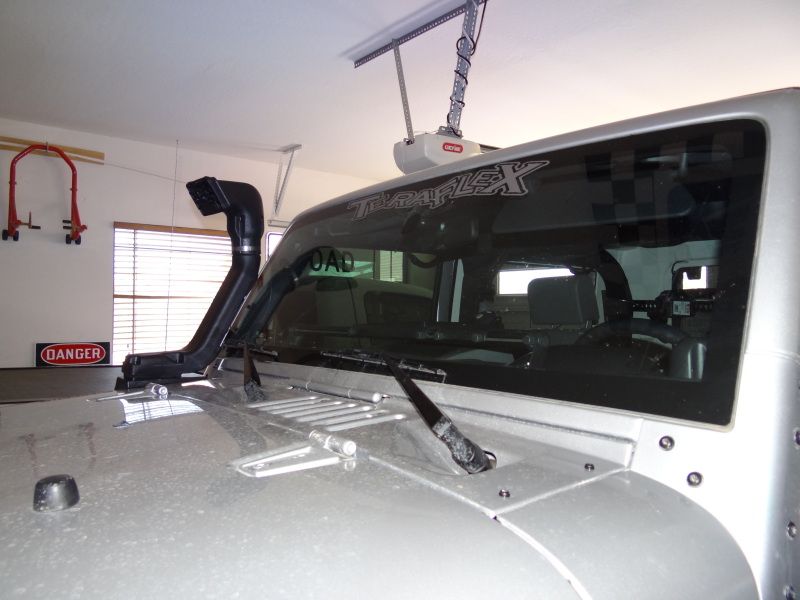
Step 20: Install the snorkel main body. This will connect to the aluminum tube below with a coupling as well as where the upper cowl was using the "Z" bracket provided.
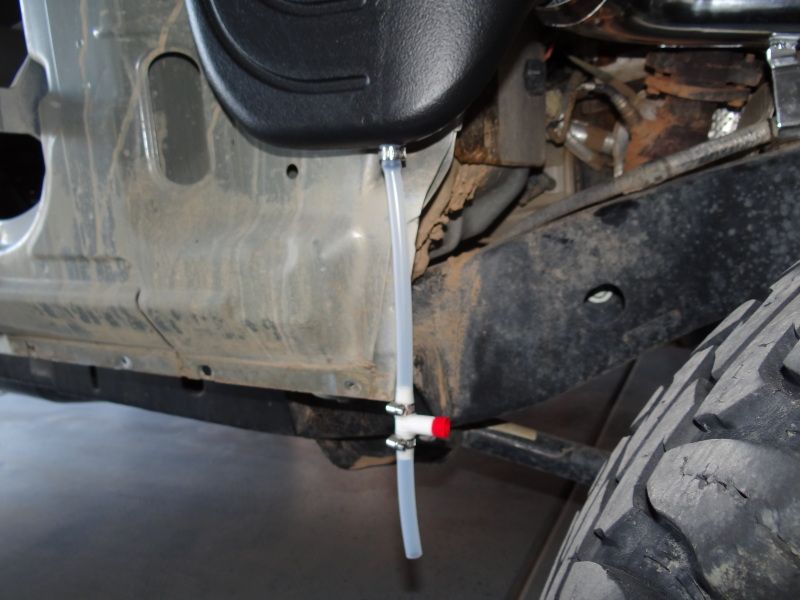
Step 21: Attach drain hose to the bottom of the main body. Make sure valve is closed.
Step 22: Install air filter and upper box. Use tabs from factory intake and switch them over to the new box. Make sure sensors and tube are correctly installed and not near moving parts.

Step 23. Check to make all connections are tight. Also, add RTV and inspect where you did so.
Step 24: Re-assemble fender, cowl, wipers, and door. Take your time and make sure you attach the antenna cable too.
Step 25: Enjoy!
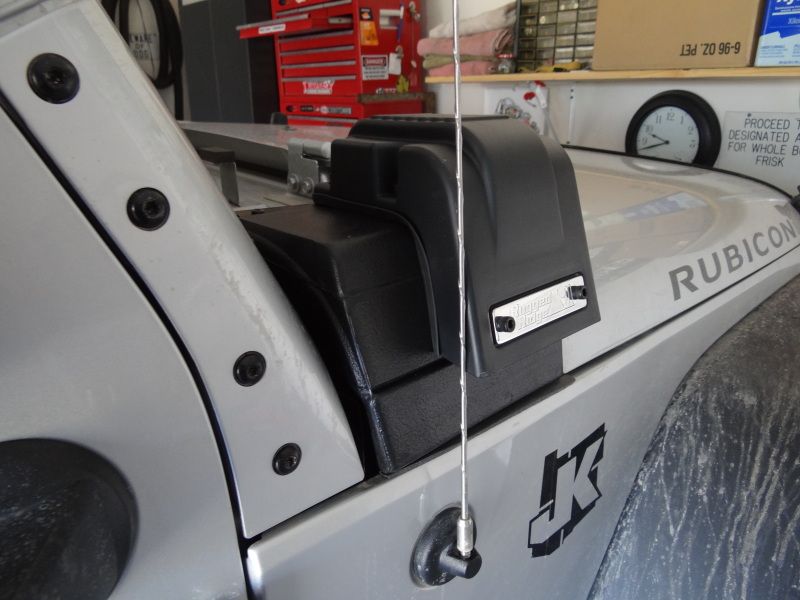
Step 26: Add the high mount of you wish. Only requires the mount and some screws. Swap-over take about 10 minutes.
***About the trim applied around the cut area of the fender: I did not like the type provided so I used some foam weatherstripped from a local auto parts store. I liked the look better and found it easier to apply.***
If anyone sees any typos or errors I may have missed, feel free to let me know so that I may fix them.
Step 15: Cut the fender using the stencil provided. Sadly, I do not have any pics on this: I forgot to take any. Add the trim provided or add your own like I did. Pics at the end of that trim I used.
Step 16: Remove any aftermarket intake such as a CAI. Also, remove the lower and upper box of the stock intake, the tube from the throttle body can be left in place. The lower box can be installed for test fitting.
Step 17. Install aluminum tube under the power steering hard line. Tube bracket is attached to the bolt holding the wiring loom in the frame.
Step 18: Install 90 elbow from air box to aluminum tube. Trim as needed, take your time. Put RTV on connections if your chose to. I only did it at the elbow/air box connection. Rugged Ridge suggests RTV at all connections.
Step 19: Paint are on passenger side where upper cowl was. This is used to help "blend" the snorkel in and make the small gap less noticeable.
Step 20: Install the snorkel main body. This will connect to the aluminum tube below with a coupling as well as where the upper cowl was using the "Z" bracket provided.
Step 21: Attach drain hose to the bottom of the main body. Make sure valve is closed.
Step 22: Install air filter and upper box. Use tabs from factory intake and switch them over to the new box. Make sure sensors and tube are correctly installed and not near moving parts.
Step 23. Check to make all connections are tight. Also, add RTV and inspect where you did so.
Step 24: Re-assemble fender, cowl, wipers, and door. Take your time and make sure you attach the antenna cable too.
Step 25: Enjoy!
Step 26: Add the high mount of you wish. Only requires the mount and some screws. Swap-over take about 10 minutes.
***About the trim applied around the cut area of the fender: I did not like the type provided so I used some foam weatherstripped from a local auto parts store. I liked the look better and found it easier to apply.***
If anyone sees any typos or errors I may have missed, feel free to let me know so that I may fix them.

 08-04-2012, 09:53 PM
#6
JK Enthusiast
Join Date: Feb 2012
Location: West Haverstraw, New York
Posts: 483
Likes: 0
Received 0 Likes
on
0 Posts
I think i noticed, you put the windshield bracket back on after the paint.
but before mounting the snorkel main body....right?
Also, where did the drain hose end up being?
I didn't see it in the finished images.
With the fender off, this would seem like a great time to add
a little extra protection,(under the visible sheet metal, like
some bed liner...just my 2 cts.) I mean when else will you
have your Jeep this much disassembled?
How long did it take you to remove all of the passengers side
of "stuff" you needed to remove to start the job?
Last edited by BoneShkr; 08-04-2012 at 10:02 PM. Reason: thought of something to add to my query.
Trending Topics
08-05-2012, 06:44 AM
#8
JK Super Freak
Thread Starter
Join Date: Jul 2011
Location: Goodyear, Arizona
Posts: 1,567
Likes: 0
Received 0 Likes
on
0 Posts
I think i noticed, you put the windshield bracket back on after the paint.
but before mounting the snorkel main body....right?
Correct
Also, where did the drain hose end up being?
I didn't see it in the finished images.
It's just behind the front fender. If you get eye-level with the rock rail you can barely see it.
With the fender off, this would seem like a great time to add
a little extra protection,(under the visible sheet metal, like
some bed liner...just my 2 cts.) I mean when else will you
have your Jeep this much disassembled?
You could, and it'd be a great idea. If you're referring to protection from rust, I'm not concerned with it where I live. However, still a great idea to do so.
How long did it take you to remove all of the passengers side
of "stuff" you needed to remove to start the job?
I'd say about 60 minutes including the rock rail removal. I did this all alone too.
08-05-2012, 06:45 AM
#9
JK Super Freak
Thread Starter
Join Date: Jul 2011
Location: Goodyear, Arizona
Posts: 1,567
Likes: 0
Received 0 Likes
on
0 Posts

