Stock Bumper "Mid-width" chop job with winch plate
 03-11-2009, 10:22 AM
#1
JK Enthusiast
Thread Starter
Join Date: Sep 2008
Location: katy, texas
Posts: 203
Likes: 0
Received 0 Likes
on
0 Posts
Hey - I've gotten a bunch of PM's on how I made my mid-width stocker, so I figured I'd post up some pics and some of the stuff I did. Let me know if you have any questions, I'll try to answer in the thread.
Note: You'll see the rotozip in here, but you need to use a jigsaw instead...when I cut the bumper, I used the Rotozip with a cutoff wheel but it has such a high RPM, it pretty much melts the plastic making a mess...a simple jigsaw with a new blade (wood blade) cuts the plastic perfectly and leaves a clean cut edge...I learned this when I cut in my winch plate.
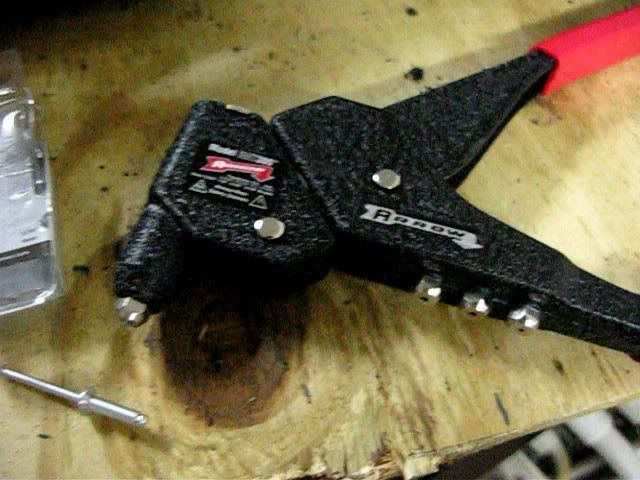
Tools used
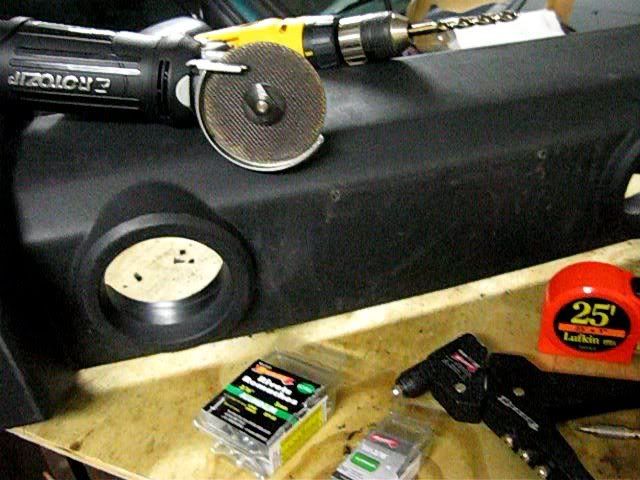
tools used
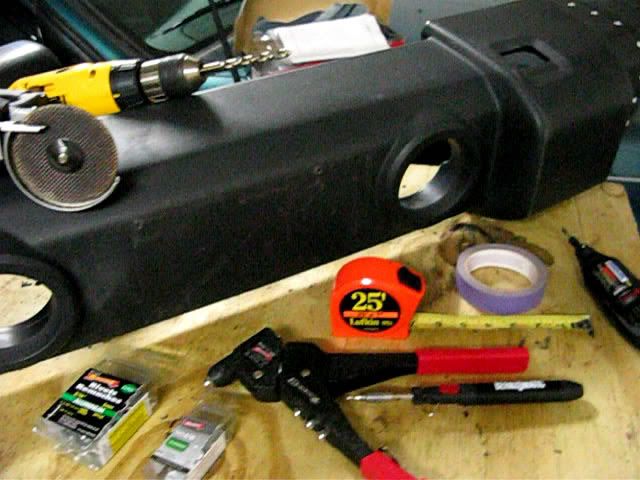
tools used
tools used
I cut out 4 1/2" of the bumper, the tape cuts were from out to out.
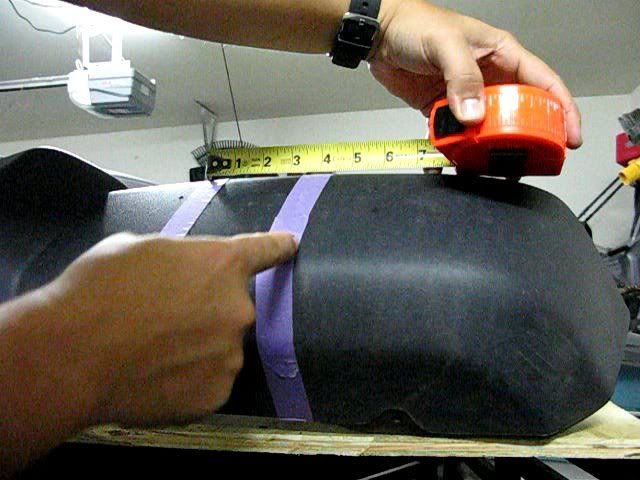
4 1/2"
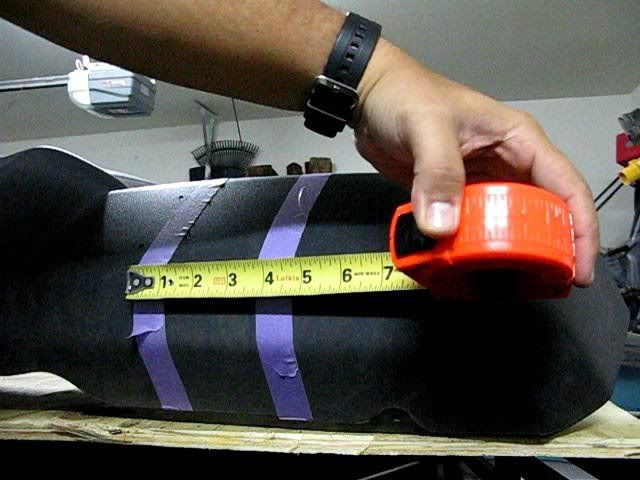
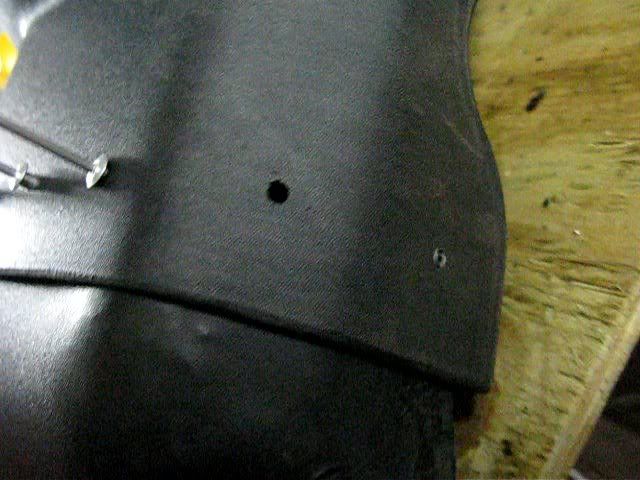
4 1/2" - notice...you're going to leave in the brass nut sleeves that attach the bumper to the steel frame...be careful not to cut close to these.

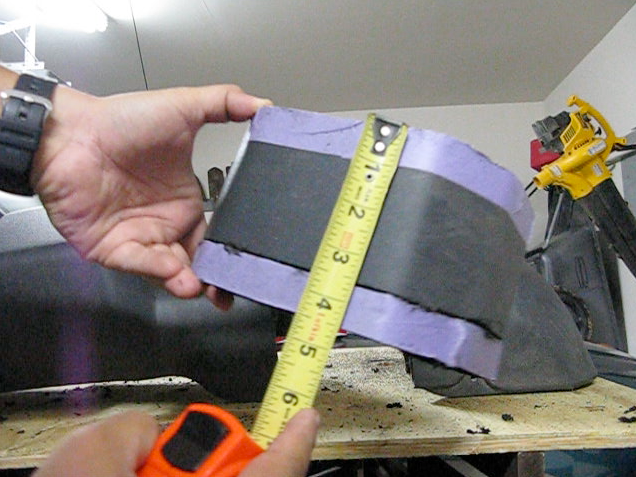
the "exposed" ends of the bumper will be 5"...the part tucked into the bumper body is about 2". This gives you enough of an overlap to be able to secure the bumper and the end together with the pop rivets. Note - your going to have to trim out the rear of the ends you just cut so that they can "slide" into the main bumper body...this is a try and test thing and you have to make cuts according to how yours are fitting together.
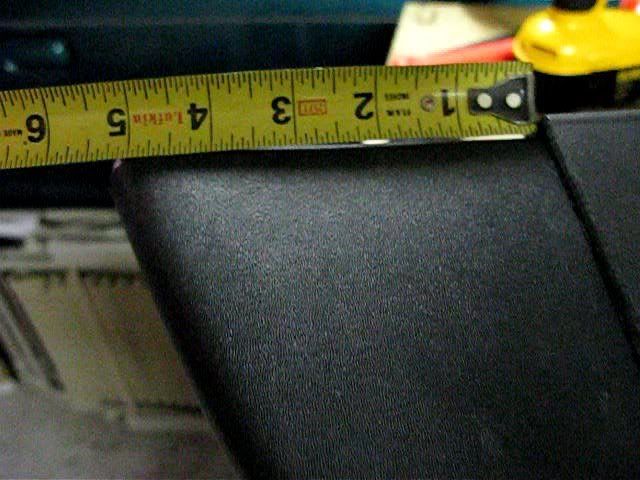
From the "crush can" on your bumper body - I used 2" as my cut line. So, where you're said and done, the exposed 5" plus the 2" give you an end that projects 7" past the crush can...perfect size for a mid-width bumper.
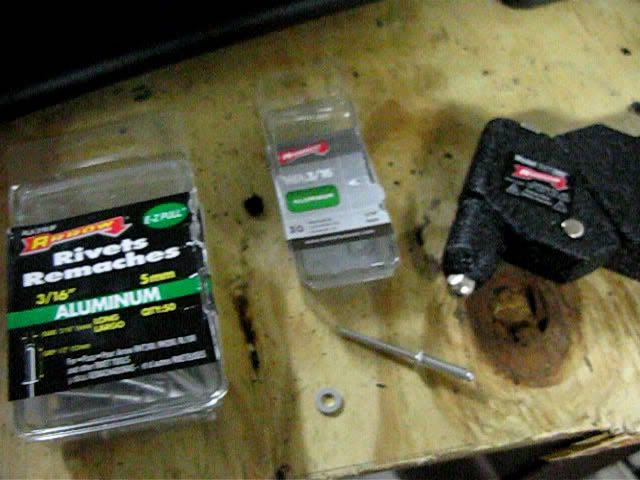
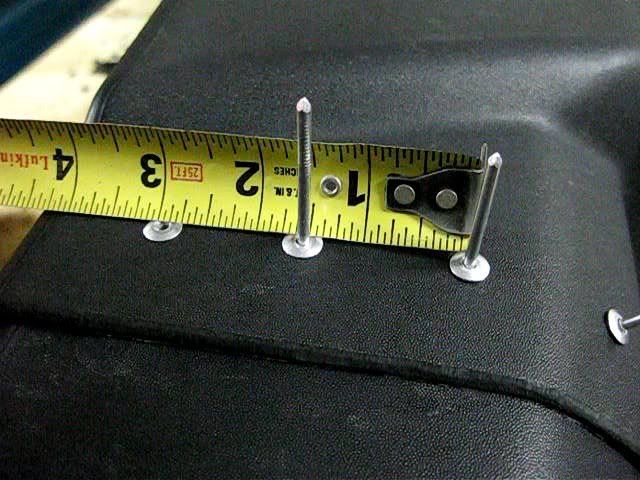
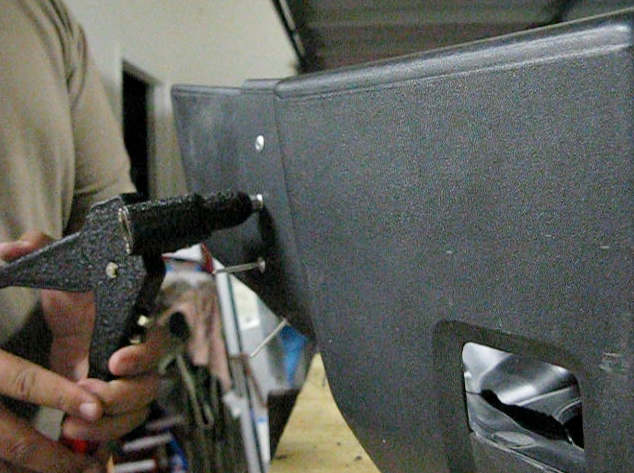
After you cut your ends and are ready to connect them to the body with rivets...you 1st dry fit the 2 parts together, then tape them together with masking tape...then using about 1 1/2" spacing - locate the holes for all your rivets. Important, be sure that you keep all the holes in line. When all are marked, use a small drill to make the holes for the rivets, then insert all the pop rivets and washers (washers are IMPORTANT for strength, don't just use rivets alone...I got all my parts from Home Depot). One thing to note - if when you use the rivet tool and set the rivet - it's good if the little hole still have some metal from the rod left over (if some if sticking out, use a Dremel or sanding block to smooth it against the head of the rivet)...the reason it's good to have some metal in the hole is so that when you bedline it, you don't have a hole left in the rivet. One of mine didn't have the metal filling the hole so I had to spray some bedliner and kinda gunk it into the hole with a nail. Anyway - measure, mark holes, drill them out, then do your rivets and set the ends on.
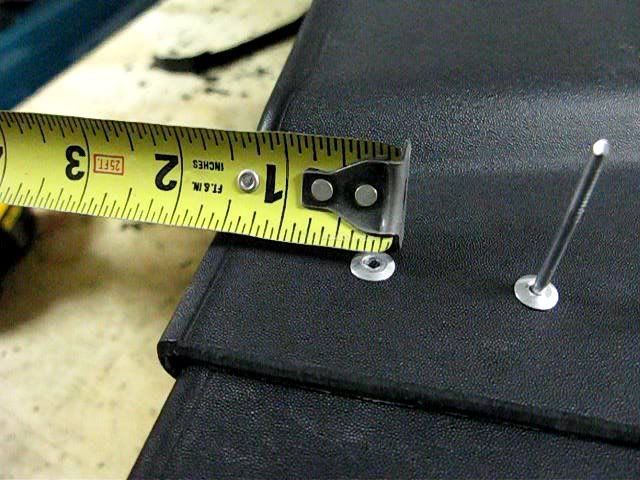
1 1/2"

1 1/2"
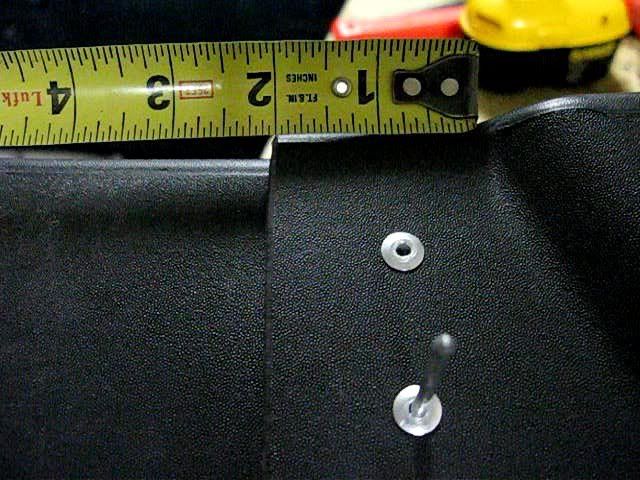
close to 1 1/2" - just center the rivet on the little face
same as above - 1 1/2"
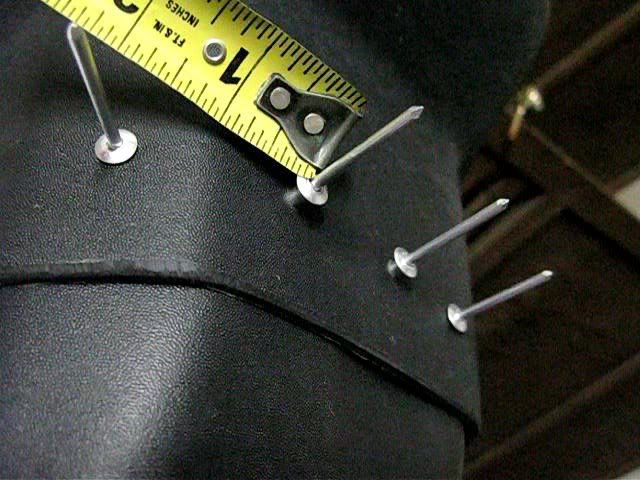
1 1/2" for all these too...
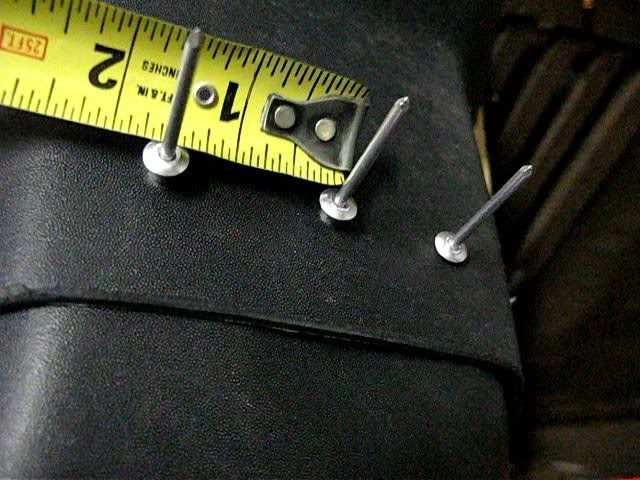
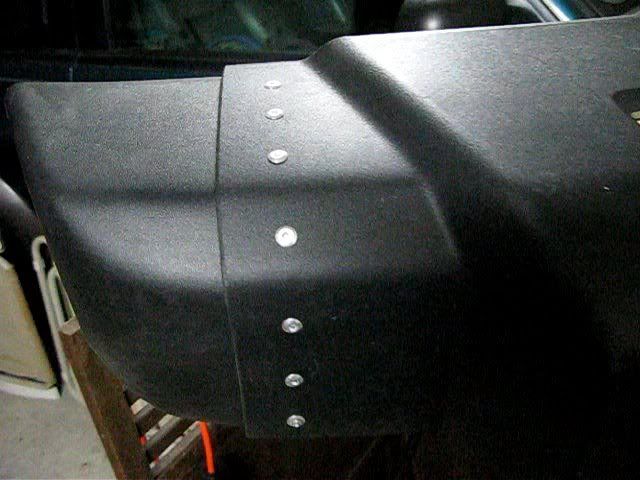
Remember, you have another 2 rivets you have to add to the bottom...in my pic below, I hadn't added the rivets in yet but you can see the holes for them...
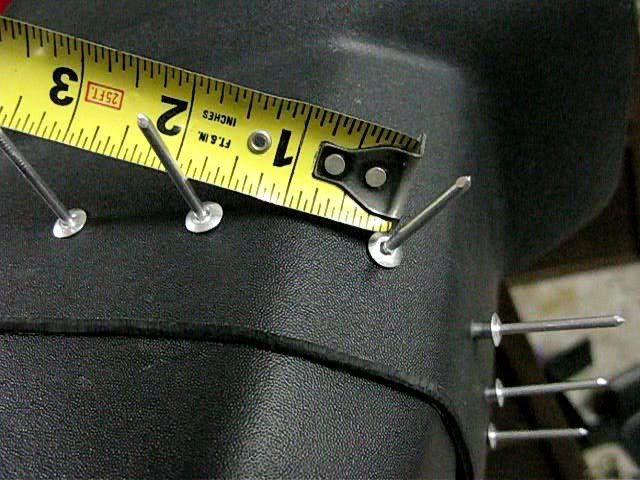
Here it is with all the rivets in without the rods cut off yet.
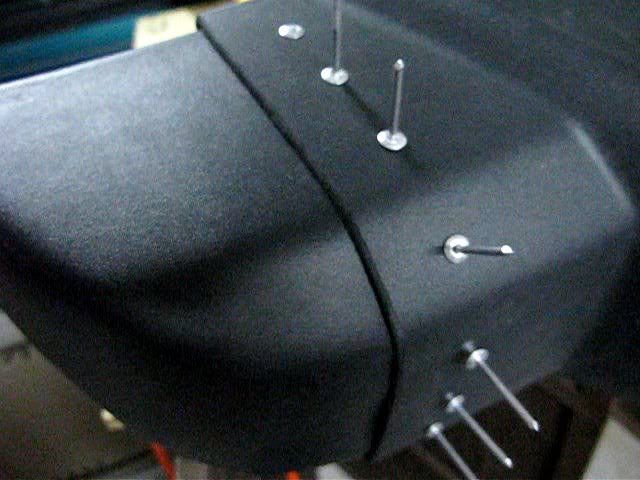
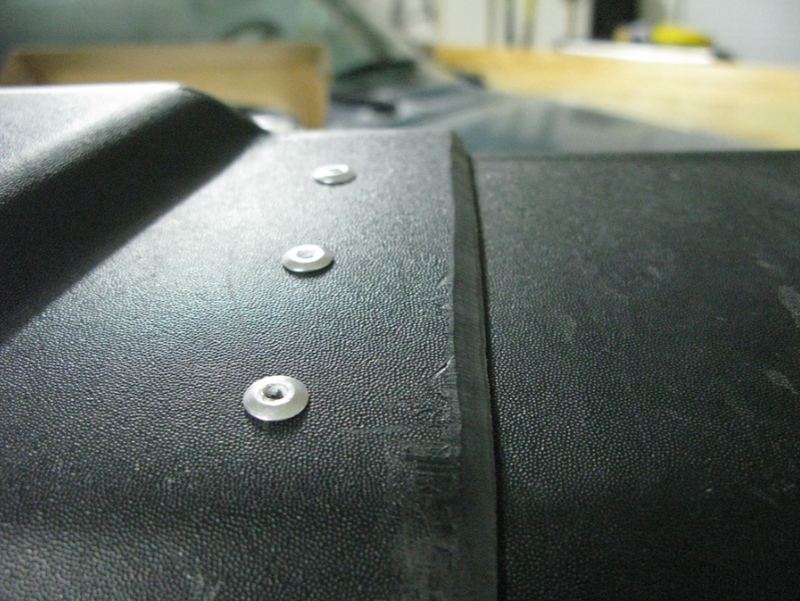
Then same with rivets all set. See what I meant by having the centers all filled...it'll only make things easier for you in the bed-lining step.
If you want...you can cut a 45 degree angle on the cut edge where the ends meet to get a cleaner look...I did it and like the way it looks. I used a Dremel tool with barrel cutting tool.
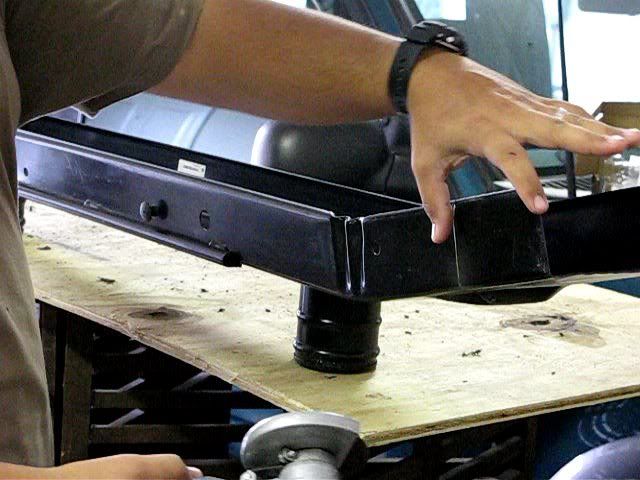
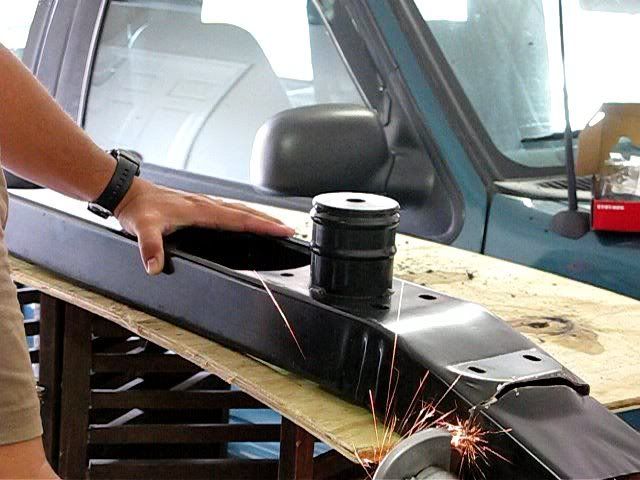
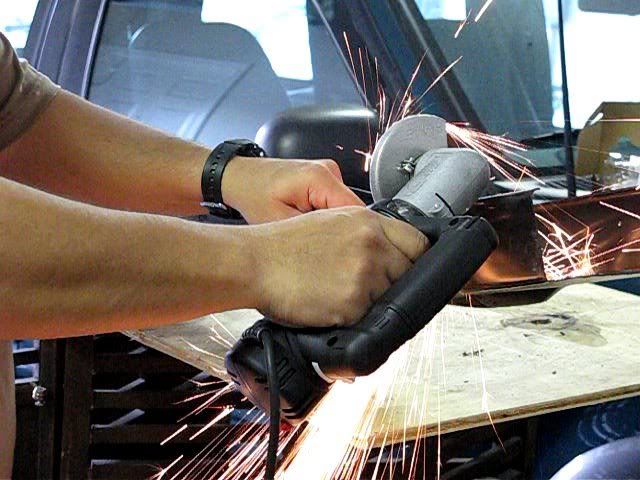
Now that the plastic portion is all done...time to cut the steel bumper frame. I cut the ends off just past the mounting holes...you can see this in the pics below. Remember to smooth your cuts so you don't cut your hand, after the cuts you get a jagged edge. For this cutting, I used my RotoZip with a cutoff wheel - the steel is pretty darn hard to cut so it will take some time. When all done, be sure to spray paint with some black Rustoleum spray paint (only where you made the cuts and metal got exposed...)
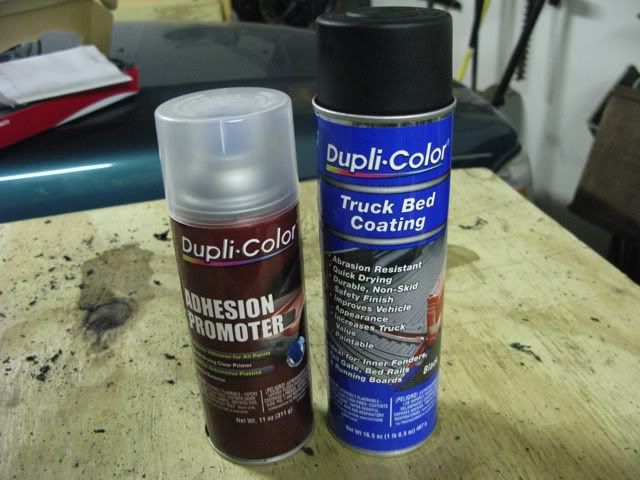
Last step is the Duplicolor Adhesion Promoter and the Spray Bed liner. Clean the entire bumper well with alcohol or something similiar to remove all oil residue and dirt. Then spray the entire bumper with the adhesion promoter making sure that every area that is going to get bed liner is coated in the adhesion promoter. Note - you're going to have to work fast because as soon as you spray the promoter on - it starts to get tacky and white in color...that is when you have to go any start spaying on the Bed Liner (I think it was like within 5 minutes of spraying on the can of promoter). With the Bed Liner spray - use at least 2 coats (should be about 1 can)...you would prob be better off with like 3-4 coats (2 cans), I only did 2 coats but should have gotten another can and did 3-4 coats...this is really to your taste. I didn't want a gloppy look but rather a clean finish. Let it air dry for a few hours and check out your handy work! You're done!
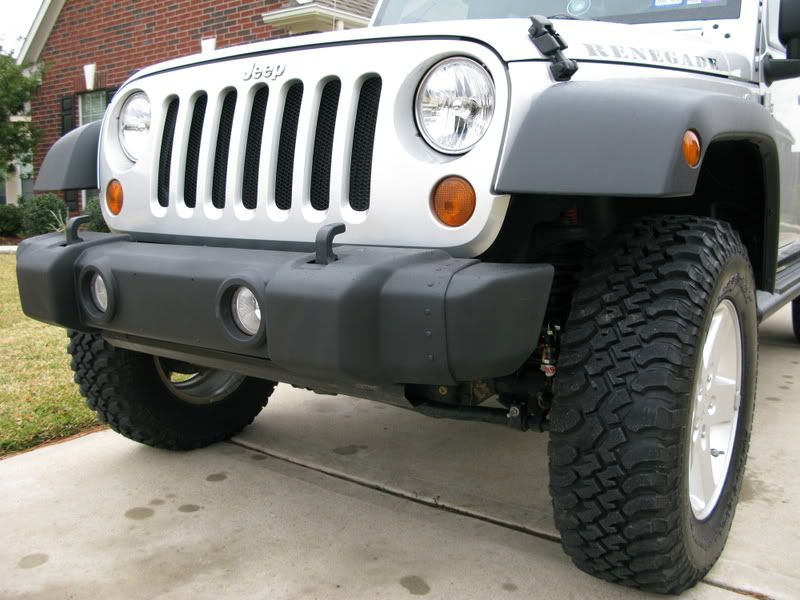
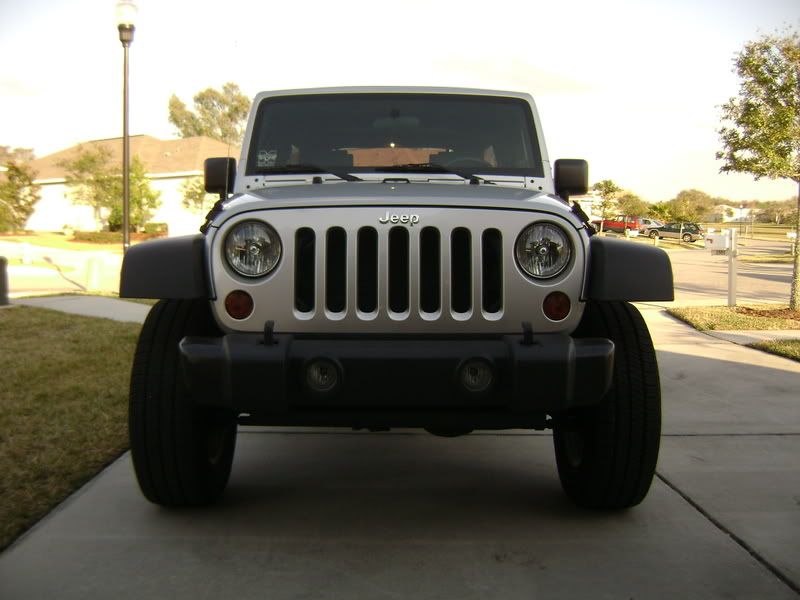
When you're all said and done - you've got a great new bumper!
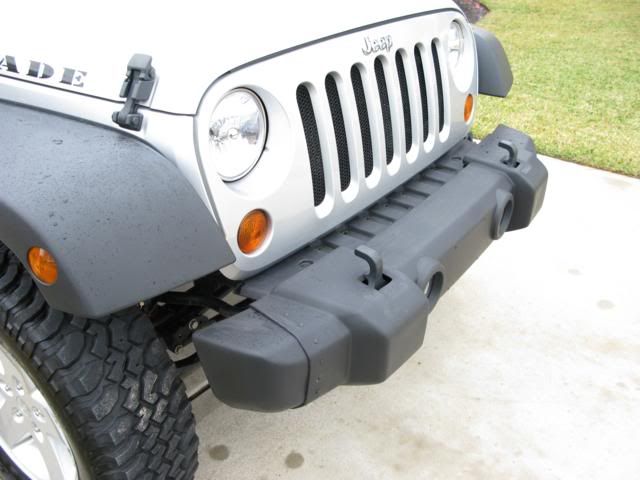
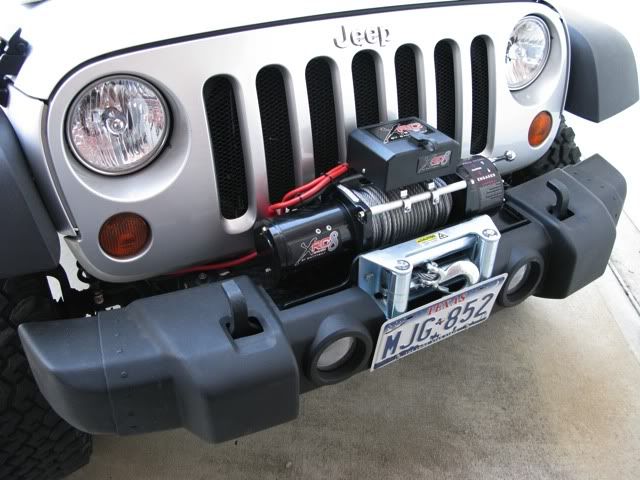
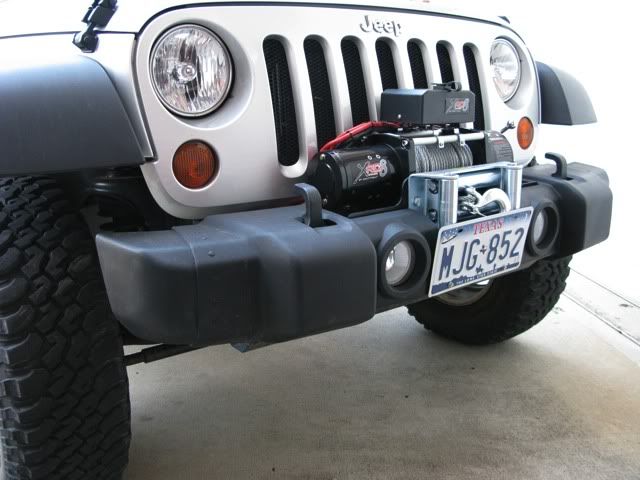
Then when you're ready - cut in that winch plate and add a nice winch! I found a great JK winch plate on Ebay that secure to both the frame rails and the bumper flange...for $135 - a great deal. It's great because it's more secure...as you can see below - it make for a clean installation into the stock bumper. I love the way it looks with the winch on it now!!
Well...I hope all the above helps anyone wanting to do this project! I've gotten a few emails asking for the info on how I did mine so I figured I'd post up the info and steps I followed. When doing this, the more info you have the better - getting started is the worst part but once you get started - everything goes pretty smoothly for the most part. I did mine slowly over the course of a week...patience is key.
Again, ask as many questions you want - post pics of your progress...and good luck! Remember,
TAKE YOUR TIME!!!!
Note: You'll see the rotozip in here, but you need to use a jigsaw instead...when I cut the bumper, I used the Rotozip with a cutoff wheel but it has such a high RPM, it pretty much melts the plastic making a mess...a simple jigsaw with a new blade (wood blade) cuts the plastic perfectly and leaves a clean cut edge...I learned this when I cut in my winch plate.
Tools used
tools used
tools used
tools used
I cut out 4 1/2" of the bumper, the tape cuts were from out to out.
4 1/2"
4 1/2" - notice...you're going to leave in the brass nut sleeves that attach the bumper to the steel frame...be careful not to cut close to these.
the "exposed" ends of the bumper will be 5"...the part tucked into the bumper body is about 2". This gives you enough of an overlap to be able to secure the bumper and the end together with the pop rivets. Note - your going to have to trim out the rear of the ends you just cut so that they can "slide" into the main bumper body...this is a try and test thing and you have to make cuts according to how yours are fitting together.
From the "crush can" on your bumper body - I used 2" as my cut line. So, where you're said and done, the exposed 5" plus the 2" give you an end that projects 7" past the crush can...perfect size for a mid-width bumper.
After you cut your ends and are ready to connect them to the body with rivets...you 1st dry fit the 2 parts together, then tape them together with masking tape...then using about 1 1/2" spacing - locate the holes for all your rivets. Important, be sure that you keep all the holes in line. When all are marked, use a small drill to make the holes for the rivets, then insert all the pop rivets and washers (washers are IMPORTANT for strength, don't just use rivets alone...I got all my parts from Home Depot). One thing to note - if when you use the rivet tool and set the rivet - it's good if the little hole still have some metal from the rod left over (if some if sticking out, use a Dremel or sanding block to smooth it against the head of the rivet)...the reason it's good to have some metal in the hole is so that when you bedline it, you don't have a hole left in the rivet. One of mine didn't have the metal filling the hole so I had to spray some bedliner and kinda gunk it into the hole with a nail. Anyway - measure, mark holes, drill them out, then do your rivets and set the ends on.
1 1/2"
1 1/2"
close to 1 1/2" - just center the rivet on the little face
same as above - 1 1/2"
1 1/2" for all these too...
Remember, you have another 2 rivets you have to add to the bottom...in my pic below, I hadn't added the rivets in yet but you can see the holes for them...
Here it is with all the rivets in without the rods cut off yet.
Then same with rivets all set. See what I meant by having the centers all filled...it'll only make things easier for you in the bed-lining step.
If you want...you can cut a 45 degree angle on the cut edge where the ends meet to get a cleaner look...I did it and like the way it looks. I used a Dremel tool with barrel cutting tool.
Now that the plastic portion is all done...time to cut the steel bumper frame. I cut the ends off just past the mounting holes...you can see this in the pics below. Remember to smooth your cuts so you don't cut your hand, after the cuts you get a jagged edge. For this cutting, I used my RotoZip with a cutoff wheel - the steel is pretty darn hard to cut so it will take some time. When all done, be sure to spray paint with some black Rustoleum spray paint (only where you made the cuts and metal got exposed...)
Last step is the Duplicolor Adhesion Promoter and the Spray Bed liner. Clean the entire bumper well with alcohol or something similiar to remove all oil residue and dirt. Then spray the entire bumper with the adhesion promoter making sure that every area that is going to get bed liner is coated in the adhesion promoter. Note - you're going to have to work fast because as soon as you spray the promoter on - it starts to get tacky and white in color...that is when you have to go any start spaying on the Bed Liner (I think it was like within 5 minutes of spraying on the can of promoter). With the Bed Liner spray - use at least 2 coats (should be about 1 can)...you would prob be better off with like 3-4 coats (2 cans), I only did 2 coats but should have gotten another can and did 3-4 coats...this is really to your taste. I didn't want a gloppy look but rather a clean finish. Let it air dry for a few hours and check out your handy work! You're done!
When you're all said and done - you've got a great new bumper!
Then when you're ready - cut in that winch plate and add a nice winch! I found a great JK winch plate on Ebay that secure to both the frame rails and the bumper flange...for $135 - a great deal. It's great because it's more secure...as you can see below - it make for a clean installation into the stock bumper. I love the way it looks with the winch on it now!!
Well...I hope all the above helps anyone wanting to do this project! I've gotten a few emails asking for the info on how I did mine so I figured I'd post up the info and steps I followed. When doing this, the more info you have the better - getting started is the worst part but once you get started - everything goes pretty smoothly for the most part. I did mine slowly over the course of a week...patience is key.
Again, ask as many questions you want - post pics of your progress...and good luck! Remember,
TAKE YOUR TIME!!!!
Last edited by akonius; 03-12-2009 at 10:46 PM.


Trending Topics
03-12-2009, 09:34 AM
#8
JK Super Freak
Great write up. Now if you can take it all apart - cut off the cans and weld a bracket to the bumper that would still keep the outside plastic - but allow D-Rings to be bolted to the frame bracket. Hmmmm....... there's an idea.
03-12-2009, 09:55 PM
#10
JK Enthusiast
Thread Starter
Join Date: Sep 2008
Location: katy, texas
Posts: 203
Likes: 0
Received 0 Likes
on
0 Posts
Hey - here's the Ebay Item number: 360134072029 - it's a winch mounting plate by aries Automotive. It fits perfectly and has good mtg hardware. It'll run $135 shipped - a great deal.

