Under-Floor Storage
 06-01-2014, 06:03 PM
#231
JK Enthusiast
Join Date: Sep 2012
Location: Leamington
Posts: 157
Likes: 0
Received 0 Likes
on
0 Posts
I have been thinking about creating some type of storage in my Jeep for quite some time, I took in all the ideas from this forum and yesterday my oldest son and I tackled the project. My criteria was simple, have room to "hide" my laptop and work samples (two way radios), the storage needs to not be obvious, have fun building it with my son, spend $0.
I used some 2x4's for the frame and left over laminate flooring for the deck, I had a couple cans of spray paint in the garage from painting the inside of my hardtop. After we built it I realized the mat from the back of the my Jeep didn't cover the deck well enough and if you looked it was painfully obvious something was hidden down there. So I broke my rule and bought a 3'x4' mat from Walmart($10). I cut the carpet about 1 1/2" larger than the deck and I think I will keep it like that rather than trying to cut it to size (I figure it's next to impossible to get it just right and most of the carpet in the Jeep is installed with an overlap like that anyways).
I still need to secure it to my Jeep which I will do with some metal strapping to the factory tie downs. There is no way this will keep someone out if they really want to get in there but I was looking for an out of sight out of mind solution and I think I achieved that.
Last edited by Johnnyfever; 06-01-2014 at 08:30 PM.
 07-13-2014, 10:02 AM
#232
JK Enthusiast
Two months later, I finally finished mine.

The project stalled because the carpet I got is TOUGH to cut. Regular scissors won't do it. I tried a razor knife, but results were not fantastic. So it sat for awhile until I found these at Lowes:

These Clauss shears stayed sharp and did a good job cutting the rubber-backed carpet.
Even after solving that problem, the job went slow. Making the carpet actually stick to the wood required a little experimentation. I didn't want to use anything that could eventually rust, so staples were out of the question for me. Typical spray adhesive did no good. I finally found that regular old wood glue did the job very well. I was hesitant to use that initially as I was concerned that the glue would soak the carpet and make a mess. But tests showed that the rubber backing of the carpet prevented the glue from soaking through. I found that 90 minutes of drying time was adequate to get the carpet to stick well enough to start working on the next area to glue down. Plan on using a variety of clamps to get the complex corners glued down. I am no upholstery wiz, but I am satisfied with the final product.
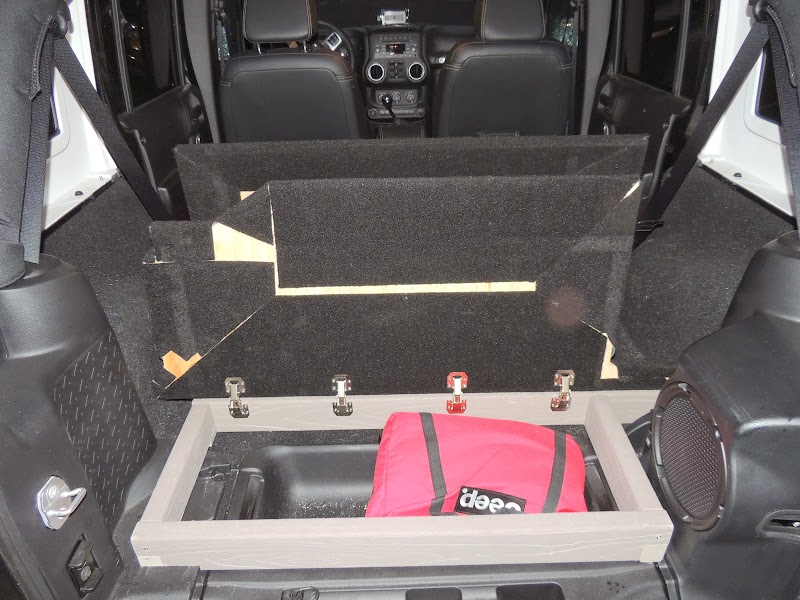
For the part that covers the folded flat rear seats, I ended up with the following:
The stainless steel piano hinges (2x12") allows the jump seat section to flip up so I can hold one rear seat passenger if desired.

In order to prevent this section from moving around, I used stainless steel cap screws to act as locating pins.

Here is my proof-of-concept:


The Choice-deck material has a tight-enough grain that the machine screws worked way better than had the material been traditional wood. I used a 7/32 drill for the main hole, and bored out maybe a half an inch deep with a 5/16 drill to accommodate the thread-less shank area. This also permitted the screw to sit upright in the hole as I pressed down hard to get the threaded part to "bite" into the decking material.

Once it bites, the tight grain and the interference fit holds that cap screw tight. A 1/2 inch bit was used to drill the hole in the wood. That creates a little "slop", but the slop is taken up once the wood is covered with the carpet. It works perfectly.

One thing I would do differently is surround the plywood with waste material when drilling that large of a hole so near to the edge. As you can see, the plywood suffered blow-out of the hole. Once covered, it is still functional, but I would preferred to have better holes drilled there.
The extra material removed from the side leaves area for the roll bar mounted seat belts. There is still plenty of clearance around the door panels so nothing touches, yet not so much room my dog is going to get his paw in there.

With the rear seats folded down, the storage lids still hold themselves open.

And everything worked out as expected up front.

From the rear, you can still see the gray decking material... Since that stuff won't permit glue to stick due to it's composition, I decided to just leave as-is. It doesn't look bad in my opinion.

I may try painting a sample black to see how the paint reacts, but then again I may not.
And finally, here's the dog enjoying his new flat floor!

EDIT: Found a PERFECT use for that center storage section last night! Wasn't planned, just worked out that way.

The project stalled because the carpet I got is TOUGH to cut. Regular scissors won't do it. I tried a razor knife, but results were not fantastic. So it sat for awhile until I found these at Lowes:
These Clauss shears stayed sharp and did a good job cutting the rubber-backed carpet.
Even after solving that problem, the job went slow. Making the carpet actually stick to the wood required a little experimentation. I didn't want to use anything that could eventually rust, so staples were out of the question for me. Typical spray adhesive did no good. I finally found that regular old wood glue did the job very well. I was hesitant to use that initially as I was concerned that the glue would soak the carpet and make a mess. But tests showed that the rubber backing of the carpet prevented the glue from soaking through. I found that 90 minutes of drying time was adequate to get the carpet to stick well enough to start working on the next area to glue down. Plan on using a variety of clamps to get the complex corners glued down. I am no upholstery wiz, but I am satisfied with the final product.
For the part that covers the folded flat rear seats, I ended up with the following:
The stainless steel piano hinges (2x12") allows the jump seat section to flip up so I can hold one rear seat passenger if desired.
In order to prevent this section from moving around, I used stainless steel cap screws to act as locating pins.
Here is my proof-of-concept:
The Choice-deck material has a tight-enough grain that the machine screws worked way better than had the material been traditional wood. I used a 7/32 drill for the main hole, and bored out maybe a half an inch deep with a 5/16 drill to accommodate the thread-less shank area. This also permitted the screw to sit upright in the hole as I pressed down hard to get the threaded part to "bite" into the decking material.
Once it bites, the tight grain and the interference fit holds that cap screw tight. A 1/2 inch bit was used to drill the hole in the wood. That creates a little "slop", but the slop is taken up once the wood is covered with the carpet. It works perfectly.
One thing I would do differently is surround the plywood with waste material when drilling that large of a hole so near to the edge. As you can see, the plywood suffered blow-out of the hole. Once covered, it is still functional, but I would preferred to have better holes drilled there.
The extra material removed from the side leaves area for the roll bar mounted seat belts. There is still plenty of clearance around the door panels so nothing touches, yet not so much room my dog is going to get his paw in there.
With the rear seats folded down, the storage lids still hold themselves open.
And everything worked out as expected up front.
From the rear, you can still see the gray decking material... Since that stuff won't permit glue to stick due to it's composition, I decided to just leave as-is. It doesn't look bad in my opinion.
I may try painting a sample black to see how the paint reacts, but then again I may not.
And finally, here's the dog enjoying his new flat floor!
EDIT: Found a PERFECT use for that center storage section last night! Wasn't planned, just worked out that way.
Last edited by jeep_n_co; 07-14-2014 at 07:35 AM.
The following users liked this post:
Alextorello (08-22-2018)
07-14-2014, 06:35 AM
#233
JK Enthusiast
Join Date: Sep 2012
Location: Leamington
Posts: 157
Likes: 0
Received 0 Likes
on
0 Posts
07-14-2014, 07:09 AM
#234
JK Enthusiast
Edit: Some folks have asked for dims... now that I have a finished product, I will write up final dims tonight. I had constant revisions as I adjusted fit due to carpet thickness.
Last edited by jeep_n_co; 07-14-2014 at 07:12 AM.
07-22-2014, 05:55 PM
#235
JK Newbie

Join Date: Jul 2014
Location: United States
Posts: 1
Likes: 0
Received 0 Likes
on
0 Posts
Thanks to the ronjenx and everyone who has followed this idea and made it their own. I had an add-a-trunk in my TJ and it worked ok, but I didn't like the space it took up. The Tuffy and Smitty storage containers are great, but $400+ for a glorified toolbox that taxes up a lot of room isn't great. This trunk deck system looks perfect for me to store my laptop, camera and odds and ends and most people would never even know it's there. I will definitely build a locking system into it.
I'm a little torn about how I want it to open up, since I want access to the compartments even if I have stuff stacked on top of it. Maybe a top that opens as well as a slide-out drawer from the tailgate could work for my needs. It'd be great if there was some way to securely store the freedom panels (I have the bag, but would prefer that to be hidden/locked as well). I'd like to keep my sub, so it looks like I'm in for a little extra work.
Does anyone drill this into the floor (similar to what I would think you must have to do for the Tuffy box. Are there factory screws we can use, or do we need to drill new holes?
jeep_n_co, Great pics.. I'm looking forward to your dimensions.
 08-22-2014, 09:58 AM
#237
JK Enthusiast

Join Date: Jun 2012
Location: Marysville, WA
Posts: 105
Likes: 0
Received 0 Likes
on
0 Posts
It's possible to relocate the stock subwoofer and box to under the passenger seat. The box does need some adjustment to fit, and the wire needs pulled from the loom to make it reach. This opens up much more space to set up your storage in the rear.
07-25-2015, 06:45 PM
#239
JK Enthusiast
Just to try and revive this thread I've decided to post photos of the new drawer system I'm building.
Started by removing the brackets
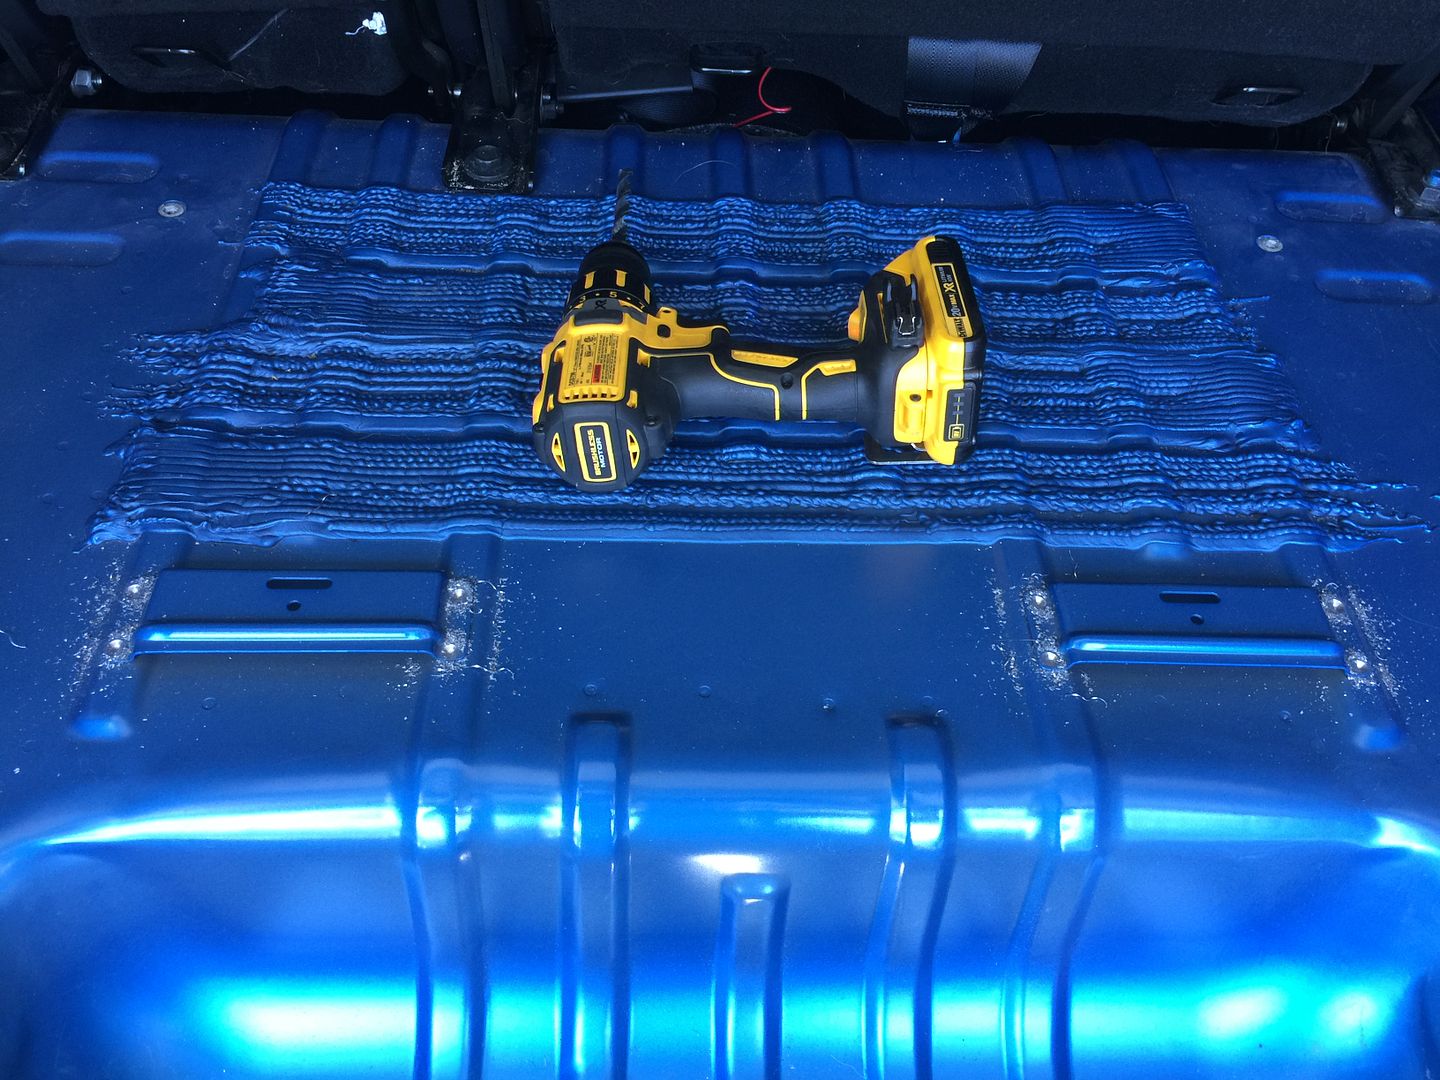
Then removed the insulation at the high spots, after box is done this will get primed and repainted and eventually Monstalined
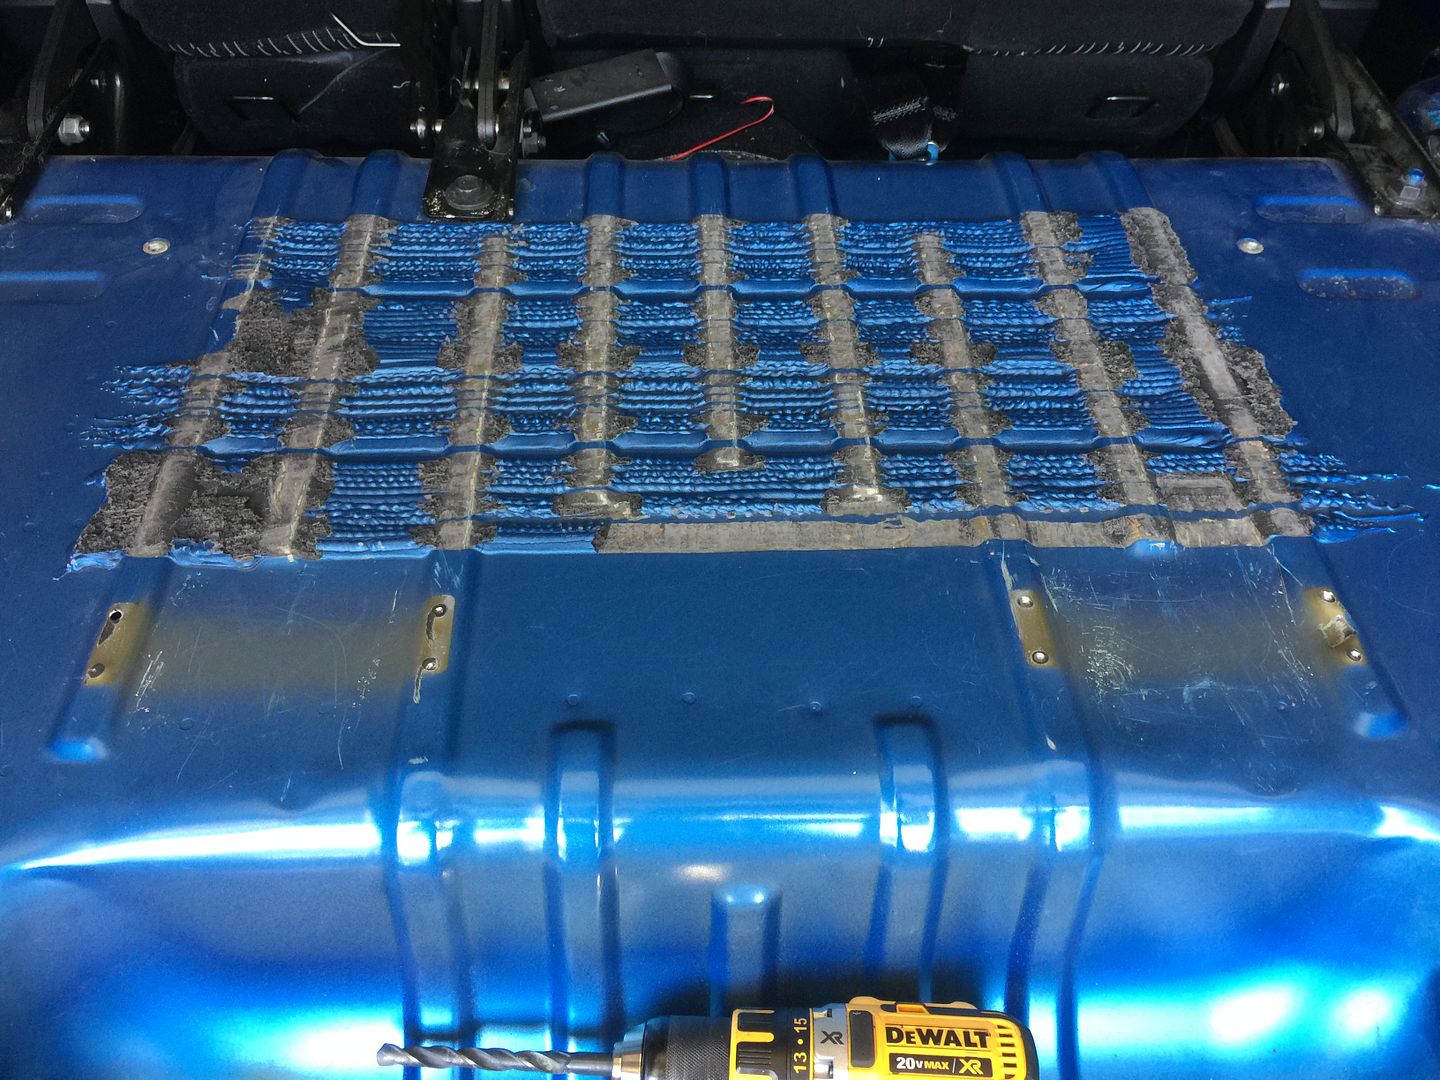
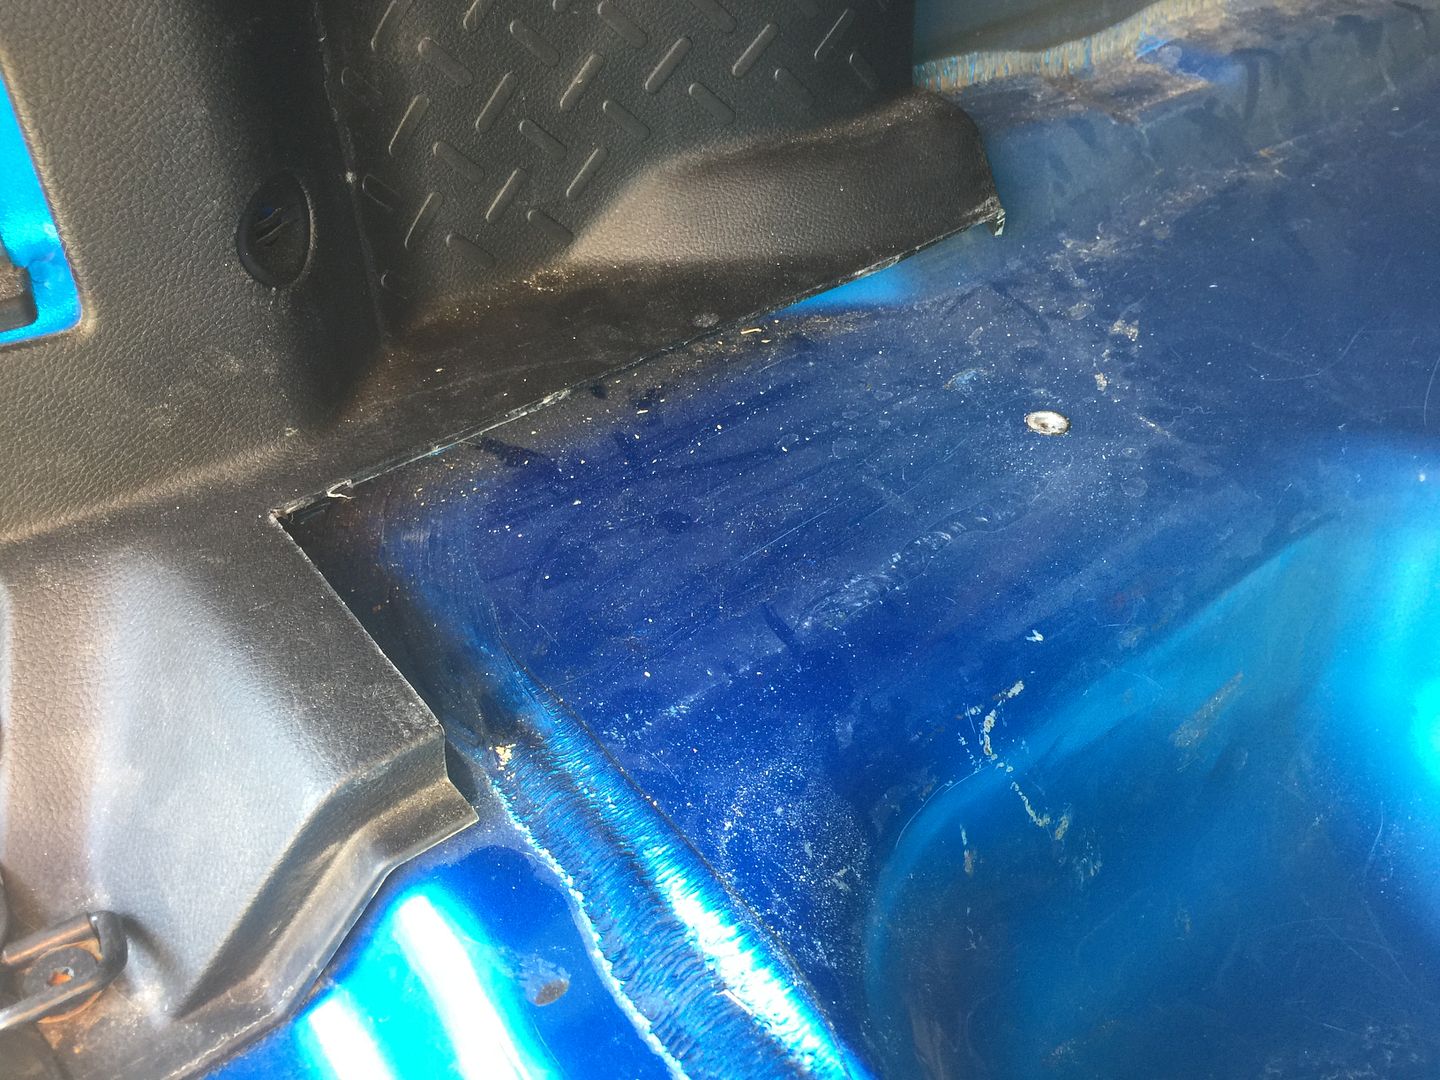
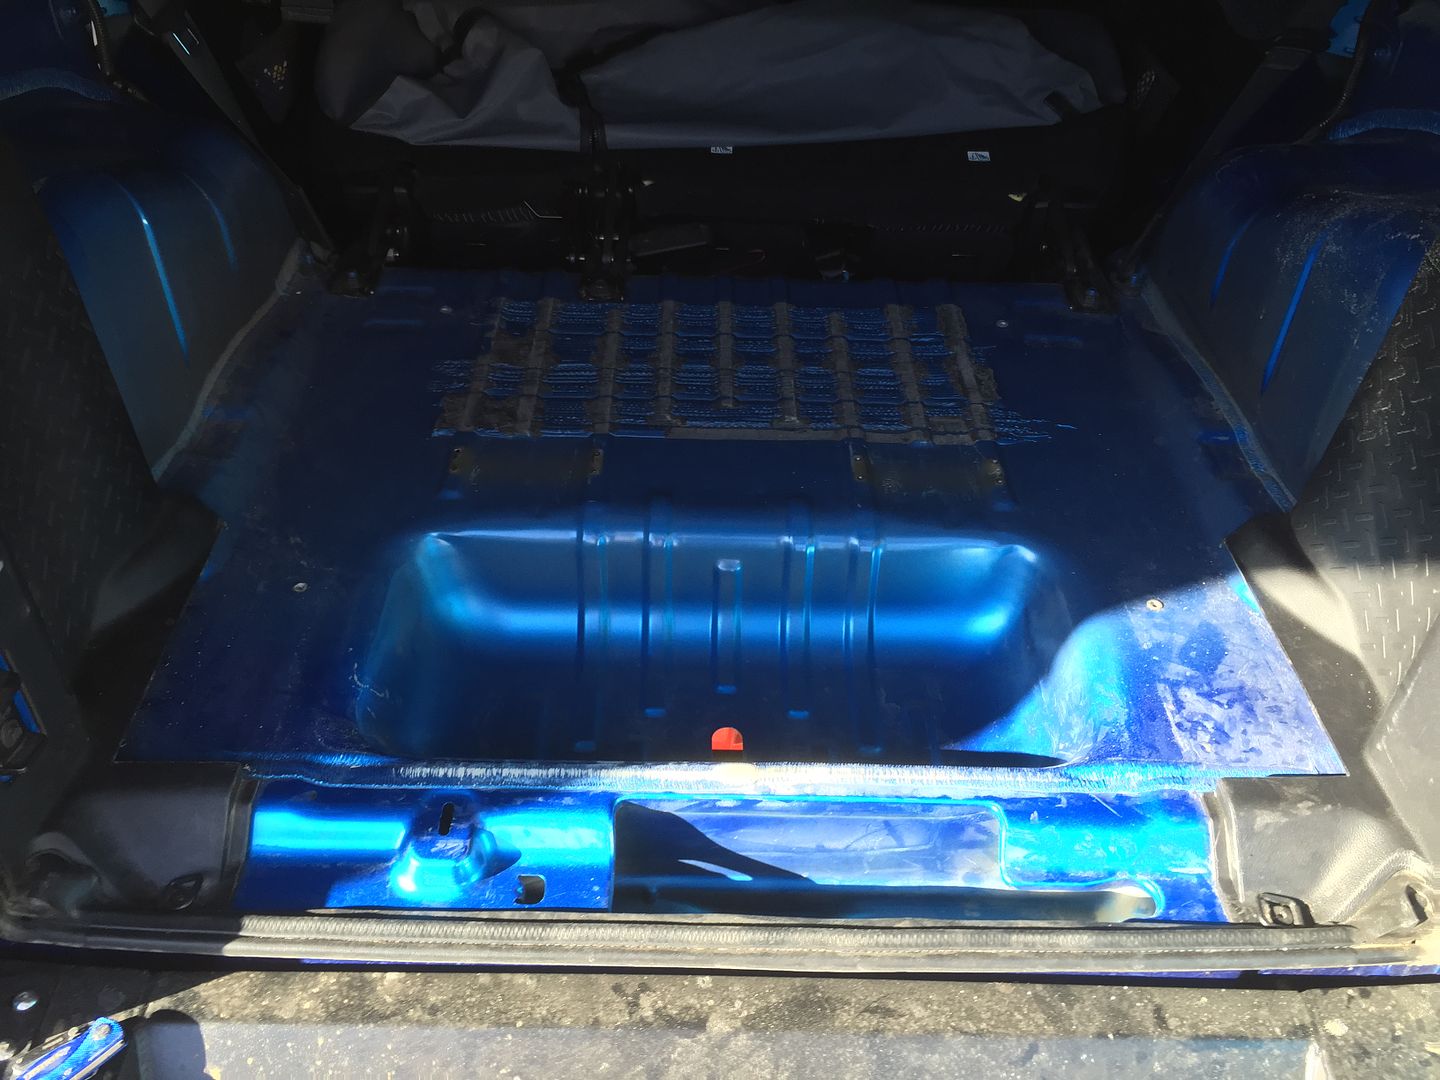
Cut the rear trim so the drawer would rest on the metal, also it gives me two more factory anchor nutserts to secure the box with.
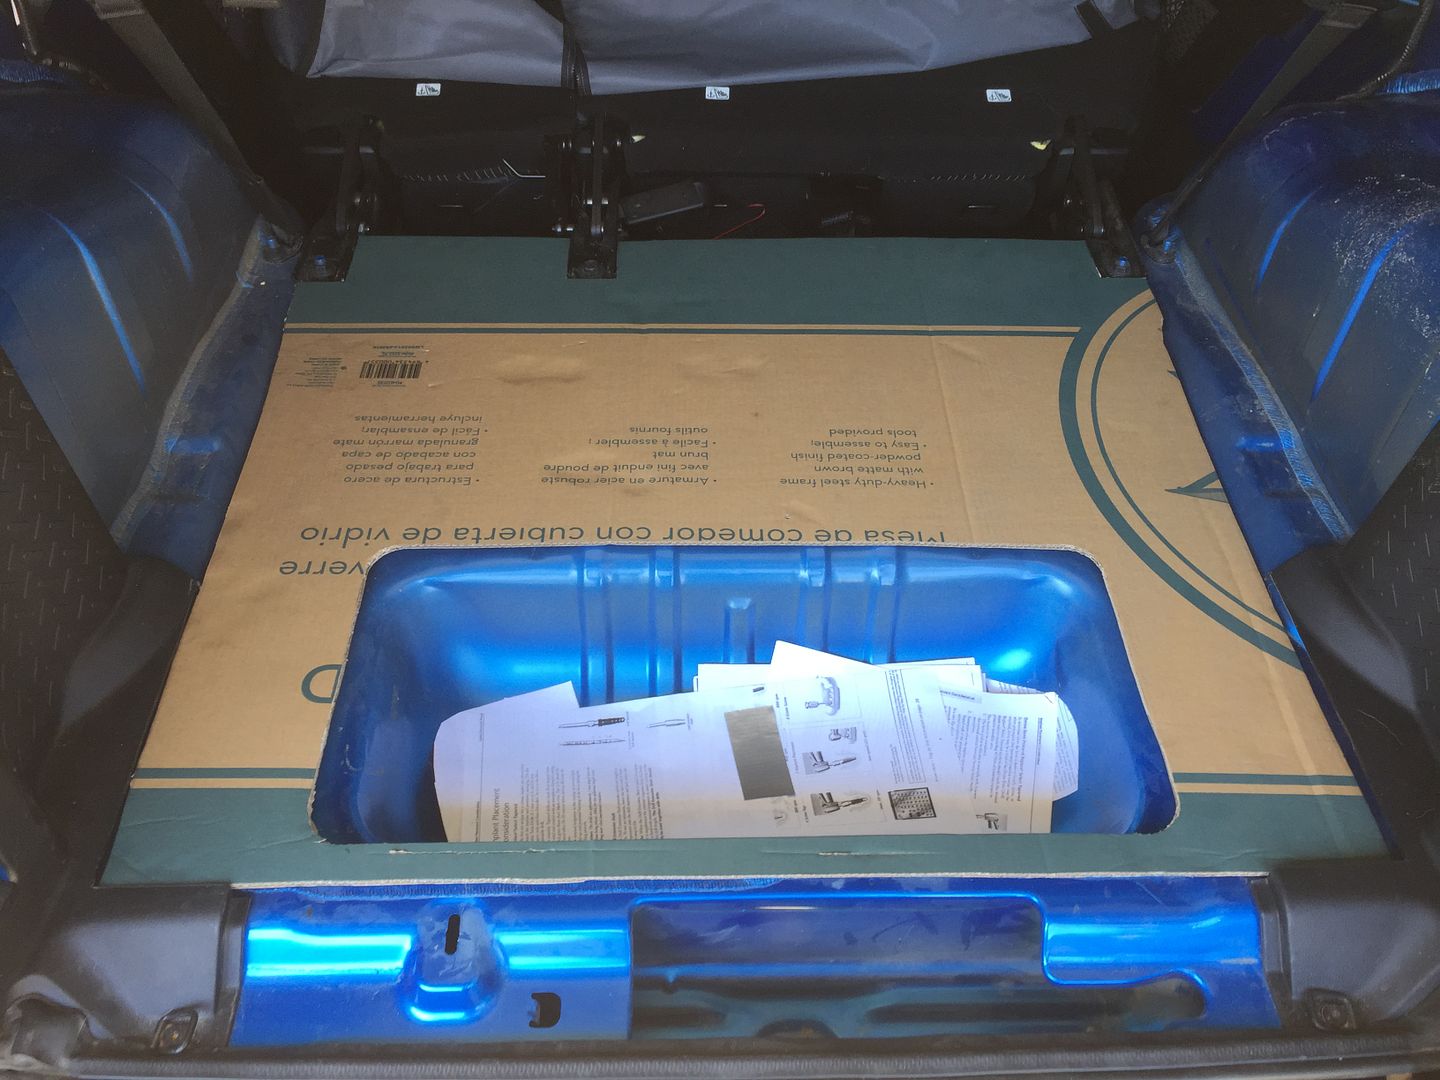
Paper pattern

Cardboard pattern
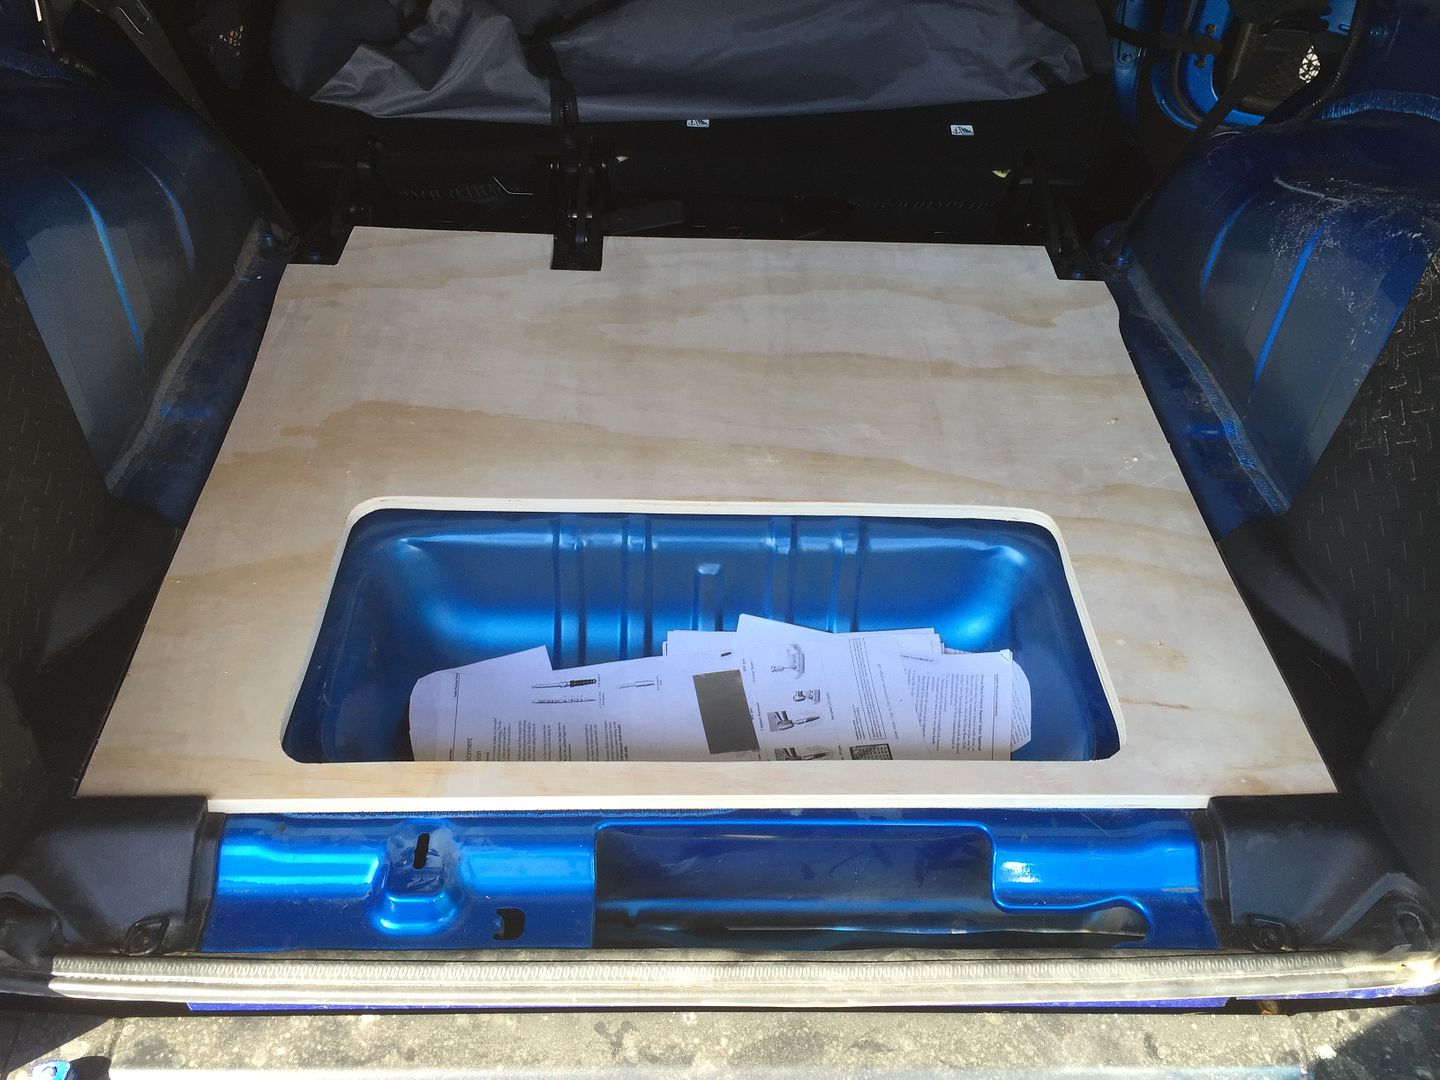
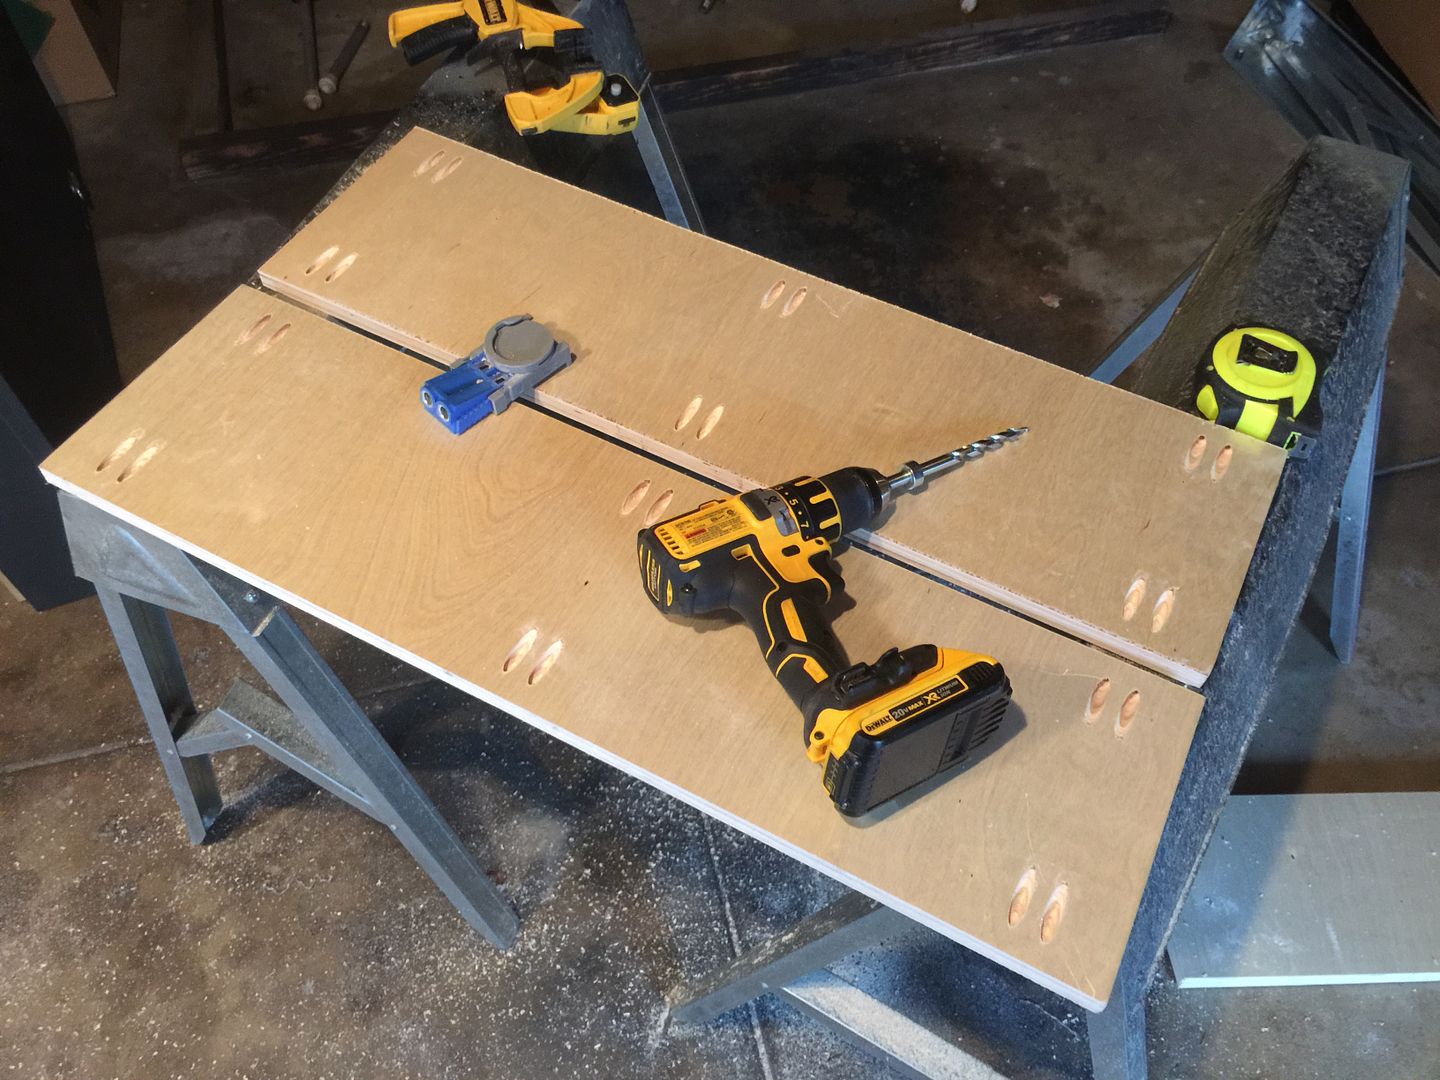
Wood
4 anchor points using factory nutserts
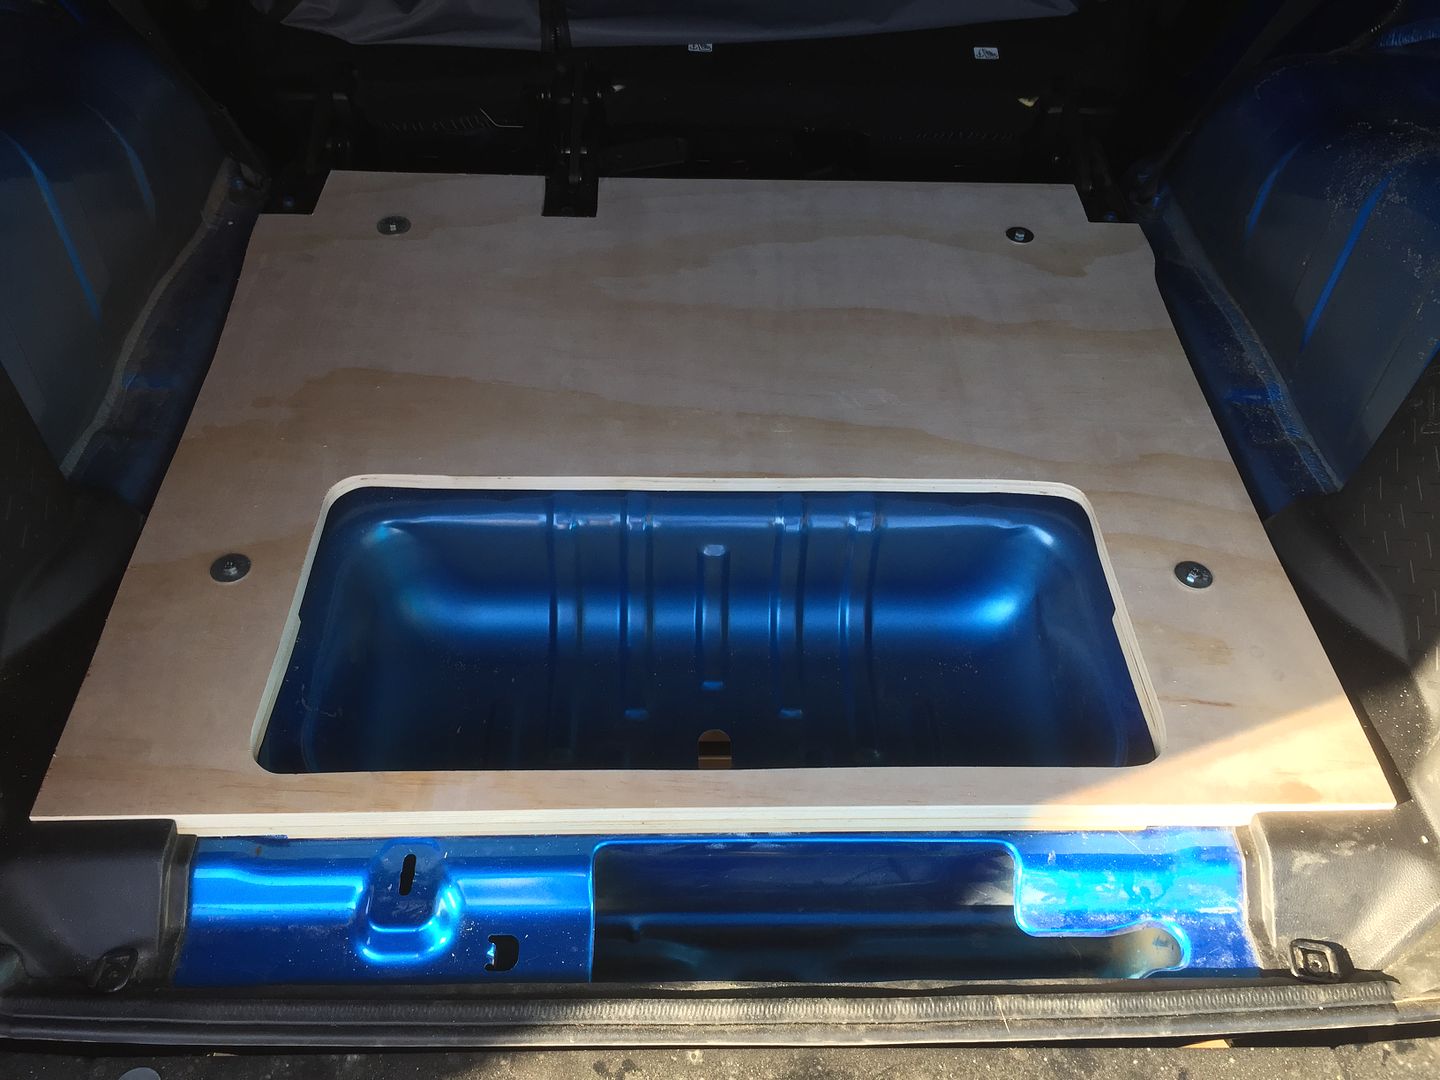
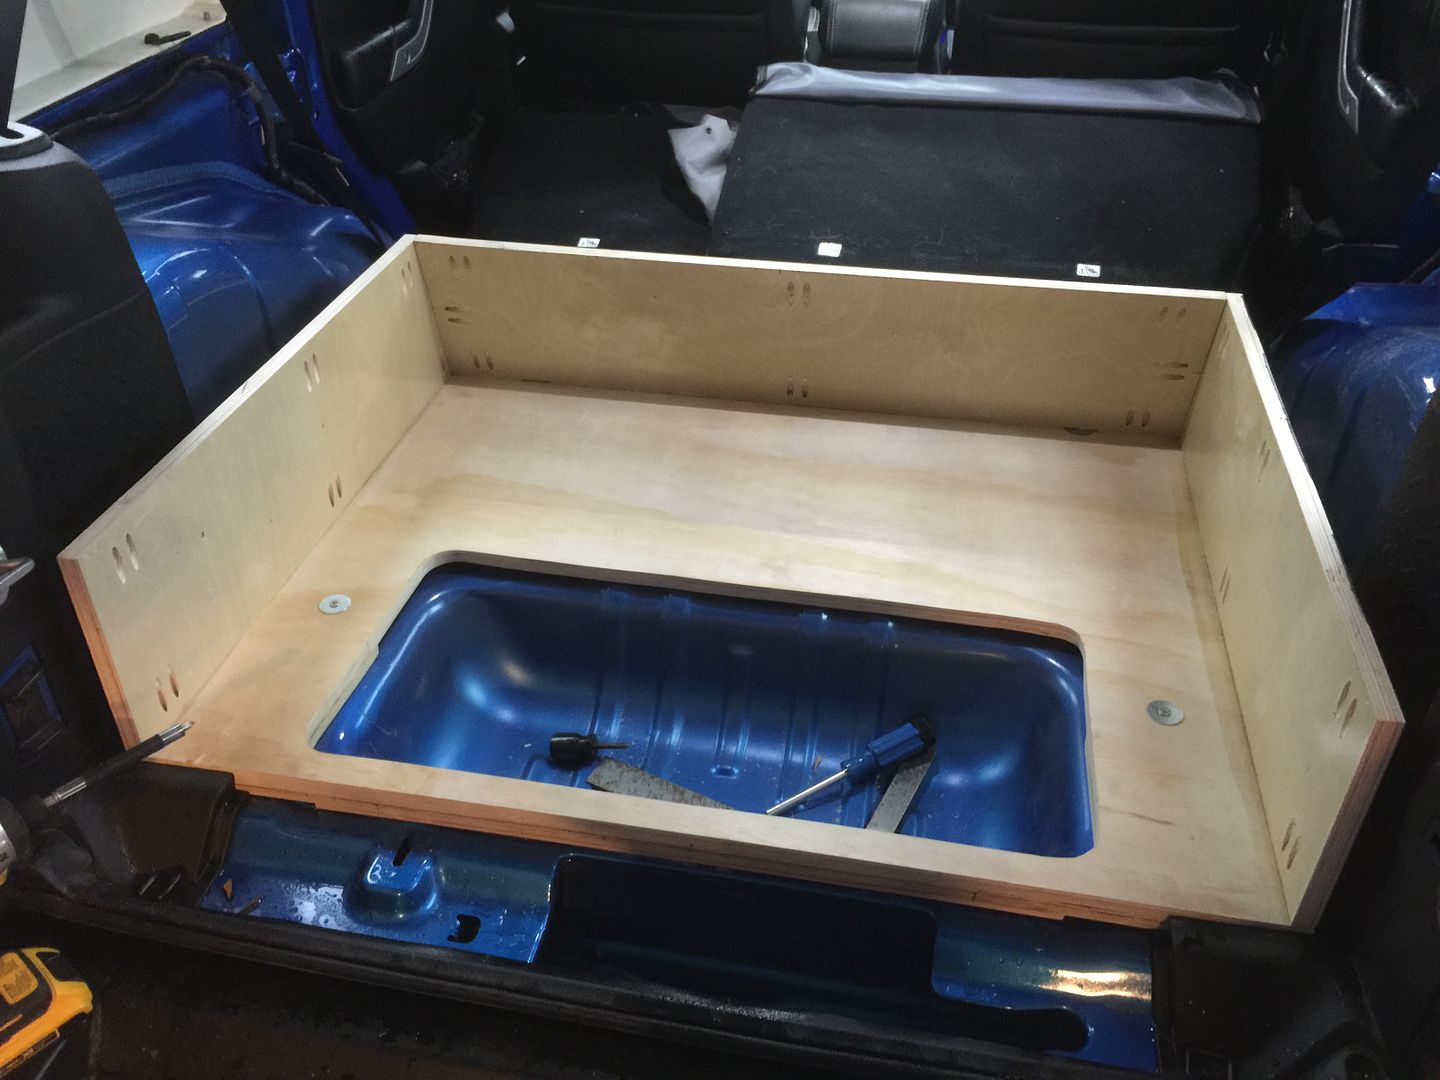
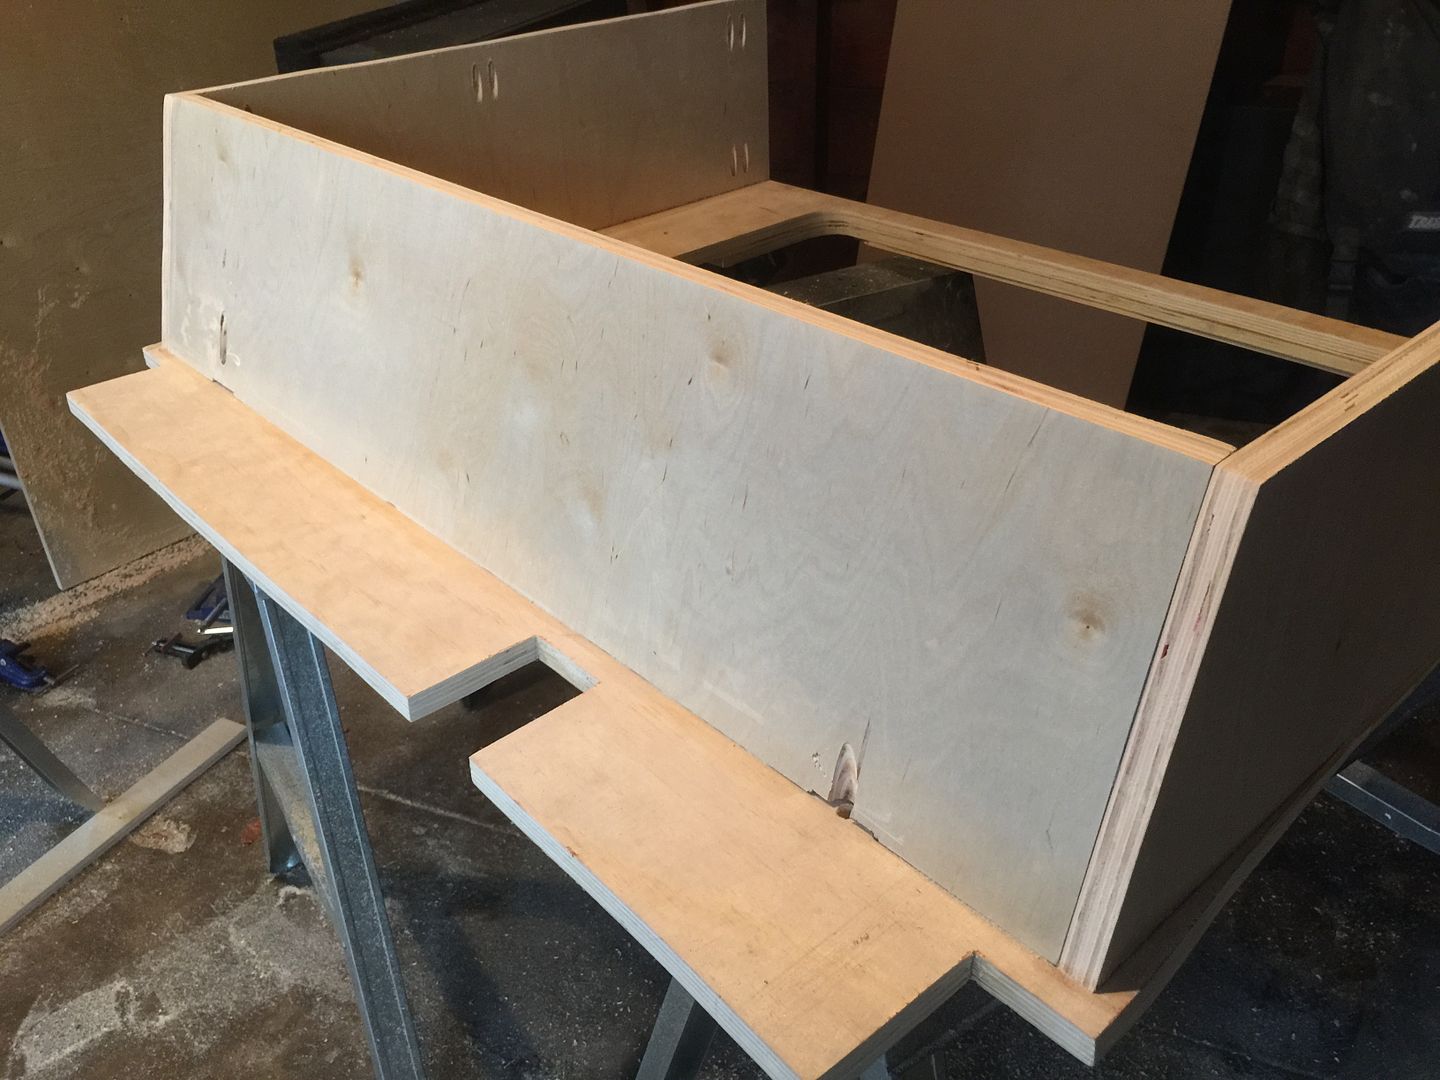
Sides cut out
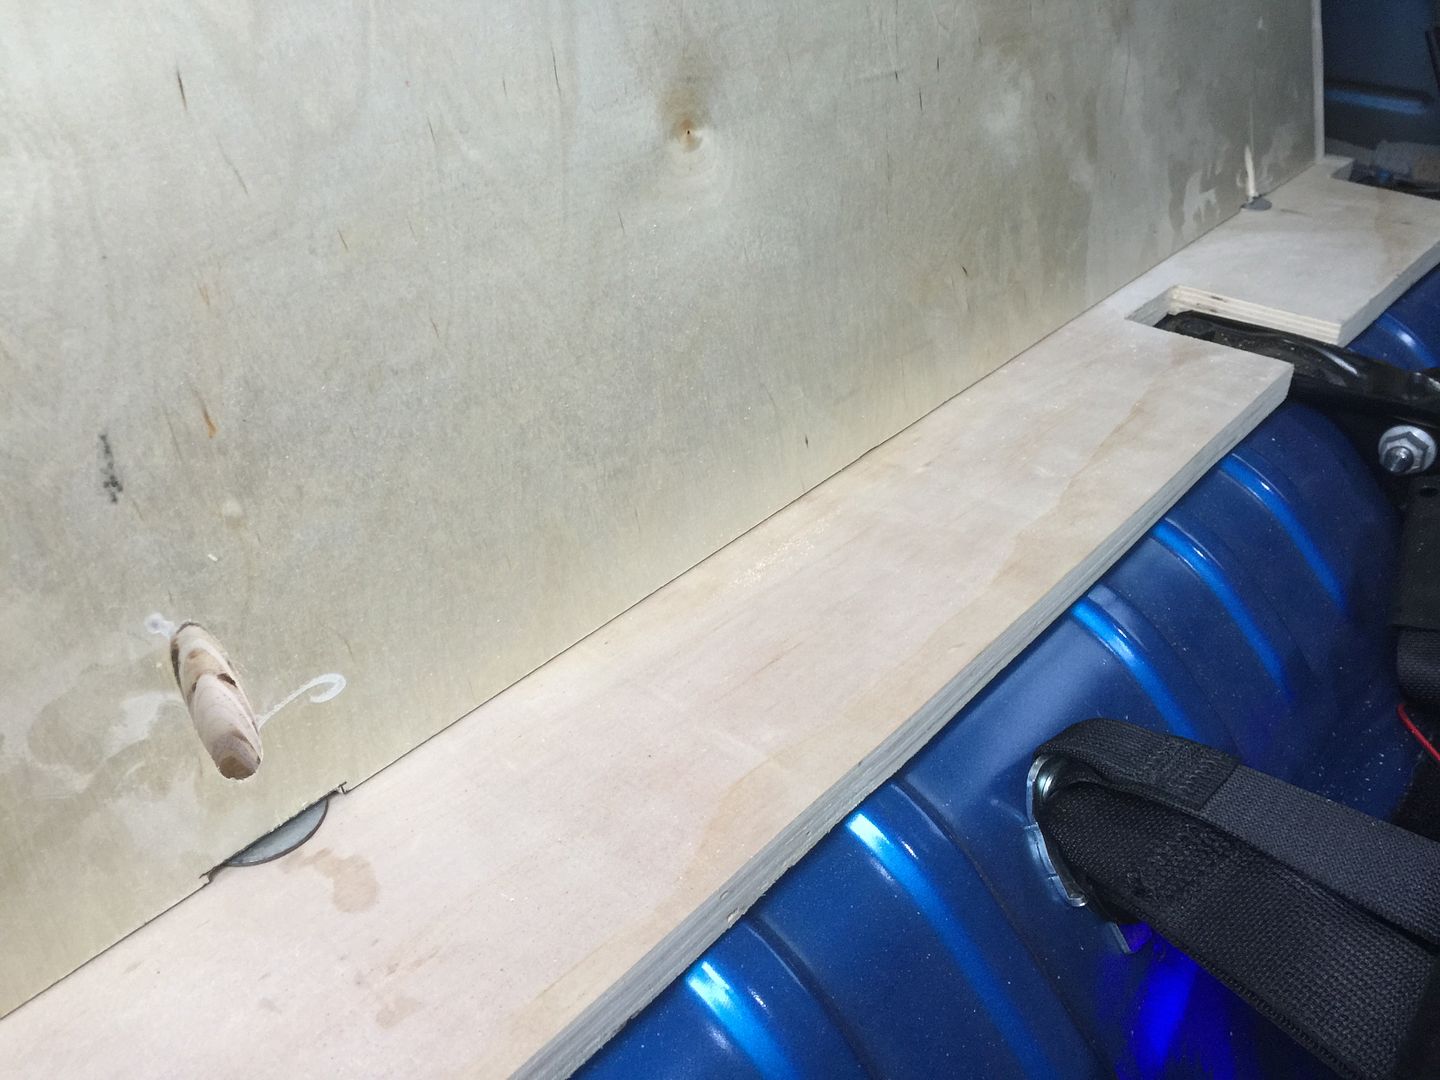
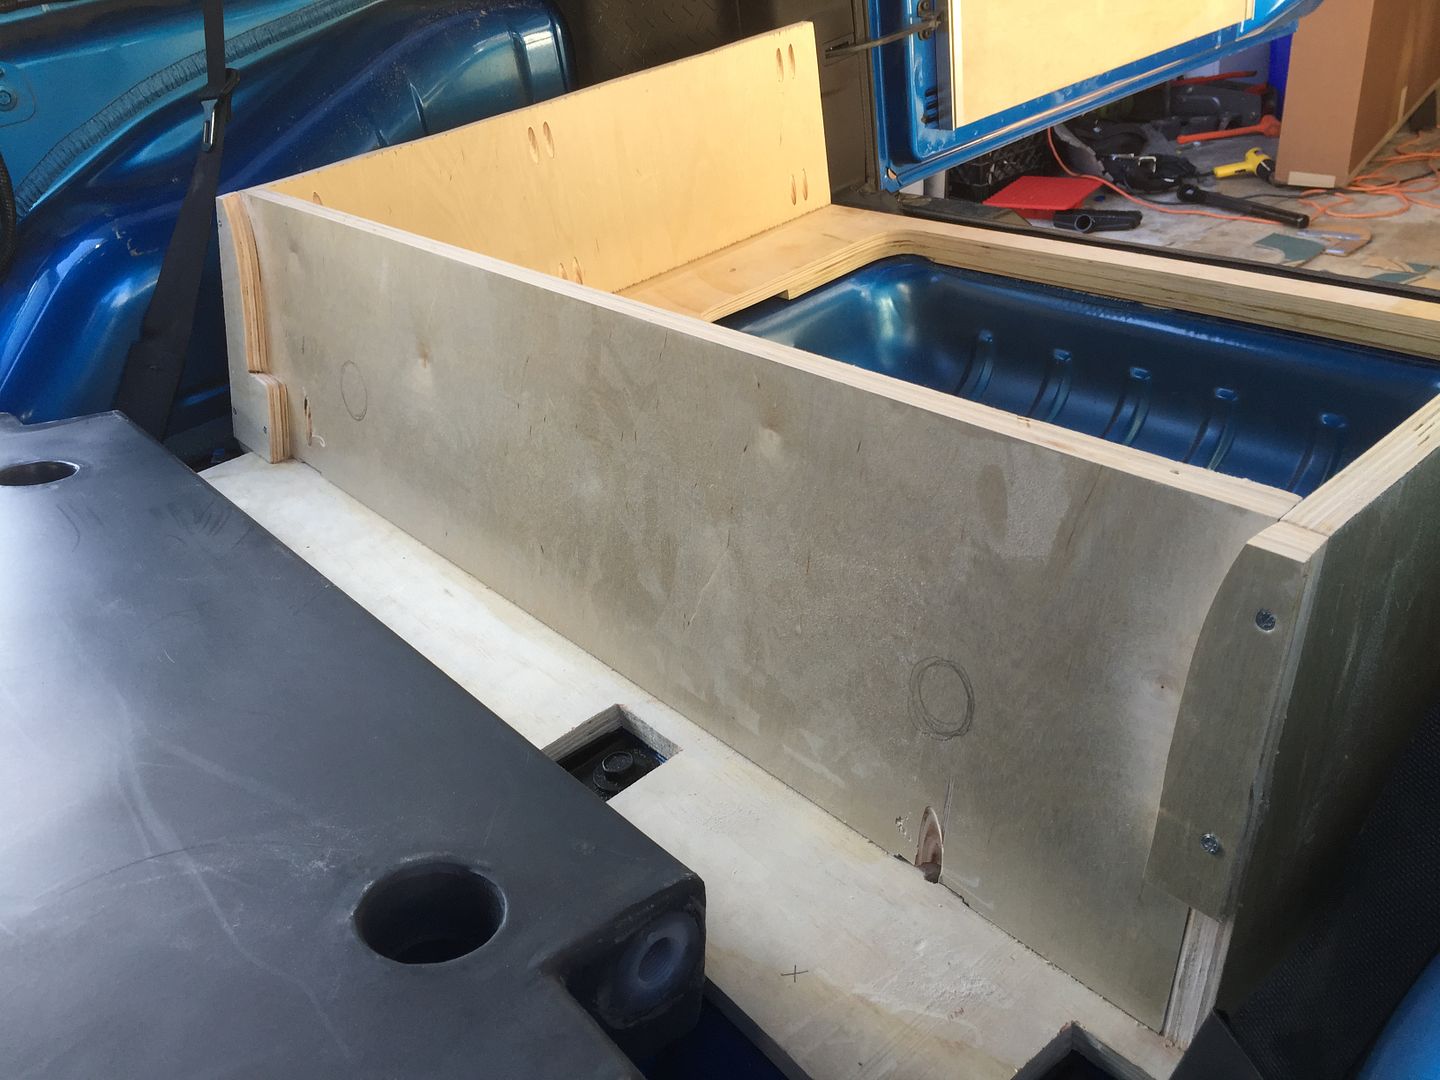
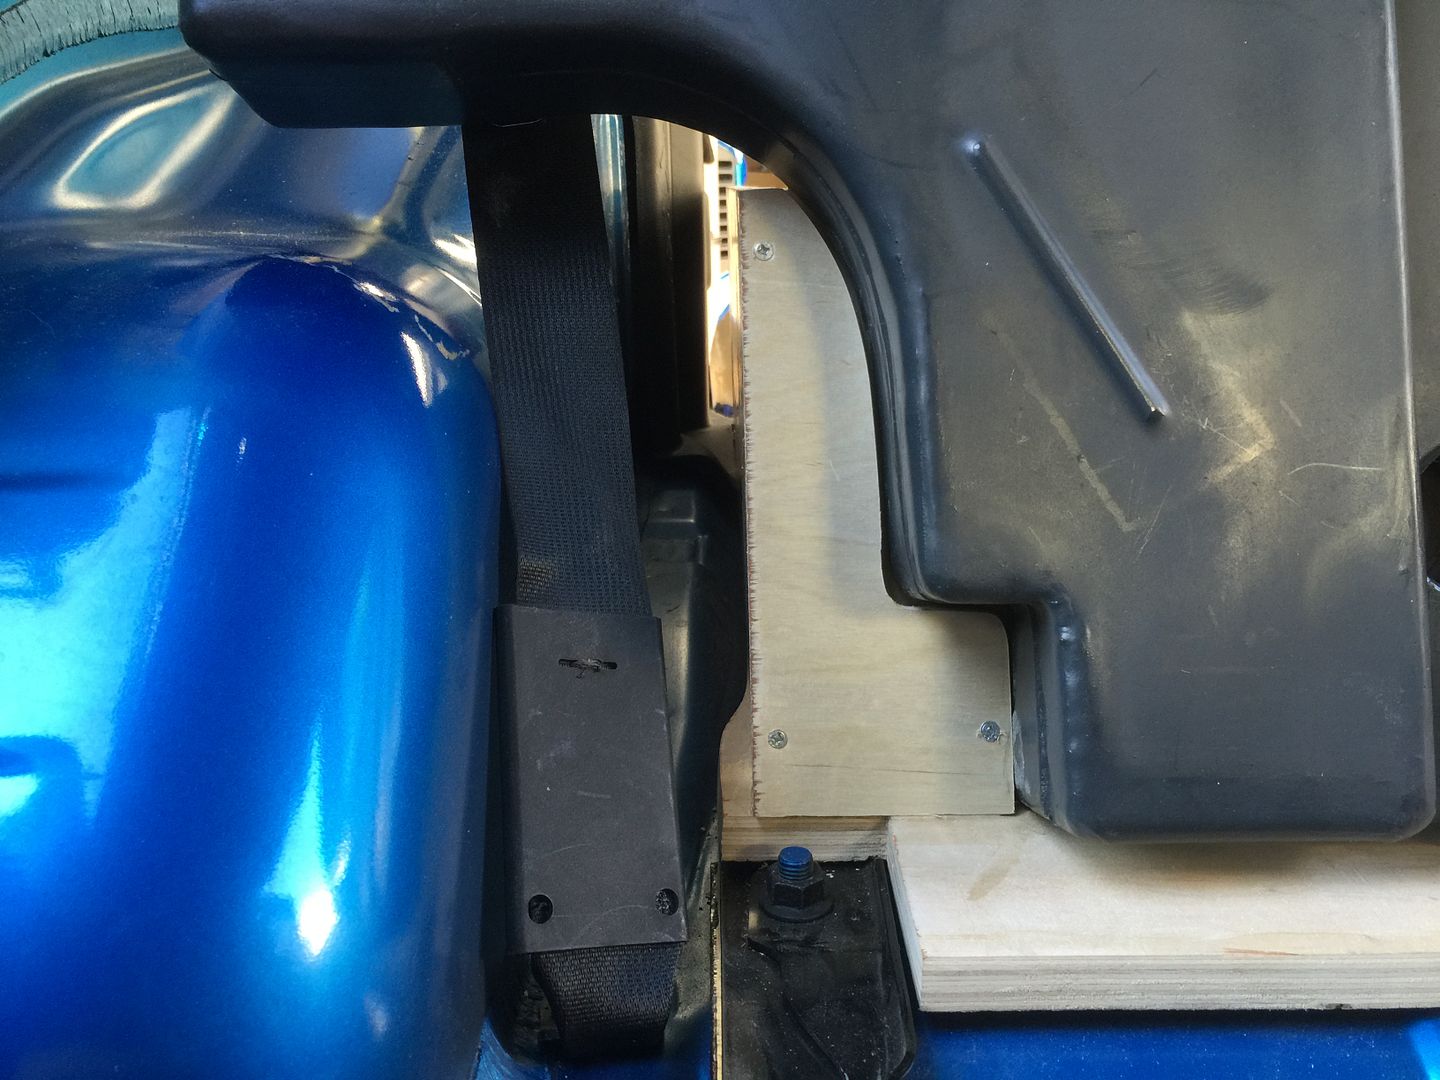
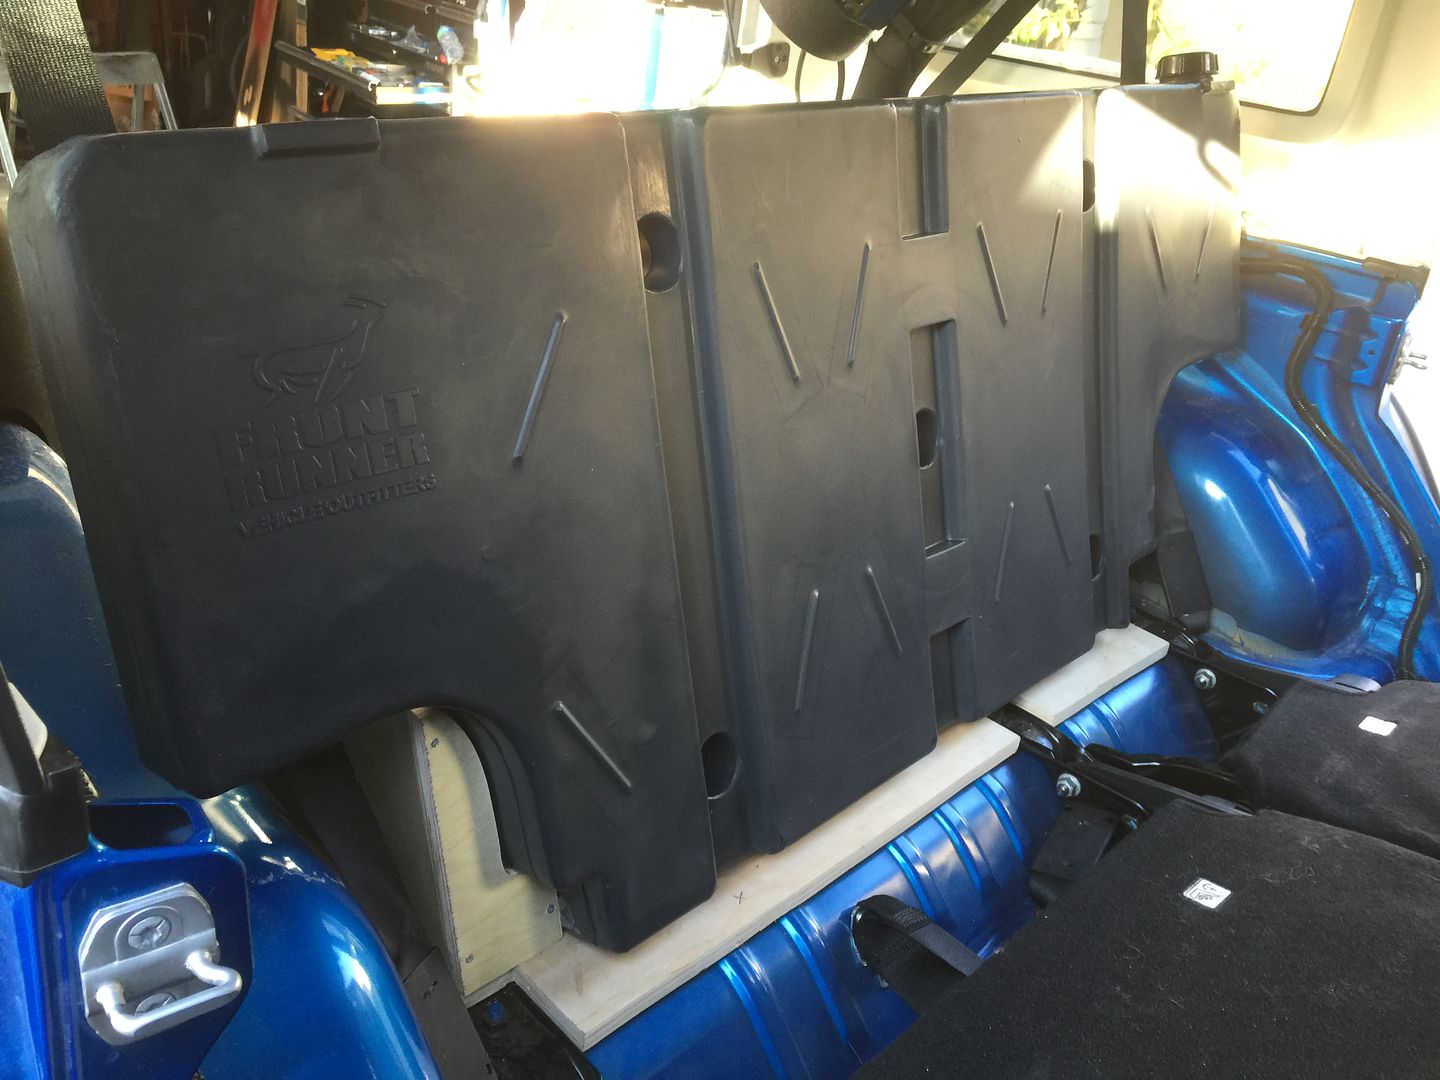
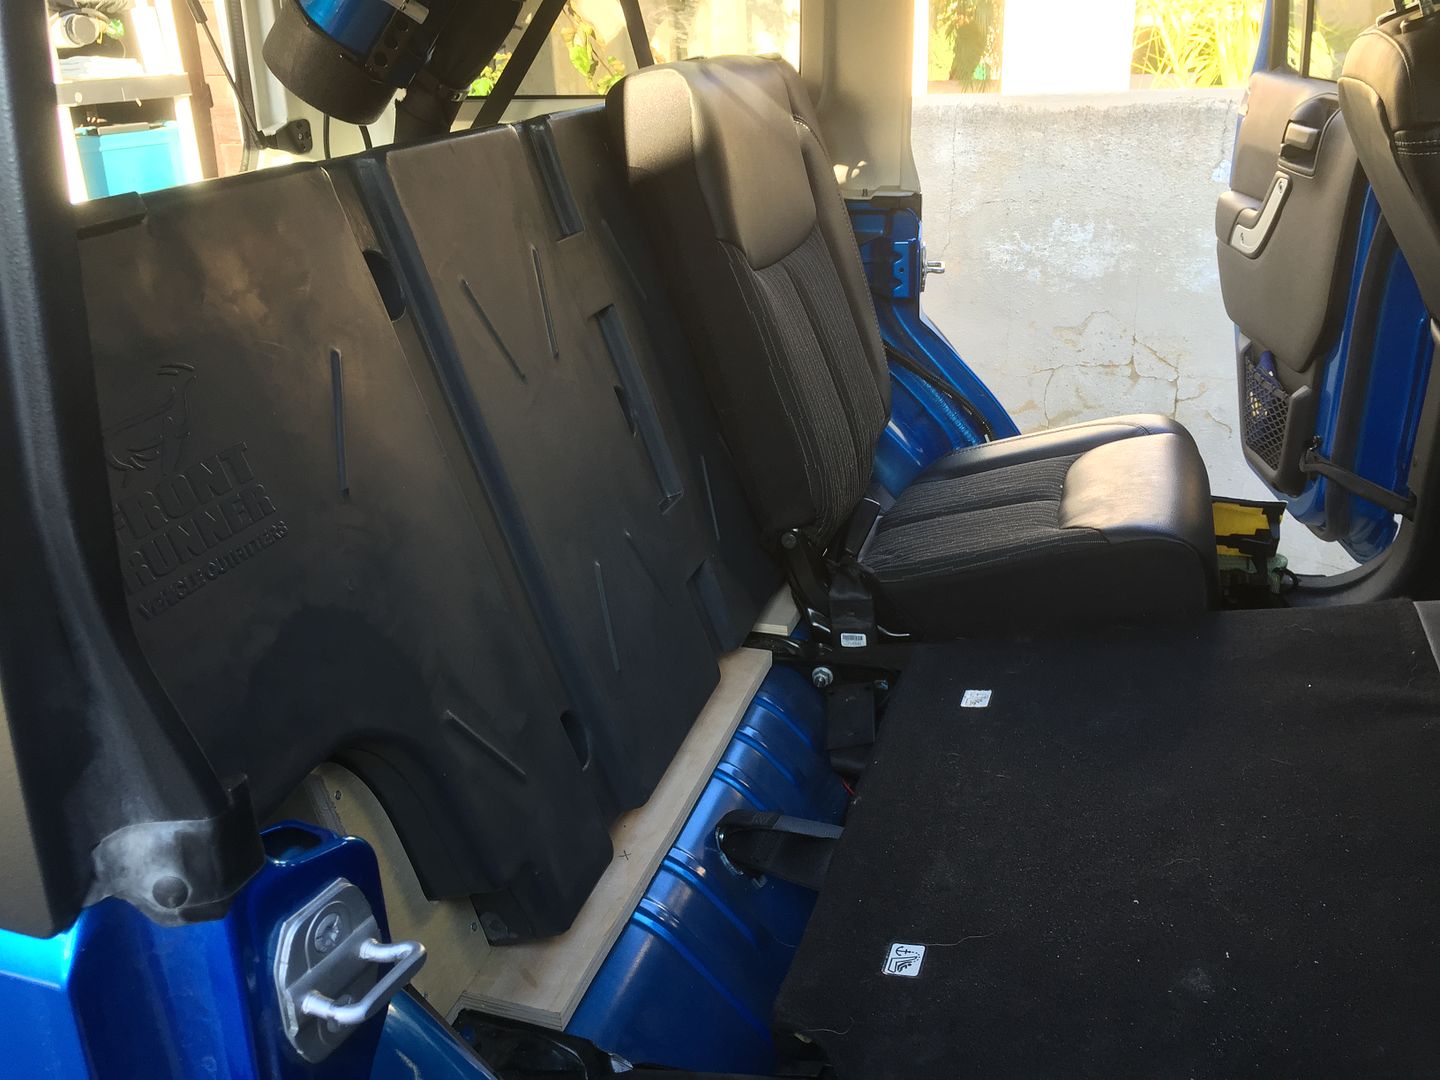
Sides installed, added a 15* angle to the rear of the box and offset it from the seat 3.5" to give room for a Frontrunner water tank
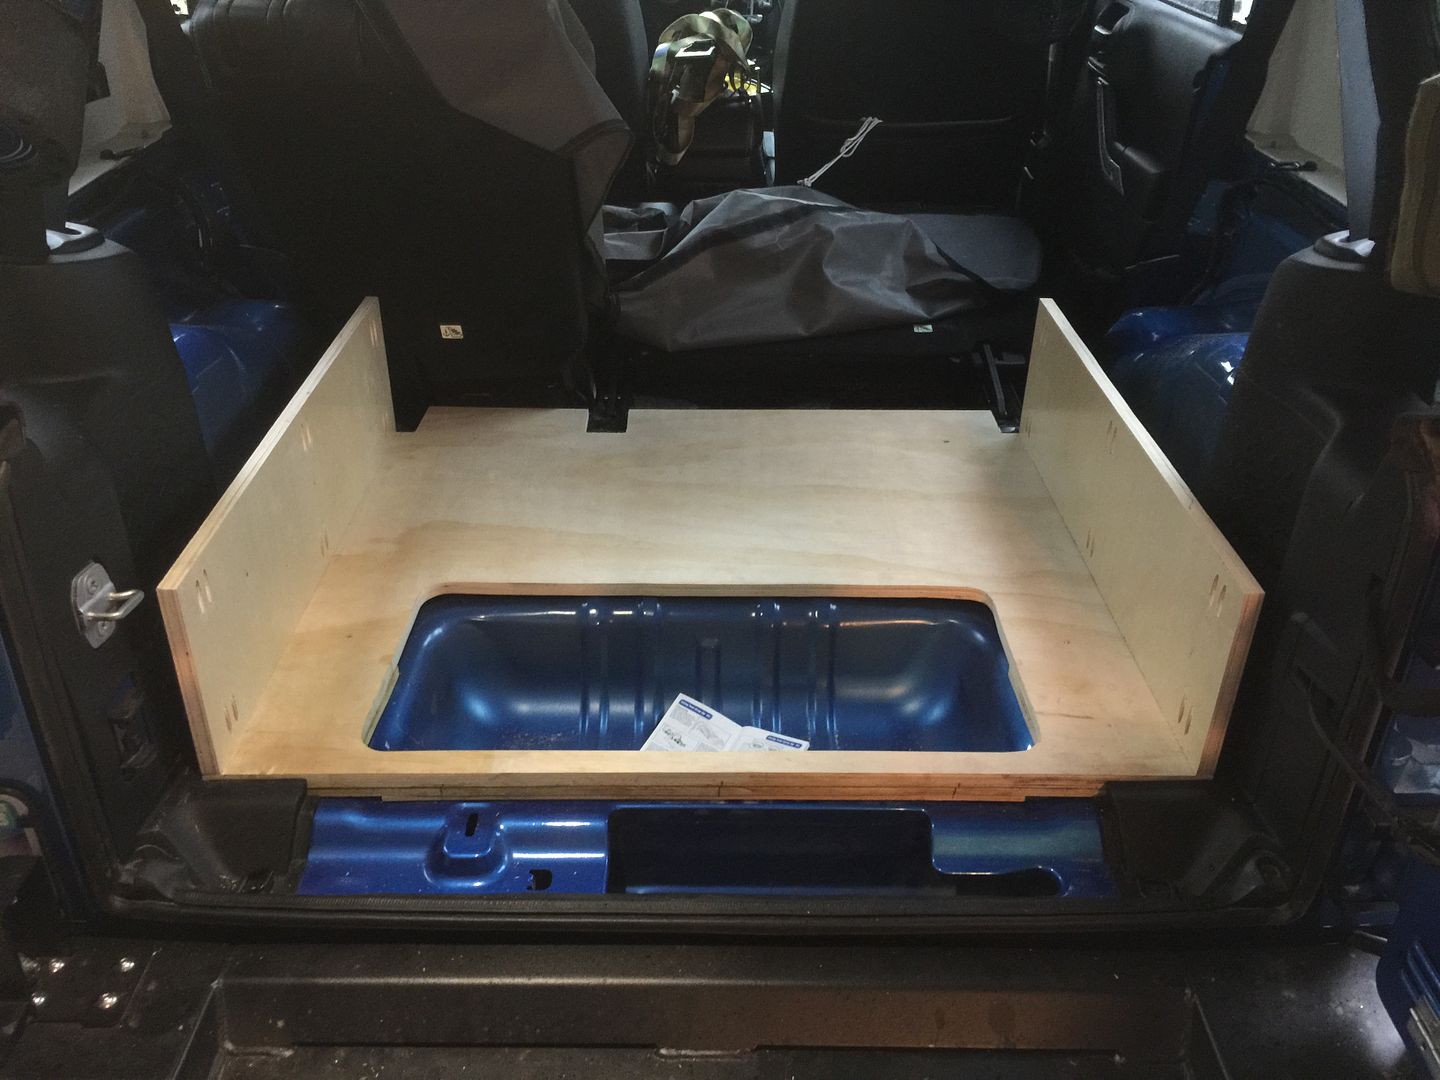
Back installed
More photos coming.
Started by removing the brackets

Then removed the insulation at the high spots, after box is done this will get primed and repainted and eventually Monstalined

Cut the rear trim so the drawer would rest on the metal, also it gives me two more factory anchor nutserts to secure the box with.


Paper pattern

Cardboard pattern

Wood

4 anchor points using factory nutserts

Sides cut out

Sides installed, added a 15* angle to the rear of the box and offset it from the seat 3.5" to give room for a Frontrunner water tank

Back installed

More photos coming.
The following users liked this post:
Alextorello (08-22-2018)
07-25-2015, 06:51 PM
#240
JK Enthusiast
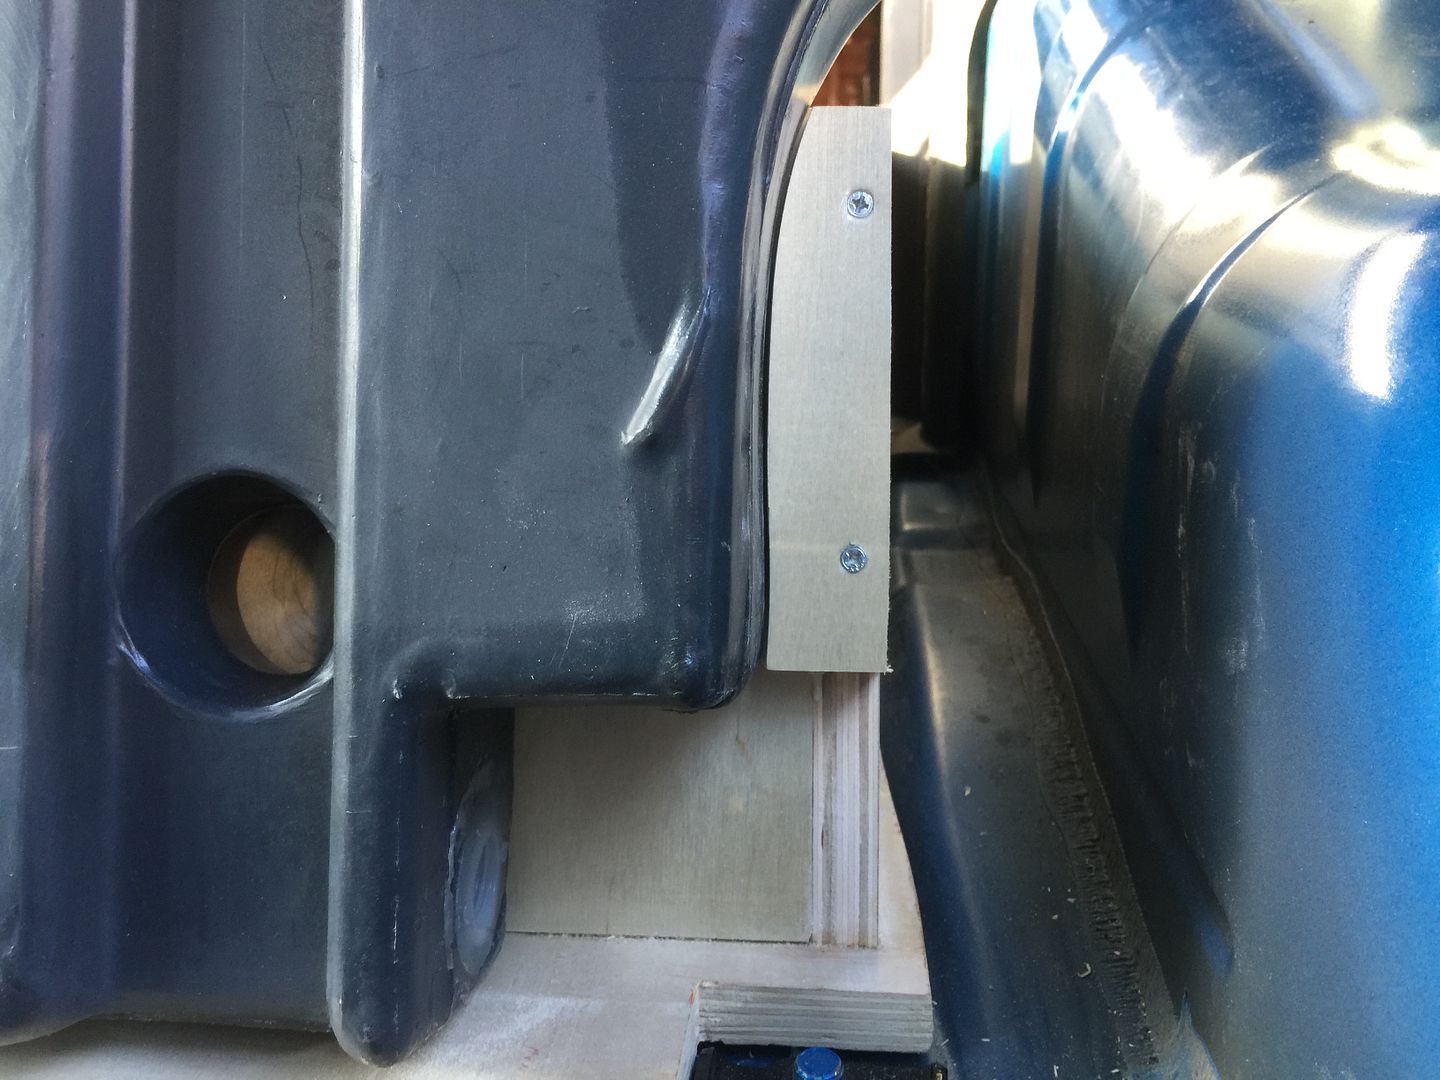
I had to get creative, since the back of the box and the factory nutserts overlapped.

installed side supports for the water tank that keep it from shifting if off camber

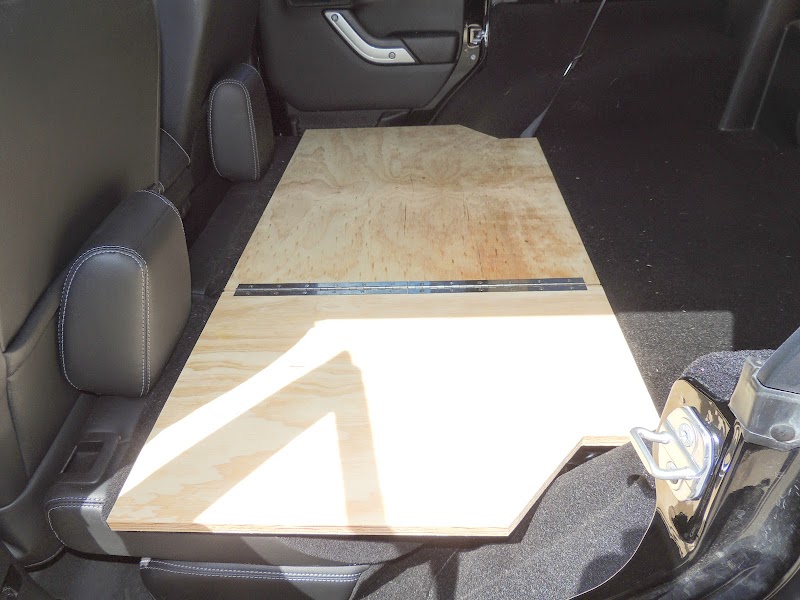
Whipped up a tailgate table
Finally, made a pattern for the top to contour around the edges and table.

Wood

Drivers side


installed side supports for the water tank that keep it from shifting if off camber


Whipped up a tailgate table


Finally, made a pattern for the top to contour around the edges and table.

Wood

Drivers side

The following users liked this post:
Alextorello (08-22-2018)