Under-Floor Storage
 04-17-2016, 09:51 PM
#261
JK Enthusiast
latest storage modification... A fridge enclosure.
This enclosure accomplishes a few things. 1. It keeps people out of the fridge when the top is off. Obviously it's wood so we're just keeping honest people honest. 2. Allows me to store my camp stove above the fridge and take advantage of that space. 3. It keeps items that are stacked up from falling behind the fridge when the fridge is pulled out. (most important)
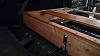
Photo of the Coleman stove on top of the enclosure. I'll bungee it down.
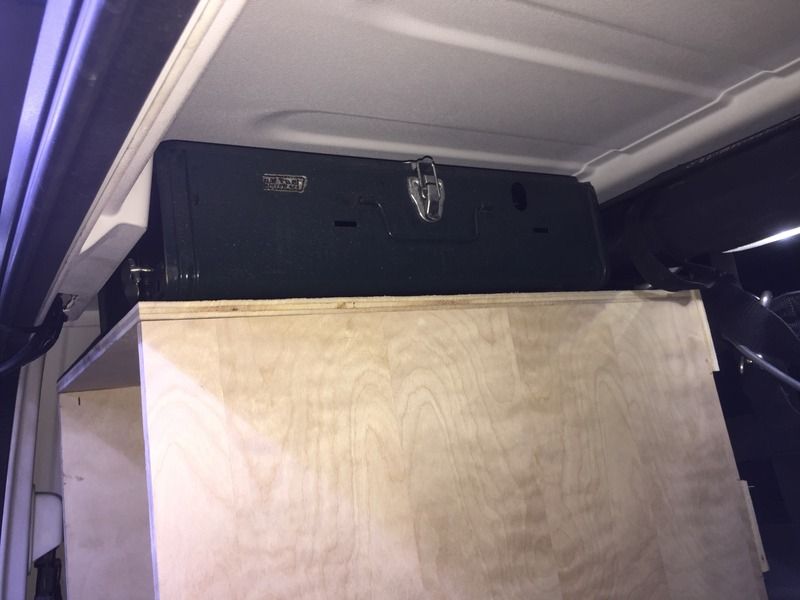
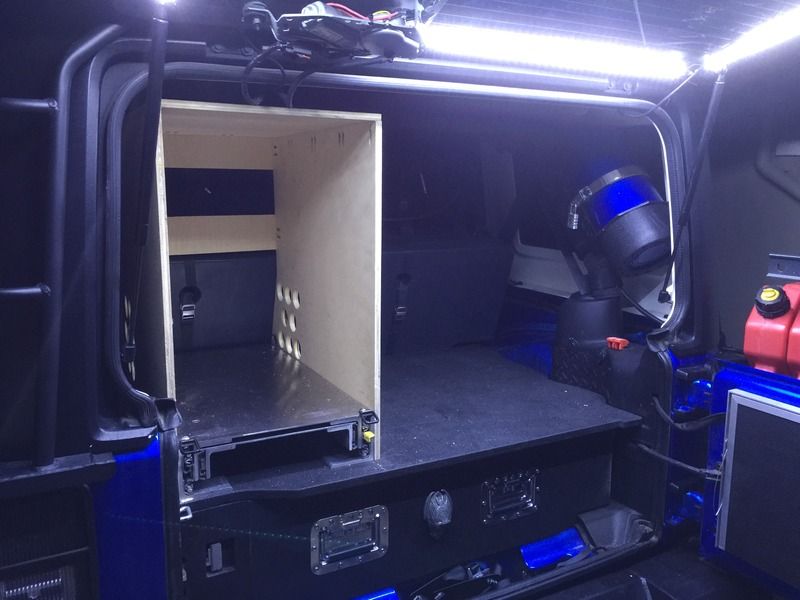
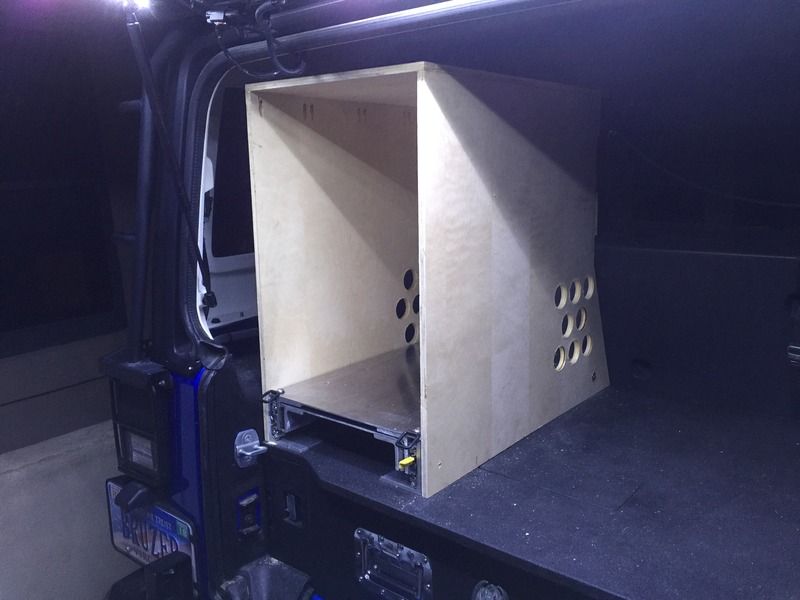
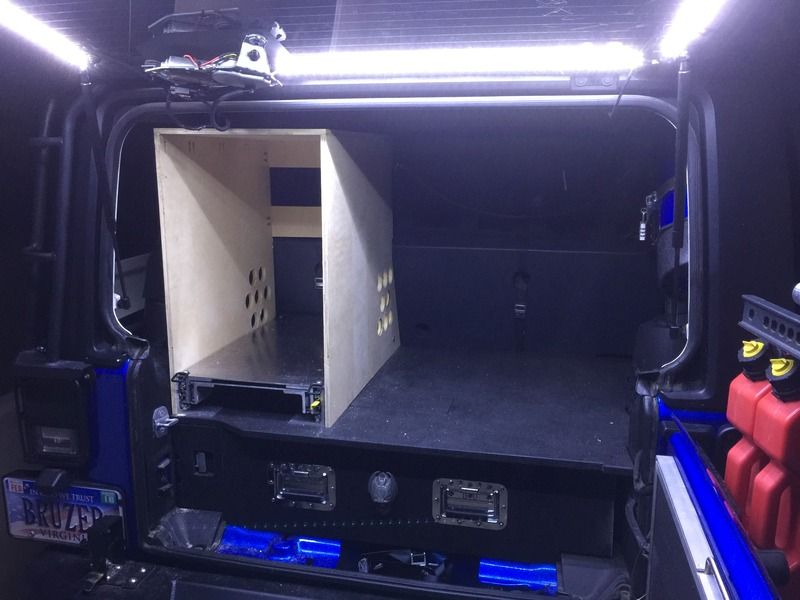
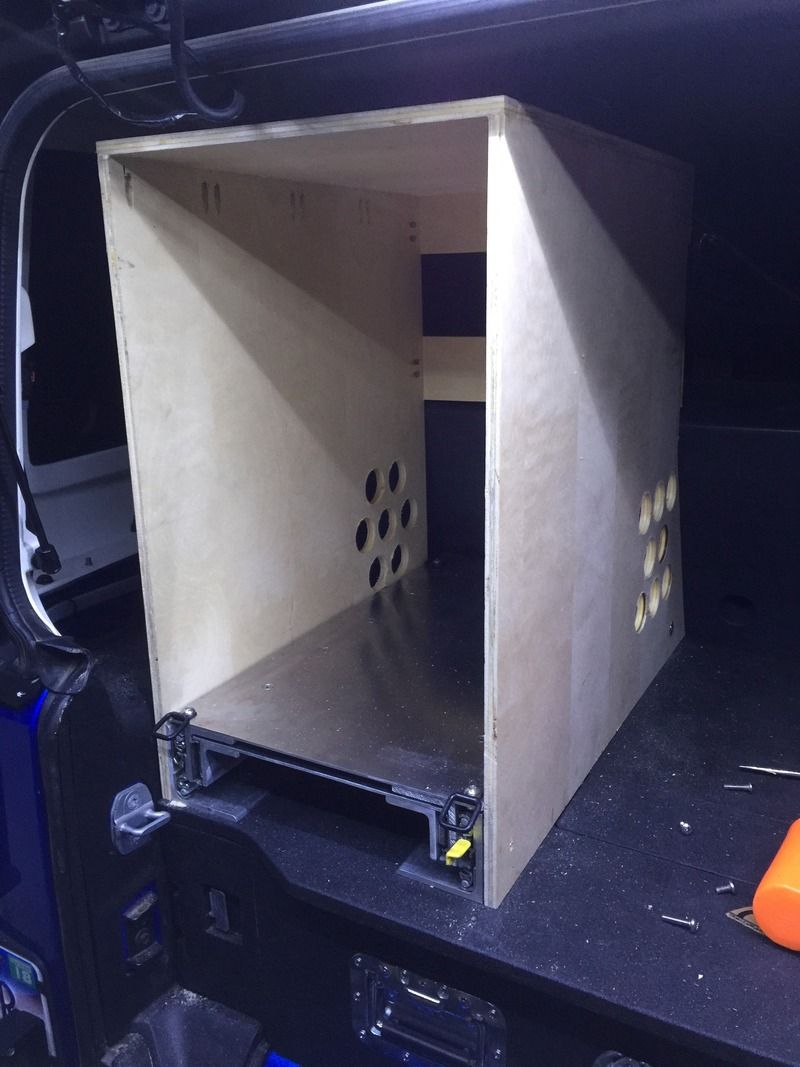
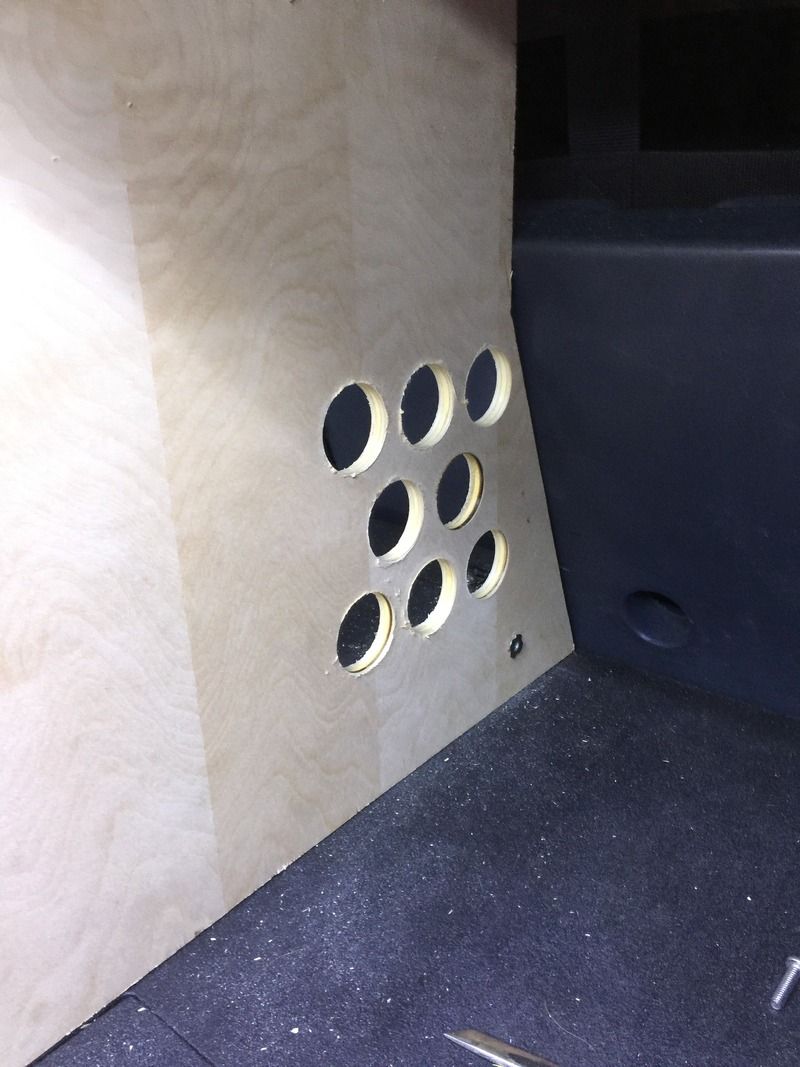
I drilled out some 2" vent holes so the fridge can properly breath. I'll be installing gutter mesh on the inside to keep debris (dog hair) from getting sucked into the fridge.
The glue is currently curing, but in the end the enclosure will sanded and finished in the same BEHR Deck Over paint at the box. This stuff is extremely tuff. The enclosure attaches to the slider using 6 1/4x20 T nuts and still allows me perfect access to the trap door so I can reach anything stored in the factory cubby under the drawer. Also the power cord will be attached via bungee so that it retracts when the fridge is pushed in.
Finally, I'll be fabricating a drawer that goes in the space under the fridge slider. This drawer will be nice and long, should hold plates, silverware and any cooking utensils I'll need.
This enclosure accomplishes a few things. 1. It keeps people out of the fridge when the top is off. Obviously it's wood so we're just keeping honest people honest. 2. Allows me to store my camp stove above the fridge and take advantage of that space. 3. It keeps items that are stacked up from falling behind the fridge when the fridge is pulled out. (most important)
Photo of the Coleman stove on top of the enclosure. I'll bungee it down.


I drilled out some 2" vent holes so the fridge can properly breath. I'll be installing gutter mesh on the inside to keep debris (dog hair) from getting sucked into the fridge.

The glue is currently curing, but in the end the enclosure will sanded and finished in the same BEHR Deck Over paint at the box. This stuff is extremely tuff. The enclosure attaches to the slider using 6 1/4x20 T nuts and still allows me perfect access to the trap door so I can reach anything stored in the factory cubby under the drawer. Also the power cord will be attached via bungee so that it retracts when the fridge is pushed in.
Finally, I'll be fabricating a drawer that goes in the space under the fridge slider. This drawer will be nice and long, should hold plates, silverware and any cooking utensils I'll need.
Last edited by JCDriller; 04-17-2016 at 09:59 PM.

The following users liked this post:
Alextorello (08-22-2018)
08-23-2016, 04:15 PM
#262
JK Newbie
Join Date: Mar 2015
Location: Bothell, WA
Posts: 10
Likes: 0
Received 0 Likes
on
0 Posts
What a goldmine of ideas! The first post here motivated me to go and make something for myself in the little time I have between school and work...so here is what I came up within a few weeks time.


Not finished yet, but I got to test it out on a Perseid Meteor viewing trip with the wife here in the PNW. The platform is solid for sleeping on
Still plan on adding a full extension drawer system in the space underneath. Lid will give top access to storage underneath when drawer will be at full extension. Also, have some 3/8" foam padding ill be rolling out and bonding on the top, which will even out the sleeping surface, as well as some carpet will go on top of that. All the wood is sealed, so water should not be a problem. Now, just need to find some solid 30" extension slides. I know a recent post had KV 8908B heavy duty full extension slides, maybe those would be a good option?
08-23-2016, 04:38 PM
#263
JK Jedi Master
Thread Starter
What a goldmine of ideas! The first post here motivated me to go and make something for myself in the little time I have between school and work...so here is what I came up within a few weeks time.
Attachment 655216Attachment 655217Attachment 655219Attachment 655218Attachment 655215
Not finished yet, but I got to test it out on a Perseid Meteor viewing trip with the wife here in the PNW. The platform is solid for sleeping on
Still plan on adding a full extension drawer system in the space underneath. Lid will give top access to storage underneath when drawer will be at full extension. Also, have some 3/8" foam padding ill be rolling out and bonding on the top, which will even out the sleeping surface, as well as some carpet will go on top of that. All the wood is sealed, so water should not be a problem. Now, just need to find some solid 30" extension slides. I know a recent post had KV 8908B heavy duty full extension slides, maybe those would be a good option?
11-11-2016, 08:32 AM
#264
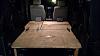
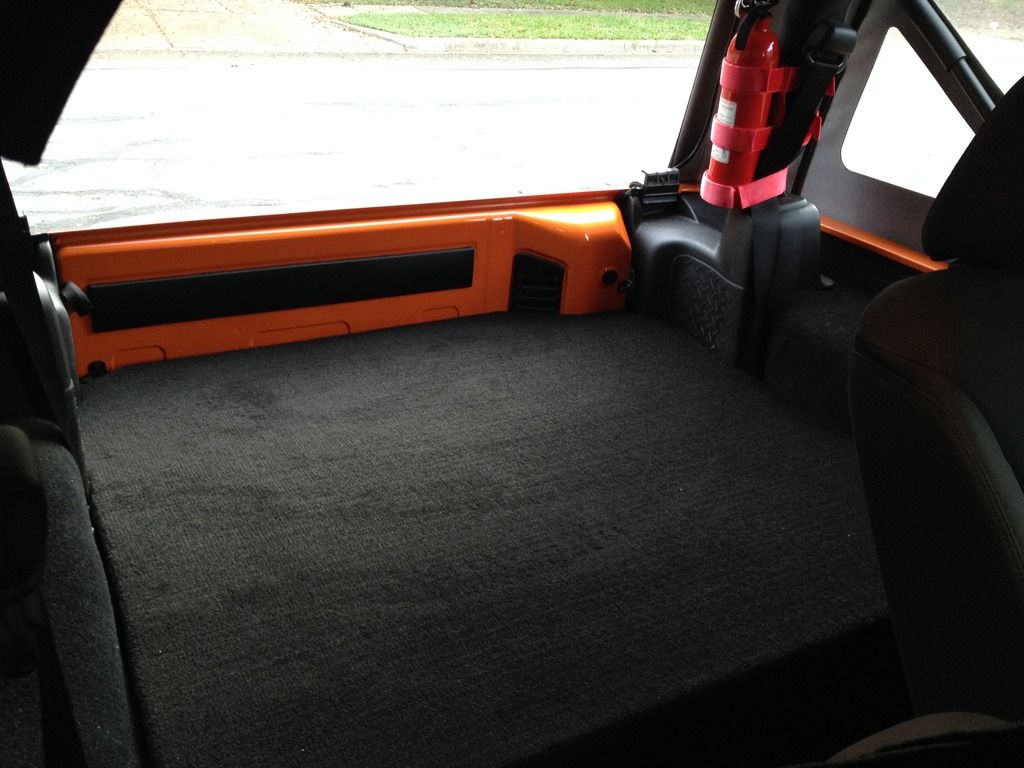
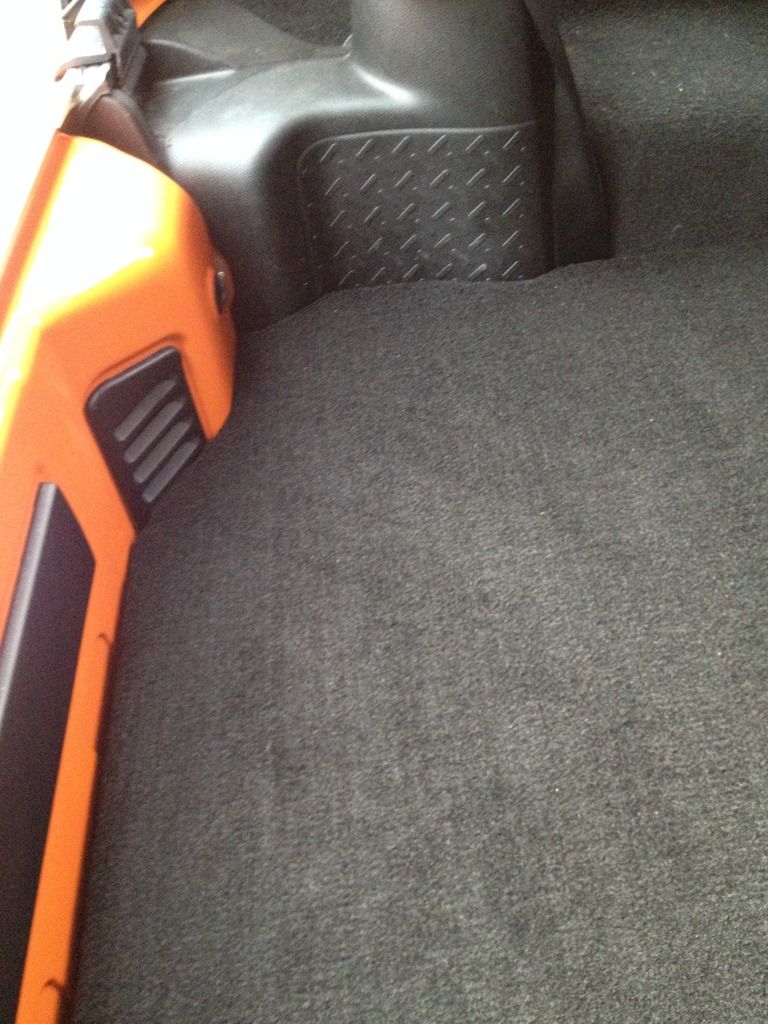
I just finished up my storage box. It's very simple and doesn't compare to some of the great work others have posted, but I thought I'd include some info to help other 2-door owners who run without a rear seat. I wanted to bolt the box down without making any modifications to the Jeep, so I used only OEM mounting points. For the back end of the box, I removed the original tie down rings, and used some brackets from Lowes. A 6x50mm bolt secures it to the floor. While not shown in the photo, I secured the bracket to the wooden frame with bolts that pass all the way through.
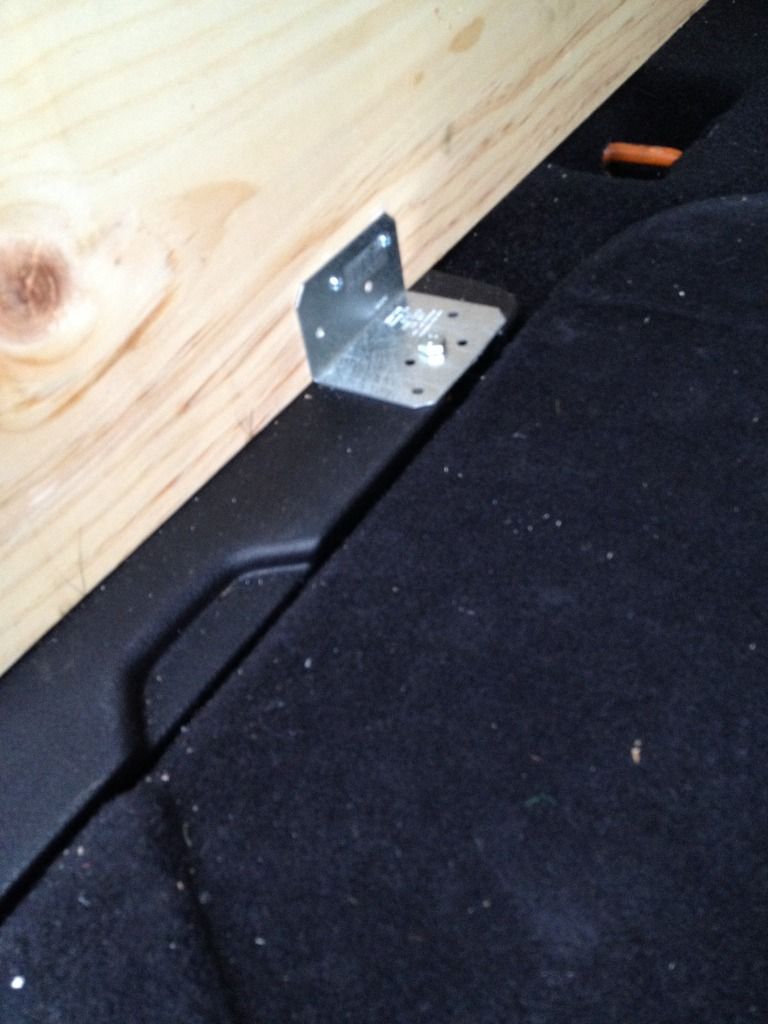
For the front mounts, I used J-hooks that hook around the forward mount rear seat mount hoop thingies. The threaded portion of the J-hooks pass through the front wooden crossmember and are secured with washers and nuts on the other side. This allows me to remove and install them easily even though my compartment lid is not hinged ( I found that a hinged top didn't make much sense on the two door since the cargo area is so small).
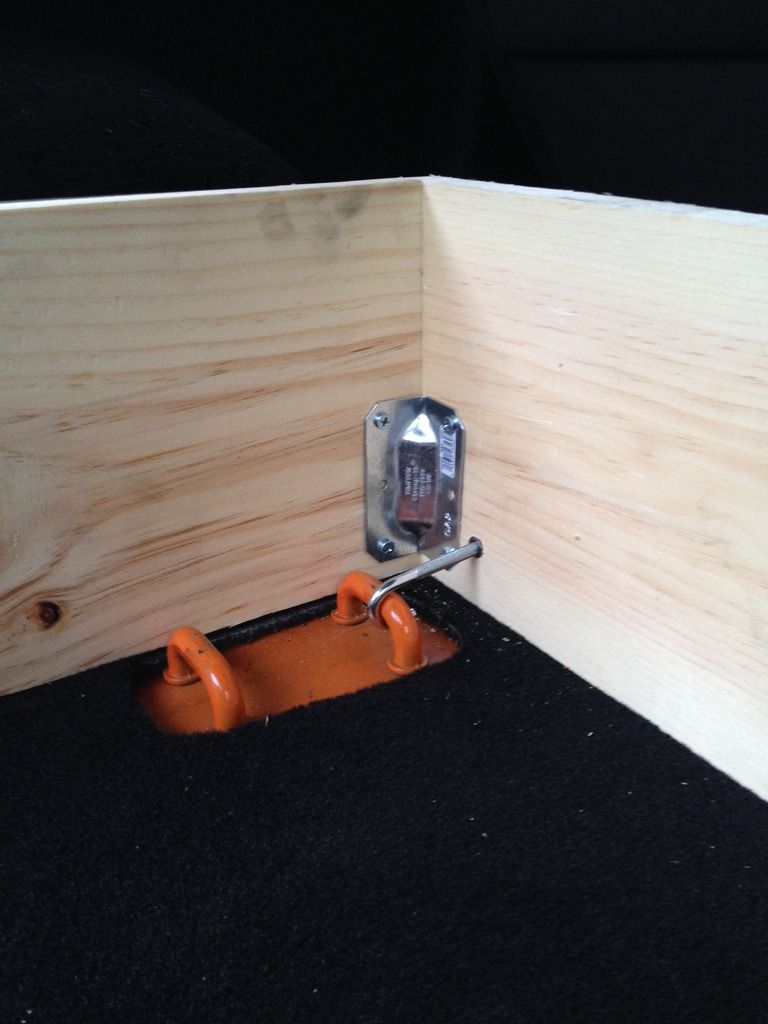
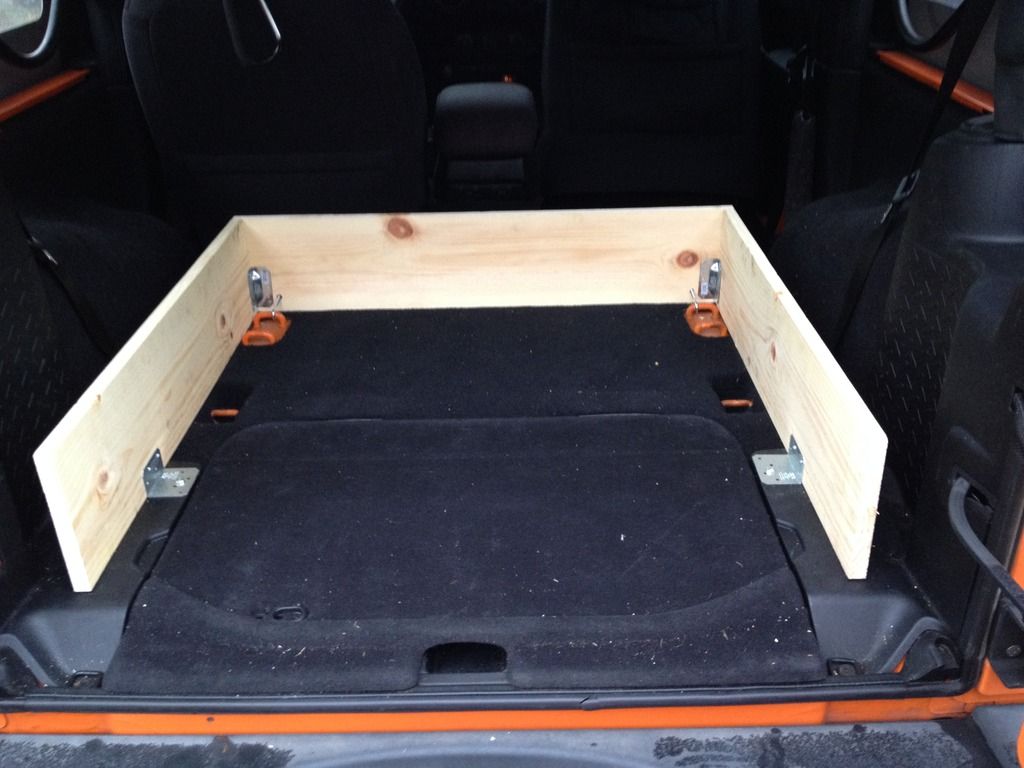
Wherever bolts pass through the frame, I installed steel sleeves to prevent the holes in the wood from getting wallowed out over time. I originally made the base out of 2x6's, but the thing weighed a ton and wasn't quite tall enough underneath. I switched to 1x8's and with the sides glued & screwed, the base bolted down and precise fitment around the sides of the tub, it's extremely sturdy. With the 3/4" plywood top, I can stand on it and it easily supports my 200 pound butt.
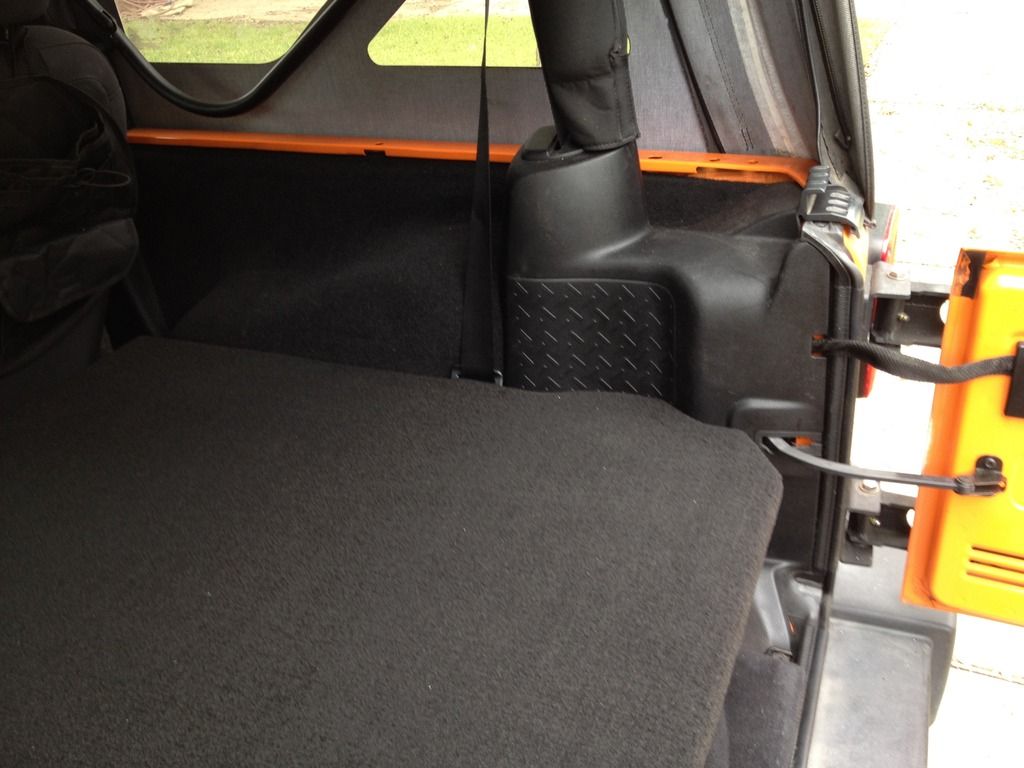
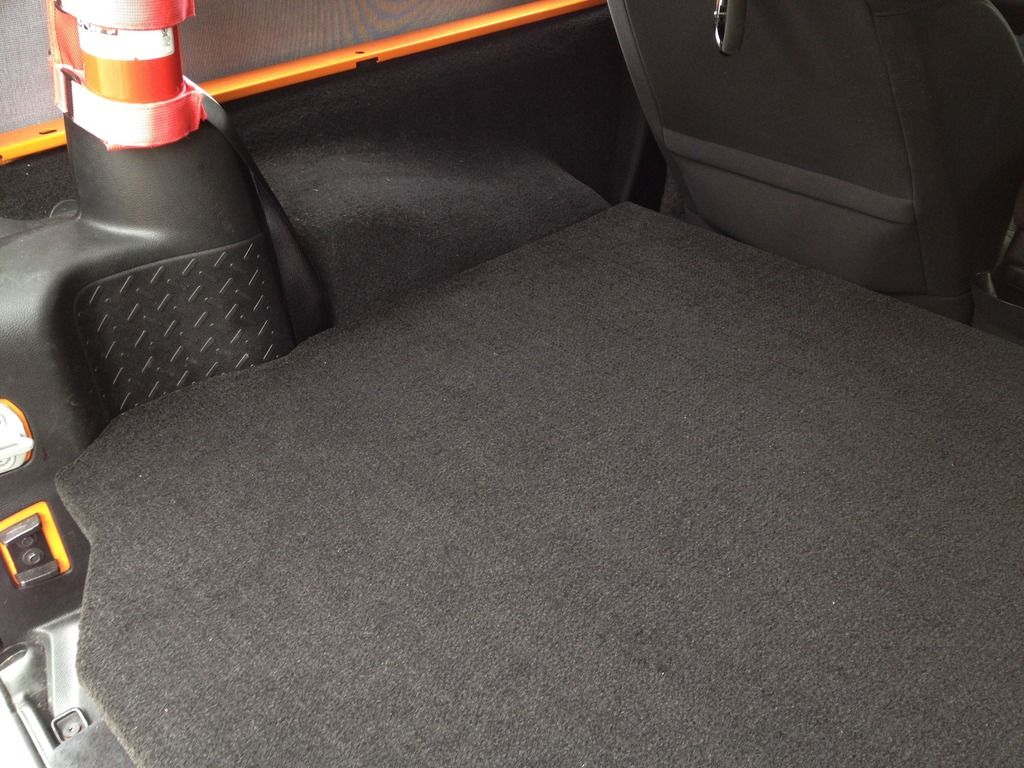
I added some toolbox drawer liner to the inner walls to keep things from banging around and making noise.
This was my prototype. I'll be making another smaller box for use with the rear seat installed and a second full length one, both with rubber mat on the top instead of carpet. I'll keep whichever full size box I like the best.
If anyone located in Austin, TX wants to build one of these for their two-door, I still have a template for the wooden platform top you can use, since getting that to fit precisely was by far the most time consuming part of the project. Bring beer

For the front mounts, I used J-hooks that hook around the forward mount rear seat mount hoop thingies. The threaded portion of the J-hooks pass through the front wooden crossmember and are secured with washers and nuts on the other side. This allows me to remove and install them easily even though my compartment lid is not hinged ( I found that a hinged top didn't make much sense on the two door since the cargo area is so small).

Wherever bolts pass through the frame, I installed steel sleeves to prevent the holes in the wood from getting wallowed out over time. I originally made the base out of 2x6's, but the thing weighed a ton and wasn't quite tall enough underneath. I switched to 1x8's and with the sides glued & screwed, the base bolted down and precise fitment around the sides of the tub, it's extremely sturdy. With the 3/4" plywood top, I can stand on it and it easily supports my 200 pound butt.


I added some toolbox drawer liner to the inner walls to keep things from banging around and making noise.
This was my prototype. I'll be making another smaller box for use with the rear seat installed and a second full length one, both with rubber mat on the top instead of carpet. I'll keep whichever full size box I like the best.
If anyone located in Austin, TX wants to build one of these for their two-door, I still have a template for the wooden platform top you can use, since getting that to fit precisely was by far the most time consuming part of the project. Bring beer
Last edited by deathwagon; 11-11-2016 at 08:46 AM.
11-11-2016, 09:27 AM
#265
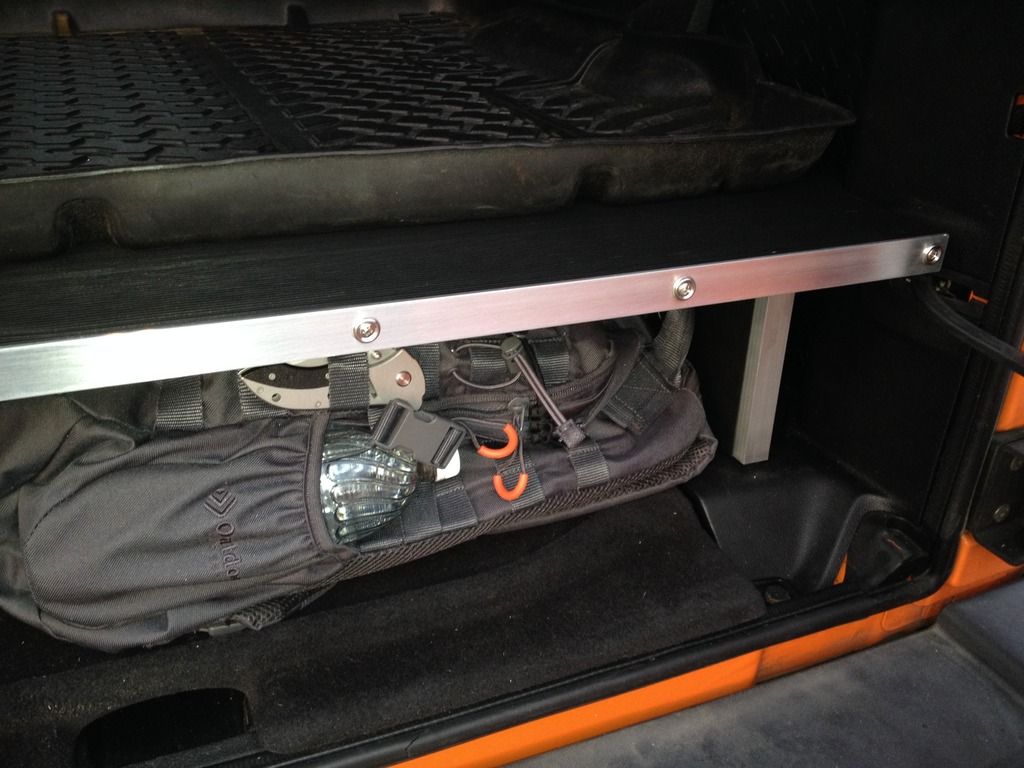
Adding to my post above with more redneck engineering, I wanted to keep my plastic tubs of choice from sliding back and forth, so I drilled the side pieces of the frame and passed a dowel through them and through a section of rubber automotive heater hose.
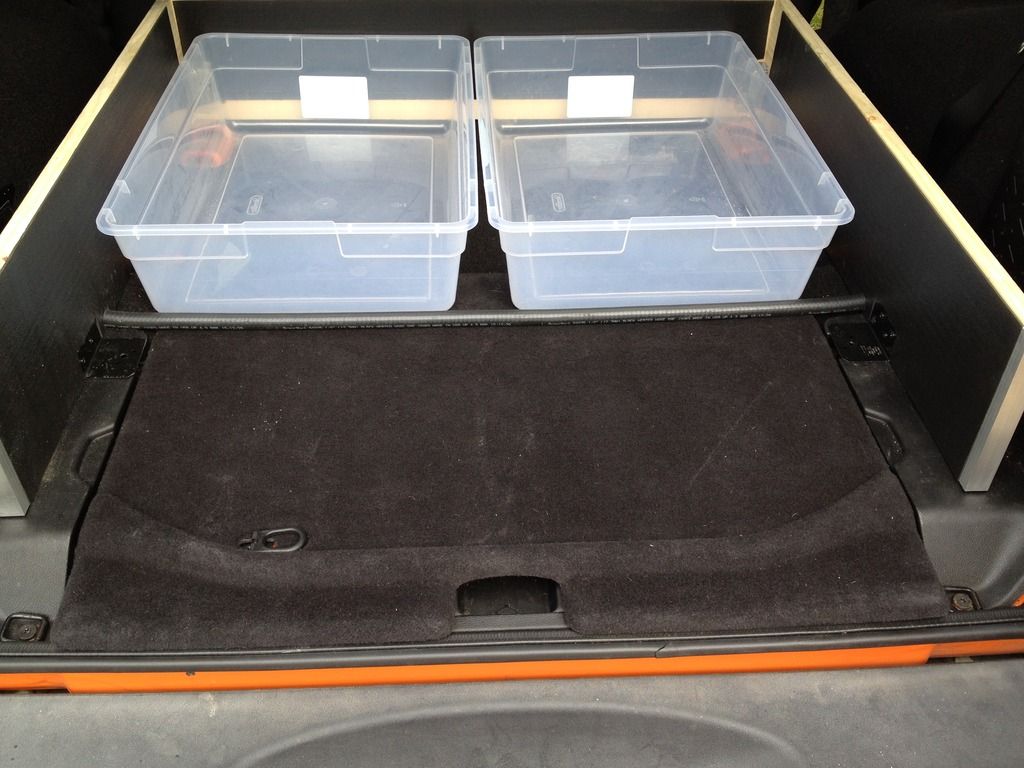
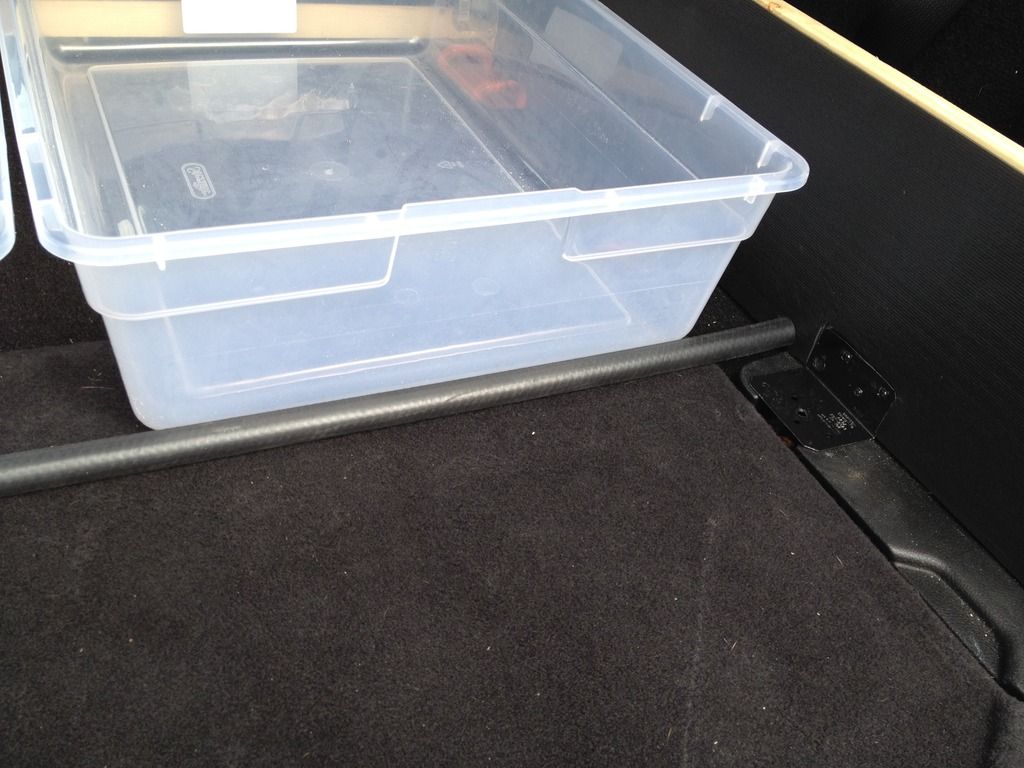
I also found some aluminum stock at Lowes that I used to finish of the visible ends of the wooden frame. Blingtastic.


I also found some aluminum stock at Lowes that I used to finish of the visible ends of the wooden frame. Blingtastic.
 11-12-2016, 04:03 PM
#267
Thanks, Fooddude. There was a lot of trial and error there. I found a contour gauge for about $7 at Harbor Freight and that helped a bit.
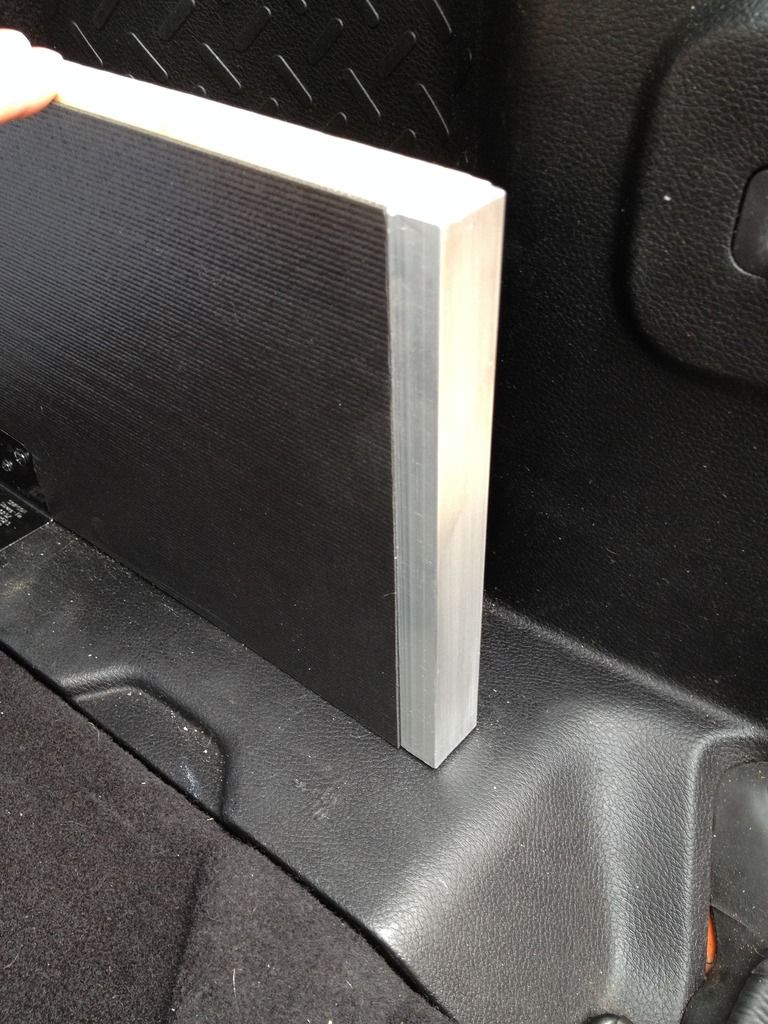
I went ahead and completed version 2.0 today and went with a rubber mat for the top. With a carpet top, you can wrap around the exposed rear-facing edge of the platform top, but with a thick rubber mat that isn't an option. I decided to go for a more industrial look with this version and fabbed up an aluminum trim piece. I bent the aluminum stock by hand, which, combined with a fair amount of Fat Tire beer made me feel pretty manly. I brushed it with some green Scotchbrite, finished it off with some stainless fasteners, and I think it turned out well. I made a similar piece for the edge on the opposite side behind the seats.
I wasn't at all pleased with the crap rubber mat options I was able to find locally, so I'm looking to replace it. If anyone knows of an online source for bulk rubber mat that's at least 46" wide and doesn't have some goofy pattern on it, please let me know. For now I plopped my Quadratec cargo mat on top of it until I can find some decent material.
I went ahead and completed version 2.0 today and went with a rubber mat for the top. With a carpet top, you can wrap around the exposed rear-facing edge of the platform top, but with a thick rubber mat that isn't an option. I decided to go for a more industrial look with this version and fabbed up an aluminum trim piece. I bent the aluminum stock by hand, which, combined with a fair amount of Fat Tire beer made me feel pretty manly. I brushed it with some green Scotchbrite, finished it off with some stainless fasteners, and I think it turned out well. I made a similar piece for the edge on the opposite side behind the seats.


I wasn't at all pleased with the crap rubber mat options I was able to find locally, so I'm looking to replace it. If anyone knows of an online source for bulk rubber mat that's at least 46" wide and doesn't have some goofy pattern on it, please let me know. For now I plopped my Quadratec cargo mat on top of it until I can find some decent material.
Last edited by deathwagon; 11-12-2016 at 04:06 PM.
11-14-2016, 04:35 AM
#268
JK Freak
Join Date: Aug 2013
Location: Tulsa, OK
Posts: 645
Likes: 0
Received 0 Likes
on
0 Posts
Thanks, Fooddude. There was a lot of trial and error there. I found a contour gauge for about $7 at Harbor Freight and that helped a bit. I went ahead and completed version 2.0 today and went with a rubber mat for the top. With a carpet top, you can wrap around the exposed rear-facing edge of the platform top, but with a thick rubber mat that isn't an option. I decided to go for a more industrial look with this version and fabbed up an aluminum trim piece. I bent the aluminum stock by hand, which, combined with a fair amount of Fat Tire beer made me feel pretty manly. I brushed it with some green Scotchbrite, finished it off with some stainless fasteners, and I think it turned out well. I made a similar piece for the edge on the opposite side behind the seats. I wasn't at all pleased with the crap rubber mat options I was able to find locally, so I'm looking to replace it. If anyone knows of an online source for bulk rubber mat that's at least 46" wide and doesn't have some goofy pattern on it, please let me know. For now I plopped my Quadratec cargo mat on top of it until I can find some decent material.
Great job on the box by the way!
12-11-2016, 08:11 PM
#269
JK Newbie

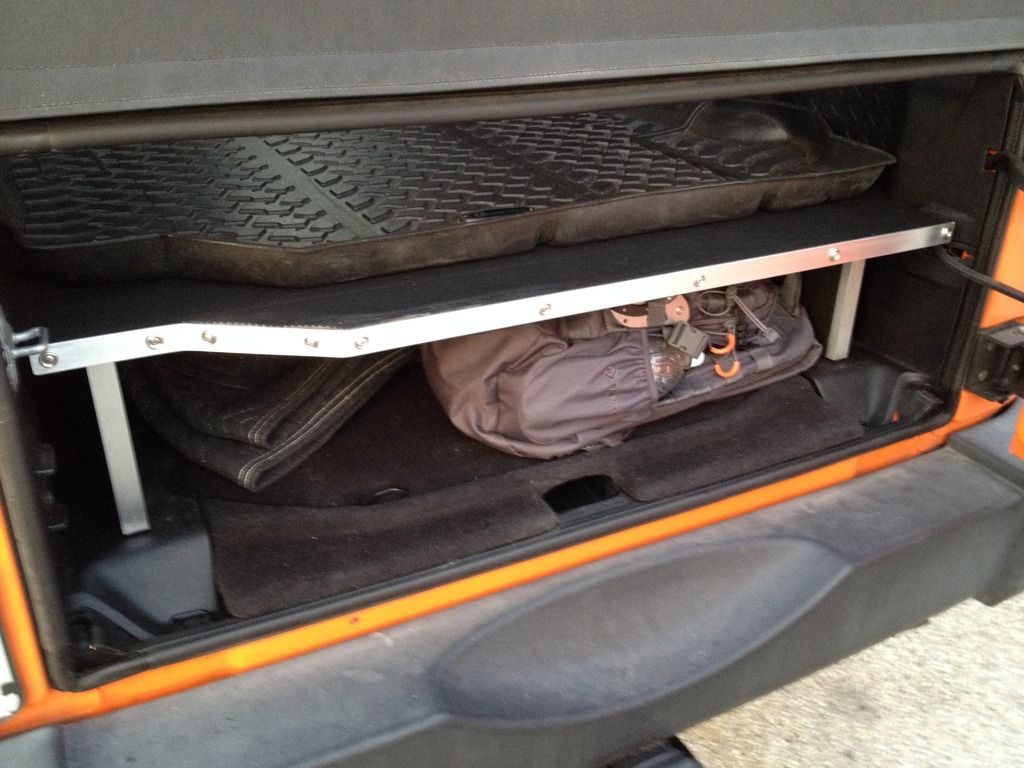
Unless someone can convince me otherwise (I.E. tell me this is a terrible idea, wont work, or should be modified in a different way), I'm going to try something that I haven't seen yet for a rear shelf. I have hookup for 1/4" aluminum sheeting, so I was thinking of building something sleek, strong, and easily removable. My planned attachment/securement points are the 6x hard top frame mounting bolts. Break the sheet at angles to maximize shelf area/minimize dead space, while protecting the plastics from cargo. Center floor support at the base (simply rests, does not bolt down), up to the hinge for the access panel to the jack/etc. Approximately 6" of room under the shelf for a Rubbermaid container or two for supplies/recovery gear. I'd have to make a couple mock-ups with cardboard, but this is the general idea:

OR


OR
 12-11-2016, 08:59 PM
#270
JK Newbie

Join Date: Sep 2016
Posts: 20
Likes: 0
Received 0 Likes
on
0 Posts
Unless someone can convince me otherwise (I.E. tell me this is a terrible idea, wont work, or should be modified in a different way), I'm going to try something that I haven't seen yet for a rear shelf. I have hookup for 1/4" aluminum sheeting, so I was thinking of building something sleek, strong, and easily removable. My planned attachment/securement points are the 6x hard top frame mounting bolts. Break the sheet at angles to maximize shelf area/minimize dead space, while protecting the plastics from cargo. Center floor support at the base (simply rests, does not bolt down), up to the hinge for the access panel to the jack/etc. Approximately 6" of room under the shelf for a Rubbermaid container or two for supplies/recovery gear. I'd have to make a couple mock-ups with cardboard, but this is the general idea: OR

