VDP Stubby Bumper Conversion
 01-22-2011, 01:38 PM
#1
JK Enthusiast
Thread Starter
Join Date: Jan 2011
Location: Friendswood, TX
Posts: 256
Likes: 0
Received 0 Likes
on
0 Posts
The first thing a lot of people want to do to their stock jeeps is toss out that stock plastic bumper and put a heavy duty one on. I would love to do that myself, however I am stuck in reality and can't afford one right now. I also have a hard time throwing something away that looks and functions well. Plus I don't want to worry about leveling this early in the game.
After looking around on Quadratec I found the perfect solution, the VDP Stubby Bumper conversion kit for about $60. The package includes the two end caps, a pack of 10 plastic fastners and a set of very detailed instructions with high quality picutes. Besides the kit you're going to need a reciprocating saw with a steel cutting blade, a drill with a 1/4 inch steel bit, tape measure, pencil, masking tape, razor blade, your favorite touchup paint, and about an hour of free time.
First thing you're going to want to do is measure 3 1/2 inches from the bumper pad toward the outside of the bumper. What I'm calling the bumper pad is the part your tow hooks are sticking out of and what houses the crush cans inside it. I marked twice on the top and twice on the front of the bumper. This is going to help you make a nice straight line with your tape. Now apply the tape to the outside edge of your line. It should look something like this:
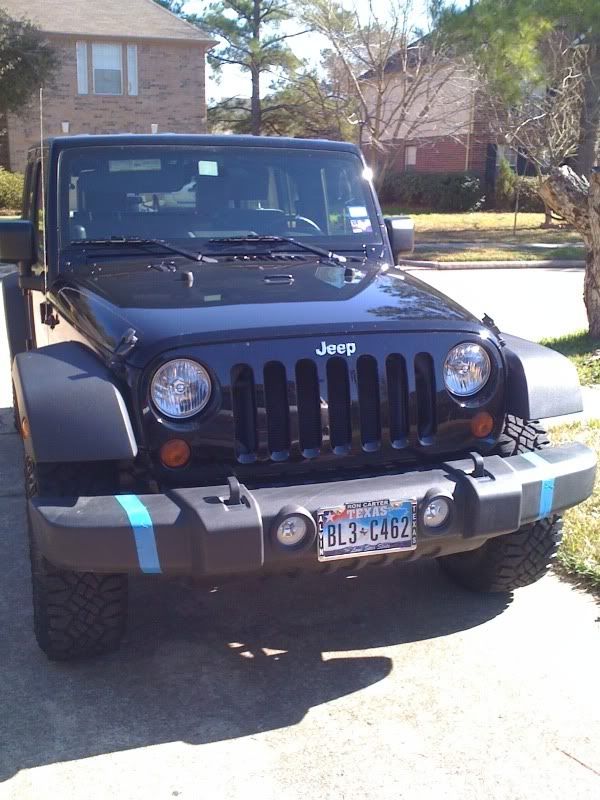
Note: you do not have to use the gigantic blue tape I used, it's all I had laying around.
Once your line is marked you are ready to begin cutting. Grab your sawzall and get to hackin'! Follow the line the best you can, there is some wiggle room with the cut area so don't freak our if you cut in to your tape.

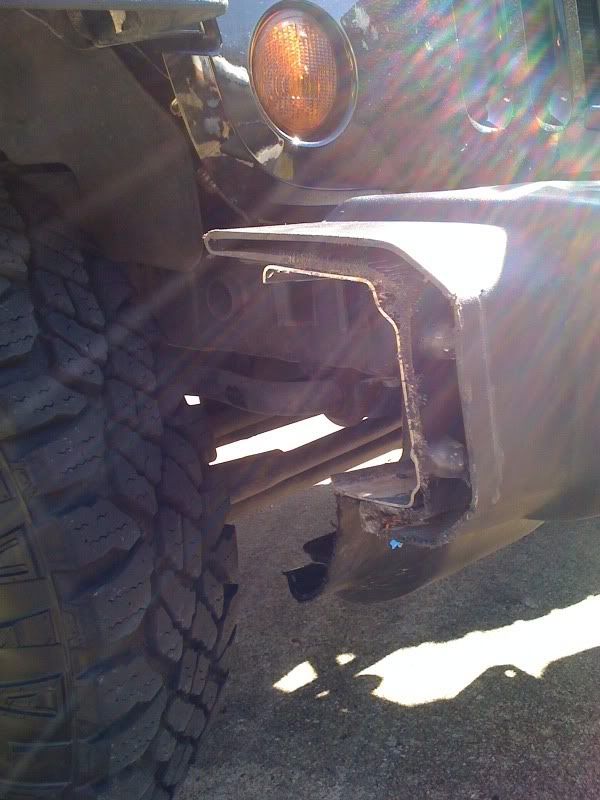
Here's where an extra set of hands come in handy. Once you get about halfway through the cut, the extra piece is going to start vibrating like crazy. Have your fearless assistant hold the part you are cutting off until you finish the cut. Once you get about halfway you might notice your blade is extremely hot. Go ahead and let it cool for a minute or two before finishing, excessive heat will cause it to warp and get dull faster. If you take your time you can easily do this with one blade. You should end up with something like this:
Note: I know the cutting image was on the other side, I accidentally deleted the photo.
After the plastic cools, go ahead and use the razorblade to cut off the lumpy melted parts, nobody likes a sloppy job. Here's an important step not included in the instructions that came with the kit, protection. You just cut through your bumper and have raw metal exposed, go ahead and hit it up with your favorite touch up paint. I know it's common sense, but its easily overlooked if you're focusing on the instructions.
Since I didn't want a lopsided bumper for the photos, I went ahead and cut the other side of the bumper. Just follow the instructions above for the other side.
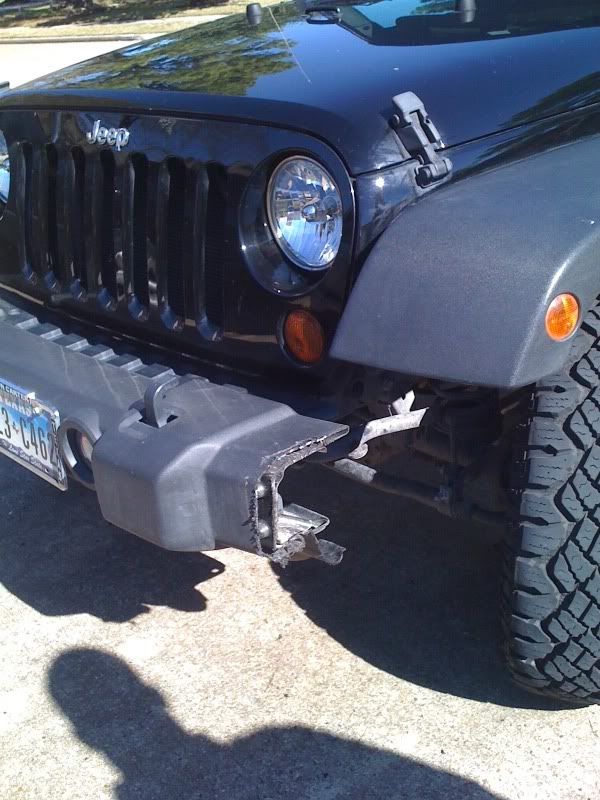
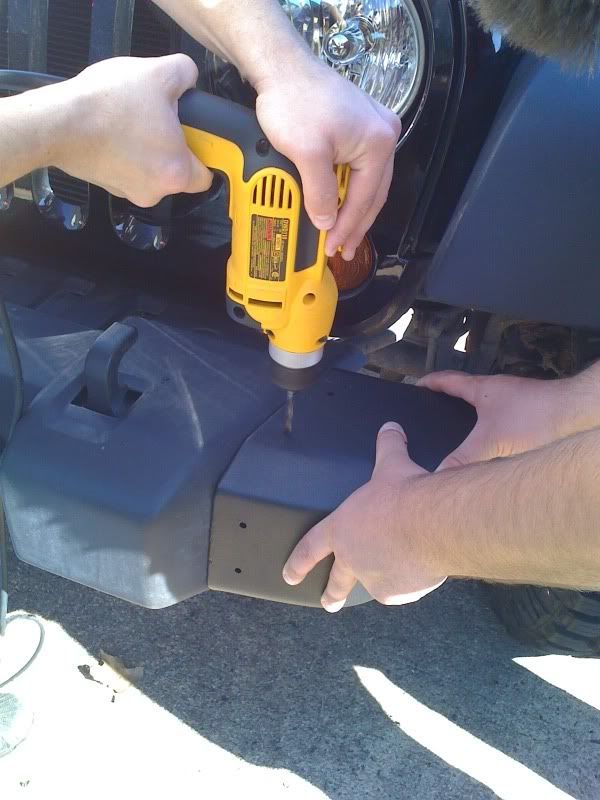
Once you've finished cutting, trimming and painting both sides, its time to put those sweet endcaps on and drill the holes for the fastners.
Have your fearless assistant put a cap on the bumper and hold it in place while you drill the holes. Make sure you have a 1/4 inch steel drilling bit and get to drilling your holes! You don't have to apply very much pressure even when drilling through the steel. If you push too hard you risk smashing into your brand new end caps and scratching them up. Just dont hulk out on it and you'll be fine . Dont forget the bottom hole, each cap has 5 holes to drill.
Once your holes are drilled Shove in the little plastic fastners.
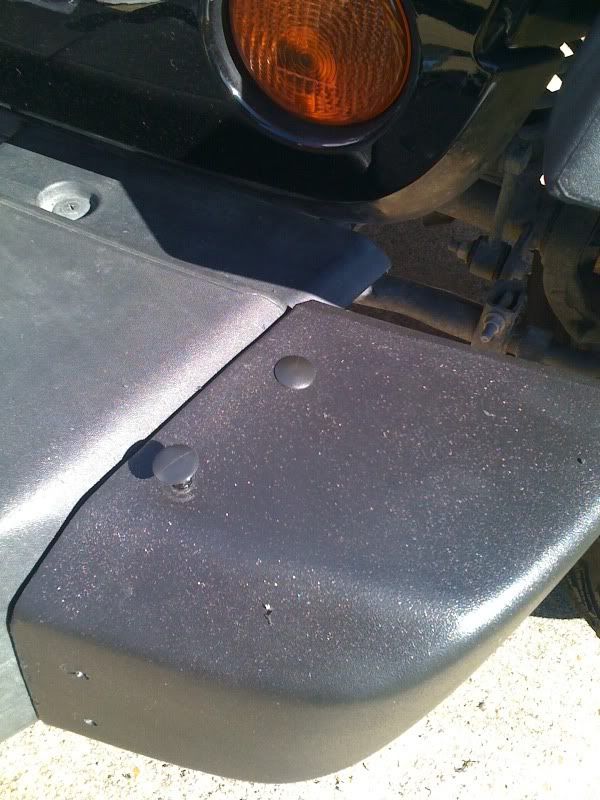
Repeat this process for the other side and you are done!
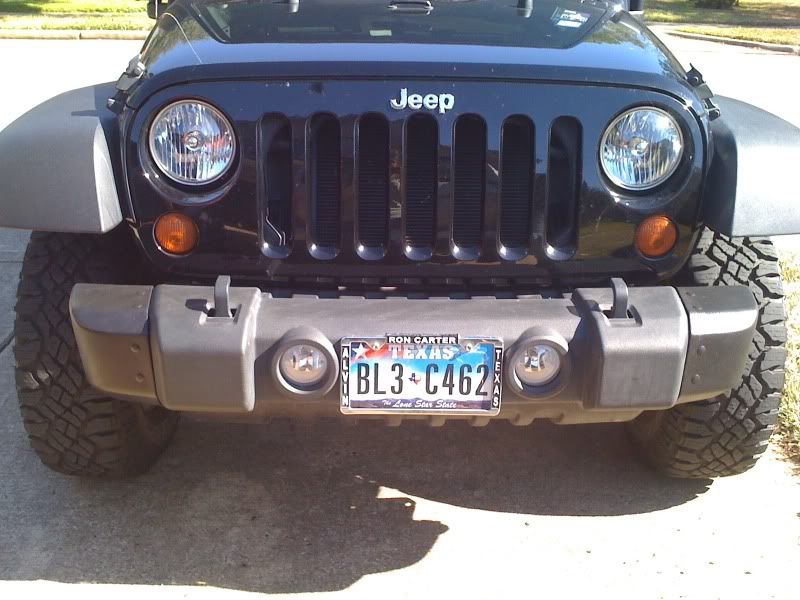
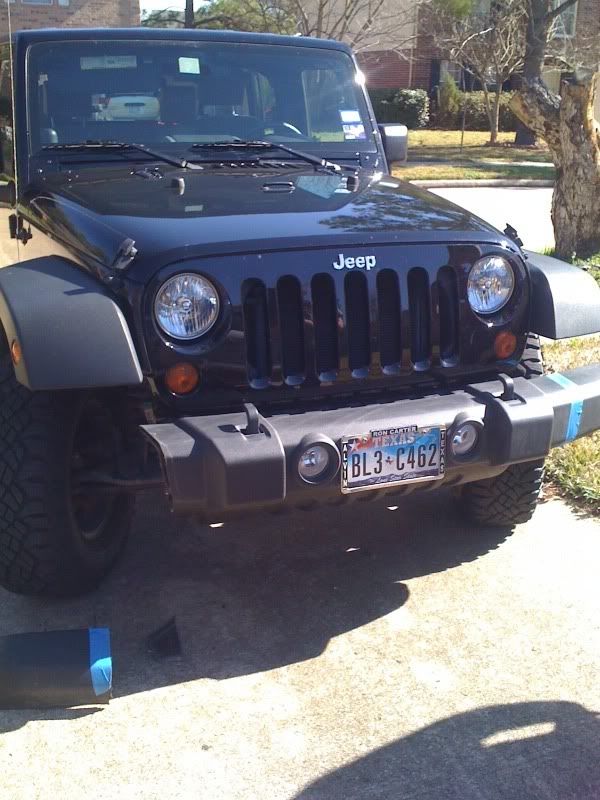
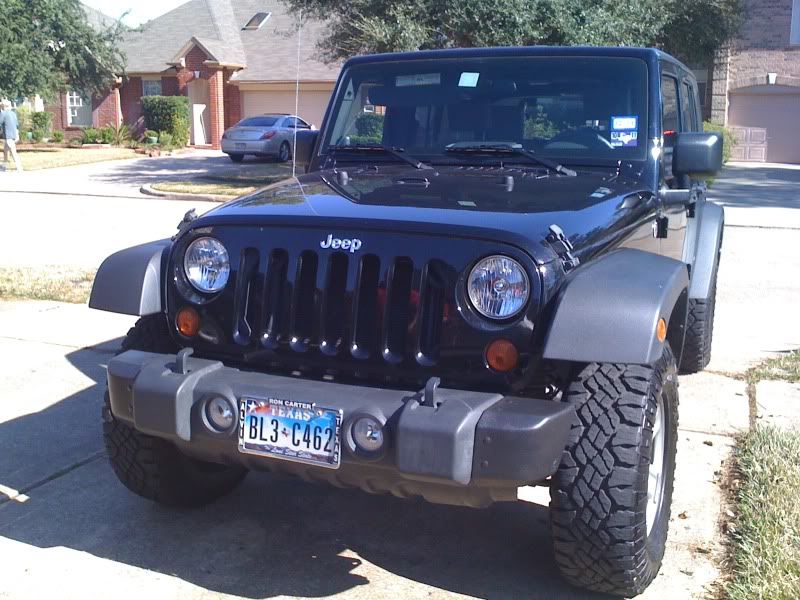
Here's the before and after comparison.
Before:
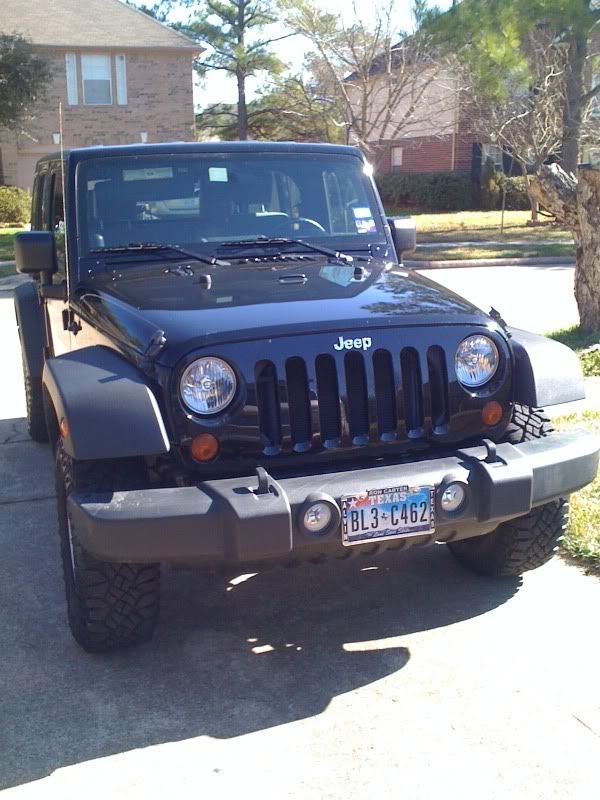
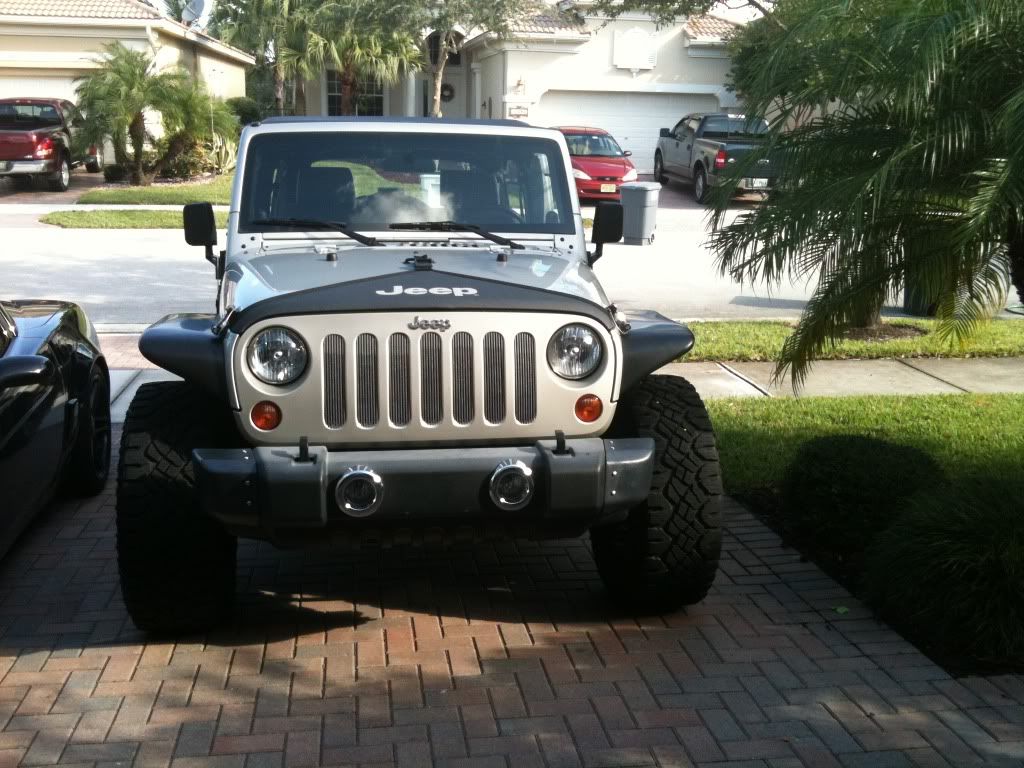
After:
I really think this a VERY economical solution for those of us who can't quite spend the money or just don't want to spend the money. The factory bumper is really a feature packed bumper, it just needs a tummy tuck.
After looking around on Quadratec I found the perfect solution, the VDP Stubby Bumper conversion kit for about $60. The package includes the two end caps, a pack of 10 plastic fastners and a set of very detailed instructions with high quality picutes. Besides the kit you're going to need a reciprocating saw with a steel cutting blade, a drill with a 1/4 inch steel bit, tape measure, pencil, masking tape, razor blade, your favorite touchup paint, and about an hour of free time.
First thing you're going to want to do is measure 3 1/2 inches from the bumper pad toward the outside of the bumper. What I'm calling the bumper pad is the part your tow hooks are sticking out of and what houses the crush cans inside it. I marked twice on the top and twice on the front of the bumper. This is going to help you make a nice straight line with your tape. Now apply the tape to the outside edge of your line. It should look something like this:
Note: you do not have to use the gigantic blue tape I used, it's all I had laying around.
Once your line is marked you are ready to begin cutting. Grab your sawzall and get to hackin'! Follow the line the best you can, there is some wiggle room with the cut area so don't freak our if you cut in to your tape.
Here's where an extra set of hands come in handy. Once you get about halfway through the cut, the extra piece is going to start vibrating like crazy. Have your fearless assistant hold the part you are cutting off until you finish the cut. Once you get about halfway you might notice your blade is extremely hot. Go ahead and let it cool for a minute or two before finishing, excessive heat will cause it to warp and get dull faster. If you take your time you can easily do this with one blade. You should end up with something like this:
Note: I know the cutting image was on the other side, I accidentally deleted the photo.
After the plastic cools, go ahead and use the razorblade to cut off the lumpy melted parts, nobody likes a sloppy job. Here's an important step not included in the instructions that came with the kit, protection. You just cut through your bumper and have raw metal exposed, go ahead and hit it up with your favorite touch up paint. I know it's common sense, but its easily overlooked if you're focusing on the instructions.
Since I didn't want a lopsided bumper for the photos, I went ahead and cut the other side of the bumper. Just follow the instructions above for the other side.
Once you've finished cutting, trimming and painting both sides, its time to put those sweet endcaps on and drill the holes for the fastners.
Have your fearless assistant put a cap on the bumper and hold it in place while you drill the holes. Make sure you have a 1/4 inch steel drilling bit and get to drilling your holes! You don't have to apply very much pressure even when drilling through the steel. If you push too hard you risk smashing into your brand new end caps and scratching them up. Just dont hulk out on it and you'll be fine
. Dont forget the bottom hole, each cap has 5 holes to drill.Once your holes are drilled Shove in the little plastic fastners.
Repeat this process for the other side and you are done!
Here's the before and after comparison.
Before:
After:
I really think this a VERY economical solution for those of us who can't quite spend the money or just don't want to spend the money. The factory bumper is really a feature packed bumper, it just needs a tummy tuck.


 01-23-2011, 11:01 AM
#6
JK Enthusiast
Thread Starter
Join Date: Jan 2011
Location: Friendswood, TX
Posts: 256
Likes: 0
Received 0 Likes
on
0 Posts
I might, and that's a big might, cut the fenders today. I'm in the cutting mood an my neighbor has a sawzall calling my name. I have not found the adhesive trim yet, all I can find is the friction grip stuff and I just can't trust that stuff
Trending Topics
01-23-2011, 06:02 PM
#8
JK Enthusiast
Thread Starter
Join Date: Jan 2011
Location: Friendswood, TX
Posts: 256
Likes: 0
Received 0 Likes
on
0 Posts
Did not cut the fenders today, got too busy around the house. Figured this weekend is as good as any to take down xmas decorations. 
Lets try for this coming weekend or the next, after looking at Bmore30's fenders I'm gonna mod my stock ones to look like that.
BTW Bmore30, how you liking those DuraTracs an what is that sick lookin' car next to your jeep?
Lets try for this coming weekend or the next, after looking at Bmore30's fenders I'm gonna mod my stock ones to look like that.
BTW Bmore30, how you liking those DuraTracs an what is that sick lookin' car next to your jeep?
