WxNerd2015's Never Ending Build -
 07-05-2016, 05:38 AM
#141
JK Enthusiast
Thread Starter
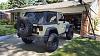
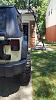
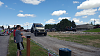
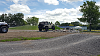
Ok, so, here it goes! As y'all have read now, I wanted to get a 3.5" AEV Dualsport SC Lift for my rig, and I finally decided that it was the time to do it! I also added on the Teraflex HD Hinged Tire Carrier for added support for when I got the chance to go to bigger tires...but on that front, my plan was to weight until fall/winter rolled around here to spread that cost out some (but we all know how that goes, those things never work out how you need em too!) So I dropped the Jeep off at Unlimited Offroad in Fenton, MI for my new accessories and was to pick the Jeep back up the next day in the afternoon with all work completed. Here's some shots of the work being done:
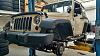
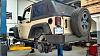
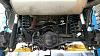
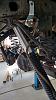
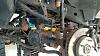
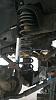
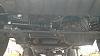
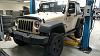
I went back to pick the Jeep up then, and was very pleased and excited when I saw the Jeep! I thought it looked great! And could not wait to see how it drove and felt now!
I ended up getting about 5 miles or so down the expressway (70-75 mph) and hit a couple of concrete seems on the road surface, and the steering wheel started shaking so bad that I had to pull over to the shoulder and stop to finally get the shaking to stop! The wheel was rotating about 45 degrees each direction back and forth, so a pretty extreme death wobble! That was definitely not fun at all! So I took it easy and went right back to the shop and they were stumped, but I left the Jeep there for them to investigate, and also to readjust the Spare carrier as after I left, the carrier drooped a bit and the tire was shaking a bit. Turns out there, the stock wheel backspacing with the stock tire just could not get the tire to fit snug up against the carrier as it should.
3 more days later, I came back out as they said they found nothing and had not had it happen to them and said it should be all good. So i once again picked it up, and sure enough, about 5-7 miles down the road again, I get another extreme death wobble, but I decided that I was just going to limp it home and investigate further from there. I ended up with 3 more instances of Death Wobble in my hour drive home, all at about 70 MPH, so not too fun, but figured out when it was happening so I could better prepare. For me, it was occurring whenever I had a bump that was parallel with the axle that hit evenly, such as concrete seems and bridge seems and it was consistently happening then.
Once I got home, I gave a call to the shop, and they were still stumped, as they said that they had never had this happen with an AEV kit and could not believe it, and they offered the option of me to buy a new front track bar as the stock one had a little flex to it, but they doubted that was the issue as well as all the bushings/mounts were tight and solid. So I went ahead and called AEV directly, and they told me to get my tires road force balanced at a tire shop as they were sure it must be the tires since I did not change them and they had 41k on them.
As everyone here knows for sure, you also go and plan on changing one thing, but some how you always end up upsetting something else that you then have to go and replace too! It never seems to be just a quick, simple, easy processes, unless you start off changing all components! Haha!
 07-05-2016, 06:29 AM
#142
JK Enthusiast
Thread Starter
So where did I leave off...ah! Yes! Chapter 2! And I did leave one piece out in Chapter 1 as well. I was also supposed to get a CB Mounting Bracket for the Carrier on the back as i could not reuse the Rugged Ridge one that I had, however, when Unlimited Offroad went to install it, they realized that Teraflex had sent a non-powder coated one, so they had to place a new order to get the right mount, which I had them just send directly to my house, because it is 2 bolts and reattaching the base of the antenna, it was basically all run, so I can easily do that myself. But anyways, but to the story!
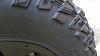
So I decided to head on over to discount tire because, when it comes to wheels and tires, I trust no one more than them, and they have always taken such great care of me there that I never even think to go anywhere else! So I asked them to road force balance the tires to see if this could be causing my death wobble issue, and sure enough, just looking at the tires, it turns out that one of the front tires had its weight knocked off somewhere, and the other was no longer round on the inside edge. It was a little weird that I was not feeling either of these when driving down the road regularly I thought, however, this was the issue that the suspension and HD Steering Stabilizer were taking care of the small vibration, but when hitting the straight on seems/bumps, it was magnifying the issue greatly and it was just a progressive wobble that continued to build until I slowed down. And this, you could see with your eyes and feel it with your hands, so Discount Tire said that it was a waste of money to road force balance them, and new tires were definitely going to be in order for me!
Was NOT planning on spent that much money all in one week, but I was going to do itanyways, so I guess I just ended up getting it all done at once...and let's face it, I definitely wasn't sad about some new wheels and tires coming sooner rather than later! Haha! Cus who really WANTS to wait on that? It just made sense to try and spread the money out a little at least.
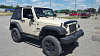
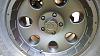
So I started discussing some numbers (and with tires, that's a lot of numbers! 33s...35s...285s...305s...70...12.5...17s...15s... etc...your get the idea! And that's not even the prices!) and I had already had an idea of the size tire I wanted along with exactly want brand/model tire i wanted, and I had an idea on the wheels! My original plan was to go with 15" Level 8 Bully Pros with either a 35x12.5xR15 or a 33x12.5xR15 Cooper Discoverer STT Pro. Now, this was a tough decision as 33s on a 2 Dr with a 3.5" lift is a bit had to find to compare, and there are so many factors that go into exactly how it sits, but I decided that I was gonna go for 33s, as 35s may bog me down too much and I don't wanna get into too much regearing or put too much stress on the drivetrain, as this is my DD, so I had to keep that in mind! Turned out though, to get the Bully Pros, they would have to be shipped from Cali to the shop in MI and it was going to take a whole week to get em in, and I couldn't be out of commission that long with my DD, so I had to look into some different options. I considered Just going stock rims with the spacers as the stock rims aren't too bad, cuz I had black rims! And it would cost a bit less, but them the sales guy really took care of me wheel, as another Jeep had been in earlier that week for wheels and tires, and ordered a set of 5 MB Razors in Flat Black, and didn't like em, so the shop already had these in!
http://www.wheelsbymbmotoring.com/pr...=Matte%20Black
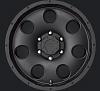
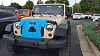
The Sales Rep went and got em out of the back and I really liked what i saw! These wheels had a sweet look to em, and with my Jeep, IMHO, they were perfect! So then I had to get into the size of the tire for the 17" rim now, and I finally settled on a 295/70/17, which should measure out to ~33" tire depending on the psi in it. The tire size calculator from Discount Tire measured it to 33.26", but that is obviously ideal measurement and not real with weight on it. I figured I was going to need to wait a few days, as I was sure these tires in a 295 size were definitely not gonna be stocked at the shop, which they weren't, but i was very surprised to hear the sales rep guy say it would be ready before closing that day! He was going to rush the tires in and make it happen that day! So I was very happy to see this!
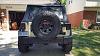
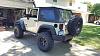
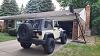
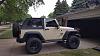
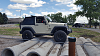
I got the call later in the afternoon that DT was taking my Jeep in now as the tires had just arrived and they figured they would call me then because they figured I might want to watch...which they were right! They swapped my TPMS Sensors from the old wheels to these new ones, got em mounted and balanced, and the only issue they had was, the lift that they put it on was not quiet tall enough for the new tires by an inch or so as I have so much travel in the suspension now with the AEV kit! But they were able to get it on, no issue, and they readjusted the Teraflex carrier with my help to get the new 5 wheel/Tire on there snug with no shake or vibration, and there ya have it! a new and very sick looking Jeep! And for the 2-Dr, and I really happy with my choice of 33s, as I think the 35s would have been too much tire for my taste on my Jeep! Proportions wise, It looks just right to me!
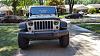

And after the drive home and a few other tests up and down the expressway and bumpy roads and starting and stopping...this fixed my death wobble! No even a hint of a wobble any more! It is great! And I am very pleased for DT taking such great care of my and fixing this fast!
So I decided to head on over to discount tire because, when it comes to wheels and tires, I trust no one more than them, and they have always taken such great care of me there that I never even think to go anywhere else! So I asked them to road force balance the tires to see if this could be causing my death wobble issue, and sure enough, just looking at the tires, it turns out that one of the front tires had its weight knocked off somewhere, and the other was no longer round on the inside edge. It was a little weird that I was not feeling either of these when driving down the road regularly I thought, however, this was the issue that the suspension and HD Steering Stabilizer were taking care of the small vibration, but when hitting the straight on seems/bumps, it was magnifying the issue greatly and it was just a progressive wobble that continued to build until I slowed down. And this, you could see with your eyes and feel it with your hands, so Discount Tire said that it was a waste of money to road force balance them, and new tires were definitely going to be in order for me!
Was NOT planning on spent that much money all in one week, but I was going to do itanyways, so I guess I just ended up getting it all done at once...and let's face it, I definitely wasn't sad about some new wheels and tires coming sooner rather than later! Haha!
Cus who really WANTS to wait on that? It just made sense to try and spread the money out a little at least.So I started discussing some numbers (and with tires, that's a lot of numbers! 33s...35s...285s...305s...70...12.5...17s...15s... etc...your get the idea! And that's not even the prices!) and I had already had an idea of the size tire I wanted along with exactly want brand/model tire i wanted, and I had an idea on the wheels! My original plan was to go with 15" Level 8 Bully Pros with either a 35x12.5xR15 or a 33x12.5xR15 Cooper Discoverer STT Pro. Now, this was a tough decision as 33s on a 2 Dr with a 3.5" lift is a bit had to find to compare, and there are so many factors that go into exactly how it sits, but I decided that I was gonna go for 33s, as 35s may bog me down too much and I don't wanna get into too much regearing or put too much stress on the drivetrain, as this is my DD, so I had to keep that in mind! Turned out though, to get the Bully Pros, they would have to be shipped from Cali to the shop in MI and it was going to take a whole week to get em in, and I couldn't be out of commission that long with my DD, so I had to look into some different options. I considered Just going stock rims with the spacers as the stock rims aren't too bad, cuz I had black rims! And it would cost a bit less, but them the sales guy really took care of me wheel, as another Jeep had been in earlier that week for wheels and tires, and ordered a set of 5 MB Razors in Flat Black, and didn't like em, so the shop already had these in!
http://www.wheelsbymbmotoring.com/pr...=Matte%20Black
The Sales Rep went and got em out of the back and I really liked what i saw! These wheels had a sweet look to em, and with my Jeep, IMHO, they were perfect! So then I had to get into the size of the tire for the 17" rim now, and I finally settled on a 295/70/17, which should measure out to ~33" tire depending on the psi in it. The tire size calculator from Discount Tire measured it to 33.26", but that is obviously ideal measurement and not real with weight on it. I figured I was going to need to wait a few days, as I was sure these tires in a 295 size were definitely not gonna be stocked at the shop, which they weren't, but i was very surprised to hear the sales rep guy say it would be ready before closing that day! He was going to rush the tires in and make it happen that day! So I was very happy to see this!
I got the call later in the afternoon that DT was taking my Jeep in now as the tires had just arrived and they figured they would call me then because they figured I might want to watch...which they were right! They swapped my TPMS Sensors from the old wheels to these new ones, got em mounted and balanced, and the only issue they had was, the lift that they put it on was not quiet tall enough for the new tires by an inch or so as I have so much travel in the suspension now with the AEV kit! But they were able to get it on, no issue, and they readjusted the Teraflex carrier with my help to get the new 5 wheel/Tire on there snug with no shake or vibration, and there ya have it! a new and very sick looking Jeep! And for the 2-Dr, and I really happy with my choice of 33s, as I think the 35s would have been too much tire for my taste on my Jeep! Proportions wise, It looks just right to me!
And after the drive home and a few other tests up and down the expressway and bumpy roads and starting and stopping...this fixed my death wobble! No even a hint of a wobble any more! It is great! And I am very pleased for DT taking such great care of my and fixing this fast!
07-05-2016, 07:17 AM
#143
JK Enthusiast
Thread Starter
On to Chapter 3! And this should hopefully be the last chapter on this, so sorry for the long winded story and explanation! If ya don't want to read, there are plenty of pictures to look at that will get you to the point of the story! (a.k.a. I got a lift and wheels and tires! lol)
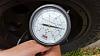
So chapter 3 comes after enough driving to for certain, and happily say, the death wobble has been conquered on my Jeep and is not more! I got my ProCal that came with the lift out and followed the very simple instructions and with 5 minutes had re-calibrated my Jeep for the new tire size! I proceeded to take a few drives at different speeds and then come back and re-calibrate to get it as close as I could to right, based on my GPS derived speed (and I figured within 1 MPH was an acceptable standard deviation and would be good), so the correct calibration for my was to input 32.75" as the tire size at 38 psi, as this was the closest to the ground up measurement, the rolling measurement, and getting the speedometer closest to GPS speed.
I also went ahead and rearranged the cubby under the trunk floor to be able to get the AEV Jack Base into there, because, just incase something might happen, I do not want to get stuck, so that was important too! Pics of those to come, though nothing special there and just as advertised by AEV!
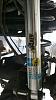
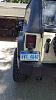
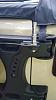
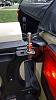
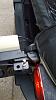
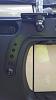
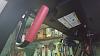
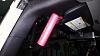
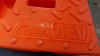
Lastly was the CB Carrier Antenna Mount from Teraflex, which finally arrived after a week or so!
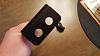
Now this mount is definitely not rocket science, and all it does is just mount up to 2 of the holes on the carrier and you attach your base for you antenna, and you are done! That simple! And since I already had a mount previously and had extra coax tucked away, I just pulled the coax out about a foot more and I was able to attach it no problem!
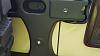
The only issue that I ran into was, I had to mount the bracket before attaching the base for the antenna as there was no enough space to get the head of the bolt bast the antenna base to start it if you used the outside hole, but that is no big deal at all! So I first attached the bracket to the carrier, and then I attached the base with the quick disconnect to the bracket! The bracket had hex head screws, so I needed an allen wrench to tighten it on, and the antenna mount for me required a 14mm wrench on either side to fasten it tight on! Once that is done, just attach the antenna, and DONE! Simple as that!

So chapter 3 comes after enough driving to for certain, and happily say, the death wobble has been conquered on my Jeep and is not more! I got my ProCal that came with the lift out and followed the very simple instructions and with 5 minutes had re-calibrated my Jeep for the new tire size! I proceeded to take a few drives at different speeds and then come back and re-calibrate to get it as close as I could to right, based on my GPS derived speed (and I figured within 1 MPH was an acceptable standard deviation and would be good), so the correct calibration for my was to input 32.75" as the tire size at 38 psi, as this was the closest to the ground up measurement, the rolling measurement, and getting the speedometer closest to GPS speed.
I also went ahead and rearranged the cubby under the trunk floor to be able to get the AEV Jack Base into there, because, just incase something might happen, I do not want to get stuck, so that was important too! Pics of those to come, though nothing special there and just as advertised by AEV!
Lastly was the CB Carrier Antenna Mount from Teraflex, which finally arrived after a week or so!
Now this mount is definitely not rocket science, and all it does is just mount up to 2 of the holes on the carrier and you attach your base for you antenna, and you are done! That simple! And since I already had a mount previously and had extra coax tucked away, I just pulled the coax out about a foot more and I was able to attach it no problem!
The only issue that I ran into was, I had to mount the bracket before attaching the base for the antenna as there was no enough space to get the head of the bolt bast the antenna base to start it if you used the outside hole, but that is no big deal at all! So I first attached the bracket to the carrier, and then I attached the base with the quick disconnect to the bracket! The bracket had hex head screws, so I needed an allen wrench to tighten it on, and the antenna mount for me required a 14mm wrench on either side to fasten it tight on! Once that is done, just attach the antenna, and DONE! Simple as that!
07-05-2016, 08:28 AM
#144
JK Enthusiast
Thread Starter
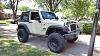
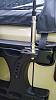
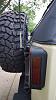
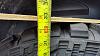
Here is the before measurement from stock suspension and stock tires:
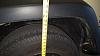
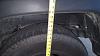
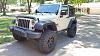
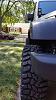
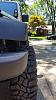
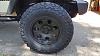
And here are some measurements, at least at the tire level after new wheels and tires! I will post some more measurements soon! But I believe, since I am riding light, that I might have gotten 5"-6" of lift total with everything done! Right now running 38 cold psi (when measured they were warmer at 40 psi) but I am working my way down to a lower psi as DT had set them at 45 psi which I know was too high. The height currently to the highest part of the tread is about 32.75" and the width from the edge of the outside of one lug to lug on the other side is about 10.5" and overall width is about 11.5" from the sidewall to sidewall.
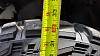
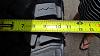
And here are some measurements, at least at the tire level after new wheels and tires! I will post some more measurements soon! But I believe, since I am riding light, that I might have gotten 5"-6" of lift total with everything done! Right now running 38 cold psi (when measured they were warmer at 40 psi) but I am working my way down to a lower psi as DT had set them at 45 psi which I know was too high. The height currently to the highest part of the tread is about 32.75" and the width from the edge of the outside of one lug to lug on the other side is about 10.5" and overall width is about 11.5" from the sidewall to sidewall.
07-13-2016, 04:44 PM
#145
JK Enthusiast
Thread Starter
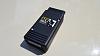
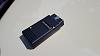
Well, gotta learn something new now! How the heck can I replace that button on the back of the mic? I would rather not get a new mic, but I opened it up and can't get to the screw to take the button off! It just broke in 2 on the drive home from work today! I may try gluing it, Or I will just replace it with a washer or something, idk?


07-14-2016, 05:37 AM
#146
JK Enthusiast
Nice looking Jeep. I think proportionally it looks great. It's nice to see a Jeep with a little space in the wheel wells. I'm not a big fan of huge tires stuffed into the wheel wells were it looks like hitting a pothole will cause rubbing. Nicely done!
07-14-2016, 05:43 AM
#147
JK Enthusiast
Thread Starter
Hey! Thanks! Appreciate it! I definitely agree with ya! Everyone was pushing 35s or 37s at me, but I think the 33s are perfect for this setup and for the 2 dr Jeep! I appreciate the compliment!
07-16-2016, 01:46 PM
#148
JK Enthusiast
Thread Starter
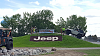
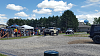
Had a great time at Jeep Fest in Frankenmuth, MI today! A lot of fun and a good test for my new lift and wheels and tires! Did awesome!
07-20-2016, 06:33 AM
#149
JK Enthusiast
Thread Starter
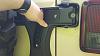
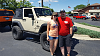
Decided I would pull the trigger on some GraBars, because, for 1, I am not that tall, and my fiance is shorter than I am, and 2, with the lift now, it has made it a bit harder to get in! So we were at the Jeep Fest in Frankenmuth, and we tested out the GraBars and they were very nice, and my fiance said that that would make getting in for her much easier, and she would like em too! So who am I to say no to that? The dealer that Jeep Fest was at hooked me up with a great set with the Red handles that came in yesterday, and I installed them yesterday evening when I got home from work!
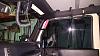
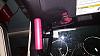
These handles are very stout! They are in the perfect position to grab to get in (and now I can stop grabbing the steering wheel, which was very bad)! They installed in about 20-30 minutes, just had an issue getting one of the top bolts to find the hole it needed to thread into, but once all bolts were in, they are solidly in! I can shake the entire Jeep with these handles, yet they do not even budge/give even a little bit! The one downside is that the sunvisor does catch the back part of the handle that has the horizontal bolt through it, so you lose being able to open the sunvisor all the way til it touches the windshield, but it's just a small range of movement you lose. I don't think I will ever miss that, and you have about 85%-90% of the normal function/range of the sunvisor with no issue at all, so I am happy with that! Overall, i am extremely pleased with my purchase! They look tough, and are a quality product from right here in the USA! I highly recommend! I may eventually look into getting some for the back, but right now, so few people are ever back there, that I don't think it is needed!
Also, as an added note, I also found this out about the owner which I think is pretty neat and makes me feel even better owning a pair of these! The owner of GraBars does a lot of charity work with the earnings/proceeds that he makes from his products! And he is even currently trying to take some of this money and build a school in Africa at the moment! So this guy is just great for our community in general! Just wanted to add that side note on!
08-02-2016, 07:33 AM
#150
JK Enthusiast
Thread Starter
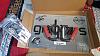
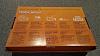
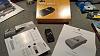
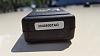
Just wanted to throw these up here too! When I got my lift, as I am sure most know, the AEV 3.5 and 4.5 kits come with the AEV Procal and the AEV Jack Base!

\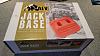
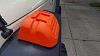

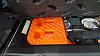
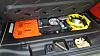
So far, I have used the Procal a few times, and gotta say, one of the most easy things to use! And especially adjusting the tire size made a big difference, and adjust the TPMS system (down to 33 psi now) was great too! As for the jack base? Seems very solid, reorganized the cubby under the floor to accommodate it, and it fits perfect! Not something you always think of, but I do not have any other jack with my but the stock jack, so definitely good knowing that I should be able to use it still if ever needed at this is my daily driver!
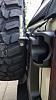
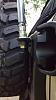
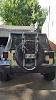
On an additional note, I installed my Thule SpareME spare tire carrier bike rack for the first time with my new setup, and it fits perfectly! Had to change to the long mounting bracket on the carrier, but still only had to use the short extension to make it reach and fit very snuggly on the spare. When I open it up, still have at least an 1"+ before the horizontal piece would touch the tire too! So I am very happy with this! And when winter rolls around, I will probably add the ski rack to it too! I know fitting this rack with bigger tires, as well as aftermarket wheels can be tricky and hit-or-miss, and some members have had issues with it fitting once they changed tires, so just wanted to share that this setup does work! And you can still install the Teraflex Third Brake Light relocation bracket and it can be seen through the carrier! And with these wheels, I believe that I will be able to reinstall the center cap over the mounting plate on the tire and not have to remove, but can still have it hidden when the full carrier isn't installed!
\
So far, I have used the Procal a few times, and gotta say, one of the most easy things to use! And especially adjusting the tire size made a big difference, and adjust the TPMS system (down to 33 psi now) was great too! As for the jack base? Seems very solid, reorganized the cubby under the floor to accommodate it, and it fits perfect! Not something you always think of, but I do not have any other jack with my but the stock jack, so definitely good knowing that I should be able to use it still if ever needed at this is my daily driver!
On an additional note, I installed my Thule SpareME spare tire carrier bike rack for the first time with my new setup, and it fits perfectly! Had to change to the long mounting bracket on the carrier, but still only had to use the short extension to make it reach and fit very snuggly on the spare. When I open it up, still have at least an 1"+ before the horizontal piece would touch the tire too! So I am very happy with this! And when winter rolls around, I will probably add the ski rack to it too! I know fitting this rack with bigger tires, as well as aftermarket wheels can be tricky and hit-or-miss, and some members have had issues with it fitting once they changed tires, so just wanted to share that this setup does work! And you can still install the Teraflex Third Brake Light relocation bracket and it can be seen through the carrier! And with these wheels, I believe that I will be able to reinstall the center cap over the mounting plate on the tire and not have to remove, but can still have it hidden when the full carrier isn't installed!