WxNerd2015's Never Ending Build -
 10-06-2015, 09:19 AM
#11
JK Enthusiast
Thread Starter
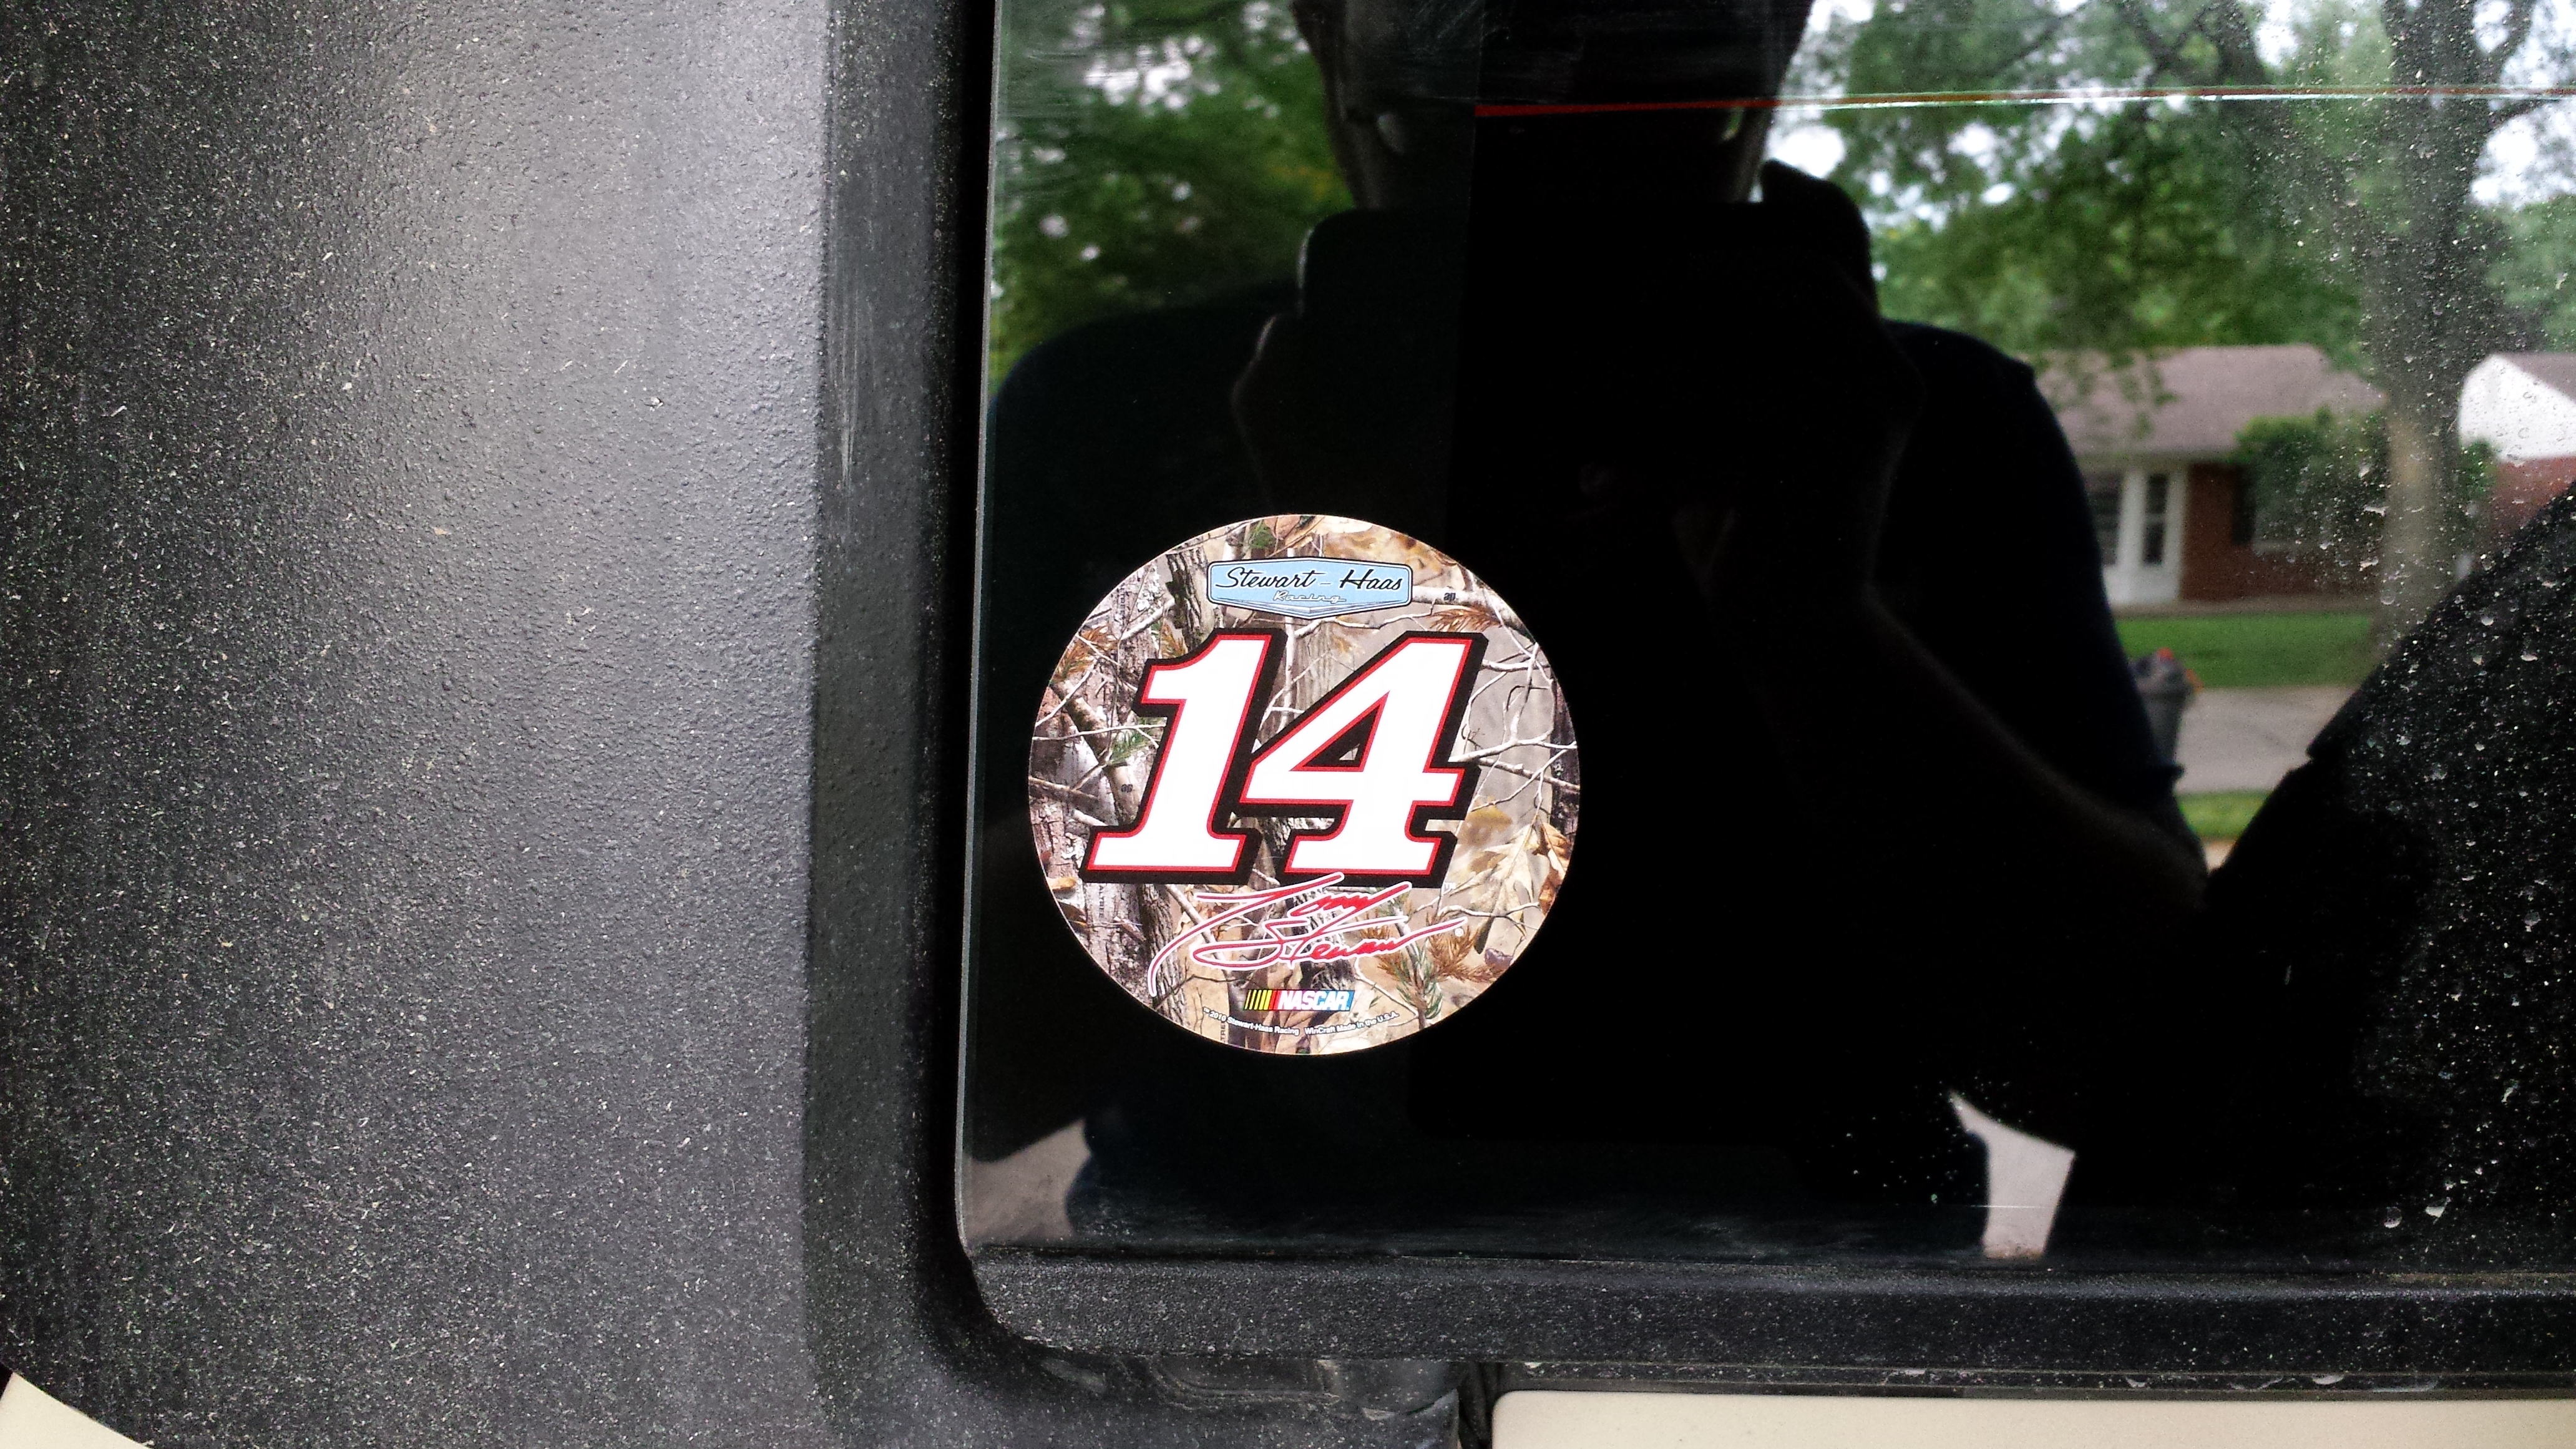
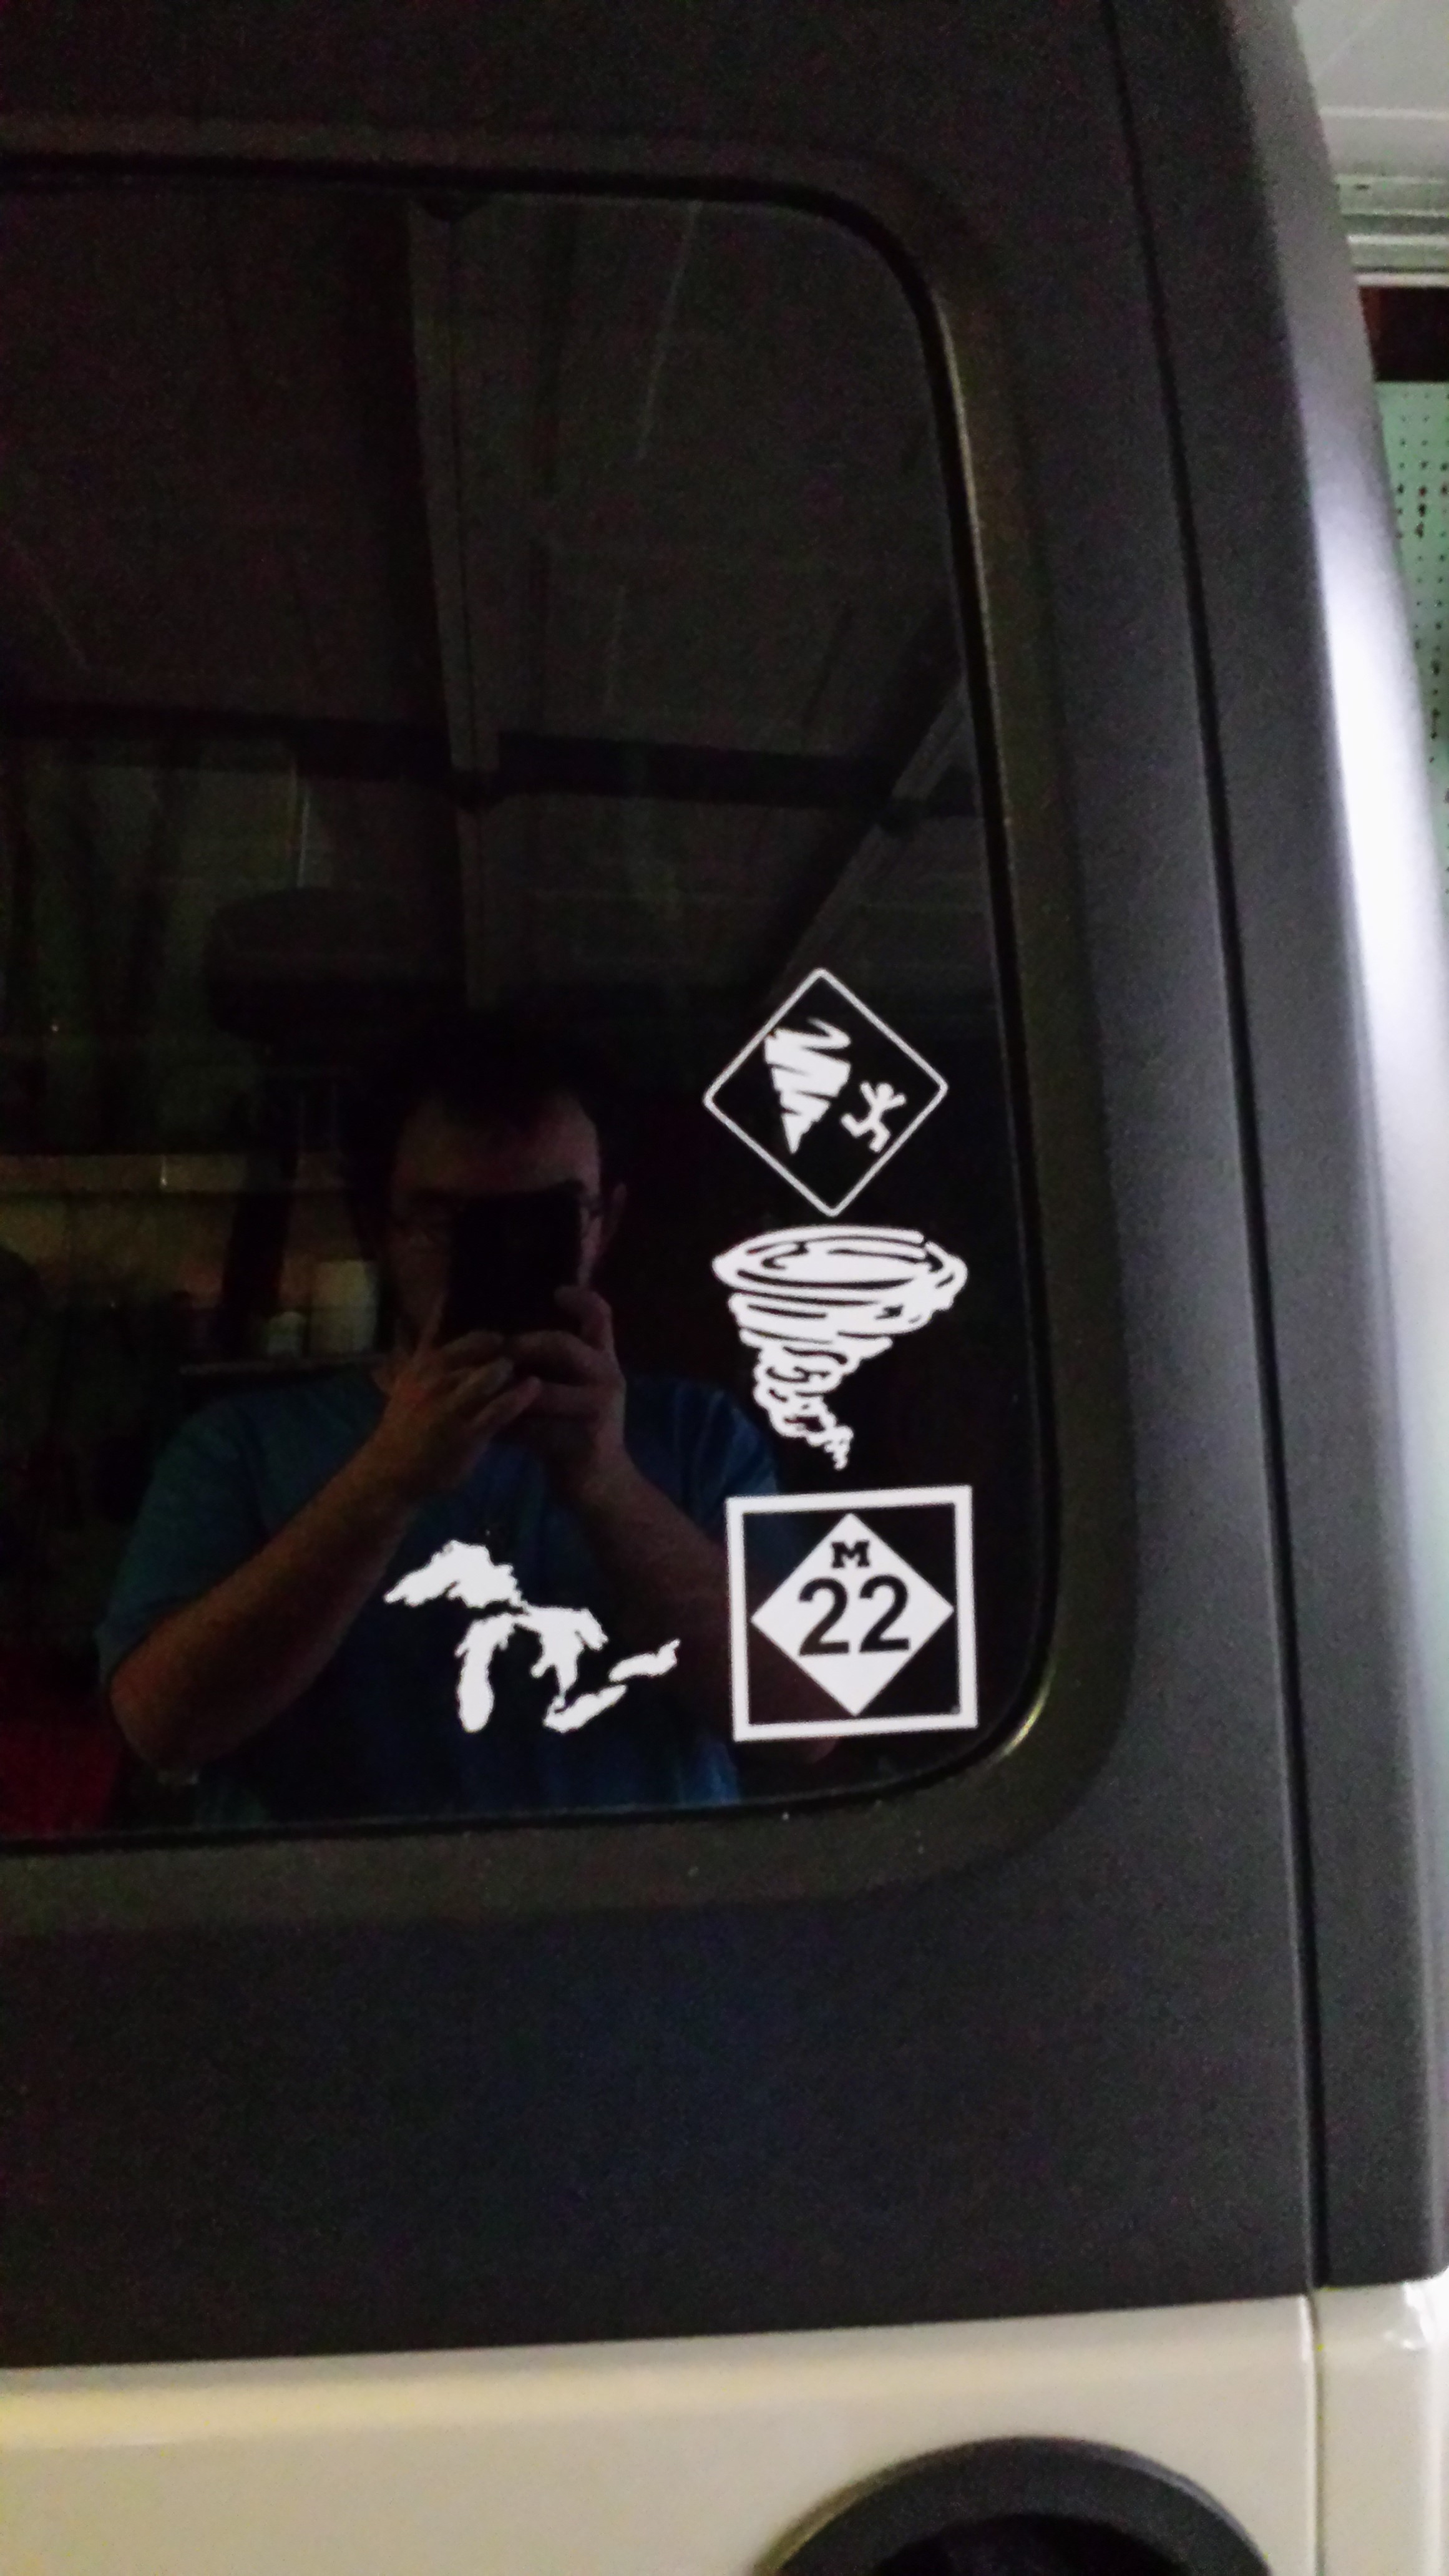
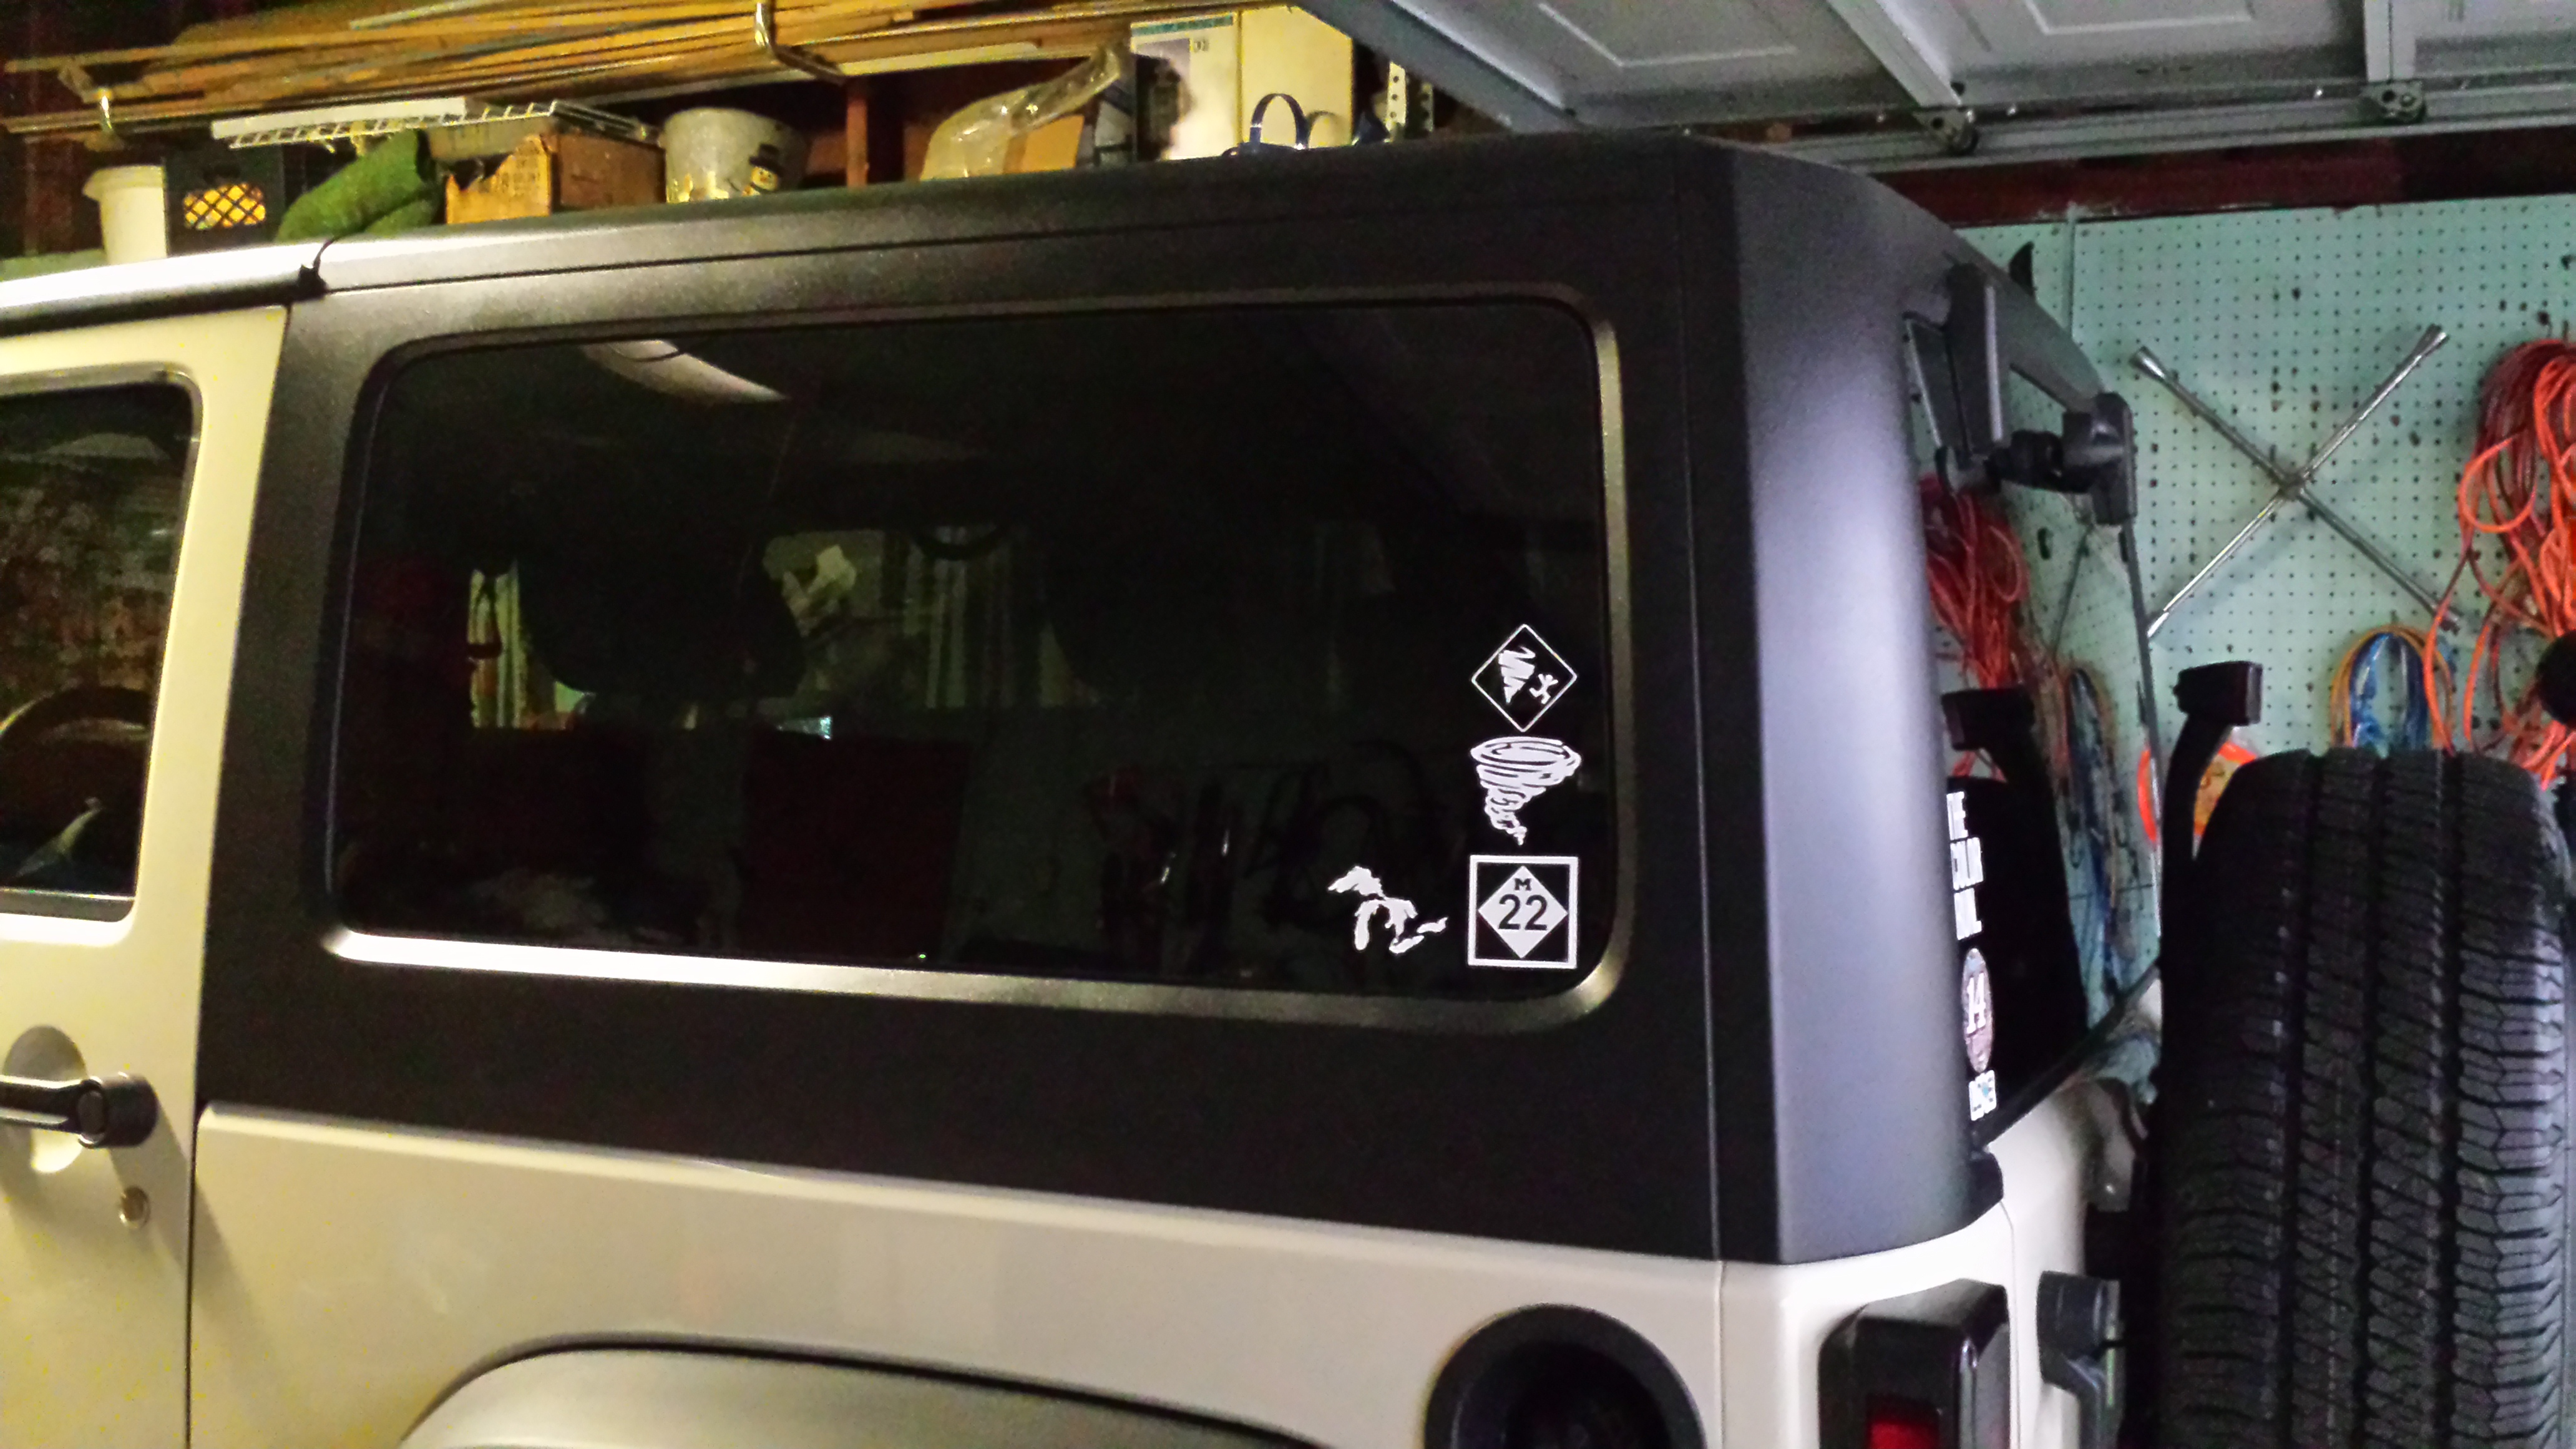
Oh yeah! Almost forgot! Had to get some good decals on there to represent me and my Jeep! I got the OU for University of Oklahoma, got my nascar decal, of coarse I represent Michigan and "Up North" (those who are from or have been to "up north" in Michigan will understand), and then my custom made vinyl decals for my storm chasing and representing my chase teams (Wedge Seekers)!

 10-06-2015, 09:46 AM
#12
JK Enthusiast
Thread Starter
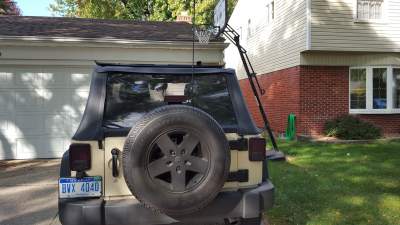
This is a quick thread just to explain the install process of how to install the Thule 963 Spare Me Spare Tire Carrier on your JK! The directions are pretty well done and self explainitory and make installation a breeze! I will add pictures to this post later!
1. Remove your spare tire
2. There is a plate that goes behind the spare tire up against the carrier. Slide the plate over the studs. It is a cast iron plate, so it is no joke, very strong!
3. Pop the center cap out of the wheel, as the plat has a post that comes through the center cap which is where the rack itself mounts to.
4. Put the spare tire back on to the spare tire carrier on the tailgate.
5. Reinstall and tighten down the lug nuts to hold the spare tire solidly.
6. Determine which extension or combinations of extensions you need on the post through the center cap to fit whatever tire size that you have, whether it be a stock tire, or a wider (and much improved over stock) tire.
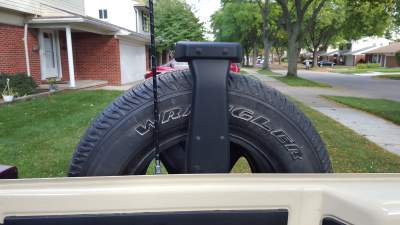
7. Once you have determined your correct extention that will make the rack stand off perfectly so that it touches the tire in 4 locations, adjust the pads/braces so that those are what is touching the tire and not the rack itself! These protect your spare tire as well as allow you to have the rack tightens down and braced very solidly to your spare tire so there is no movement at all.
8. Once those are adjusted, slide the center post on the race onto the post that is coming through the center cap of the wheel.
9. Tighten down the screw in the middle of the rack so that the mount is held on tight. This is done by inserting the key into the black knob in the middle of the from side of the rack, and with the key turned the correct direction, continue to turn the knob until it becomes tight. (Comment, the key does not stay in the unlocked/tight positive very wheel so you will most likely need two hands to get this right, as when the key is in the locked position, the knob just spins freely without doing anything, so it can be hard to tell if you actually are tightening sometimes)
10. Now that you have tightened the rack on, he only way to get it off is inserting the key and turning the knob while the key is in the correct position, which I really do like and keep much more secure with the rack on the back.
There ya go! Rack is installed!
11. Now to install the bike, you have to give the U shaped piece a good, hard pull to get the part that holds the bike into the right position. When it locks in place, it is extremely hard to budge! Solid when you have a bike on there, but tough when you need to get it out if you have the rack folded down. Once you have the rack out, you can go ahead and get your bike on there and go!
***Side note, the rack is equipped with rubberized holders which are staggered to prevent the bike from swinging and rotating, as well as heavy duty, beaded/wavy style rubberized straps to hold the bike down and prevent it from swing as well.***
Also, if you are going somewhere and would like to leave your bike on the back and not have to worry as much about someone taking it off while your are gone, or just an extra strap to hold the bike on, in the horizontal and vertical post ends on the passenger side, there is a built in, keyed bike lock. The lock works by pulling both ends of the lock out of the end of the post, insert the same key used to lock the rack to the Jeep and unlock the lock. Insert the male end of the lock in and turn the key back to locked, and now you have an extra bit of security on your bike rack! I personally have found this very useful as it gives me a bit more piece of mind that no one will steal my bike or anything like that! Great rack, easy add if you take ur bike lots of places, and especially if you have a 2dr as fitting a full sized bike in there really does not work all that well!
1. Remove your spare tire
2. There is a plate that goes behind the spare tire up against the carrier. Slide the plate over the studs. It is a cast iron plate, so it is no joke, very strong!
3. Pop the center cap out of the wheel, as the plat has a post that comes through the center cap which is where the rack itself mounts to.
4. Put the spare tire back on to the spare tire carrier on the tailgate.
5. Reinstall and tighten down the lug nuts to hold the spare tire solidly.
6. Determine which extension or combinations of extensions you need on the post through the center cap to fit whatever tire size that you have, whether it be a stock tire, or a wider (and much improved over stock) tire.
7. Once you have determined your correct extention that will make the rack stand off perfectly so that it touches the tire in 4 locations, adjust the pads/braces so that those are what is touching the tire and not the rack itself! These protect your spare tire as well as allow you to have the rack tightens down and braced very solidly to your spare tire so there is no movement at all.
8. Once those are adjusted, slide the center post on the race onto the post that is coming through the center cap of the wheel.
9. Tighten down the screw in the middle of the rack so that the mount is held on tight. This is done by inserting the key into the black knob in the middle of the from side of the rack, and with the key turned the correct direction, continue to turn the knob until it becomes tight. (Comment, the key does not stay in the unlocked/tight positive very wheel so you will most likely need two hands to get this right, as when the key is in the locked position, the knob just spins freely without doing anything, so it can be hard to tell if you actually are tightening sometimes)
10. Now that you have tightened the rack on, he only way to get it off is inserting the key and turning the knob while the key is in the correct position, which I really do like and keep much more secure with the rack on the back.
There ya go! Rack is installed!
11. Now to install the bike, you have to give the U shaped piece a good, hard pull to get the part that holds the bike into the right position. When it locks in place, it is extremely hard to budge! Solid when you have a bike on there, but tough when you need to get it out if you have the rack folded down. Once you have the rack out, you can go ahead and get your bike on there and go!
***Side note, the rack is equipped with rubberized holders which are staggered to prevent the bike from swinging and rotating, as well as heavy duty, beaded/wavy style rubberized straps to hold the bike down and prevent it from swing as well.***
Also, if you are going somewhere and would like to leave your bike on the back and not have to worry as much about someone taking it off while your are gone, or just an extra strap to hold the bike on, in the horizontal and vertical post ends on the passenger side, there is a built in, keyed bike lock. The lock works by pulling both ends of the lock out of the end of the post, insert the same key used to lock the rack to the Jeep and unlock the lock. Insert the male end of the lock in and turn the key back to locked, and now you have an extra bit of security on your bike rack! I personally have found this very useful as it gives me a bit more piece of mind that no one will steal my bike or anything like that! Great rack, easy add if you take ur bike lots of places, and especially if you have a 2dr as fitting a full sized bike in there really does not work all that well!
10-07-2015, 07:11 AM
#13
JK Enthusiast
Thread Starter
As promised, here is a more detailed write up on the installation of the Rugged Ridge CB Radio and Antenna Mounting Kit, as well as the radio and antenna themselves, with pictures.
So this was, in fact, the first modification to my Jeep. I had a CB from my truck as well as 2 antennas lying around, and I loved having the radio in my truck, plus, I just think it is cool! So this was a must for me to get into my Jeep, and besides, I had almost everything that I needed just laying around anyways! So I went on eBay and from this CB installation kit, with antenna mount and radio mount all in one, for around $40, which isn't too bad and I was happy to spend!
Jeep Wrangler JK 07 14 New CB Radio Antenna Mount Kit 11503 96 | eBay
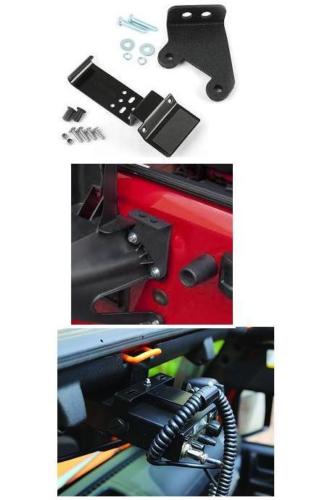
This kit that I purchased was something like that above! So the kit came within a few days, and the installation was done on the following weekend! Total install time was probably around 3-4 hours of actually working and figuring out how and wear to run the actual wires for the entire system, not counting any parts runs to the store, but it was installed within an afternoon!
Installation:
1. Since the kit only comes, as you can see, with the brackets, you will need to still get all the wires and connections needed for the antenna and a power source for the radio. Now I had already had my radio installed, so I had had most of these to begin with. So I disassembled my previous antenna mount to harvest the antenna connection to install on the tailgate mount. This is what the mount for my truck looked like:
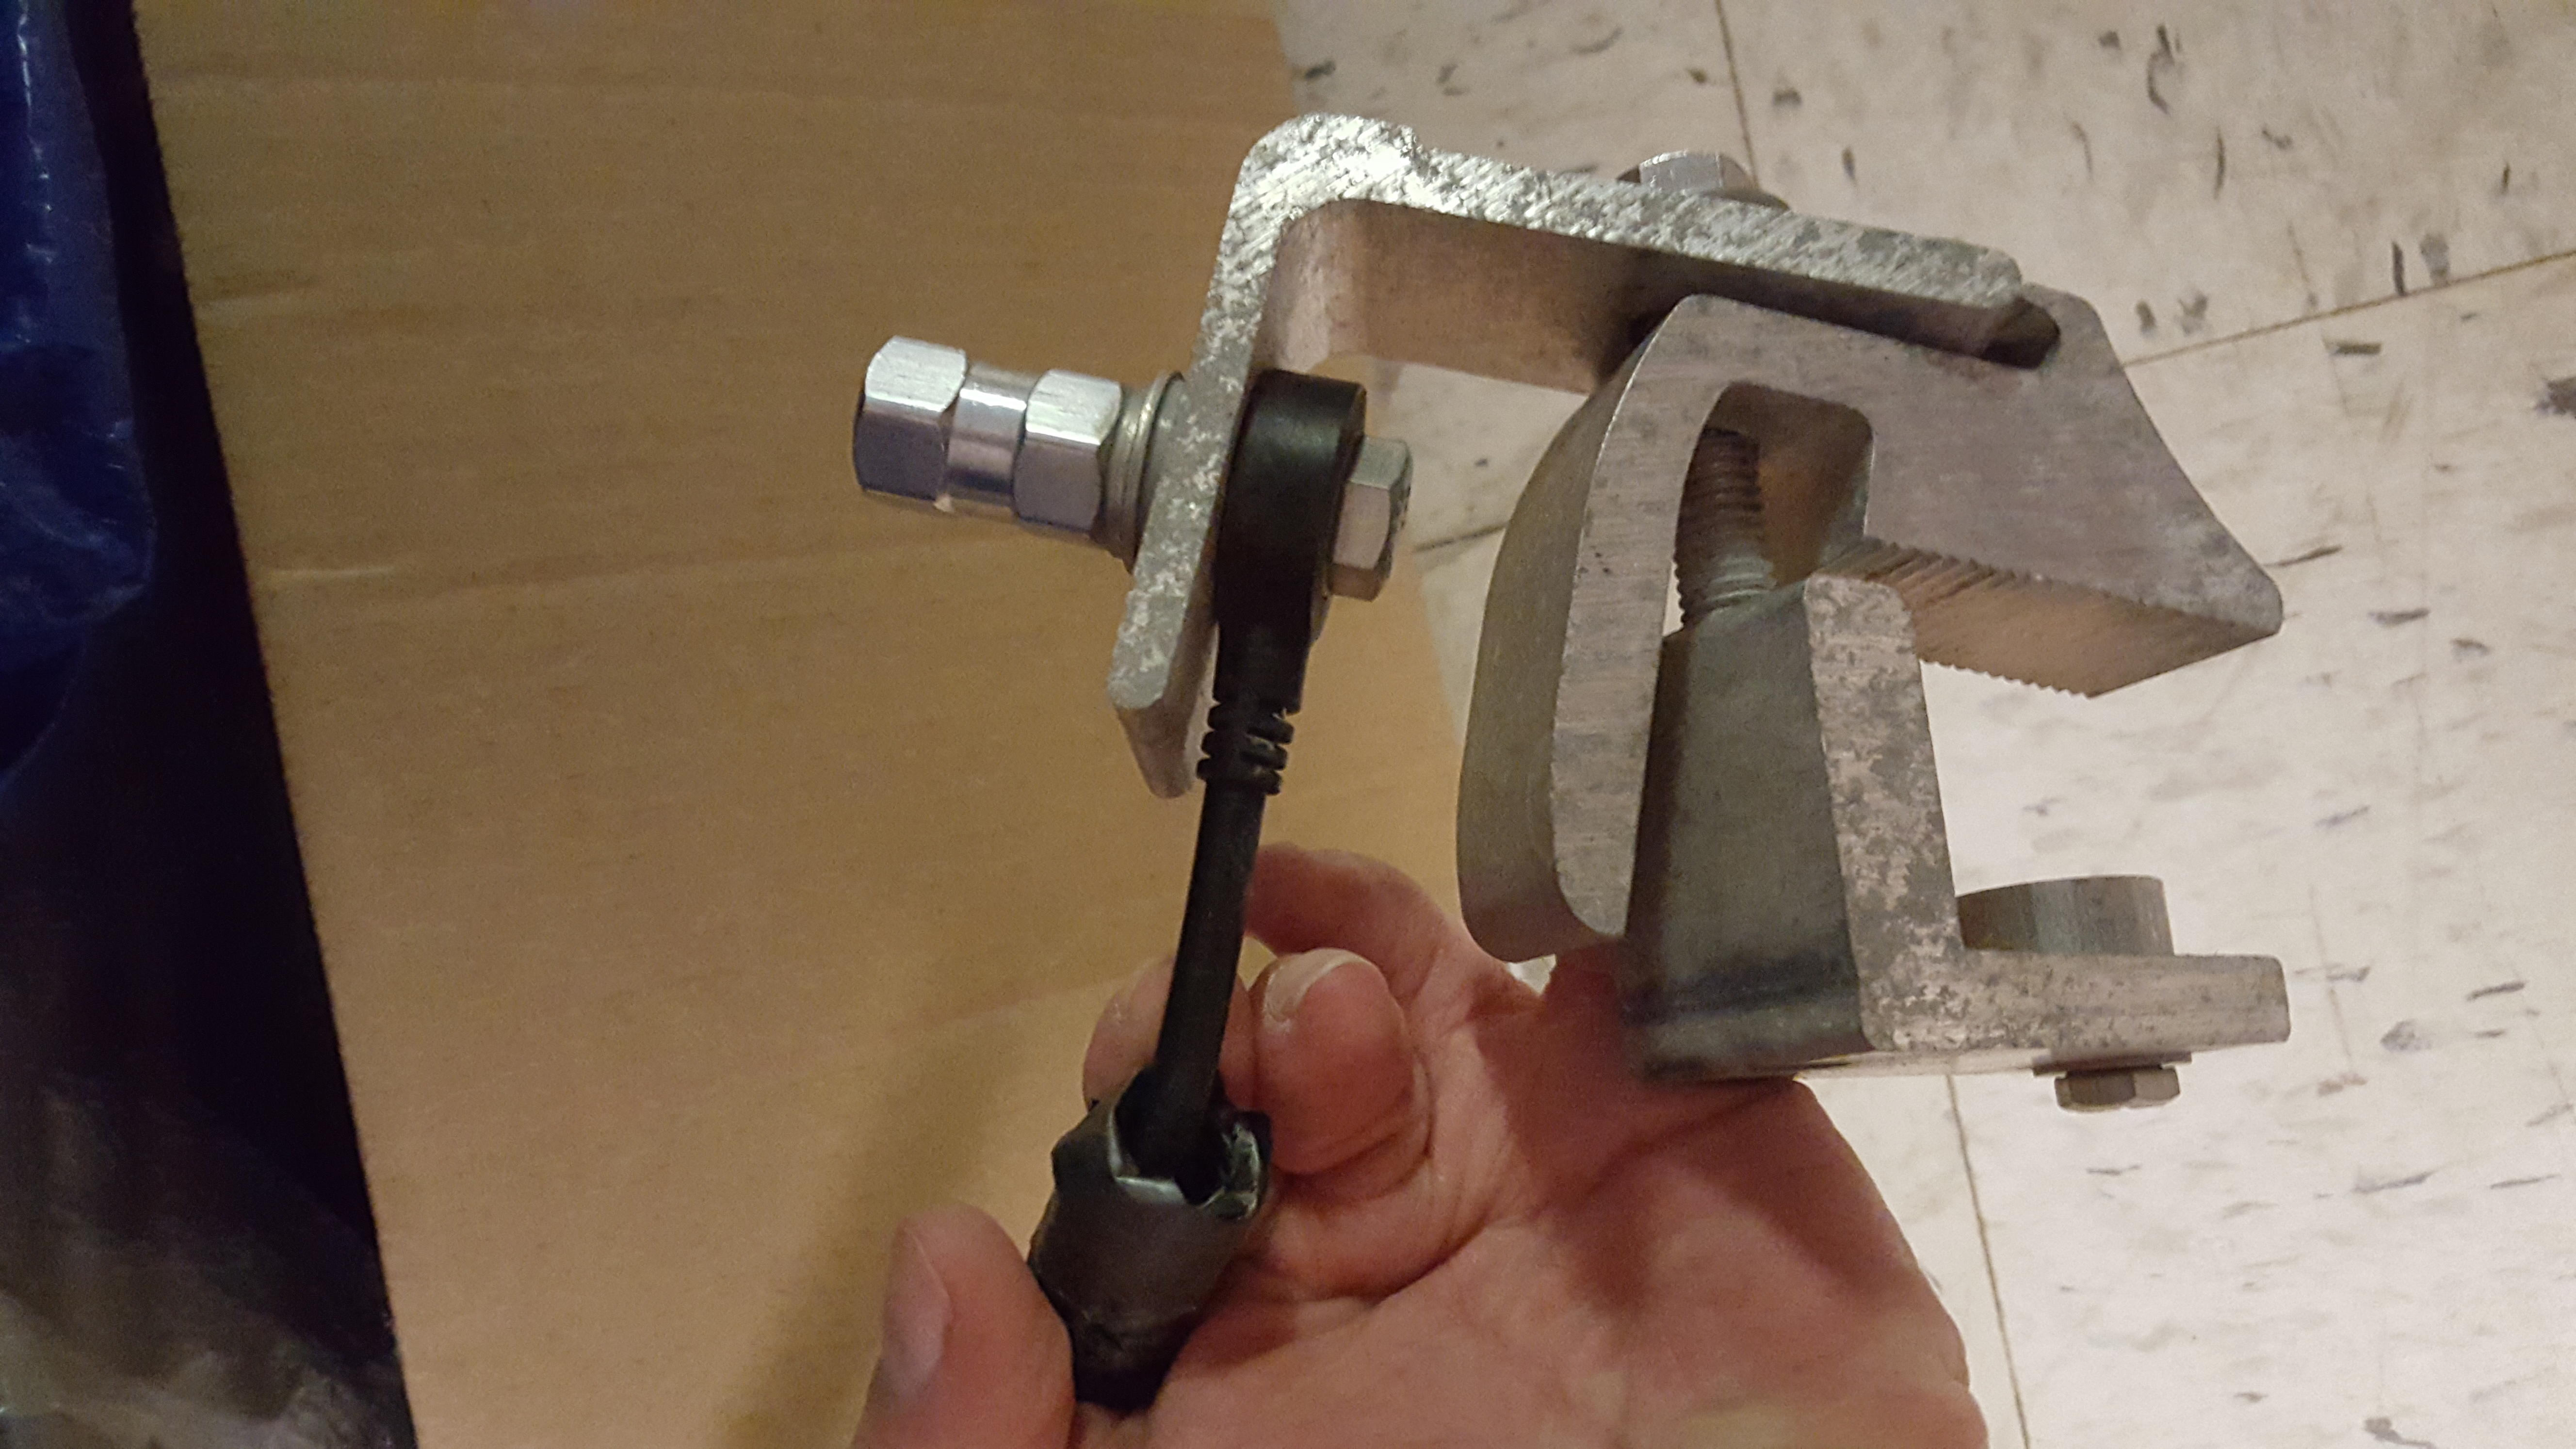
This was fairly simple as it was just unscrewing the connector on the top (which is the left side in the picture, and the wire attached on the bottom (the black wire attached) and all the hardware you need just slides out of the whole and you are goo to go to install it into your new Tailgate mount.
2. Just repeat the steps from my removal in reverse order to reinstall. Therefore, Line the bottom connection (the black wire) up directly beneath the opening in which you want the antenna to be.
***Make sure it is centered as the whole is not a tight fit so a perfectly centered install will make it much more secured and stable, and in my opinoin, I just like to do it right!***
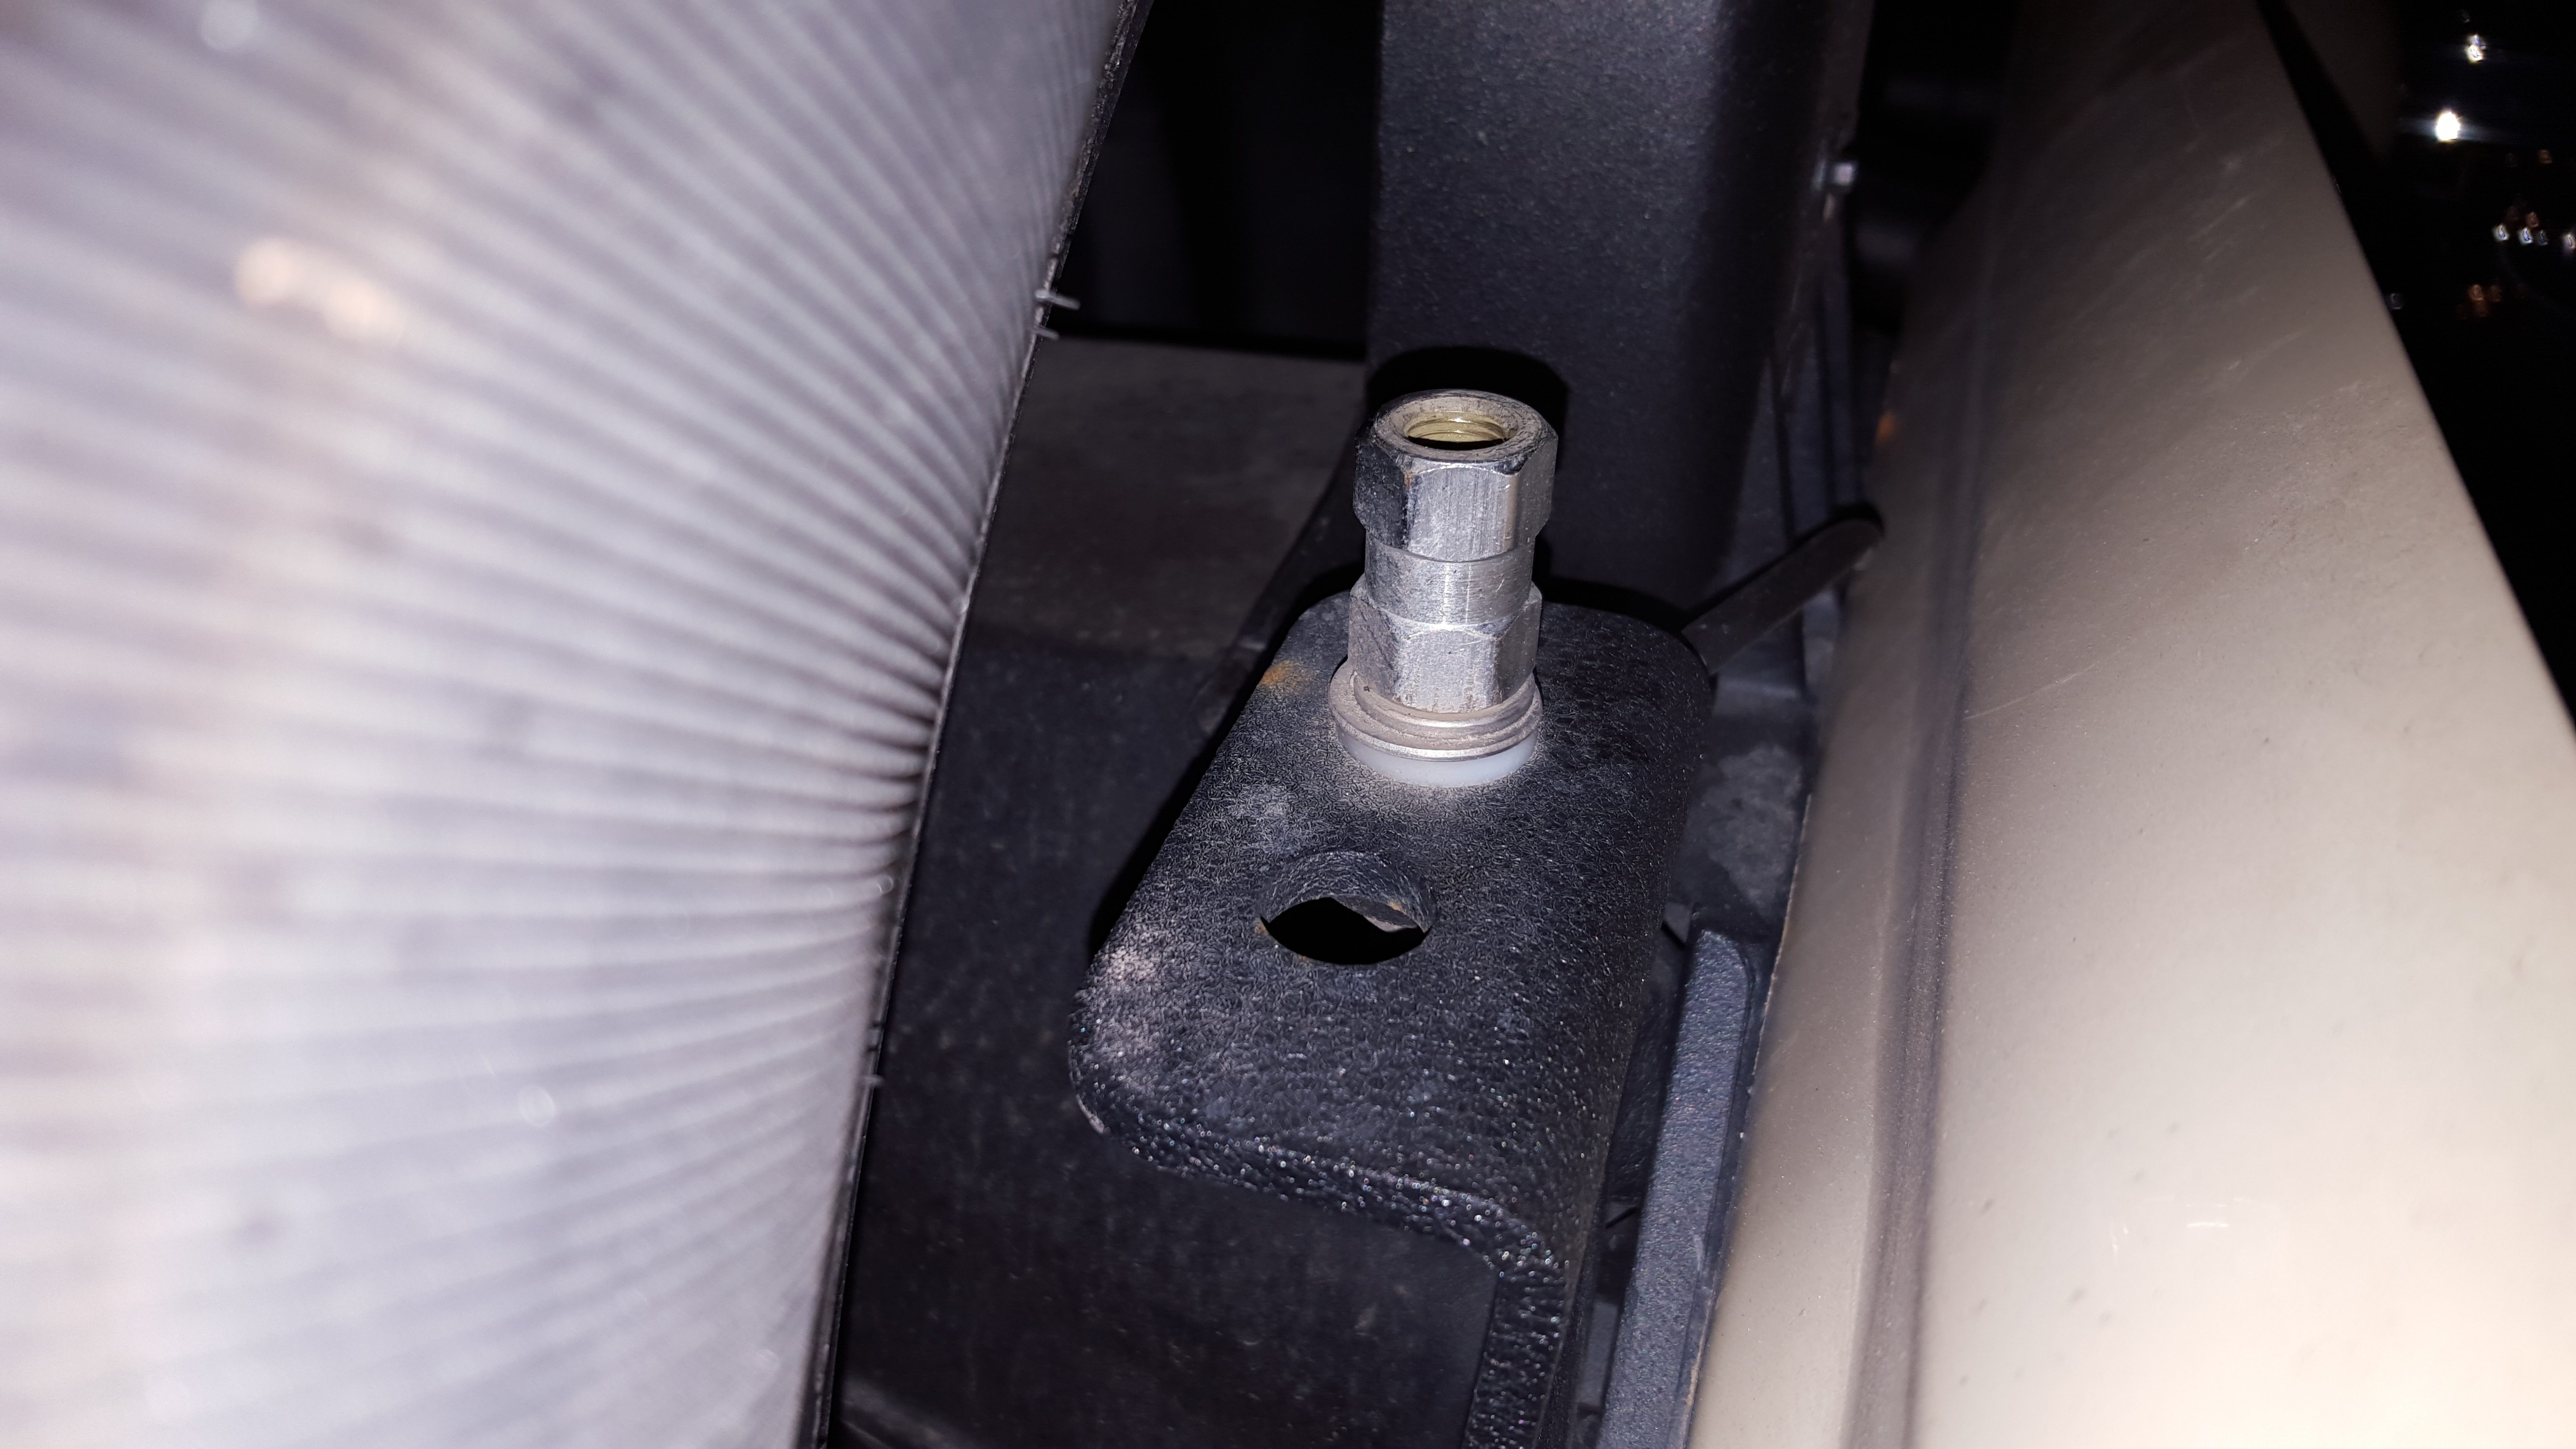
3. Once lined up, insert the washer and the connector on the top of the mounting bracket and thread into the black antenna wire's connector that you have lined up beneath the hole on the mount.
4. Go ahead and tighten your connector down until your are confident it is tight and feel secure with the connection.
5. Go ahead and remove you spare tire from the tailgate.
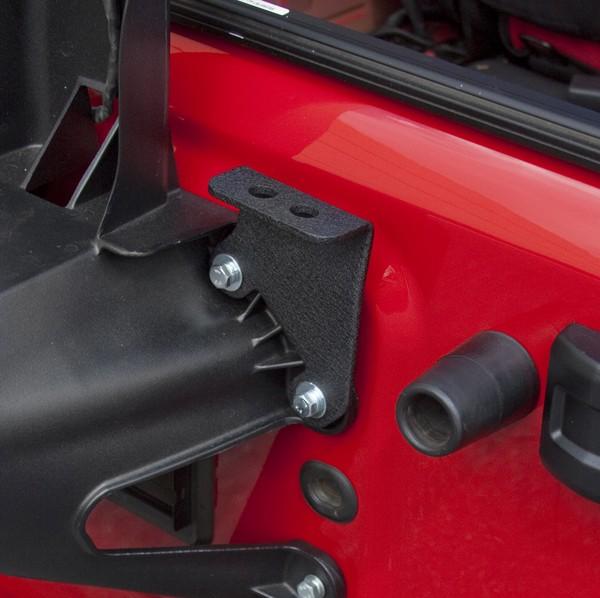
6. Once the spare is removed, go ahead and remove the the upper passenger side bolts (there should be 2) which hold the spare tire carrier to the tailgate. Here is the location which can be seen by where the mount is lacated:
7. Once those bolts are removed, discard the bolts as the kit provides new longer bolts to account for the mount being on the tailgate.
***Side note, when I installed my tailgate mount, I had to redo steps 2-4 as I originally placed the antenna in the outer whole, but when I reinstalled the spare tire, I found that the mount was actually slightly inside the rim. And having the stiffer fiberglass Firestick antenna, i could not really bend the antenna to get it in the mount and tighten it correctly. So I ended up having to move the antenna mount to the inside mounting location which then allowed for just enough clearance for the antenna to thread properly into the hole and not be bent***
8. Hold the bracket in place and insert your new longer bolts with washers back into the same holes that your pulled the old bolts out of and tighten down your bolts. Make sure both are threaded correctly (not cross threaded or not all the way in the whole, etc.) and are properly tighten as the spare tire mount is pretty important and is also supporting a good amount of weight, so you want to make sure that all is properly secured. Mine looked like this once on:
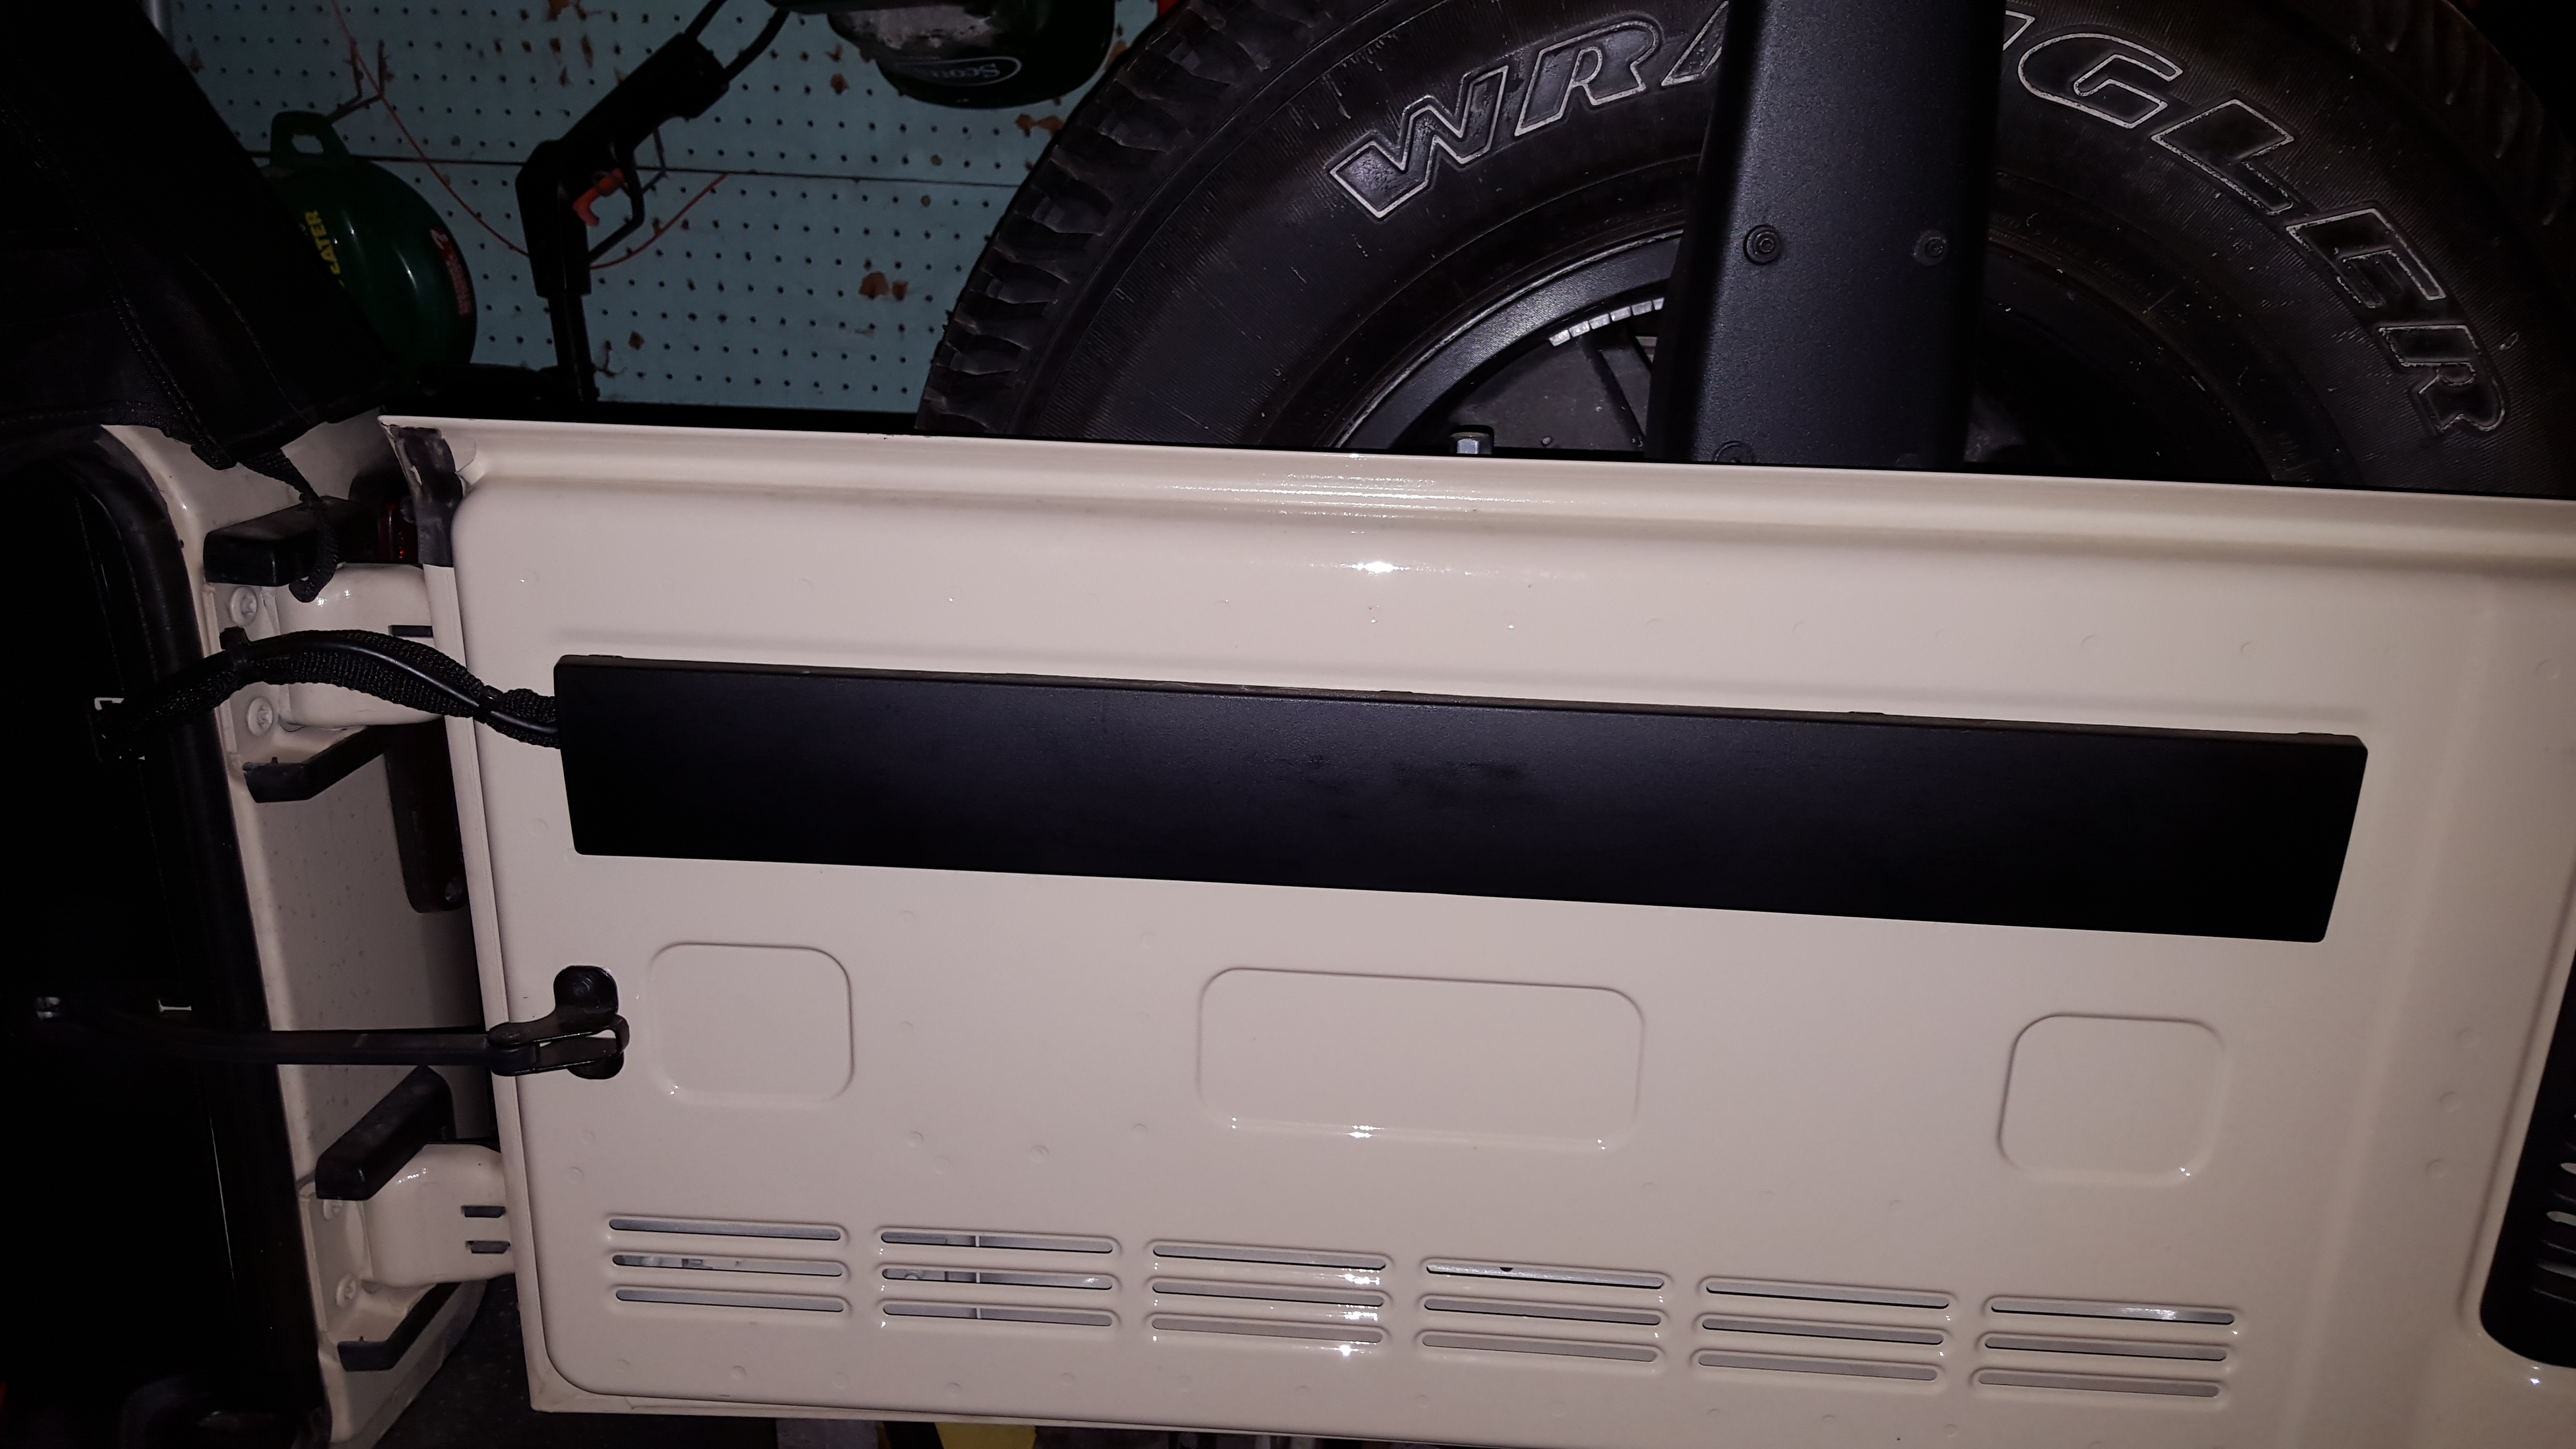
9. Next step is to decide where you want to run your wire for the antenna into the Jeep. There are many different ways, as the tailgate has built in rubber grommets that you could go through, or follow the wires for the middle brake light, or make your own location, or just run them over the top edge of the tailgate and let the edge of the rear window or tailgate bar seal it off. The method that I chose that suited my needs and made the easiest installation was to run through one of the slots in the tailgate vent directly inside/behind the center of the tire carrier. I just lifted up one of the flaps and feed the coax cable through into the inside of the tailgate.
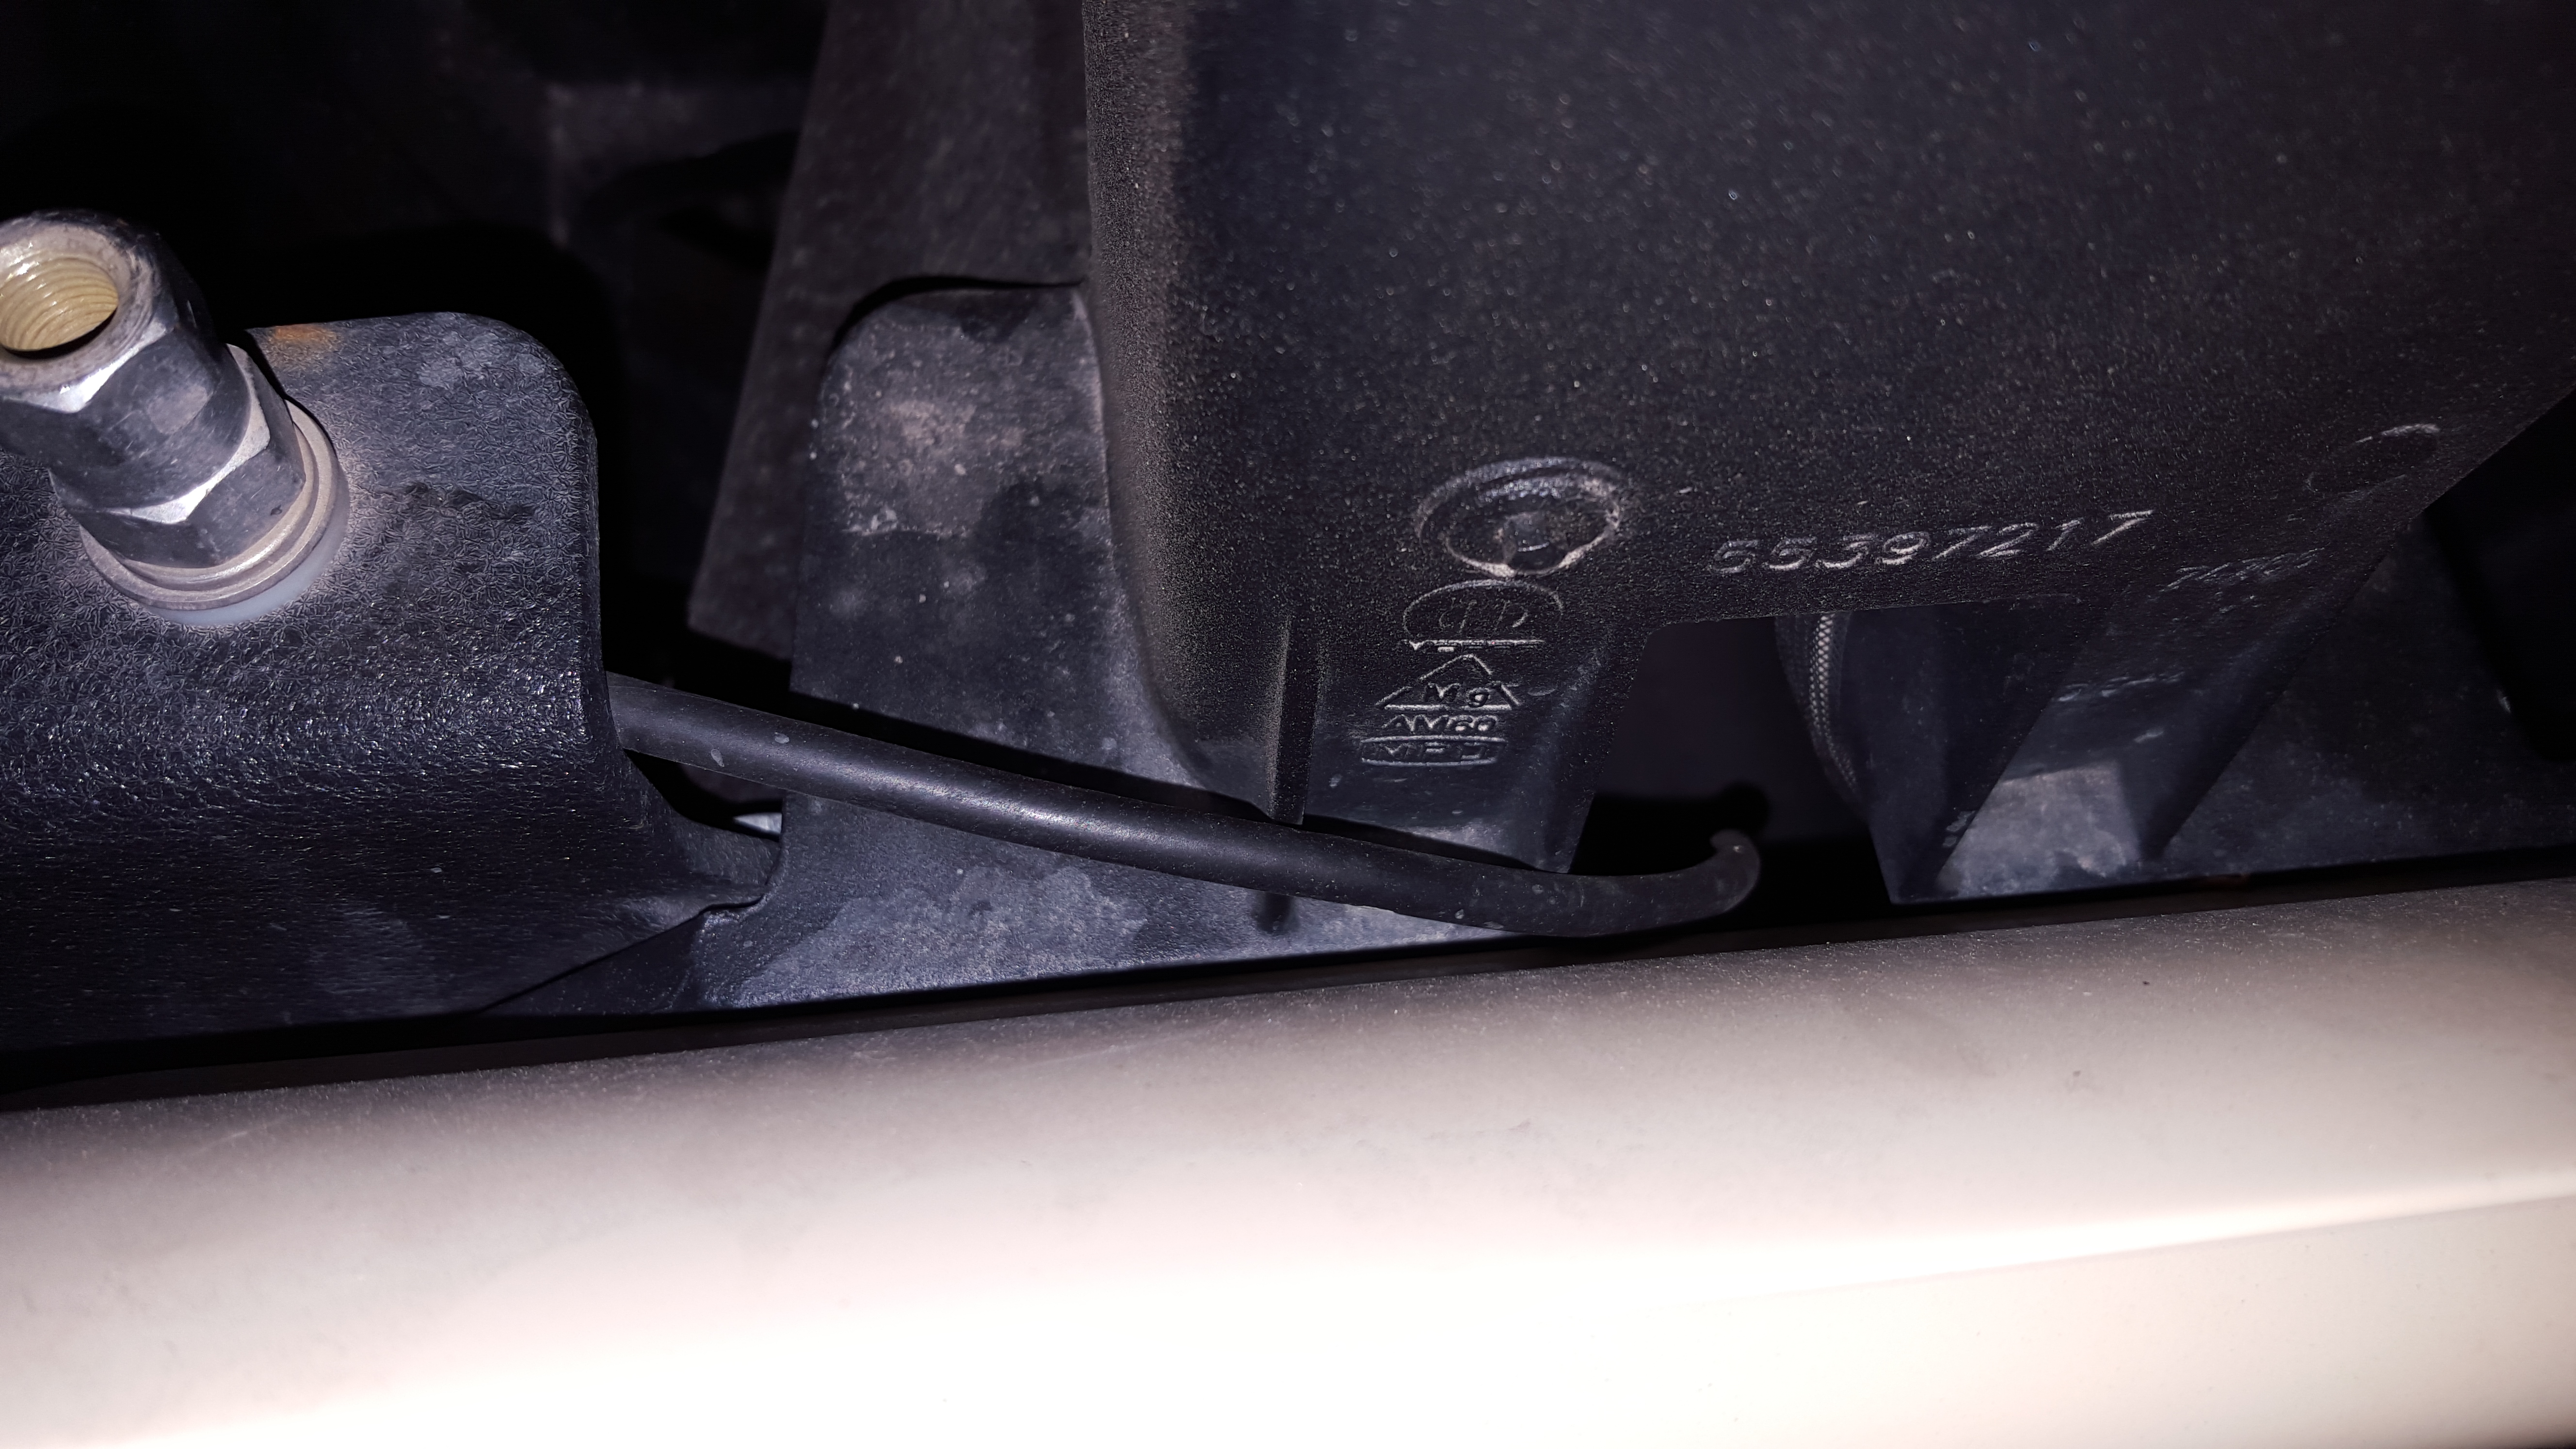
***Side note, I chose this location because when running through the tailgate, there are multiple layers of sheet metal, it is not just going through the front and coming through the back to the inside. The location that I selected was the most bottom, driver hand side vent opening as this was the closest to where the opening on the backside of the tailgate was for the wires running to the 3rd brake light. This allowed me to reach in from the opening in the inside of the tailgate much easier and find the wire to pull through, without too much of a hassle or struggle. Now I am not saying that this is the best location to run the coax for the antenna, but IMO, it was the simplest and easiest to do and it has been installed for almost a year and a half that way and been off roading and storm chasing and all that and have no issues whatsoever.***
10. Once you have Coax antenna cable fed into the inside of the tailgate, remove the black plastic cover on the inside of the tailgate that runs the width of the tailgate. This is just snapped into the tailgate, no hardware involved. Just carefully pry it off and it will pop off. This will give you access to the innards of the tailgate where the Coax is currently sitting through the same hole that the 3rd brake light wiring is going.
11. With the cover removed, reach into the hold which will be to the further right side in the picture above under the cover and find where your coax cable is sitting in there and pull the coax all the way through the tailgate until there is just a very slight pit of slack left outside. (Just enough so that the wire outside is not hanging there, but nothing is pinched or bent or pulling)
12. Go ahead and install your antenna into the antenna mount. Make sure that it threads in straight, and depending on your preference, tighten. Personally for me, I park my Jeep in a garage so I take the antenna off to go in the garage so I typically on hand tighten, which is plenty tight to hold the antenna securely. But if you would prefer, or the antenna is staying on there permanently, go ahead and once hand tightened, go ahead and give a few twists with a wrench. Then that antenna is not going anywhere!
13. Lastly, to finish off the outside work on the vehicle, go ahead and reinstall your spare tire onto the mount and tighten it down securely.
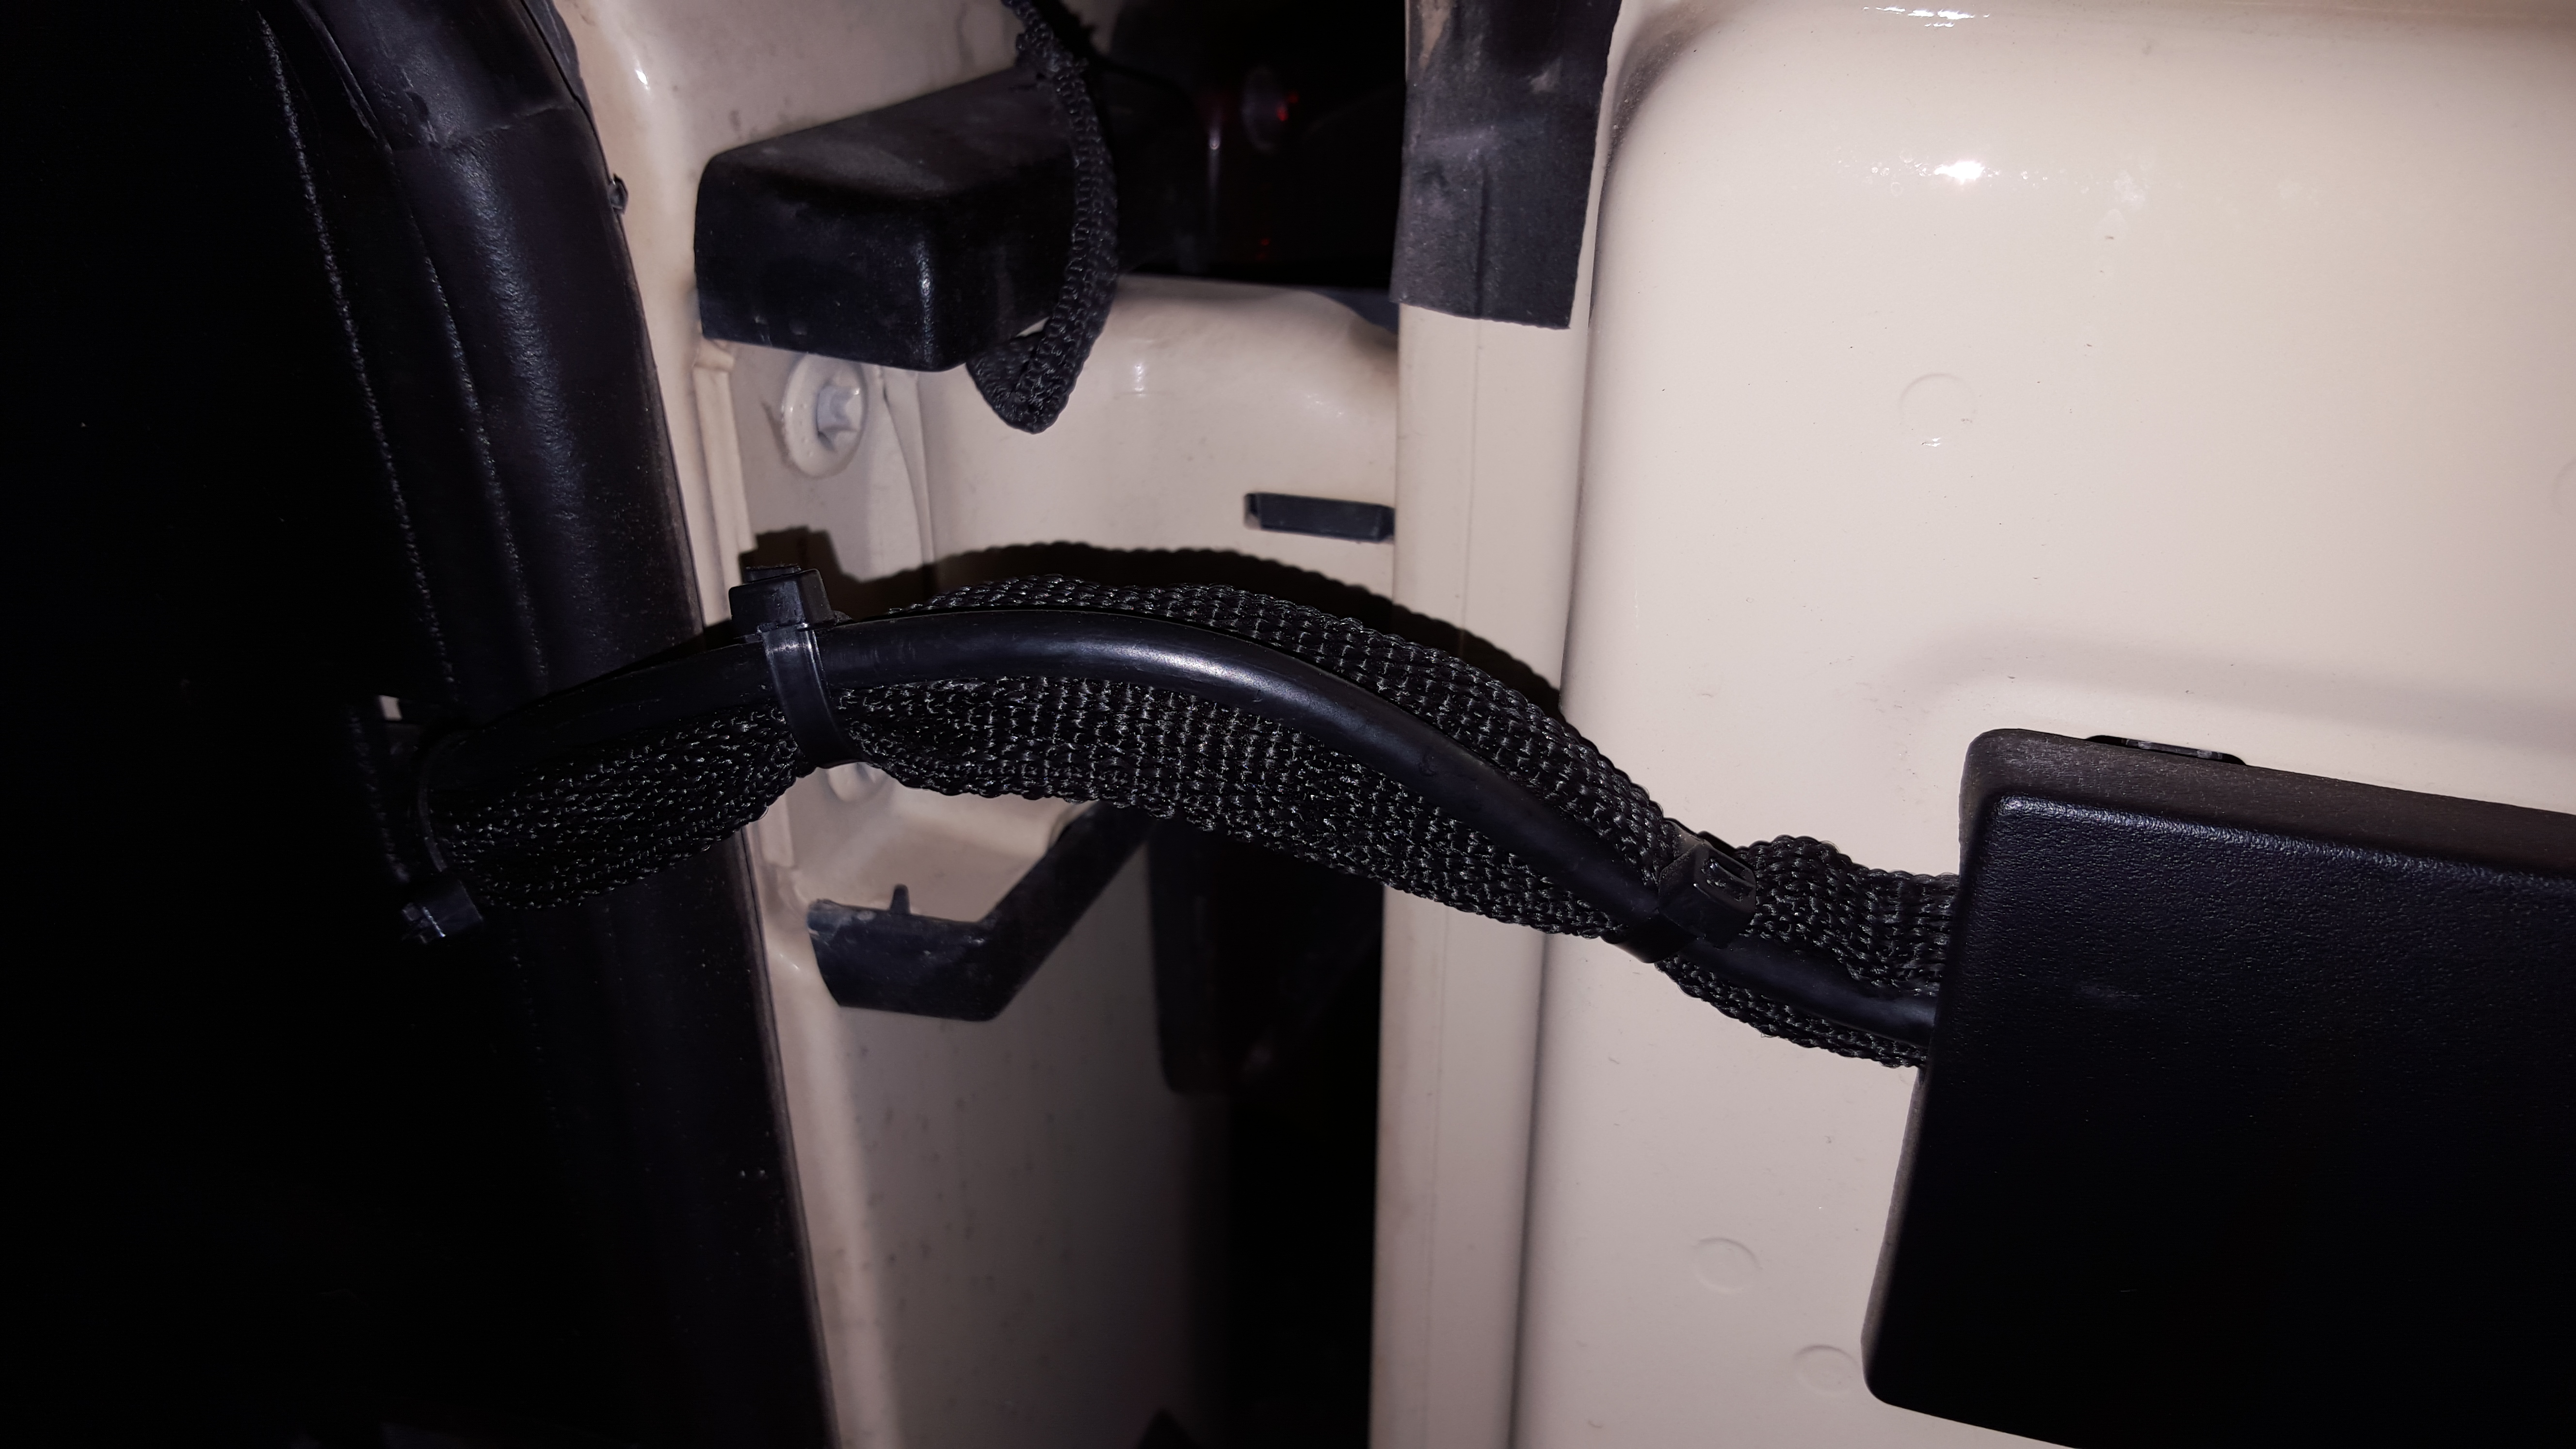
14. Once the outside is all buttoned up, you will need to run the coax cable inside the vehicle. Line up the coax with the 3rd brake light wiring and zip tie the cable to the wiring across the entire tailgate.
15. Reinstall the black plastic cover over both wires making sure that none are caught or pinched as you snap the cover back into place.
16. Once the tailgate is all buttoned up, you need to decide how the wire will go into the vehicle. Since I had already run the coax cable along the pre-existing wiring, I chose to just continue following that path into the vehicle. I removed the plastic trim in the truck area in the passenger side which gave me access to slight the cable in the existing tailgate catch location where the strap to stop the tailgate and the wiring for the 3rd brake light is run.
So this was, in fact, the first modification to my Jeep. I had a CB from my truck as well as 2 antennas lying around, and I loved having the radio in my truck, plus, I just think it is cool! So this was a must for me to get into my Jeep, and besides, I had almost everything that I needed just laying around anyways! So I went on eBay and from this CB installation kit, with antenna mount and radio mount all in one, for around $40, which isn't too bad and I was happy to spend!
Jeep Wrangler JK 07 14 New CB Radio Antenna Mount Kit 11503 96 | eBay
This kit that I purchased was something like that above! So the kit came within a few days, and the installation was done on the following weekend! Total install time was probably around 3-4 hours of actually working and figuring out how and wear to run the actual wires for the entire system, not counting any parts runs to the store, but it was installed within an afternoon!
Installation:
1. Since the kit only comes, as you can see, with the brackets, you will need to still get all the wires and connections needed for the antenna and a power source for the radio. Now I had already had my radio installed, so I had had most of these to begin with. So I disassembled my previous antenna mount to harvest the antenna connection to install on the tailgate mount. This is what the mount for my truck looked like:
This was fairly simple as it was just unscrewing the connector on the top (which is the left side in the picture, and the wire attached on the bottom (the black wire attached) and all the hardware you need just slides out of the whole and you are goo to go to install it into your new Tailgate mount.
2. Just repeat the steps from my removal in reverse order to reinstall. Therefore, Line the bottom connection (the black wire) up directly beneath the opening in which you want the antenna to be.
***Make sure it is centered as the whole is not a tight fit so a perfectly centered install will make it much more secured and stable, and in my opinoin, I just like to do it right!***
3. Once lined up, insert the washer and the connector on the top of the mounting bracket and thread into the black antenna wire's connector that you have lined up beneath the hole on the mount.
4. Go ahead and tighten your connector down until your are confident it is tight and feel secure with the connection.
5. Go ahead and remove you spare tire from the tailgate.
6. Once the spare is removed, go ahead and remove the the upper passenger side bolts (there should be 2) which hold the spare tire carrier to the tailgate. Here is the location which can be seen by where the mount is lacated:
7. Once those bolts are removed, discard the bolts as the kit provides new longer bolts to account for the mount being on the tailgate.
***Side note, when I installed my tailgate mount, I had to redo steps 2-4 as I originally placed the antenna in the outer whole, but when I reinstalled the spare tire, I found that the mount was actually slightly inside the rim. And having the stiffer fiberglass Firestick antenna, i could not really bend the antenna to get it in the mount and tighten it correctly. So I ended up having to move the antenna mount to the inside mounting location which then allowed for just enough clearance for the antenna to thread properly into the hole and not be bent***
8. Hold the bracket in place and insert your new longer bolts with washers back into the same holes that your pulled the old bolts out of and tighten down your bolts. Make sure both are threaded correctly (not cross threaded or not all the way in the whole, etc.) and are properly tighten as the spare tire mount is pretty important and is also supporting a good amount of weight, so you want to make sure that all is properly secured. Mine looked like this once on:
9. Next step is to decide where you want to run your wire for the antenna into the Jeep. There are many different ways, as the tailgate has built in rubber grommets that you could go through, or follow the wires for the middle brake light, or make your own location, or just run them over the top edge of the tailgate and let the edge of the rear window or tailgate bar seal it off. The method that I chose that suited my needs and made the easiest installation was to run through one of the slots in the tailgate vent directly inside/behind the center of the tire carrier. I just lifted up one of the flaps and feed the coax cable through into the inside of the tailgate.
***Side note, I chose this location because when running through the tailgate, there are multiple layers of sheet metal, it is not just going through the front and coming through the back to the inside. The location that I selected was the most bottom, driver hand side vent opening as this was the closest to where the opening on the backside of the tailgate was for the wires running to the 3rd brake light. This allowed me to reach in from the opening in the inside of the tailgate much easier and find the wire to pull through, without too much of a hassle or struggle. Now I am not saying that this is the best location to run the coax for the antenna, but IMO, it was the simplest and easiest to do and it has been installed for almost a year and a half that way and been off roading and storm chasing and all that and have no issues whatsoever.***
10. Once you have Coax antenna cable fed into the inside of the tailgate, remove the black plastic cover on the inside of the tailgate that runs the width of the tailgate. This is just snapped into the tailgate, no hardware involved. Just carefully pry it off and it will pop off. This will give you access to the innards of the tailgate where the Coax is currently sitting through the same hole that the 3rd brake light wiring is going.
11. With the cover removed, reach into the hold which will be to the further right side in the picture above under the cover and find where your coax cable is sitting in there and pull the coax all the way through the tailgate until there is just a very slight pit of slack left outside. (Just enough so that the wire outside is not hanging there, but nothing is pinched or bent or pulling)
12. Go ahead and install your antenna into the antenna mount. Make sure that it threads in straight, and depending on your preference, tighten. Personally for me, I park my Jeep in a garage so I take the antenna off to go in the garage so I typically on hand tighten, which is plenty tight to hold the antenna securely. But if you would prefer, or the antenna is staying on there permanently, go ahead and once hand tightened, go ahead and give a few twists with a wrench. Then that antenna is not going anywhere!
13. Lastly, to finish off the outside work on the vehicle, go ahead and reinstall your spare tire onto the mount and tighten it down securely.
14. Once the outside is all buttoned up, you will need to run the coax cable inside the vehicle. Line up the coax with the 3rd brake light wiring and zip tie the cable to the wiring across the entire tailgate.
15. Reinstall the black plastic cover over both wires making sure that none are caught or pinched as you snap the cover back into place.
16. Once the tailgate is all buttoned up, you need to decide how the wire will go into the vehicle. Since I had already run the coax cable along the pre-existing wiring, I chose to just continue following that path into the vehicle. I removed the plastic trim in the truck area in the passenger side which gave me access to slight the cable in the existing tailgate catch location where the strap to stop the tailgate and the wiring for the 3rd brake light is run.
10-08-2015, 05:07 AM
#14
JK Enthusiast
Thread Starter
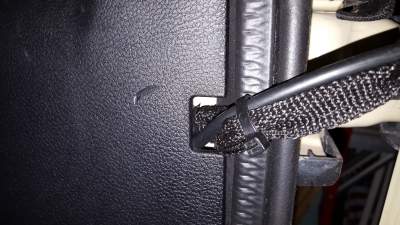
17. Follow the existing wire exactly, and zip tie the coax to the wiring. What I mean by follow exactly is, the tailgate is a hinged and moving part on the Jeep, therefore you must leave some slack in the wiring so that it can flex when the tailgate is opened. Therefore, if you follow the existing wiring and leave the same amount of slack, zip tied to the wire, then you will have no issue with the flex when the tailgate is opened.
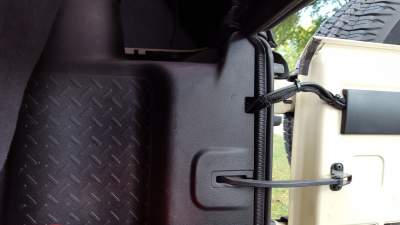
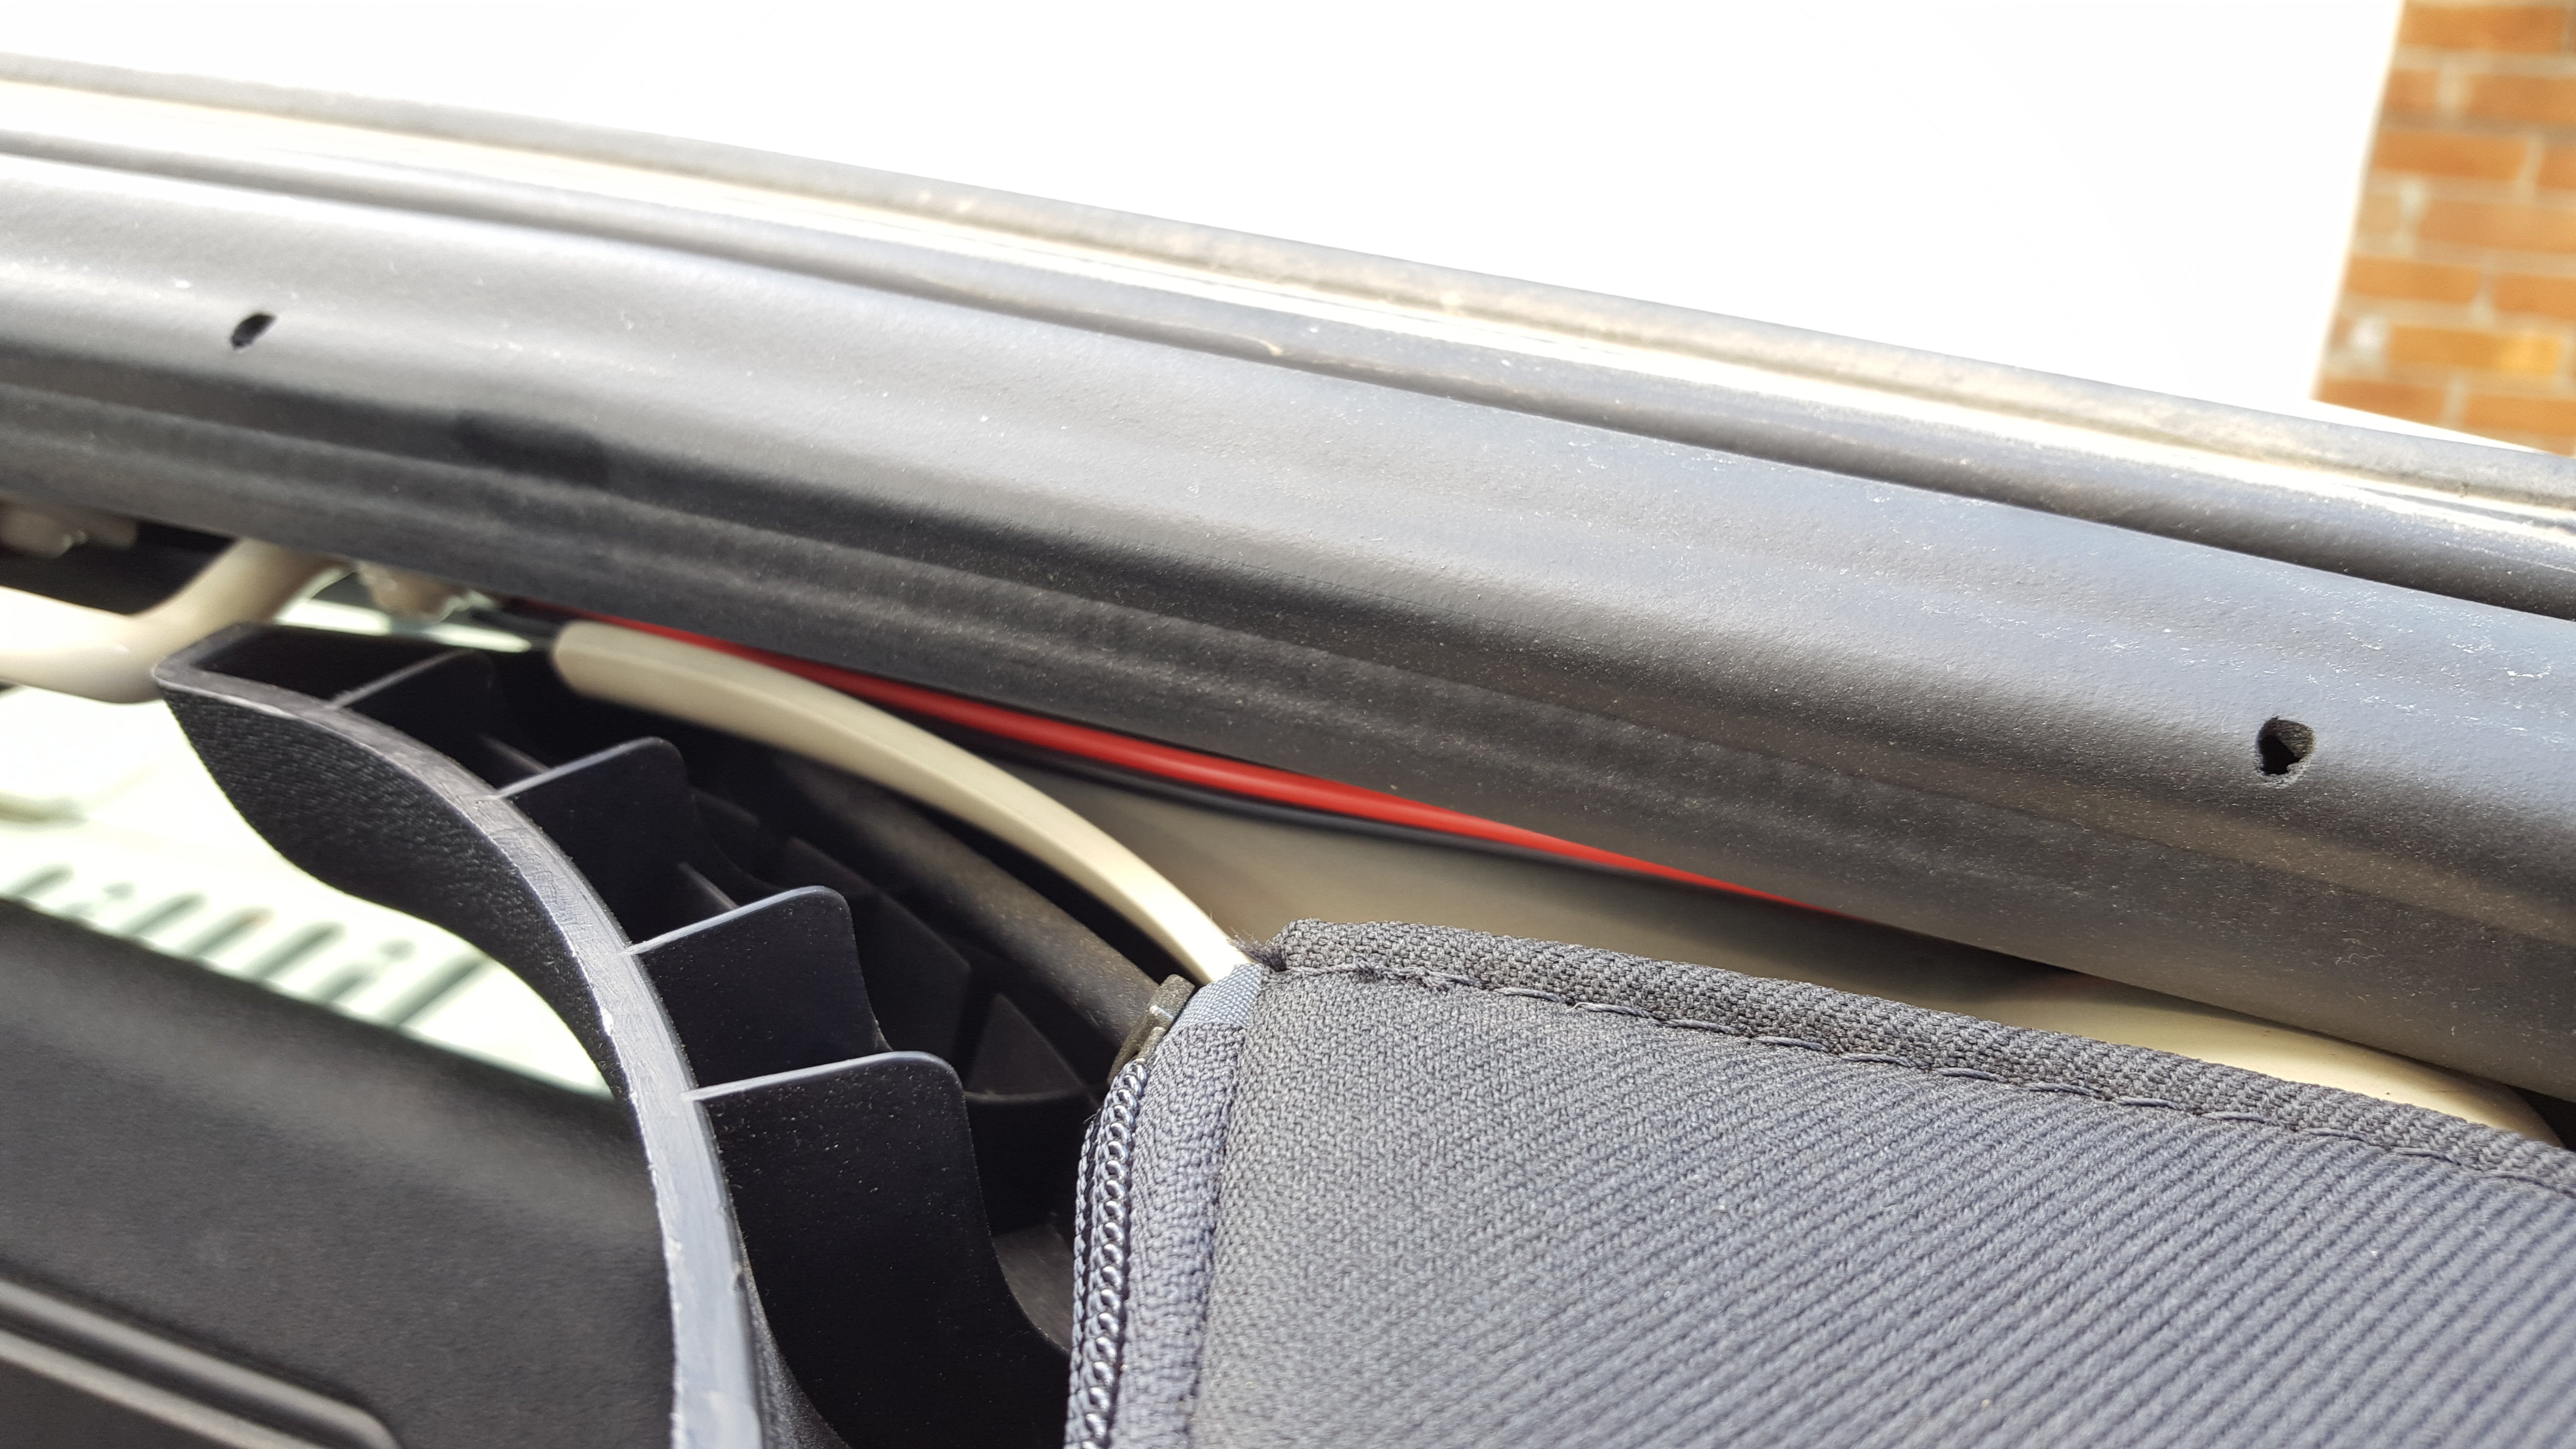
18. Once you have the coax zip tied up, you have to decide where to run the coax up to the front of the Jeep where the radio will be. Since I already ran the coax into the passenger side of the Jeep, I really just had two options. One, run the coax along the existing wiring along the floor (which requires a bit more working with pulling back of carpet and fishing wire), or two running up behind the trunk panel which I already had removed, up to the roll bar (as the radio will be at that height anyways). So I opted for the second option and ran the coax up inside the panel and up to the roll bar, and then reinstalled the trunk trim panel. Here is what that looked like buttoned back up with the coax sticking out the top:
19. Then, probably the easiest part, I unzipped all the roll bar padding on the passenger side and ran the wire along the roll bar, and then zipped all the padding back up.
20. Now you have the coax to the top edge of the windshield on the passenger side, so the next step is to remove some of the trim pieces along the windshield.
21. First, remove the two bolts holding in the passenger side sun visor on.
22. Next remove the bolt holding the upper passenger side trim corner on.
23. Remove the upper trim panel on the passenger side and then loosen the plastic trim that runs across the width of the upper part of the windshield. This panel is just held by clips, no other hardware. Loosen this panel by pulling gently at each of the clips to release them. Be extremely careful not to break a clip or crack or bend the plastic trim (it�s plastic, it�s not hard to break).
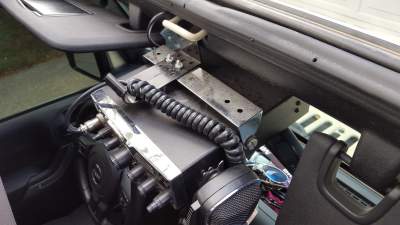
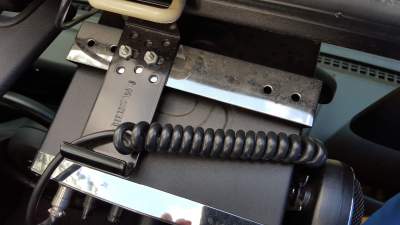
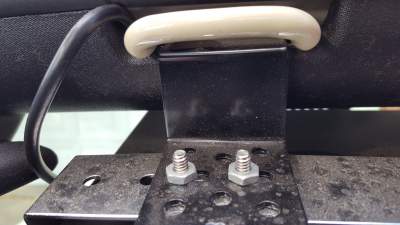
24. Once you have this trim piece loosened, find the center footmans loop and remove the two screws holding the footmans loop there, but hold the footmans loop in place where it is.
25. Grab the CB radio mount and line the end up with the holds that match the holds of the footmans loop.
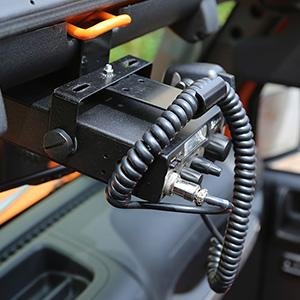
26. Replace the screws through the bracket and the footmans loop and tighten back down. The mount should now look something like this, with the part sticking out from the windshield being the mount and the horizontal piece is the bracket that comes with the radio:
18. Once you have the coax zip tied up, you have to decide where to run the coax up to the front of the Jeep where the radio will be. Since I already ran the coax into the passenger side of the Jeep, I really just had two options. One, run the coax along the existing wiring along the floor (which requires a bit more working with pulling back of carpet and fishing wire), or two running up behind the trunk panel which I already had removed, up to the roll bar (as the radio will be at that height anyways). So I opted for the second option and ran the coax up inside the panel and up to the roll bar, and then reinstalled the trunk trim panel. Here is what that looked like buttoned back up with the coax sticking out the top:
19. Then, probably the easiest part, I unzipped all the roll bar padding on the passenger side and ran the wire along the roll bar, and then zipped all the padding back up.
20. Now you have the coax to the top edge of the windshield on the passenger side, so the next step is to remove some of the trim pieces along the windshield.
21. First, remove the two bolts holding in the passenger side sun visor on.
22. Next remove the bolt holding the upper passenger side trim corner on.
23. Remove the upper trim panel on the passenger side and then loosen the plastic trim that runs across the width of the upper part of the windshield. This panel is just held by clips, no other hardware. Loosen this panel by pulling gently at each of the clips to release them. Be extremely careful not to break a clip or crack or bend the plastic trim (it�s plastic, it�s not hard to break).
24. Once you have this trim piece loosened, find the center footmans loop and remove the two screws holding the footmans loop there, but hold the footmans loop in place where it is.
25. Grab the CB radio mount and line the end up with the holds that match the holds of the footmans loop.
26. Replace the screws through the bracket and the footmans loop and tighten back down. The mount should now look something like this, with the part sticking out from the windshield being the mount and the horizontal piece is the bracket that comes with the radio:
10-08-2015, 05:31 AM
#15
JK Enthusiast
Thread Starter
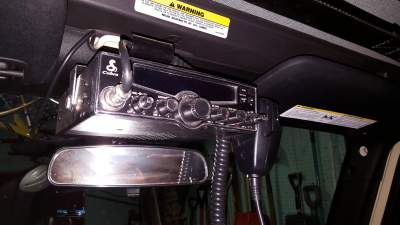
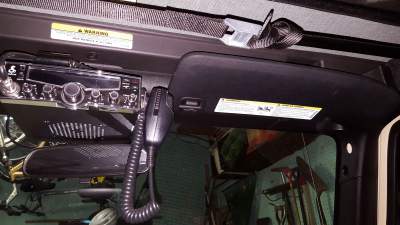
27. Now, its time to test fit your CB radio on the mount. Attach the U bracket that came with the radio to the radio.
28. Go ahead and place the U bracket over the bracket and figure out where the radio will mount best on the mount.
***When test fitting the radio, make sure that you have clearance for the radio in respect to being able to see out the rearview mirror still, as well as clearance between the sun visors (depending on the width or your radio), and being able to get the coax cable plugged into the rear of the radio too. Don�t forget to leave space for the mic if you want to hang it off the side of the radio too!***
***For me, the radio had to be installed offset to the right, meaning the bracket was only holding the left side of the U bracket. This Cobra radio just barely fits wit the mic attached between the visors, but it does actually fit.***
29. The CB mount bracket has a bunch of pre-drilled holes for mounting for many different kinds of radios, so line up the holes on the U bracket to the pre-drilled holes and attach screw(s) and washer(s) to both brackets and tighten.
***For my install, I did not feel secure with only 1 single screw holding the radio, as well as one caused the radio to pivot when I did not want it to. So I ended up drilling my own mounting holes in the U bracket that lined up with the mounting bracket and fastened down***
30. Go ahead and grab the coax cable again and run it inside the plastic trim at the top of the windshield and run it until the middle footmans loop and then bring it out through there.
***I chose to bring it through the footmans loop location because I did not want to cut any trim pieces and that was the only place it fit to come through.***
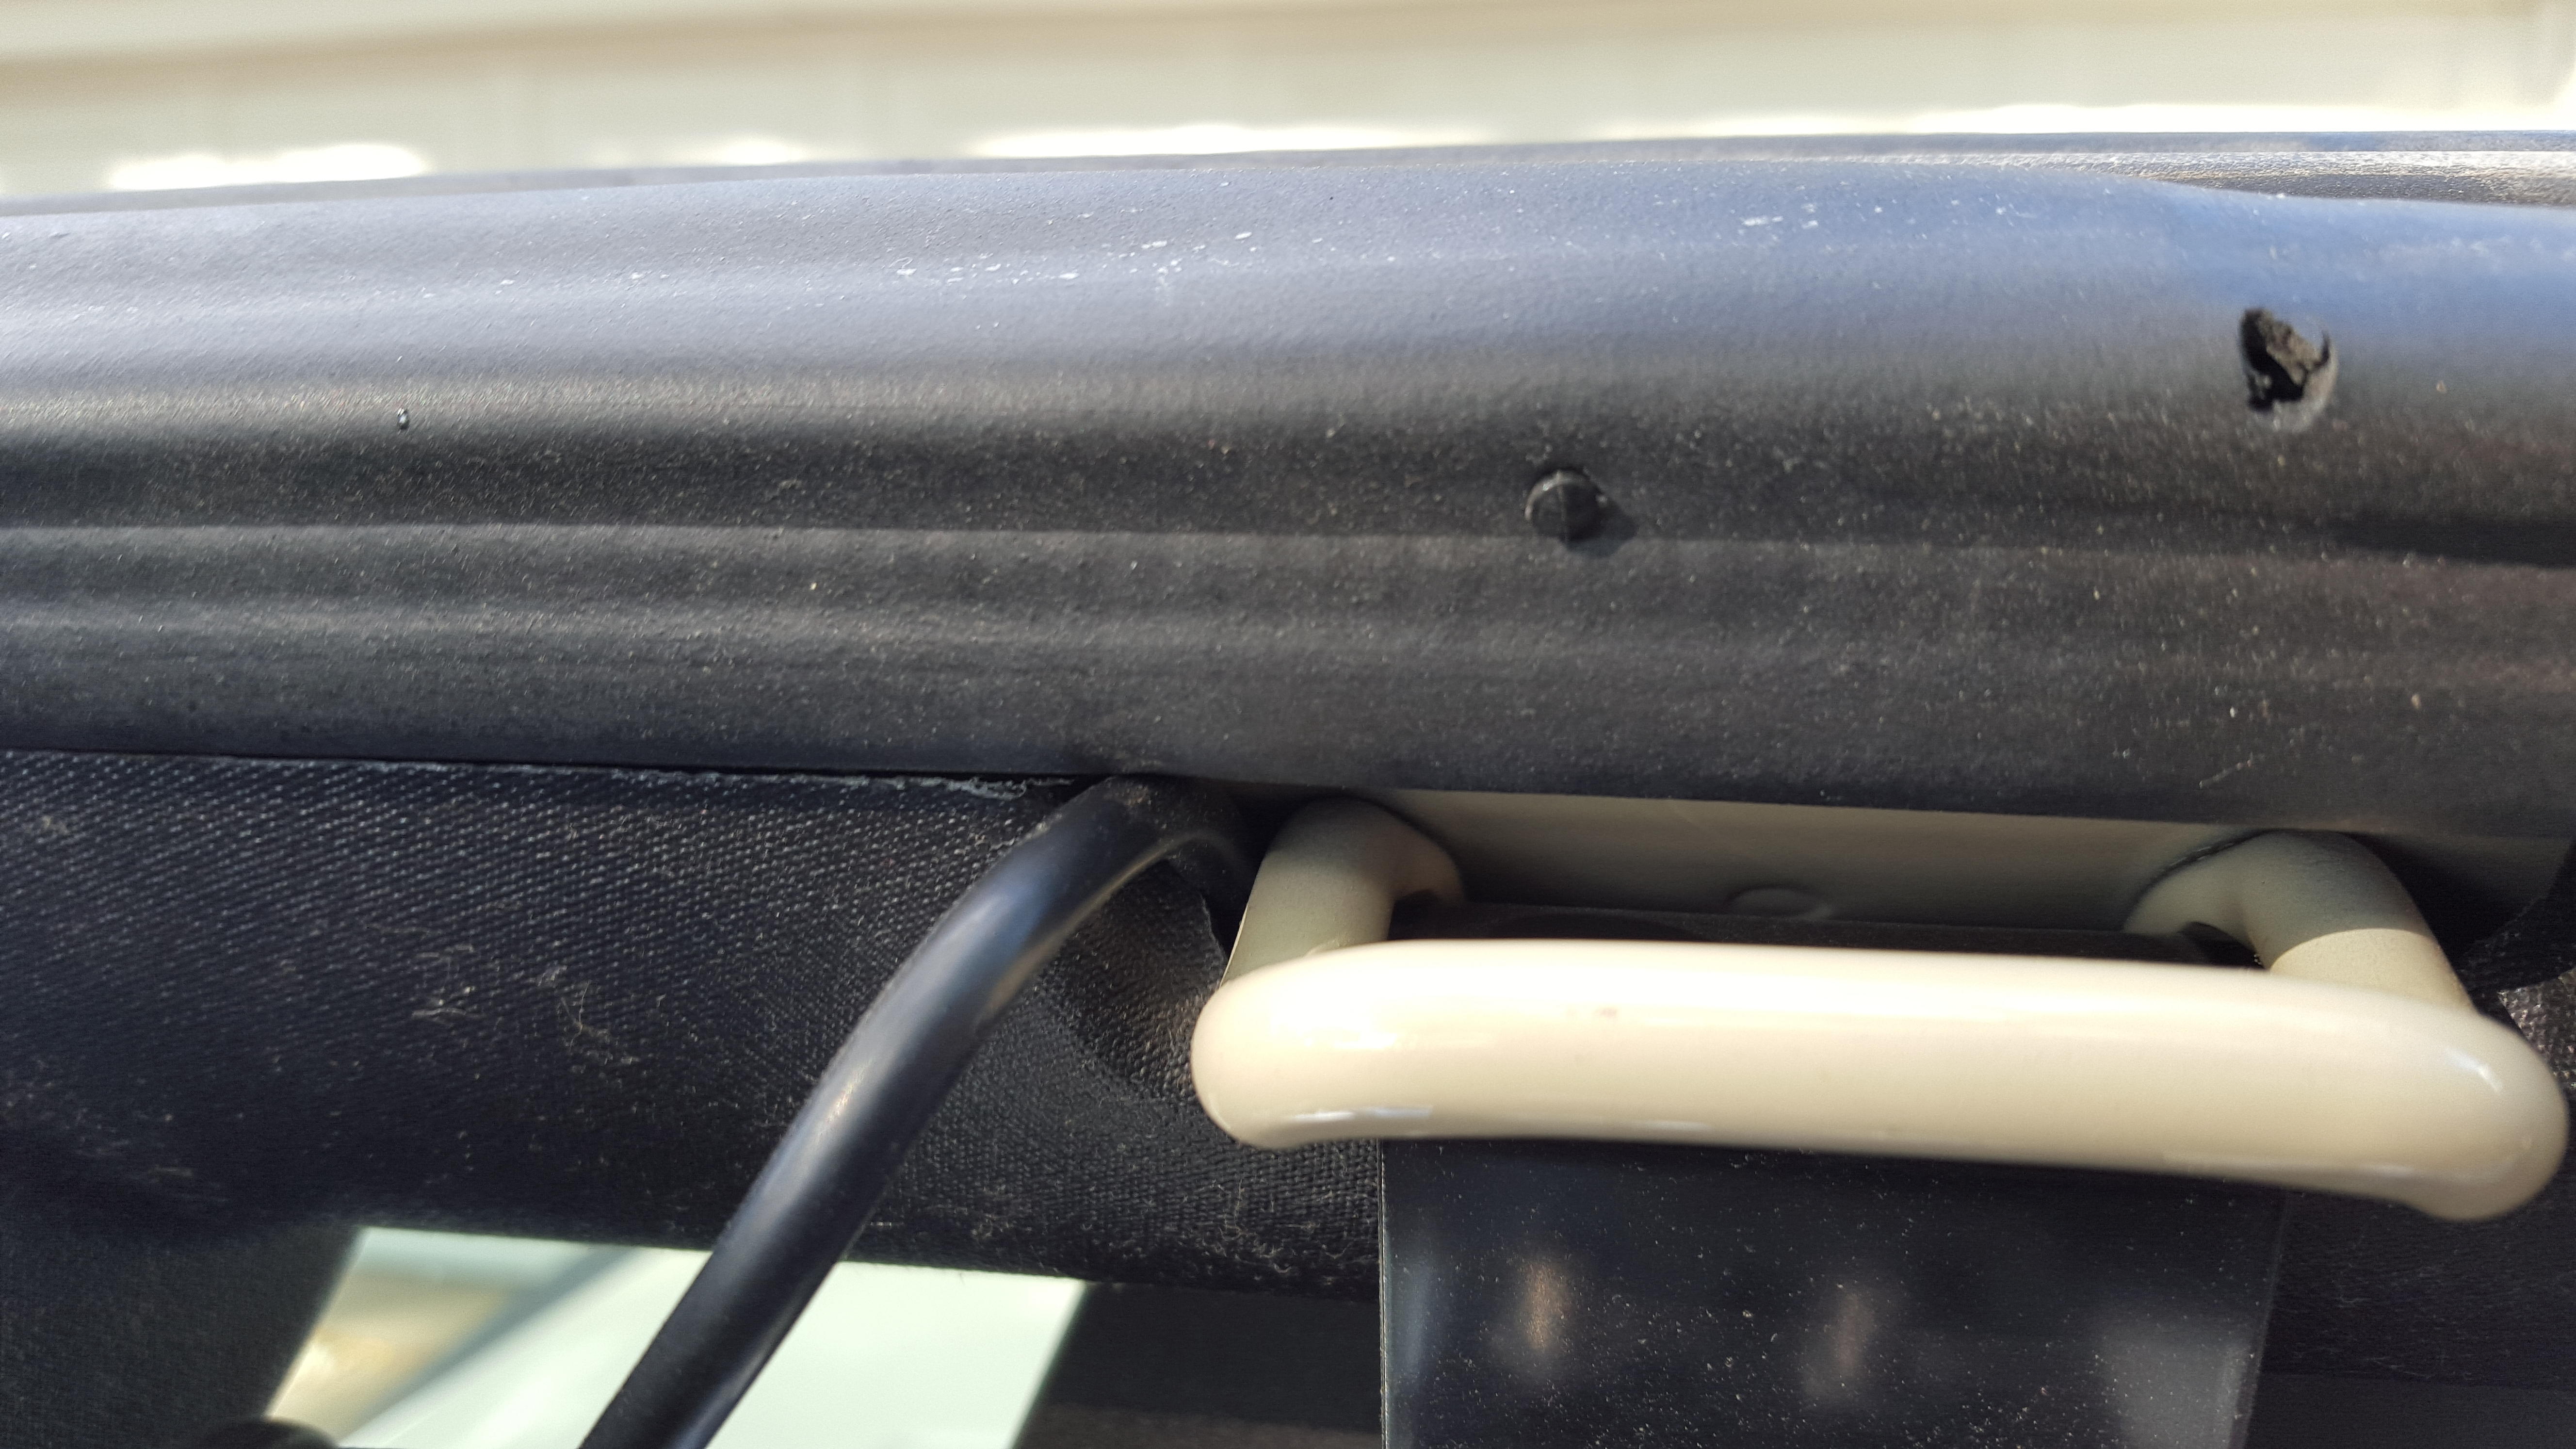
31. Go ahead and connect the coax to your radio now.
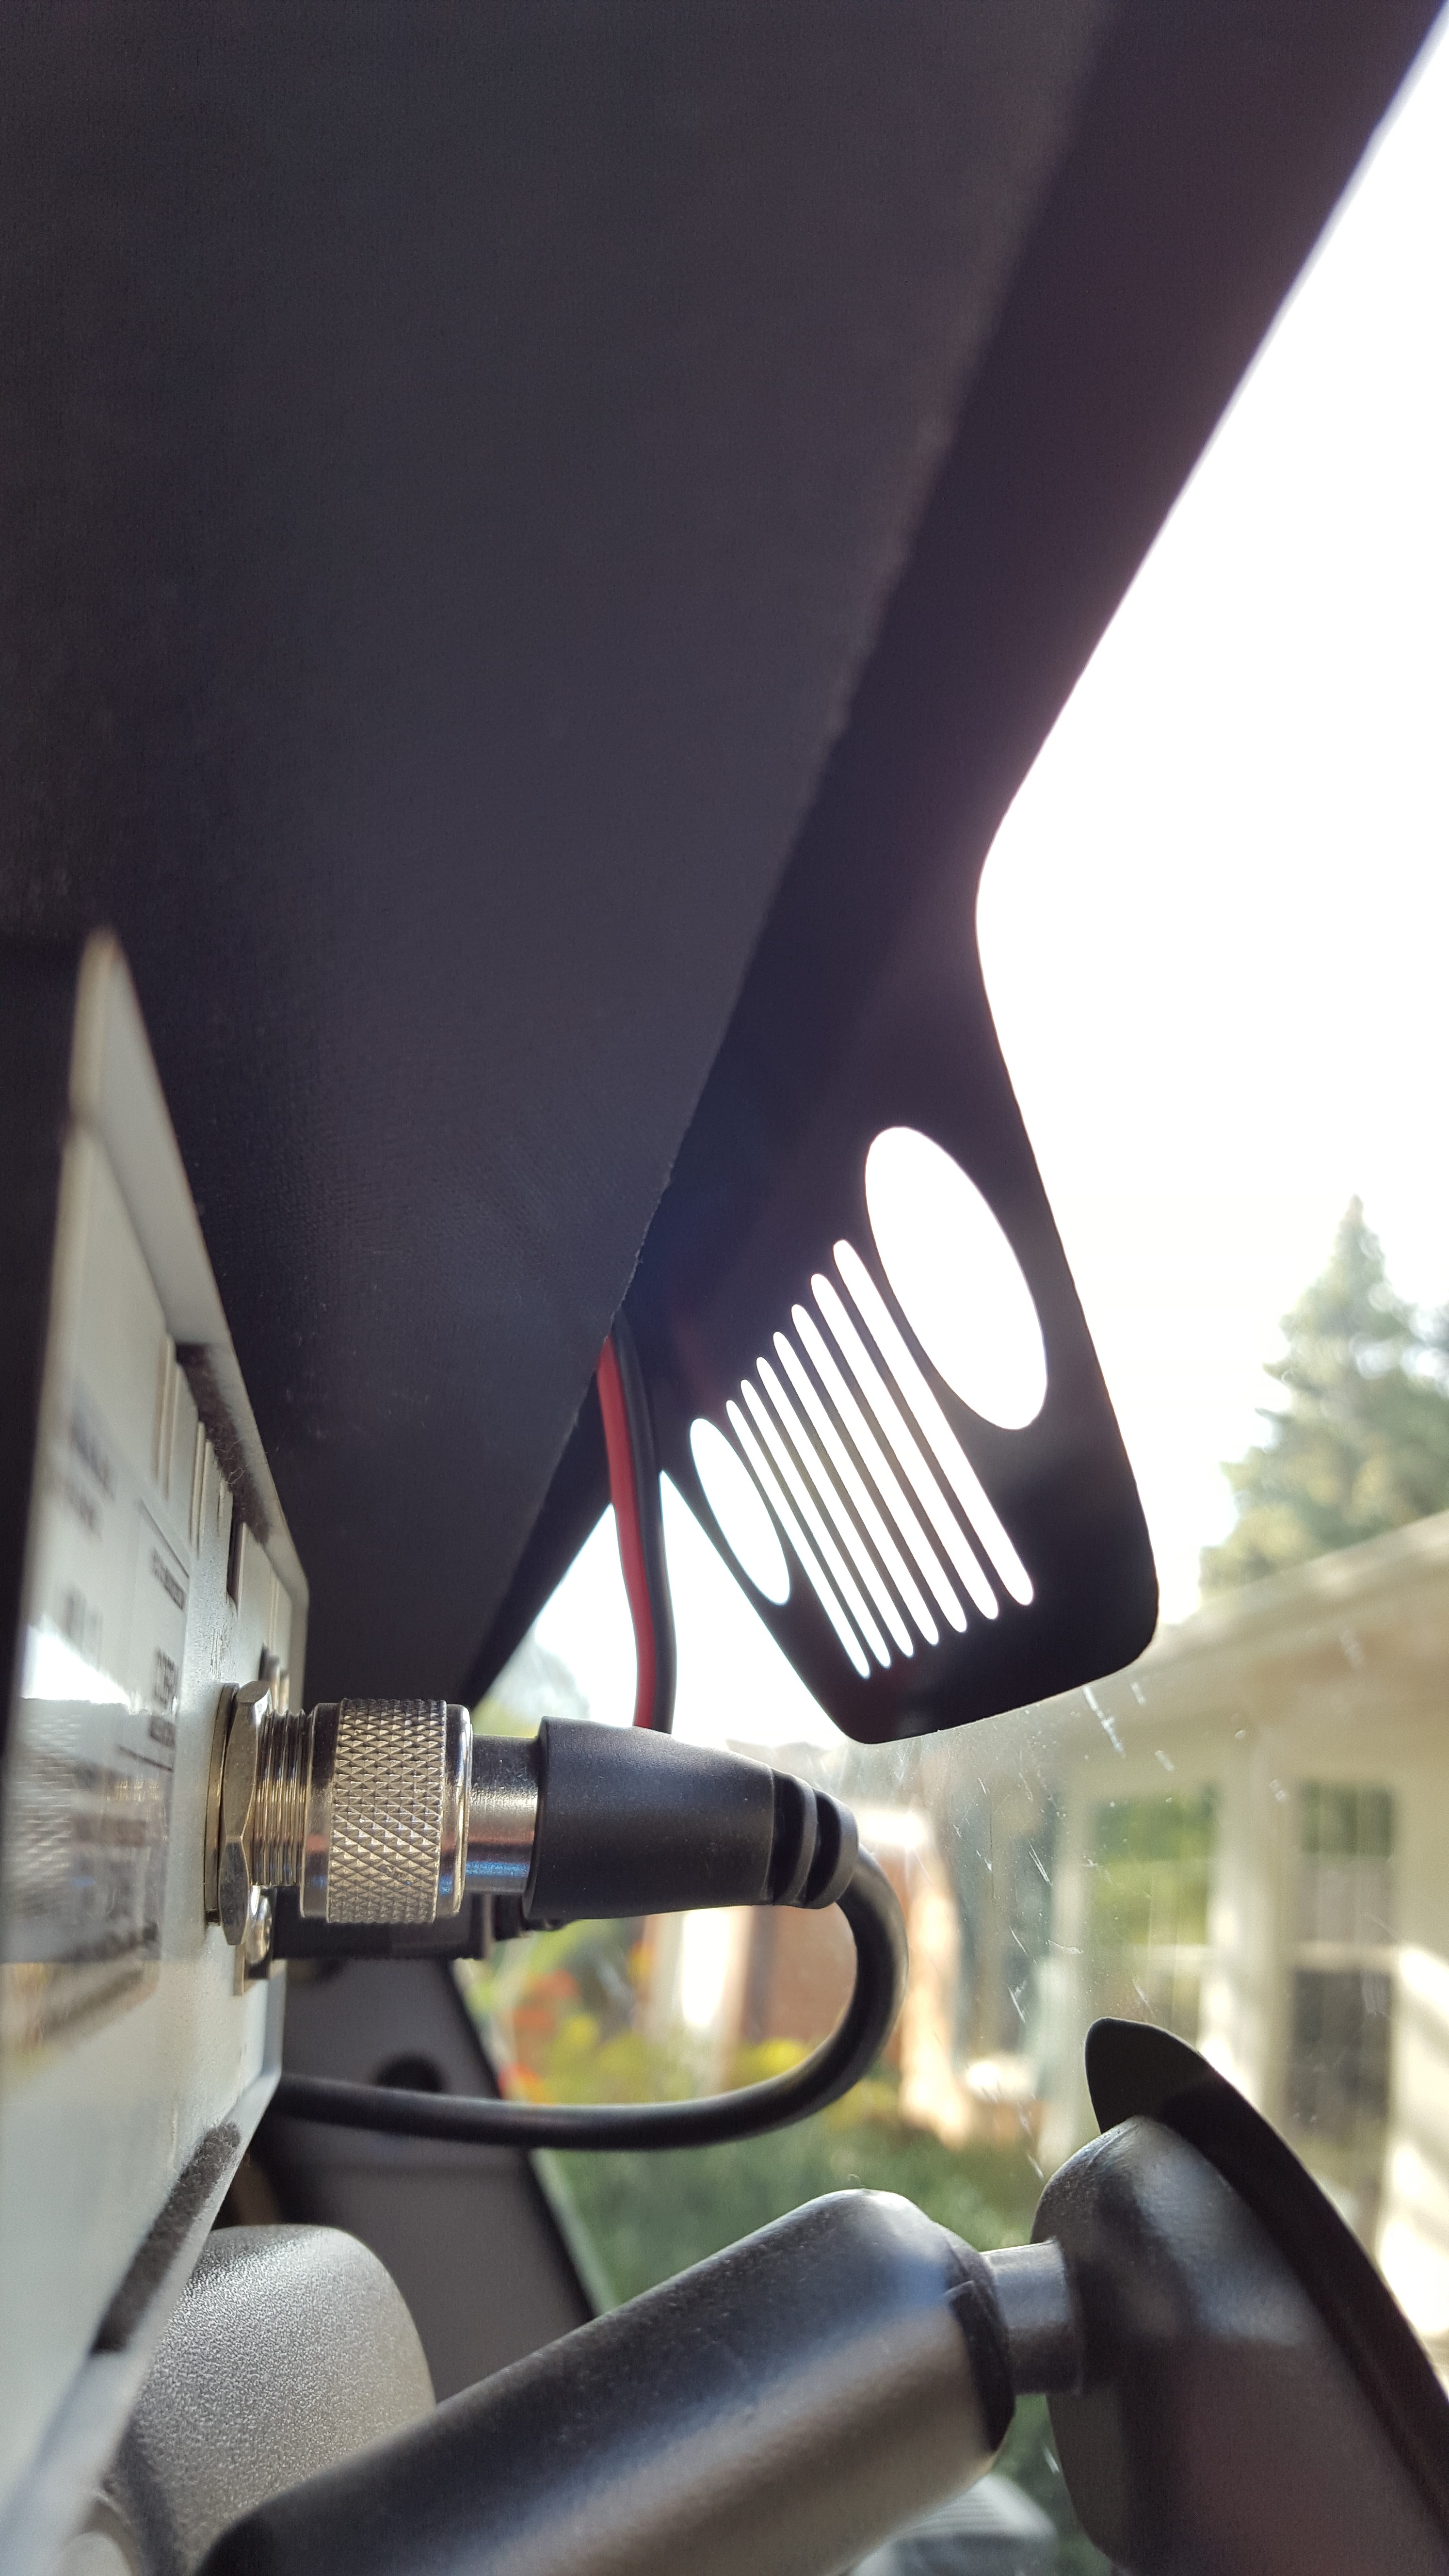
32. Then grab the power cord and run it back through the upper trim piece the same way that you just ran the coax cable, just the opposite direction.
33. When you get to the passenger corner of the windshield, instead of going over to the roll bar, run the power cord down through the A pillar and into the side of the passenger side of the dashboard.
34. At this point, go ahead and reassemble the upper trim pieces above the windshield, the corner containment piece, and the passenger side sun visor.
28. Go ahead and place the U bracket over the bracket and figure out where the radio will mount best on the mount.
***When test fitting the radio, make sure that you have clearance for the radio in respect to being able to see out the rearview mirror still, as well as clearance between the sun visors (depending on the width or your radio), and being able to get the coax cable plugged into the rear of the radio too. Don�t forget to leave space for the mic if you want to hang it off the side of the radio too!***
***For me, the radio had to be installed offset to the right, meaning the bracket was only holding the left side of the U bracket. This Cobra radio just barely fits wit the mic attached between the visors, but it does actually fit.***
29. The CB mount bracket has a bunch of pre-drilled holes for mounting for many different kinds of radios, so line up the holes on the U bracket to the pre-drilled holes and attach screw(s) and washer(s) to both brackets and tighten.
***For my install, I did not feel secure with only 1 single screw holding the radio, as well as one caused the radio to pivot when I did not want it to. So I ended up drilling my own mounting holes in the U bracket that lined up with the mounting bracket and fastened down***
30. Go ahead and grab the coax cable again and run it inside the plastic trim at the top of the windshield and run it until the middle footmans loop and then bring it out through there.
***I chose to bring it through the footmans loop location because I did not want to cut any trim pieces and that was the only place it fit to come through.***
31. Go ahead and connect the coax to your radio now.
32. Then grab the power cord and run it back through the upper trim piece the same way that you just ran the coax cable, just the opposite direction.
33. When you get to the passenger corner of the windshield, instead of going over to the roll bar, run the power cord down through the A pillar and into the side of the passenger side of the dashboard.
34. At this point, go ahead and reassemble the upper trim pieces above the windshield, the corner containment piece, and the passenger side sun visor.
10-08-2015, 05:43 AM
#16
JK Enthusiast
Thread Starter
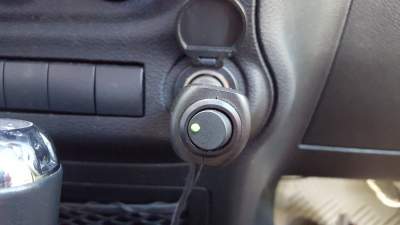
35. Now is the time to decide how to connect the radio to power. You could wire the radio directly to the battery, you could wire the power to a 12V outlet or other power source, etc. Many different ways to attach. My choice was to attach a 12V outlet plug to the power cord.
***My 12V plug also has a power switch on the end of it as well***
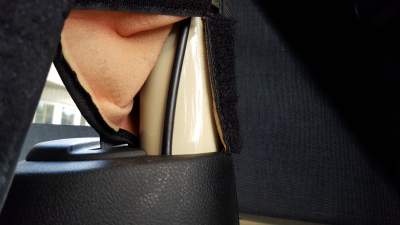
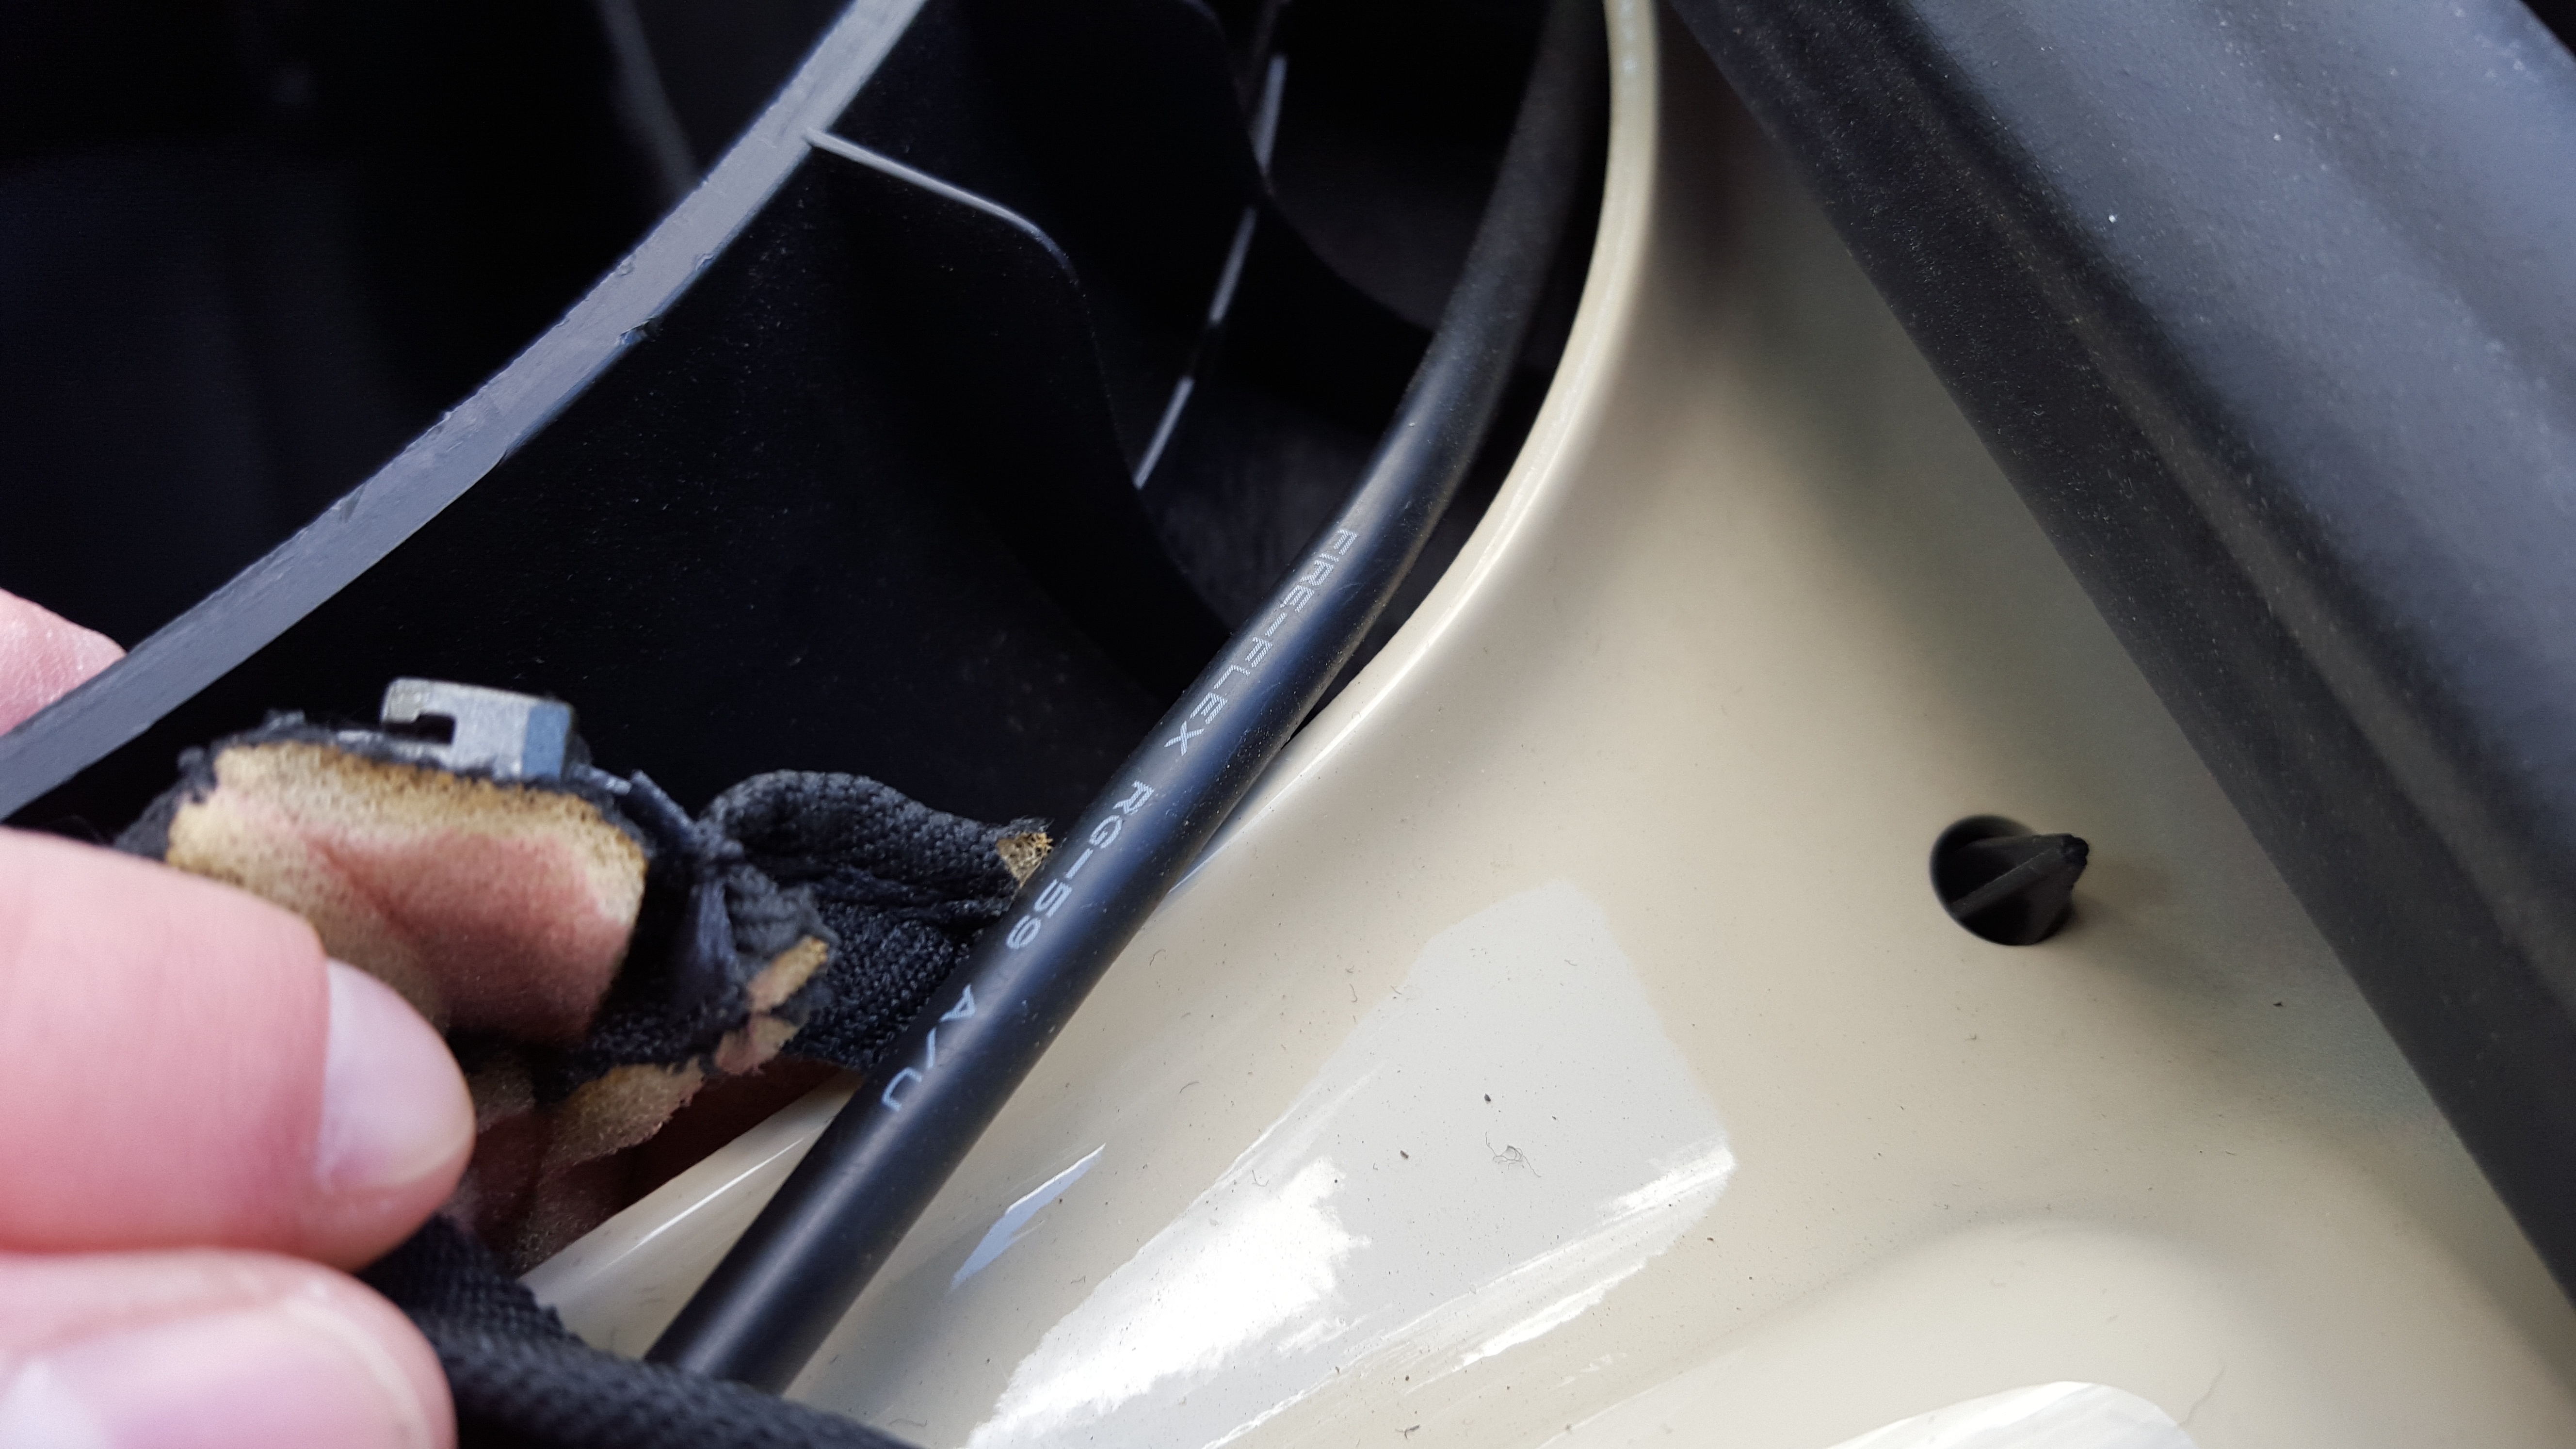
36. With a way to power the radio now settled, I then ran the power cord under the passenger side of the dash, and to the center. Then brought the cord back out of the dash right below the bungee pouch on the lower center piece of the dash.
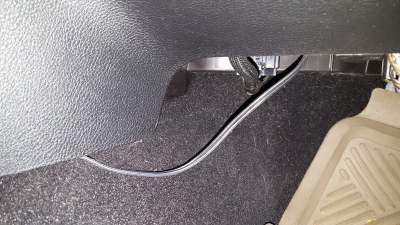 This is the wire tucked up under the dash and over to the center dash trim piece.
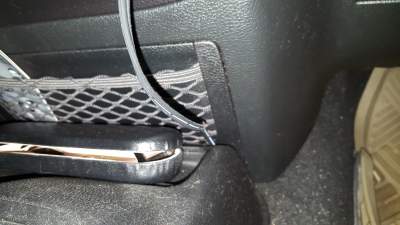
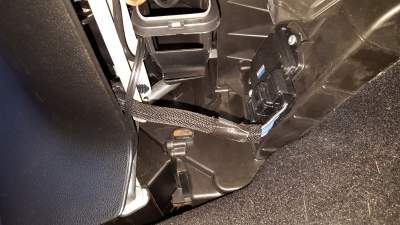 This is a shot up under the passenger side glove box. The thinner black wire on the left which is getting tucked up into the trim is the power cord.
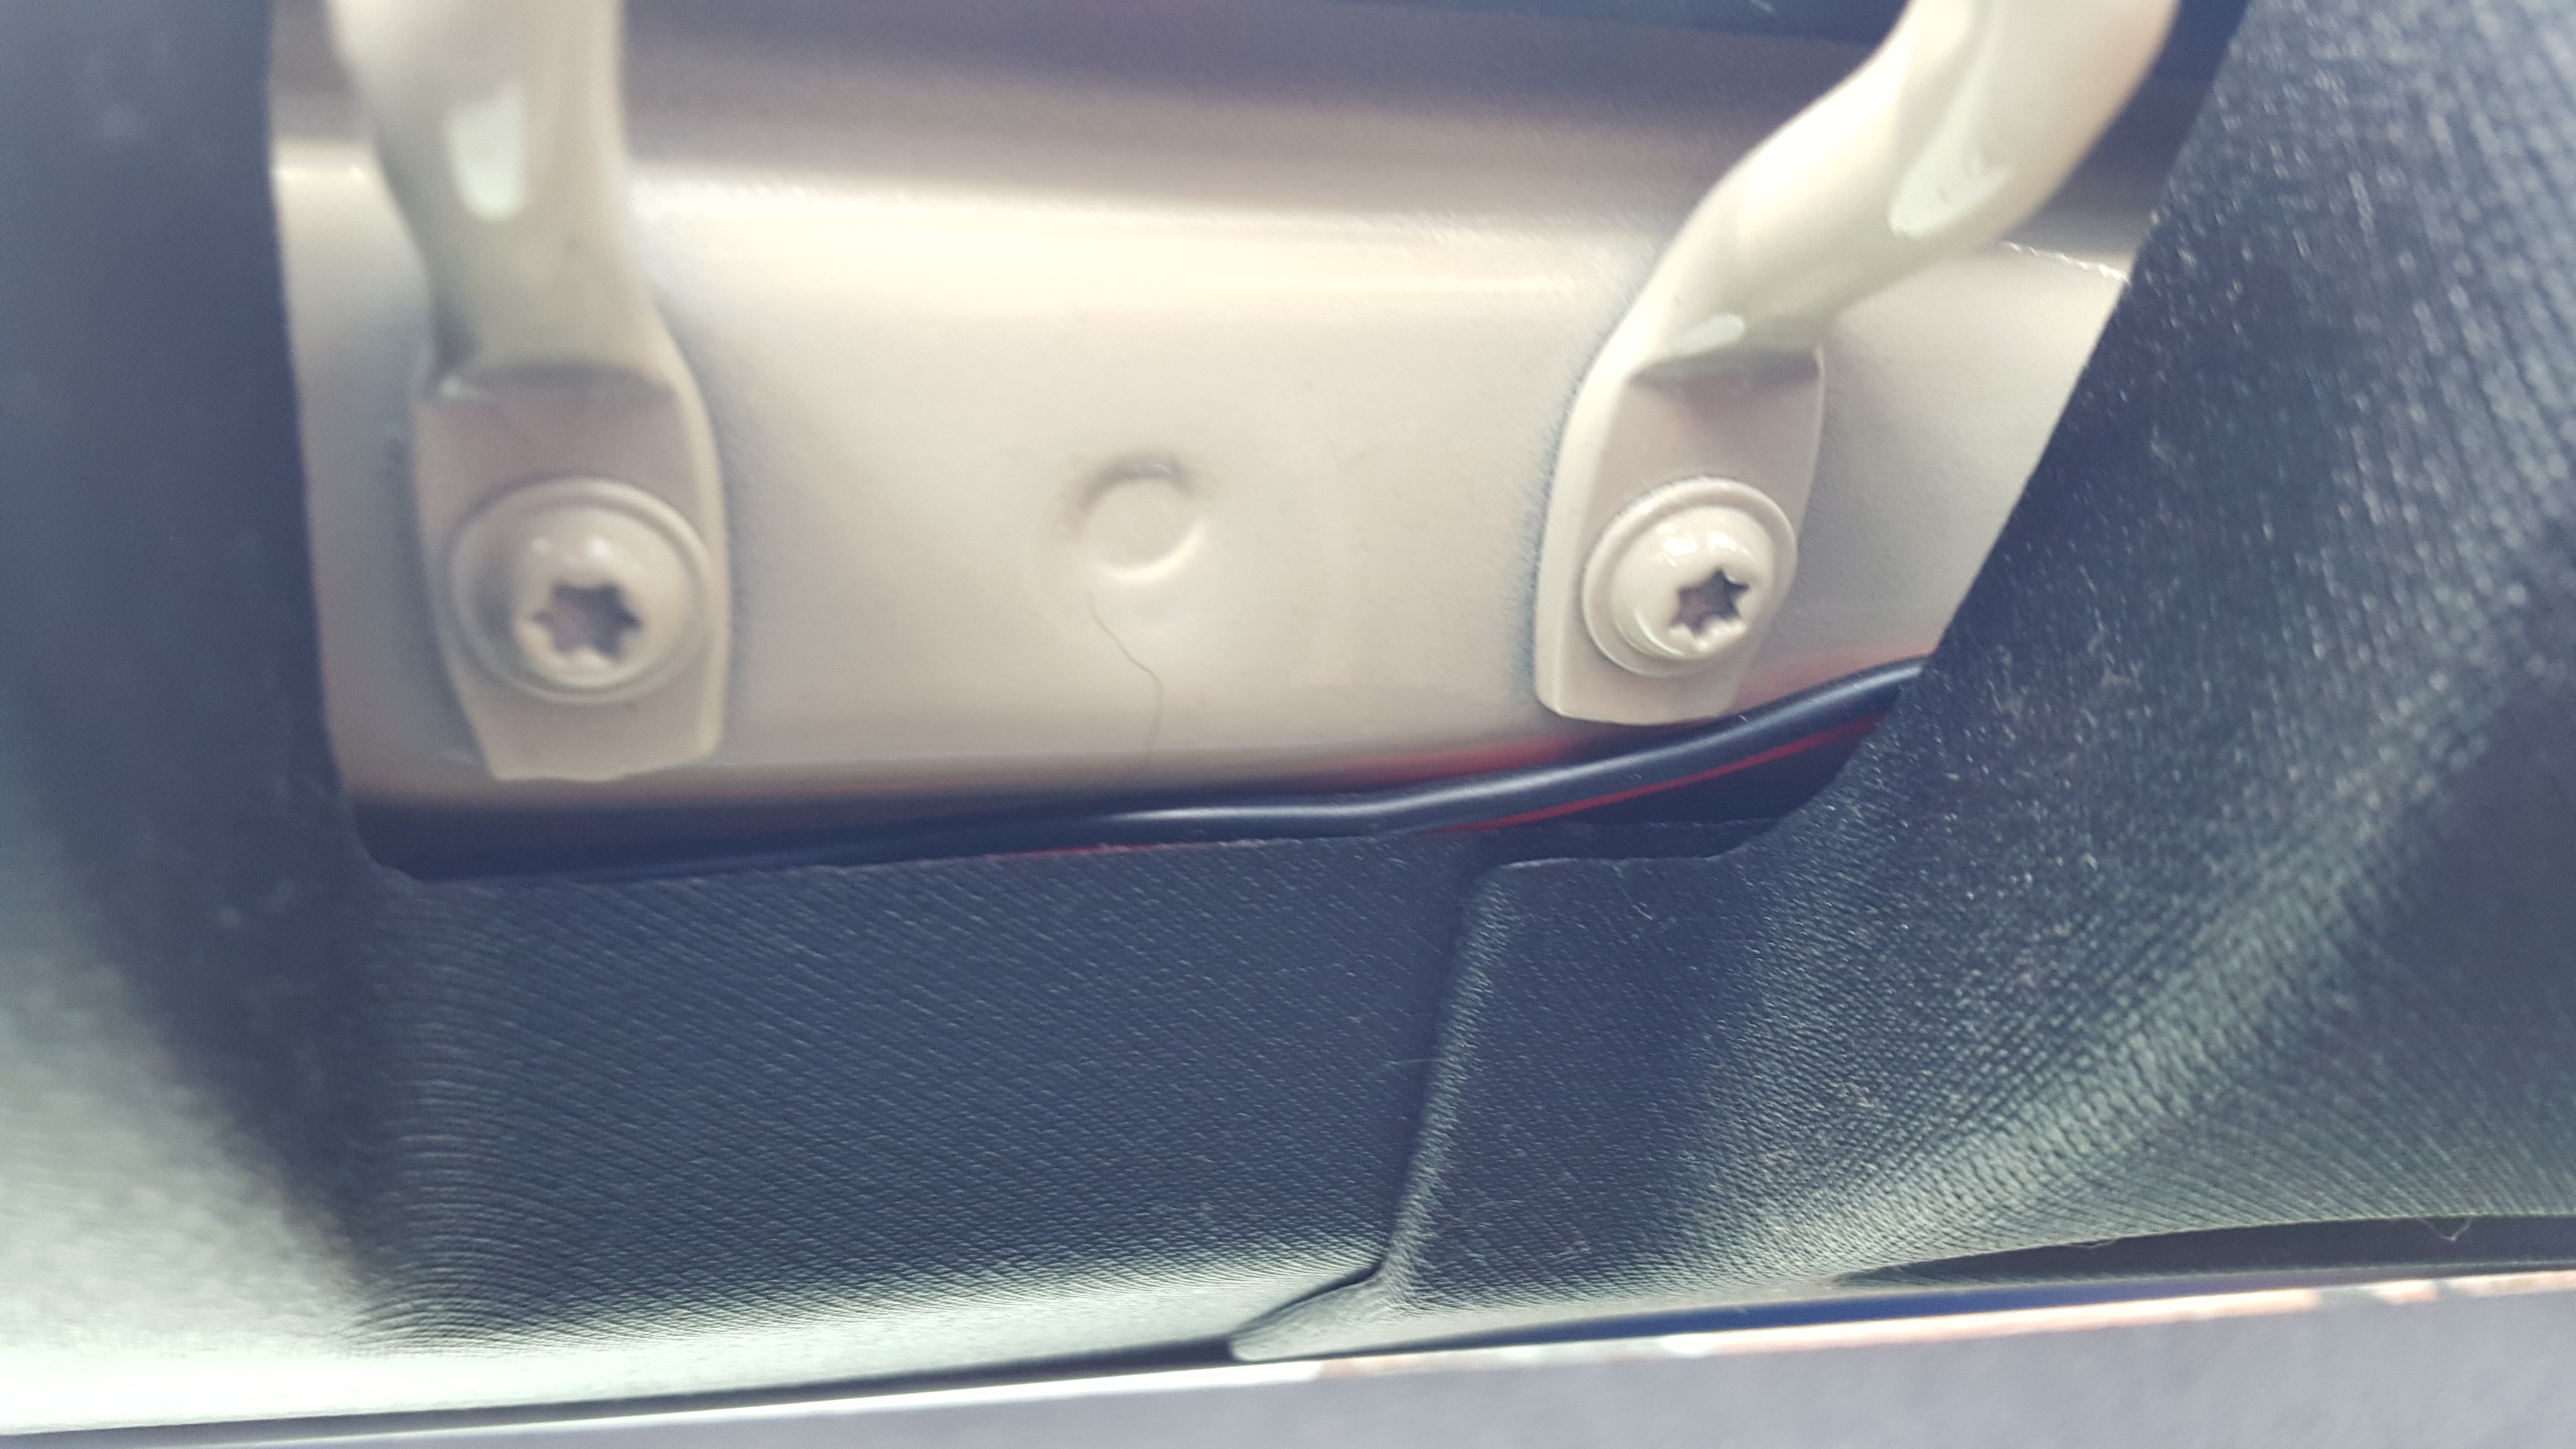
 The Cord coming through the center dashboard.
37. Then, plug in the power cord into the 12V outlet plug.
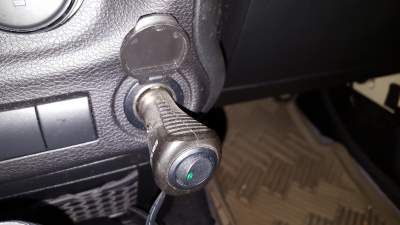
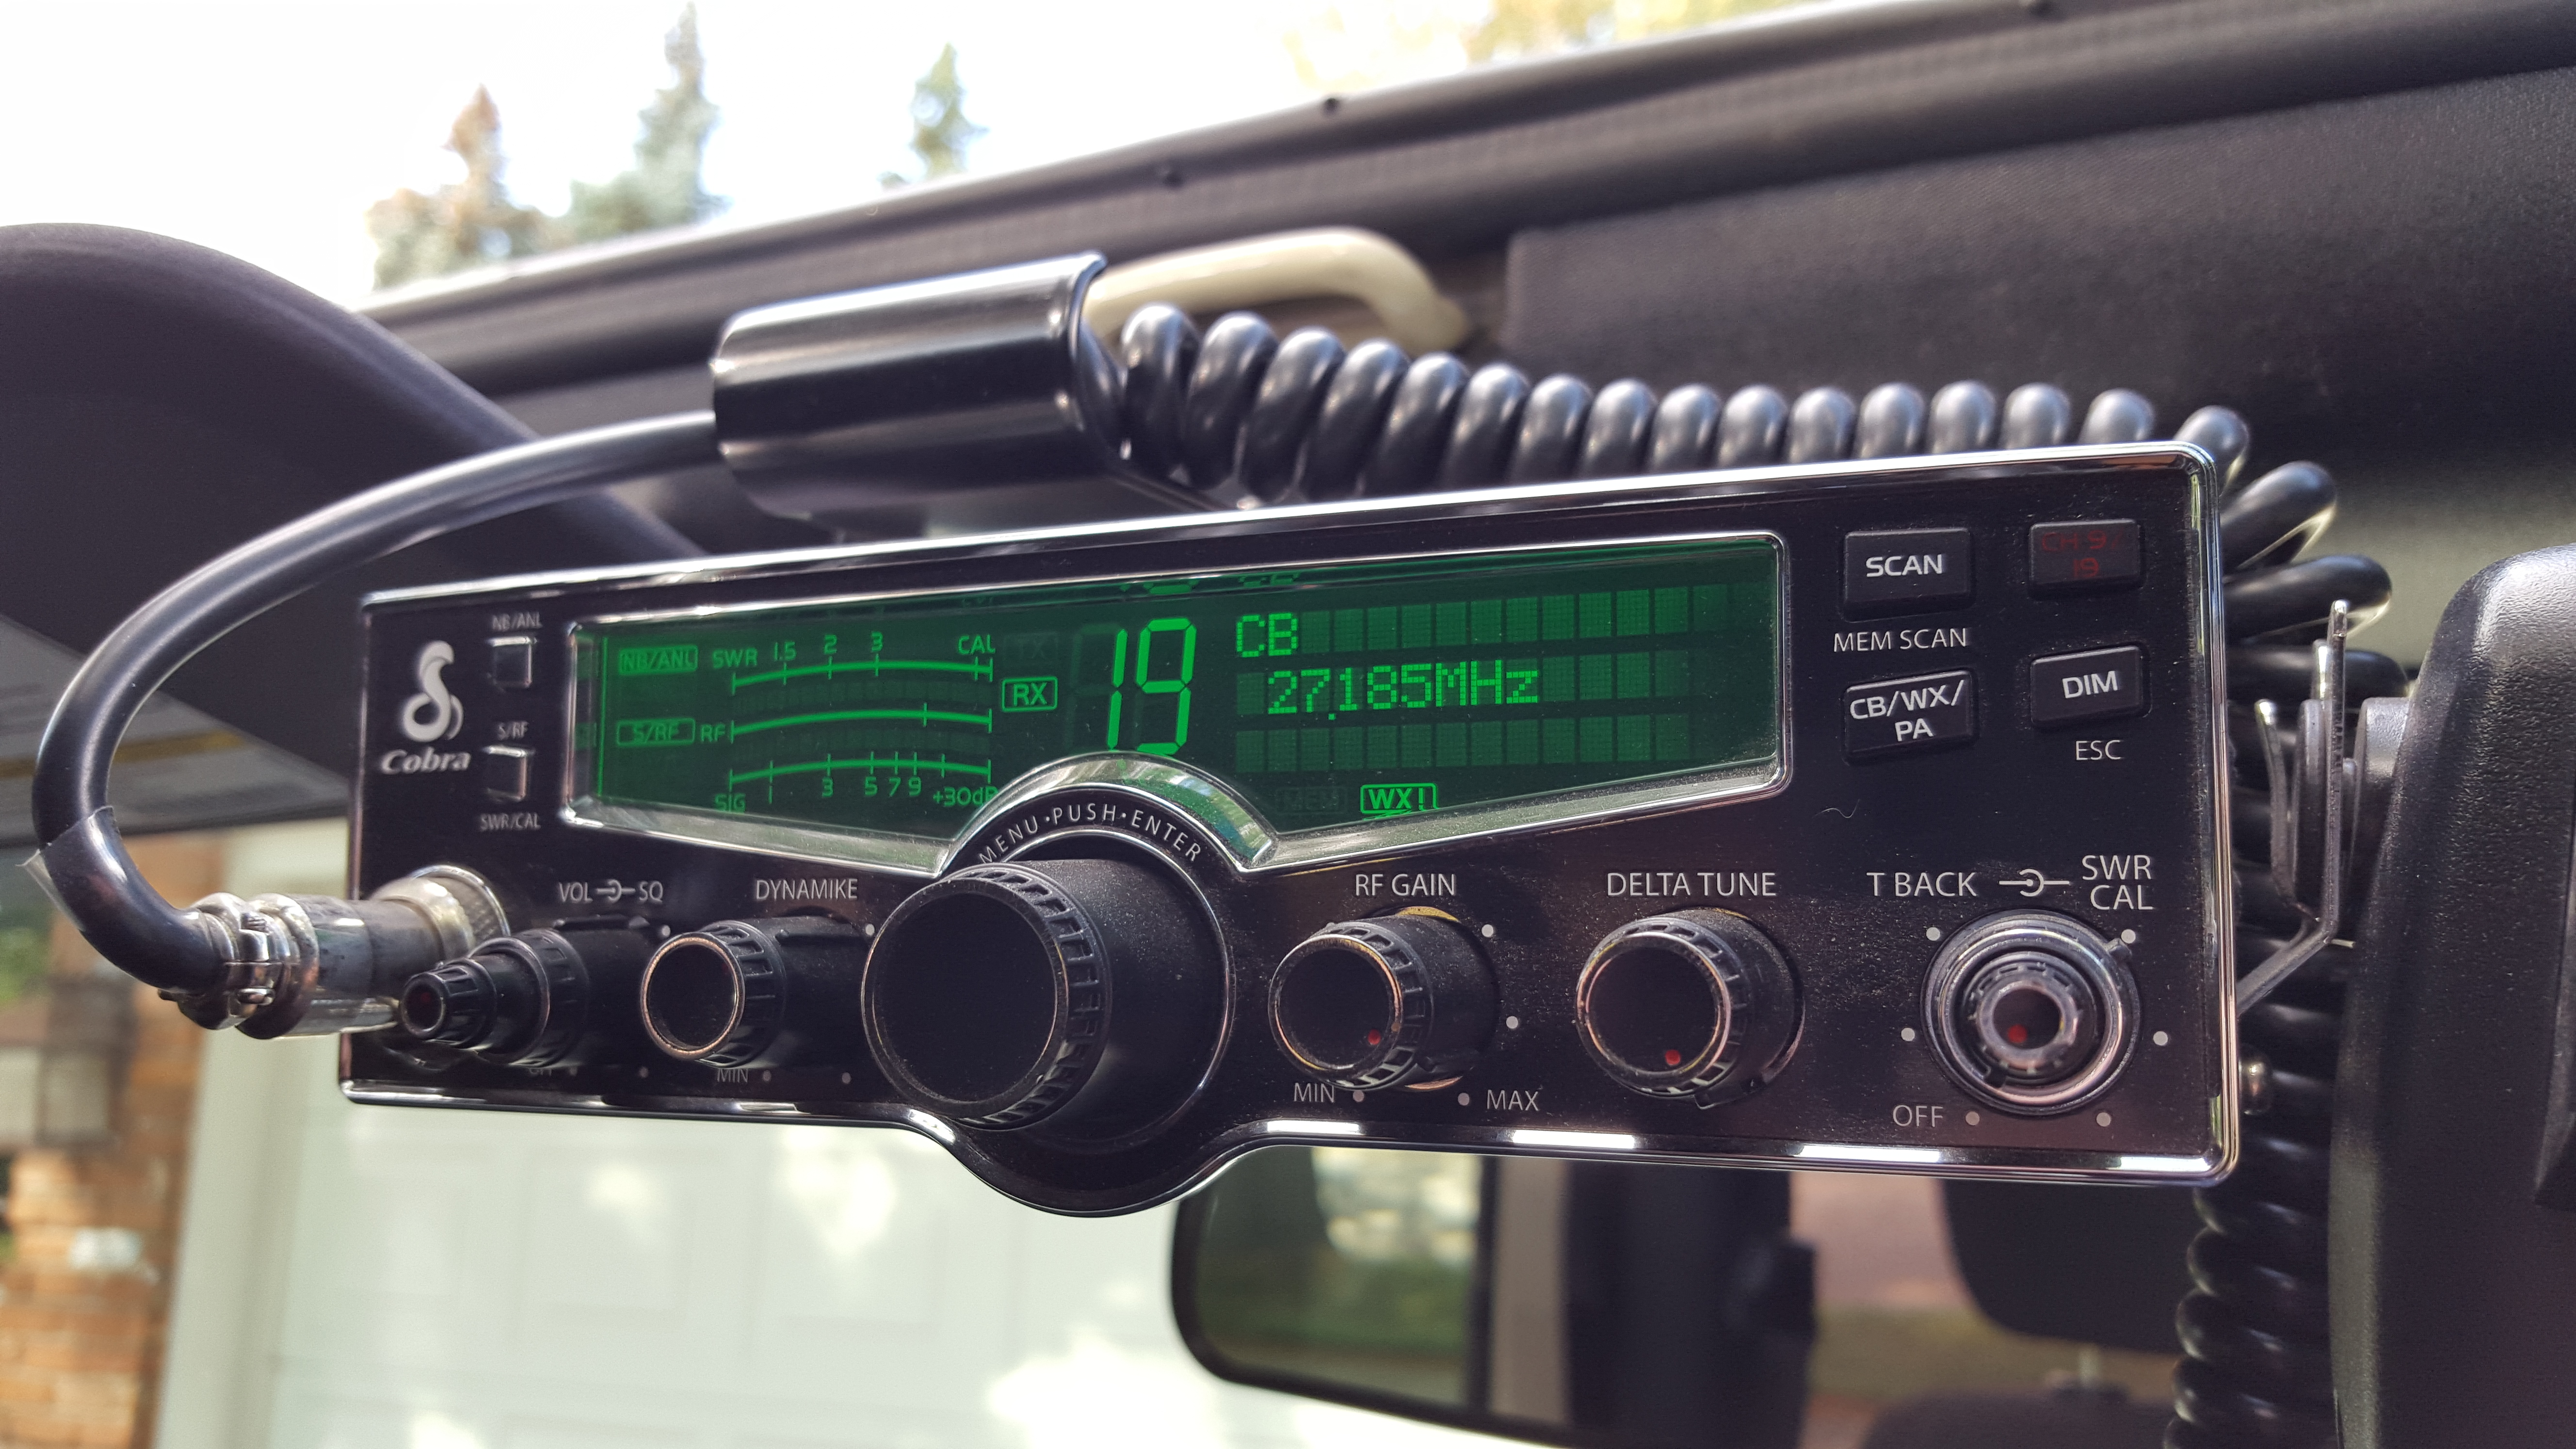
38. With the 12V plug that I used, you have to make sure the ignition power is on, then flip the power switch on, and then go ahead a turn the radio on!
There ya have it! CB radio and antenna installed and ready to use! Let me know any question you may have and I will answer to the best of my ability, otherwise, I hope I answered some questions and provided some help!
***My 12V plug also has a power switch on the end of it as well***
36. With a way to power the radio now settled, I then ran the power cord under the passenger side of the dash, and to the center. Then brought the cord back out of the dash right below the bungee pouch on the lower center piece of the dash.
37. Then, plug in the power cord into the 12V outlet plug.
38. With the 12V plug that I used, you have to make sure the ignition power is on, then flip the power switch on, and then go ahead a turn the radio on!
There ya have it! CB radio and antenna installed and ready to use! Let me know any question you may have and I will answer to the best of my ability, otherwise, I hope I answered some questions and provided some help!
10-09-2015, 03:57 AM
#17
JK Enthusiast
Thread Starter
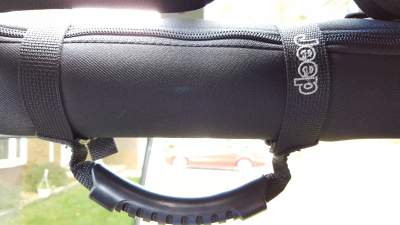
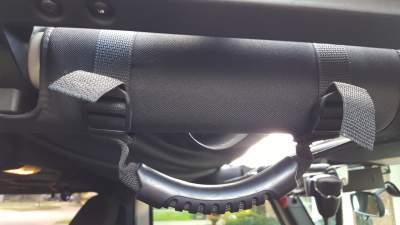
Picked up a pair of these Mopar, Jeep branded roll bar grab handles for the front seats on my Jeep. I feel they have good construction to them, as well as help people to be able to get in and out of my Jeep! They were easy to install (about 10 minutes). I spent about $30 on them, so nothing that'll break the bank of anything, but they are solid and do the job!
10-09-2015, 04:33 AM
#18
JK Enthusiast
Thread Starter
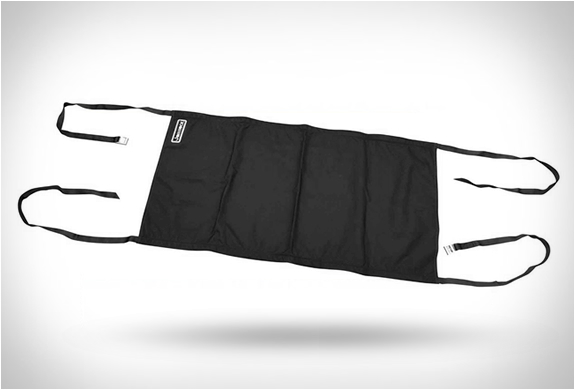
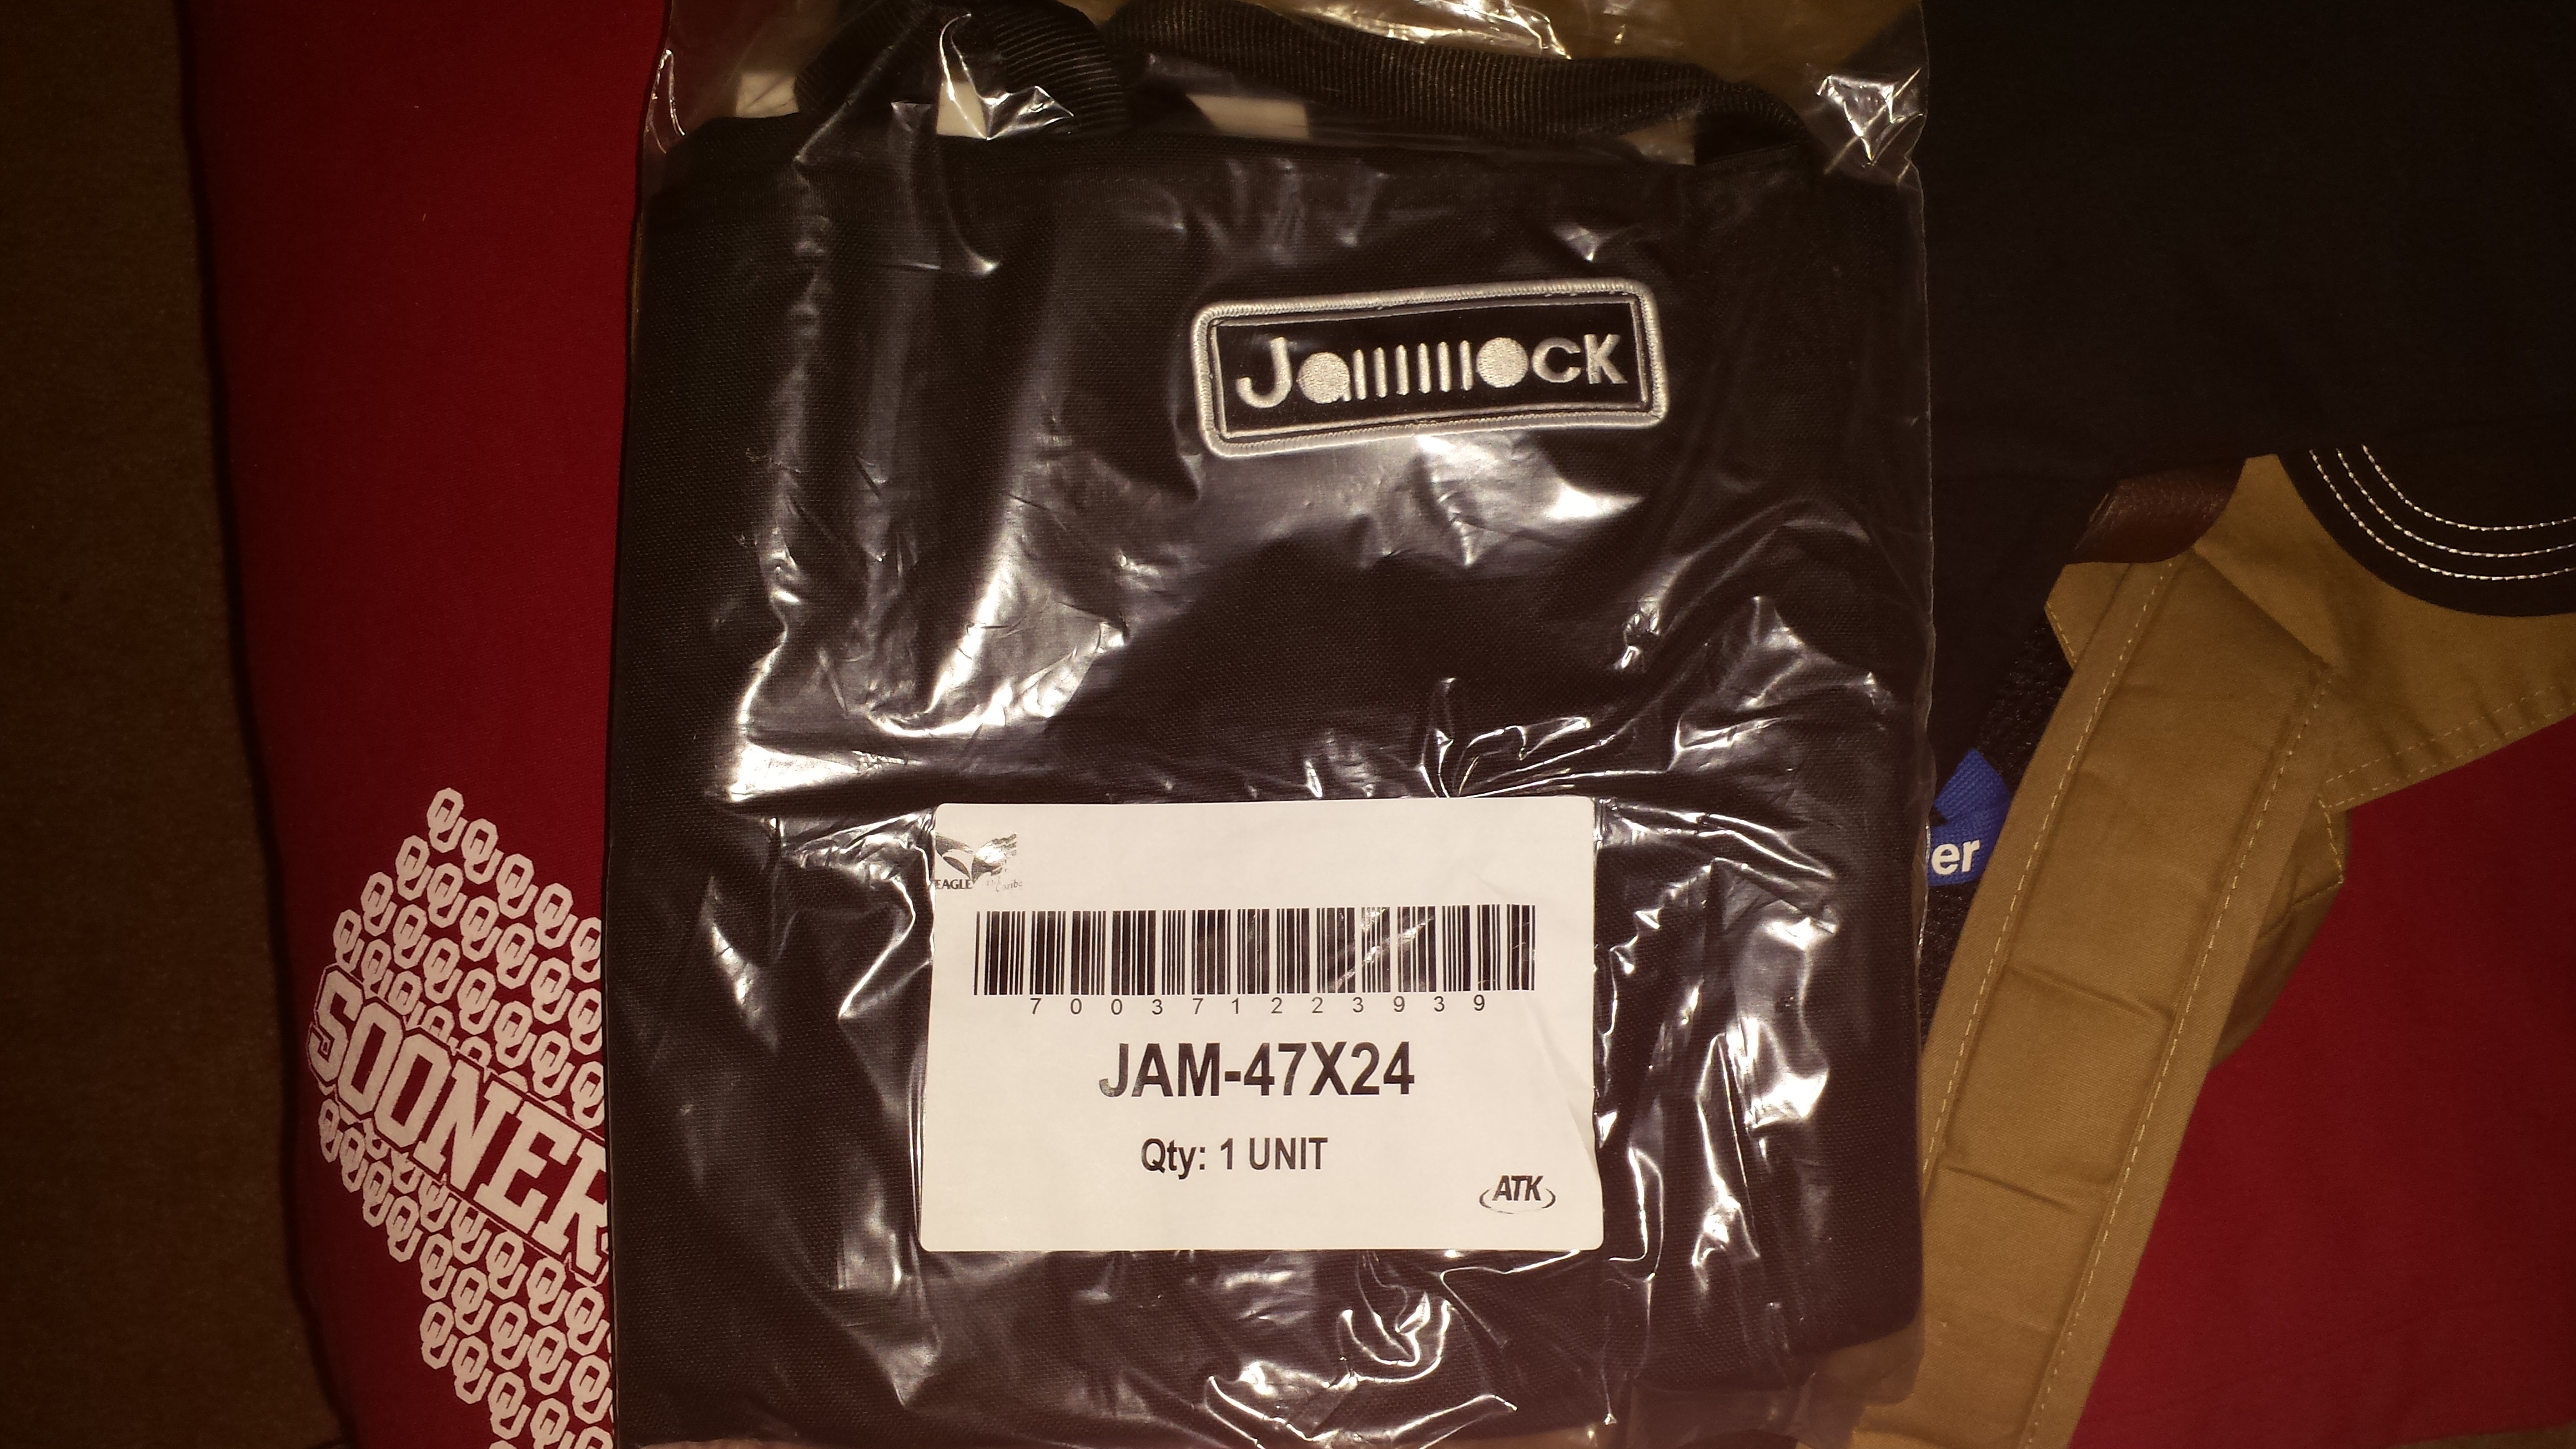
For my birthday this year, I was given a JammockBlack, and I absolutely love it! For anyone who may not know, the Jammock is similar to a bikini top or a brief top, which just covers the front part of the cabin usually mash of some sort of mesh or something like that. However, the Jammock is not only a summer top like that, which is coated to make it "water resistant but still allow air flow" (right from Jammock's website and product description, and i can speak to it being water resistant, as I have had it on in light rain and the front cabin has stayed perfectly dry!), but it is also a rooftop hammock for you Jeep! It fits between the roll bars and is attached by 2 long straps that run width wise across the Jeep that get wrapped around the roll bars and fastened together under the Jammock! It's quite easy and simply to install, and easy to use and I just all around love it!
Product specs from the website:
[TABLE="width: 100%"]
[TR]
[TD]Weight[/TD]
[TD][/TD]
[TD]2.0 lbs[/TD]
[/TR]
[TR]
[TD]Dimensions[/TD]
[TD][/TD]
[TD]47 x 24 x 1 in[/TD]
[/TR]
[TR]
[TD]Working Load Limit[/TD]
[TD][/TD]
[TD]350 lbs.[/TD]
[/TR]
[TR]
[TD]Usable Size[/TD]
[TD][/TD]
[TD]47″ x 24″[/TD]
[/TR]
[TR]
[TD]Fabric[/TD]
[TD][/TD]
[TD]1000D Cordura Nylon, 9.8 oz per sq. yd.[/TD]
[/TR]
[TR]
[TD]Straps[/TD]
[TD][/TD]
[TD]Tubular Nylon, 1″ wide[/TD]
[/TR]
[TR]
[TD]Buckles[/TD]
[TD][/TD]
[TD]Aluminum NRS, 1″ wide, tension-lock type[/TD]
[/TR]
[TR]
[TD]Color[/TD]
[TD][/TD]
[TD]Black[/TD]
[/TR]
[TR]
[TD]Strap Length[/TD]
[TD][/TD]
[TD]10′ 4"[/TD]
[/TR]
[/TABLE]
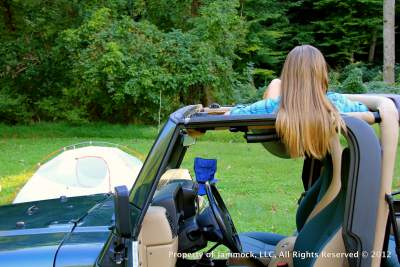
Now it says that the working load is 350 lbs, which shouldn't be too hard to stay within, however most of the components have individual weight ratings of much more! You can just lounge in the sun in this, you can sit with someone else in the Jammock, you can even use it as a normal hammock with straps around a tree! Go check this out, as there are so many possibilities with what yo can do with the Jammock, and it is just such as a quality product. Made of high end, and quality materials, and built to last! It cost about $140, which isn't much more than what you would pay for a top like this that you can't use as a hammock! Also, the thing that I find very cool is, I can still close the top, hard top or soft top, with the Jammock on, no problem! So I have no need to even take it down! It's ready to go whenever I would like it! As a Jeep own, this is something you need to have, as it is just so versatile, and so much fun to be able to take advantage of you Jeep even more!
Here is the link to their site! Go check it out and read about it!
JammockBlack <--- Click here!
https://www.youtube.com/watch?v=gIs_daj796U https://www.youtube.com/watch?v=nbPMDv45jgI

Product specs from the website:
[TABLE="width: 100%"]
[TR]
[TD]Weight[/TD]
[TD][/TD]
[TD]2.0 lbs[/TD]
[/TR]
[TR]
[TD]Dimensions[/TD]
[TD][/TD]
[TD]47 x 24 x 1 in[/TD]
[/TR]
[TR]
[TD]Working Load Limit[/TD]
[TD][/TD]
[TD]350 lbs.[/TD]
[/TR]
[TR]
[TD]Usable Size[/TD]
[TD][/TD]
[TD]47″ x 24″[/TD]
[/TR]
[TR]
[TD]Fabric[/TD]
[TD][/TD]
[TD]1000D Cordura Nylon, 9.8 oz per sq. yd.[/TD]
[/TR]
[TR]
[TD]Straps[/TD]
[TD][/TD]
[TD]Tubular Nylon, 1″ wide[/TD]
[/TR]
[TR]
[TD]Buckles[/TD]
[TD][/TD]
[TD]Aluminum NRS, 1″ wide, tension-lock type[/TD]
[/TR]
[TR]
[TD]Color[/TD]
[TD][/TD]
[TD]Black[/TD]
[/TR]
[TR]
[TD]Strap Length[/TD]
[TD][/TD]
[TD]10′ 4"[/TD]
[/TR]
[/TABLE]
Now it says that the working load is 350 lbs, which shouldn't be too hard to stay within, however most of the components have individual weight ratings of much more! You can just lounge in the sun in this, you can sit with someone else in the Jammock, you can even use it as a normal hammock with straps around a tree! Go check this out, as there are so many possibilities with what yo can do with the Jammock, and it is just such as a quality product. Made of high end, and quality materials, and built to last! It cost about $140, which isn't much more than what you would pay for a top like this that you can't use as a hammock! Also, the thing that I find very cool is, I can still close the top, hard top or soft top, with the Jammock on, no problem! So I have no need to even take it down! It's ready to go whenever I would like it! As a Jeep own, this is something you need to have, as it is just so versatile, and so much fun to be able to take advantage of you Jeep even more!
Here is the link to their site! Go check it out and read about it!
JammockBlack <--- Click here!
https://www.youtube.com/watch?v=gIs_daj796U https://www.youtube.com/watch?v=nbPMDv45jgI
Last edited by WxNerd2015; 11-04-2015 at 06:57 AM.
10-12-2015, 04:38 AM
#19
JK Enthusiast
Thread Starter
Just wanted to share this tidbit that I had discovered on the build pages here! I shared on another forum post but wanted to also have all my stuff in one location! I learned this when I had my '01 Dakota, and tested it when I got my Jeep and it still works! So I believe that this should work with any Jeep, Dodge, Chrysler, Ram vehicle which has a digital odometer (though I don't know if it works with the LCD screens). If you have any trouble codes or warning lights on your Jeep, you are able to check them without having to buy an expensive unit to plug in to the computer or making another trip to Autozone to have them tell you what the code says! When you get in your Jeep, insert the key in the ignition, push the key in, and turn it back and forth from off to on (do not hit the start position on the jeep though), finishing in the on position. The odometer will then change over to display any codes the Jeep may be experiencing, which you can take and just search in google then, or if it's a bigger issue at least be better informed on the problem, and you don't even have to go anywhere! Once all the codes are finished being reported, a dashed line will appear across the odometer, and then the word "done" to signify that the report is complete. Then the odometer will switch back to normal operation! Hopefully this will help some of you save some time and money out there! And here's a short video of me performing this trick so you can see the actual function:
https://www.youtube.com/watch?v=Qul9HC-FDCg Also, here is the link to a Quadratec site that shows every possible trouble code that could come through the console and what it means:
http://www.quadratec.com/jeep_knowle...rticle-139.htm
This is also highlighted in post #136, which is the time this was found, but figured this was important to add to the actual post itself with how to use and obtain these codes.
Last edited by WxNerd2015; 06-09-2016 at 05:38 AM.
10-12-2015, 05:08 AM
#20
JK Enthusiast
Thread Starter
Here's another small, simple, but extremely helpful tidbit about the Jeeps! The JK's have an oil change indication message that displays roughly every 2500 miles, but it does vary on driving style and how it was programmed from the factory. This is the information that I have been able to gather from my research. Now, I believe that mine seems to go a bit further than that 2500 on my occasions so far (as I am at 30K miles, so I have changed the oil enough times to be able to say this with confidence), however I never rely on the oil change indicator, but just keep track of the miles since last oil change myself! The oil change indicator is not an actual sensor, but more of an algorithm based on mileage, and driving style, and a few other factors, but it is not measuring the oil directly. So whether you change your own oil, or an oil change place does it and does not reset you oil light, or it just comes on and you know it is not time yet and want the light to go off, this is the process to reset your oil change message/light yourself:
1. Insert key into ignition.
2. Turn key to the on position, but do not start the Jeep.
3. Within 10 seconds, press the accelerator all the way to the floor and release it 3 times, not going too fast or too slow.
4. Turn the key to the off position.
5. Let all the power shut off in the vehicle (I cheat and just open the door so it kills all the power).
6. Turn the Jeep back on, (engine running) and there should be no more oil change message.
There ya go! Oil message reset!