Jeep Wrangler JK: How to Perform After Off-Roading Maintenance
With good after off-roading maintenance, you can be sure your Wrangler is ready for the next trip into the wild, or even just to the mall. Read on to see how to check and maintain your Wrangler at the trail's end.
This article applies to the Jeep Wrangler JK (2007-Present).
The harsh off-road environment stresses fluids and subjects undercarriage components to rock strikes and immersion damage. After off-roading, dirt and mud must be removed so you can check for fluid leaks and damage. Hose down the wheels, wheel wells and undercarriage to remove the mud. It's also critically important to clean the suspension and chassis in the winter, as frozen mud and muck can act like a rock; jamming up springs and breaking moving parts. Use caution with a pressure washer, as the high pressure can damage cooling fins, force water past seals and wash grease from the brake pads. Many owners find that running a lawn sprinkler under the Wrangler for a few hours does an effective job of loosening and clearing mud.

Materials Needed
- Garden hose with sprayer
- Tire repair plug kit
- Socket wrench set
- Engine air filter
- Flashlight
- Mechanic's gloves
Step 1 – Inspect the tires
All-terrain tires are equipped with steel belts that protect the tread face, but the sidewalls are constructed only of polyester radial plys. When crossing rocky terrain, always attempt to center your tires on rocks so that the steel belts take the deformation. When not centered on a rock, tire sidewall damage can result because the sidewall is pinched or compressed between the rock and the wheel rim. This can cause cracks and weak spots that result in blisters. Sidewall blisters will grow progressively larger as the plys weaken.
Hose the Wrangler's tires clean and look for torn tread blocks, punctures and sidewall damage. Make sure to check the inner sidewalls as well. You can repair tread punctures with a tire plug kit, but a sidewall damaged tire should be replaced with the spare. Then re-inflate the tires to your on-road pressure. For a comprehensive review of on-board air compressors, see the related article Portable Air Compressor Reviews.
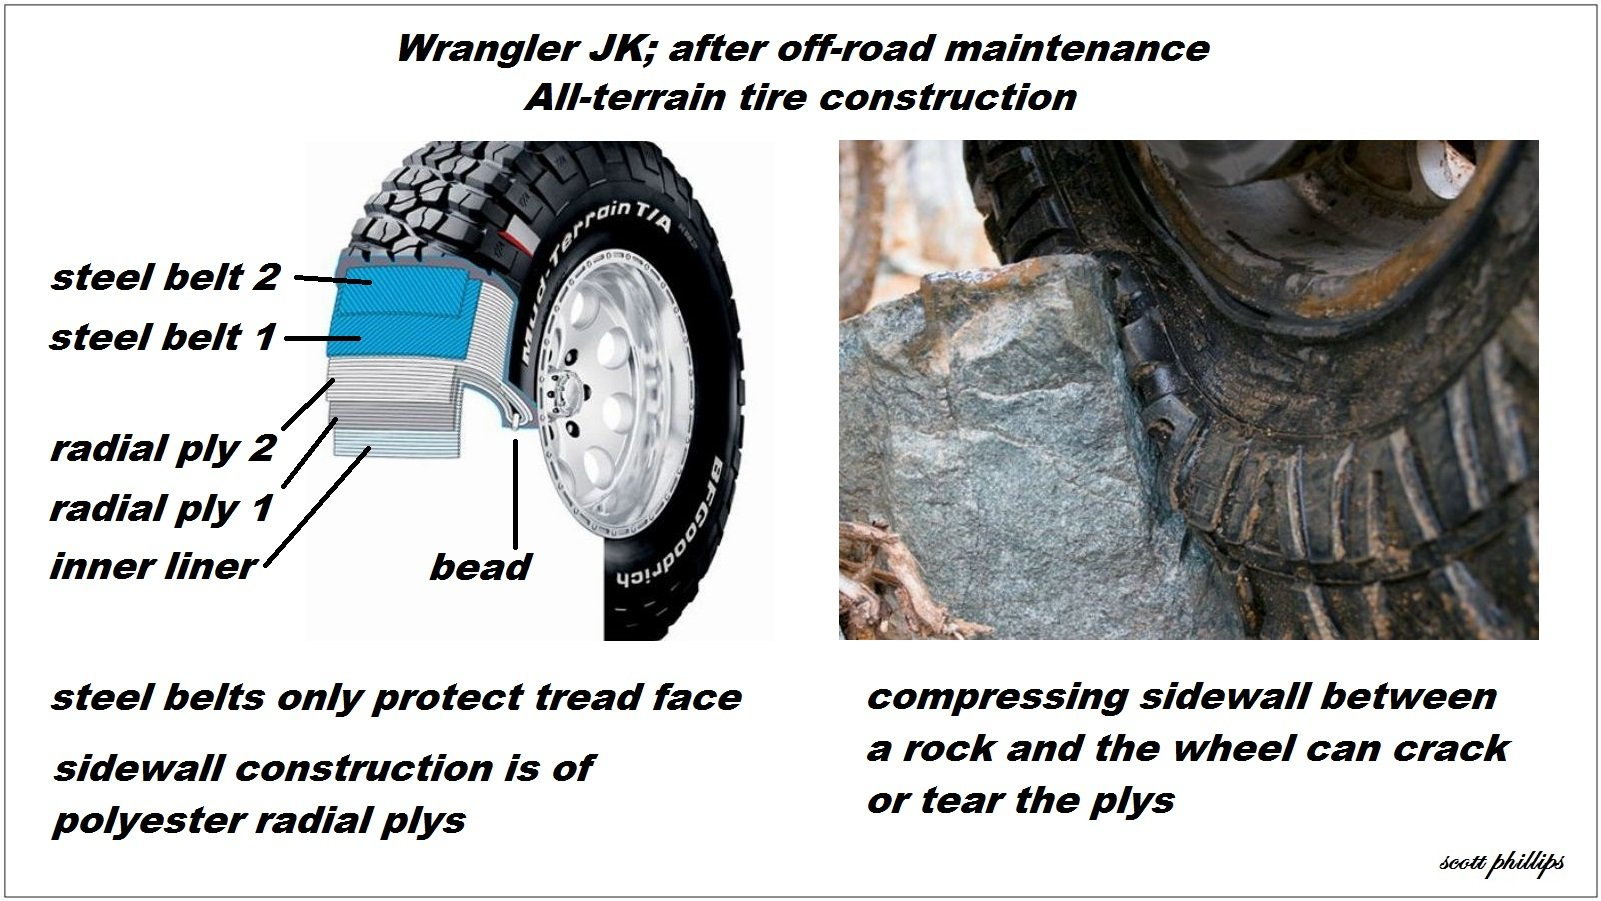
Figure 1. All-terrain tire construction. 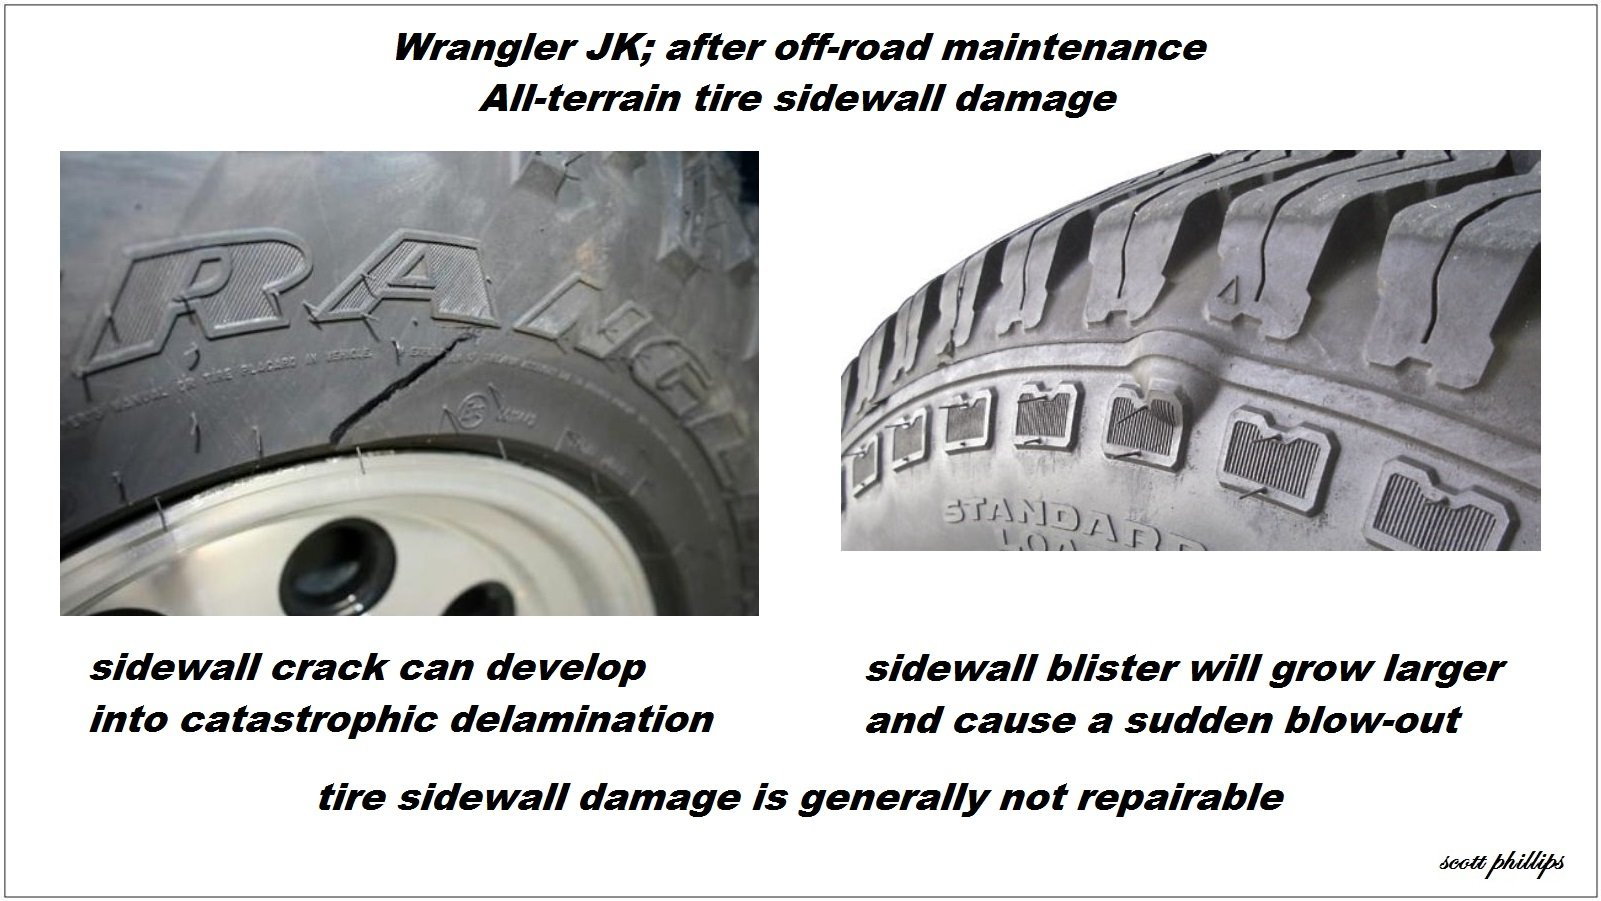
Figure 2. Tire sidewall damage.
Pro Tip
All sidewall damage is dangerous because the tire can suddenly delaminate or blow-out on the highway, causing sudden loss of control and very often a rollover crash.
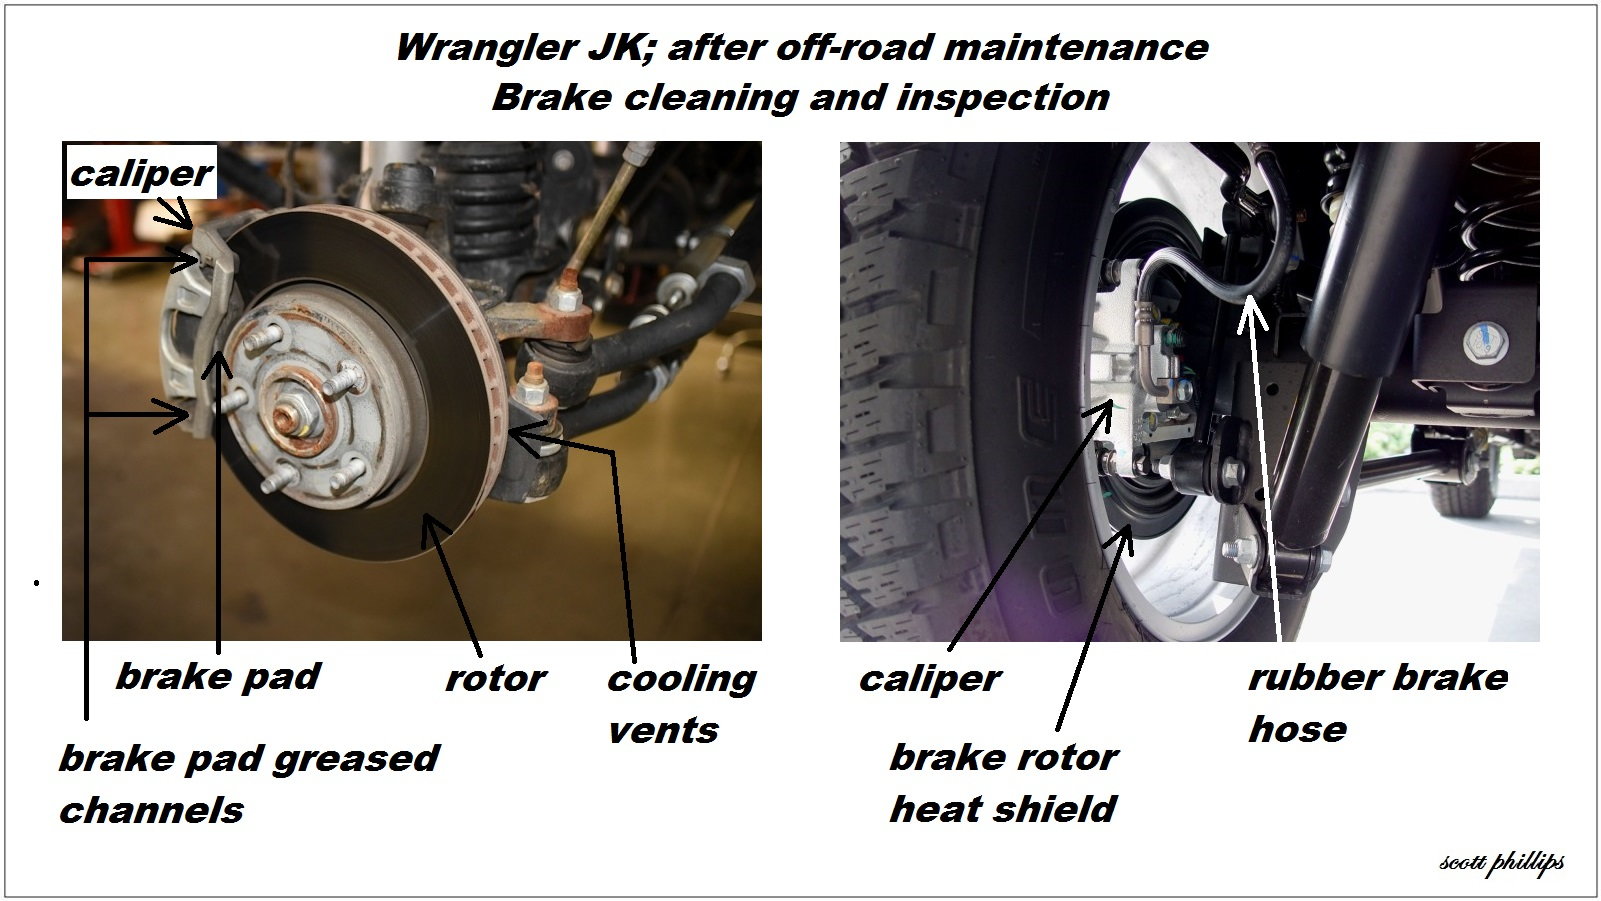
Step 2 – Inspect the brakes
- Avoid high pressure spray on the brake calipers, as it can wash the grease off the brake pad channels.
- Clean the calipers and check the hose connections for leaks.
- Insure that both sides of the brake rotors are cleaned as well as the rotor cooling vents.
- Check that no stones are jammed between the rotors and heat shields.
- Check the rubber brake hoses for cracks and leaks.
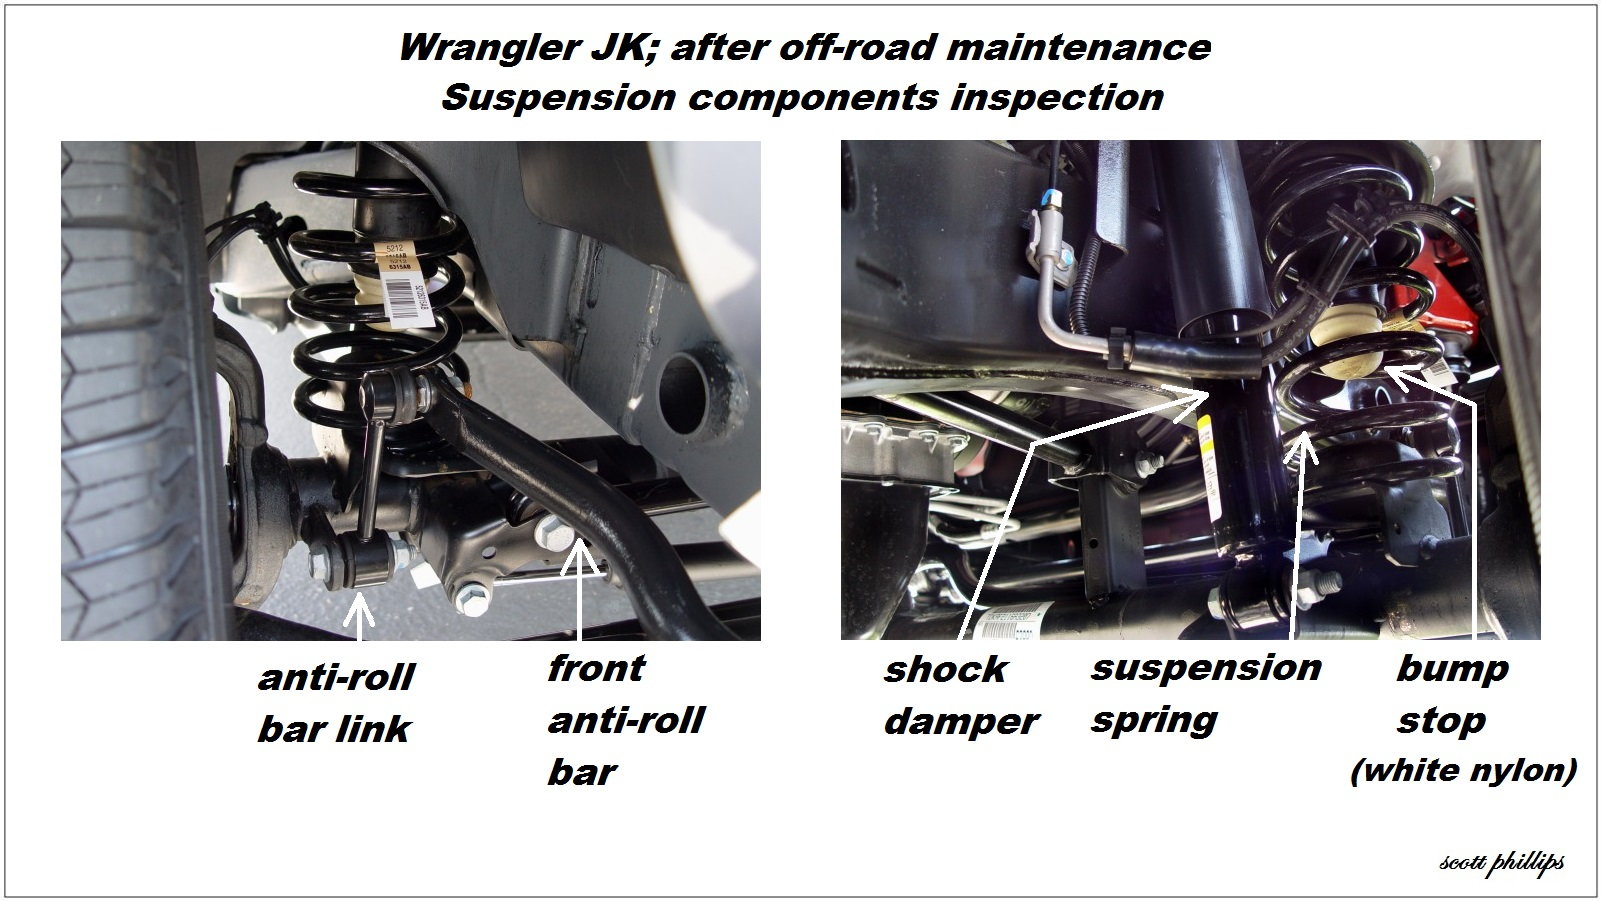
Step 3 – Reconnect and check suspension components
- Reconnect the front anti-roll bar links.
- Look for oil leaks on the lower bodies of the shock dampers.
- Check for broken suspension springs.
- Check that the white nylon bump stops are in place and not deformed.
- Look for loose, bent, or broken suspension parts.
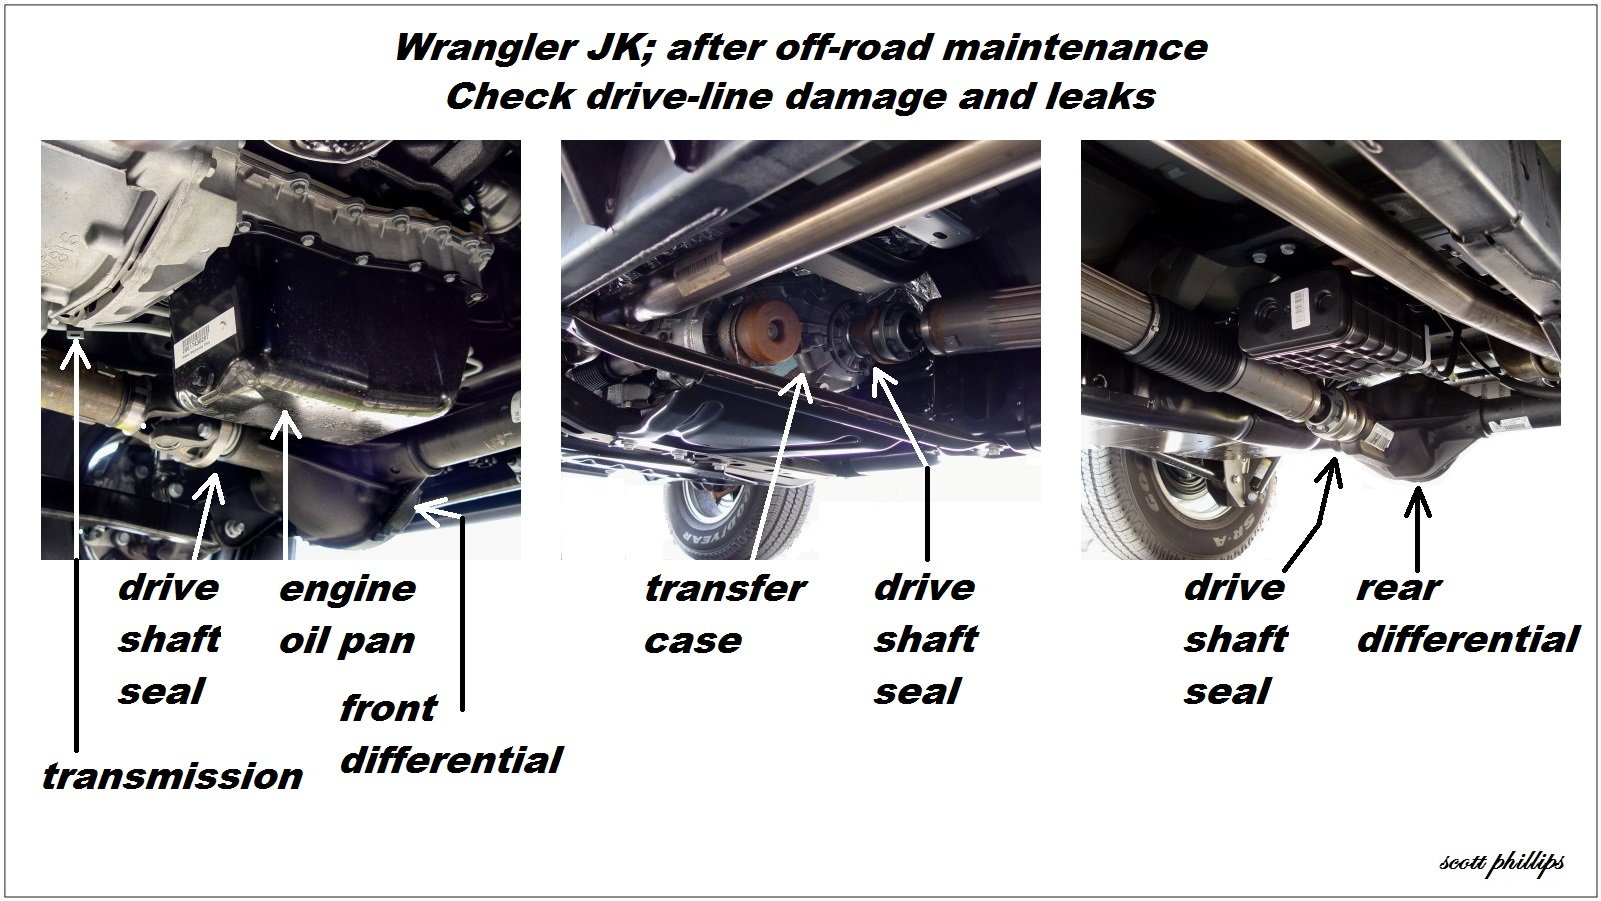
Step 4 – Check for leaks and damage in driveline components
- Check the engine oil pan for scrapes, dents, and oil leaks.
- Check the transfer case for damage and leaks.
- Check the differentials for damage and leaks.
- Check the drive shafts for damage and drive shaft seals for leaks.
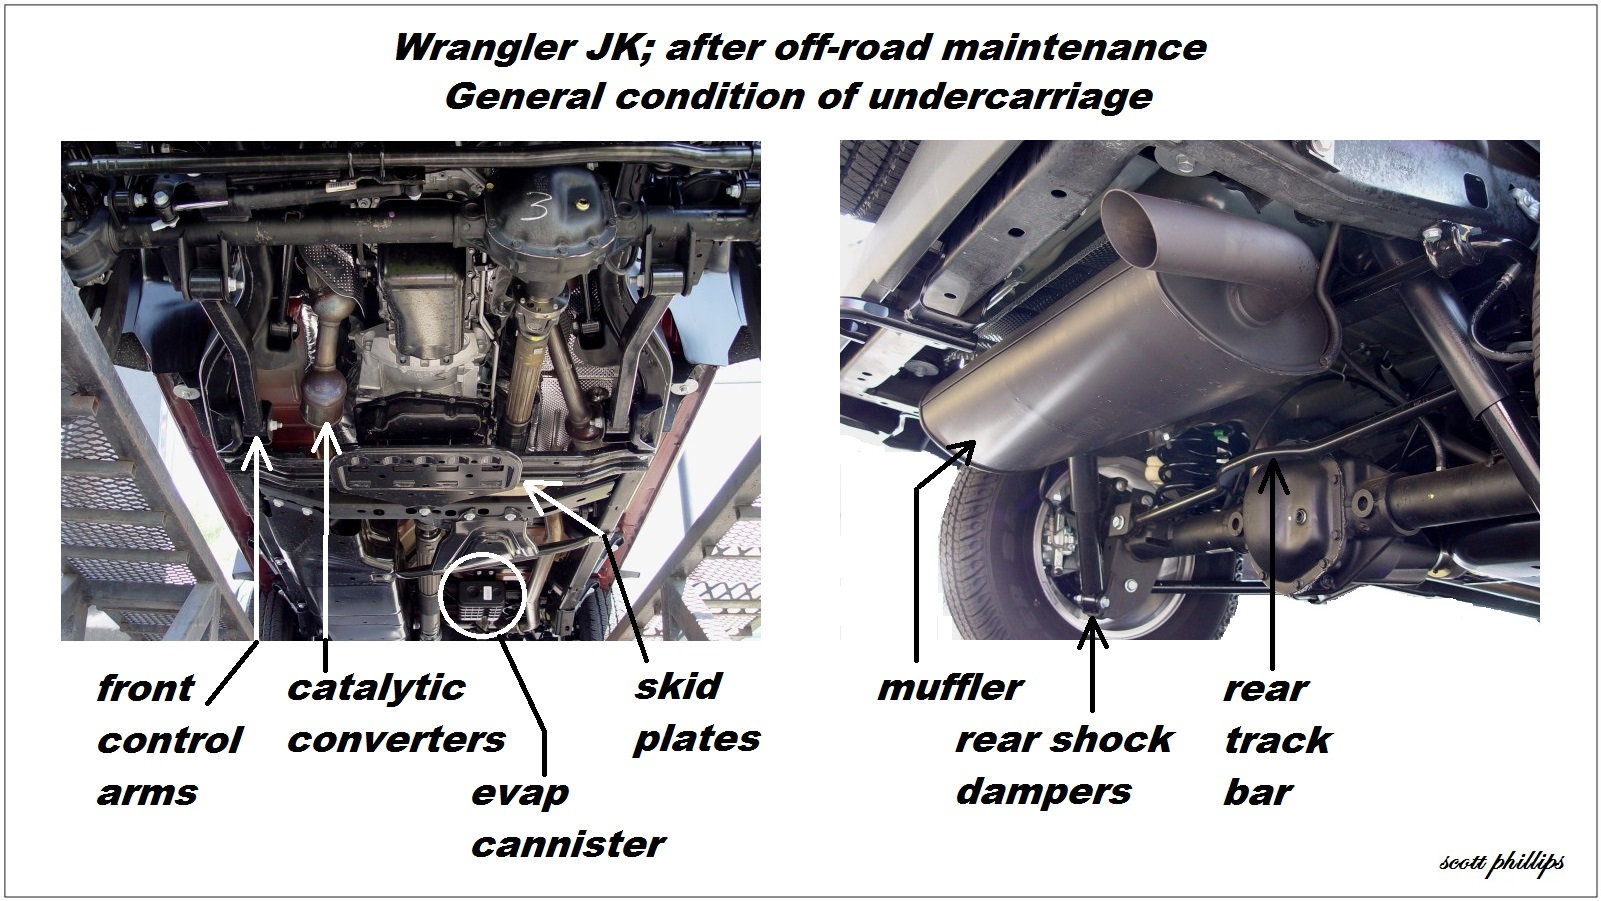
Step 5 – General condition of undercarriage
- Look for loose or bent suspension control arms.
- Check the catalytic converters for security.
- Check for damage to the EVAP canister.
- Look for scrapes and dents in the skid plates.
- Check for holes in the muffler.
- Check the rear shock dampers for leaks and rear springs for breakage.
- Check the rear track bar for security.
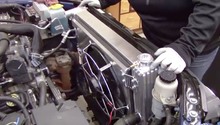
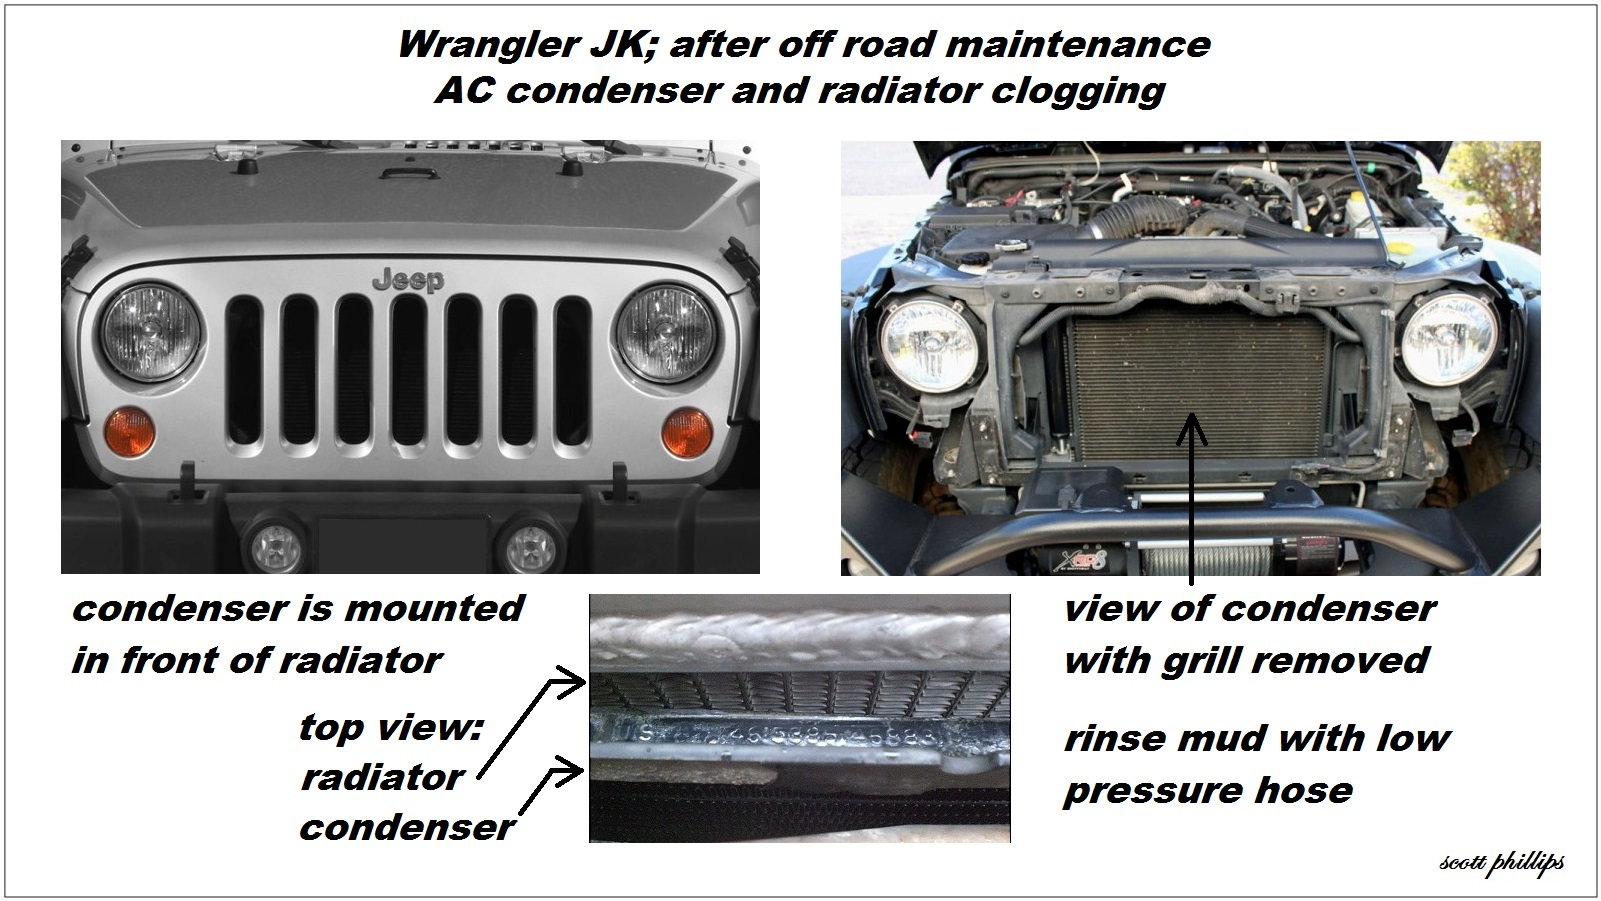
Step 6 – Rinse mud from the A/C condenser and radiator
Mud clogging the fine cooling fins of the condenser and radiator can lead to rapid overheating. The condenser is mounted in front of the radiator, but dirt will pass through to both. Avoid using a pressure washer, as it will bend the delicate cooling fins.
- Allow the Wrangler to cool.
- Rinse the condenser and radiator from both sides with a low pressure hose until the water runs clear.
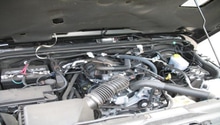
Step 7 – Check or replace the engine air filter
Trail dust and dirt can quickly clog the Wrangler's engine air filter. To check and change the filter, see the related article How to Replace Air Filter.
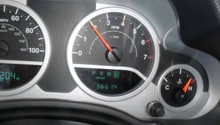
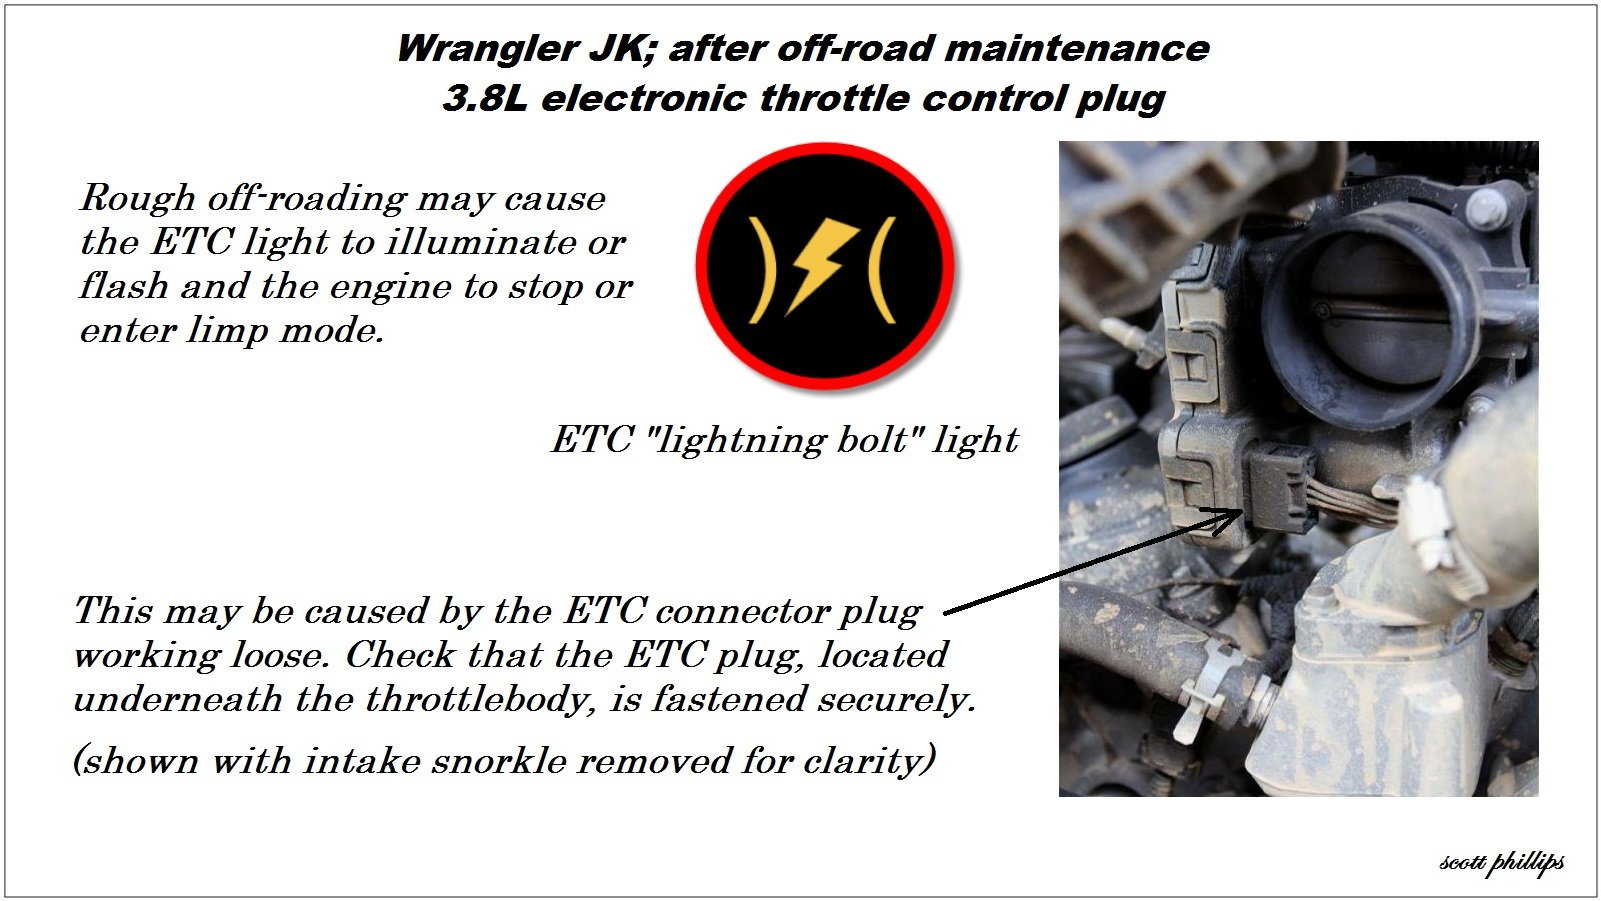
Step 8 – Check electronic throttle control plug (3.8L engine)
After rough off-roading, the electronic throttle control (lightning bolt light) may illuminate or flash and the engine may stop or enter limp mode. This is often because the ETC connector plug, underneath the throttle body, has worked loose and simply needs to be reconnected.
Related Discussion
- After Mudding Maintenance - JK-Forum.com