Jeep Wrangler JK: How to Repair Tailgate Rattle/Clunk
Is your tailgate driving you crazy by making a rattling or clunking noise? This article will guide you through the process of eliminating that annoying, endless noise.
This article applies to the Jeep Wrangler JK (2007-Present).
Interior rattles are terrible. They annoy you to no end while you're driving, and are seemingly impossible to track down. Fortunately for you, the fine folks of JK-Forum.com have found the common sources of rattles. With the information contained in this guide, you'll be one step closer to peace and quiet for the long drive home.

Materials Needed
- Black electrical tape or silicone
- Torque driver
- Torque wrench
- Common size sockets and driver bits
Step 1 – Check the spare tire and tailgate bumper
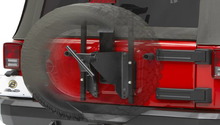
Many Jeep owners notice a rattling noise when driving over bumps or rough terrain coming from the tailgate area. First, check your spare tire by lifting up on it while the tailgate is closed. If you hear a click, feel slack or movement, tighten down the spare; the lug nuts might just have come loose. If your spare is snugly in place, the fit between the tailgate bumper and the body might be poor. You can temporarily close this gap and eliminate the rattle by using a few layers of electrical tape to snug up the fit (as shown in Figure 1), or by applying a layer of silicone.
Step 2 – Adjust the latching assembly
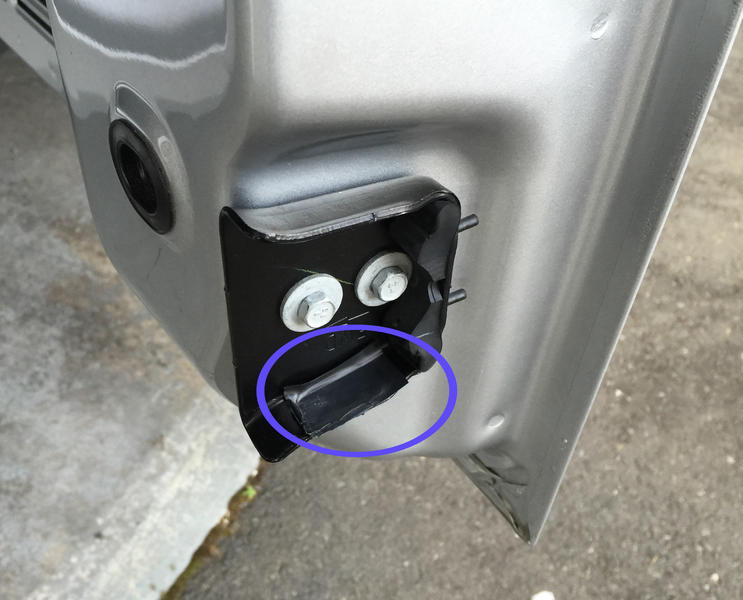
If a little tape or silicone doesn't correct the problem, some adjustment to the latching assembly might be needed. The specific parts that can be adjusted are the striker, stabilizer, and stabilizer cup. The striker is the piece of metal that the tailgate attaches to when it's closed, while the stabilizer is what supports the weight of the tailgate when it's closed. Over time, these parts can move and cause the tailgate to be out of alignment, which can cause noises.
To adjust the striker, remove the stabilizer, then insert and loosen the striker bolts. Adjust the striker up or down to center it with the latch opening, then fore or aft so the swing gate is flush to the body. Adjust the striker crossbar engagement to the latch by adding 2mm shims (if necessary) to close the gap. Tighten the striker bolts to 21 ft/lbs and reinstall the stabilizer insert.
To adjust the stabilizer, adjust the insert up or down until it is centered within the stabilizer cup, then fore or aft until it is flush with the D-pillar. Open the tailgate and tighten the bolts to 90 in/lbs. Close the tailgate and confirm that there is not excessive movement and that the tailgate closes with little effort.
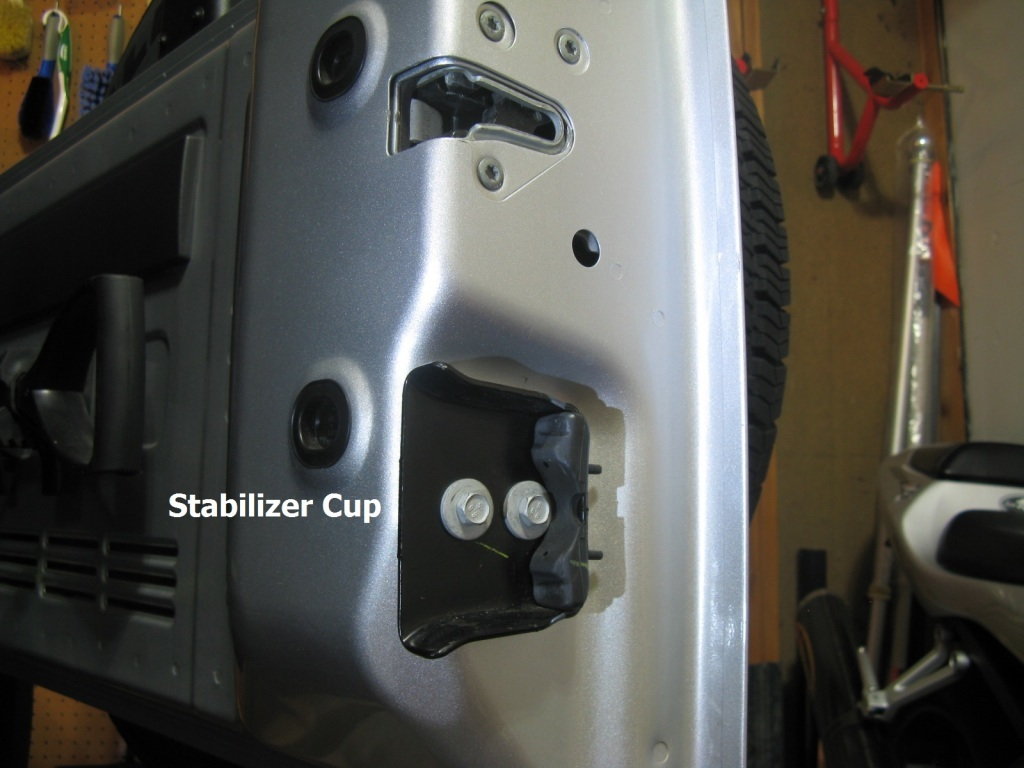
Figure 2. The stabilizer cup. 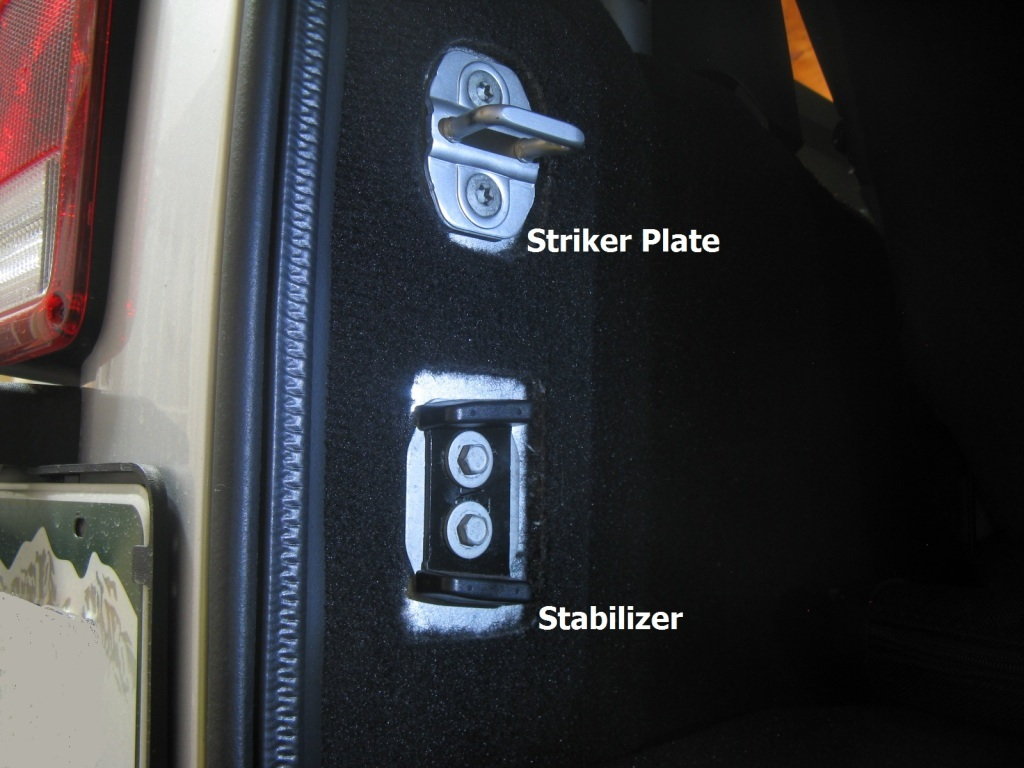
Figure 3. The striker plate and stabilizer.
Related Discussions
- Tailgate Clunk Fix - Tailgate Adjustment - JK-Forum.com
- Tailgate Rattle - One Simple Fix - JK-Forum.com