JCR Stubby Bumper With Tall Hoop Install & Review!!!
 02-25-2012, 05:03 PM
#1
JK Newbie
Thread Starter
Join Date: Dec 2011
Location: Newton, KS
Posts: 77
Likes: 0
Received 0 Likes
on
0 Posts
To start this review and install off I am going to show some pics of how well this bumper is built and how good the packaging was for shipping.
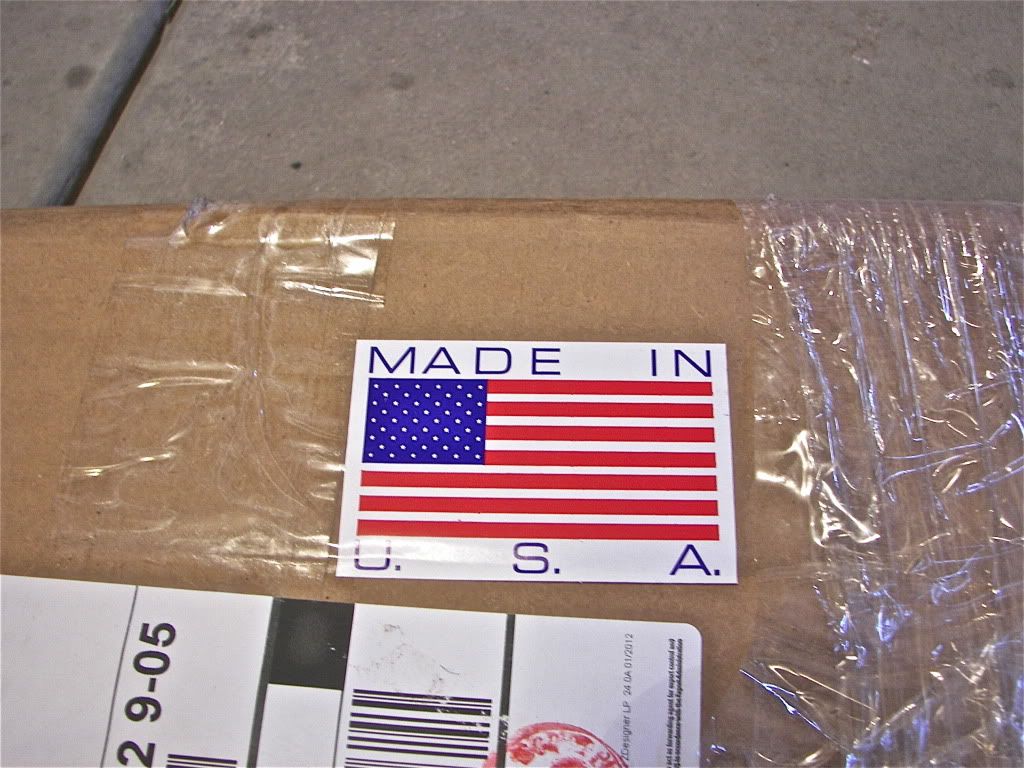
This bumper as stated on the JCR website is built in the USA and the quality of their products is second to none. The welds are clean and very straight and have great penetration into the metal.
Here are a few pics to show how this bumper arrived.
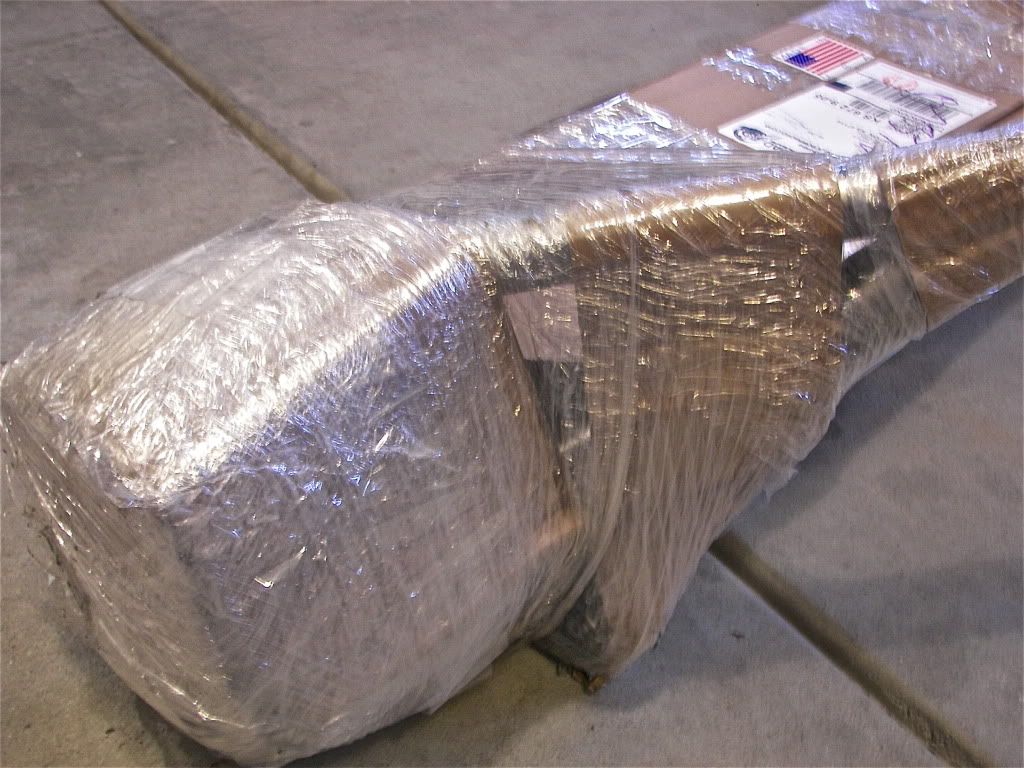
First off it came packaged in a layer of cardboard around the whole bumper plate then the ends were wrapped once more and a layer of packing was wrapped all the way around the upper hoop and lower bars for added protection then finally wrapped up in packing tape and secured by shipping wrap to keep it all together.
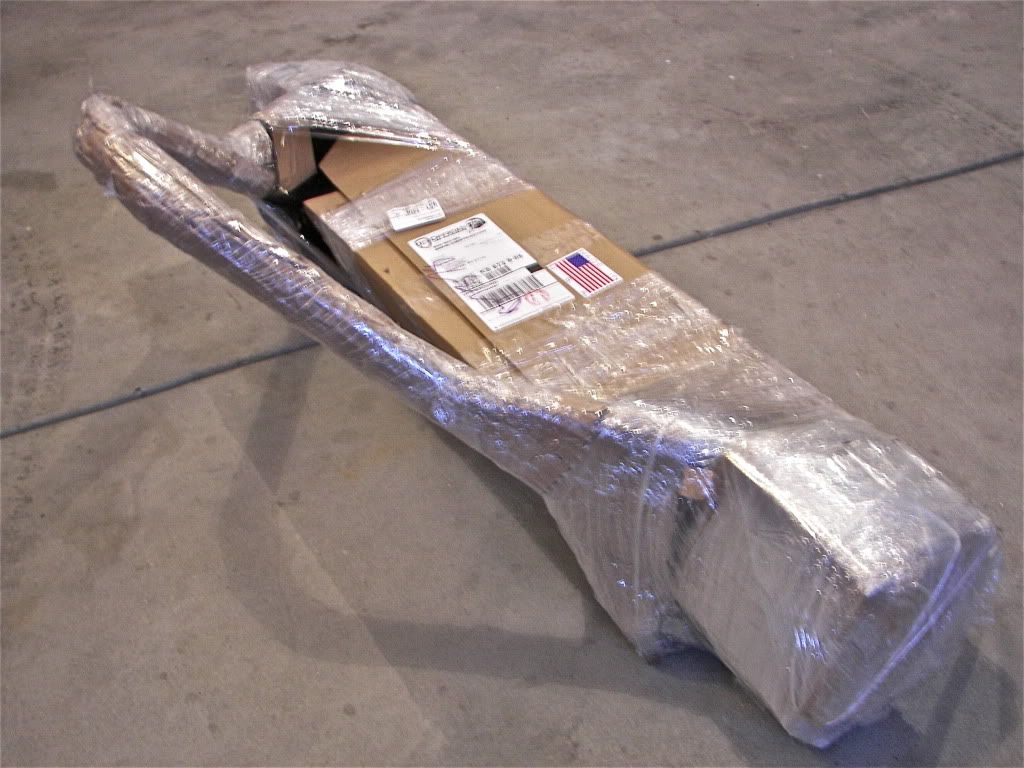
Best of all right on the package it reminds everyone that America can still make amazing products.
Now to start unpacking and seeing what's behind all the cardboard and wrap.
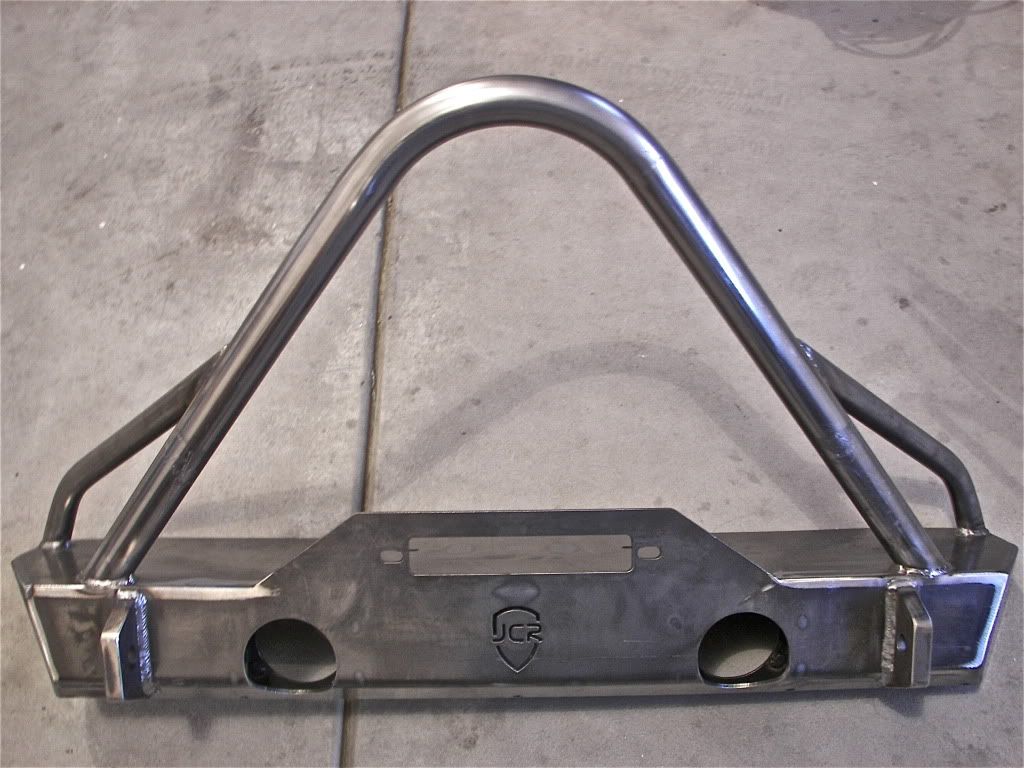
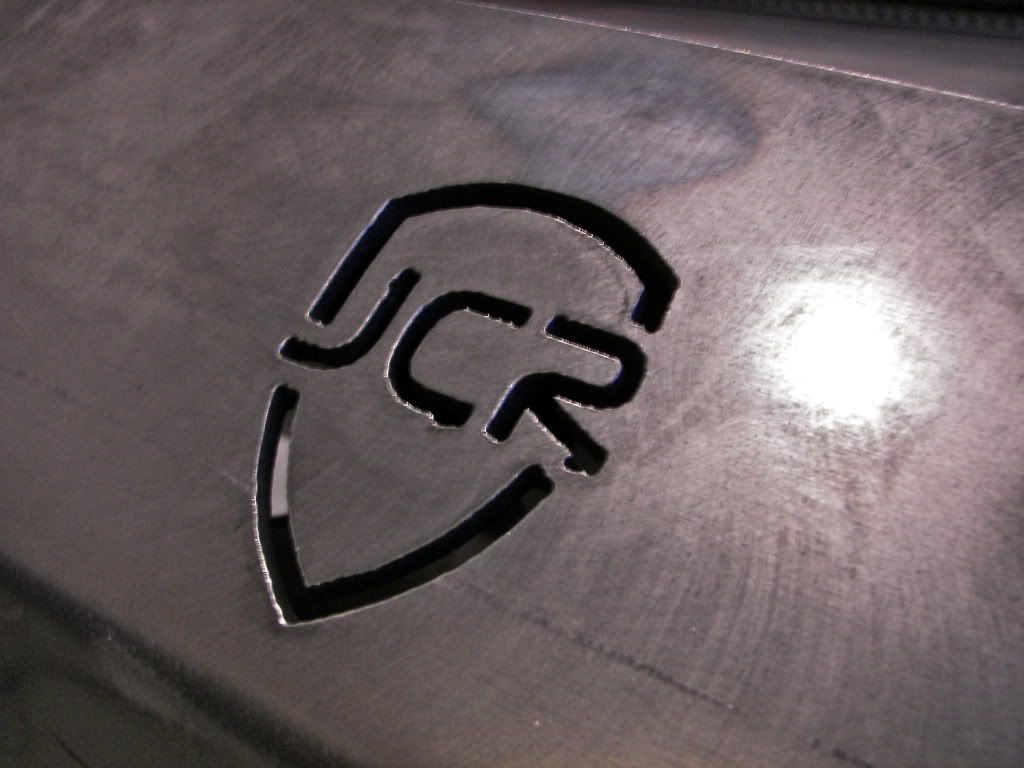
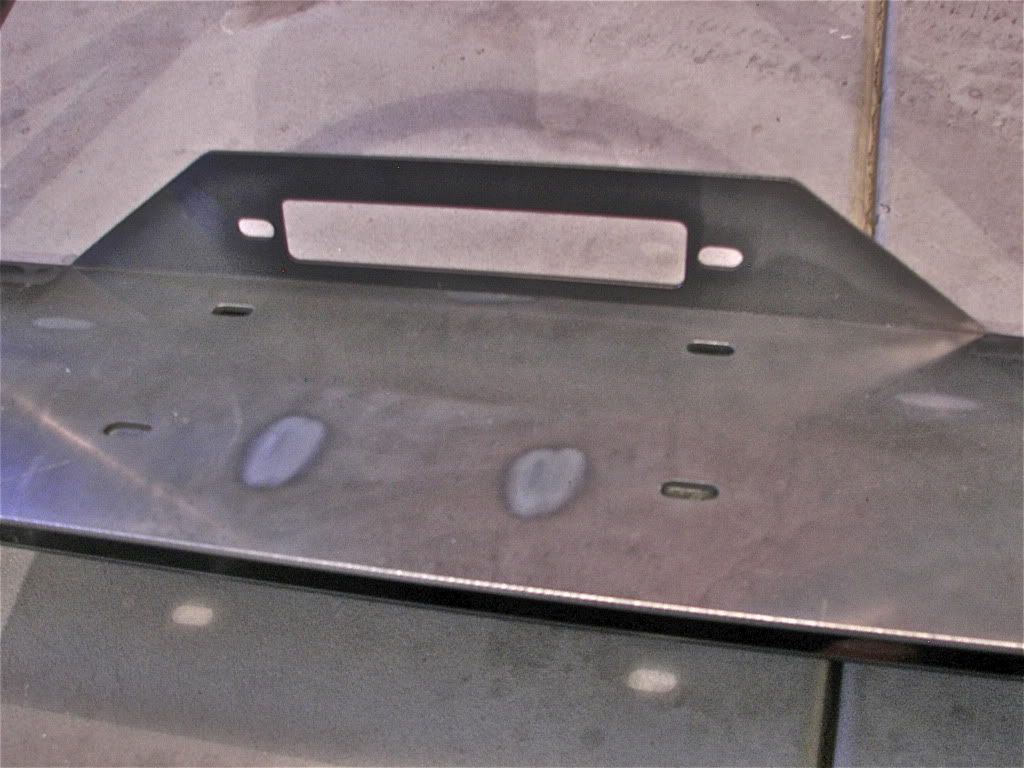
Nicely cut in logo right in the center of the bumper.
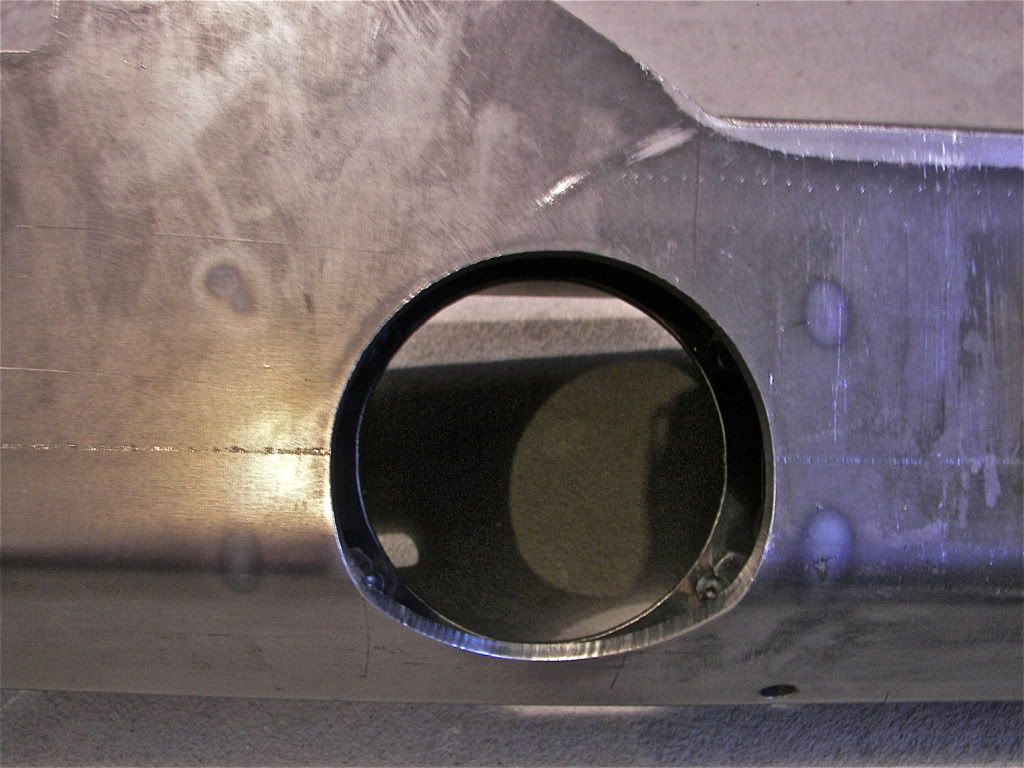
The fog light holes are very clean cuts and all the bends are extremely clean and very precise.
Now onto the d-ring mounts. They are very cleanly cut out and no burrs are left in the hole to cause fitment issues. Also the welds are very clean and have great penetration into both pieces of metal.
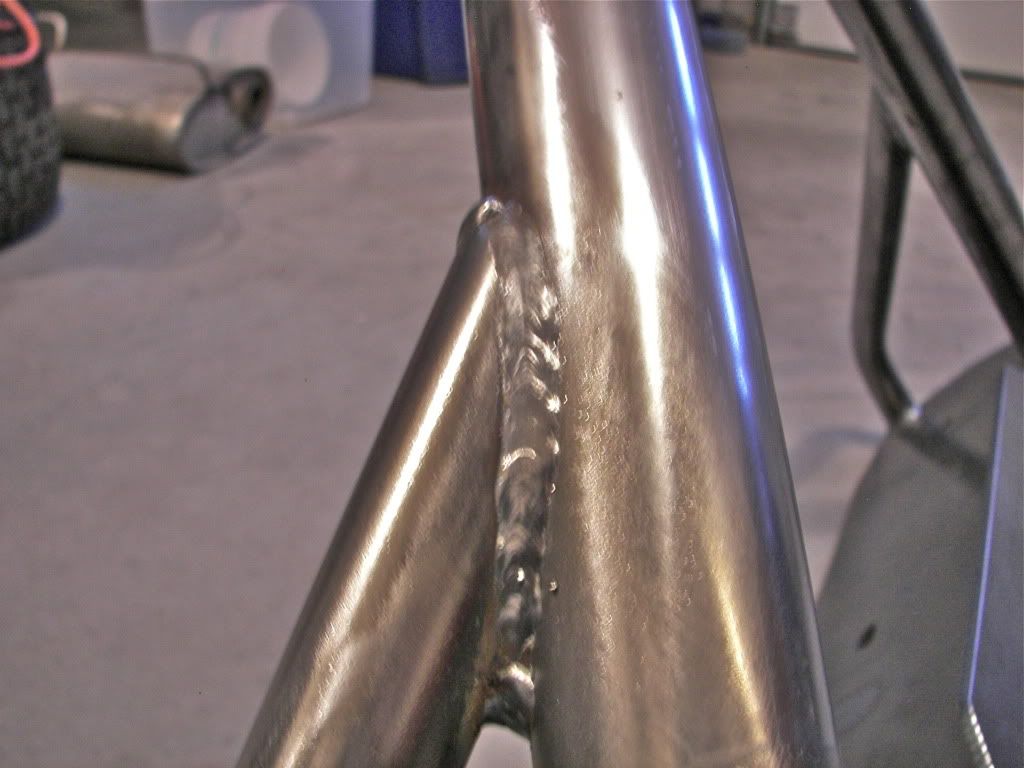
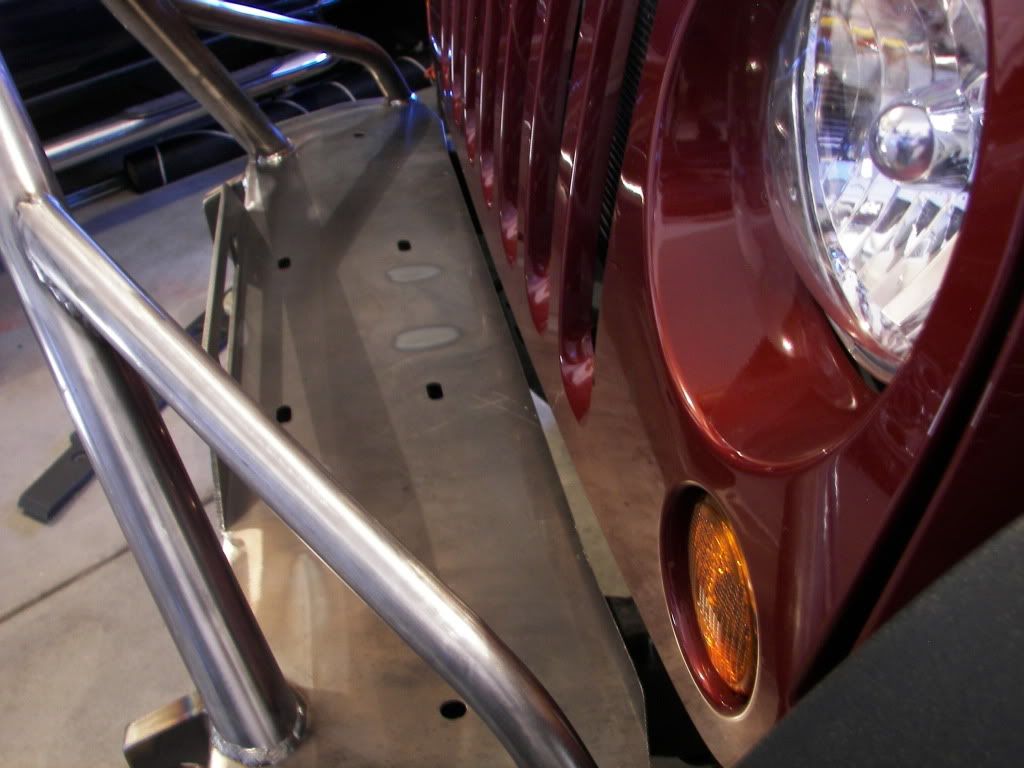
The upper hoop that I ordered with this bumper is very well bent and has no machine pinch marks or reduction of tube size do to over stressing the metal commonly seen on cheaper built products. The welds are also super clean and fitment of lower braces are top notch.
Moving onto the top plate with the winch mount and fairlead mount you can once again see how well everything lines up and how well centered everything is. I got the calipers out just to see how close this was and the mounting holes were only 0.004" apart from being perfectly in line with the rear of the plate but that is absolutely amazing. The holes are very clean and square as well as the lead holes and opening.
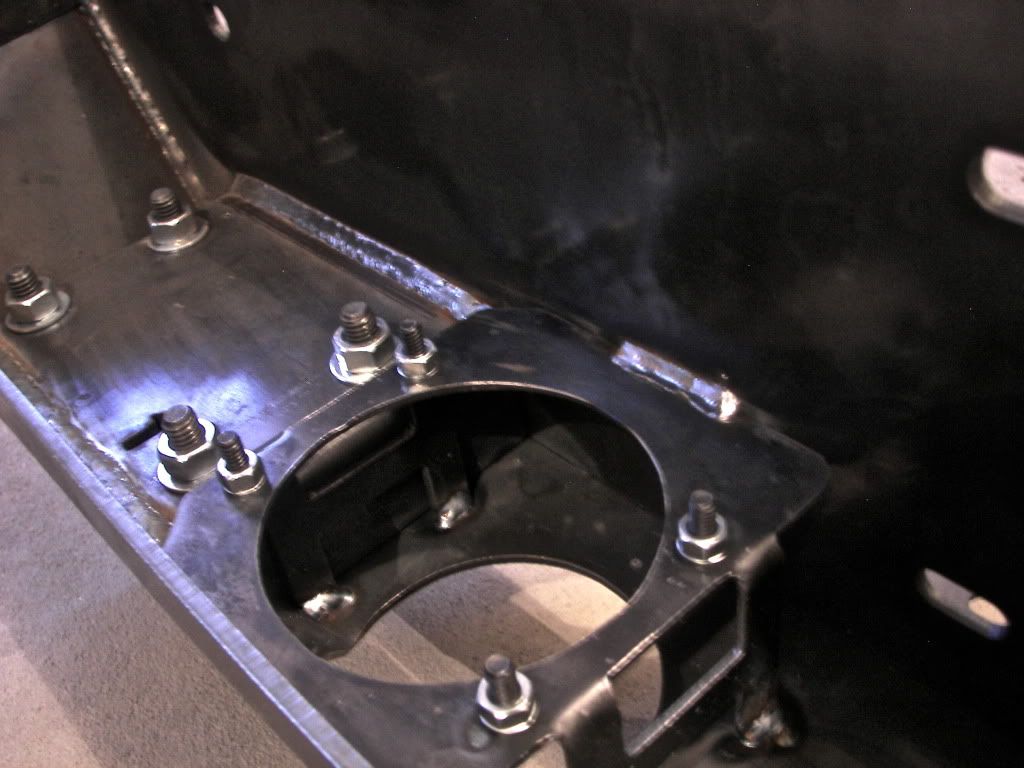
Once the bumper is flipped over to examine the underside(backside) it is clear to see how much work and bracing went into producing this very stout bumper in such a small package. No spot was left unattended to detail and quality.
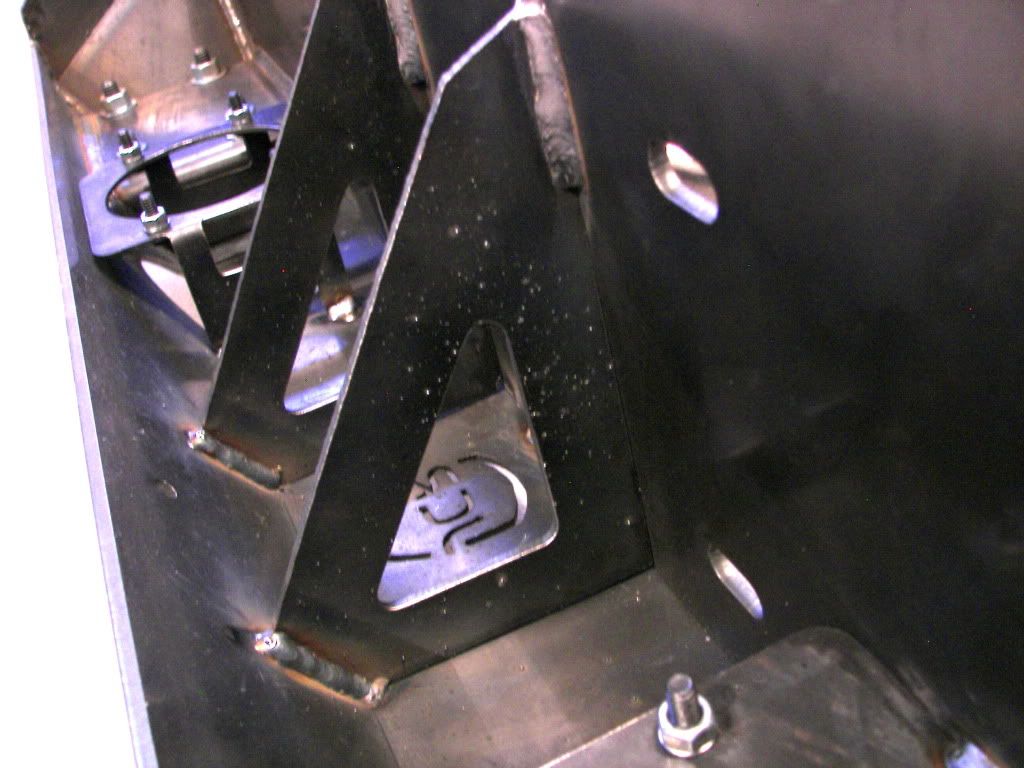
The foglight mounts from the back are very well built and precisely aligned so there are no fitment issues when installing the lights once coated.
As stated extra bracing was built into this bumper to give it great rigidity.
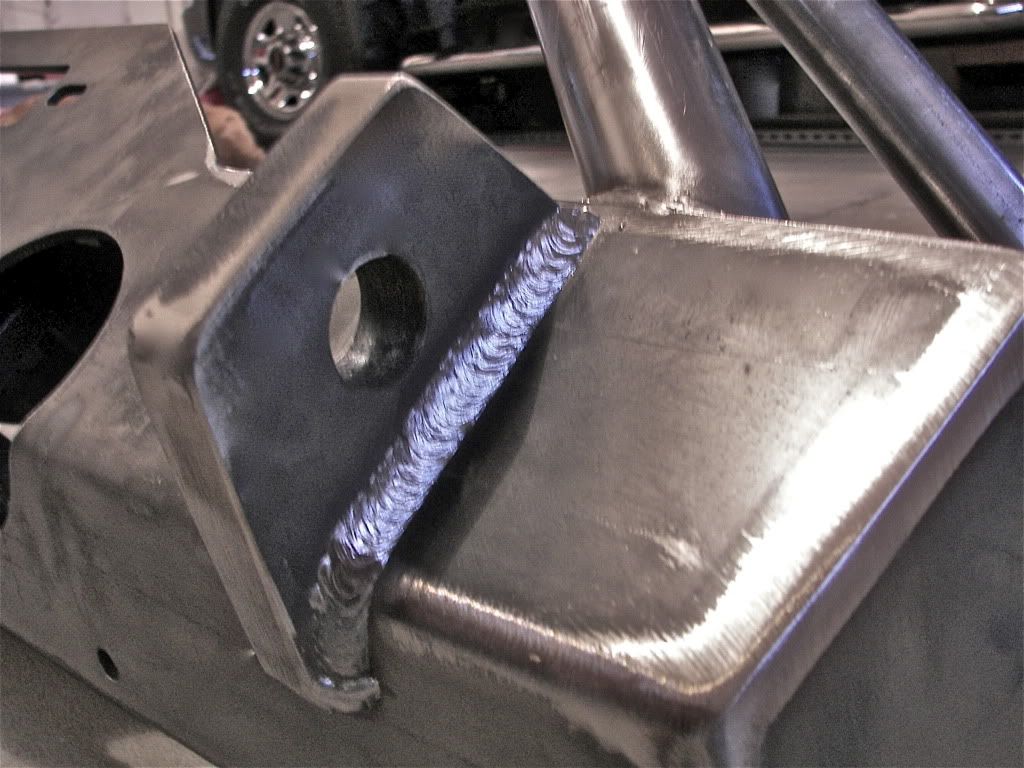
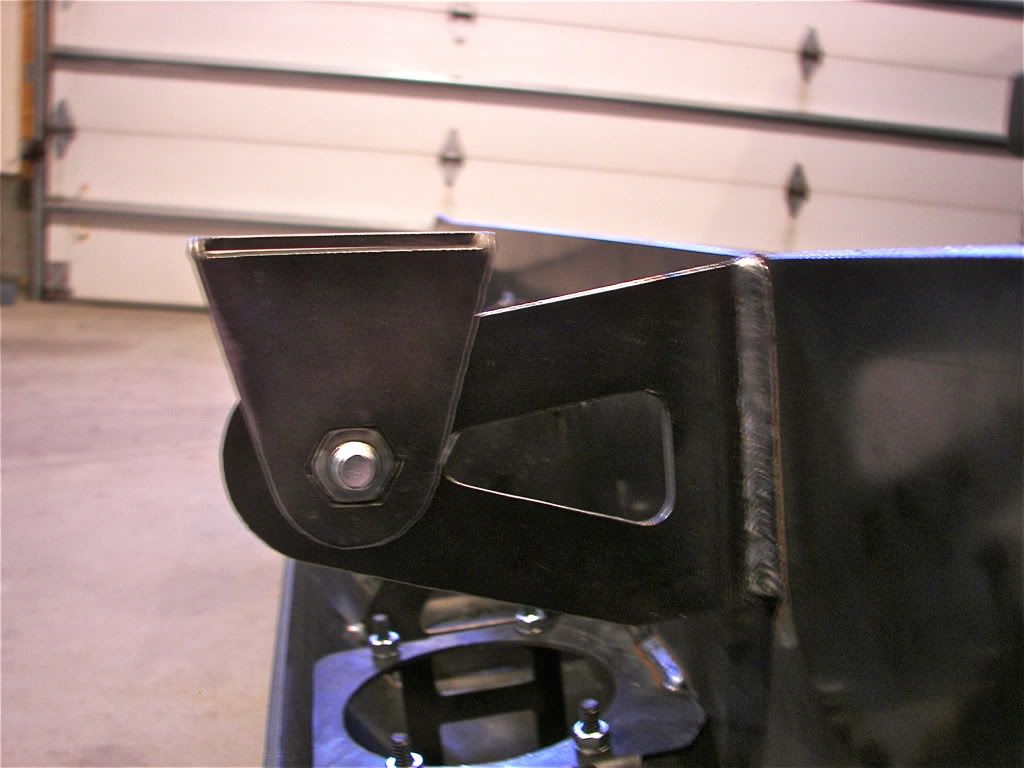
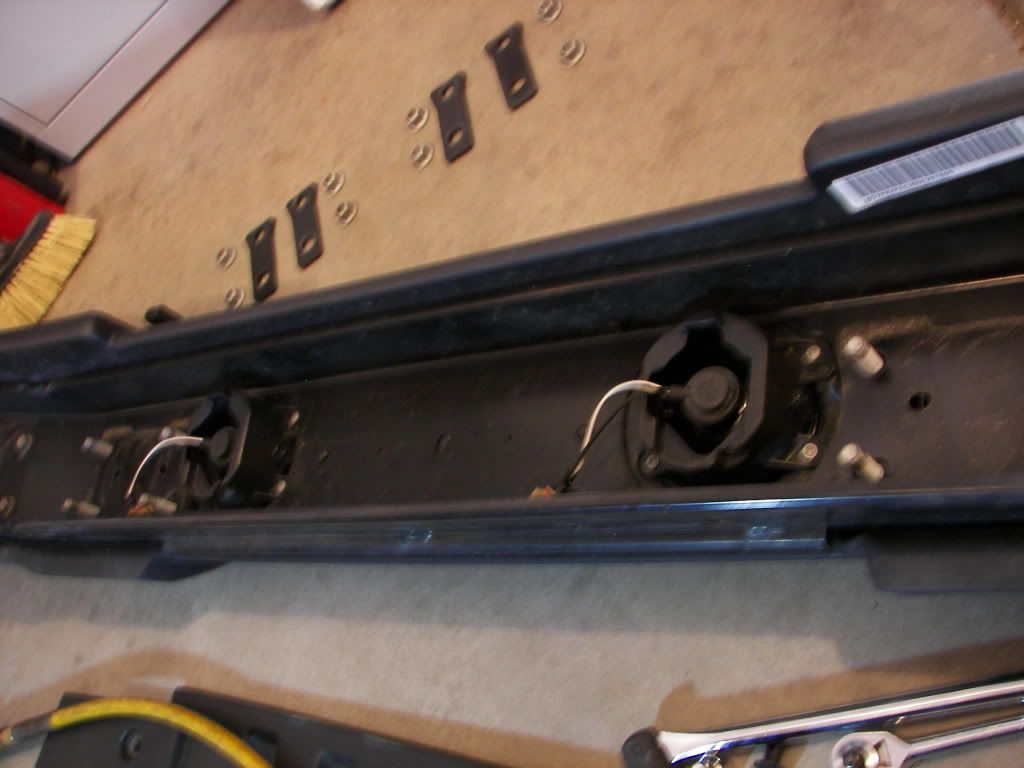
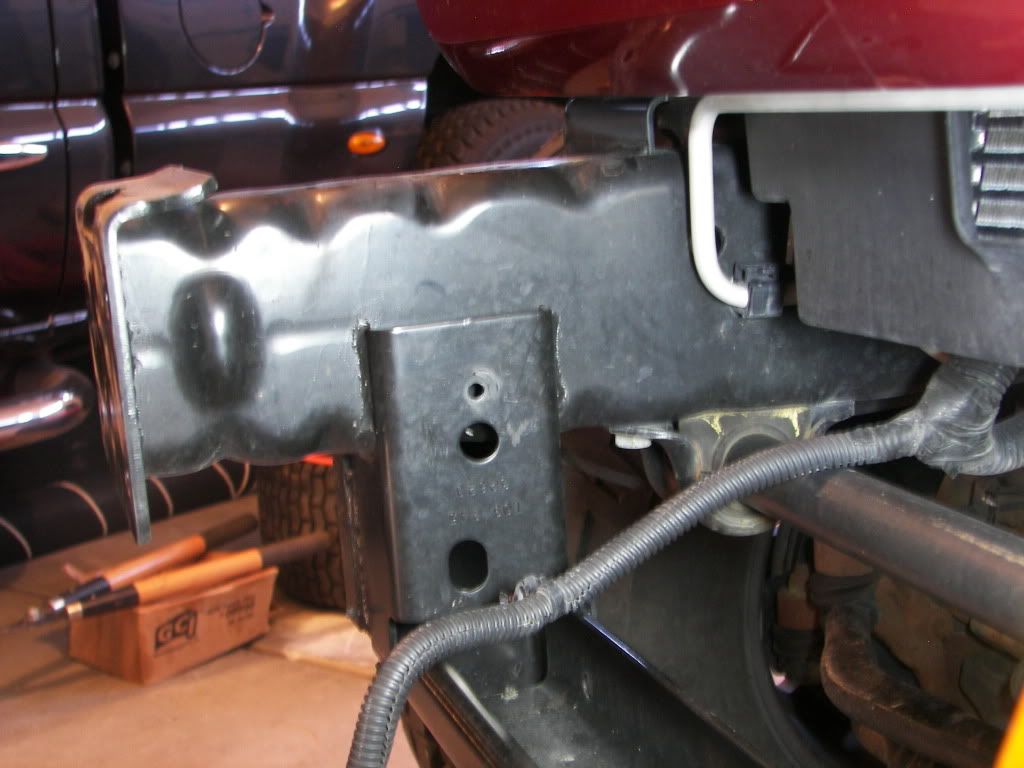
Here is a shot of the frame channel mount to align and strengthen the bumper up once installed.
The mounts for the frame horns are fully boxed in and the bolts are exactly square so once put on there is no fitment issue trying to get bolts to line up with the holes from the factory.
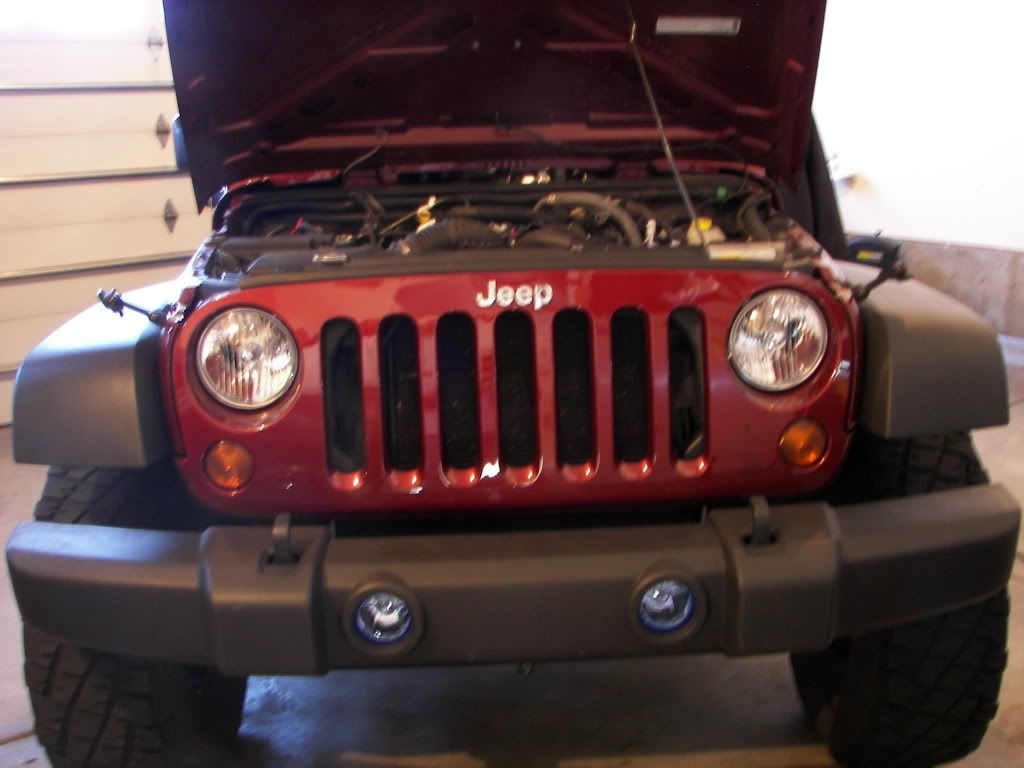
First off we start with the goofy looking plastic bumper from the factory.
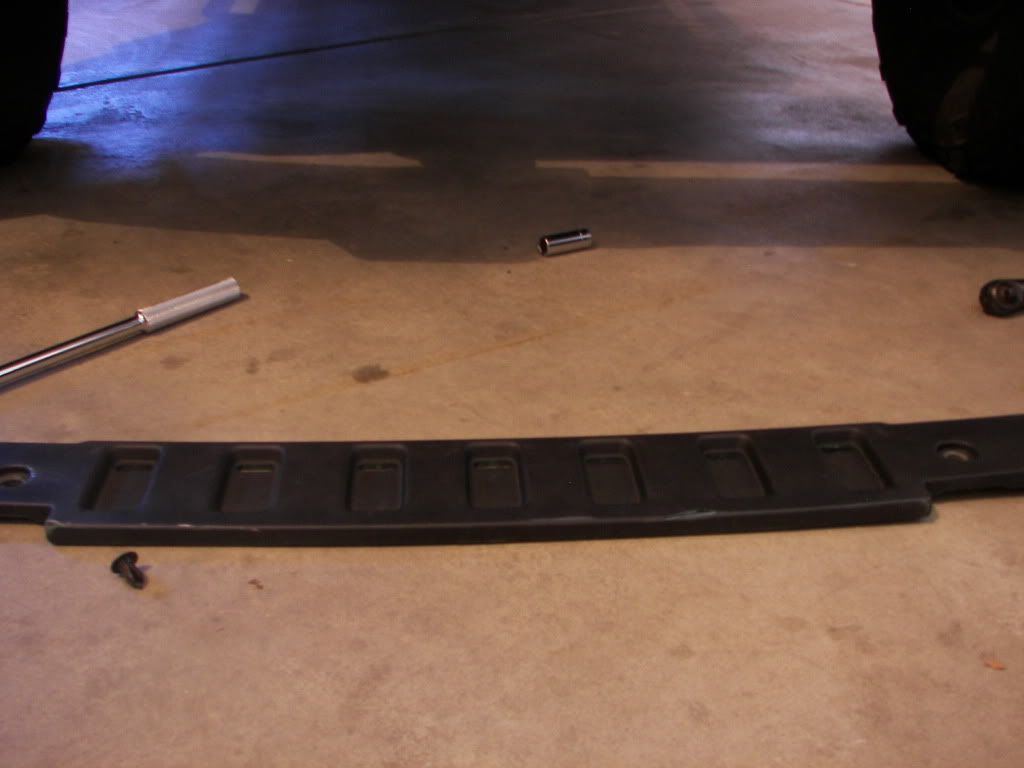
Our first step is to remover the two small screw inserts to get the small upper plate off to access the nuts on the frame horns easier. (note the lower air dam was previously removed, if it is still installed you will need to remove the plastic screws for that as well and get it out of the way.)
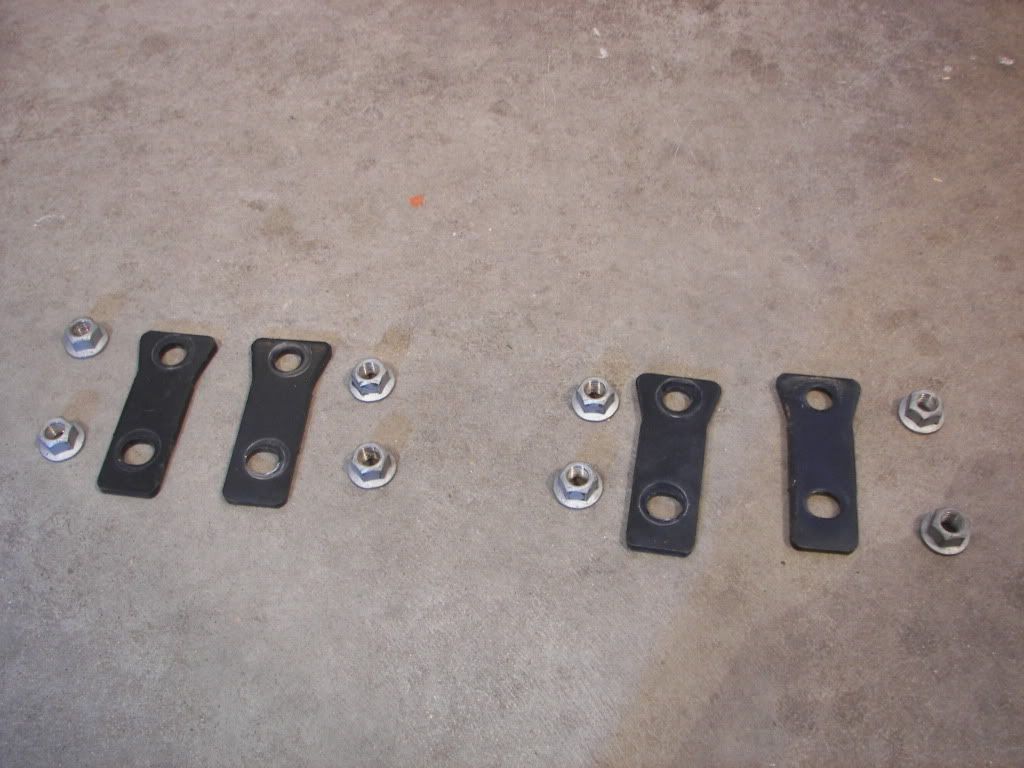
Next is to get out an 18MM deep socket and 2" in extension and ratchet and start to remove the 8 nuts and 4 plates on the frame horns to get the plastic bumper and tow hooks off. (note for quicker uninstall/install I used a 3/8" air ratchet.
Once removed the 8 nuts and 4 plates should look like this.
After they are all removed you can easily pry out the "christmas tree" clips holding the factory foglight wiring into the bumper and unplug the stock lights so the bumper can be removed. Once the bumper is off it should be laid out of the way in a safe place so it doesn't get damaged.
Here is what the factory bumper looks like from the back side.
Once the bumper is off you should have a front end that looks like this.
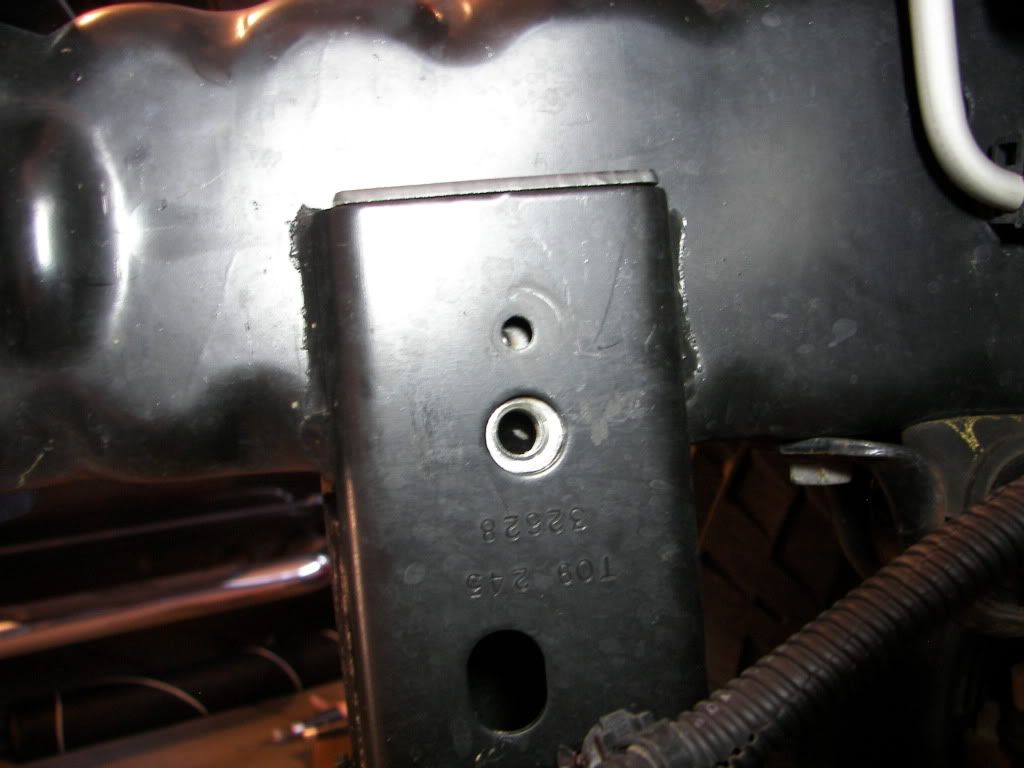
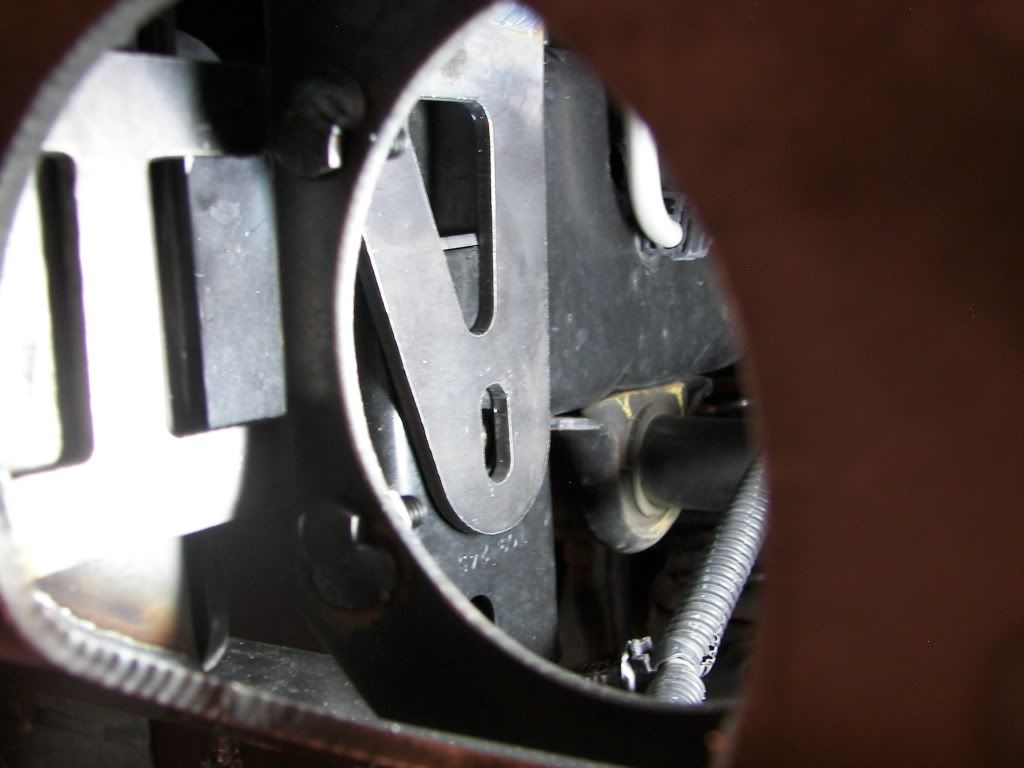
Next it is time to locate where the small frame mount will go into the pocket on the passenger side rail for later use.
Factory mount on the rail looks like this.
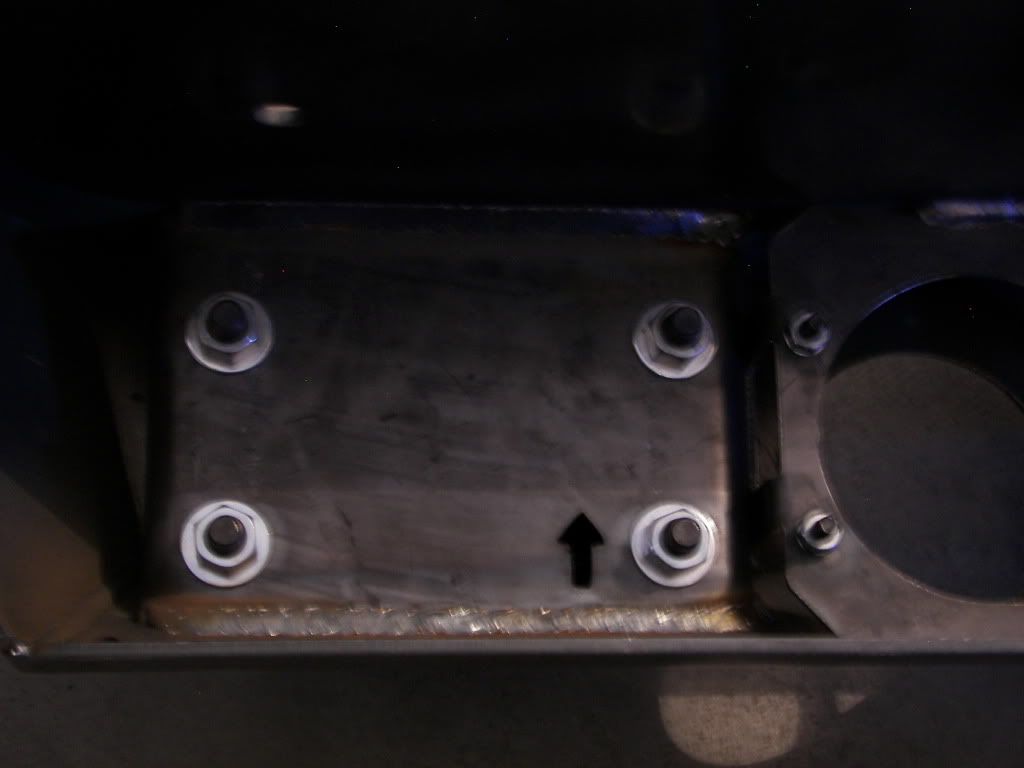
Now with the pocket plate installed. (note the bent tab on the new plate face out from the frame and sits on the lip of the pocket.)
Now it is time to mount up the new bumper and start tightening up bolts to secure it and check the fit and the new look of you jeep.
Start by removing the 4 nuts and washers on each mount and then re-installing them when the bumper is on and all the bolt studs are through the frame horns.
Once all the nuts and washers are back on and tightened up it's time to install the frame bolt and secure it into the pocket brace.
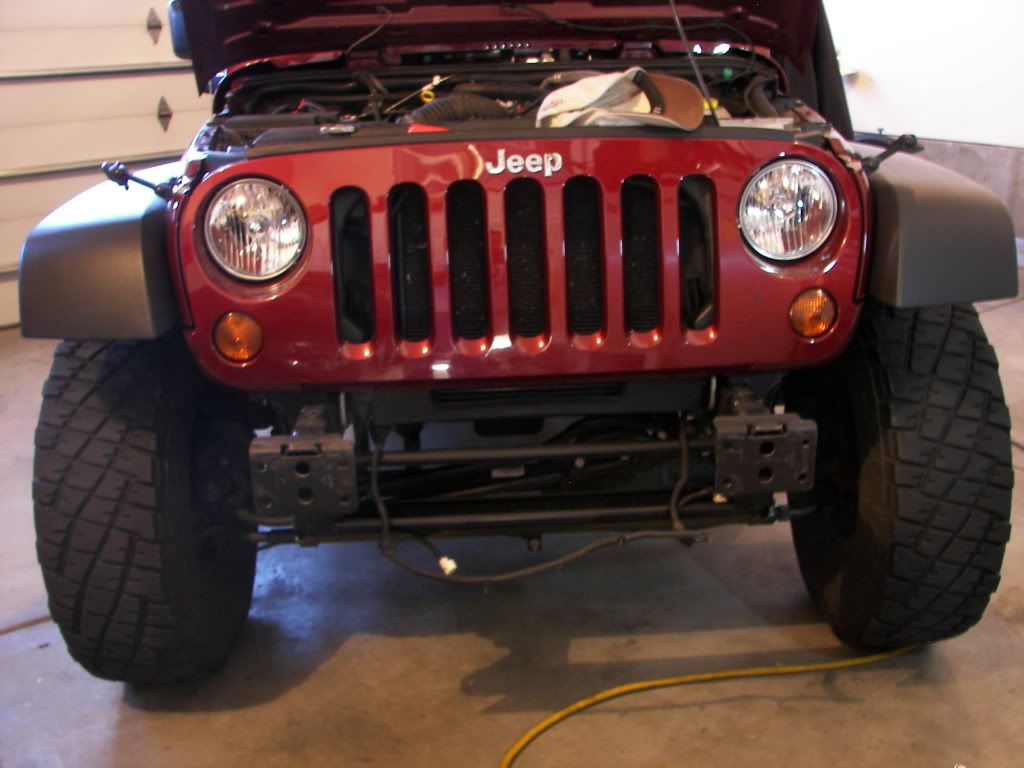
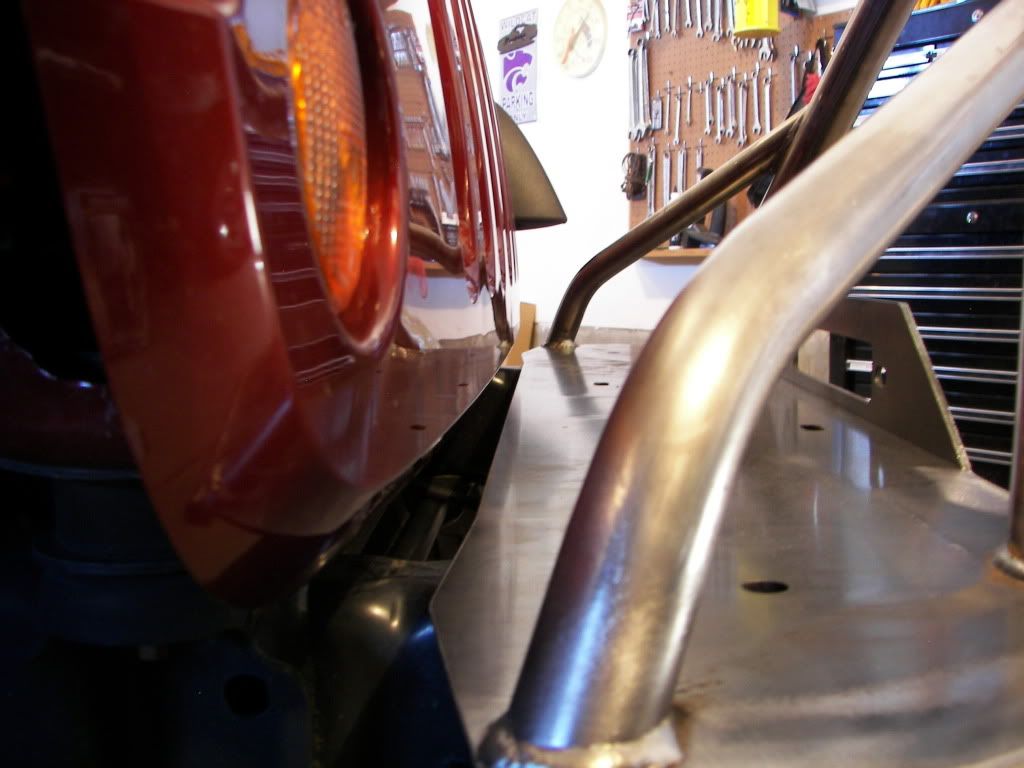
Once all the nuts are tightened up and everything is checked once again to make sure it is tight and buttoned up it's time to step back and look at your new front end.
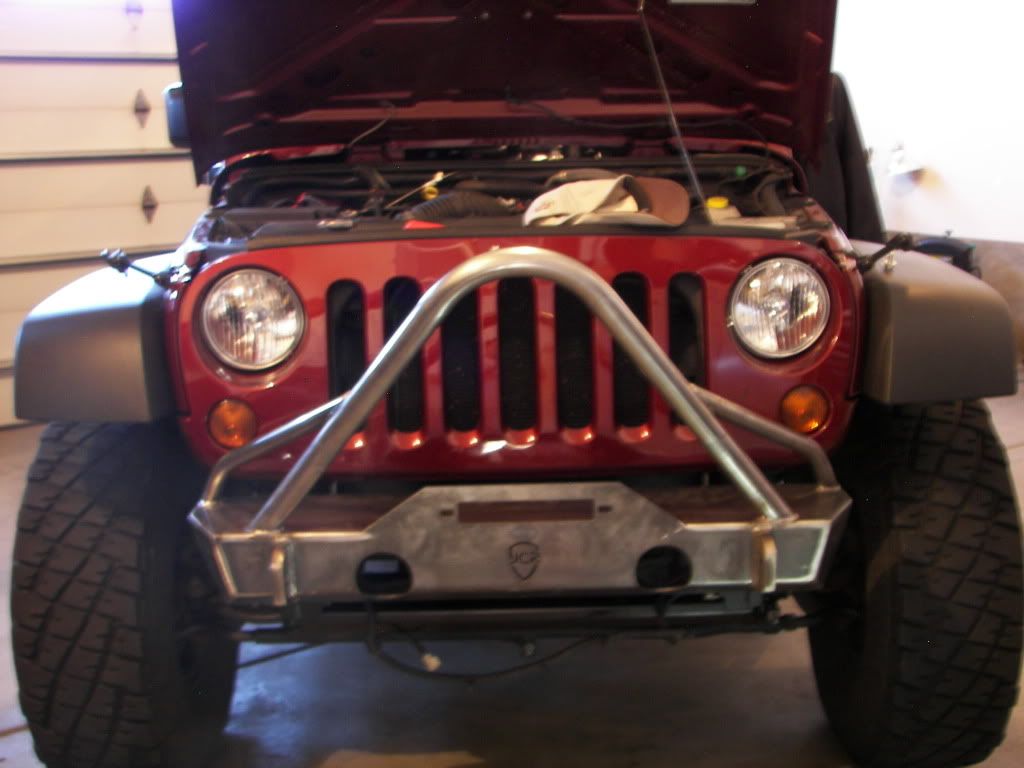
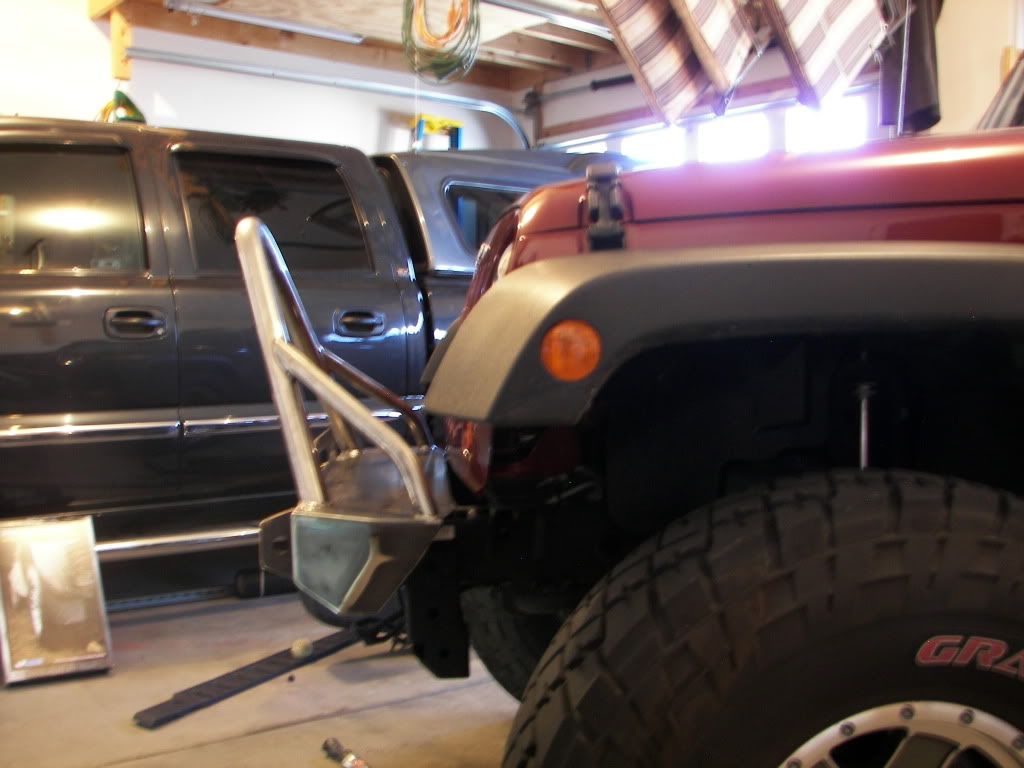
New front end looks great and gives a much more aggressive look and better approach angle to all kinds of situations.
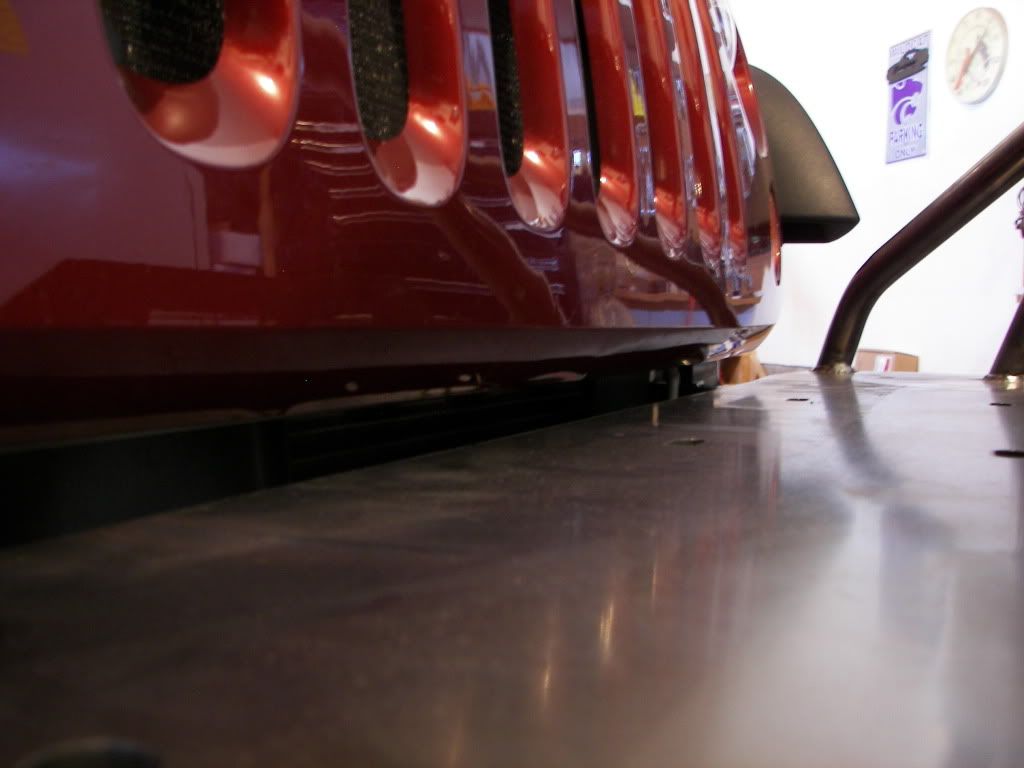
A few side shots to show the clearance between the bumper and the lower grill. There are no unsightly gaps and close quarters where the bumper will rub paint off or destroy the grill in any way.
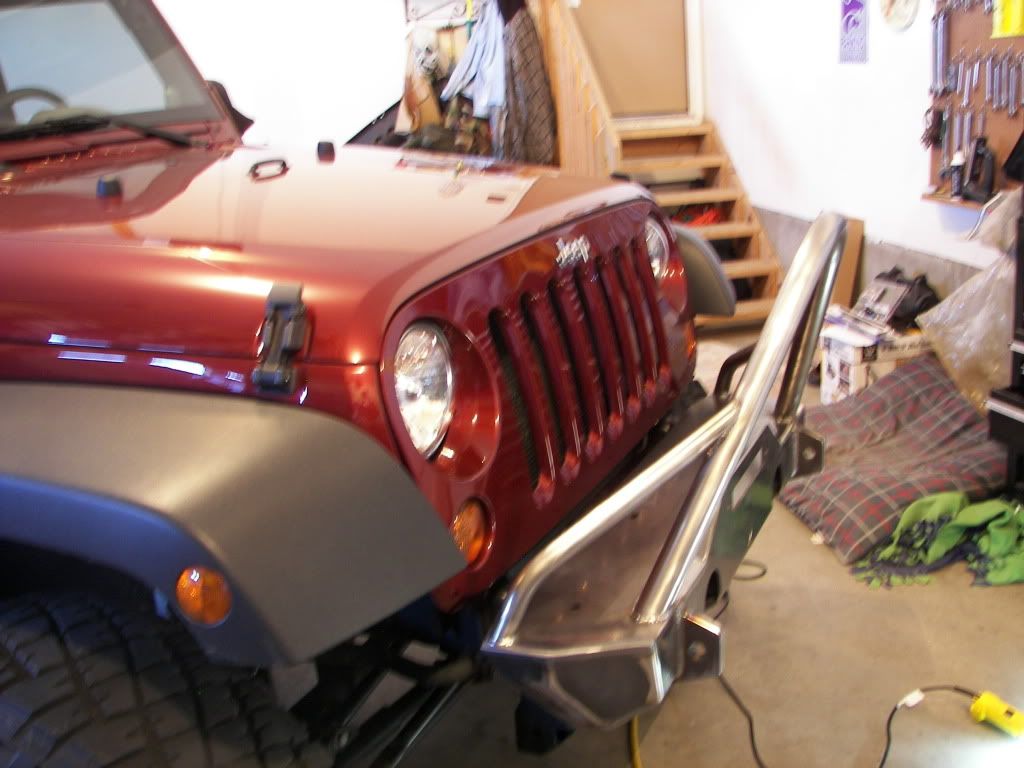
Trick photography in this picture makes it look like the bumper is not in line with the grill but it is simply the angle I took the picture at. You can see in the next couple pics that the bumper is even with the lower portion of the bumper.
This was a very easy install of an amazing product built by JCR here in the U.S. and compliments the look of the Jeep very well.
Now I did not write a full write-up as I did not install the fog lights at this time due to it coming back off in a couple of days to head to the powder coaters, but once it is back I will update with some new info and pics to show how the whole setup looks once finished.
I cannot stress enough how amazing of quality this bumper is and how easy the install was due to how precisely the bumper was built.
I hope you all enjoyed the install as much as I enjoyed installing and let me know if you all have any questions about the product or install as I will be glad to answer anything to help out.
Tyler
This bumper as stated on the JCR website is built in the USA and the quality of their products is second to none. The welds are clean and very straight and have great penetration into the metal.
Here are a few pics to show how this bumper arrived.
First off it came packaged in a layer of cardboard around the whole bumper plate then the ends were wrapped once more and a layer of packing was wrapped all the way around the upper hoop and lower bars for added protection then finally wrapped up in packing tape and secured by shipping wrap to keep it all together.
Best of all right on the package it reminds everyone that America can still make amazing products.
Now to start unpacking and seeing what's behind all the cardboard and wrap.
Nicely cut in logo right in the center of the bumper.
The fog light holes are very clean cuts and all the bends are extremely clean and very precise.
Now onto the d-ring mounts. They are very cleanly cut out and no burrs are left in the hole to cause fitment issues. Also the welds are very clean and have great penetration into both pieces of metal.
The upper hoop that I ordered with this bumper is very well bent and has no machine pinch marks or reduction of tube size do to over stressing the metal commonly seen on cheaper built products. The welds are also super clean and fitment of lower braces are top notch.
Moving onto the top plate with the winch mount and fairlead mount you can once again see how well everything lines up and how well centered everything is. I got the calipers out just to see how close this was and the mounting holes were only 0.004" apart from being perfectly in line with the rear of the plate but that is absolutely amazing. The holes are very clean and square as well as the lead holes and opening.
Once the bumper is flipped over to examine the underside(backside) it is clear to see how much work and bracing went into producing this very stout bumper in such a small package. No spot was left unattended to detail and quality.
The foglight mounts from the back are very well built and precisely aligned so there are no fitment issues when installing the lights once coated.
As stated extra bracing was built into this bumper to give it great rigidity.
Here is a shot of the frame channel mount to align and strengthen the bumper up once installed.
The mounts for the frame horns are fully boxed in and the bolts are exactly square so once put on there is no fitment issue trying to get bolts to line up with the holes from the factory.
Now time for installation.
First off we start with the goofy looking plastic bumper from the factory.
Our first step is to remover the two small screw inserts to get the small upper plate off to access the nuts on the frame horns easier. (note the lower air dam was previously removed, if it is still installed you will need to remove the plastic screws for that as well and get it out of the way.)
Next is to get out an 18MM deep socket and 2" in extension and ratchet and start to remove the 8 nuts and 4 plates on the frame horns to get the plastic bumper and tow hooks off. (note for quicker uninstall/install I used a 3/8" air ratchet.
Once removed the 8 nuts and 4 plates should look like this.
After they are all removed you can easily pry out the "christmas tree" clips holding the factory foglight wiring into the bumper and unplug the stock lights so the bumper can be removed. Once the bumper is off it should be laid out of the way in a safe place so it doesn't get damaged.
Here is what the factory bumper looks like from the back side.
Once the bumper is off you should have a front end that looks like this.
Next it is time to locate where the small frame mount will go into the pocket on the passenger side rail for later use.
Factory mount on the rail looks like this.
Now with the pocket plate installed. (note the bent tab on the new plate face out from the frame and sits on the lip of the pocket.)
Now it is time to mount up the new bumper and start tightening up bolts to secure it and check the fit and the new look of you jeep.
Start by removing the 4 nuts and washers on each mount and then re-installing them when the bumper is on and all the bolt studs are through the frame horns.
Once all the nuts and washers are back on and tightened up it's time to install the frame bolt and secure it into the pocket brace.
Once all the nuts are tightened up and everything is checked once again to make sure it is tight and buttoned up it's time to step back and look at your new front end.
New front end looks great and gives a much more aggressive look and better approach angle to all kinds of situations.
A few side shots to show the clearance between the bumper and the lower grill. There are no unsightly gaps and close quarters where the bumper will rub paint off or destroy the grill in any way.
Trick photography in this picture makes it look like the bumper is not in line with the grill but it is simply the angle I took the picture at. You can see in the next couple pics that the bumper is even with the lower portion of the bumper.
This was a very easy install of an amazing product built by JCR here in the U.S. and compliments the look of the Jeep very well.
Now I did not write a full write-up as I did not install the fog lights at this time due to it coming back off in a couple of days to head to the powder coaters, but once it is back I will update with some new info and pics to show how the whole setup looks once finished.
I cannot stress enough how amazing of quality this bumper is and how easy the install was due to how precisely the bumper was built.
I hope you all enjoyed the install as much as I enjoyed installing and let me know if you all have any questions about the product or install as I will be glad to answer anything to help out.
Tyler
 02-25-2012, 07:45 PM
#2
JK Freak
Join Date: May 2010
Location: Graham, NC
Posts: 983
Likes: 0
Received 0 Likes
on
0 Posts
Looks great. Really liking their new line of bumpers. I have always planned to eventually go with the PSC Brawler Lite with brawler bar and tube gussets, but the more I see this bumper, the more I like it. Can you post up a couple pics from the drivers seat? Just wondering how much of the stinger you can see out the windshield. Thanks!
02-25-2012, 09:43 PM
#3
JK Newbie
Join Date: Aug 2011
Location: Golden, CRAWLERADO
Posts: 88
Likes: 0
Received 0 Likes
on
0 Posts
Great write up. I just painted my JCR crusader today and plan on installing it tomorrow. I was wondering what the little bracket was for. Now i know. JCR deffinetly makes a nice looking bumper.
 02-26-2012, 04:51 AM
#6
JK Freak
Join Date: Feb 2011
Location: Baton Rouge, Louisiana
Posts: 585
Likes: 0
Received 0 Likes
on
0 Posts
My mid width crusader pre runner is on order. I think I'm going to prime and paint mine myself to save a few dollars. How much was it to powder coat? I've heard a couple of others say it was $150.
02-26-2012, 06:04 PM
#7
JK Enthusiast
Join Date: Nov 2011
Location: Somewhere,CA
Posts: 333
Likes: 0
Received 0 Likes
on
0 Posts
Trending Topics
02-26-2012, 08:19 PM
#8
JK Newbie
Thread Starter
Join Date: Dec 2011
Location: Newton, KS
Posts: 77
Likes: 0
Received 0 Likes
on
0 Posts
That is very close to the going rate anywhere you are looking. The most expensive part is not only the coating but heating these bumpers up to temp so they will hold the powder.
Tyler
Tyler