Spray in Liner - UPOL Raptor Tintable: Deep Water Blue
 01-03-2011, 06:56 PM
#1
JK Enthusiast
Thread Starter
Join Date: Aug 2010
Location: Kalamazoo, MI
Posts: 366
Likes: 0
Received 0 Likes
on
0 Posts
This is my write up on on the UPOL Raptor DIY spray in liner kit. I have the Deep Water Blue JK and have chosen to use the tintable kit so the spray in liner will be similar to the color of the jeep rather than black (just for something a little different). I took the factory paint code to a local auto parts store and they were able to mix it up for me.
This project has been a work in progress ever since I took in water this past summer and removed all the carpet so she could dry out. Once the carpet was out I decided I didn't want to deal with it anymore and it wasn't going back in.
I probably have around $200 into this project with the UPOL Raptor Tintable kit, the matching paint, misc supplies like tape, sandpaper, etc.
I basically did this project in 3 different steps:
1) Re-routed the wiring harnesses/looms up into the rollcage
2) Removed the sound deadening goop
3) The actual spray in (which I am doing this Saturday)
I will post pics of the everything once it is complete at the end of the weekend
Last edited by mark9998; 01-08-2011 at 04:18 PM.
 01-03-2011, 07:23 PM
#2
JK Enthusiast
Thread Starter
Join Date: Aug 2010
Location: Kalamazoo, MI
Posts: 366
Likes: 0
Received 0 Likes
on
0 Posts
Since the factory wiring harness/loom runs under the carpet at the rear door's I didnt want them exposed to where they could get damaged over time, especially since I have little kids getting in/out of the back all the time, and there is a loom on both the passenger and driver sides. Also I didn't like how they looked exposed in the back once the carpet is out.
Since the harness is hidden under the floor trim in the front, I chose to run it up the B pillar and then just hide it behind the fabric that is wrapped around the rollcage. This is pretty simple since the fabric zips off.
Since the factory loom is not long enough to just simply re-route I had to extend them each about 3-5'. I used 18awg wire with multiple conductors (7 & 10) and had to run a couple lengths of this to reconnect all the wires. I also had to extend the wind-shield wiper fluid line on the driver side since I run the hardtop in the winter.
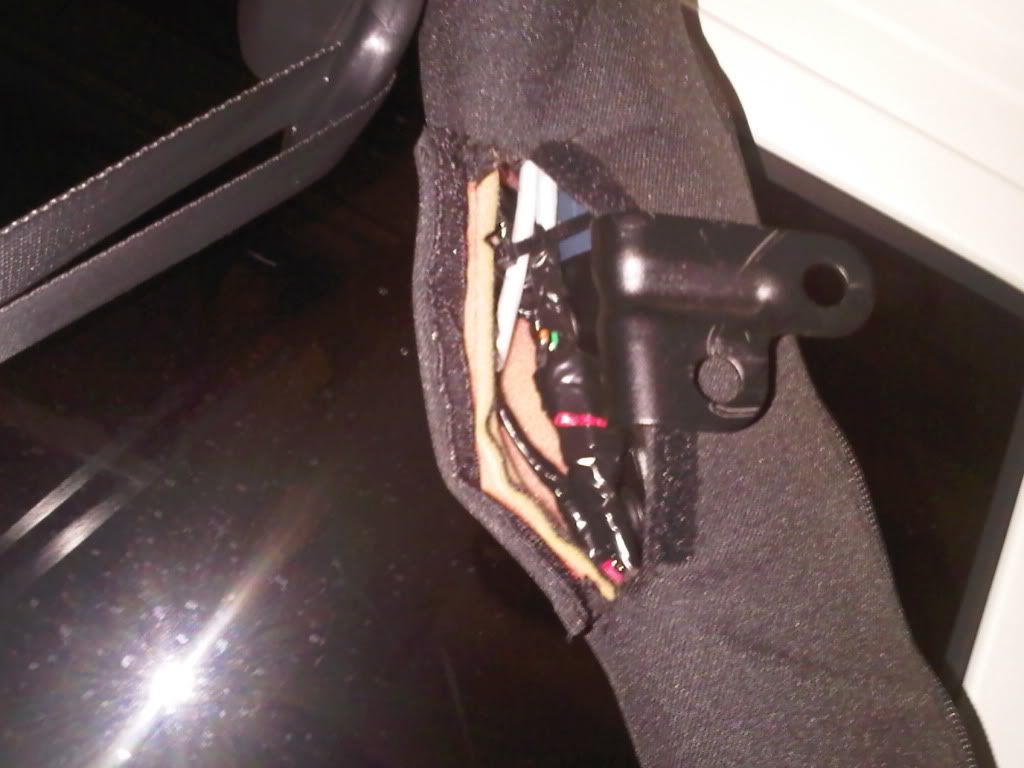
I made one splice near where the seatbelt mechanism is under the floor trim and the second splice reconnecting everything where the rear roll cage angles back down. You can kinda see the splice here where the soft top attaches to the roll cage (its not this noticable, you can velcro that opening back together)
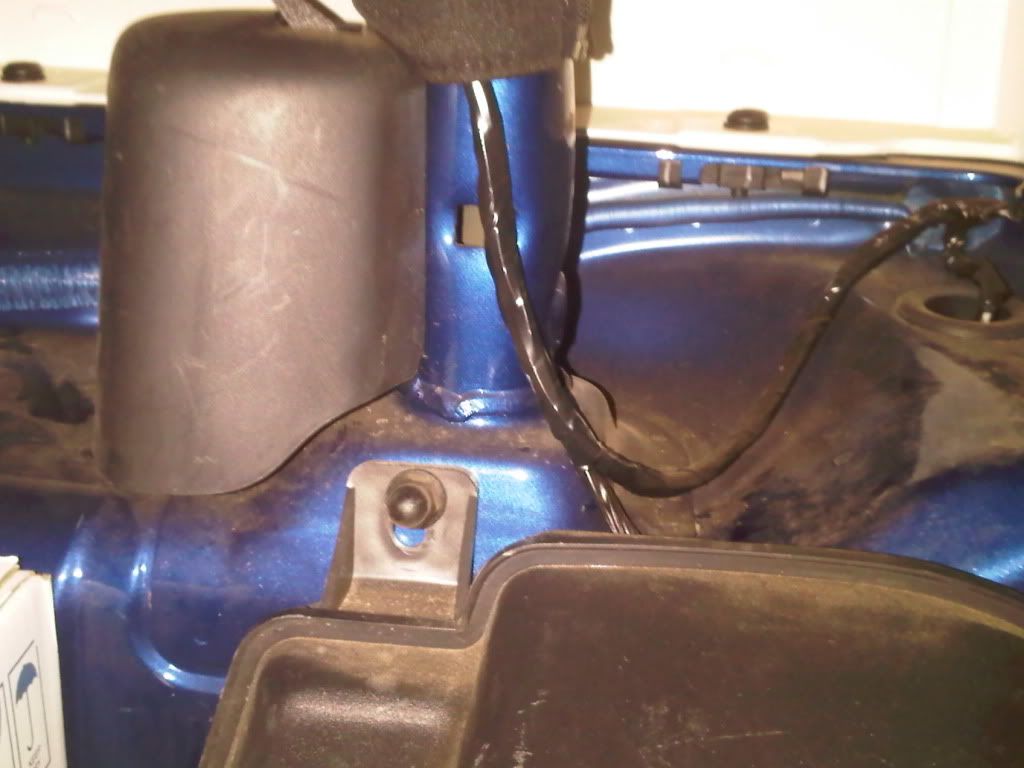
I also ground off the studs in the rear that were used to hold the factory harness in place under the carpet. One of them on each side is right where someone could catch their foot on it, and again with kids I didnt want them getting hurt on it. Here is a pic with the stud gone, and you can see the trim piece where the harness used to come out of. One of the splices in the harness I made is under that trim piece
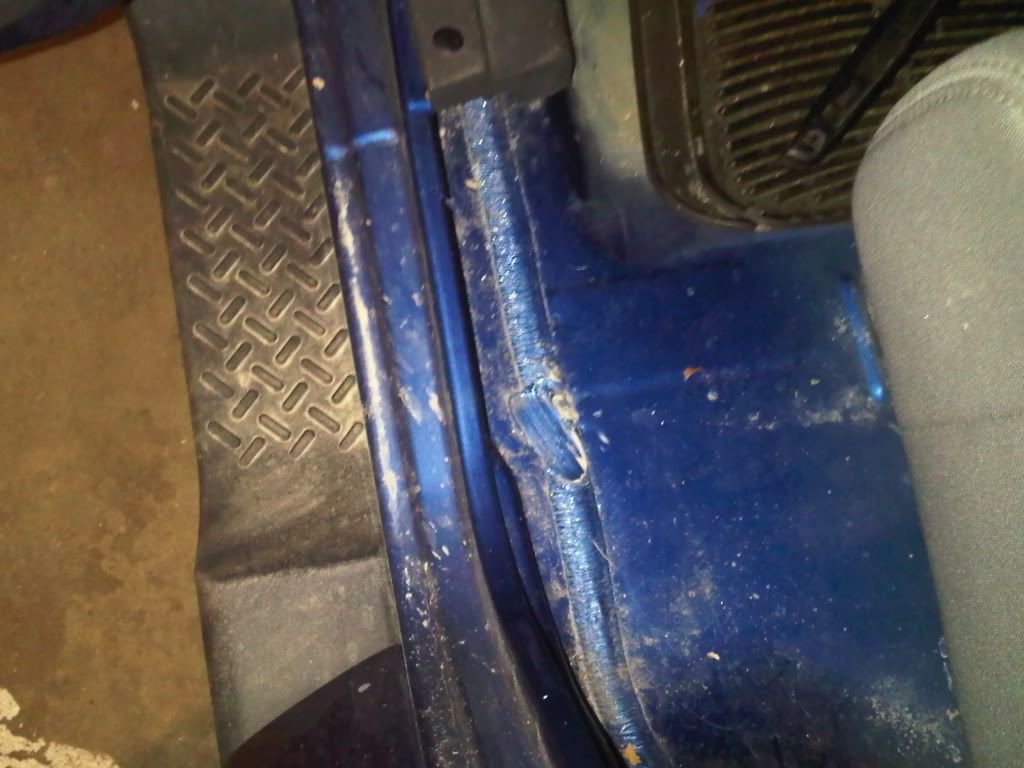
Here is a pic of where the harness comes out now, so this is the only wiring now that is visible
Since the harness is hidden under the floor trim in the front, I chose to run it up the B pillar and then just hide it behind the fabric that is wrapped around the rollcage. This is pretty simple since the fabric zips off.
Since the factory loom is not long enough to just simply re-route I had to extend them each about 3-5'. I used 18awg wire with multiple conductors (7 & 10) and had to run a couple lengths of this to reconnect all the wires. I also had to extend the wind-shield wiper fluid line on the driver side since I run the hardtop in the winter.
I made one splice near where the seatbelt mechanism is under the floor trim and the second splice reconnecting everything where the rear roll cage angles back down. You can kinda see the splice here where the soft top attaches to the roll cage (its not this noticable, you can velcro that opening back together)
I also ground off the studs in the rear that were used to hold the factory harness in place under the carpet. One of them on each side is right where someone could catch their foot on it, and again with kids I didnt want them getting hurt on it. Here is a pic with the stud gone, and you can see the trim piece where the harness used to come out of. One of the splices in the harness I made is under that trim piece
Here is a pic of where the harness comes out now, so this is the only wiring now that is visible
01-03-2011, 07:44 PM
#3
JK Enthusiast
Thread Starter
Join Date: Aug 2010
Location: Kalamazoo, MI
Posts: 366
Likes: 0
Received 0 Likes
on
0 Posts
I absolutely hated how this sound deadening stuff looked once the carpet was out so I wanted it all gone. Plus I read some other posts where guys were getting water under it and causing rust overtime
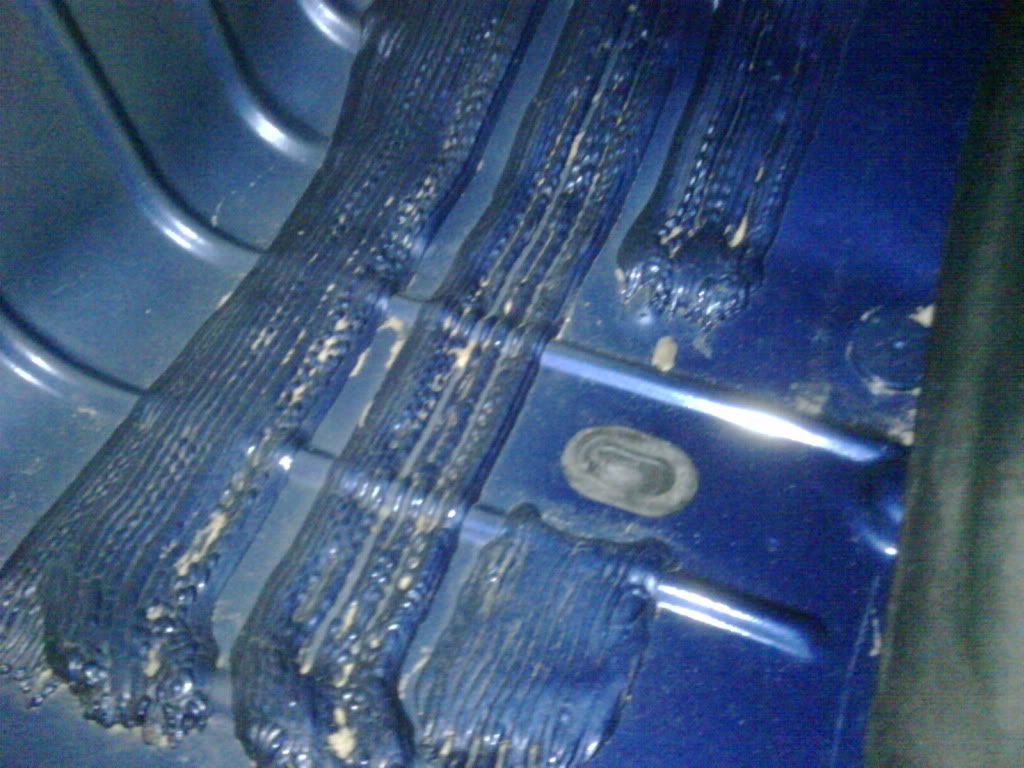
I didnt have an air chisel like other people have used (probably should of bought one), but was too stubborn and used a hammer and screwdriver to get up the bulk of it. I found once the bulk of the top layer was gone when the remaining stuff that is left is wet it came up very easy with a wire wheel on a drill. So I just kept wetting it with a sponge and hitting it with the wire wheel. I also hit everything with self etching primer since I ended up getting down to bare metal in quite a few spots
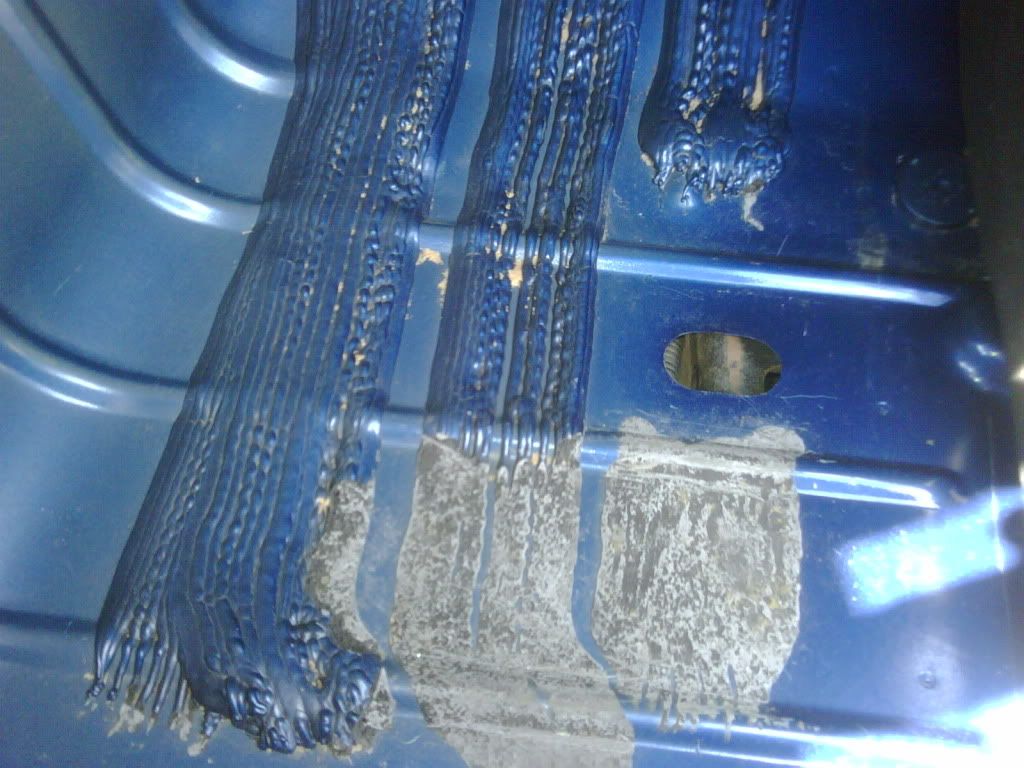
Its a little dirty here since I did this about a month ago but you get the idea, way better looking than all that factory sound deadening goop
Since I removed all this stuff I dont notice any difference in heat or noise in the jeep. I could tell a difference when the carpet came out in terms of it being a little louder, but if I wanted a super quiet ride I would of bought a Cadillac, not a Jeep
I didnt have an air chisel like other people have used (probably should of bought one), but was too stubborn and used a hammer and screwdriver to get up the bulk of it. I found once the bulk of the top layer was gone when the remaining stuff that is left is wet it came up very easy with a wire wheel on a drill. So I just kept wetting it with a sponge and hitting it with the wire wheel. I also hit everything with self etching primer since I ended up getting down to bare metal in quite a few spots
Its a little dirty here since I did this about a month ago but you get the idea, way better looking than all that factory sound deadening goop
Since I removed all this stuff I dont notice any difference in heat or noise in the jeep. I could tell a difference when the carpet came out in terms of it being a little louder, but if I wanted a super quiet ride I would of bought a Cadillac, not a Jeep
01-03-2011, 07:48 PM
#4
JK Enthusiast
Thread Starter
Join Date: Aug 2010
Location: Kalamazoo, MI
Posts: 366
Likes: 0
Received 0 Likes
on
0 Posts
OK got her all tore apart and sprayed today. It took 2 of us about 4hrs to get everything out (already had the carpet out), finish sanding (I had already done about half of the sanding prior to today), and taped off. I started everything at 8:30am and was done with all 4 bottles of the UPOL Raptor kit by 5:00pm. I am letting it dry overnight and will put everything back in tomorrow
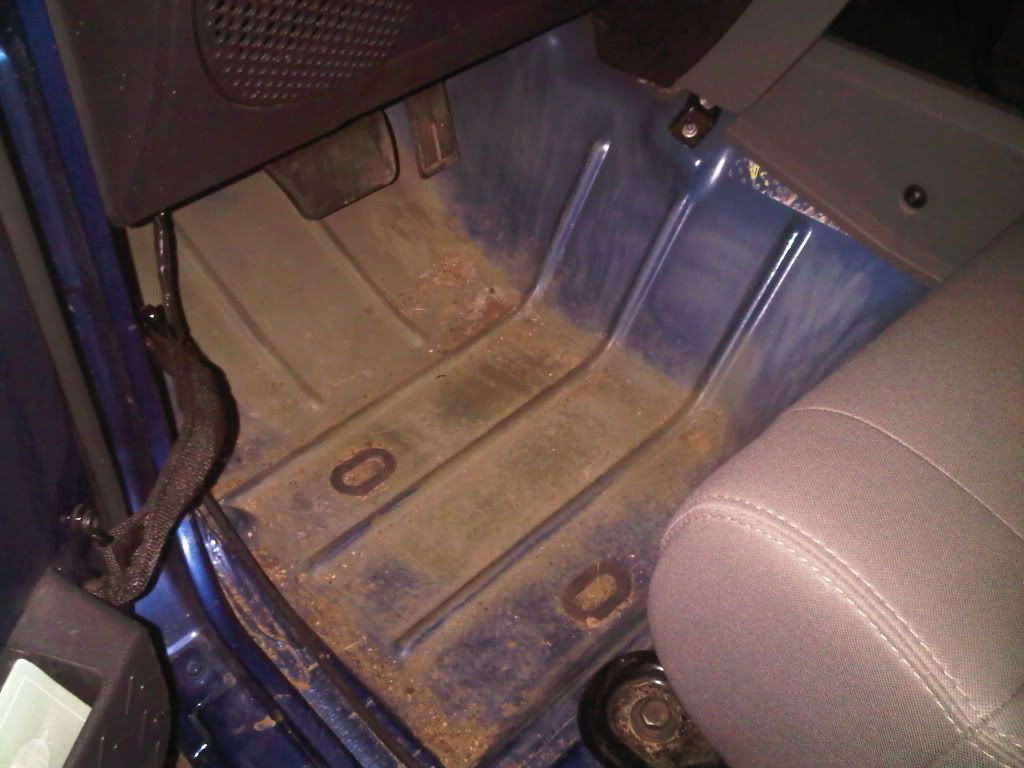
As far as prepping/sanding, I just used sanding blocks and sand paper for the tight spots. I didnt get super fussy with it, just enough to scuff up the paint. I just stuffed all the threaded holes for the seats with tape
Here it is before the spray

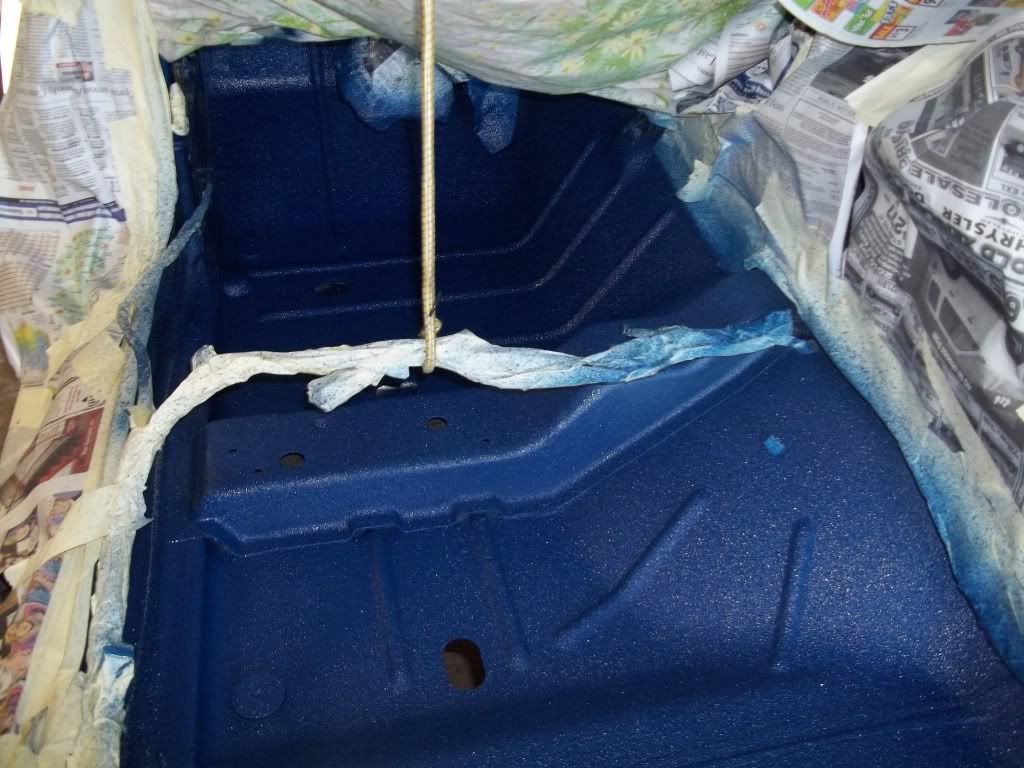
And here she is after all 4 bottles. I was pretty much able to do a complete coat of everything with one bottle. So at first I did everything with 2 bottles, so pretty much 2 coats, let her sit for an hour and changed the oil. Then did 2 more coats with the last 2 bottles
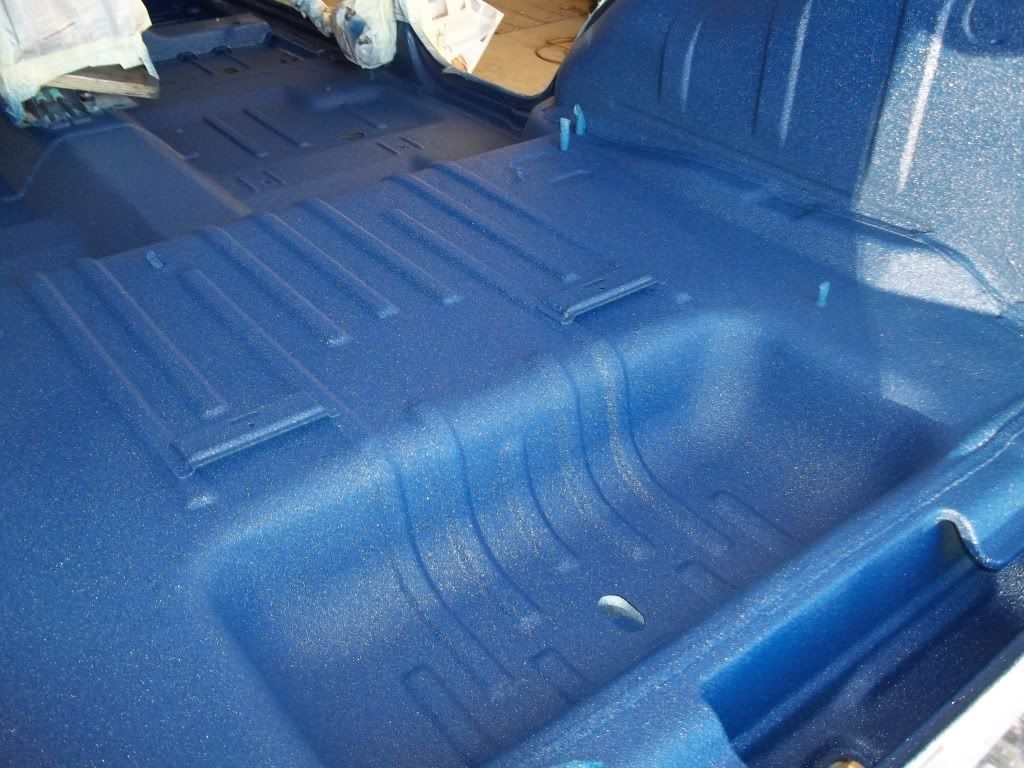
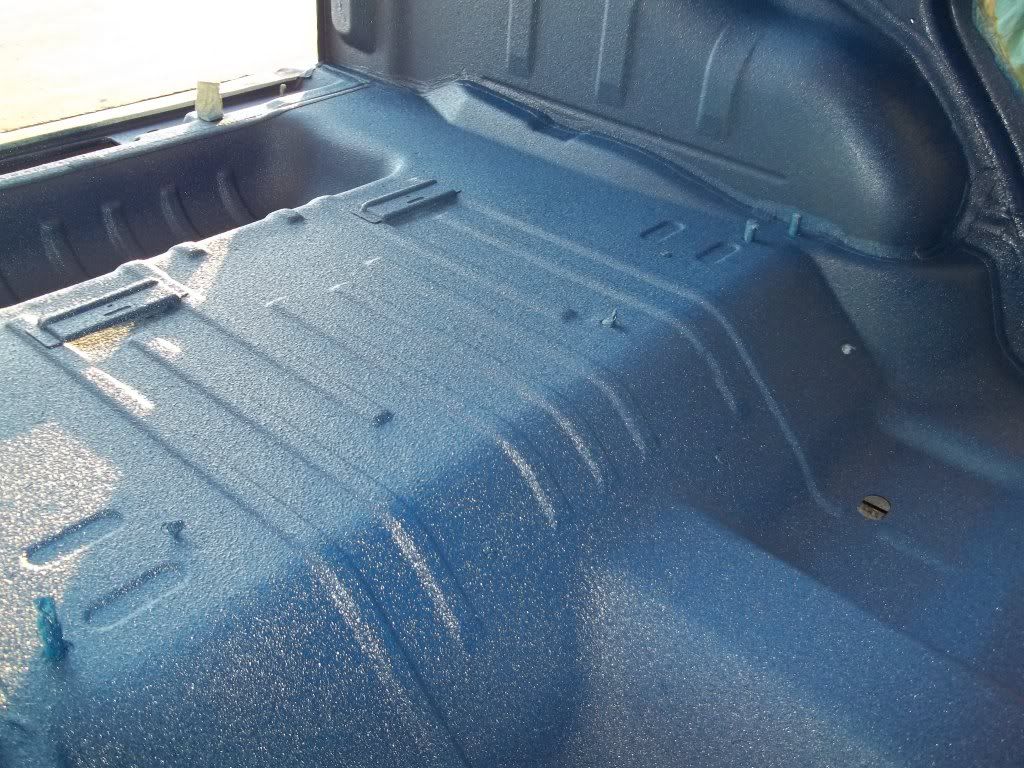
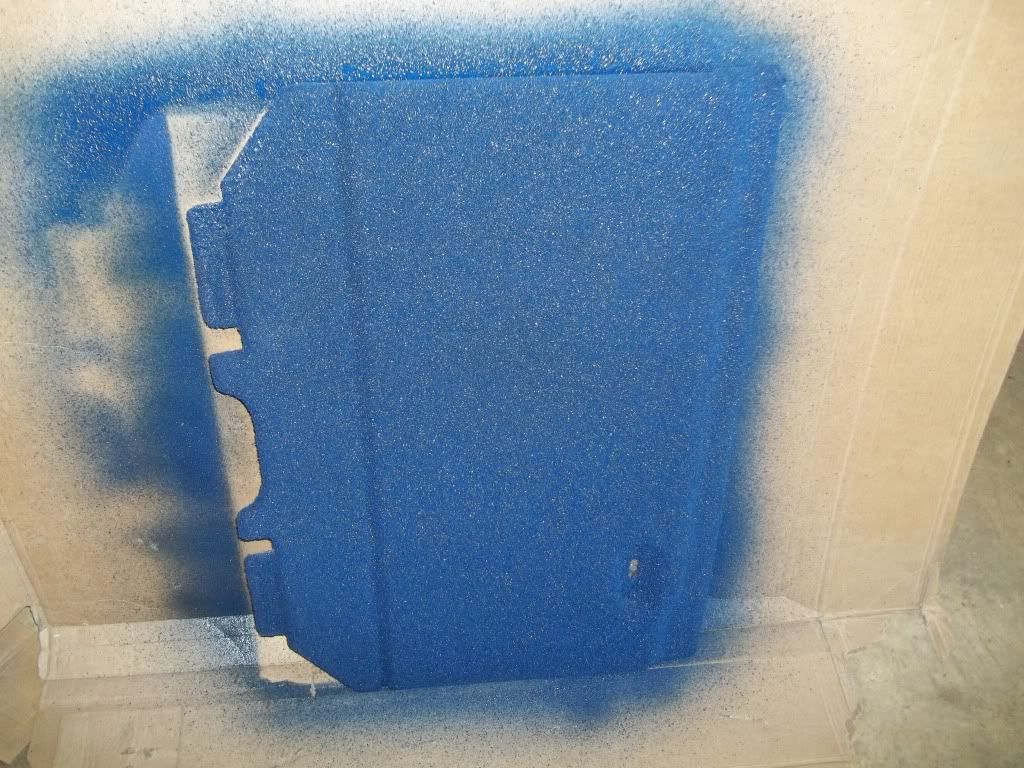
I did the tailgate too
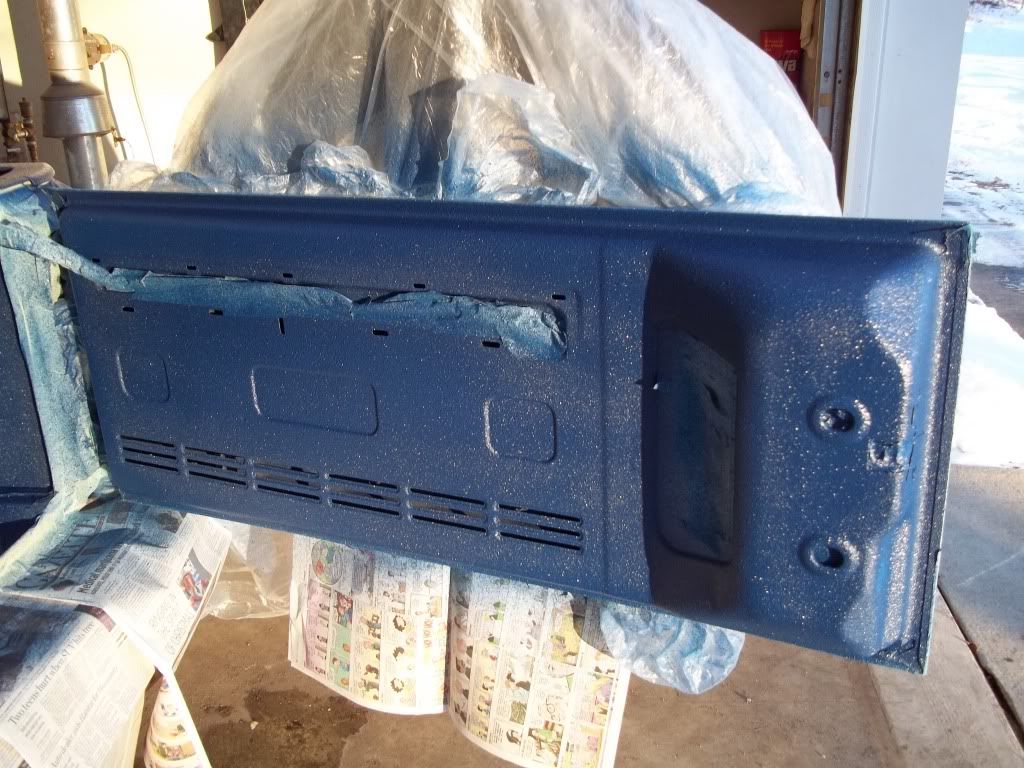
I ended up spraying the rear storage cover also, I think it looks good, we'll see how it looks when its all back together tomorrow though. Not quite sure what the texture of it will be as it was wet when I left my dads shop today
Just like everyone else who has done this has said, all the time is in the prep. The actual spraying goes really fast and is extremely easy. This is the first time I have done anything like this and although it was very time consuming, it was very easy. I would not recommend anyone to pay to have this done, save the $$ for other mods and do it yourself!
I will post more pics tomorrow of everything installed back together
As far as prepping/sanding, I just used sanding blocks and sand paper for the tight spots. I didnt get super fussy with it, just enough to scuff up the paint. I just stuffed all the threaded holes for the seats with tape
Here it is before the spray
And here she is after all 4 bottles. I was pretty much able to do a complete coat of everything with one bottle. So at first I did everything with 2 bottles, so pretty much 2 coats, let her sit for an hour and changed the oil. Then did 2 more coats with the last 2 bottles
I did the tailgate too
I ended up spraying the rear storage cover also, I think it looks good, we'll see how it looks when its all back together tomorrow though. Not quite sure what the texture of it will be as it was wet when I left my dads shop today
Just like everyone else who has done this has said, all the time is in the prep. The actual spraying goes really fast and is extremely easy. This is the first time I have done anything like this and although it was very time consuming, it was very easy. I would not recommend anyone to pay to have this done, save the $$ for other mods and do it yourself!
I will post more pics tomorrow of everything installed back together
Last edited by mark9998; 01-08-2011 at 03:43 PM.
 01-04-2011, 06:44 PM
#6
JK Freak
Join Date: Jun 2008
Location: LAUREL,DE
Posts: 560
Likes: 0
Received 0 Likes
on
0 Posts
x2 on the end result on the tintable. I have done several pick up beds with the Raptor and just like the texture of it and how it layed. Really good stuff. Have been trying to decide whether or not to do the tintable or not. I was going to do gray for something different.


