DIY 10' freedom top for 07'-09' latch Mod.
 10-06-2010, 03:34 PM
#1
JK Newbie
Thread Starter
Join Date: Sep 2010
Location: SoCal
Posts: 13
Likes: 0
Received 0 Likes
on
0 Posts
First off. All the credit for this needs to go to member enzo319 for his brilliant idea on this fix and the help he gave me.  I figured I'd right up my experiance with it with a few pics. (you can view enzo319's original thread about it here.
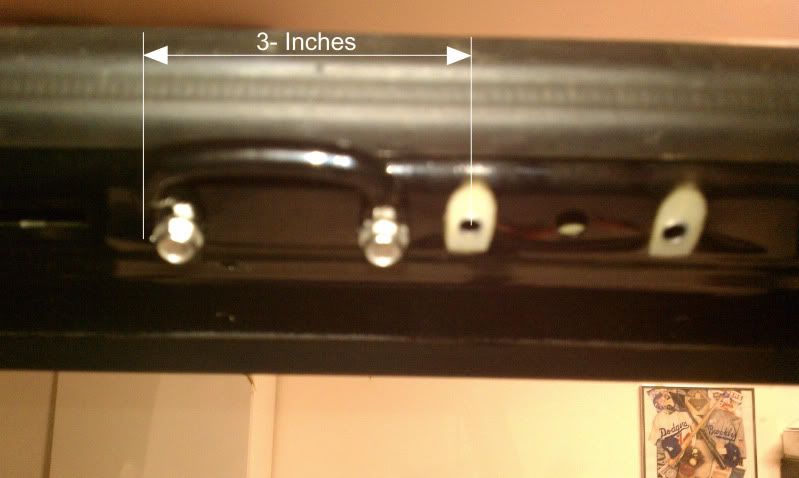
Anyone that has purchased a new(10' and up) freedom top for their 07'-09' JK knows it fits exactly except for the front latch and bracket don't even come close to lining up. Here is picture clarifying the latch location change between the new panel latch location and the location of the latch on the older panels:
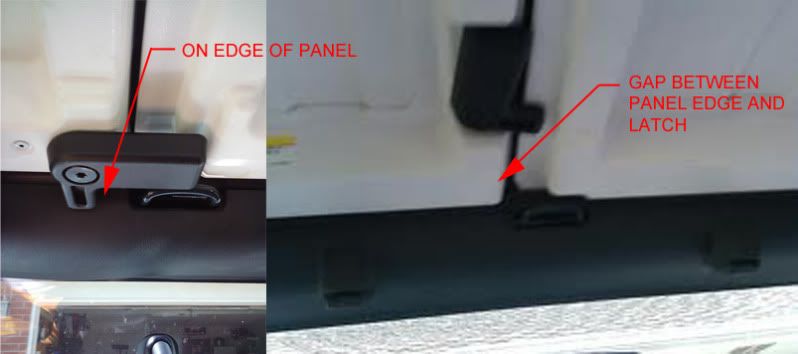
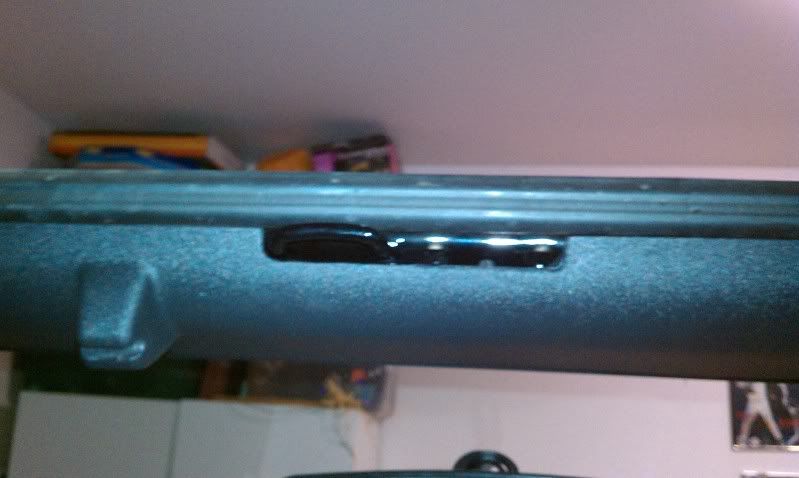
You can clearly see the gap in the next picture between the latch and the other panel. The panels no longer latch to each other in this location on the new panels. Here is an enlarged view of how the new freedom top panel latch doesn't align with the 07'-08' JK windshield bracket:
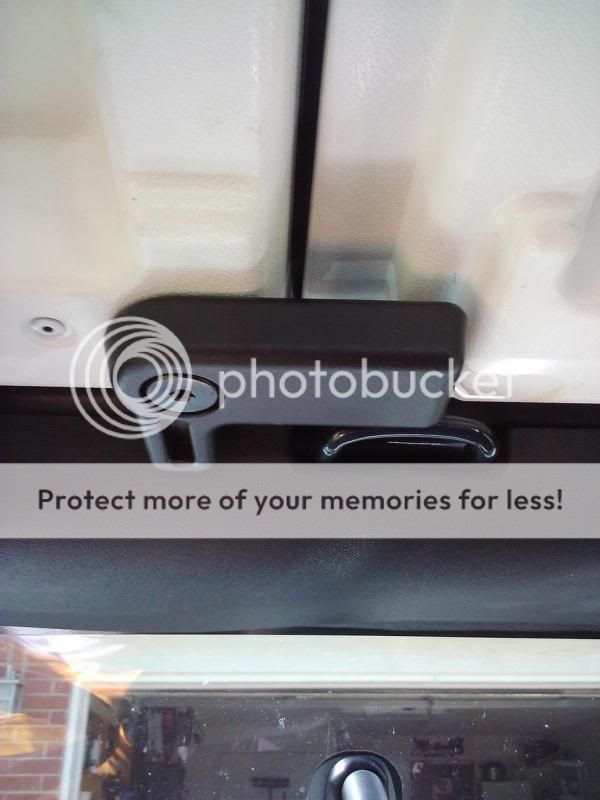
miss-aligned latch and bracket
This will cause unwanted extra road noise not to mention potential leaking from improper seal. Well, this is an easy fix. It should take about 30-60 minutes. I'll apologize now for the not so great pics (I took them with my phone), but they get the point across.
What you need for this project:
* 2- #14x1" hex head self taping sheet metal screws.
* touch up paint
* a drill w/ 9/64" and 5/32" drill bits
* Dremel with cutting wheel
* Sand paper or sanding attachment for Dremel
* Exacto knife
* Flat Head Screw driver
* Masking tape
* Measuring tape
* Straight edge
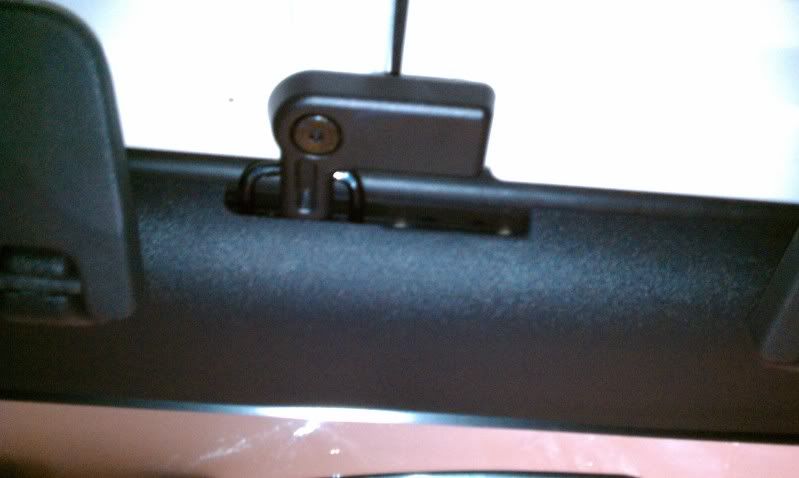
1. First step is your going to want to remove the head interior trim piece to expose the bracket (see pic below). This is very simple to do and really doesn't need much explanation. It quite literally just pulls off. I used a flat head screw driver to help pry the initial part off. Once you get a couple of the snaps to pop off it comes down pretty easily.
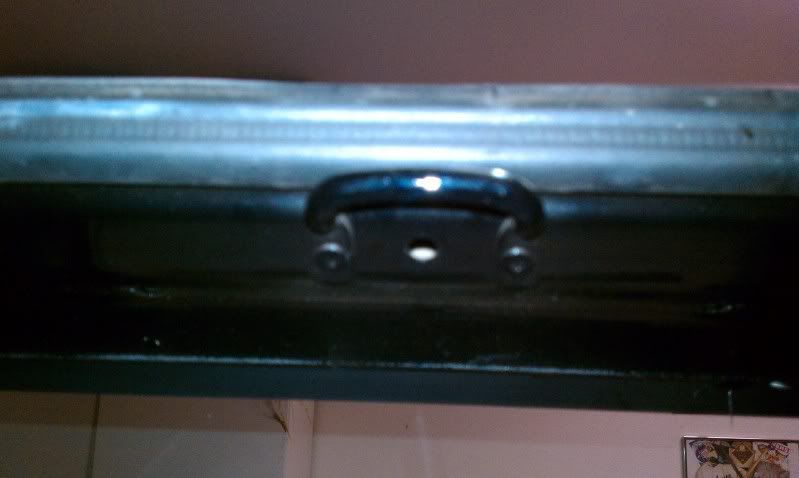
exposed bracket
2. Next take your drill and using the 5/32" drill bit, drill out the center of the rivets holding the bracket in place. After that it should only take a little bit of persuading to get off.
3. Once you remove the bracket you will need to shave a little bit of the holes in the bracket so that the #14 screws will fit through them. (I thought that anything smaller might not be sturdy enough). This can be accomplished using you drill with the 5/32" bit and rubbing it around the edges. You only need to shave it ever so slightly so that the threads don't catch in the hole.
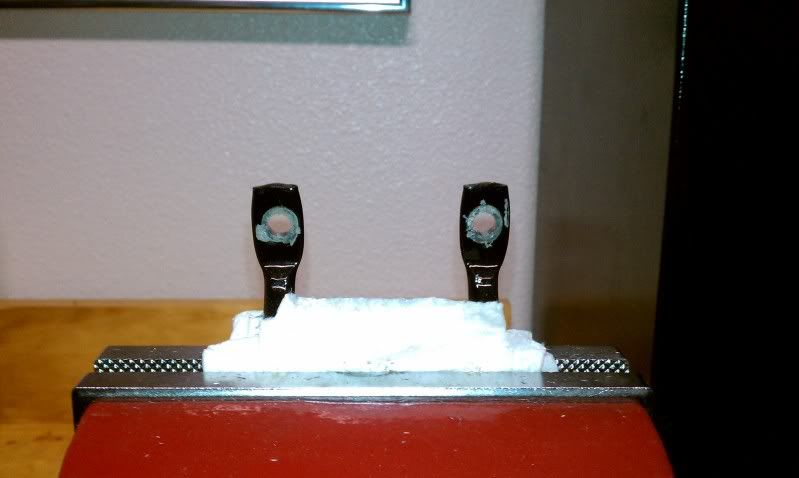
The bracket after shaving the wholes
4. After this your ready to mark your spots for the new location. Now when enzo319 did it he used one of the existing holes by just sliding the bracket over to the left by one hole which works fine also. I didn't do this as I wanted the latch to fall in the middle of the bracket and I was afraid that the hole would be to big for the #14 screw to properly tighten down in.
I aligned the latch on the panel with where I wanted the bracket and came up with a measurement of 3" from the left edge to the center of the existing left hole (See pick below). after that I simply marked where I needed the holes using the bracket as a guide.
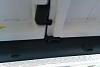
Once you have the holes marked drill out pilot holes for your #14 sheet metal screws using a 9/64" drill bit. Now that you have that done you can go ahead and screw your bracket into it's new location using your two #14x1" self taping sheet metal screws. When your done it should look something like this:
re-attached bracket
5. After I had that re-installed, I taped it up and sprayed some touch-up paint to hide those ugly screws and existing wholes.
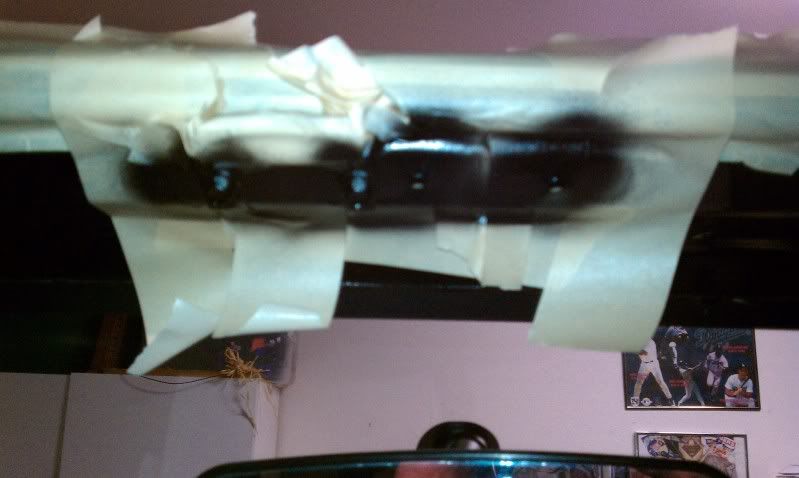
A little bit of touch up paint
6. Now for the Interior trim piece. Take a length of masking tape and tape the side of the piece that you are going to cut. using a tape measure, pen, and a straight edge, measure over 3" and trace where you want the new opening to be. Using this method insures a clean cut and prevents accidental scuffing. It should look similar to this when your done:
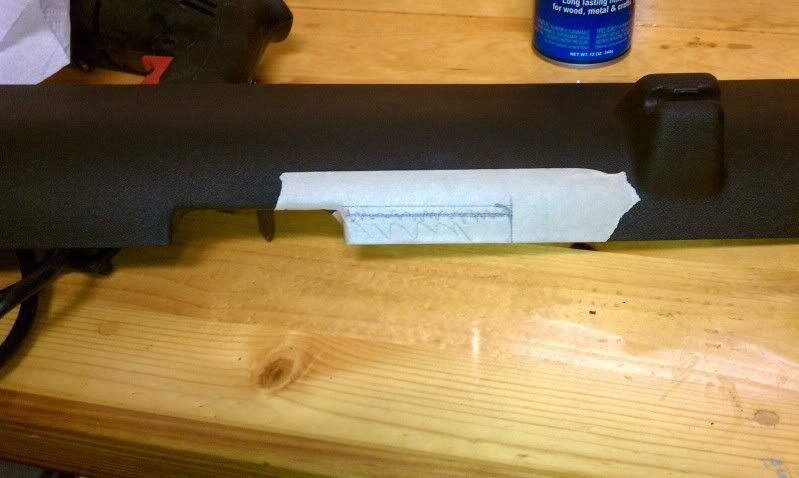
taped and ready to cut
5. Make your cut. Using a Dremel with a cut off wheel attachment make a cut using your guide. Don't cut it exactly on the line, instead leave a 1/16th of an inch or around that so that you have some material to sand down and smooth out.
now you can probably use a sander or hand sand it to finish it from here, but if you have a sanding and buffing attachment for your Dremel, go that route. I used a sanding wheel and buffing stone attachment I had for my Dremel. Take your time and work it till it's nice and straight and smooth. You can then use an exacto knife to trim off any remaining pieces or melted burrs left by the cutting and sanding. I then just wiped it down with some armor-all.
When your done it should look something like this:
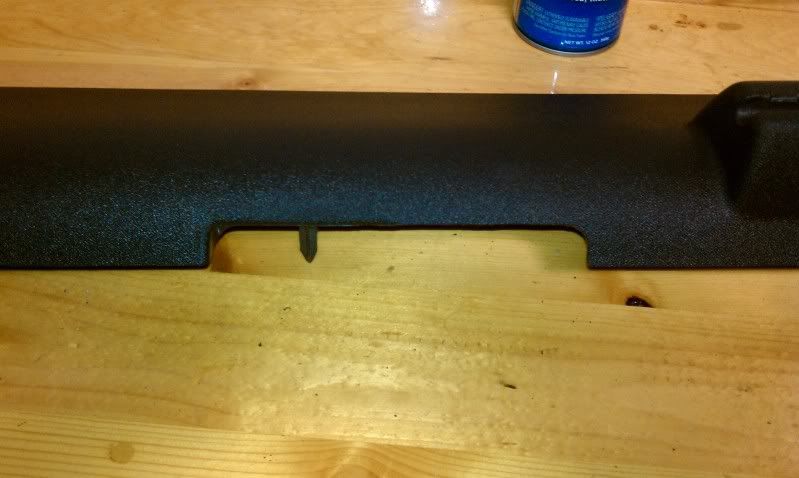
Ready to be re-installed
6. After that simply re-install the trim piece in your jeep. Make sure to align the edges in the side trim pieces first before pushing it in, it makes it a lot easier... trust me.
Good to go!
And there you have it! a 2010 Freedom top good to go on your 07'-09' JK. Hope you guys find this helpful.
Now isn't that better!
I figured I'd right up my experiance with it with a few pics. (you can view enzo319's original thread about it here.Anyone that has purchased a new(10' and up) freedom top for their 07'-09' JK knows it fits exactly except for the front latch and bracket don't even come close to lining up. Here is picture clarifying the latch location change between the new panel latch location and the location of the latch on the older panels:
You can clearly see the gap in the next picture between the latch and the other panel. The panels no longer latch to each other in this location on the new panels. Here is an enlarged view of how the new freedom top panel latch doesn't align with the 07'-08' JK windshield bracket:
miss-aligned latch and bracket
This will cause unwanted extra road noise not to mention potential leaking from improper seal.
Well, this is an easy fix. It should take about 30-60 minutes. I'll apologize now for the not so great pics (I took them with my phone), but they get the point across.What you need for this project:
* 2- #14x1" hex head self taping sheet metal screws.
* touch up paint
* a drill w/ 9/64" and 5/32" drill bits
* Dremel with cutting wheel
* Sand paper or sanding attachment for Dremel
* Exacto knife
* Flat Head Screw driver
* Masking tape
* Measuring tape
* Straight edge
1. First step is your going to want to remove the head interior trim piece to expose the bracket (see pic below). This is very simple to do and really doesn't need much explanation. It quite literally just pulls off. I used a flat head screw driver to help pry the initial part off. Once you get a couple of the snaps to pop off it comes down pretty easily.
exposed bracket
2. Next take your drill and using the 5/32" drill bit, drill out the center of the rivets holding the bracket in place. After that it should only take a little bit of persuading to get off.
3. Once you remove the bracket you will need to shave a little bit of the holes in the bracket so that the #14 screws will fit through them. (I thought that anything smaller might not be sturdy enough). This can be accomplished using you drill with the 5/32" bit and rubbing it around the edges. You only need to shave it ever so slightly so that the threads don't catch in the hole.
The bracket after shaving the wholes
4. After this your ready to mark your spots for the new location. Now when enzo319 did it he used one of the existing holes by just sliding the bracket over to the left by one hole which works fine also. I didn't do this as I wanted the latch to fall in the middle of the bracket and I was afraid that the hole would be to big for the #14 screw to properly tighten down in.
I aligned the latch on the panel with where I wanted the bracket and came up with a measurement of 3" from the left edge to the center of the existing left hole (See pick below). after that I simply marked where I needed the holes using the bracket as a guide.
Once you have the holes marked drill out pilot holes for your #14 sheet metal screws using a 9/64" drill bit. Now that you have that done you can go ahead and screw your bracket into it's new location using your two #14x1" self taping sheet metal screws. When your done it should look something like this:
re-attached bracket
5. After I had that re-installed, I taped it up and sprayed some touch-up paint to hide those ugly screws and existing wholes.
A little bit of touch up paint
6. Now for the Interior trim piece. Take a length of masking tape and tape the side of the piece that you are going to cut. using a tape measure, pen, and a straight edge, measure over 3" and trace where you want the new opening to be. Using this method insures a clean cut and prevents accidental scuffing. It should look similar to this when your done:
taped and ready to cut
5. Make your cut. Using a Dremel with a cut off wheel attachment make a cut using your guide. Don't cut it exactly on the line, instead leave a 1/16th of an inch or around that so that you have some material to sand down and smooth out.
now you can probably use a sander or hand sand it to finish it from here, but if you have a sanding and buffing attachment for your Dremel, go that route. I used a sanding wheel and buffing stone attachment I had for my Dremel. Take your time and work it till it's nice and straight and smooth. You can then use an exacto knife to trim off any remaining pieces or melted burrs left by the cutting and sanding. I then just wiped it down with some armor-all.
When your done it should look something like this:
Ready to be re-installed
6. After that simply re-install the trim piece in your jeep. Make sure to align the edges in the side trim pieces first before pushing it in, it makes it a lot easier... trust me.
Good to go!
And there you have it! a 2010 Freedom top good to go on your 07'-09' JK. Hope you guys find this helpful.
Now isn't that better!
Last edited by Demon Hunter; 10-07-2010 at 08:33 AM.
 10-06-2010, 05:17 PM
#2
JK Enthusiast

Join Date: Feb 2009
Location: Montreal
Posts: 241
Likes: 0
Received 0 Likes
on
0 Posts
I applaud all the hard work you did......
But that loop is not for the latch, thats the windshield tie down loop (for when you lower the window, you lash it down with the loop on our hood).
The short arm on the latch is supposed to cross over the left and right side of the freedom top....and not the windshield.
Like so...
Kind of funny....really.....
Last edited by Atticka; 10-06-2010 at 05:21 PM.
10-06-2010, 05:36 PM
#4
JK Enthusiast
Join Date: Feb 2009
Location: Montreal
Posts: 241
Likes: 0
Received 0 Likes
on
0 Posts
Nope.....I'm pretty certain that loop is for the windshield tie down....had the same loop on a 93 YJ, same loop on my 2008, and its centered with the loop on your hood (in between the two bump stops your windshield is meant to rest on).
The latch is positioned wrong, the fat part is the handle, while the small part is supposed to cross over to the adjacent panel.
Funky mod though, and he did some great work....
The latch is positioned wrong, the fat part is the handle, while the small part is supposed to cross over to the adjacent panel.
Funky mod though, and he did some great work....
10-06-2010, 05:40 PM
#5
JK Enthusiast
Join Date: Feb 2009
Location: Montreal
Posts: 241
Likes: 0
Received 0 Likes
on
0 Posts
Here, check out this JK how to
http://project-jk.com/jeep-jk-write-...om-top-removal
I know the 2010 is "slightly different", but I can assure you the latch was not "supposed" to attach to that loop.
Not that its not an innovative mod!
http://project-jk.com/jeep-jk-write-...om-top-removal
I know the 2010 is "slightly different", but I can assure you the latch was not "supposed" to attach to that loop.
Not that its not an innovative mod!
10-06-2010, 05:46 PM
#6
JK Freak

Join Date: Feb 2008
Location: Lost in the woods, MO
Posts: 508
Likes: 0
Received 0 Likes
on
0 Posts
Nice fab-up... but my question is why? did someone want to trade you a colored one for a non-colored one?
or did you buy one? the next question is if you bought one wouldnt it be cheaper and easier just to buy a used old one and get it painted, than a brand new one?
or did you buy one? the next question is if you bought one wouldnt it be cheaper and easier just to buy a used old one and get it painted, than a brand new one?
10-06-2010, 05:46 PM
#7
JK Junkie
Here, check out this JK how to
http://project-jk.com/jeep-jk-write-...om-top-removal
I know the 2010 is "slightly different", but I can assure you the latch was not "supposed" to attach to that loop.
Not that its not an innovative mod!
http://project-jk.com/jeep-jk-write-...om-top-removal
I know the 2010 is "slightly different", but I can assure you the latch was not "supposed" to attach to that loop.
Not that its not an innovative mod!
What the op did is awesome and if I ever upgrade to the 2010 freedom panels I will surely follow his write up.
Trending Topics
10-06-2010, 05:48 PM
#8
JK Enthusiast
Join Date: Feb 2009
Location: Montreal
Posts: 241
Likes: 0
Received 0 Likes
on
0 Posts
Atticka, 2010 has a redesigned hard top that allows the forward latch to attach to the footman loop. The footman loop on 2010+ jeeps are off center to attach to the hard top latch...
What the op did is awesome and if I ever upgrade to the 2010 freedom panels I will surely follow his write up.
What the op did is awesome and if I ever upgrade to the 2010 freedom panels I will surely follow his write up.
Apologies! I'm eating my words

 10-06-2010, 05:50 PM
#10
JK Enthusiast

Join Date: May 2007
Location: woodland, ca
Posts: 441
Likes: 0
Received 0 Likes
on
0 Posts
Here, check out this JK how to
http://project-jk.com/jeep-jk-write-...om-top-removal
I know the 2010 is "slightly different", but I can assure you the latch was not "supposed" to attach to that loop.
Not that its not an innovative mod!
http://project-jk.com/jeep-jk-write-...om-top-removal
I know the 2010 is "slightly different", but I can assure you the latch was not "supposed" to attach to that loop.
Not that its not an innovative mod!

