Removing and Installing PCV Valve
 05-17-2014, 04:55 PM
#161
JK Newbie
Join Date: Jan 2011
Location: Lone Tree, Colorado
Posts: 4
Likes: 0
Received 0 Likes
on
0 Posts
Finally got it out. Did it after a short drive to get everything warm. Poured some PB blaster to loosen it up and used a vise grip to leverage it out with a screw driver...
Here is how it looked
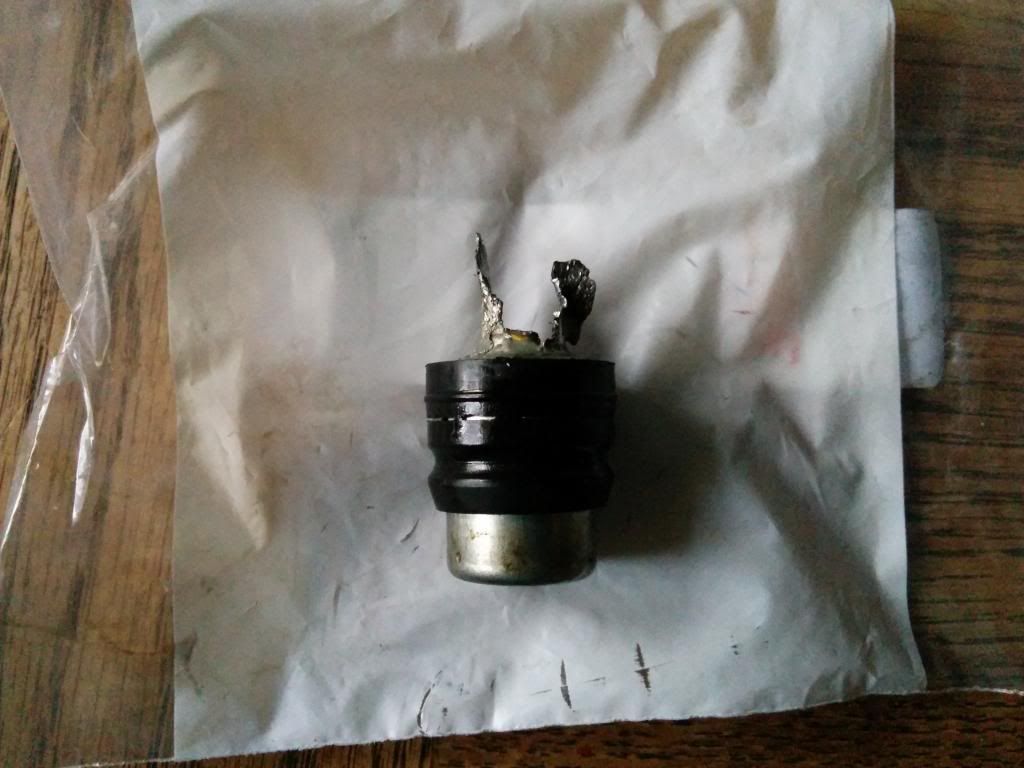

Here is how it looked
 09-24-2016, 09:42 AM
#162
JK Enthusiast
Join Date: Sep 2011
Location: Houston, TX (Clear Lake)
Posts: 116
Likes: 0
Received 0 Likes
on
0 Posts
This thread is awesome! Took me 15 minutes thanks to y'all. I did it early (5 years, only 40k miles), warmed up engine, bolt in center of valve "nozzle," vice grips on bolt, screwdriver through vice grips leveraged on engine, lift/pry up way harder than you think you'd need to and it popped right out. Large socket over new one once it's in the hole, extension + rubber mallet to tap it into place.
08-02-2018, 10:31 AM
#163
JK Newbie

Join Date: Aug 2018
Location: Nashville, TN
Posts: 1
Likes: 0
Received 0 Likes
on
0 Posts
Here may be another tip. My jkur is an 07 with 86,000 miles. So I was worried it would be really tuff. I pulled two bolts on coil pack, left all the wires connected, lowered it down.
Sprayed a really small amount of PB blaster into the lid off pb can, and poured it around the edge of pcv valve. 1 hour later, put a small screw down inside the old valve to keep nipple from crushing, grabbed it with vice grips, screw driver thru jaws, leveraged it right out. Super easy.
Sprayed a really small amount of PB blaster into the lid off pb can, and poured it around the edge of pcv valve. 1 hour later, put a small screw down inside the old valve to keep nipple from crushing, grabbed it with vice grips, screw driver thru jaws, leveraged it right out. Super easy.

 08-13-2018, 08:24 PM
#165
Super Moderator
11-29-2020, 11:41 AM
#166

This is how I easily removed and installed the PCV valve:
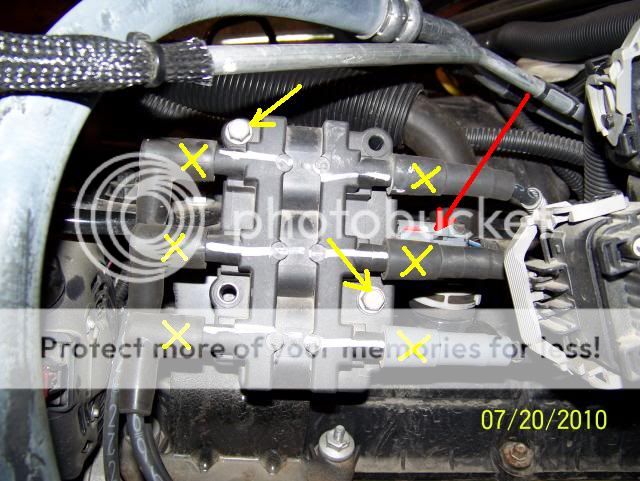
Removing the coil pack is easy to do, and greatly improves access to the PCV valve.
Disconnect all six plug wires at the coil pack. The stock wires and the coil pack terminals are numbered, so no need to worry about marking them.
Remove the two bolts marked with yellow arrows.
Leave the main electrical plug, marked with red arrow, connected.
Rotate the coil pack up and out of the way. It will tuck in behind some of the wires, and stay there.
Now that you have plenty of room to work, remove the clamp from the PCV hose. Pliers will do it, but a hose clamp tool designed for this type of clamp will make it easier.
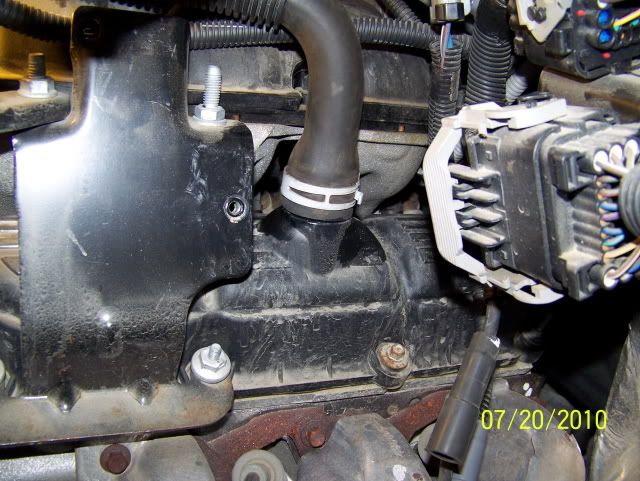
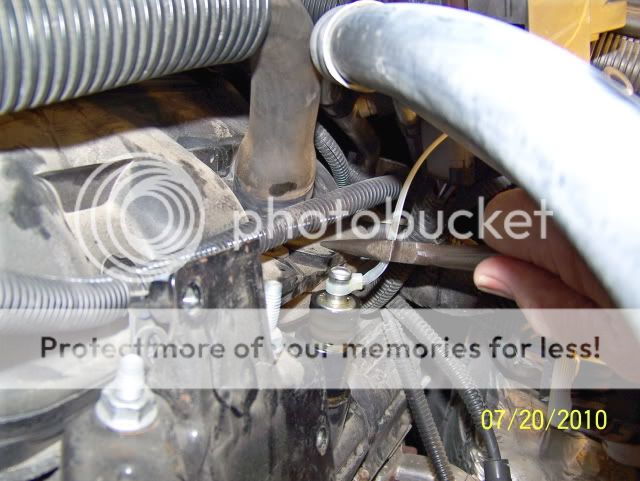
You now can see the PCV valve recessed into the adapter.
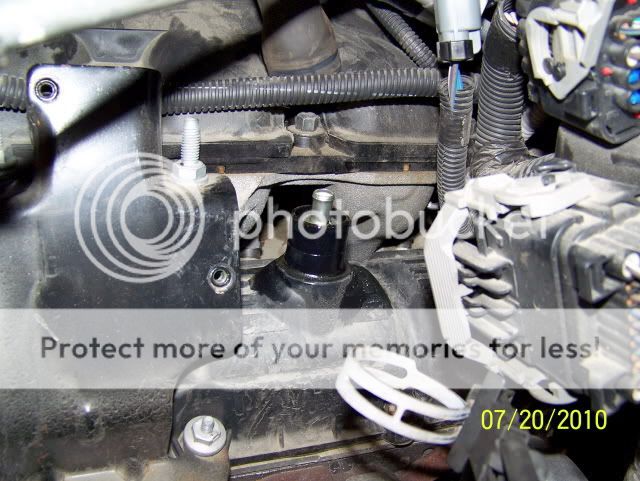
Put a zip tie on the neck, as pictured. Grab the zip tie with some pliers. Rest the nose of the pliers on the intake manifold, as in the picture.
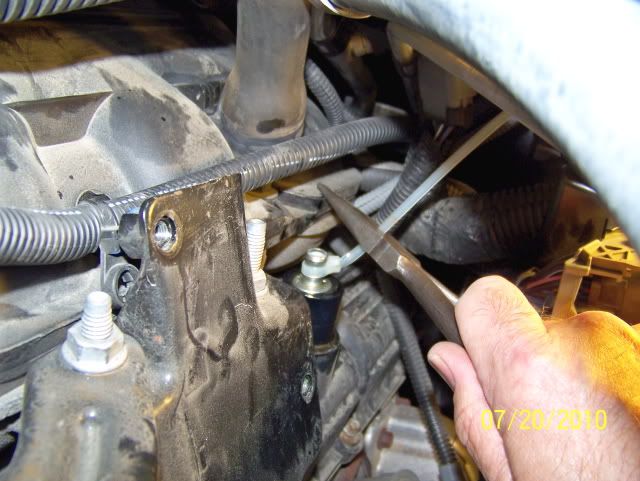
Pry up with the pliers. The Valve comes out so fast and easy, it actually may make a "pop".
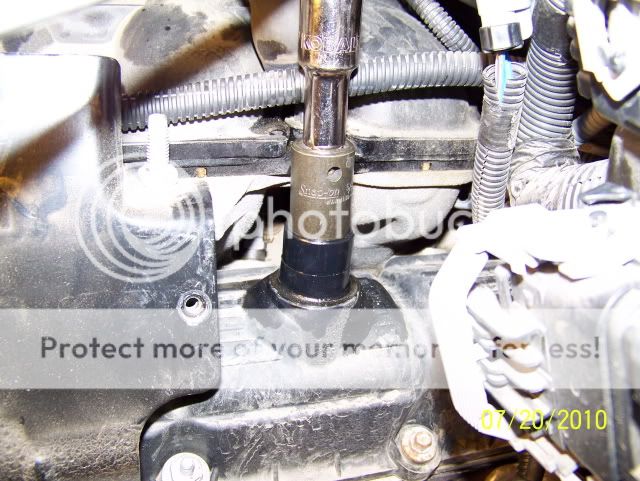
Place the new valve in the adapter. It will be hard to push home, so get a socket just big enough to fit in the adapter. The socket wall should be thick enough so it will push the valve, and the rubber seal.
An extension on top, long enough to stick above neighboring lines, will allow you to push or tap the valve home.
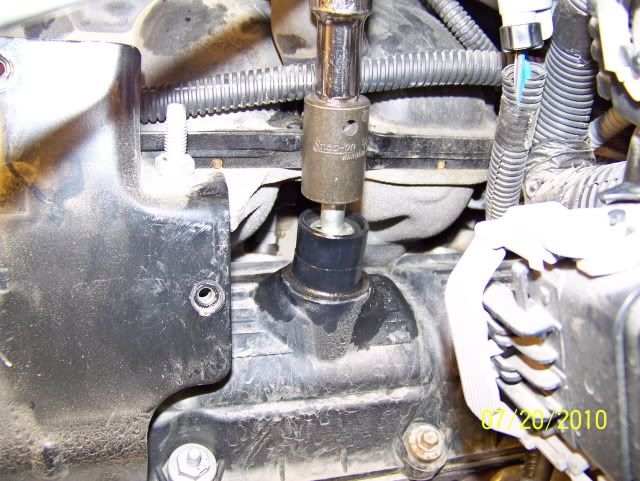
Here is a pic of the valve after seating it with the socket.
Reconnect the hose with the clamp, to the PCV adapter.
Reinstall the coil pack, connect the wires to the appropriate terminals.
When you push the plug wires onto the terminals, make sure you hear them snap into place.
Remove all tools from the engine bay.
Here is a link to how the valve works:
https://www.jk-forum.com/forums/show...CV-Valve-Study
Removing the coil pack is easy to do, and greatly improves access to the PCV valve.
Disconnect all six plug wires at the coil pack. The stock wires and the coil pack terminals are numbered, so no need to worry about marking them.
Remove the two bolts marked with yellow arrows.
Leave the main electrical plug, marked with red arrow, connected.
Rotate the coil pack up and out of the way. It will tuck in behind some of the wires, and stay there.
Now that you have plenty of room to work, remove the clamp from the PCV hose. Pliers will do it, but a hose clamp tool designed for this type of clamp will make it easier.
You now can see the PCV valve recessed into the adapter.
Put a zip tie on the neck, as pictured. Grab the zip tie with some pliers. Rest the nose of the pliers on the intake manifold, as in the picture.
Pry up with the pliers. The Valve comes out so fast and easy, it actually may make a "pop".
Place the new valve in the adapter. It will be hard to push home, so get a socket just big enough to fit in the adapter. The socket wall should be thick enough so it will push the valve, and the rubber seal.
An extension on top, long enough to stick above neighboring lines, will allow you to push or tap the valve home.
Here is a pic of the valve after seating it with the socket.
Reconnect the hose with the clamp, to the PCV adapter.
Reinstall the coil pack, connect the wires to the appropriate terminals.
When you push the plug wires onto the terminals, make sure you hear them snap into place.
Remove all tools from the engine bay.
Here is a link to how the valve works:
https://www.jk-forum.com/forums/show...CV-Valve-Study
All the Best,
Mike