Wrangler Ultimate Dash Cam build and Mini0906 Dual Dash Cam details
 06-09-2018, 06:35 AM
#11
Super Moderator
Thread Starter
System Wiring diagram is up!
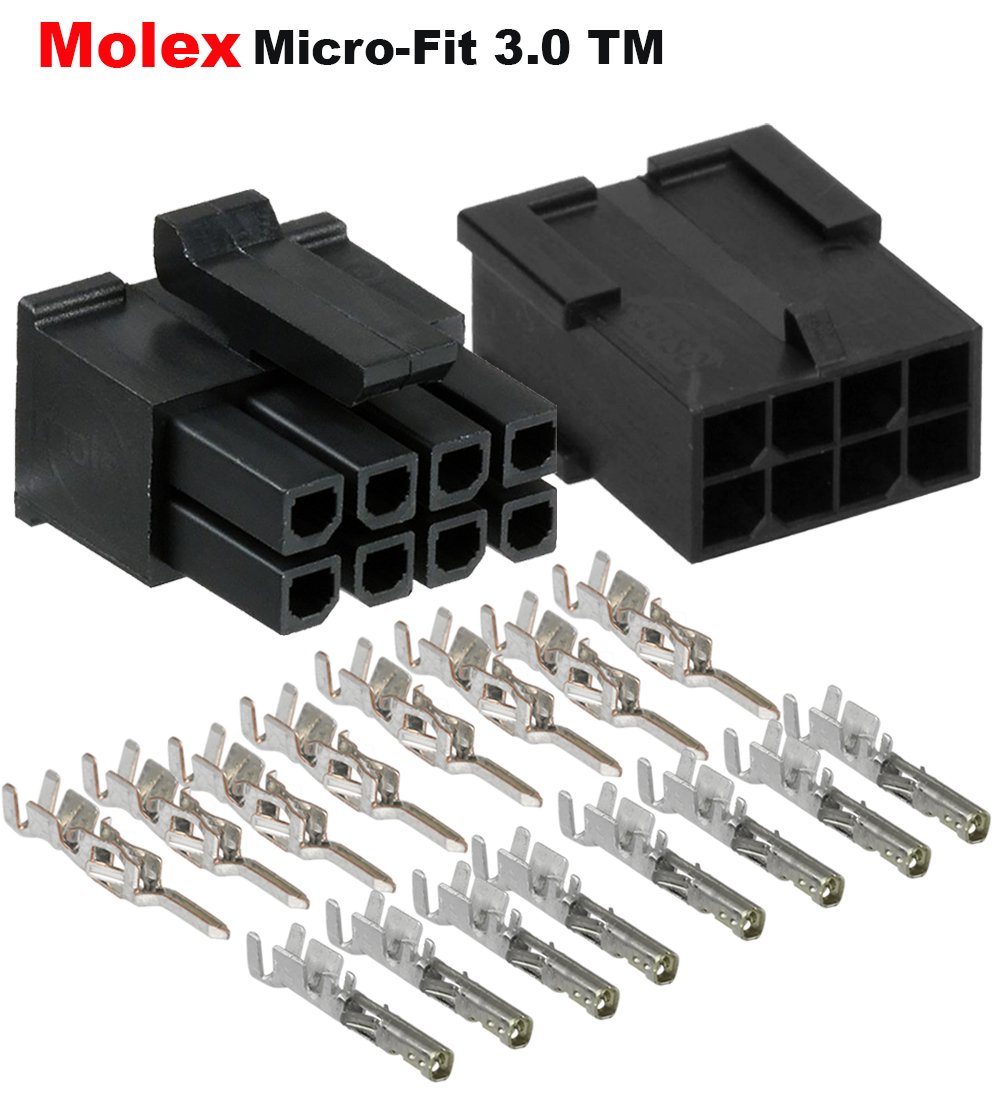
The most challenging parts of wiring this system will be in dealing with the rear window view camera and getting the location swap details figured out as well as providing quick connect/disconnect connectors of the wires worked out since I will need that to be able to take off the top while having the camera mounted on the rear window. Working out the finer details of making the Y-Adapter sync cable (The one that connects between the Front and Rear cameras) and also in figuring out how I'm going to splice into that same cable so I can add the quick disconnect connectors. The sync cable seems to have 8 wires, possibly 9 if it's a shielded cable. So what I will need to find are some 8-10 pin male and female connectors made for smaller size wires, so that when I go to take off the top, I can disconnect those connectors. Essentially I would need to cut the front/rear camera sync cable and splice some connectors into it.
Here's what I'm currently considering to use as an 8 wire connector set, only problem I can't find anything similar from a U.S. seller.
https://www.ebay.com/itm/2Pairs-Wate...YAAOSwR2RaIC7T
Last edited by Rednroll; 06-09-2018 at 09:04 AM.

 06-12-2018, 04:56 AM
#13
Super Moderator
Thread Starter
https://www.amazon.com/dp/B07997NH2Q/?coliid=I1YOQTGOZ1JOJ8&colid=41JVCR2XXBN2&psc=0&ref_=lv_ov_lig_dp_it
I also found some GM, Audio/VW throttle body wire harness connectors with pigtails but I couldn't find both sides and they had 12 wires.
These seemed like another good option but on the higher price side and had additional wires I didn't need.
https://www.ebay.com/itm/HID-Headlight-10-to-14-Pin-Wiring-Harness-Connector-Adapter-for-AUDI-A4-VW-Golf/253537007267?ssPageName=STRK%3AMEBIDX%3AIT&_trksid =p2055119.m1438.l2649

Those IP68 connectors that I posted are interesting, where I found you can get them in multiple wire configurations such as 2, 3, 4, 6, 8 and up to 12 wire options. It seems their typical application uses are for LED lighting and Air crafts. I went with the 8 wire, and am hoping they will work well for my needs. The only thing I didn't like about them are that I really dislike round connectors, since you find yourself spinning them around to get the proper pin to pin alignment when plugging them together, where that tends to be a pain, especially when working in the dark.
Last edited by Rednroll; 06-12-2018 at 05:44 AM.
06-25-2018, 02:59 PM
#15
Super Moderator
Thread Starter
I received all the parts this past weekend and had a chance to start wiring things up as well. Install pics will start coming in. Currently, I have the power wires in the interior and mounted the front dash cam.
One thing of note, is that it seems I'm going to have to find some areas to be able to wrap and hide away some of these custom wires which came with the camera setups. These cables are a length intended to be run the entire length of the vehicle, but for my setup that will not really be needed. The problem is since they're custom cables, cutting them unless necessary to reduce their length is not a small task. For example, the included cable that connects from the front cam to the rear cam in the mini 0906 setup is almost 20ft in length and my longest run between the 2 cameras will be about 7 feet. So I've got 13-15feet of wire to ball up and hide. The same thing with the hardwire kits. On the H/W kits, on one side are the 3 power wires, no problem adjust their length, but the side that connects to the camera and provides power to it is a micro USB cable which is about 11 feet in length and I'm not really interested in shortening and splicing a USB cable.
One thing of note, is that it seems I'm going to have to find some areas to be able to wrap and hide away some of these custom wires which came with the camera setups. These cables are a length intended to be run the entire length of the vehicle, but for my setup that will not really be needed. The problem is since they're custom cables, cutting them unless necessary to reduce their length is not a small task. For example, the included cable that connects from the front cam to the rear cam in the mini 0906 setup is almost 20ft in length and my longest run between the 2 cameras will be about 7 feet. So I've got 13-15feet of wire to ball up and hide. The same thing with the hardwire kits. On the H/W kits, on one side are the 3 power wires, no problem adjust their length, but the side that connects to the camera and provides power to it is a micro USB cable which is about 11 feet in length and I'm not really interested in shortening and splicing a USB cable.
06-26-2018, 04:56 AM
#16
Super Moderator

I do a lot of splicing using connectors. The best place I've found to pick up something that fits whatever the application requires is (and I don't know about linking to non vendors here so I'm just gonna spell it out for you) cycle terminal dot com. The pricing is very reasonable and the selection is enormous. The owner is in NJ and the stuff comes in the mail quickly. Check it out.
07-04-2018, 02:28 PM
#17
Super Moderator
Thread Starter
Well today, I did the splicing into the cable which connects between the front and rear cams of one of the Mini 0906 setups and inserted the 8pin connectors on both sides of the cable. The intent was to mount a front cam onto the rear window, then run the cable to the rear camera, which would mount the rear camera so that it was capturing the front dash IP area of the interior. It seems it is highly unlikely to be able to splice into this cable and have it continue to work. It's a high-tech USB cable which don't like to be spliced.
REAR FACING CAMERA PLAN B:
I'm still going to mount a front cam in the rear window. However, I am not going to run the cable which connects the front cam to the rear cam when the camera is mounted to the rear window. This means I will lose the front IP recording I had originally planned when I have the hard top on. However, when I take the hard top off and move that camera to the roll bar mounting location, I will run the cable to connect it to the rear cam which will be recording the front IP view. A slight inconvenience but if I was to lose any of the camera views, this seems like the least important, so I will make due.
07-05-2018, 09:11 AM
#19
Super Moderator
Thread Starter
Definitely, a bummer but as I'm moving forward with this install, other ideas have been coming to me where I'm going to try to make lemonade out of lemons.
My original plan was to mount 2 cams on the sound bar, one facing forward to capture the front dash/IP area and another facing rearwards to capture the rear seat occupants and back window area. Both of those views are kind of "Meh" but I noticed if I mounted one of those cameras on the back side of the sound bar facing rearward, I could adjust it so it was facing towards the sky and capture a sky view, which gave me some ideas.
Since I essentially destroyed one of the 20ft cables trying to do the splicing, this introduced another obstacle. I've sent a message to the seller on Amazon to see if I can obtain a replacement cable. I've read reviews where the customer received a defective cable and they were sent a replacement cable separately.....Mine seems to be defective as well.
However, I still have the 1foot cable that I purchased separately and this may solve a few problems if I'm unable to get a replacement longer cable and it may now be my preferred plan of attack.
https://www.amazon.com/gp/product/B078H8XG7C/ref=oh_aui_detailpage_o01_s00?ie=UTF8&amp&psc=1
The shorter cable's intended application is so you can mount the front cam on the windshield, and then connect the rear cam on the front windshield facing the opposite direction to capture the interior of the vehicle. The shorter cable is nice in this setup, so you don't have to connect the cams using a 20ft long cable when they're essentially mounted right next to each other. I mentioned this problem earlier, where I had originally intended to connect the front cam to the rear cam and mount that rear cam on the backside of the sound bar (rear passenger view). However, I had about 12 foot of extra cable I needed to figure out where to tuck away. Therefore, instead I decided to use the short cable for its intended use with the rear cam facing backwards, mounted directly above the rear view mirror instead, right next to the front facing cam and this cam now provides an interior view of the front and rear occupants which is what I wanted to capture anyways but had originally planned to do it with 2 separate cams.
Now the question for me becomes, where do I mount the rear cam that will connect to the cam that's mounted on the rear window?
Here are some of my current thoughts.
- Get another short cable, and connect it on the rear window facing forward towards the interior (likely won't be able to capture the dash odometer view, but I think that is likely not that important anyways since the cams have GPS for speed anyways). However, with the shorter cable when I move the rear cam to the rear roll bar mount location (top off), this makes it so I can move both cams since it's now a short cable that isn't routed to the interior of the vehicle which is the reason I needed to splice the cable. Thus I eliminate that problem by using a shorter cable instead of doing my original splicing and Y-cable plan.
- Mount that rear cam underneath the vehicle and connect it to the rear facing roll bar mounted cam. I'm thinking mounting it somewhere near the front axle so that I can capture suspension articulation and the underside terrain view. I will need to find some type of water proof housing for the cam, since they're not waterproof but I think this could be an interesting view to capture for off-road uses, where most of the time I have my top off anyways.
Here's my current Plan B that I'm thinking, where I'm starting to like this idea better than my original plan A.
Use case scenarios (rear mounted cam).
Hard Top On: Front cam mounted on rear window facing the rear. Get another 1ft cable, and mount rear cam facing forwards to get interior view from the rear. (Still Good for capturing thieves breaking in)
Soft Top/Topless (config option 1): Front cam will be relocated to the back/center/top part of the roll bar and facing rearward. Connect short cable and move the rear cam, along with front cam to that same mounting location and face rear cam forward in the opposite direction (similar view as above, just moved up) or adjust the rear cam to point skyward, to capture sky topless view.
Soft Top/Topless (config option 2): Front cam will be relocated to the back/center/top part of the roll bar and facing rearward. Connect Long cable, run it through the floor boards to the exterior and route it to the front axle area, facing forward to capture suspension and underside terrain views. Will need some type of waterproof Go-Pro style of enclosure mounting case.
So essentially, in the Soft Top/Topless configurations I could move the rear smaller cam which doesn't hold the SD card to the underside by connecting the long cable of the dual cam setup, or connect the short cable of the dual cam setup where I can adjust the rear cam to capture the interior front facing view, or I point it upwards to capture a topless sky view. Those views and config options seem much cooler than I had originally planned.
Last edited by Rednroll; 07-05-2018 at 09:26 AM.
07-05-2018, 11:32 AM
#20
Super Moderator
Thread Starter
Here's how I decided to mount the front/ interior rear view cams using the 1ft cam connection cable. The front facing cam shows the view just over the top of the hood, the rear facing cam shows driver, passenger, and rear occupants.

P.S. Not shown but I ended up putting a crack in my windshield doing this install. I was using a plastic trim tool remover to pry the top molding off, as I was prying I noticed a dot the size of a pin head and thought it was a spec of dirt on the windshield. Turns out it was a tiny stone chip on the outside and the slight pressure I applied on the windshield in the hot sun with the trim tool remover, sent a crack down the center of the windshield. Going to be a trip to Safelite in the near future.
Yesterday ended up being a bummer 4th of July for me. I spent a lot of time splicing the connectors, and routing that cable through the hard top in the rear only to learn that was a lot of wasted time. I then decided to move to the front cam new plan install and cracked the front windshield.
Last edited by Rednroll; 07-05-2018 at 11:44 AM.