OTRATTW switches and Daystar panel

 03-17-2012, 12:25 PM
#2
JK Super Freak
Join Date: Oct 2007
Location: Phoenix, AZ
Posts: 1,572
Likes: 0
Received 0 Likes
on
0 Posts
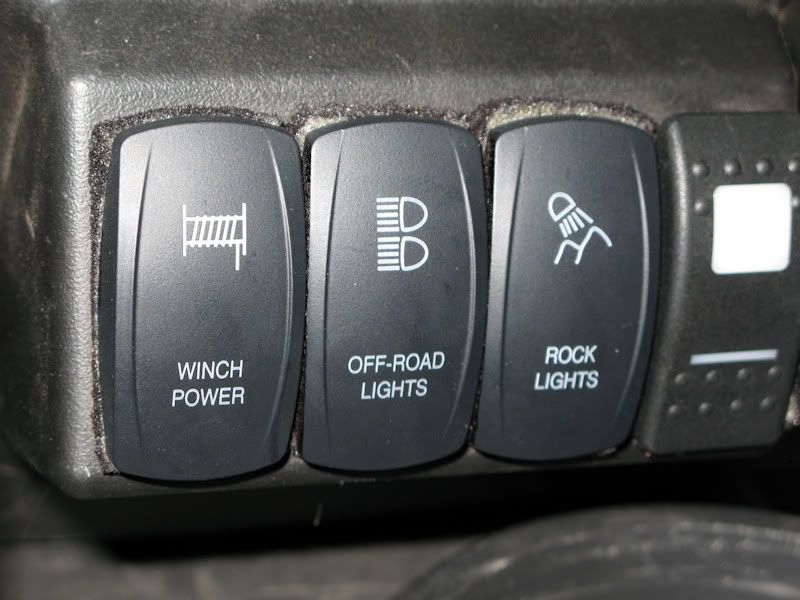
Funny, I had to sand mine to get them to seat properly (OTRATTW warned me before I purchase them). I notice in your picture your switches are bent slightly to the side - because the covers are a little too big. You don't have to sand off too much, and with the help of a Sharpie you can't even tell:
Last edited by joe002; 03-17-2012 at 12:28 PM.
03-17-2012, 01:03 PM
#4
JK Super Freak
Join Date: Oct 2007
Location: Phoenix, AZ
Posts: 1,572
Likes: 0
Received 0 Likes
on
0 Posts
If you look really close at the top of the switches when you have them both turned on you'll see they don't sit completely flat - because the cover is just a little too wide. I just used a palm sander on the sides and when they sat correctly I got a Sharpie and made the white plastic black again. Just be careful to only sand the sides (not the front).
03-17-2012, 01:41 PM
#6
JK Super Freak
Join Date: Oct 2007
Location: Phoenix, AZ
Posts: 1,572
Likes: 0
Received 0 Likes
on
0 Posts
04-29-2012, 08:26 AM
#7
JK Freak
Join Date: Jul 2011
Location: Atlanta, GA
Posts: 501
Likes: 0
Received 0 Likes
on
0 Posts
Those look great. Just ordered my daystar panel, now to order the switches. OTRATTW has so many to choose from. I only need two switches for my roof rack lights, might get another for the rear lights (or only wire them to reverse lights).
Let's see some other samples that others have done.
Let's see some other samples that others have done.
Trending Topics
04-29-2012, 01:40 PM
#9
JK Super Freak
Join Date: Oct 2007
Location: Phoenix, AZ
Posts: 1,572
Likes: 0
Received 0 Likes
on
0 Posts
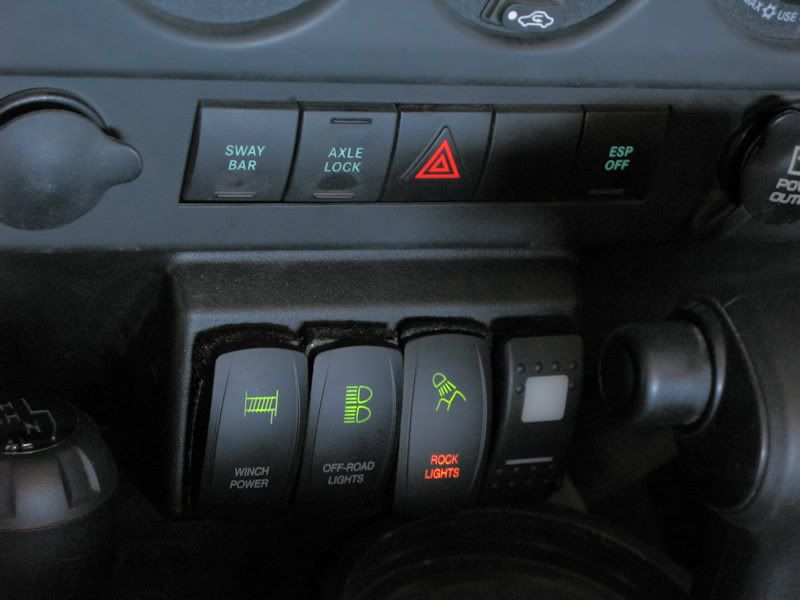
The color of the LEDs are different than the stock switches. Also the shape of the switches are different than the stock switches.
I think that most would guess that they re after-market because of the size/shape of the switches, and color of the LEDs, not because of the lettering.