Custom modular JK hardtop
 10-06-2017, 05:29 AM
#1801
JK Super Freak
Looking forward to this, as are the Dogs. Is that tinted Skylight going to be a Production item for the 2dr Hardtop as well ?? Meaning, a item I can buy, and then install
 10-06-2017, 06:47 AM
#1802
JK Enthusiast

Join Date: Jul 2016
Location: West Coast Florida
Posts: 143
Likes: 0
Received 0 Likes
on
0 Posts


 10-06-2017, 10:14 AM
#1803
JK Super Freak
Thread Starter

The Freedom Panel skylight is in the process of becoming a commercial product, there's just one more component that has to be finalized for manufacturing (the hinges). The tinted glass is ready to be manufactured (I've received prototypes already) and the latch and weatherstrip are sourced.
The main roof skylights are easy to do; I don't think a kit really would be necessary. I can show people how to DIY them if people are interested.
10-06-2017, 11:48 AM
#1805
JK Super Freak
Thread Starter
 10-07-2017, 03:22 AM
#1808
JK Super Freak
Thread Starter
Here are the basic steps for installing a fixed skylight in a hardtop roof.
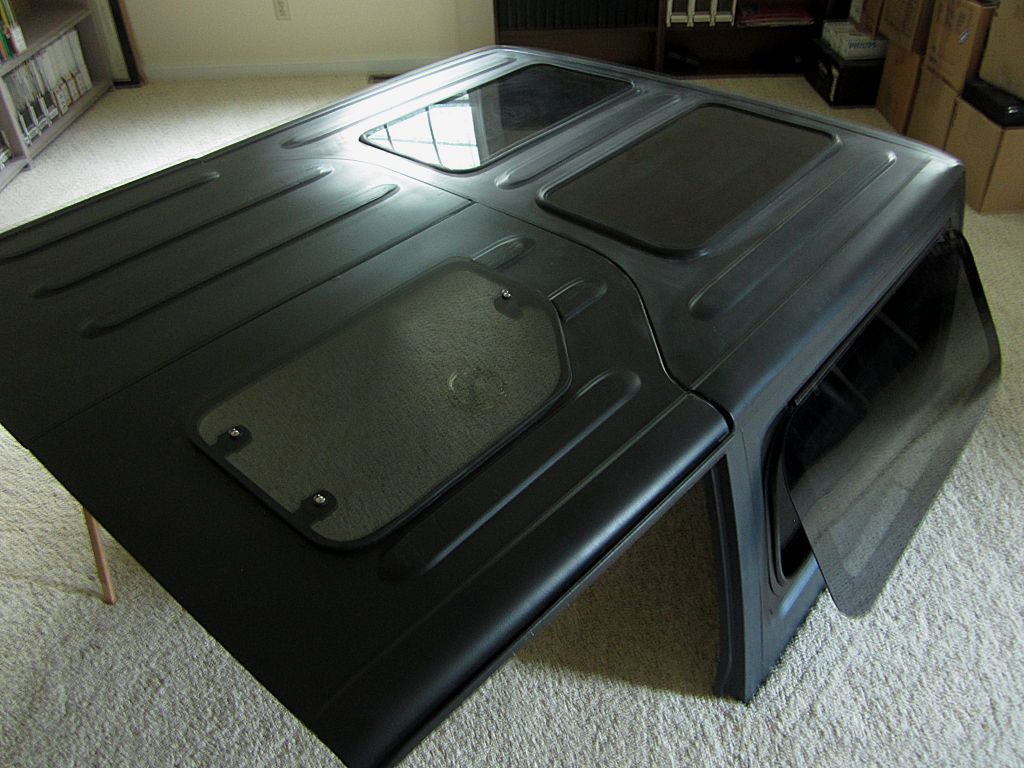
1. Decide on the size and position of the skylight. You'll need a flat area, so on the JK hardtop roof you'll have to work around the raised ribs in the roof. The photo below shows where I put the skylights on a 2-door hardtop.
You can mark the outline of the skylight with 1/4" masking tape as shown in the photo below. Lay out the corners with a 1.5" radius - that's a radius that the weatherstrip bends around well.
2. You'll need a glass weatherstrip, here's one that I use for applications like this: AS1179 - CRL Two-Piece Self-Sealing Weatherstrip for 3/32" to 9/64" Panel or 3/16" to 1/4" Glass. This is a two-piece weatherstrip that includes a "lock strip" that locks the glass into the mounting surface. There are one-piece weatherstrips available but I find that the two-piece type seals much more reliably, which is especially important in a skylight application. You'll need enough to go all the way around the hole(s) you've marked, plus a little bit.
3. Get glass cut to match the hole you marked. You have three choices:
- Tempered glass. You'll have the best choice of tints going this route because you use ordinary 1/4" glass and it gets tempered after it's cut. You'll need to find a glass place that can do tempering (or can send it out to a specialty tempering place).
- Automotive laminated safety glass. This is the material that windshields are made of, it's two layers of glass with plastic sandwiched in between. You may not find as good a selection of tints in this type of glass, mostly because it's used for windshields, which aren't tinted. A glass place can easily cut it to size and it doesn't need any post-cutting tempering - once it's cut it's ready to install.
- Plastic (lexan, plexiglass, etc.). I'm not a fan of this because it scratches so easily and it's subject to clouding and degradation due to UV light exposure. It can be cut at home so you won't need a glass shop, but in many cases it's even more expensive than real glass. I often use plastic for prototypes - I cut the plastic, get everything fitted, then I remove the plastic and take it to the glass shop for them to use as a template to cut the glass. I've never used plastic for anything but prototypes though, I always use real glass.
My choice for the skylight is tempered glass because you'll find the best choice of tints/colors, and it's safe - if it breaks it'll break in a million pieces like an automotive side window.
4. Use the glass as a template for marking the hole that needs to be cut. You'll need to allow 5/16" all around the glass for the weatherstrip, so as you trace the glass, add 5/16 on all sides. A better way than tracing to ensure accuracy is to lay the glass on the hardtop and run a new line of 1/4" tape around the glass.
5. Cut the hole on the line you drew in the previous step. It's best to cut fiberglass with an abrasive cutting disk, such as a 1/16" thick cutoff wheel in a 4 1/2" angle grinder. You can use a fine-toothed blade in a jigsaw, but the impacts of the teeth can create micro-fractures in the fiberglass which may turn into cracks over time. If you do use a jigsaw, cut a bit inside the line and then sand the fiberglass to the line, this will eliminate any fractures.
If you use a 1/16" cutting disk and you've put the tape outline on the hardtop as in step 4, you can cut at the outer edge of the 1/4" tape - the 1/4" tape width plus the 1/16" cutting disk thickness will result in the hole being 5/16" larger than the glass, which is exactly what's needed for the weatherstrip.
6. Fit the weatherstrip into the hole. Since rubber will shrink over time, the butt joint where the two ends meet should be cut at least 1/4" long and force-fit. It's best to use silicone sealant at the butt joint.
7. Fit the glass into the weatherstrip, and install the lock strip to seal and lock the glass into place. The easiest way to install the lock strip is with a lock strip tool: https://www.amazon.com/Lisle-47000-W.../dp/B000COA1CQ.
A search will turn up lots of videos on YouTube showing how to install the weatherstrip and the lock strip: https://www.google.com/search?q=lock...utf-8&oe=utf-8
To make things go together a bit easier, I spray Windex or similar window cleaner on the rubber as I'm working to provide lubrication. In addition to the lock strip tool, I find that a plastic trim tool helps to get the glass initially into the weatherstrip, they're available at most auto stores.
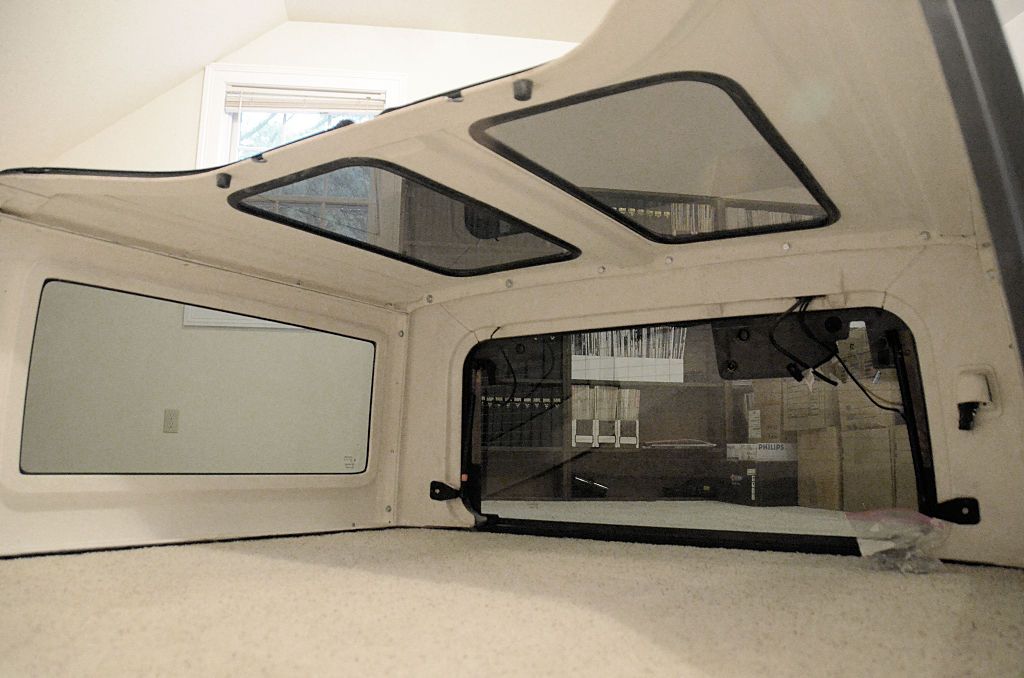
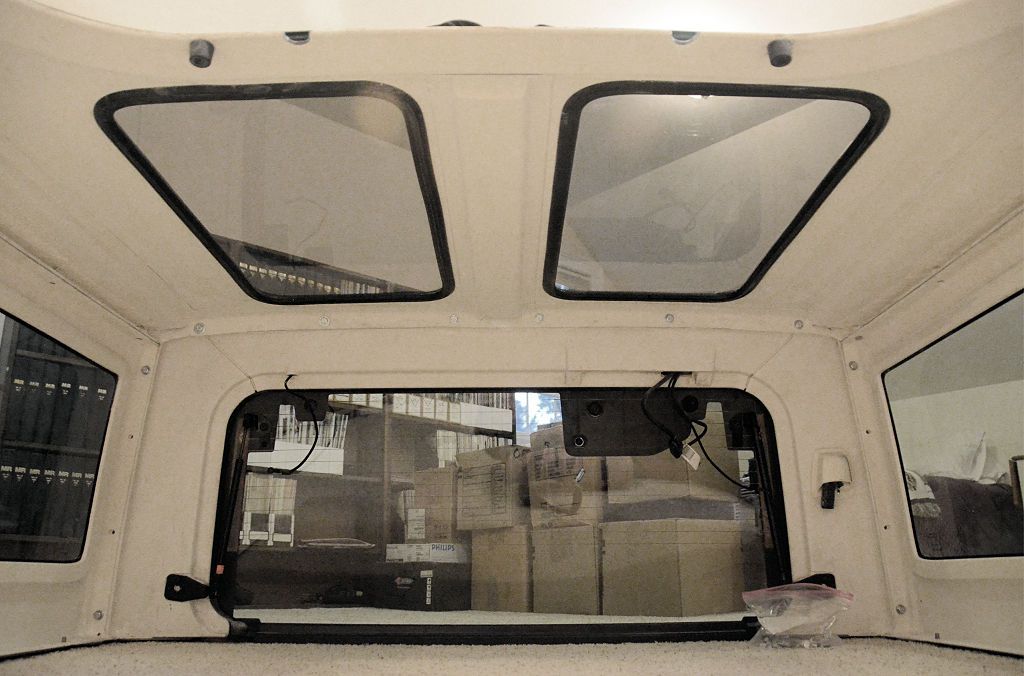
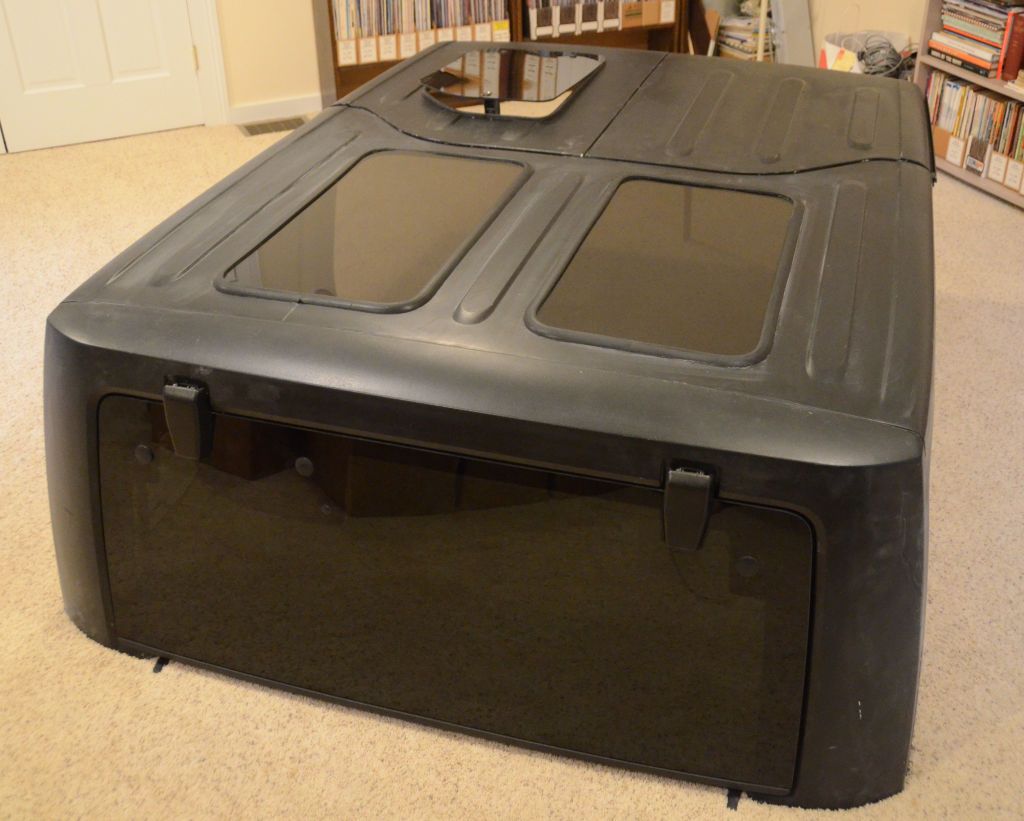
A view of the installed skylights from the inside, the hardtop has been converted to modular so this photo is just the roof panel:
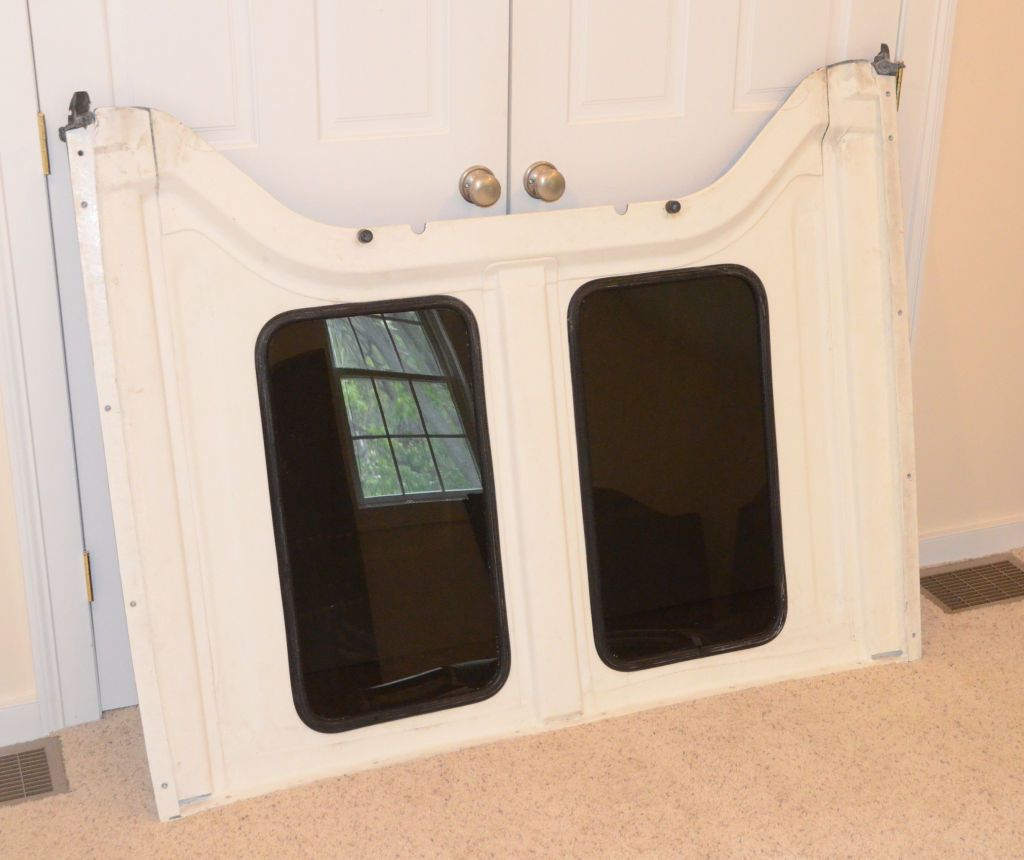
And outside:

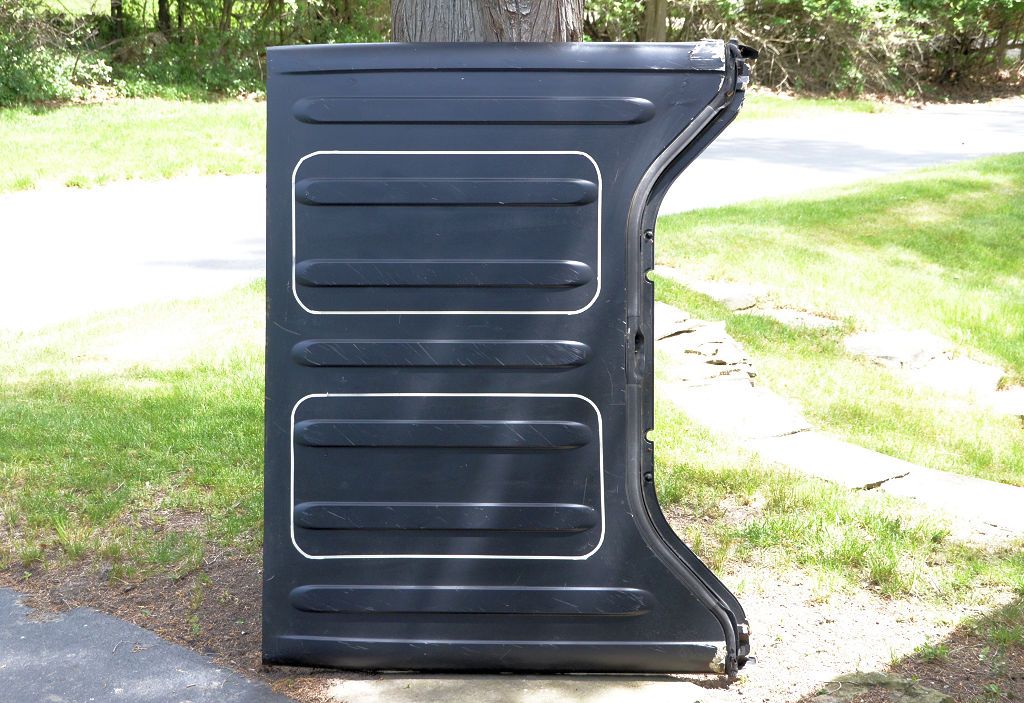
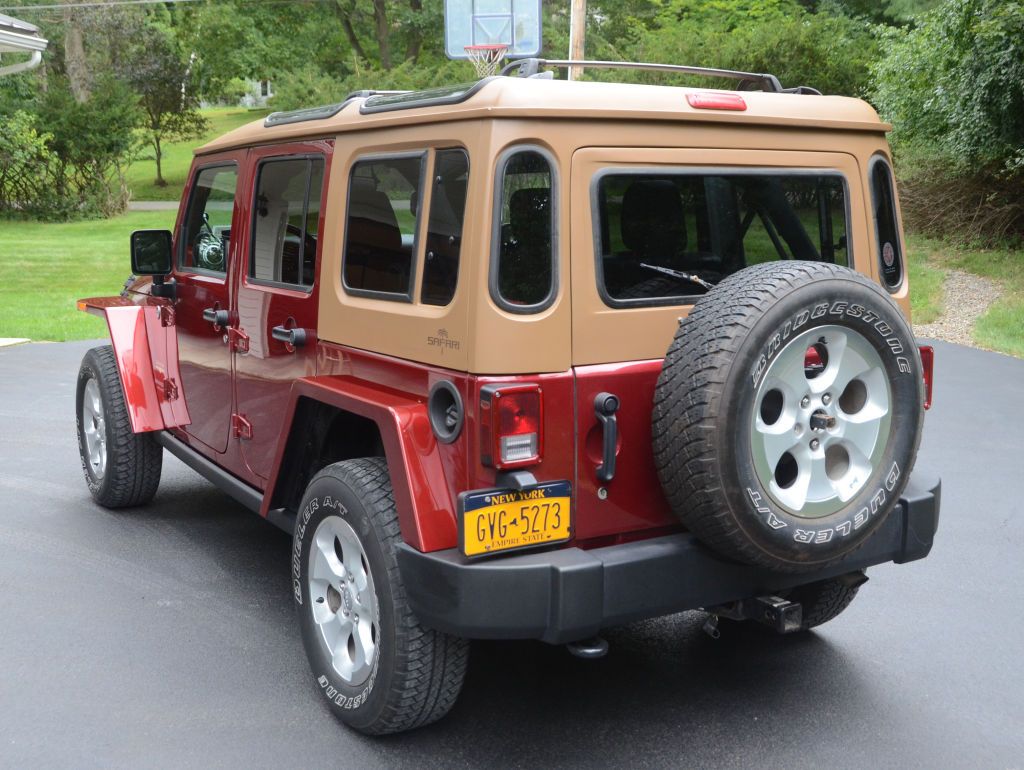
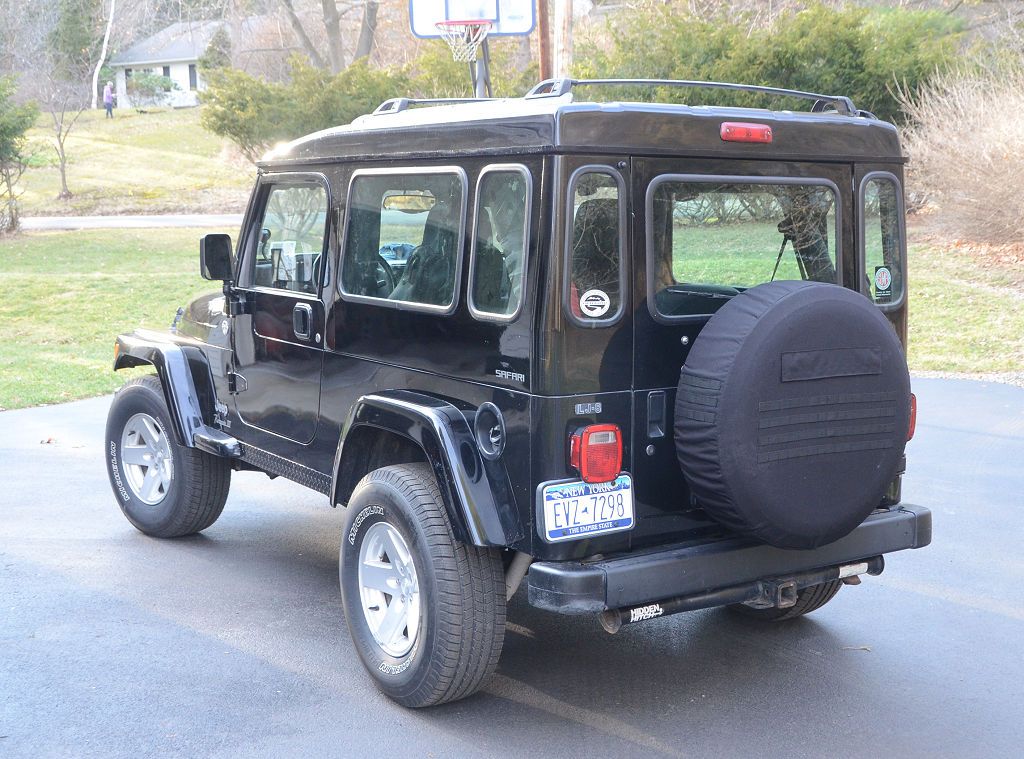
All of the above is also how I've done the windows in both of my Safari Cab hardtops. The windows in the JK Safari are tinted tempered glass, and the windows in the LJ Safari are laminated safety glass.
1. Decide on the size and position of the skylight. You'll need a flat area, so on the JK hardtop roof you'll have to work around the raised ribs in the roof. The photo below shows where I put the skylights on a 2-door hardtop.
You can mark the outline of the skylight with 1/4" masking tape as shown in the photo below. Lay out the corners with a 1.5" radius - that's a radius that the weatherstrip bends around well.
2. You'll need a glass weatherstrip, here's one that I use for applications like this: AS1179 - CRL Two-Piece Self-Sealing Weatherstrip for 3/32" to 9/64" Panel or 3/16" to 1/4" Glass. This is a two-piece weatherstrip that includes a "lock strip" that locks the glass into the mounting surface. There are one-piece weatherstrips available but I find that the two-piece type seals much more reliably, which is especially important in a skylight application. You'll need enough to go all the way around the hole(s) you've marked, plus a little bit.
3. Get glass cut to match the hole you marked. You have three choices:
- Tempered glass. You'll have the best choice of tints going this route because you use ordinary 1/4" glass and it gets tempered after it's cut. You'll need to find a glass place that can do tempering (or can send it out to a specialty tempering place).
- Automotive laminated safety glass. This is the material that windshields are made of, it's two layers of glass with plastic sandwiched in between. You may not find as good a selection of tints in this type of glass, mostly because it's used for windshields, which aren't tinted. A glass place can easily cut it to size and it doesn't need any post-cutting tempering - once it's cut it's ready to install.
- Plastic (lexan, plexiglass, etc.). I'm not a fan of this because it scratches so easily and it's subject to clouding and degradation due to UV light exposure. It can be cut at home so you won't need a glass shop, but in many cases it's even more expensive than real glass. I often use plastic for prototypes - I cut the plastic, get everything fitted, then I remove the plastic and take it to the glass shop for them to use as a template to cut the glass. I've never used plastic for anything but prototypes though, I always use real glass.
My choice for the skylight is tempered glass because you'll find the best choice of tints/colors, and it's safe - if it breaks it'll break in a million pieces like an automotive side window.
4. Use the glass as a template for marking the hole that needs to be cut. You'll need to allow 5/16" all around the glass for the weatherstrip, so as you trace the glass, add 5/16 on all sides. A better way than tracing to ensure accuracy is to lay the glass on the hardtop and run a new line of 1/4" tape around the glass.
5. Cut the hole on the line you drew in the previous step. It's best to cut fiberglass with an abrasive cutting disk, such as a 1/16" thick cutoff wheel in a 4 1/2" angle grinder. You can use a fine-toothed blade in a jigsaw, but the impacts of the teeth can create micro-fractures in the fiberglass which may turn into cracks over time. If you do use a jigsaw, cut a bit inside the line and then sand the fiberglass to the line, this will eliminate any fractures.
If you use a 1/16" cutting disk and you've put the tape outline on the hardtop as in step 4, you can cut at the outer edge of the 1/4" tape - the 1/4" tape width plus the 1/16" cutting disk thickness will result in the hole being 5/16" larger than the glass, which is exactly what's needed for the weatherstrip.
6. Fit the weatherstrip into the hole. Since rubber will shrink over time, the butt joint where the two ends meet should be cut at least 1/4" long and force-fit. It's best to use silicone sealant at the butt joint.
7. Fit the glass into the weatherstrip, and install the lock strip to seal and lock the glass into place. The easiest way to install the lock strip is with a lock strip tool: https://www.amazon.com/Lisle-47000-W.../dp/B000COA1CQ.
A search will turn up lots of videos on YouTube showing how to install the weatherstrip and the lock strip: https://www.google.com/search?q=lock...utf-8&oe=utf-8
To make things go together a bit easier, I spray Windex or similar window cleaner on the rubber as I'm working to provide lubrication. In addition to the lock strip tool, I find that a plastic trim tool helps to get the glass initially into the weatherstrip, they're available at most auto stores.
A view of the installed skylights from the inside, the hardtop has been converted to modular so this photo is just the roof panel:
And outside:
All of the above is also how I've done the windows in both of my Safari Cab hardtops. The windows in the JK Safari are tinted tempered glass, and the windows in the LJ Safari are laminated safety glass.
Last edited by jscherb; 10-07-2017 at 03:26 AM.
10-07-2017, 05:42 AM
#1809
JK Super Freak
Very nice, Thank you ! For myself, I think laminated windshield glass ; hail, branches, impacts could break the tempered glass, and shower the interior with glass pebbles. Imagine the look of K9 Surprise !
10-07-2017, 06:44 AM
#1810
JK Super Freak
Thread Starter
If you use laminated safety glass and want a dark tint, you might end up using tint film to get the percentage tint you want because there usually aren't too many tint choices available for laminated safety glass.