Freedom Top Repair / Repaint (Bedlined)
 08-24-2010, 02:47 PM
#21
JK Junkie
Thread Starter
thanks guys, it really turned out nice.
I will have to get more pics for you when i put the hardtop back on.
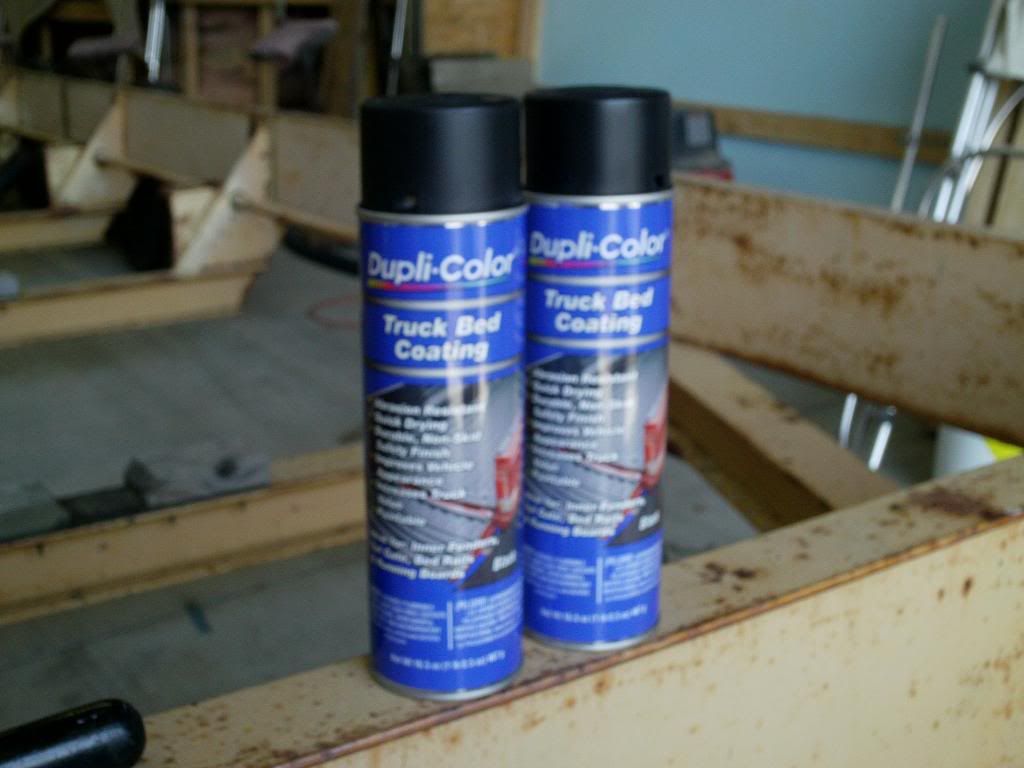
I can't really answer about the durability of the duplicolor bedliner because i have not abused it yet, but i'm sure after a couple washes and weather will wear it down a bit, but thats fine with me. As for usage, i originally bought 8 cans, and i have most of one can left. The sides and back portion of the top took about 3-4 cans, but remember i screwed up the back of the rear top section and had to go back and fix it. The top of the whole rear section took 2-3 cans and the freedom panels took 1-2 cans. You don't really need to go crazy with it, because it you build up too much, it gets blotchy easily. I tried my best to make it nice even coats.
But i will get some pics for you guys within the next month or so because it's time for Fall
I will have to get more pics for you when i put the hardtop back on.
I can't really answer about the durability of the duplicolor bedliner because i have not abused it yet, but i'm sure after a couple washes and weather will wear it down a bit, but thats fine with me. As for usage, i originally bought 8 cans, and i have most of one can left. The sides and back portion of the top took about 3-4 cans, but remember i screwed up the back of the rear top section and had to go back and fix it. The top of the whole rear section took 2-3 cans and the freedom panels took 1-2 cans. You don't really need to go crazy with it, because it you build up too much, it gets blotchy easily. I tried my best to make it nice even coats.
But i will get some pics for you guys within the next month or so because it's time for Fall
 08-28-2010, 10:33 PM
#22
JK Junkie
Thread Starter
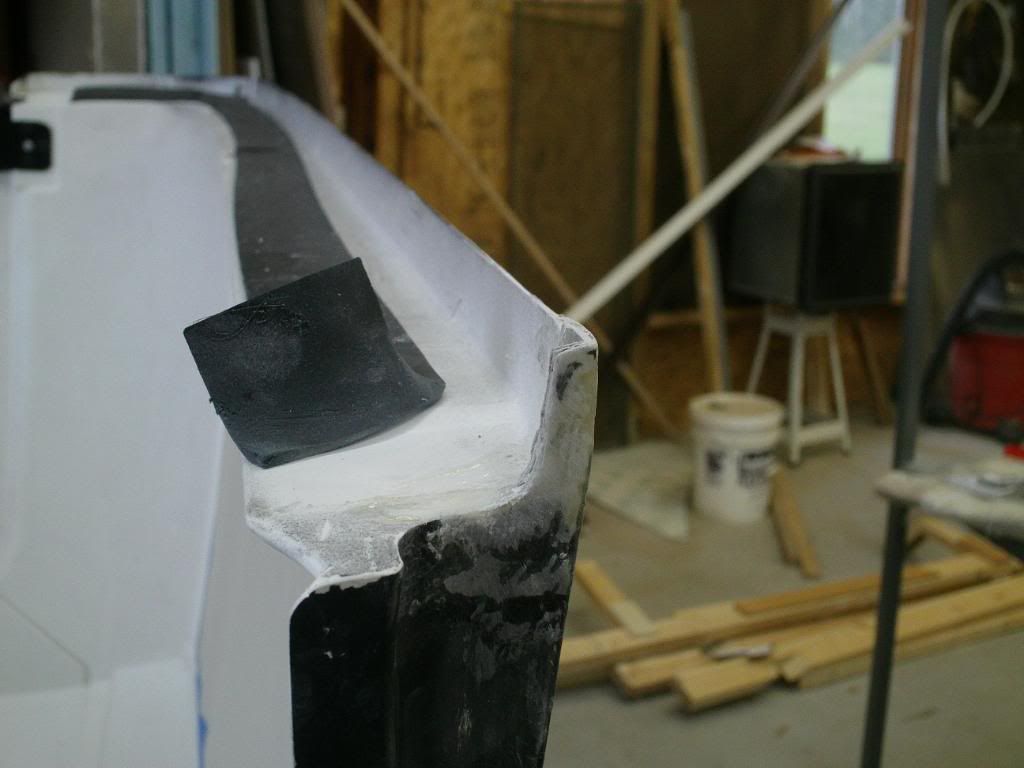
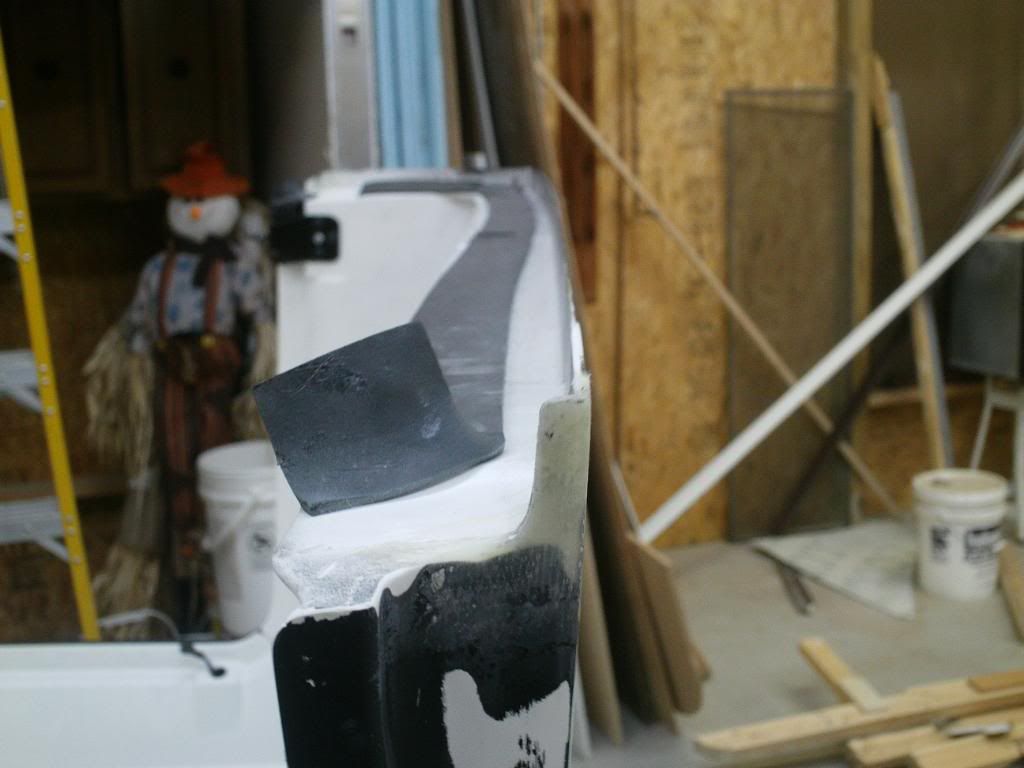
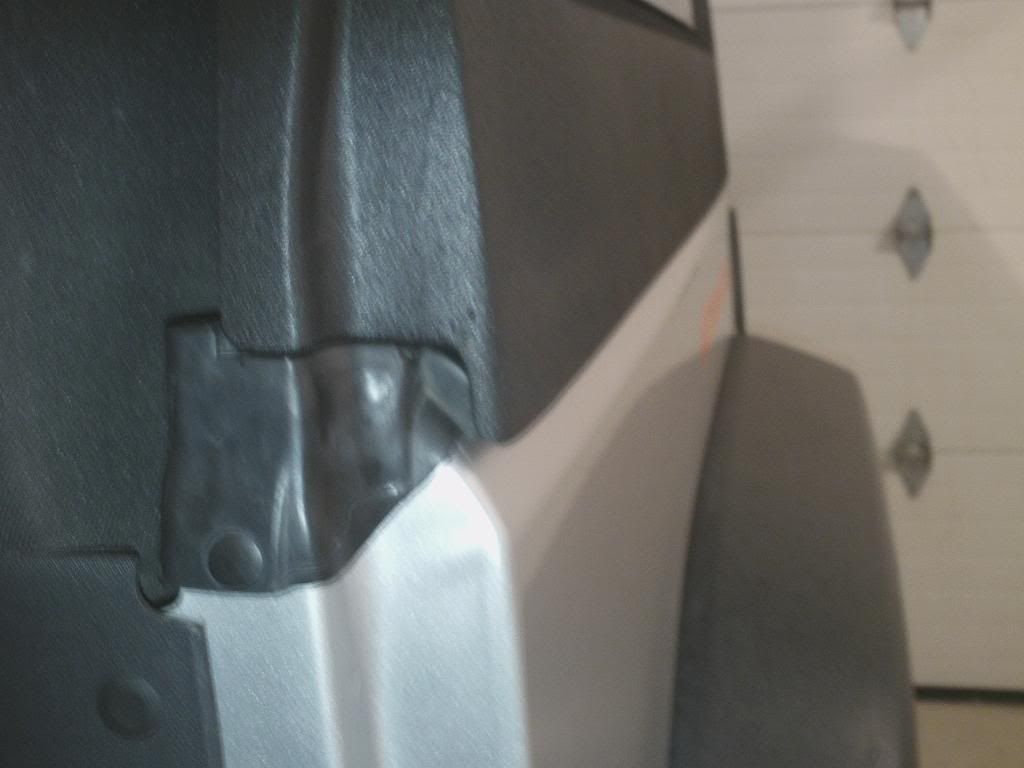
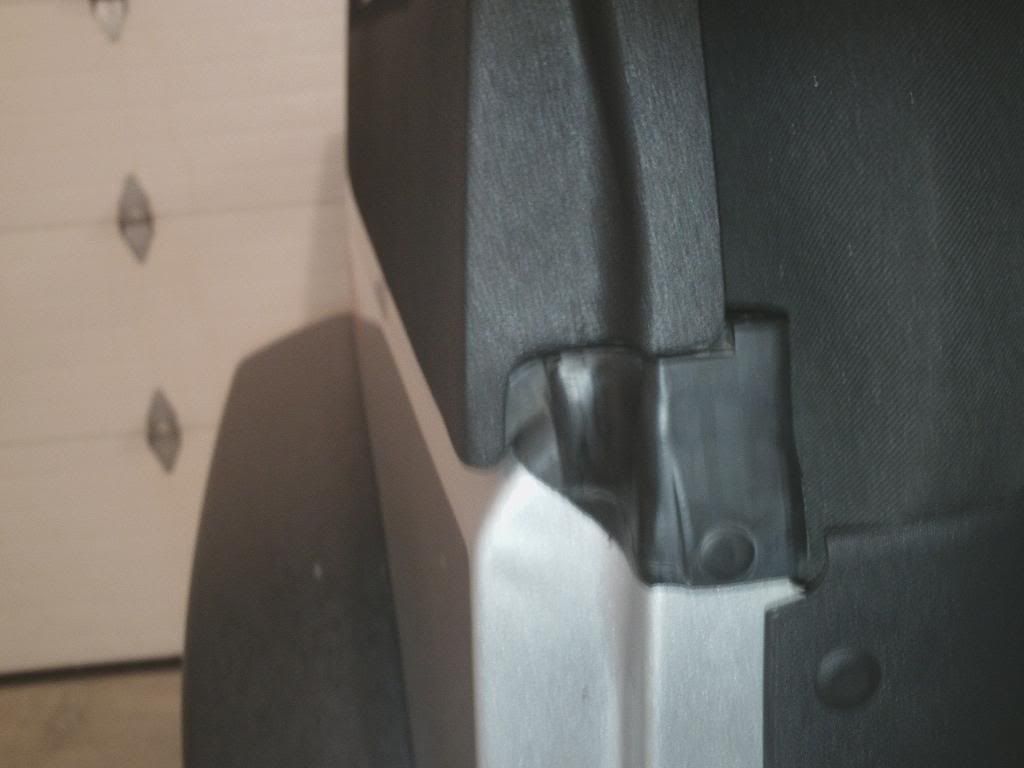
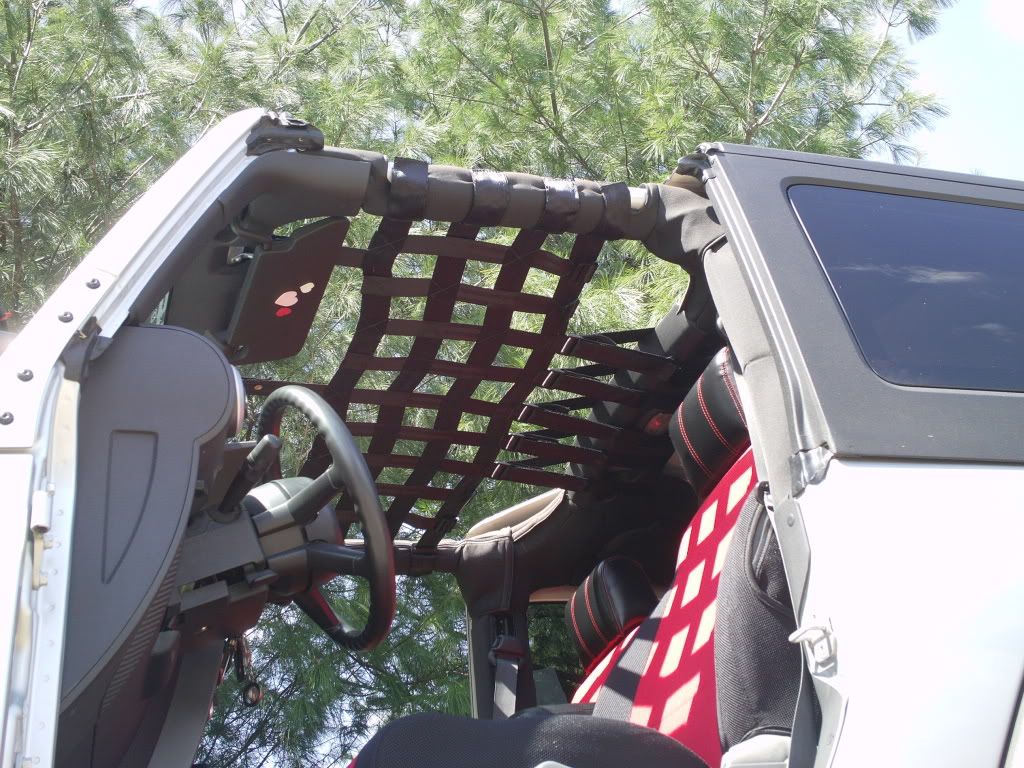
As promised i took a few pics of the Freedom panels.
After putting them on i realized the passenger side was lighter then the driver side and it needed another coat or two, so i used up the last of my eighth can.
Here are the pics of the panels
After putting them on i realized the passenger side was lighter then the driver side and it needed another coat or two, so i used up the last of my eighth can.
Here are the pics of the panels
09-11-2010, 07:50 PM
#23
JK Junkie
Thread Starter
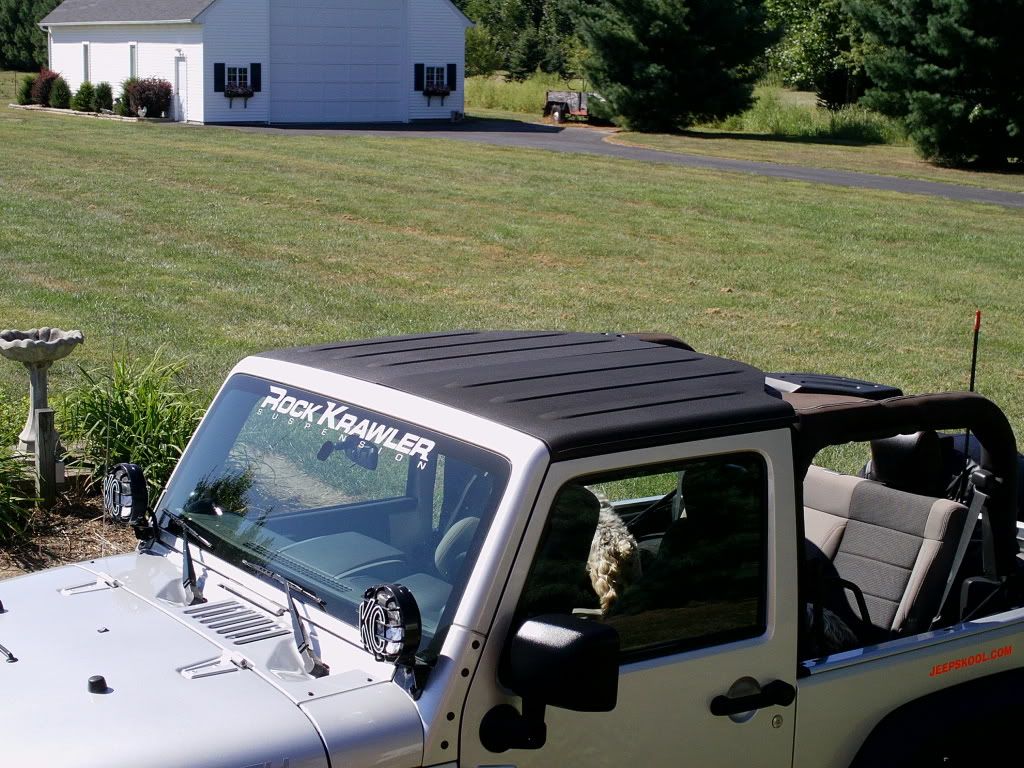
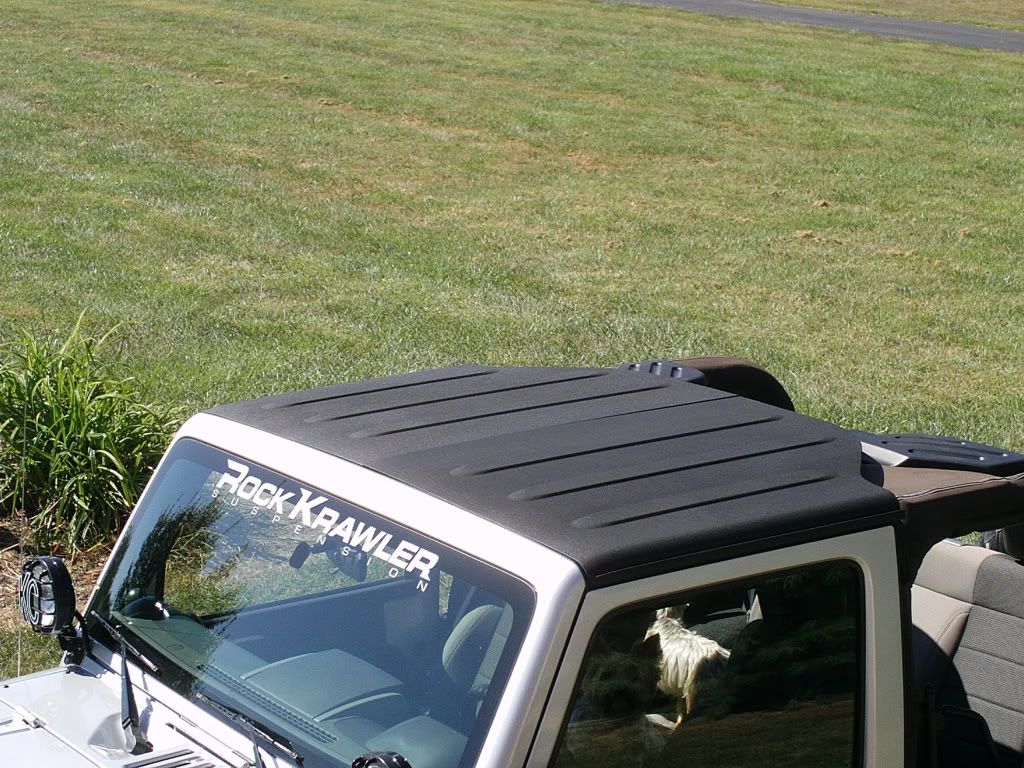
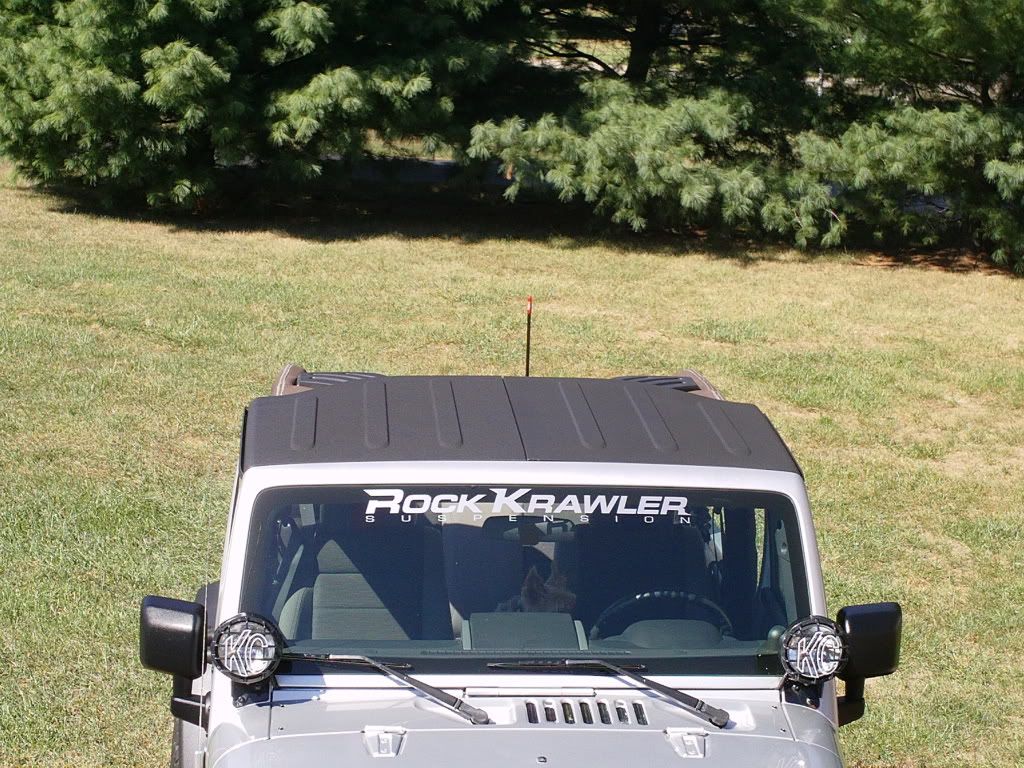
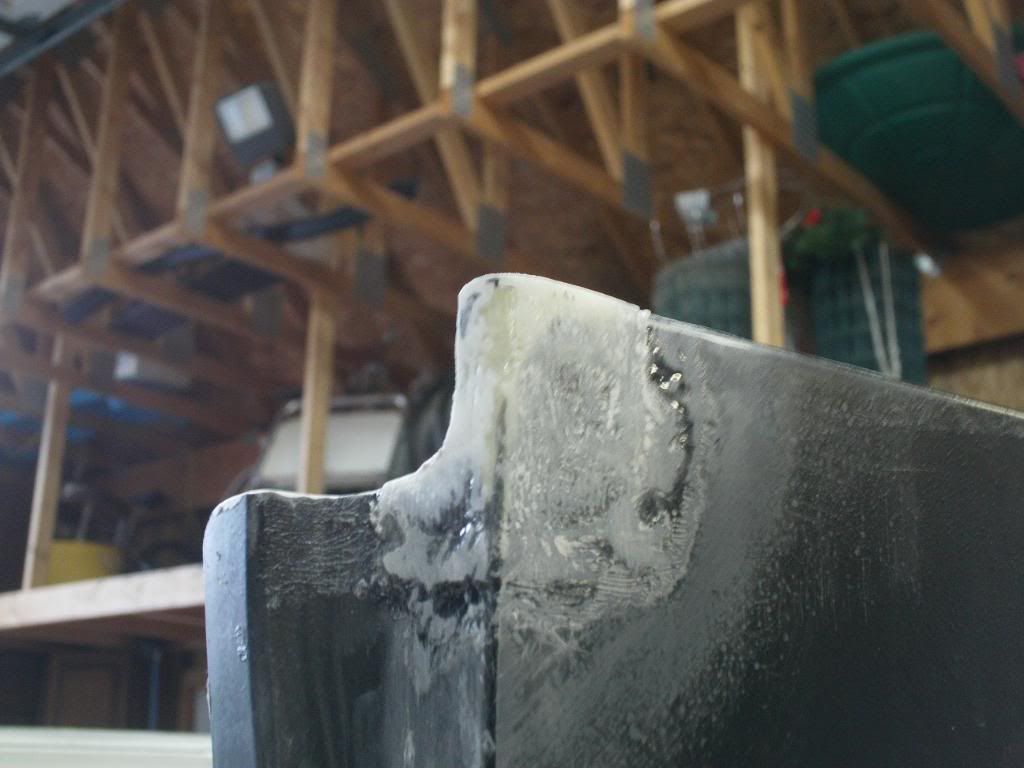
complete pictures!
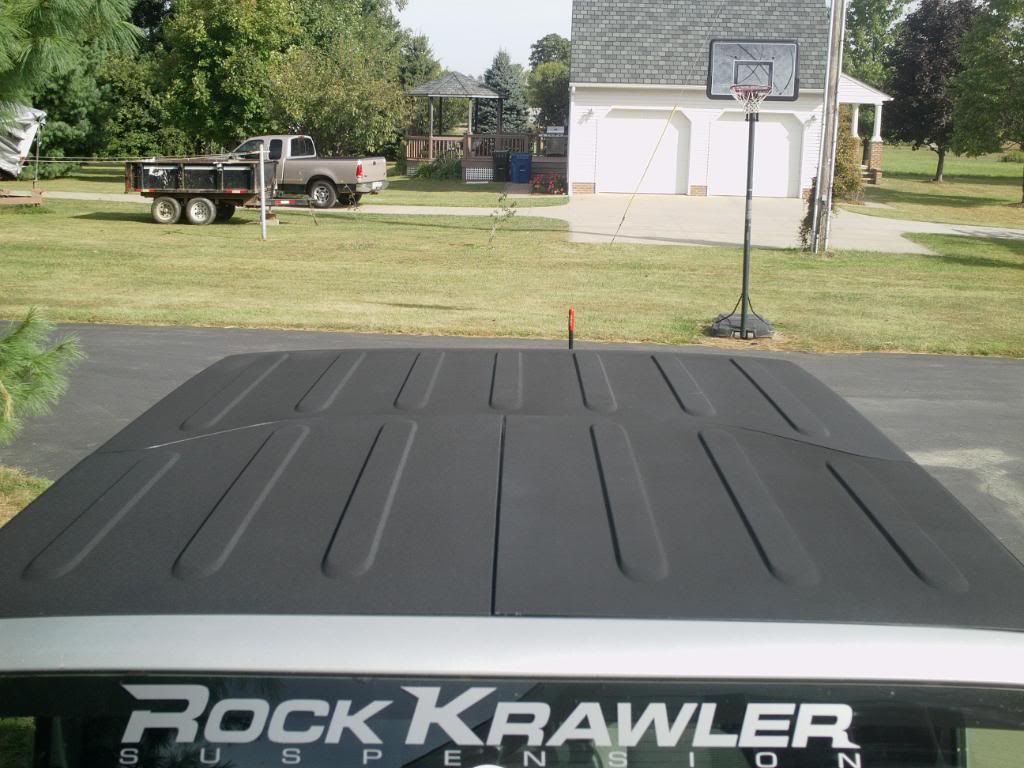
Overall, the top needs one good scrub/wash to get the loose bedliner off, but otherwise it's great. i get a ton of compliments on it and it's pretty tough, and has a good grip to it. if anyone has any questions let me know, its really easy to do
Overall, the top needs one good scrub/wash to get the loose bedliner off, but otherwise it's great. i get a ton of compliments on it and it's pretty tough, and has a good grip to it. if anyone has any questions let me know, its really easy to do
10-18-2010, 03:53 PM
#25
JK Enthusiast
Join Date: Jan 2010
Location: Central Illinois
Posts: 258
Likes: 0
Received 0 Likes
on
0 Posts
Nice write-up!! You made the fiberglass repair appear to be so easy that I'm trying to figure out a project for its use now. 
Something to consider next time you're spraying is the addition of a "pistol grip" handle. I've tried spraying without the grip and it was very hard to control the amount of spray. With the grip - it was a breeze. Bought mine at Walmart for like $3. It also allowed me to spray the surface directly without having to use the overspray approach (when the Duplicolor begins to run out, it does start blotching).
Below is my ARB front bumper (Duplicolor can has the grip I mentioned above).
THANK YOU!!! I have been getting tired of the blotching from the Duplicolor and figured someone had to make something like the trigger spray. I'm heading to Wally World tomorrow!
Great job to the OP! It looks better than stock!
05-23-2011, 04:47 PM
#26
JK Newbie

Join Date: Jun 2008
Location: Leadville Colorado
Posts: 3
Likes: 0
Received 0 Likes
on
0 Posts
Good job Im trying to fix my top right now as well cracked it this weekend on a tree. fun day still
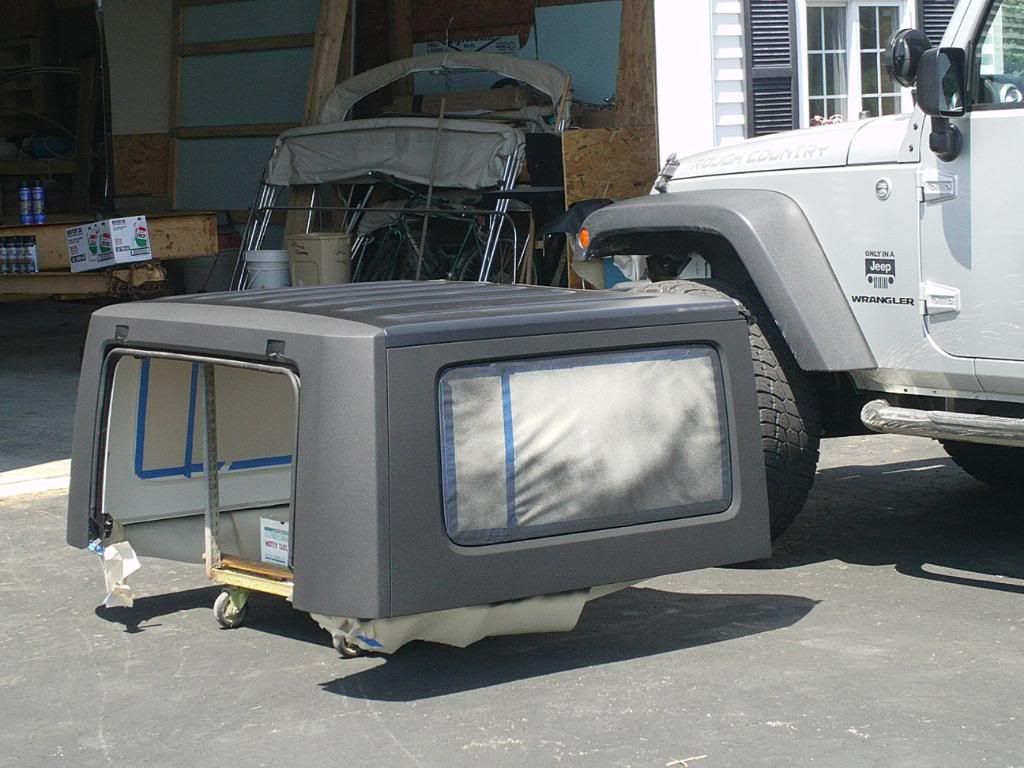
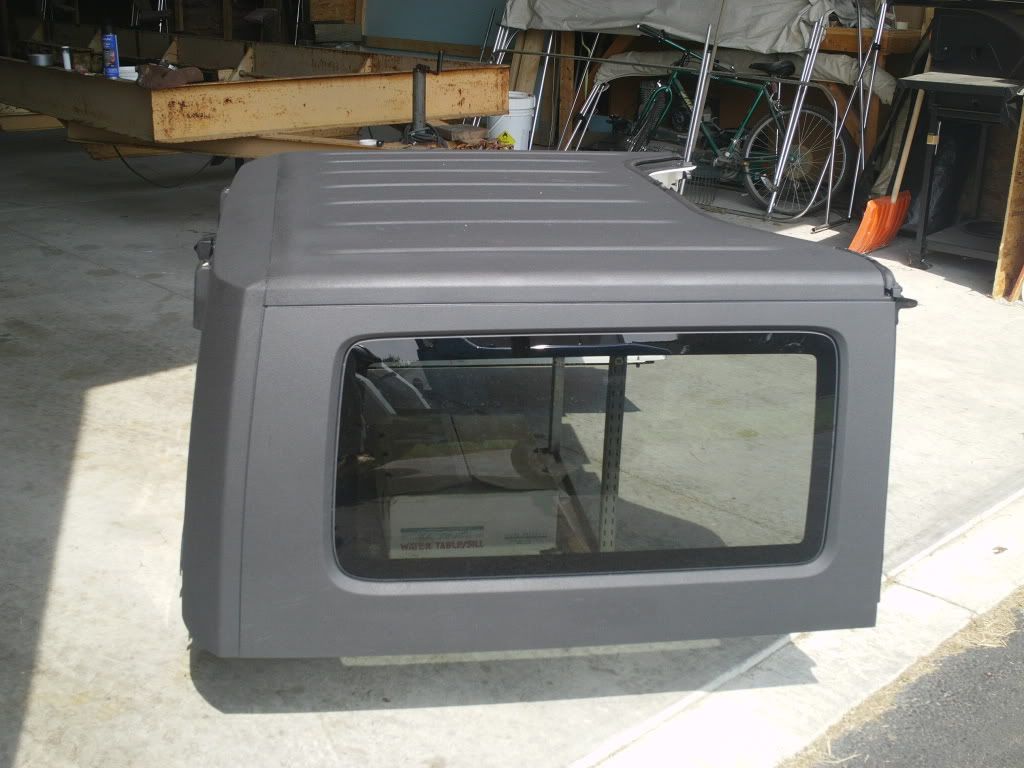
Hey guys, I just wanted to show you what i've been up to this weekend. I scored a hardtop and picked it up the other day.
Beginning details:
- delaminating fiberglass on rear corners
- rear structure damage
- many scratches (mainly on back and sides)
- rear glass broken/busted out
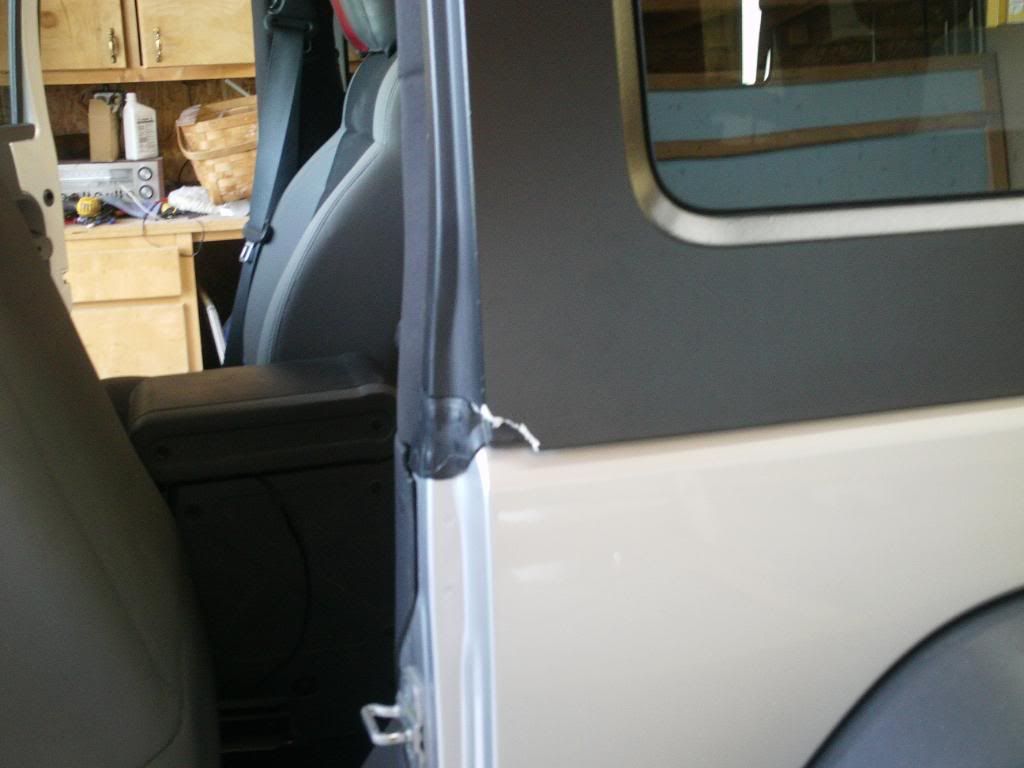
- hardtop corners by door-jam broken on both sides
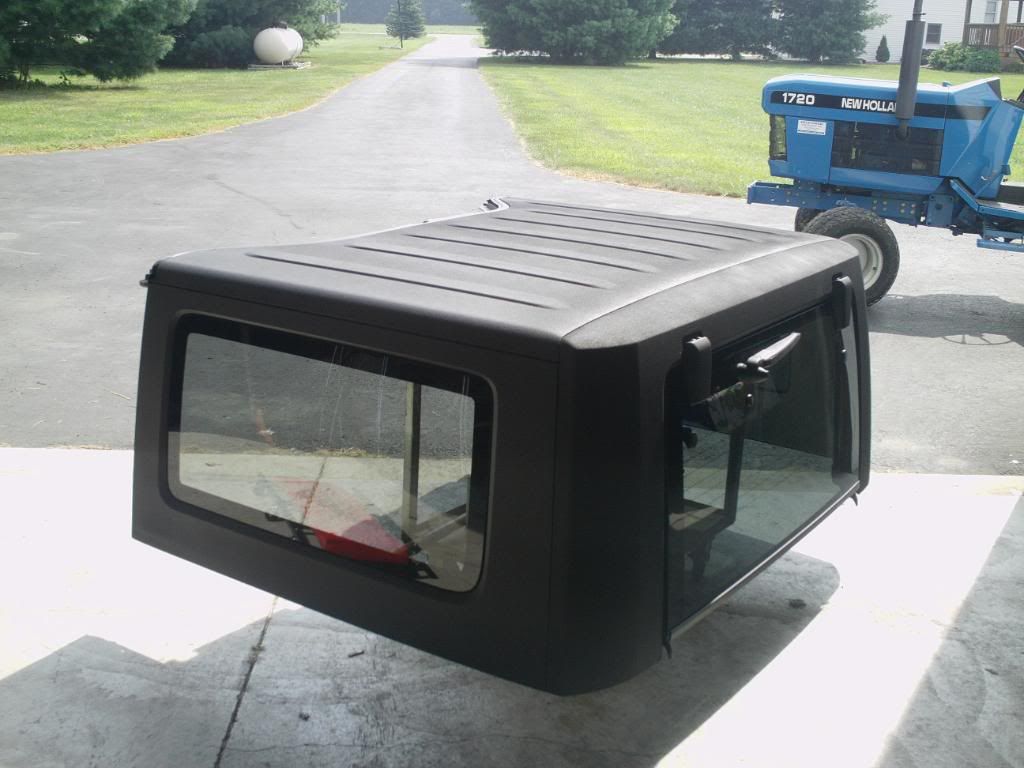
First brought it home
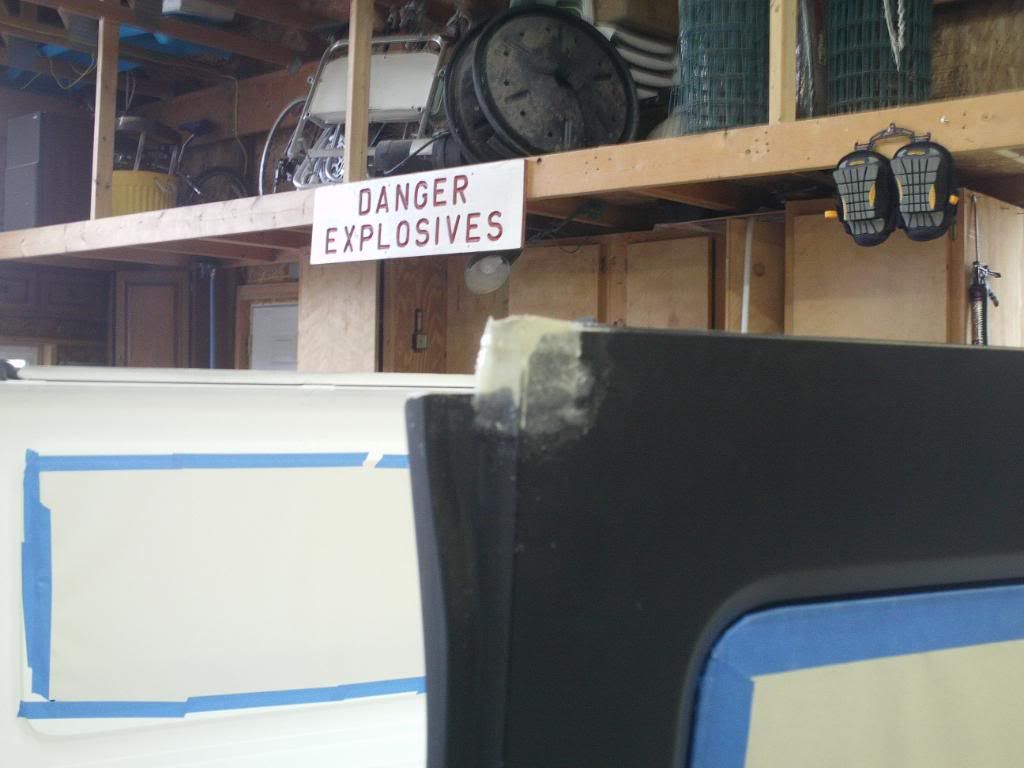
Scratches
Broken Corners;
Passenger:
Driver:
(No pics of the delaminated glass or rear structure damage)
Repair
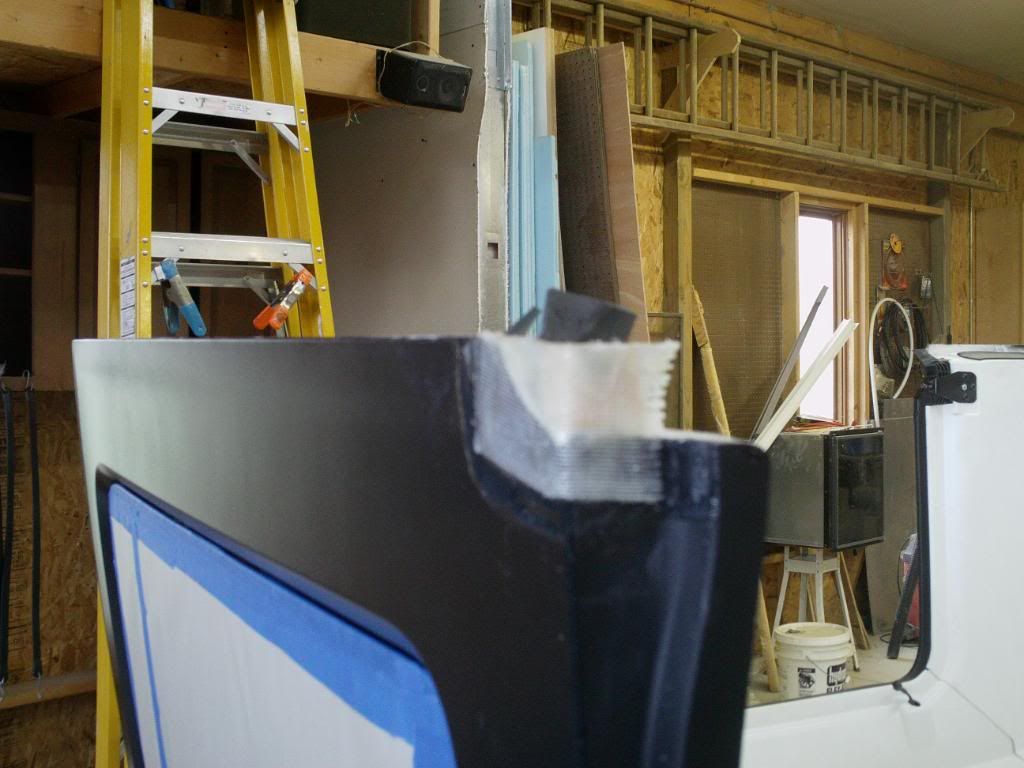
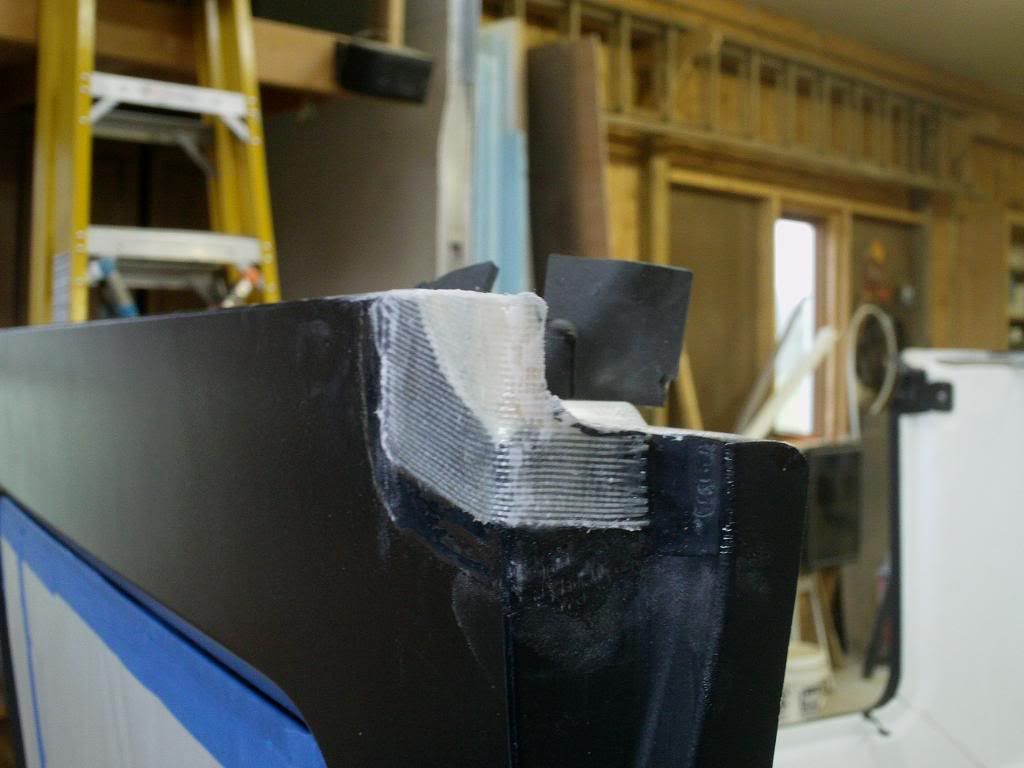
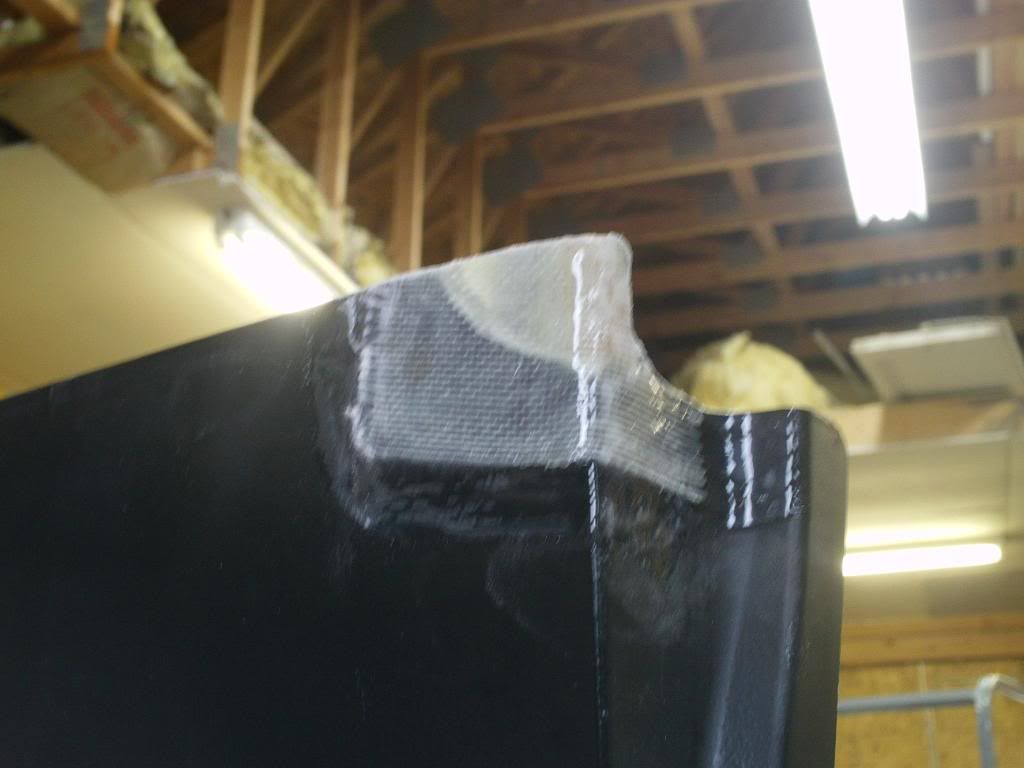
First thing i did was wash the top and wipe it all down. After i removed the top and managed to flip it over onto a moving cart, i sanded down the broken corners to clean them up, and i also sanded the inside and outside of the driver and passenger doorjam corner. To repair these corners i used a fiberglass repair kit from West Marine for less then $20. It came with everything i needed to fix these and the rest of the top.
I made a cardboard template of what the corners should* look like and then got my fiberglass ready.
put more on then you need, because after it cures and fully dries you can cut and sand off everything you don't need.
Driver Side:
Passenger Side:
- After i got these set how i needed them to dry, i began to tape off the windowsinside and outside.
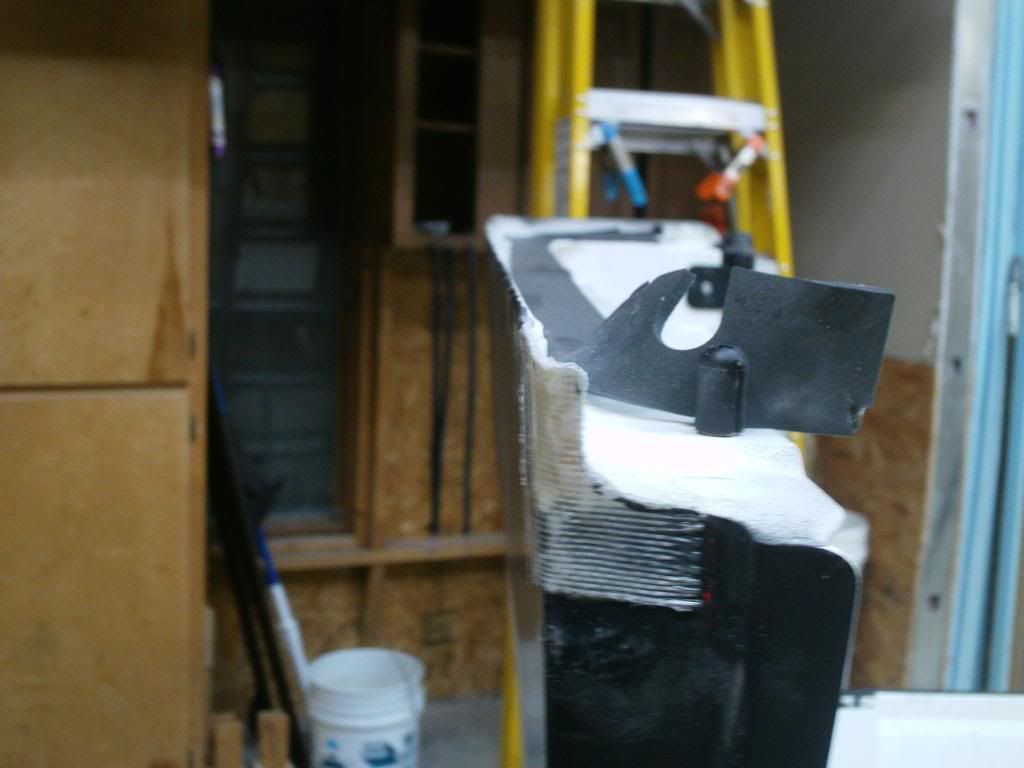
Within in a few hours i was able to use a hack saw and cut the formed fiberglass to the specs of my cardboard template. I then let it dry for a few more hours and came back that night and was able to sand down the glass to a relatively smooth surface. (I did this by hand and our disk sander would've made life alot easier..)
after getting the corners to where i wanted them, i added one more generous coat of fiberglass resin, and also removed the sealing foam on the rear where it rests on the Jeep body, and also glassed that together to give it more strength.
Cut fiberglass corners:
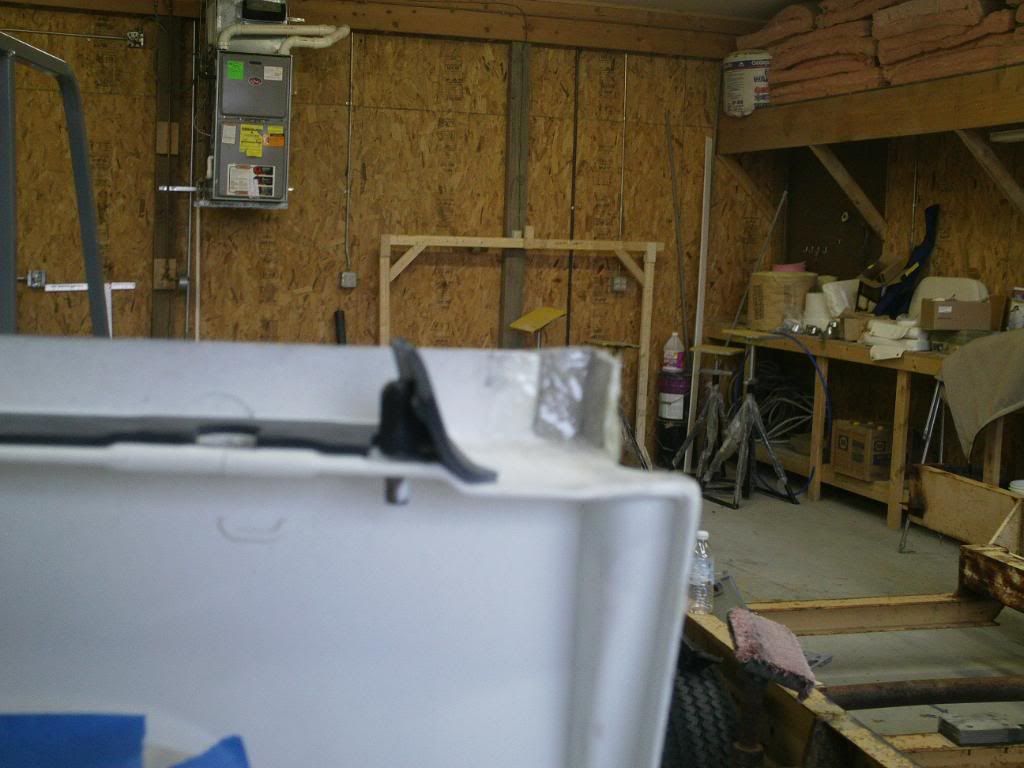
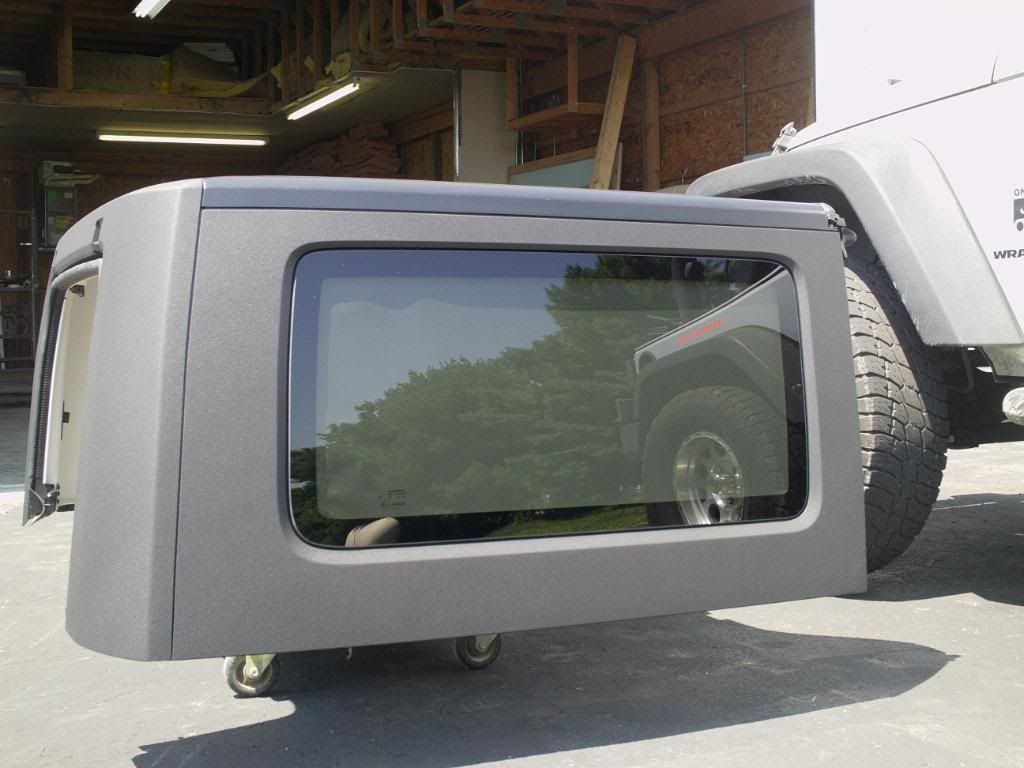
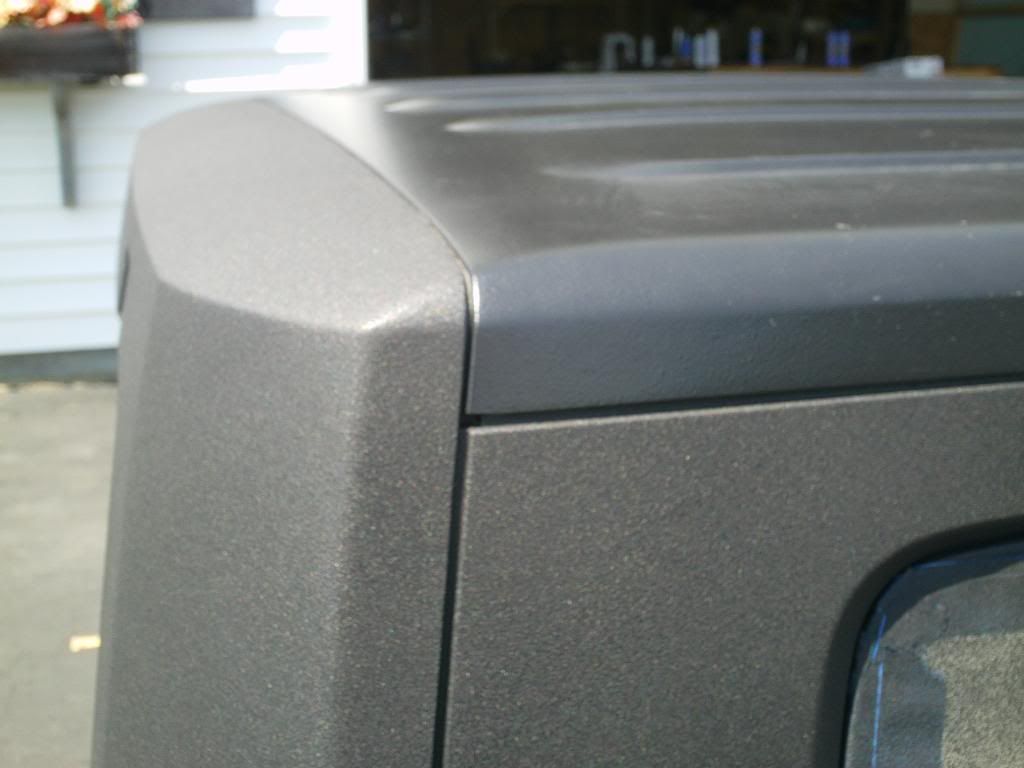
When i got the corners as thick and strong as i needed them, i wiped down the whole top again, scuffed up the scratches with sand paper, wiped it down a second time, and then masked off everything i wasn't going to bedline. Thats right folks, Duplicolor Spray on Bedliner. I sprayed the inside lip of the hardtop for a bit more strength, and after i let that dry for a few minutes we flipped the top over and continued masking off the top section of the top, and the front and rear openings, trying to prevent over-spray.
Begin spraying the bedliner away from the top, and move into the area that needs bedlined, and proceed to over shoot it, and bring it back in. Do not start and stop on the top itself. Doing this prevents the build-up of too much paint in one place, which makes it really blotchy and screwed up looking. Keep applying evenly sprayed coats of bedliner until you get the top (or what ever you are painting) where you want it. If you take your time and do it right, you will end up with a very very nice finish. why should i keep explaining crap, you're ready for more pics right?
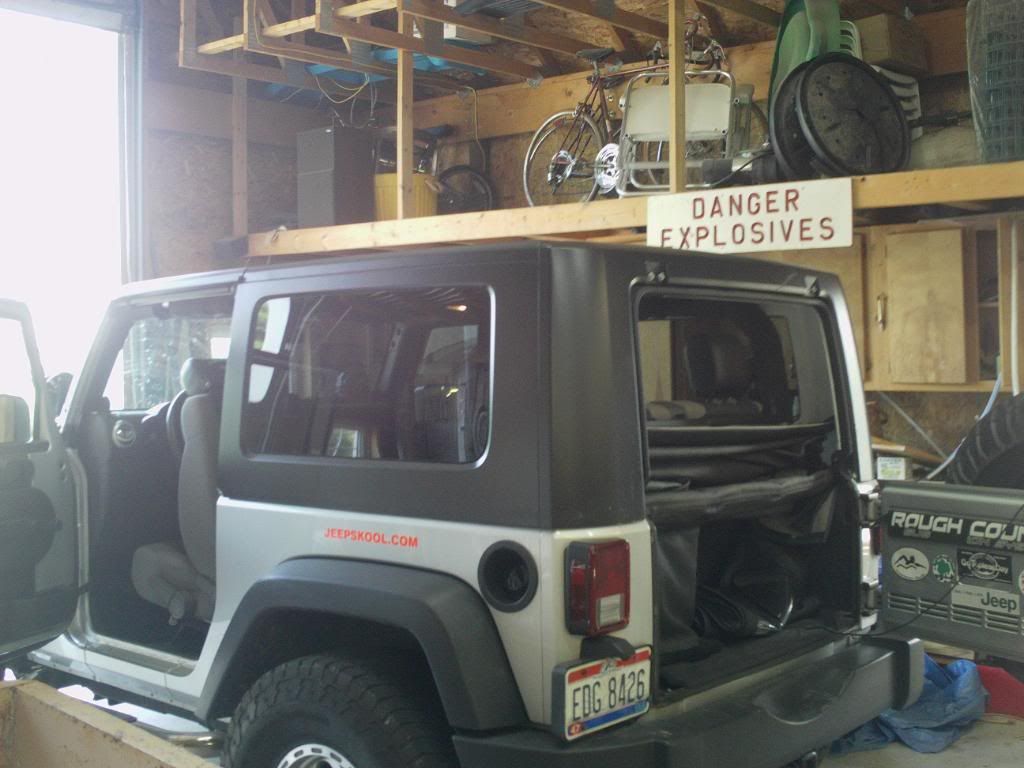
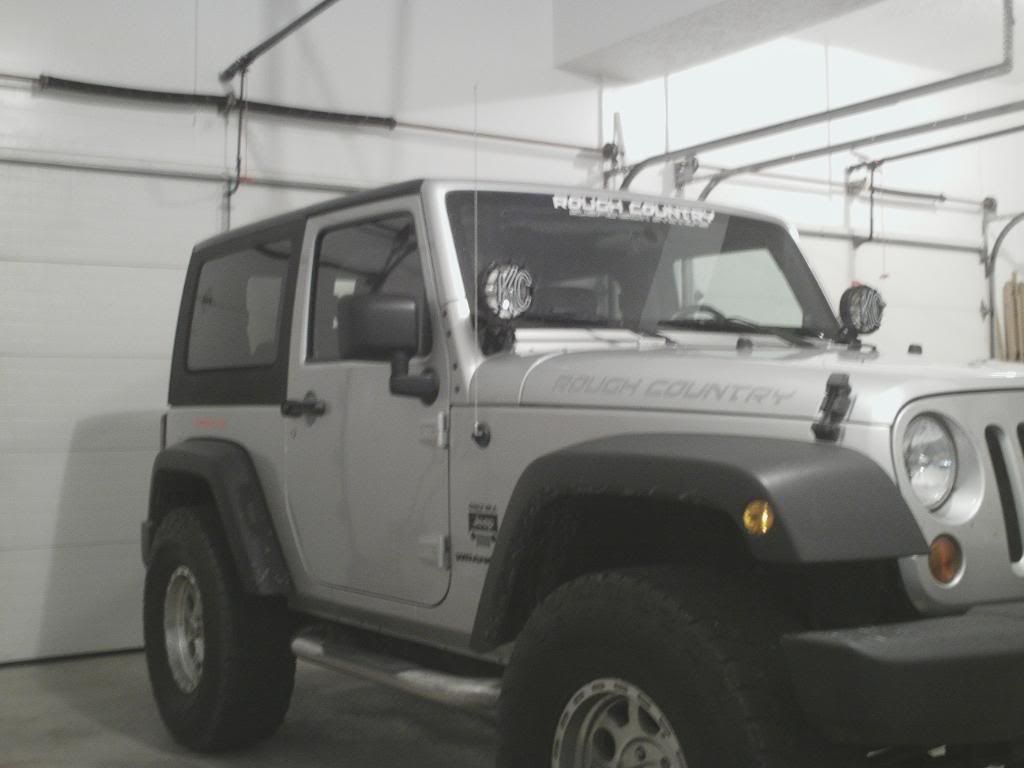
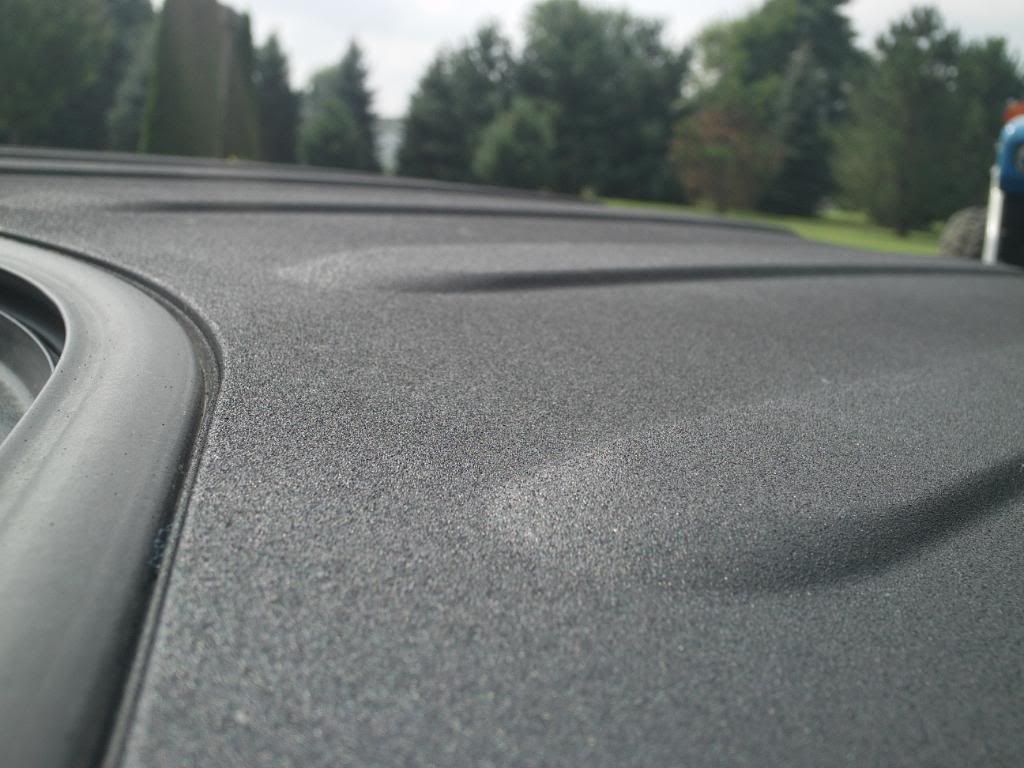
Post Bedliner:

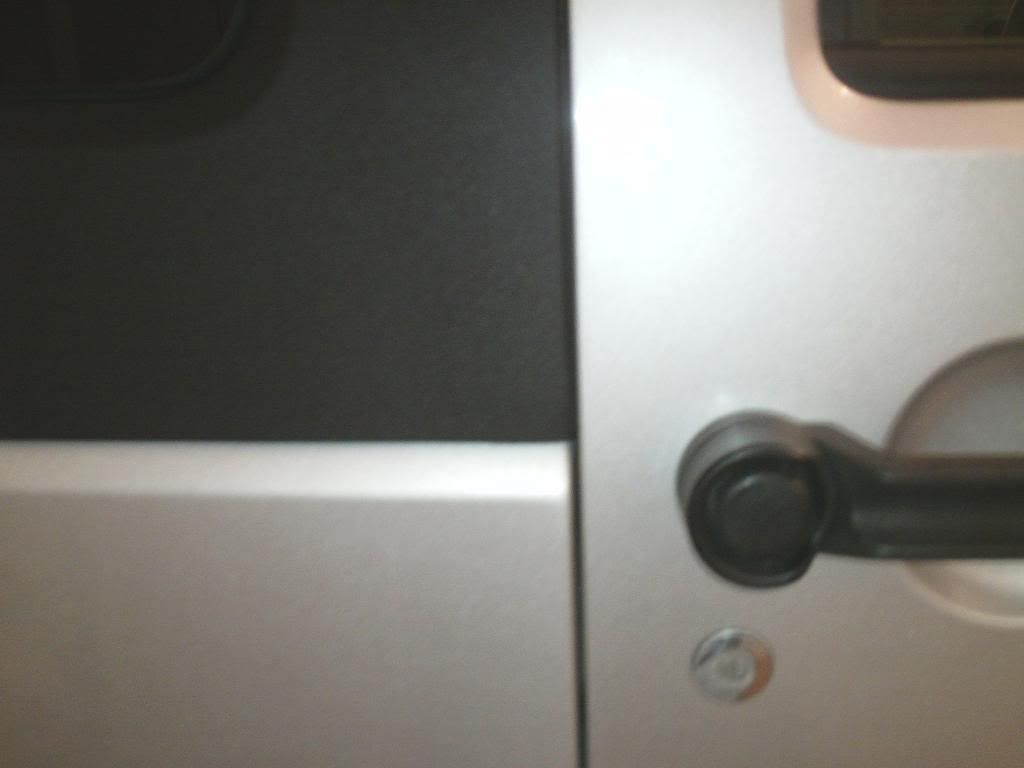
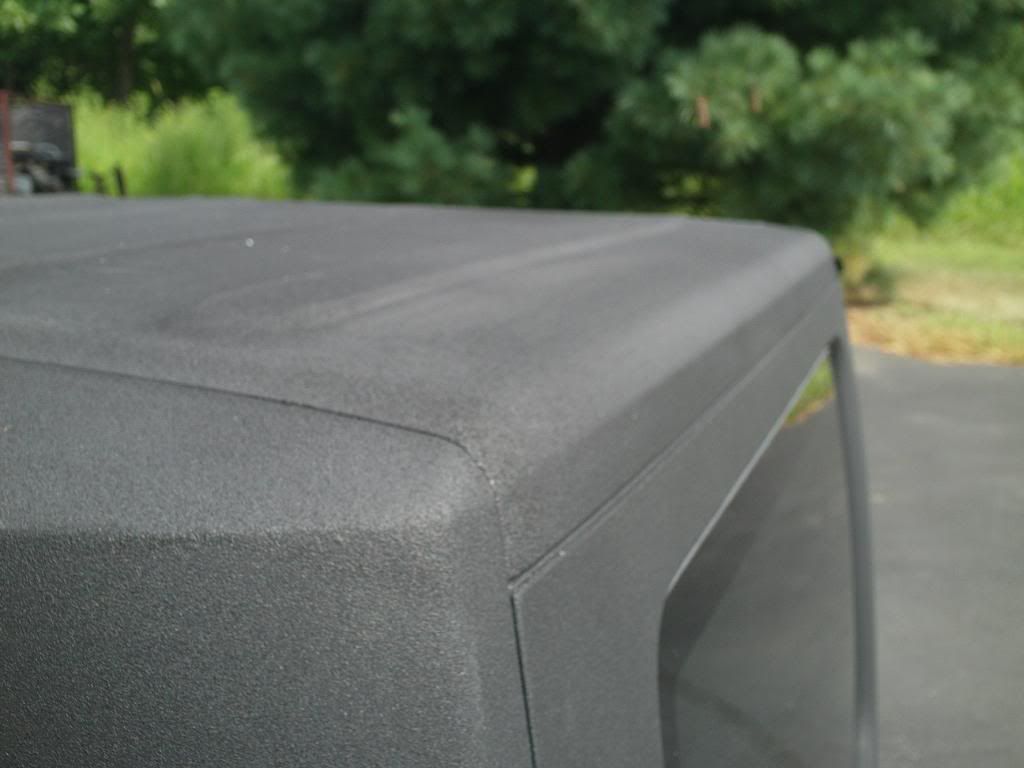
Difference in finish between duplicolor spray on bedliner and mopar freedom top finish:
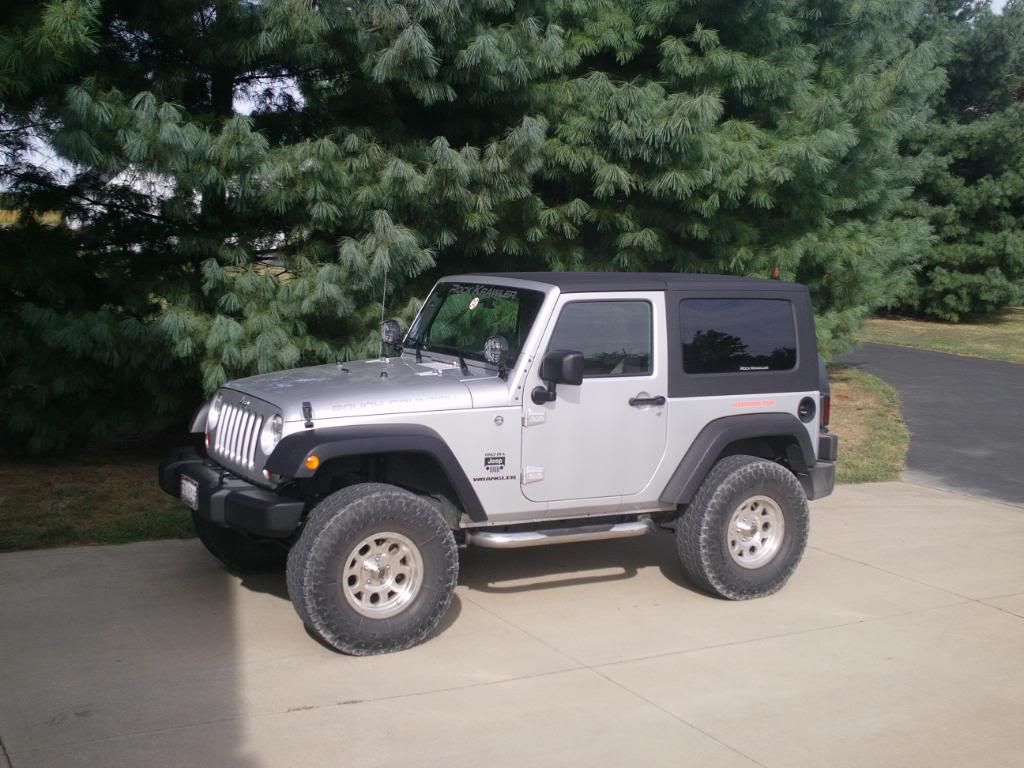
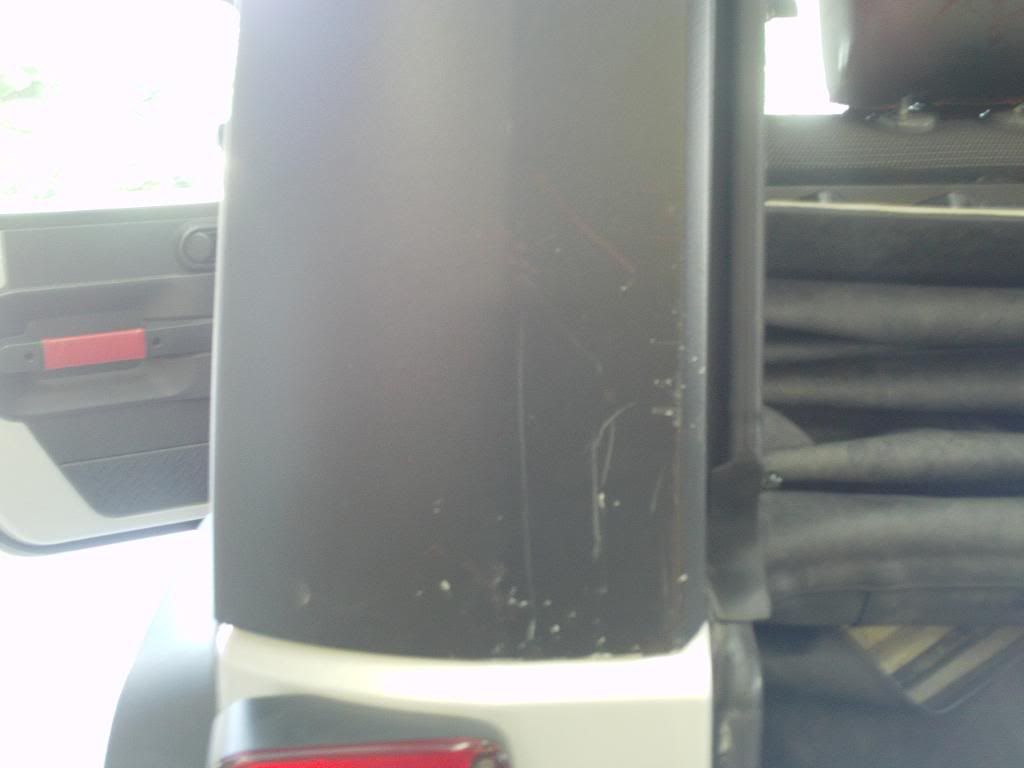
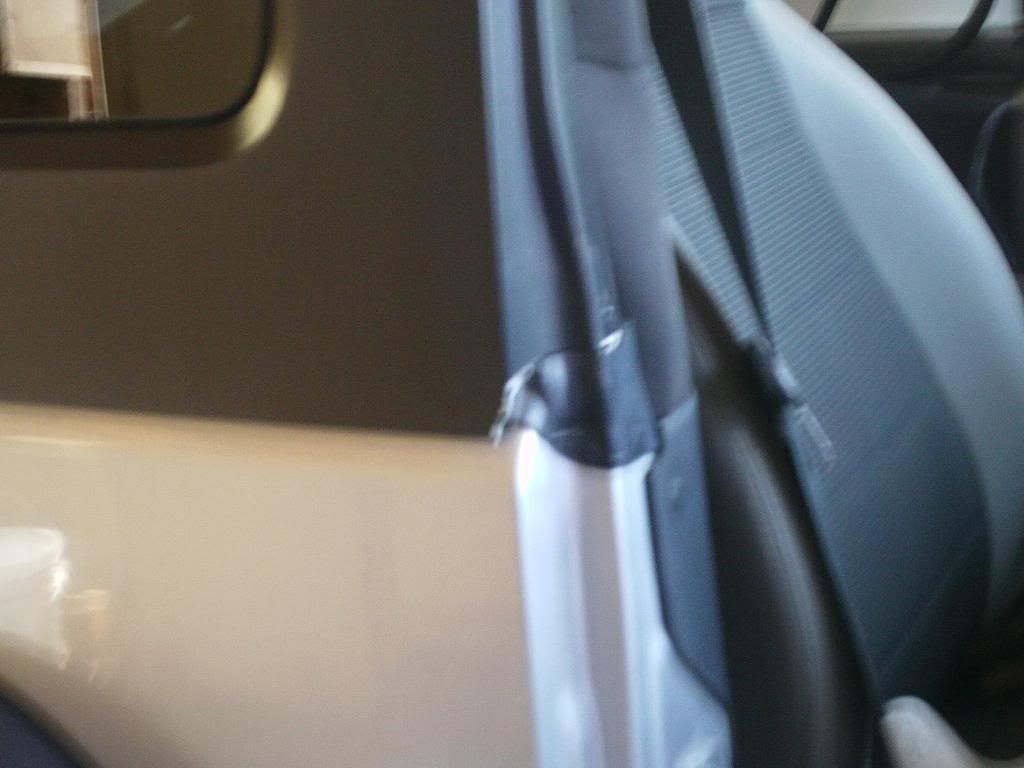
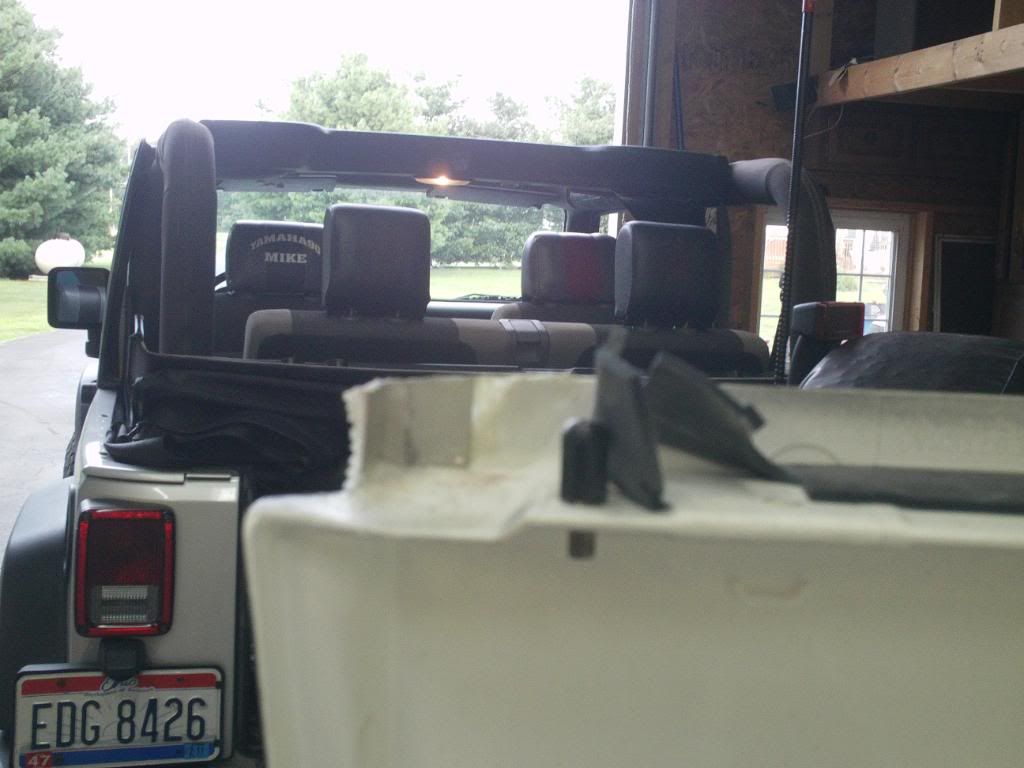
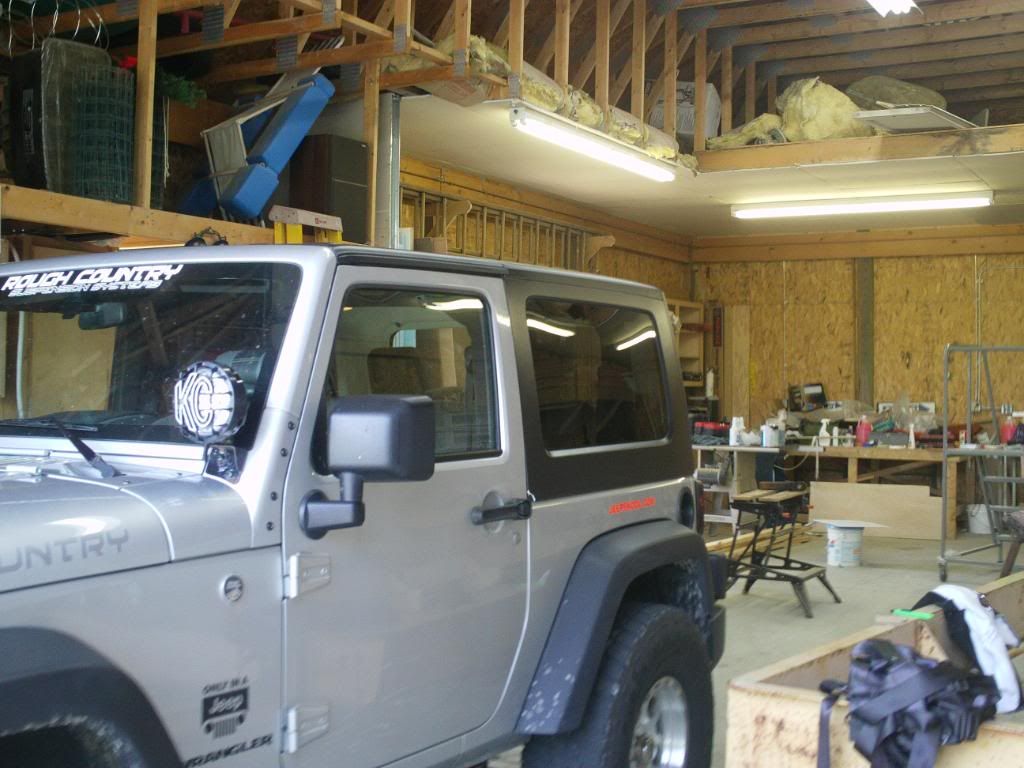
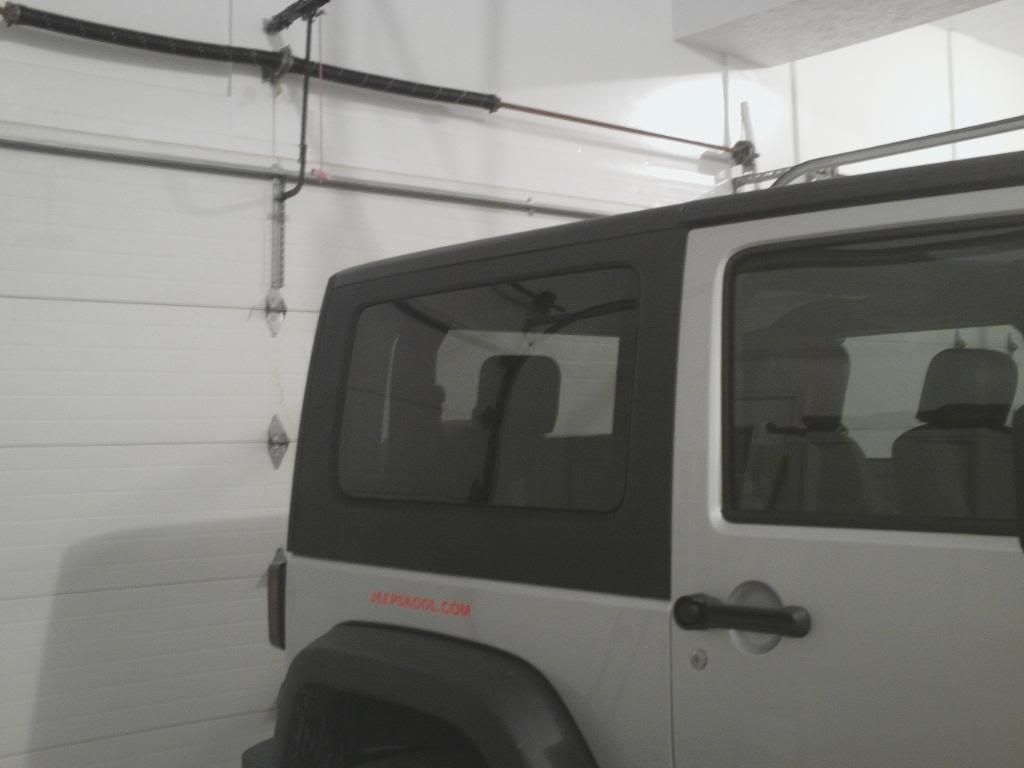
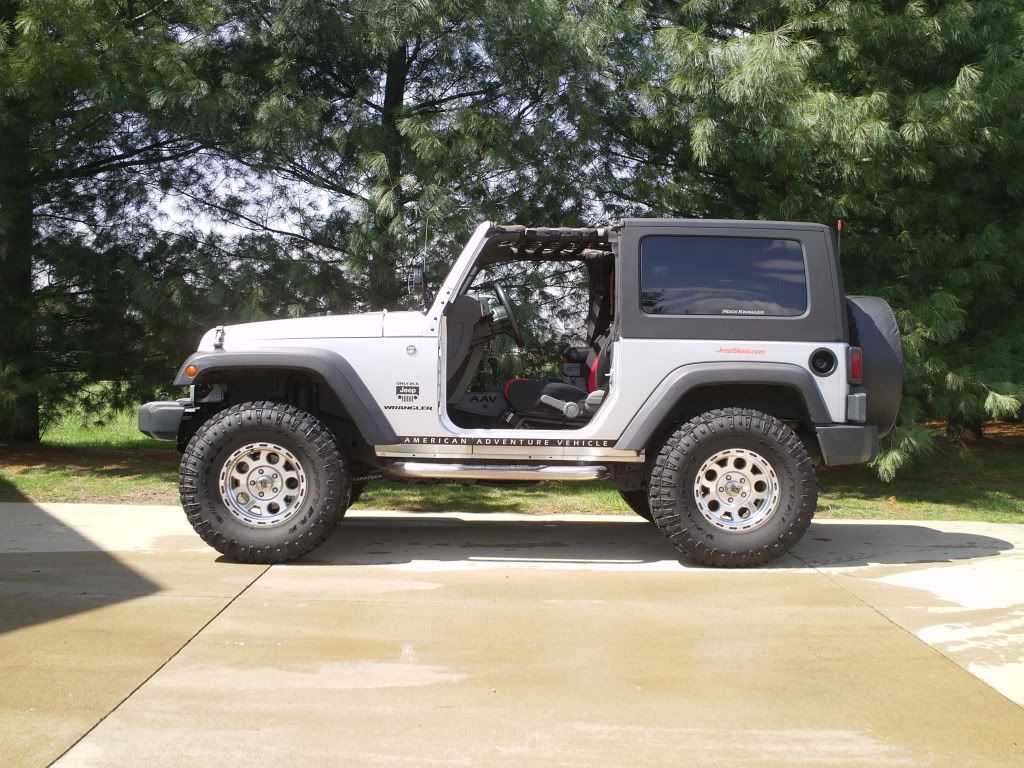
Last but not least, here is the hardtop on my Jeep, and pics of my repaired corners, with comparison pictures:
Driver Broken:
Driver side Fixed:
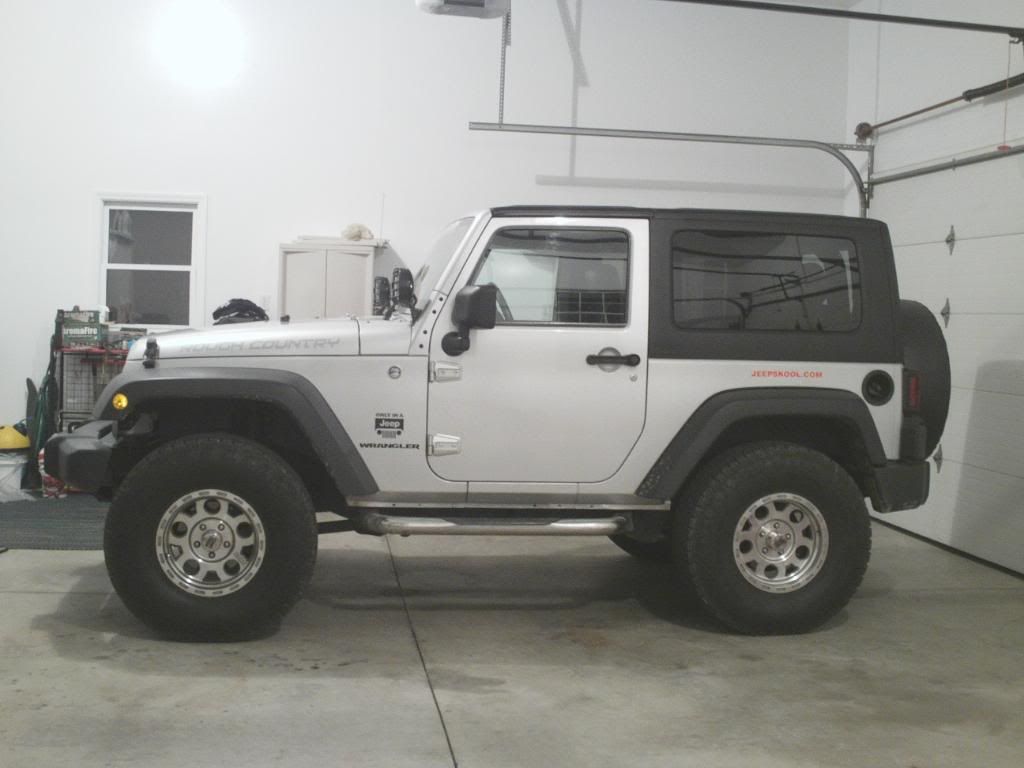
Passenger Broken:
Passenger side Fixed:
Thoughts and Reviews:
The fiberglass was a bit of a pain at first, but after it starts curing you can still form it, but remember you're on a time constraint and need to do get it done, so be careful yet patient. Have it all prepped and ready to go before you go slopping fiberglass on stuff that could've had a second going over. Gloves would also be a big help, but if you don't have any/didn't grab a set just have some acetone and harsh thinner to clean your hands off with.
Duplicolor... Fantastic. I was very pleased with the quality and finished product that came from that rattle can. I am impressed. I am so happy with what came of the sides and back of the top, that i am going to proceed and do the top of the rear section, as well as the freedom panels. The interior will be done in regular black eventually, not bedlined. As i said in the body of the thread about spraying the bedliner, start off the top and bring the spray into where you're painting and over spray continuing your arch. Press down on the can tip hard in order to get the full pressure of the can and a good solid texture and finish. These tops should come this way from the factory, it's that great.
Other then that.. i think i covered everything, feel free to ask questions and post up comments.
More pictures will be posted as i'm getting the rear glass installed tomorrow morning, and i'll eventually finished bedlining the whole hardtop. Picked the top up thursday night, worked on it friday, saturday and sunday little by little and now it's better then new. Minus rear glass, but thats tomorrow

EDIT:
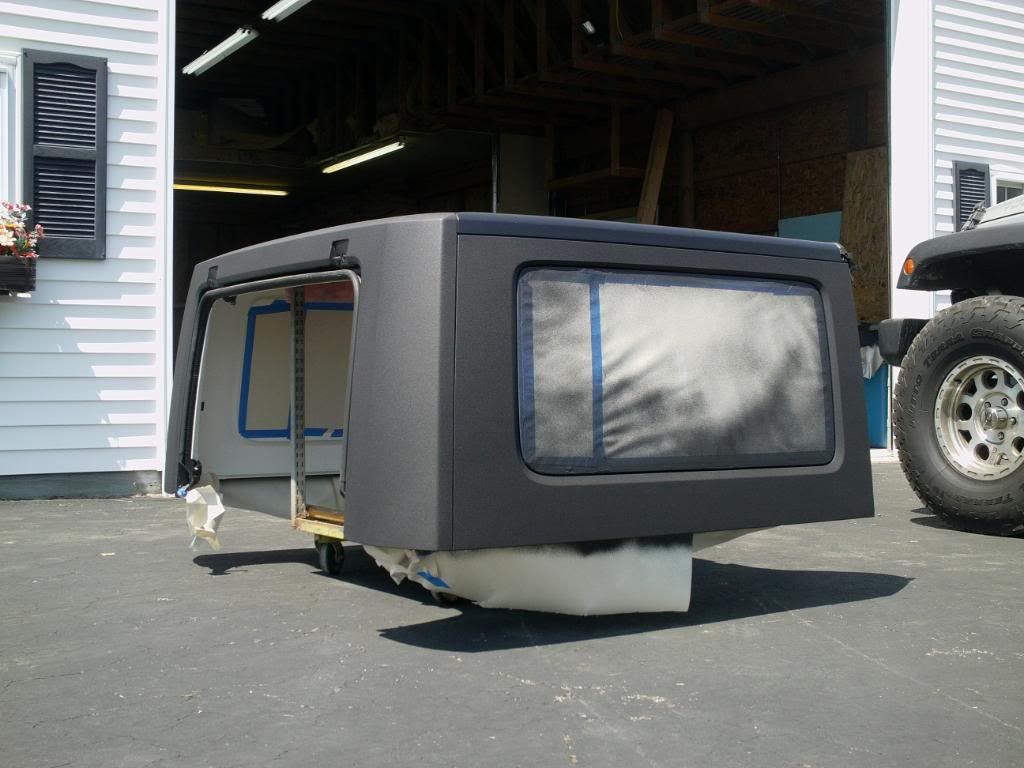
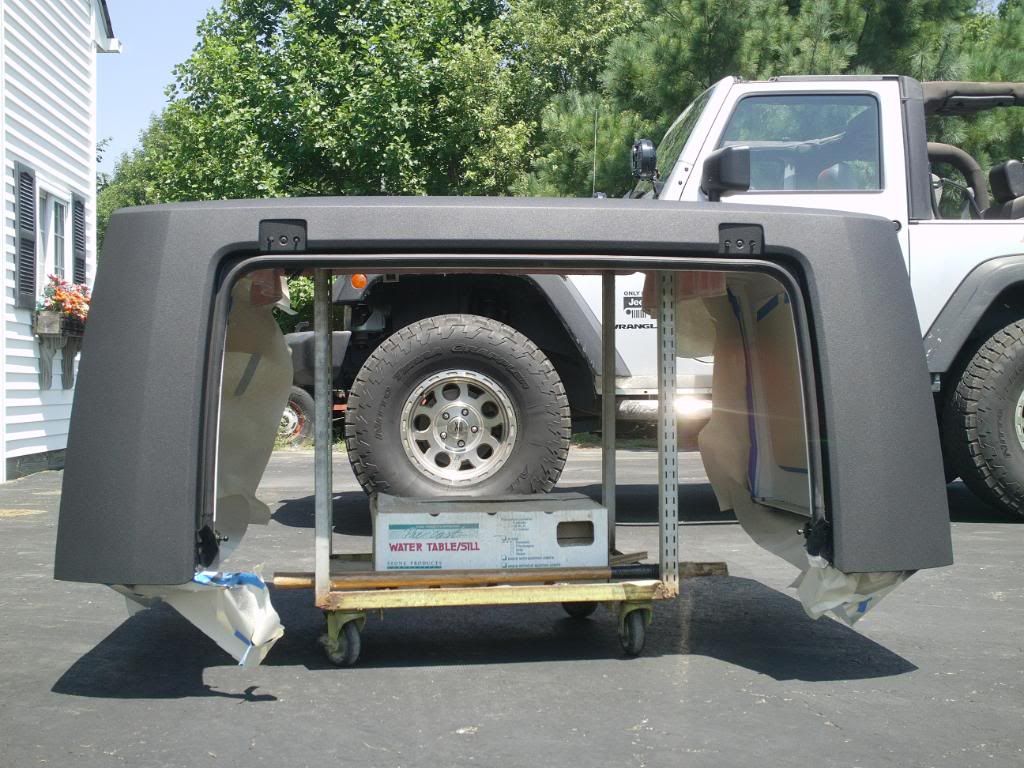
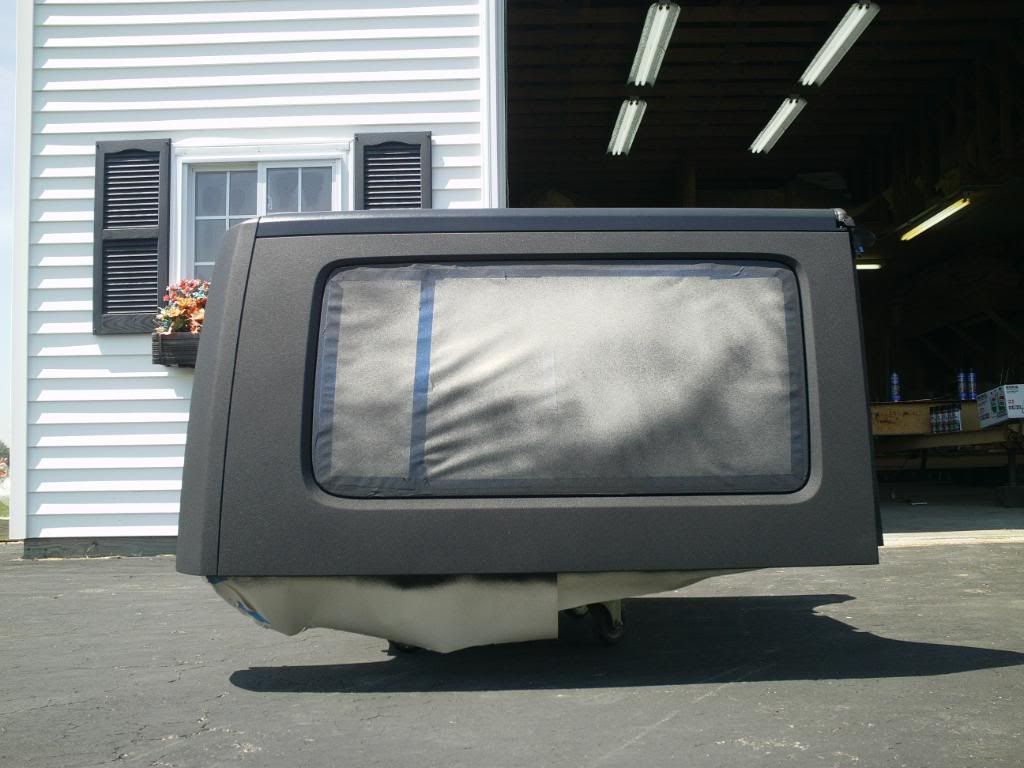
Finished bedlining the top on sunday morning, but i went and screwed up the top of the rear section, so monday i woke up and fixed my screw up by masking it all off again, sanding the top of the rear section and then hitting it again with the last of my bedliner. Now i am finished messing with my top for now, it looks great and i can't wait to get it back on the Jeep somehow. Pics of the finished product:
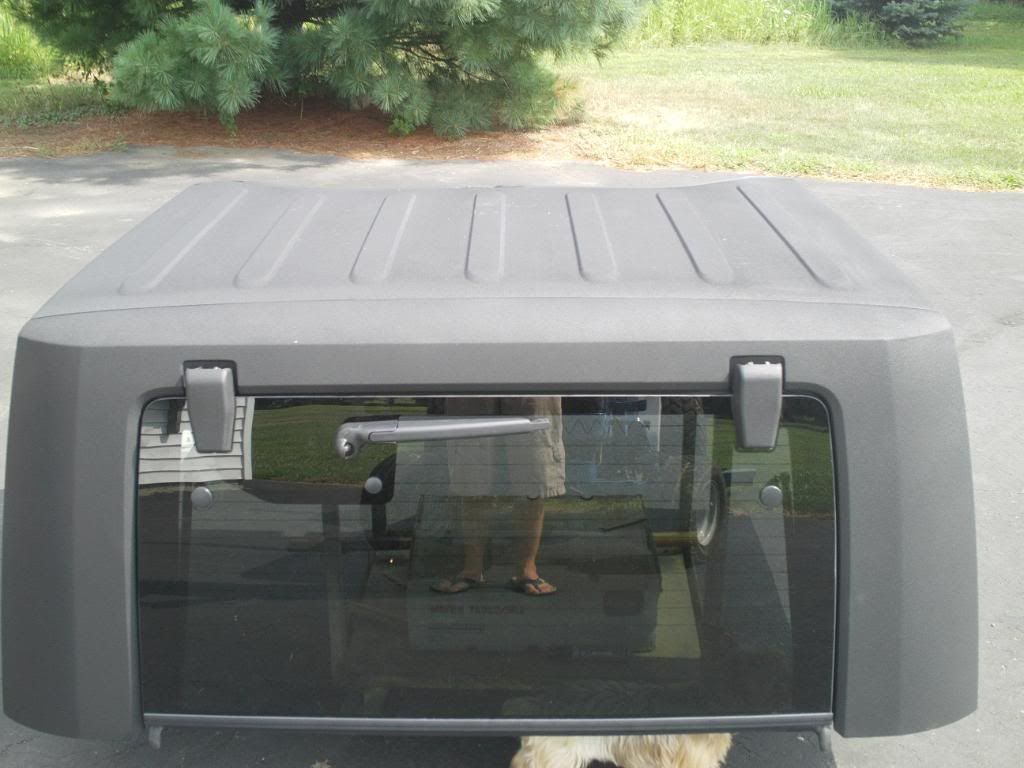
Freedom panels also came out great, i'll post pics of those eventually too
All Done!
Please Do Not quote the entire post, It's Massive! Count the pictures and image codes in order to get the right picture you have a question about. Thanks!
Beginning details:
- delaminating fiberglass on rear corners
- rear structure damage
- many scratches (mainly on back and sides)
- rear glass broken/busted out
- hardtop corners by door-jam broken on both sides
First brought it home
Scratches
Broken Corners;
Passenger:
Driver:
(No pics of the delaminated glass or rear structure damage)
Repair
First thing i did was wash the top and wipe it all down. After i removed the top and managed to flip it over onto a moving cart, i sanded down the broken corners to clean them up, and i also sanded the inside and outside of the driver and passenger doorjam corner. To repair these corners i used a fiberglass repair kit from West Marine for less then $20. It came with everything i needed to fix these and the rest of the top.
I made a cardboard template of what the corners should* look like and then got my fiberglass ready.
put more on then you need, because after it cures and fully dries you can cut and sand off everything you don't need.
Driver Side:
Passenger Side:
- After i got these set how i needed them to dry, i began to tape off the windowsinside and outside.
Within in a few hours i was able to use a hack saw and cut the formed fiberglass to the specs of my cardboard template. I then let it dry for a few more hours and came back that night and was able to sand down the glass to a relatively smooth surface. (I did this by hand and our disk sander would've made life alot easier..)
after getting the corners to where i wanted them, i added one more generous coat of fiberglass resin, and also removed the sealing foam on the rear where it rests on the Jeep body, and also glassed that together to give it more strength.
Cut fiberglass corners:
When i got the corners as thick and strong as i needed them, i wiped down the whole top again, scuffed up the scratches with sand paper, wiped it down a second time, and then masked off everything i wasn't going to bedline. Thats right folks, Duplicolor Spray on Bedliner. I sprayed the inside lip of the hardtop for a bit more strength, and after i let that dry for a few minutes we flipped the top over and continued masking off the top section of the top, and the front and rear openings, trying to prevent over-spray.
Begin spraying the bedliner away from the top, and move into the area that needs bedlined, and proceed to over shoot it, and bring it back in. Do not start and stop on the top itself. Doing this prevents the build-up of too much paint in one place, which makes it really blotchy and screwed up looking. Keep applying evenly sprayed coats of bedliner until you get the top (or what ever you are painting) where you want it. If you take your time and do it right, you will end up with a very very nice finish. why should i keep explaining crap, you're ready for more pics right?
Post Bedliner:
Difference in finish between duplicolor spray on bedliner and mopar freedom top finish:
Last but not least, here is the hardtop on my Jeep, and pics of my repaired corners, with comparison pictures:
Driver Broken:
Driver side Fixed:
Passenger Broken:
Passenger side Fixed:
Thoughts and Reviews:
The fiberglass was a bit of a pain at first, but after it starts curing you can still form it, but remember you're on a time constraint and need to do get it done, so be careful yet patient. Have it all prepped and ready to go before you go slopping fiberglass on stuff that could've had a second going over. Gloves would also be a big help, but if you don't have any/didn't grab a set just have some acetone and harsh thinner to clean your hands off with.
Duplicolor... Fantastic. I was very pleased with the quality and finished product that came from that rattle can. I am impressed. I am so happy with what came of the sides and back of the top, that i am going to proceed and do the top of the rear section, as well as the freedom panels. The interior will be done in regular black eventually, not bedlined. As i said in the body of the thread about spraying the bedliner, start off the top and bring the spray into where you're painting and over spray continuing your arch. Press down on the can tip hard in order to get the full pressure of the can and a good solid texture and finish. These tops should come this way from the factory, it's that great.
Other then that.. i think i covered everything, feel free to ask questions and post up comments.
More pictures will be posted as i'm getting the rear glass installed tomorrow morning, and i'll eventually finished bedlining the whole hardtop. Picked the top up thursday night, worked on it friday, saturday and sunday little by little and now it's better then new. Minus rear glass, but thats tomorrow
EDIT:
Finished bedlining the top on sunday morning, but i went and screwed up the top of the rear section, so monday i woke up and fixed my screw up by masking it all off again, sanding the top of the rear section and then hitting it again with the last of my bedliner. Now i am finished messing with my top for now, it looks great and i can't wait to get it back on the Jeep somehow. Pics of the finished product:
Freedom panels also came out great, i'll post pics of those eventually too
All Done!
Please Do Not quote the entire post, It's Massive! Count the pictures and image codes in order to get the right picture you have a question about. Thanks!
05-23-2011, 06:40 PM
#27
JK Enthusiast

Join Date: Aug 2010
Location: Greenville, SC
Posts: 411
Likes: 0
Received 0 Likes
on
0 Posts
My man that looks killer, I've been want ing to see this for a while. I had some tree limbs put some light surface scratches in my top, and now i have just found my solution to fix it. I was planning on doing the inside soon, now i will do the outside in the same move. Very nice work!!!!!!!!!!


 07-15-2011, 04:07 PM
#30
JK Enthusiast
Join Date: Aug 2009
Location: Mesa, AZ
Posts: 228
Likes: 0
Received 0 Likes
on
0 Posts
How is it to wash and dry? Can you actually dry it with a towel? I saw you mentioned that using a brush is better. Also, (you may have mentioned this and I didn't catch it) how thick is it compared to stock?