Brake Pad Replacement Using Hawk Brake Pads
 06-10-2011, 06:03 PM
#1
JK Super Freak
Thread Starter
Join Date: Oct 2007
Location: Phoenix, AZ
Posts: 1,572
Likes: 0
Received 0 Likes
on
0 Posts
Eventually your disc pads wear out (on JKs, typically the rear ones go first). I ordered some Hawk LTS High Performance Jeep JK Brake Pads from JeepSwag.com, and installed them. Here’s what I did.
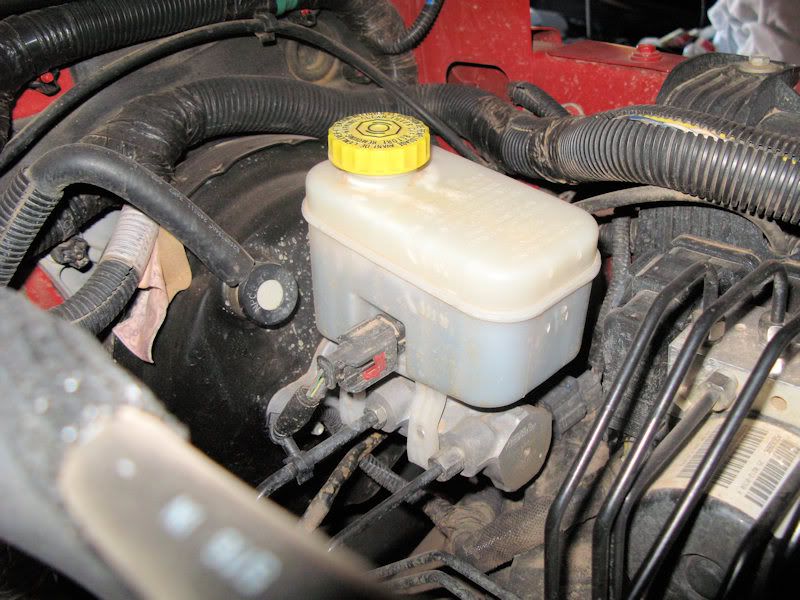
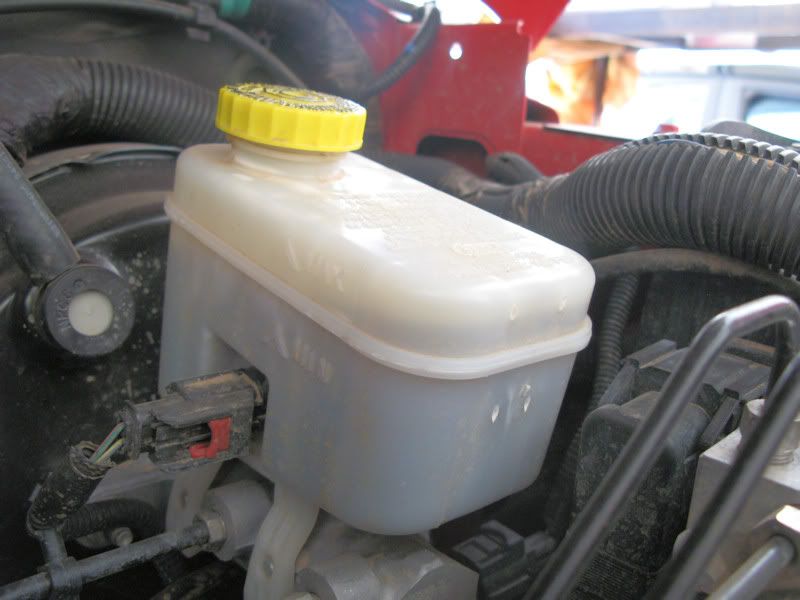
There are a few symptoms of low brake pads: brake noise when applying brakes (the brake pads have a tab that makes the brakes squeal when they are really low), a need to press the brake pedal in more, if you look at the pads you'll see they aren't as thick, and/or your brake fluid is low (even though you don't have a leak). Here's a shot of my brake fluid - lower than the stock fill:
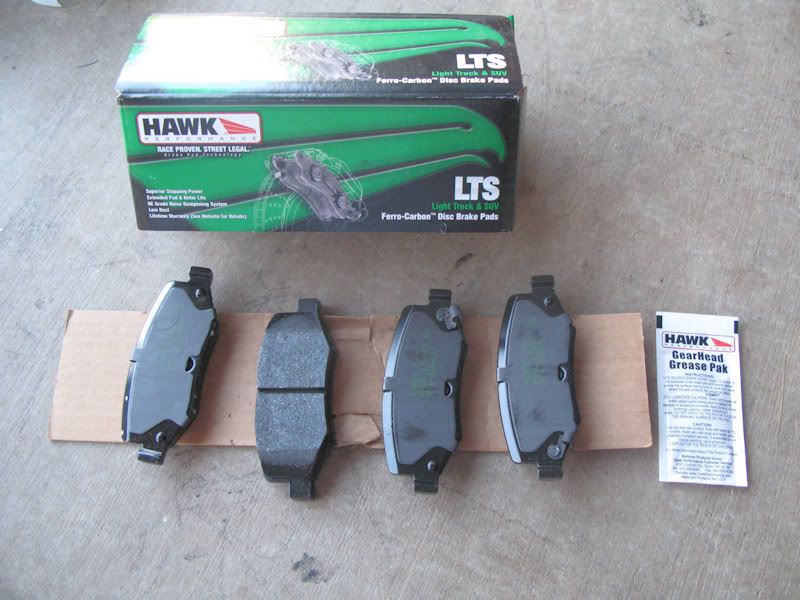
I could visually see the pads were low and the fluid was low, so time for a change. The pads were well packed in the box (securely held together so they didn't bang around in shipping), plus they supply plenty of brake grease. Note that you don't get new clips with these pads, so you'll have to clean and re-use the stock ones:
I started with the passenger rear wheel. Block your tires, jack up your Jeep under the axle, add a solid support under the axle, remove the wheel:
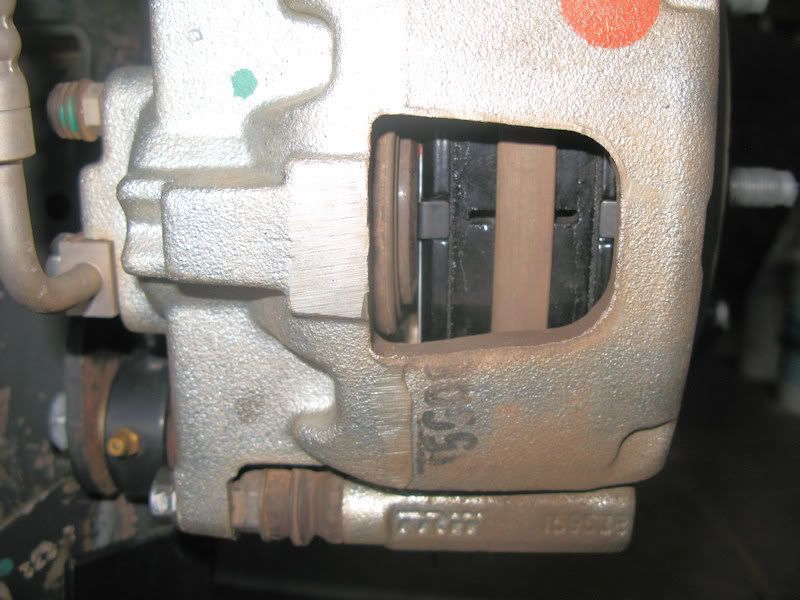
Here's a view of the pads and rotor. The pads are to the left and right of the rotor (lighter brown smoother surface - offset to the right). There's still some material left, but I wanted to replace them anyway:
There are a couple of ways to get to the pads on the JK, but the Factory Service Manual recommends removing the two caliper mounting bolts. This is the top bolt (the bottom bolt is at the bottom of the picture with a white marking on it):
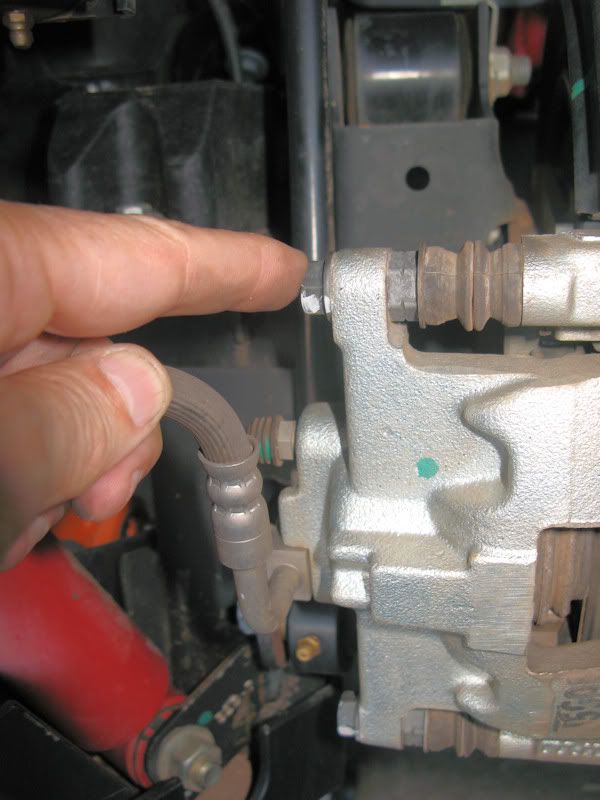
You'll need a thin wrench to hold the inner nut, and a wrench or socket for the outer bolt:
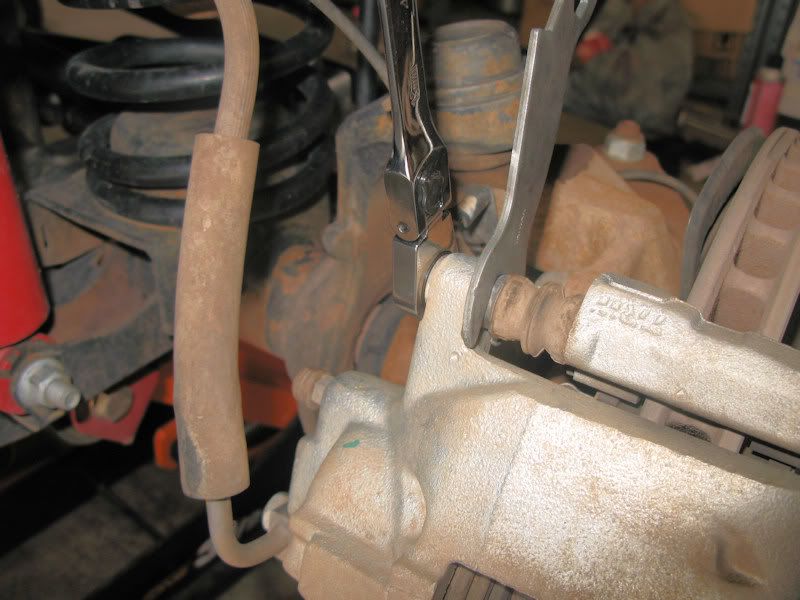
Once you get the two bolts off you can remove the caliper:

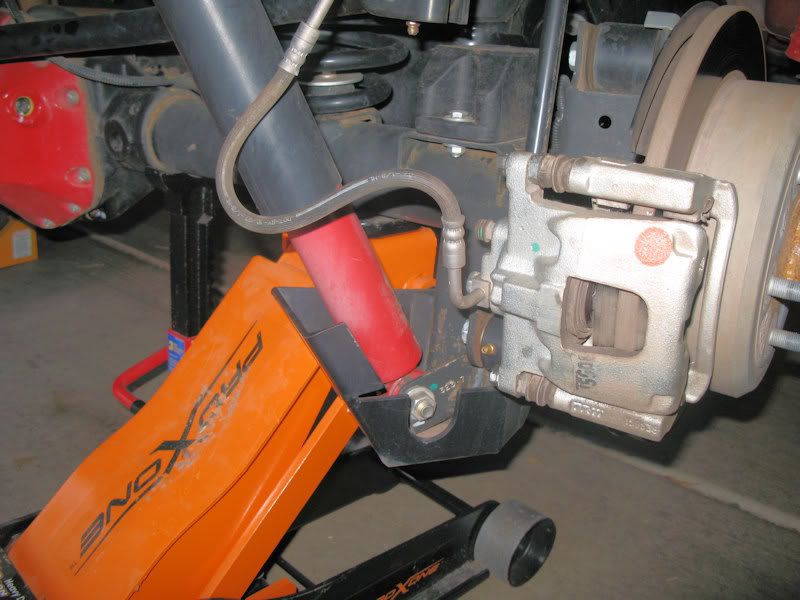
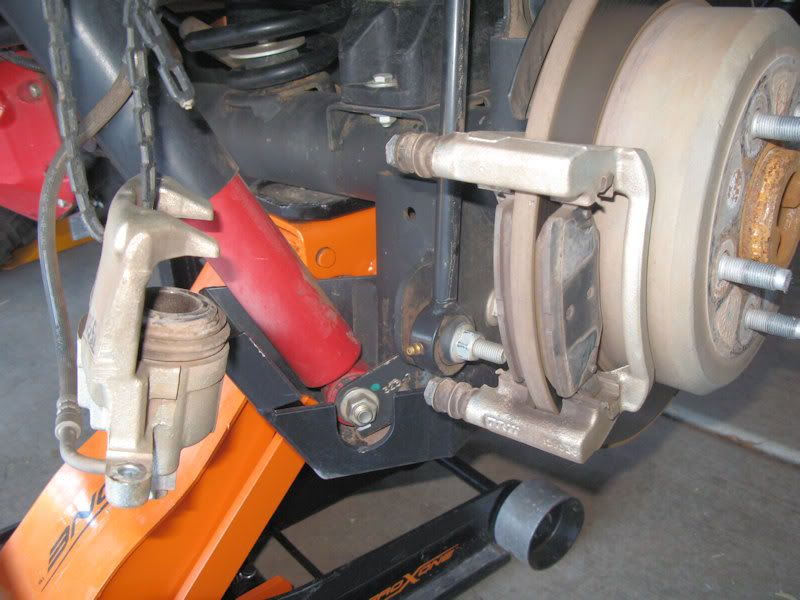
Do not let the caliper hang by the brake line - you need to support it! Here you can see the supported caliper (I had an old plastic holder), and the old brake pads still in place:
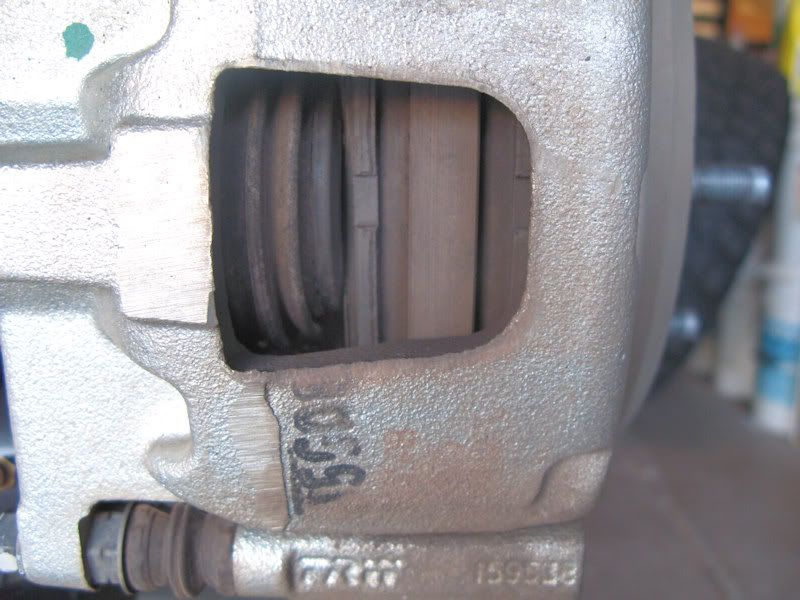
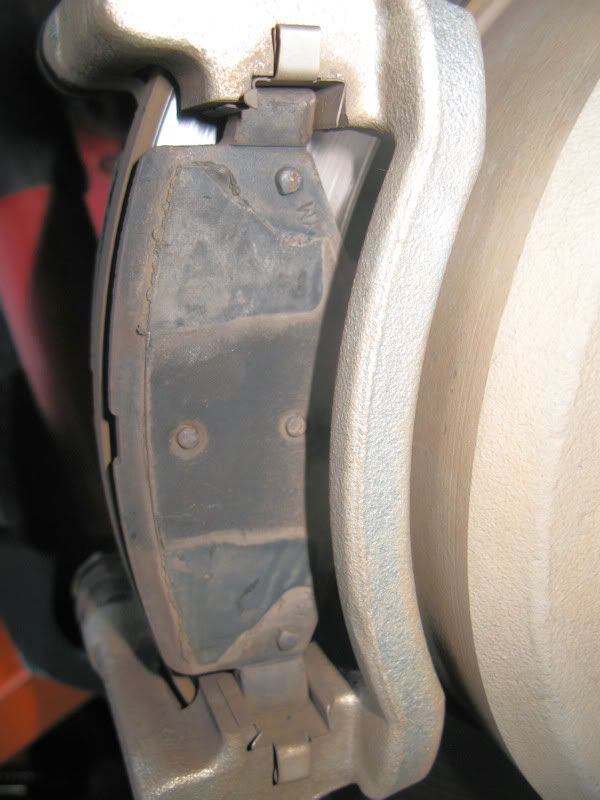
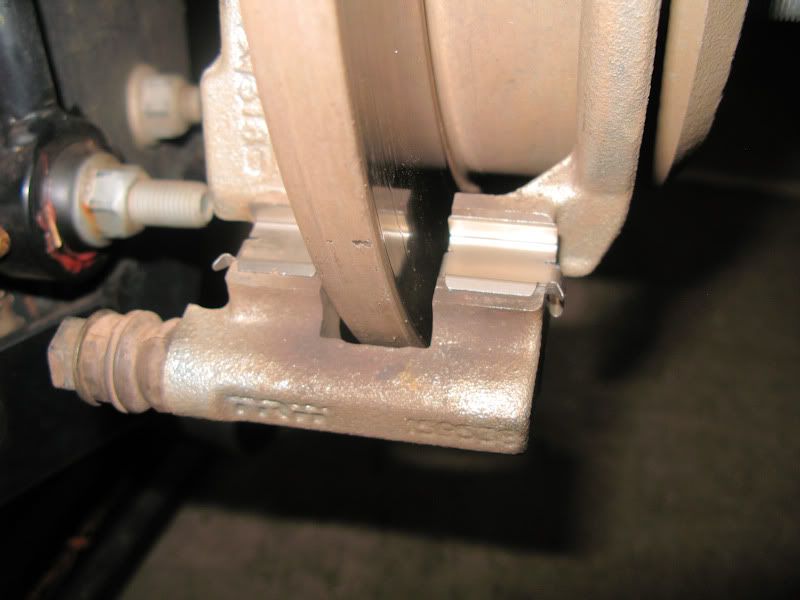
Here's a close up of the outer pad - you can see the stock clips on the top and bottom. I found that it's not a bad idea to use new clips:
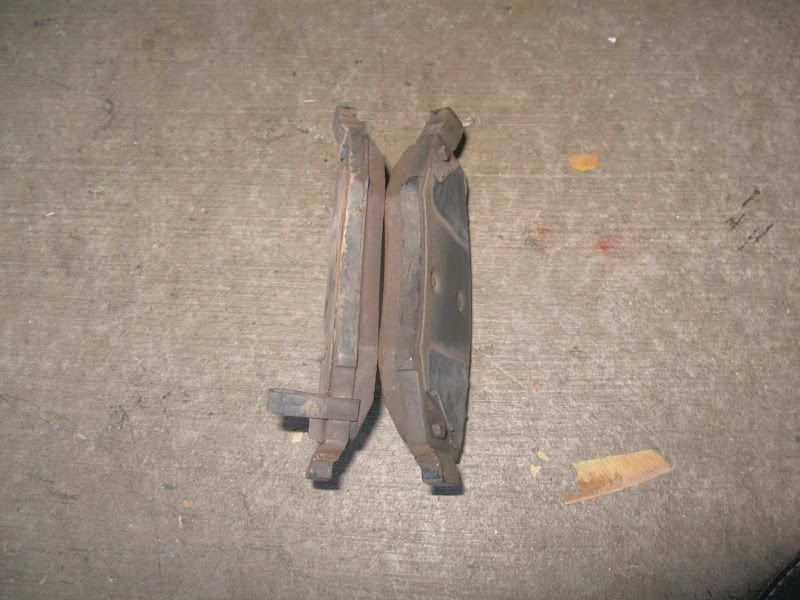
The pads should come off easily - slide the top off first then the bottom. Note that you never want to touch the rotor surfaces as any contamination is not helpful. Here are the pads removed. Note that the inner pad has the clip that makes a noise when the pad material is too low (there's about 1/8" of material left before it hits the noise tab):
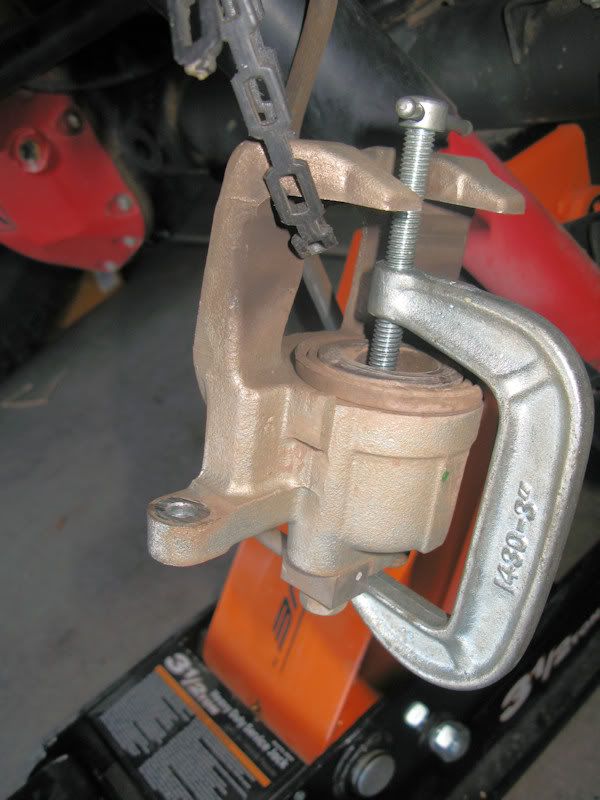
Next, you need to compress the brake piston in the caliper. If your brake fluid reservoir is completely full then you'll have to remove some fluid as compressing the piston will raise the level in the reservoir. Once you're sure there's room for the fluid in your reservoir you use a clamp to slowly compress the piston. I only had a 3" clamp, and slightly larger clamp would have been a little easier to use. Also note that you may need to put a socket in the piston if your clamp can't reach down far enough to compress the piston:
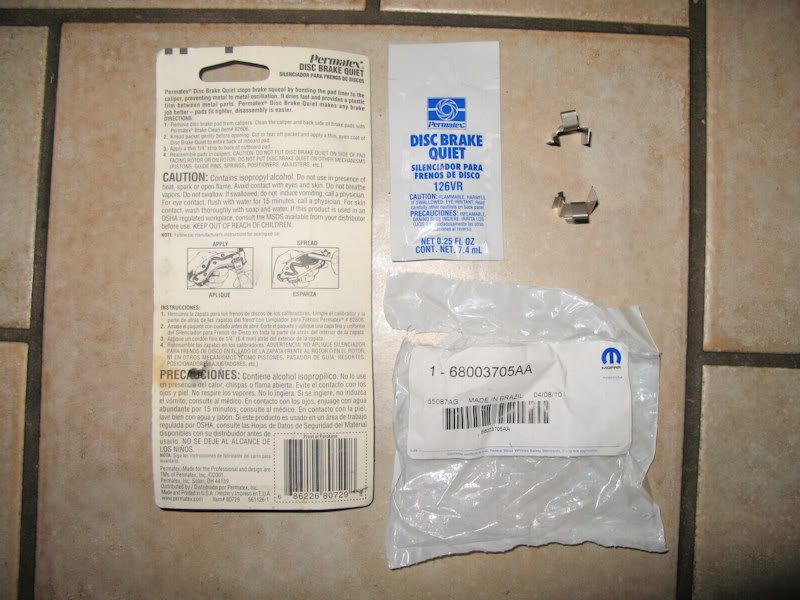
You can re-use your old clips, but you need to carefully inspect your old clips to ensure none of the tabs are broke or loose. I suggest getting new clips and Permatex Disc Brake Quiet which will help the clips hold to the caliper:
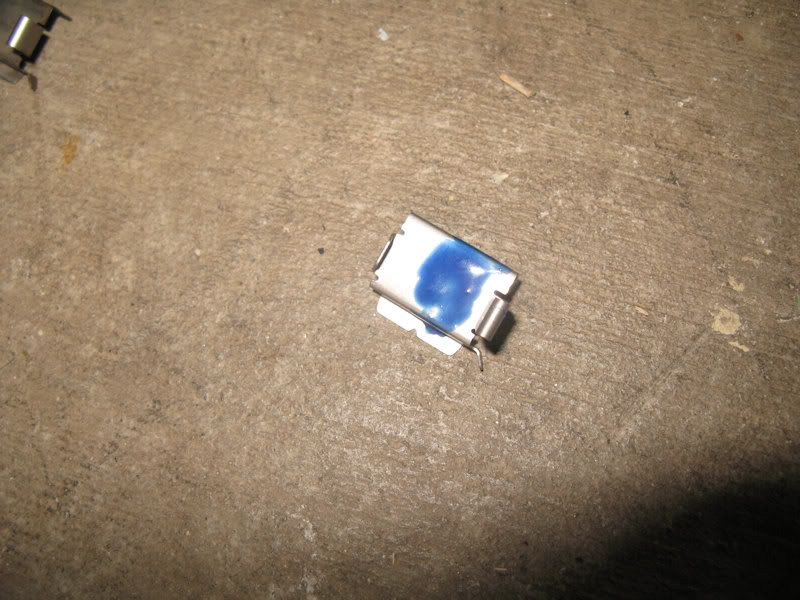
Put the Disc Brake Quiet on the bottom and sides that will come in contact with the caliper - don't get any on any other surfaces:
Carefully clip each clip back in place - note that the side tab points toward the rear:
Since my rotors are good, I'm going to keep them the way they are (if you want to replace your rotors you need to do it now). Next, you need to clean off the surface of the clips and use the supplied grease on the clips (I tend to try to keep the grease away from the rotor edge):
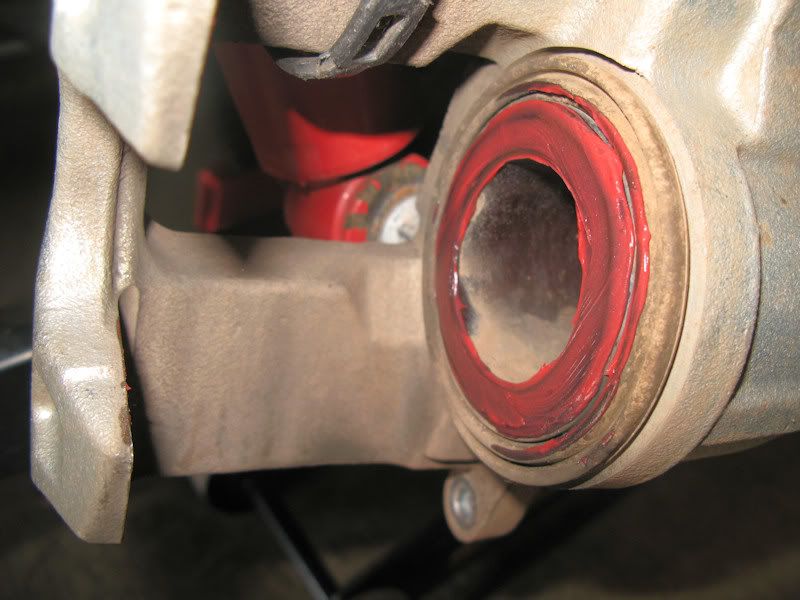
Also put grease on the piston. It's OK with this grease to get it on the rubber boot:
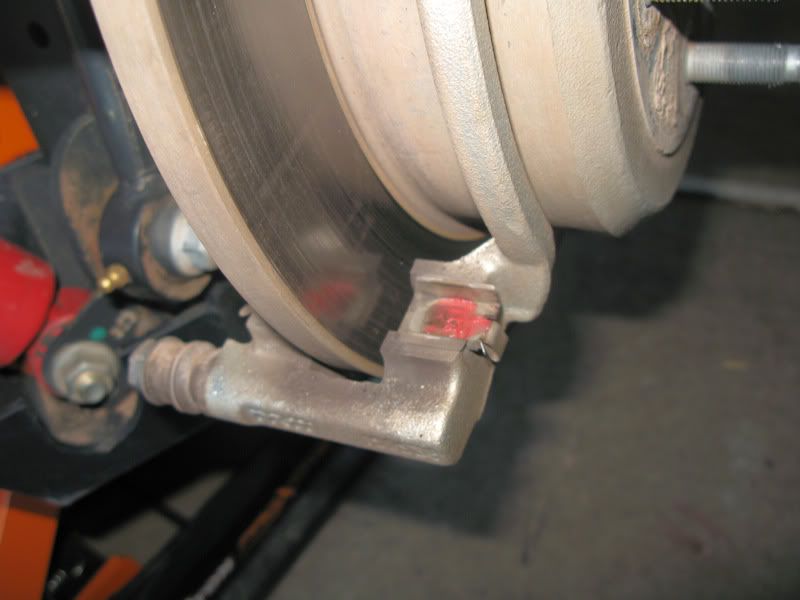
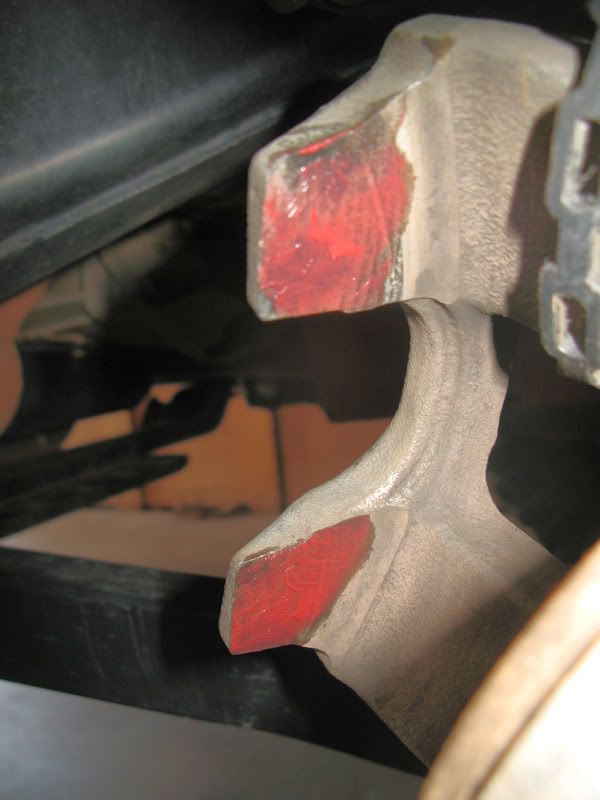
And finally put some grease on the inside of the arms of the caliper. You put the grease on the wear marks:
You can now put your new pads on the Jeep. Put the bottom part in first, edge in the top, then slide the entire pad over until it's in contact with the rotor. Remember that the inside pads has the noise clip. You can now put the caliper back on. Since you compressed the piston it should easily go back in place. The mounting bolt nuts are spring loaded so you need to push against them as you slip the assembly in place. Next, torque (don't quote me, but the Factory Service Manual says 26 ft. lbs. rear, and 26 or 32 ft. lbs. front (different numbers in different parts of the manual)) the bolts back on to hold the caliper. I noticed that they had some kind of thread locker, so I added some blue Loctite:

Here's what it looks like with the new pads installed. In the future you can look for the slot in the pad and when you can't see it anymore you can figure it's time to replace the pads again:
Always finish up with Brakleen. Spray down the inside and outside surface of the rotors to remove any grease, dirt, fingerprints, etc. that you may have accidently gotten on the surface. Don't spray it on the outside surface of the pads as you'll wash off the grease you want to keep:

Put your wheel back on, torque it down and repeat on your other wheels. Here's my brake fluid level after replacing all of my pads. After taking this picture I added a little more to top it off:
After installing the brakes you need to burnish the pads. The Hawk instructions say to make 6 to 10 stops from 30-35 MPH applying moderate pressure, then make 2 to 3 hard stop from 40-45 MPH, and then allow the brake pads to cool for 15 minutes. I did 10 and 3.
There are a few symptoms of low brake pads: brake noise when applying brakes (the brake pads have a tab that makes the brakes squeal when they are really low), a need to press the brake pedal in more, if you look at the pads you'll see they aren't as thick, and/or your brake fluid is low (even though you don't have a leak). Here's a shot of my brake fluid - lower than the stock fill:
I could visually see the pads were low and the fluid was low, so time for a change. The pads were well packed in the box (securely held together so they didn't bang around in shipping), plus they supply plenty of brake grease. Note that you don't get new clips with these pads, so you'll have to clean and re-use the stock ones:
I started with the passenger rear wheel. Block your tires, jack up your Jeep under the axle, add a solid support under the axle, remove the wheel:
Here's a view of the pads and rotor. The pads are to the left and right of the rotor (lighter brown smoother surface - offset to the right). There's still some material left, but I wanted to replace them anyway:
There are a couple of ways to get to the pads on the JK, but the Factory Service Manual recommends removing the two caliper mounting bolts. This is the top bolt (the bottom bolt is at the bottom of the picture with a white marking on it):
You'll need a thin wrench to hold the inner nut, and a wrench or socket for the outer bolt:
Once you get the two bolts off you can remove the caliper:
Do not let the caliper hang by the brake line - you need to support it! Here you can see the supported caliper (I had an old plastic holder), and the old brake pads still in place:
Here's a close up of the outer pad - you can see the stock clips on the top and bottom. I found that it's not a bad idea to use new clips:
The pads should come off easily - slide the top off first then the bottom. Note that you never want to touch the rotor surfaces as any contamination is not helpful. Here are the pads removed. Note that the inner pad has the clip that makes a noise when the pad material is too low (there's about 1/8" of material left before it hits the noise tab):
Next, you need to compress the brake piston in the caliper. If your brake fluid reservoir is completely full then you'll have to remove some fluid as compressing the piston will raise the level in the reservoir. Once you're sure there's room for the fluid in your reservoir you use a clamp to slowly compress the piston. I only had a 3" clamp, and slightly larger clamp would have been a little easier to use. Also note that you may need to put a socket in the piston if your clamp can't reach down far enough to compress the piston:
You can re-use your old clips, but you need to carefully inspect your old clips to ensure none of the tabs are broke or loose. I suggest getting new clips and Permatex Disc Brake Quiet which will help the clips hold to the caliper:
Put the Disc Brake Quiet on the bottom and sides that will come in contact with the caliper - don't get any on any other surfaces:
Carefully clip each clip back in place - note that the side tab points toward the rear:
Since my rotors are good, I'm going to keep them the way they are (if you want to replace your rotors you need to do it now). Next, you need to clean off the surface of the clips and use the supplied grease on the clips (I tend to try to keep the grease away from the rotor edge):
Also put grease on the piston. It's OK with this grease to get it on the rubber boot:
And finally put some grease on the inside of the arms of the caliper. You put the grease on the wear marks:
You can now put your new pads on the Jeep. Put the bottom part in first, edge in the top, then slide the entire pad over until it's in contact with the rotor. Remember that the inside pads has the noise clip. You can now put the caliper back on. Since you compressed the piston it should easily go back in place. The mounting bolt nuts are spring loaded so you need to push against them as you slip the assembly in place. Next, torque (don't quote me, but the Factory Service Manual says 26 ft. lbs. rear, and 26 or 32 ft. lbs. front (different numbers in different parts of the manual)) the bolts back on to hold the caliper. I noticed that they had some kind of thread locker, so I added some blue Loctite:
Here's what it looks like with the new pads installed. In the future you can look for the slot in the pad and when you can't see it anymore you can figure it's time to replace the pads again:
Always finish up with Brakleen. Spray down the inside and outside surface of the rotors to remove any grease, dirt, fingerprints, etc. that you may have accidently gotten on the surface. Don't spray it on the outside surface of the pads as you'll wash off the grease you want to keep:
Put your wheel back on, torque it down and repeat on your other wheels. Here's my brake fluid level after replacing all of my pads. After taking this picture I added a little more to top it off:
After installing the brakes you need to burnish the pads. The Hawk instructions say to make 6 to 10 stops from 30-35 MPH applying moderate pressure, then make 2 to 3 hard stop from 40-45 MPH, and then allow the brake pads to cool for 15 minutes. I did 10 and 3.
Last edited by joe002; 07-11-2011 at 09:51 PM. Reason: Updated clip information.
 06-10-2011, 08:06 PM
#3
JK Super Freak
Thread Starter
Join Date: Oct 2007
Location: Phoenix, AZ
Posts: 1,572
Likes: 0
Received 0 Likes
on
0 Posts
Give it a shot.
06-10-2011, 08:13 PM
#4
JK Enthusiast

Join Date: Mar 2007
Location: Canada
Posts: 495
Likes: 0
Received 0 Likes
on
0 Posts
I might try that if I can find a skinny wrench, the rotors shouldn't need to come off so why not. Did you find a torque for the caliper bolts, I didn't notice it in the write up.
06-10-2011, 08:21 PM
#5
JK Super Freak
Thread Starter
Join Date: Oct 2007
Location: Phoenix, AZ
Posts: 1,572
Likes: 0
Received 0 Likes
on
0 Posts
The torque settings are in the write up above the blue screw picture. I don’t know why they had different torque setting for front vs. rear (since they are the same bolt), but I did what they said anyway.
06-10-2011, 08:37 PM
#7
JK Super Freak
Thread Starter
Join Date: Oct 2007
Location: Phoenix, AZ
Posts: 1,572
Likes: 0
Received 0 Likes
on
0 Posts

Trending Topics
06-11-2011, 02:38 PM
#10
JK Super Freak
Thread Starter
Join Date: Oct 2007
Location: Phoenix, AZ
Posts: 1,572
Likes: 0
Received 0 Likes
on
0 Posts
Nope. No vibrations before or after.