Hardtop hoist/storage write-up
 04-19-2007, 06:49 AM
#11
Why not just leave it on the hoist? Is it pretty unstable - or at least enough to justify keeping it on the platform?
Great idea though...may have to do this as well.
Great idea though...may have to do this as well.
 04-24-2007, 01:31 PM
#12
JK Newbie
Join Date: Dec 2006
Location: Central Valley California
Posts: 26
Likes: 0
Received 0 Likes
on
0 Posts
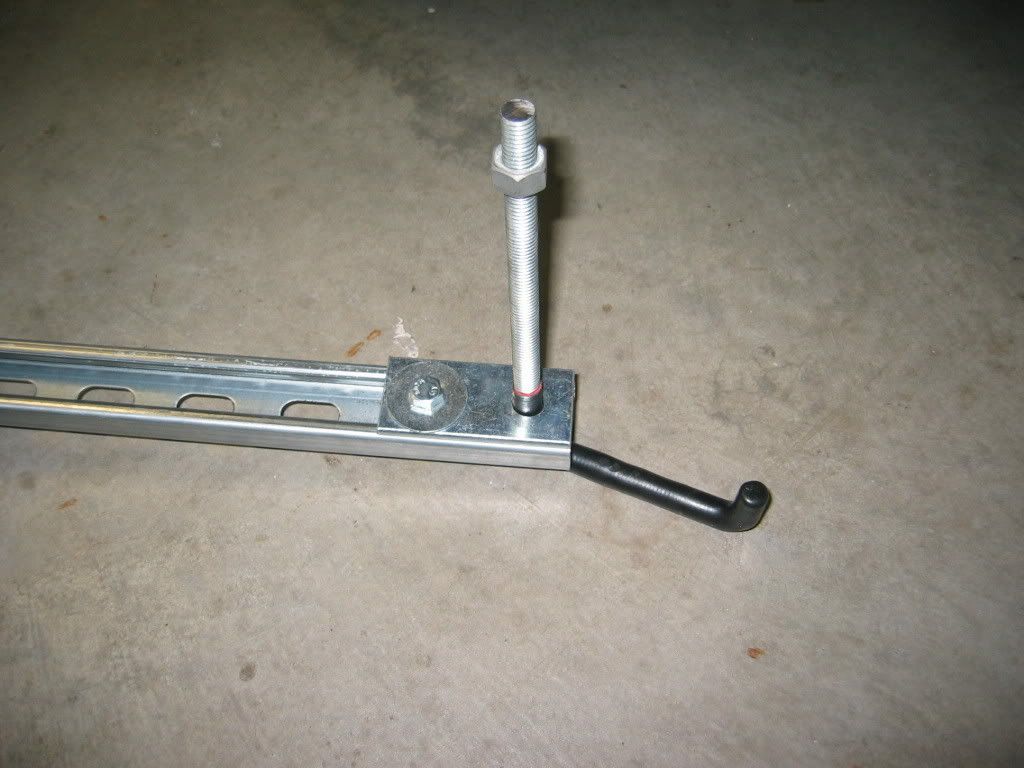
I just completed my version of this lift, but didnt feel the need to use the deep channel. I also looked all over for those u bolts, but no one had them. So, I went to OSH, and just bought some threaded rod, put it in a vise, and heated it up where I wanted the bends. My first attempt was some rod from a trailer parts store, and damn it took awhile to get it to the temp to where it would bend. That when I bought the rod at OSH.
FOr the to front pick up locations, bend the rod at 1 inch from the end, and then 4 inches from that, and then cut off the long end at 6 inches tall.
For the back one, do the same thing, but cut it off at 8 inches tall. Make sure you leave a nut on the rod before cutting it. The nut will act like a deburring tool when you thread it off the rod.
I also thought of using the tube, but man do I love playing with plastic dip, I just dipped the rods, and used an old paint brush to dip into the can where the bent rods would not fit, and just kind gooped it on.
I also opted for a 12 volt winch mounted to the wall to lift the contraption. I found one at Harbor Freight Tools for 49 bucks. The only drawback is that I now have to mount a shelf with a 12 volt battery sitting on it. But until then, I just back the jeep in, hook up the leads to the battery in the jeep, and tadaaaaa.
I will post pics later tonight when I get home.
I will post pics real soon.
04-25-2007, 07:35 AM
#13
JK Enthusiast
Join Date: Apr 2007
Location: PA
Posts: 103
Likes: 0
Received 0 Likes
on
0 Posts
What do you do with your doors? I went to home depot a purchased 4 heavy duty rake/shovel racks & mouted the to my garage wall. The four doors hang out of the way and are off the ground.
04-25-2007, 07:51 AM
#14
JK Newbie
Join Date: Dec 2006
Location: Central Valley California
Posts: 26
Likes: 0
Received 0 Likes
on
0 Posts
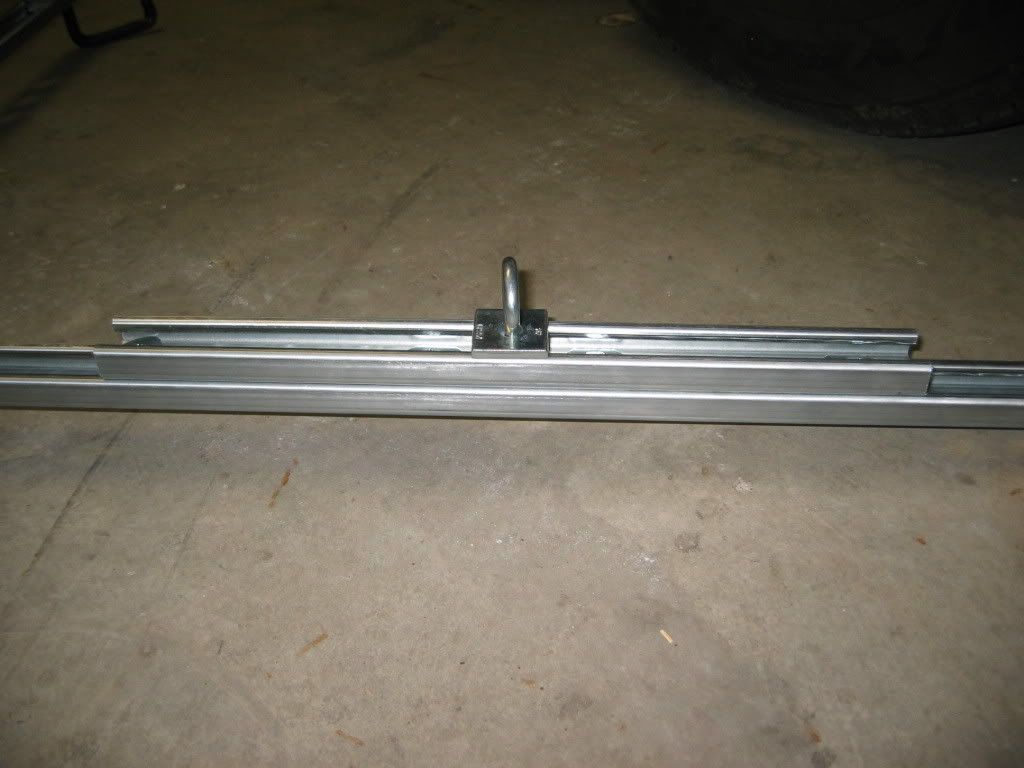
As I said, here is a similar version of the original. I purchase all the components from a electrical supply warehouse. Total cost for the build up was around 50 bucks (not including the hoist setup)
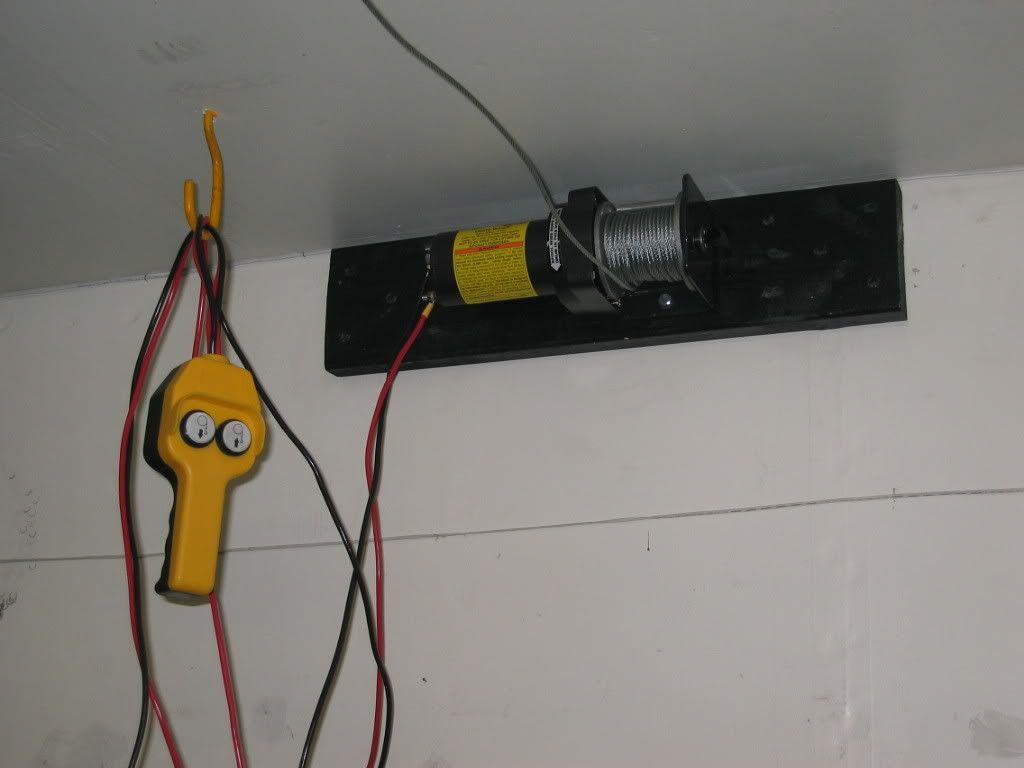
This is a 40 dollar hoist from Harbor Freigh Tools
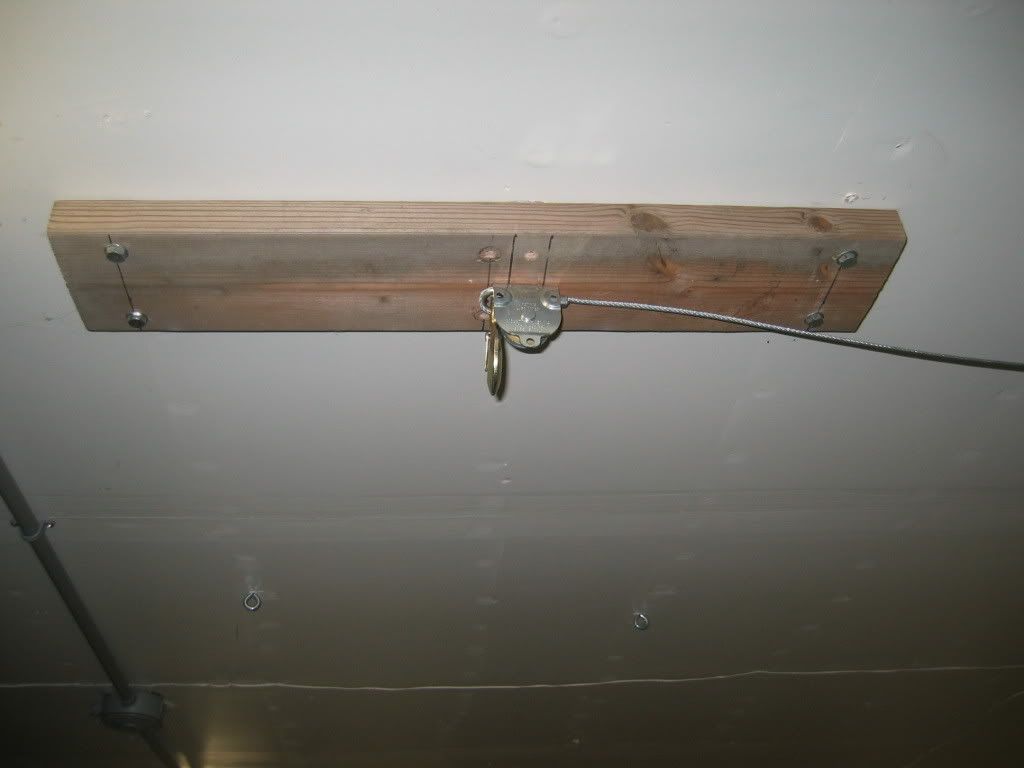
I actually set 2 of these up, 1 for lifting the lid on the jeep, and another one inline, but further towards the front of my garage. The second one works well for when Im working on my quad (say changing my tires) The pully system allows you to pull a cotter pin, and run the cable to the another location.
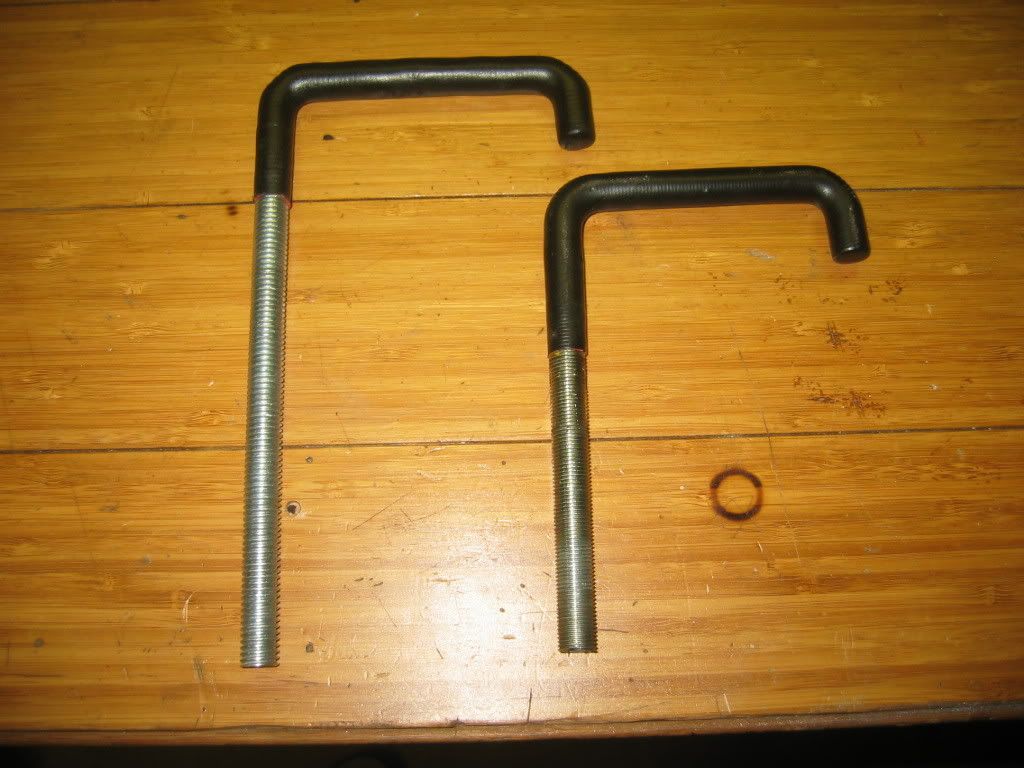
The shorter one (times 2) is for the pick points at the side of the lid, and the longer one is for the rear pick point.
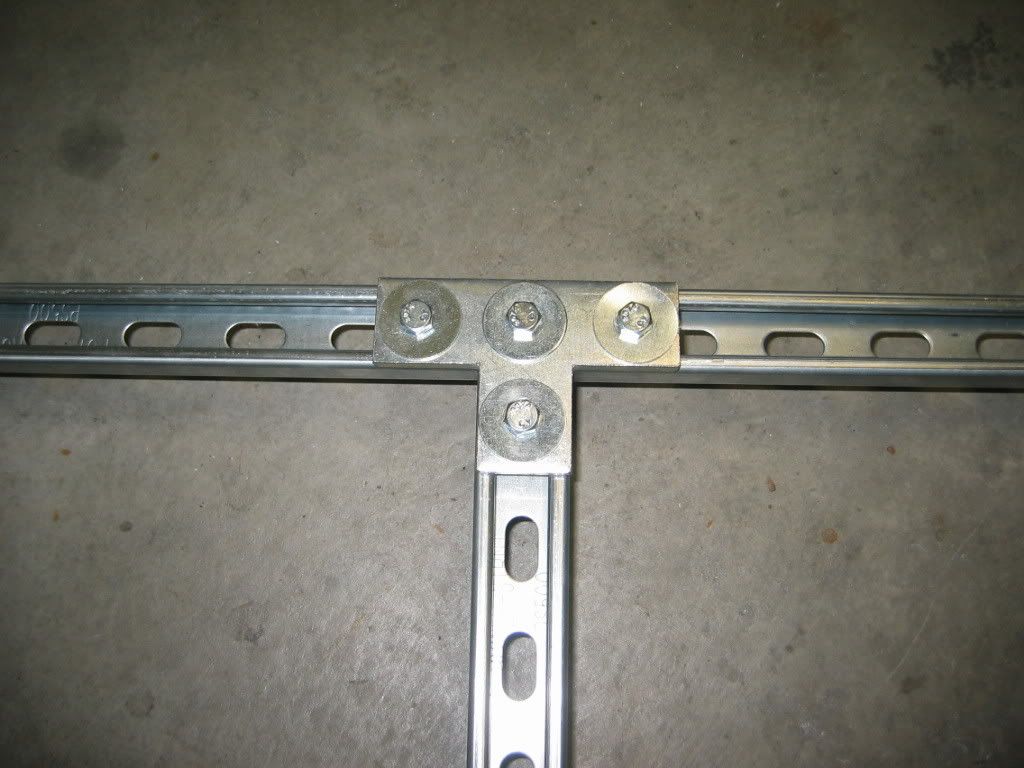
Just some close ups
Just some close ups
[IMG][IMG]http://i176.photobucket.com/albums/w166/rriker67/Hoist0008.jpg
[/IMG][/IMG]
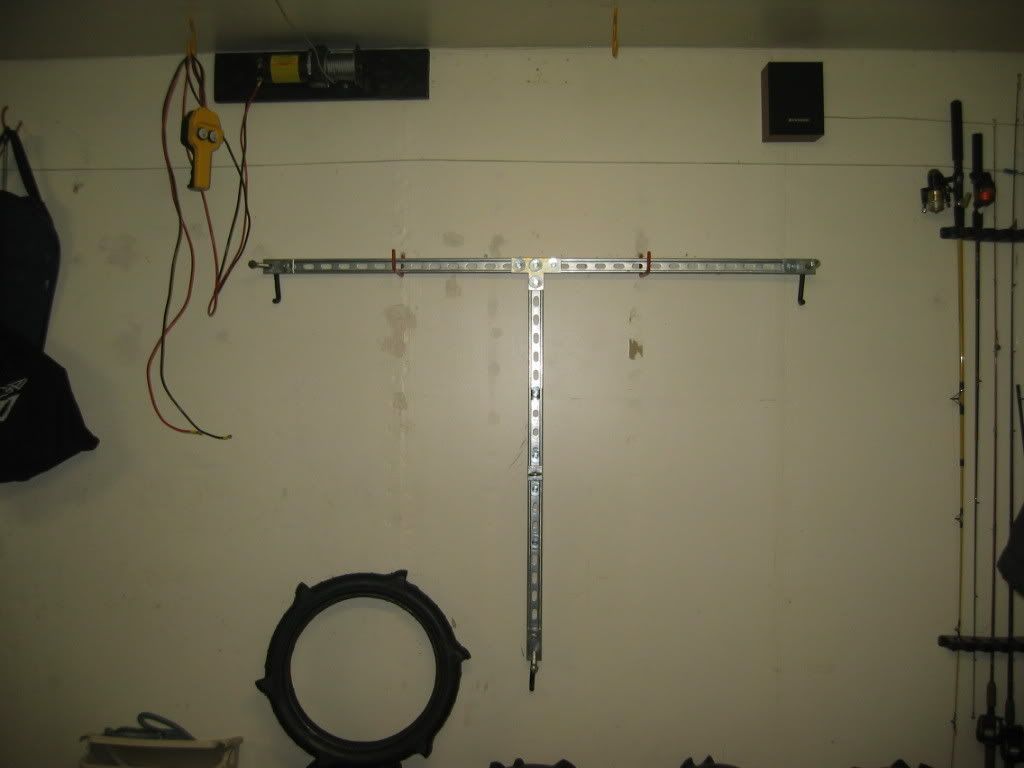
The whole setup.
This is a 40 dollar hoist from Harbor Freigh Tools
I actually set 2 of these up, 1 for lifting the lid on the jeep, and another one inline, but further towards the front of my garage. The second one works well for when Im working on my quad (say changing my tires) The pully system allows you to pull a cotter pin, and run the cable to the another location.
The shorter one (times 2) is for the pick points at the side of the lid, and the longer one is for the rear pick point.
Just some close ups
Just some close ups
[IMG][IMG]http://i176.photobucket.com/albums/w166/rriker67/Hoist0008.jpg
[/IMG][/IMG]
The whole setup.
04-25-2007, 07:54 AM
#15
JK Newbie
Join Date: Dec 2006
Location: Central Valley California
Posts: 26
Likes: 0
Received 0 Likes
on
0 Posts
As I said, here is a similar version of the original. I purchase all the components from a electrical supply warehouse. Total cost for the build up was around 50 bucks (not including the hoist setup)
This is a 40 dollar hoist from Harbor Freigh Tools
I actually set 2 of these up, 1 for lifting the lid on the jeep, and another one inline, but further towards the front of my garage. The second one works well for when Im working on my quad (say changing my tires) The pully system allows you to pull a cotter pin, and run the cable to the another location.
The shorter one (times 2) is for the pick points at the side of the lid, and the longer one is for the rear pick point.
Just some close ups
Just some close ups
 04-25-2007, 12:00 PM
#17
JK Freak
Join Date: Mar 2007
Location: AZ via AK, MN, MA, CA, etc!
Posts: 532
Likes: 0
Received 0 Likes
on
0 Posts
Anyone know the weight of the top? And the panels?
Thinking of welding a setup very similar to those listed but definitely want to go electric (110V).
When we first took them off it seemed fairly light but saw an electric hoist rated at 220# for single cable and started looking for the specs on the top weights but haven't come across them yet.
Thanks
04-25-2007, 04:04 PM
#18
JK Junkie
Thread Starter
Join Date: Oct 2006
Location: Pottstown, PA
Posts: 2,466
Likes: 0
Received 0 Likes
on
0 Posts
04-25-2007, 07:14 PM
#19
JK Freak
Join Date: Mar 2007
Location: AZ via AK, MN, MA, CA, etc!
Posts: 532
Likes: 0
Received 0 Likes
on
0 Posts
Thanks - was that by measurement or did you actually find it written somewhere? Someone posted that the 2 door was 95# also.
Just wondering as I am very surprised that many of these little items are listed in the owners manual!
Just wondering as I am very surprised that many of these little items are listed in the owners manual!
06-18-2007, 12:32 PM
#20
JK Newbie

Join Date: Jun 2007
Location: Troy, MI
Posts: 24
Likes: 0
Received 0 Likes
on
0 Posts
How does the hand winch brake work? Do you have to press a release lever or something, or can you just turn the lever the other way for a controlled lowering? If you let go of the handle does it lock? Or do you have to keep pressure on it with your hand? I just want to make sure it's easy and safe to lower.
I also noticed that most hand winches and even the electric winch in this post are supposed to be used for "horizontal use only." Has this caused a problem? Does it seem stable?
I also noticed that most hand winches and even the electric winch in this post are supposed to be used for "horizontal use only." Has this caused a problem? Does it seem stable?