Installing JE REEL 1350 Rear Driveshaft
 02-07-2008, 12:44 PM
#1
JK Freak
Thread Starter
Before we get started, here's the disclaimer. I am in no way an experienced veteran on this. This, in fact, was my first drive shaft replacement. I had some help with torque values and techniques along the way and thought I would share them.
Also, excuse the mud caked up on the Jeep. We�re on a water ban in GA and I didn�t want to drive it to the car wash in front wheel drive.
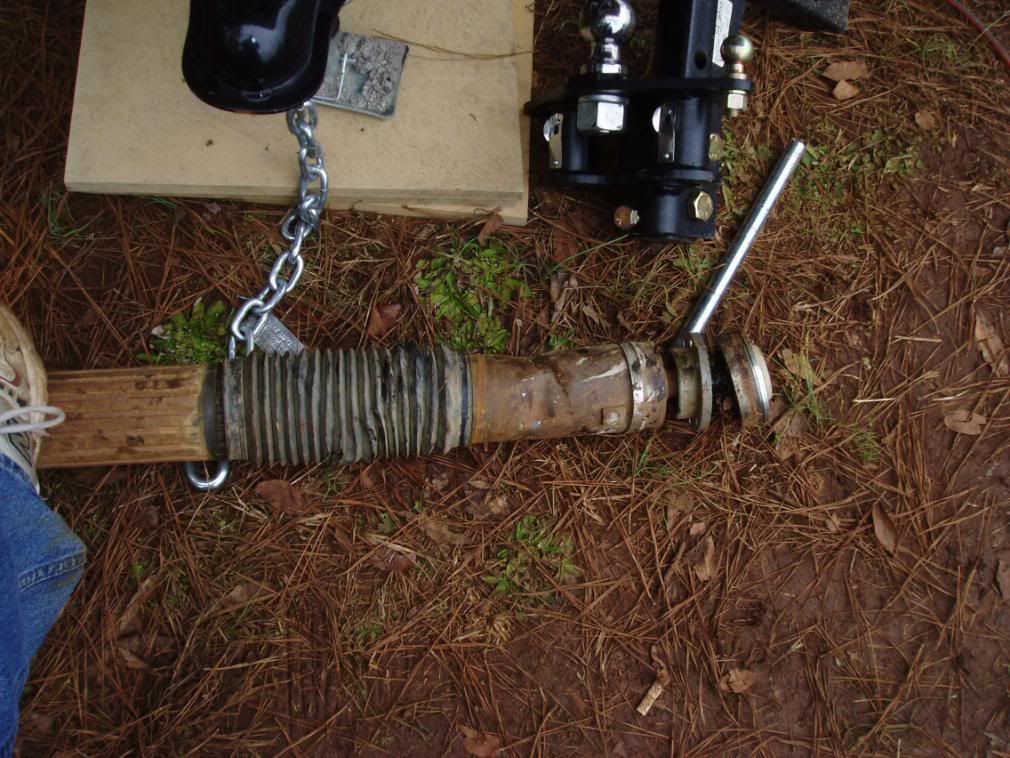
Step 1. (Optional) Dent your stock drive shaft on a rock.
Step 2. Place rear axle on jack stands and remove wheels.
Step 3. Remove (8) retaining bolts connecting the drive shaft to the rear axle output flange.
Step 4. Remove (8) retaining bolts connecting the drive shaft to the transfer case output flange.
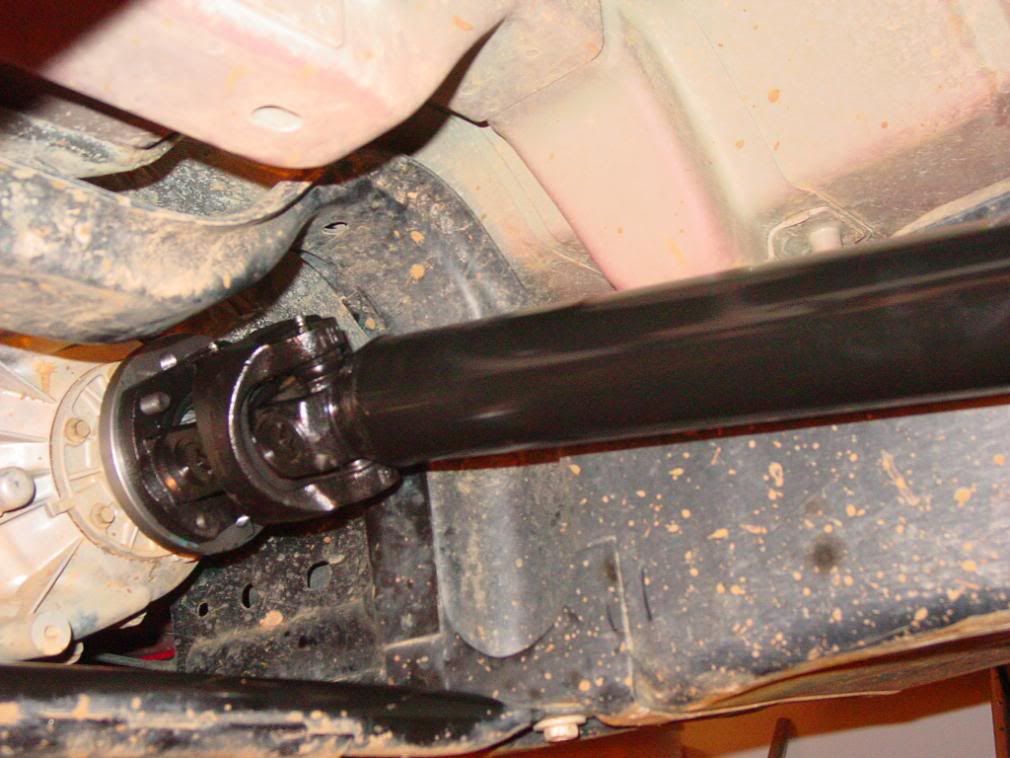
Step 5. Separate the drive shaft from the transfer case flange using a flat tip screw driver or pry bar. This is the easy end. You can rest the drive shaft on the transfer case skid.
Step 6. Separate the drive shaft from the axle flange. Look on the back of the flange. There are some holes that aren't threaded. Use a round dull punch or screwdriver and a hammer through the holes to tap the drive shaft out. Work your way around as you go so it will come out even.
Sorry I don't have pictures for the steps above. This was done in the field.
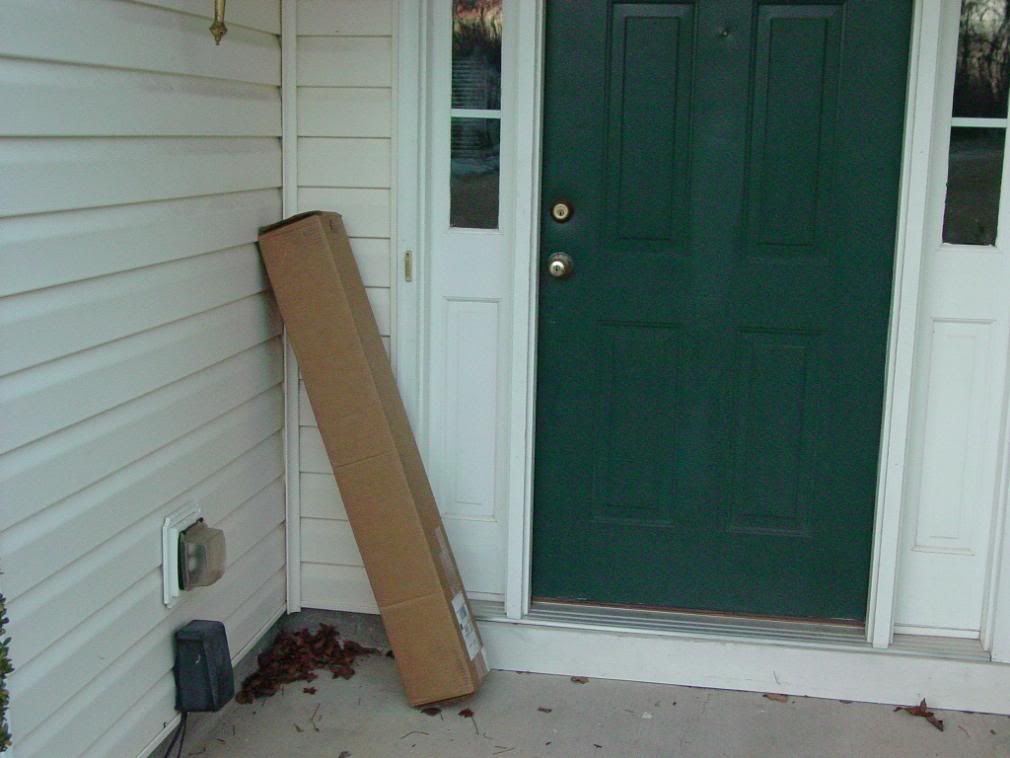
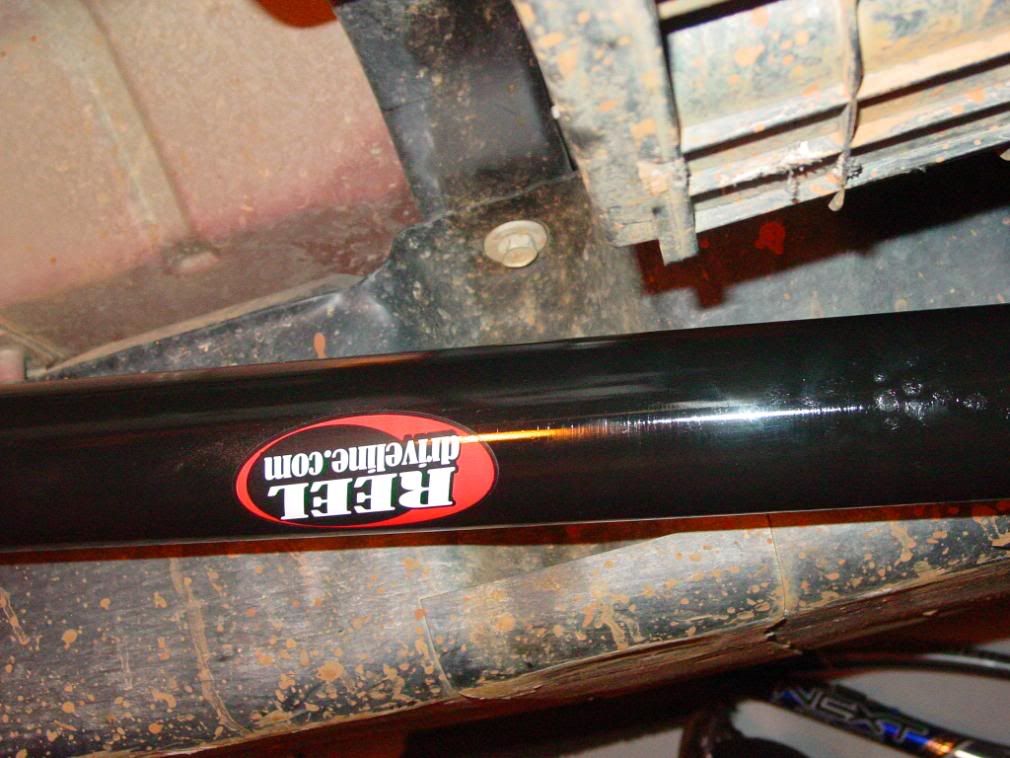
Step 7. Check your front porch to see if your new drive shaft has arrived from Northridge 4X4.
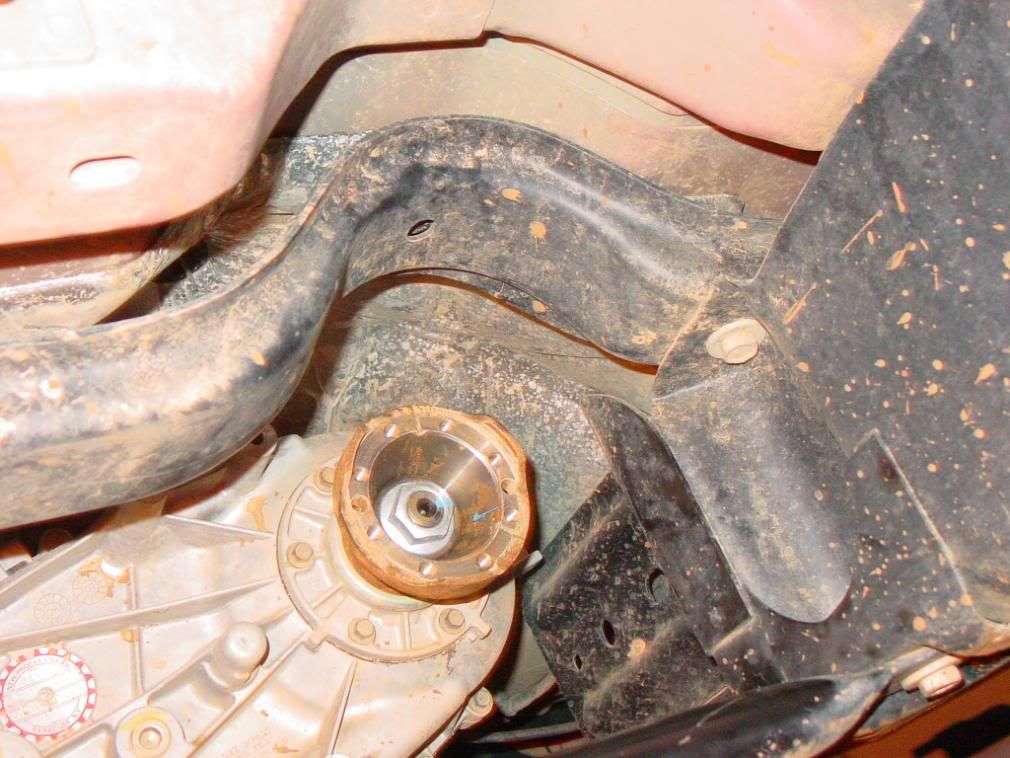
Step 8. Next you must determine your rotational torque or pre-load on the pinion bearing before you remove the pinion nut.
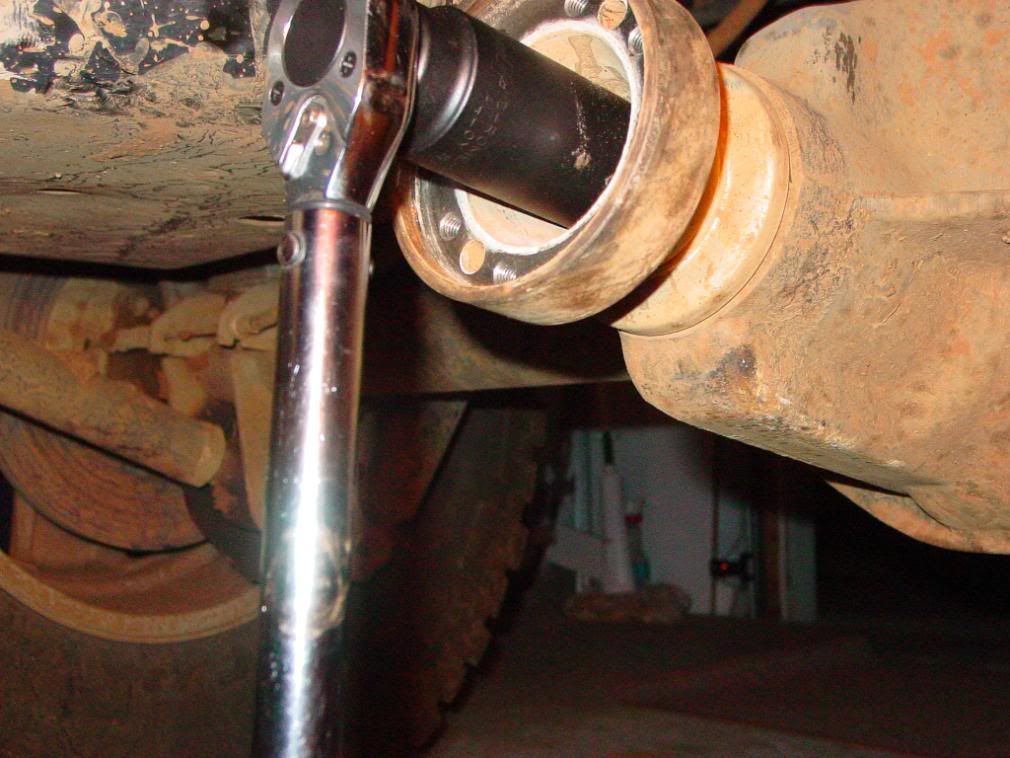
Put in neutral, spread brake pads so they don't drag on disc, using a inch pound torque wrench(needle indicator type) that can measure as low as 2 1/2 inch pounds of torque (kd tools p/n 2955) and a 1 1/4" or 35 mm socket on the nut, rotate the pinion flange and record how much torque it takes to move it (mine took 20 inch lbs to turn the flange). Do this several times so you can get an average.
Also, excuse the mud caked up on the Jeep. We�re on a water ban in GA and I didn�t want to drive it to the car wash in front wheel drive.
Step 1. (Optional) Dent your stock drive shaft on a rock.
Step 2. Place rear axle on jack stands and remove wheels.
Step 3. Remove (8) retaining bolts connecting the drive shaft to the rear axle output flange.
Step 4. Remove (8) retaining bolts connecting the drive shaft to the transfer case output flange.
Step 5. Separate the drive shaft from the transfer case flange using a flat tip screw driver or pry bar. This is the easy end. You can rest the drive shaft on the transfer case skid.
Step 6. Separate the drive shaft from the axle flange. Look on the back of the flange. There are some holes that aren't threaded. Use a round dull punch or screwdriver and a hammer through the holes to tap the drive shaft out. Work your way around as you go so it will come out even.
Sorry I don't have pictures for the steps above. This was done in the field.
Step 7. Check your front porch to see if your new drive shaft has arrived from Northridge 4X4.
Step 8. Next you must determine your rotational torque or pre-load on the pinion bearing before you remove the pinion nut.
Put in neutral, spread brake pads so they don't drag on disc, using a inch pound torque wrench(needle indicator type) that can measure as low as 2 1/2 inch pounds of torque (kd tools p/n 2955) and a 1 1/4" or 35 mm socket on the nut, rotate the pinion flange and record how much torque it takes to move it (mine took 20 inch lbs to turn the flange). Do this several times so you can get an average.
 02-07-2008, 12:45 PM
#2
JK Freak
Thread Starter
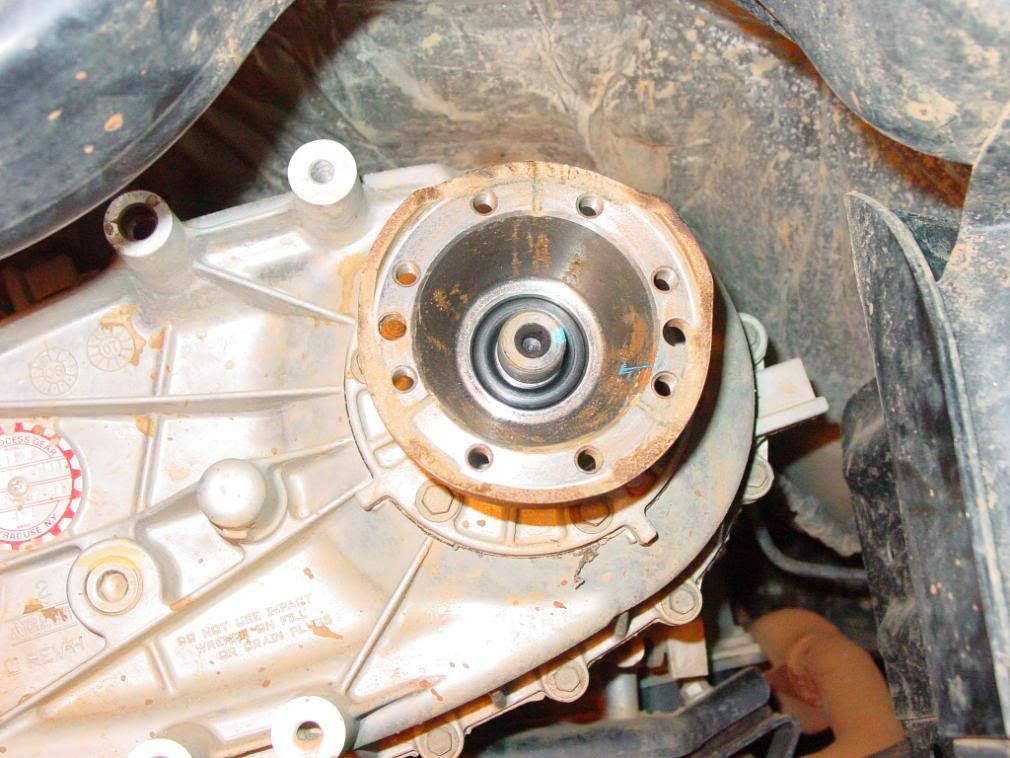
Step 9. Remove the flange nut and washer from the rear axle pinion using a 35 mm socket.
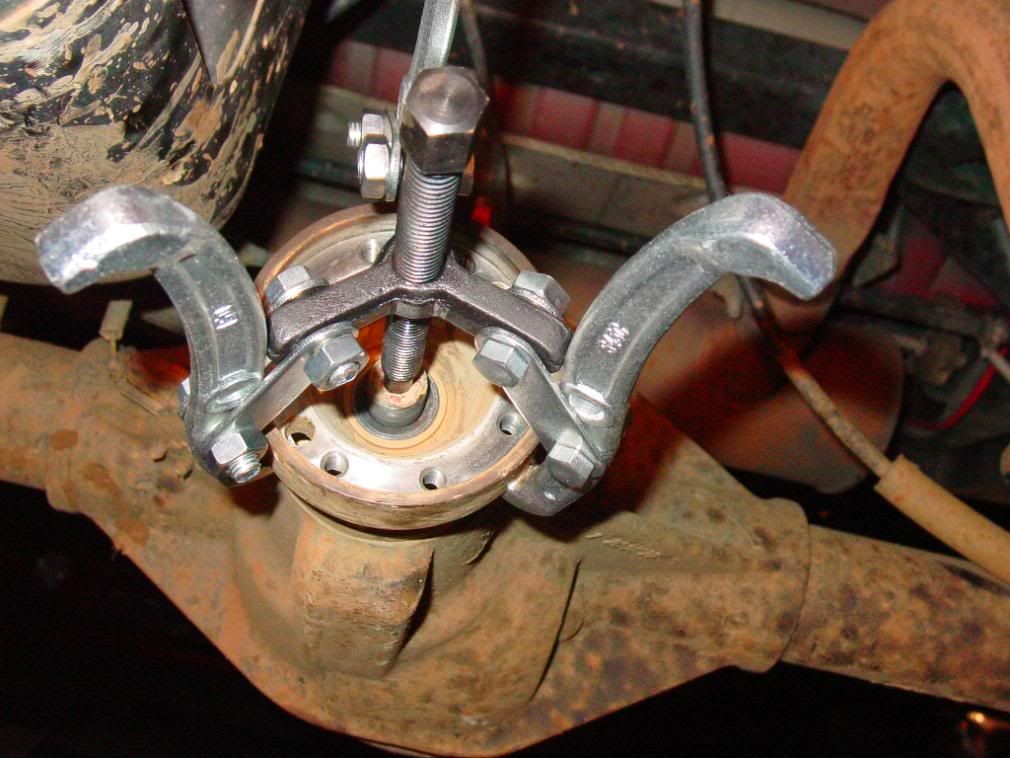
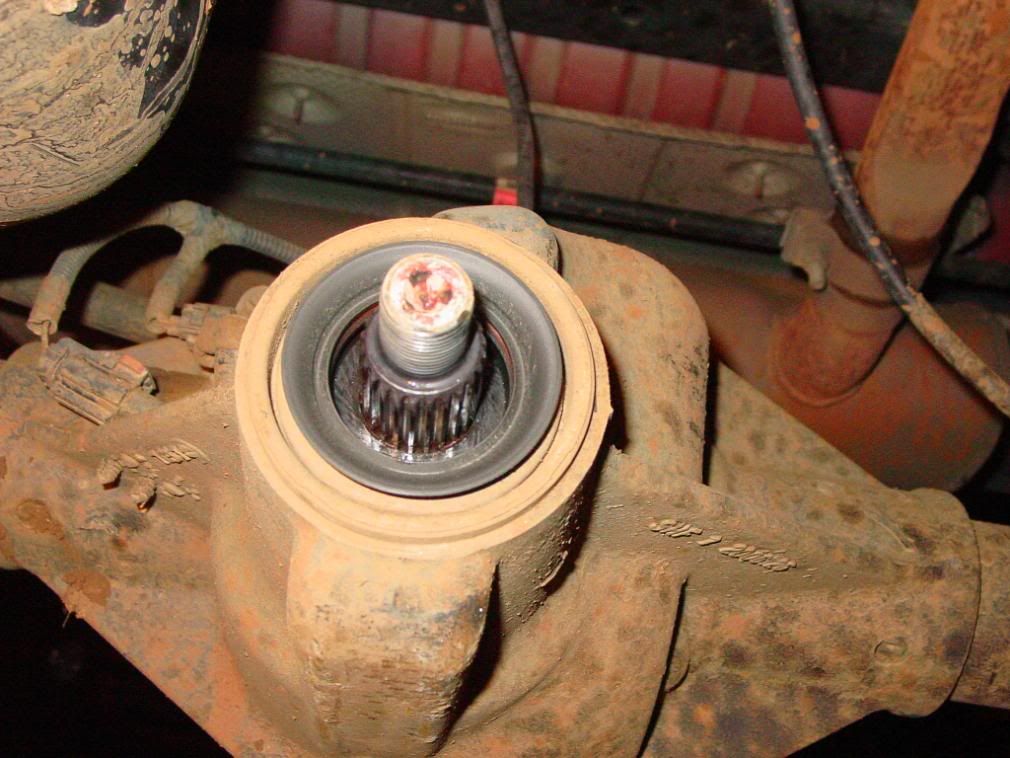
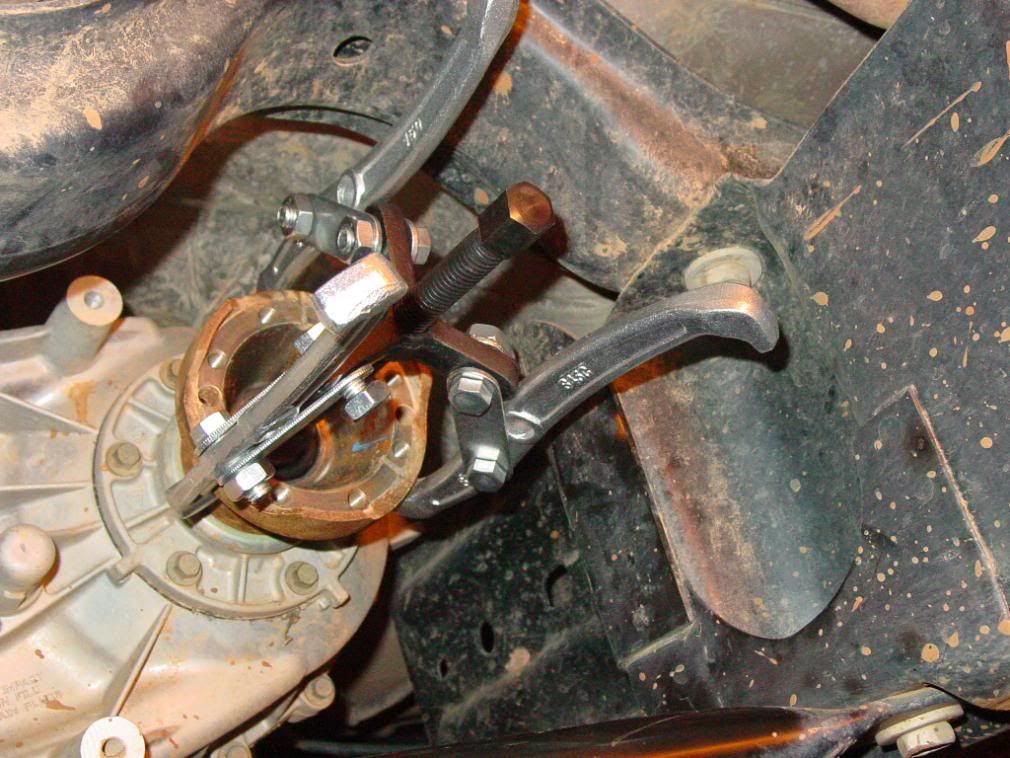
Step 10. Using a gear puller, remove the flange from the rear axle pinion.
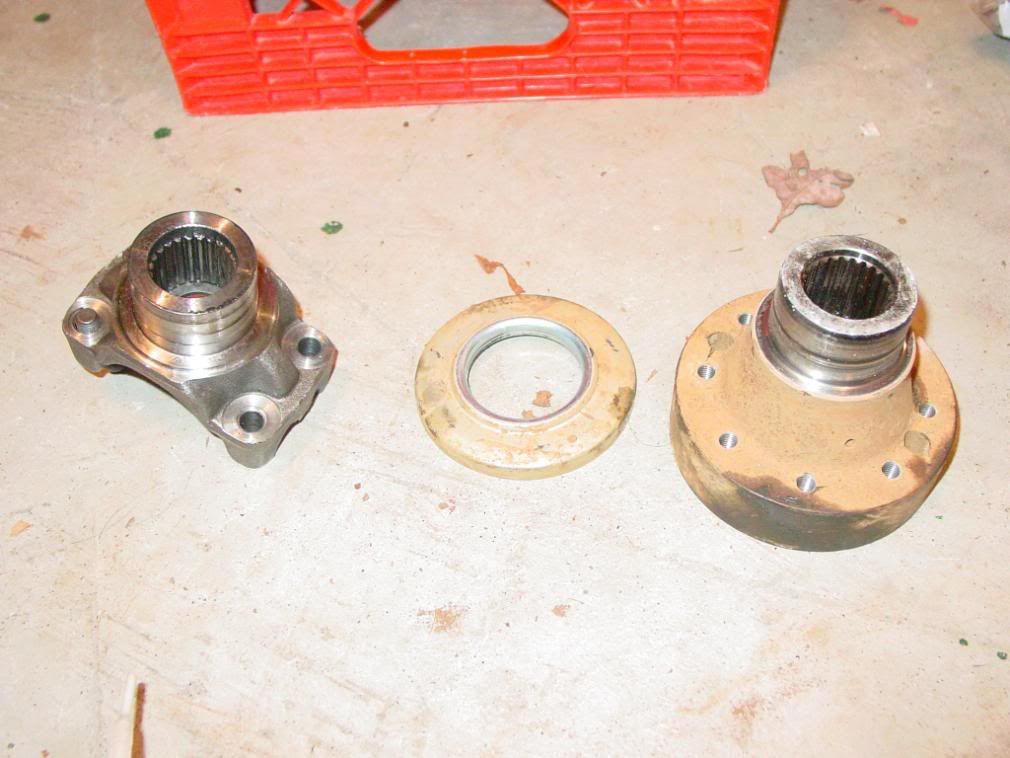
Step 11. Remove the dust ring from the factory flange and tap it in place on the replacement flange. I used the factory flange with a hammer to tap the dust ring in place.


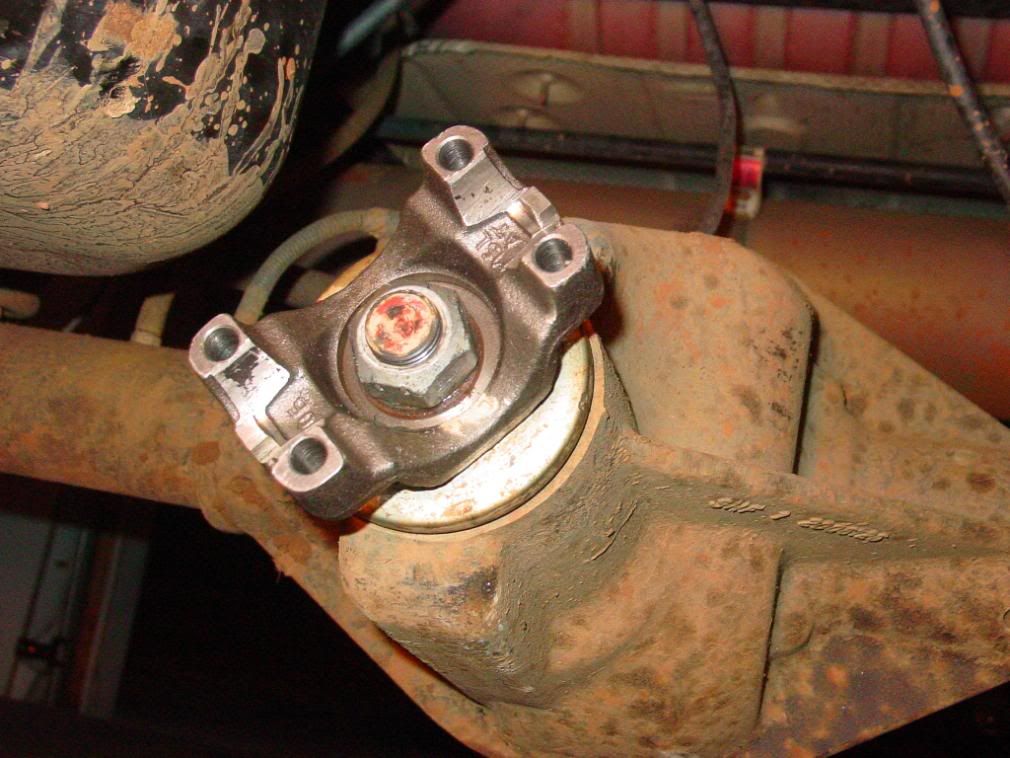
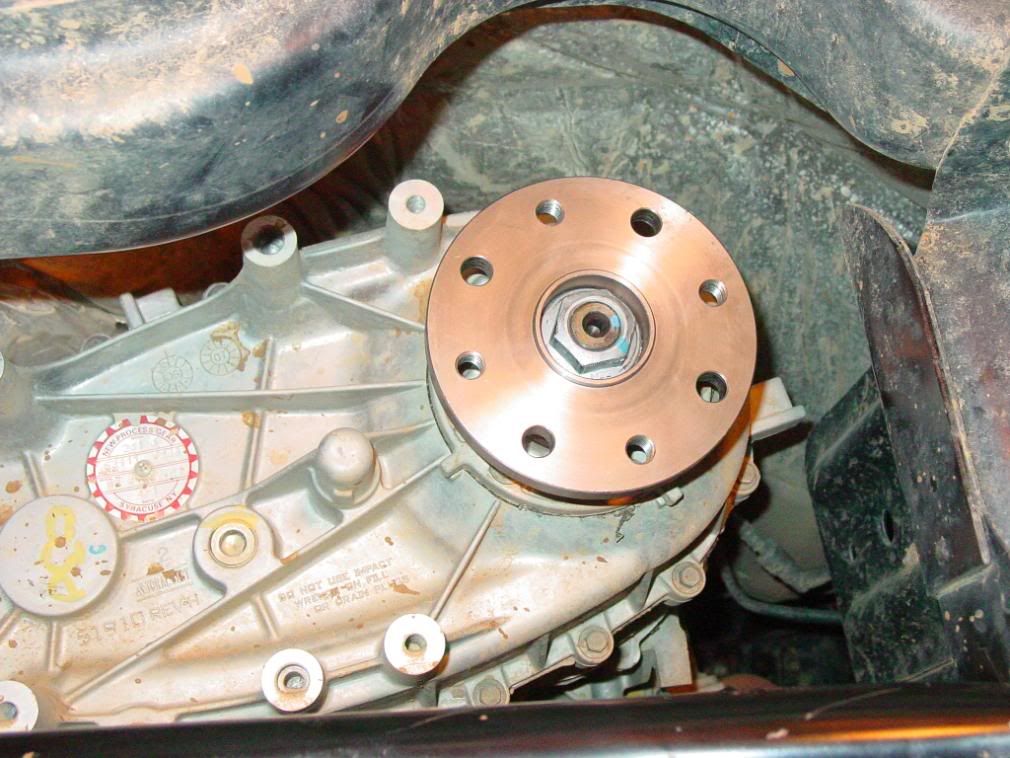
Step 12. Install the new flange on the axle pinion using factory nut and washer.
Step 13. Using a flange holding tool ( a 24" piece of angle iron bolted to the flange) tighten pinion nut to about 150 ft/lbs (stop) take a rotation torque reading. Continue tightening pinion nut in 5 to 10 ft/lb increments, checking rotation torque each time until you reach your original rotational torque. I would not go past 210 ft./lbs in fear of
destroying the crush sleeve.
Step 14. Remove the flange nut from the transfer case flange.
Step 15. Remove flange from transfer case using a gear puller.
Step 16. Install new flange on transfer case and toque to 85 – 95 ft/lbs.
Step 17. Connect your new drive shaft to the transfer case flange using the supplied (not in my case) 12mmx1.75x30 bolts. There is no torque value for these, but you want them as tight as you can get them without stressing the bolt. I used blue lock tight on these bolts.
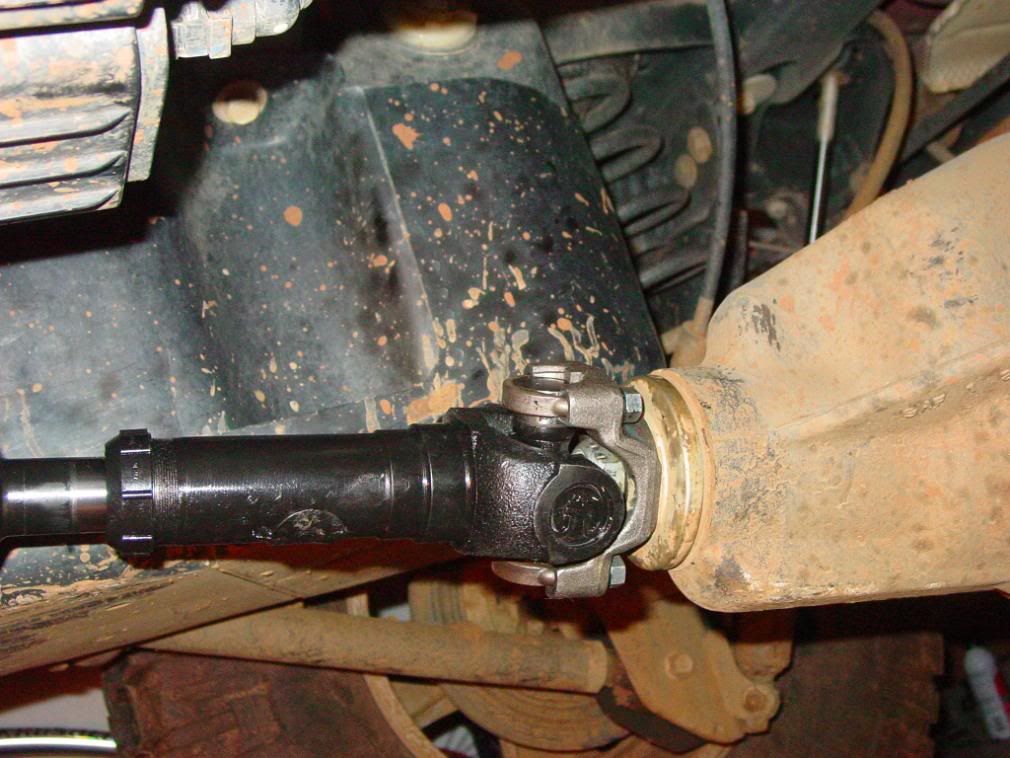
Step 18. Connect your new drive shaft to the axle flange using the supplied hardware. There is no torque value for these, but you want them as tight as you can get them without stressing the bolt. I used blue lock tight on these bolts.
Test drive and check for vibrations and leaks. Adjust control arms if needed for vibration.
Step 10. Using a gear puller, remove the flange from the rear axle pinion.
Step 11. Remove the dust ring from the factory flange and tap it in place on the replacement flange. I used the factory flange with a hammer to tap the dust ring in place.
Step 12. Install the new flange on the axle pinion using factory nut and washer.
Step 13. Using a flange holding tool ( a 24" piece of angle iron bolted to the flange) tighten pinion nut to about 150 ft/lbs (stop) take a rotation torque reading. Continue tightening pinion nut in 5 to 10 ft/lb increments, checking rotation torque each time until you reach your original rotational torque. I would not go past 210 ft./lbs in fear of
destroying the crush sleeve.
Step 14. Remove the flange nut from the transfer case flange.
Step 15. Remove flange from transfer case using a gear puller.
Step 16. Install new flange on transfer case and toque to 85 – 95 ft/lbs.
Step 17. Connect your new drive shaft to the transfer case flange using the supplied (not in my case) 12mmx1.75x30 bolts. There is no torque value for these, but you want them as tight as you can get them without stressing the bolt. I used blue lock tight on these bolts.
Step 18. Connect your new drive shaft to the axle flange using the supplied hardware. There is no torque value for these, but you want them as tight as you can get them without stressing the bolt. I used blue lock tight on these bolts.
Test drive and check for vibrations and leaks. Adjust control arms if needed for vibration.
Last edited by RotorHead; 02-07-2008 at 12:53 PM.
 02-07-2008, 01:05 PM
#4
JK Freak
Thread Starter

Trending Topics
02-07-2008, 03:22 PM
#8
JK Newbie
Join Date: Dec 2007
Location: Venice, FL
Posts: 38
Likes: 0
Received 0 Likes
on
0 Posts
Great write up but I'm confused . I thought the 1310 heavy duty and 1350 heavy duty shafts look the same with the 1350 being the stronger of the two? I have the 1310 HD for my 2dr and both the transfercase and axle flanges look the same where as your transfer case and axle flange look different.
. I thought the 1310 heavy duty and 1350 heavy duty shafts look the same with the 1350 being the stronger of the two? I have the 1310 HD for my 2dr and both the transfercase and axle flanges look the same where as your transfer case and axle flange look different.
02-07-2008, 04:25 PM
#9
JK Freak
Thread Starter
Great write up but I'm confused. I thought the 1310 heavy duty and 1350 heavy duty shafts look the same with the 1350 being the stronger of the two? I have the 1310 HD for my 2dr and both the transfercase and axle flanges look the same where as your transfer case and axle flange look different.
. I thought the 1310 heavy duty and 1350 heavy duty shafts look the same with the 1350 being the stronger of the two? I have the 1310 HD for my 2dr and both the transfercase and axle flanges look the same where as your transfer case and axle flange look different.
02-07-2008, 06:14 PM
#10
JK Enthusiast

Join Date: Mar 2007
Posts: 427
Likes: 0
Received 0 Likes
on
0 Posts
Question.
You said:
"Continue tightening pinion nut in 5 to 10 ft/lb increments, checking rotation torque each time until you reach your original rotational torque. I would not go past 210 ft./lbs in fear of
destroying the crush sleeve."
Do you tighten the pinoun nut to increase or decrease rotational torque?