Powertank Monster Valve 2 install!!!!!
 04-14-2015, 08:10 AM
#1
JK Enthusiast
Thread Starter
Join Date: Mar 2012
Location: Escondido, California
Posts: 466
Likes: 0
Received 0 Likes
on
0 Posts
So, I have had a few different types of tire deflators and all did their job. But that’s where it changes. I JUST WANT THE AIR OUT… Airing down is about 15 mins, and depending on what you have to pump the life back into your tire it could be the same or much slower. For myself I use the lovely Powertank. 10lbs of awesome! Although the Powertank takes considerably less time than say a compressor, it still takes time.
So on to the Monster Valves. These things move some air whether it’s in or out! I have seen multiple installs of the tried and true original valves that you drill and tap a hole without removing the bead. They work amazing in tight places and with some patience install easily. But I could not find much on the Monster Valve 2’s. They are relatively new, but still nothing on install or process. So why not?? Let’s give them a try and see how they are.
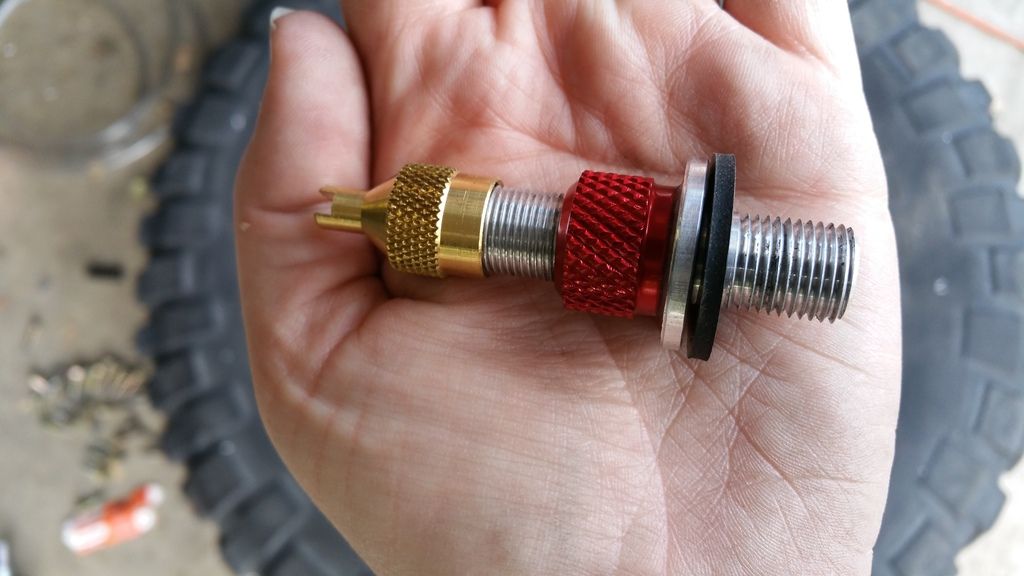
As you can see they are very similar to the original, only they have a nut and washer that goes on the inside of the rim, which is why you need to pop the bead to get the tire out of the way. They are very light and machined fantastically and also come with simple instructions.
The tools below are just for the Monster Valves. Depending on your wheels you will need more tools.
Tools needed:
Drill
Drill bits up to a 1/2 inch
3/4 inch wrench
Spray bottle with soapy water
Beer of choice
So for myself, it was easy as I am running beadlocks and I can easily break the bead with some tools and get the tire out of the way. I hesitated because the wheels are also kind of pricey and I’m about to drill a ˝ hole in it. But you only live once (or something) and the instructions assured me it will seal since they were basic and did not have multiple steps that are harder to read than IKEA instructions.
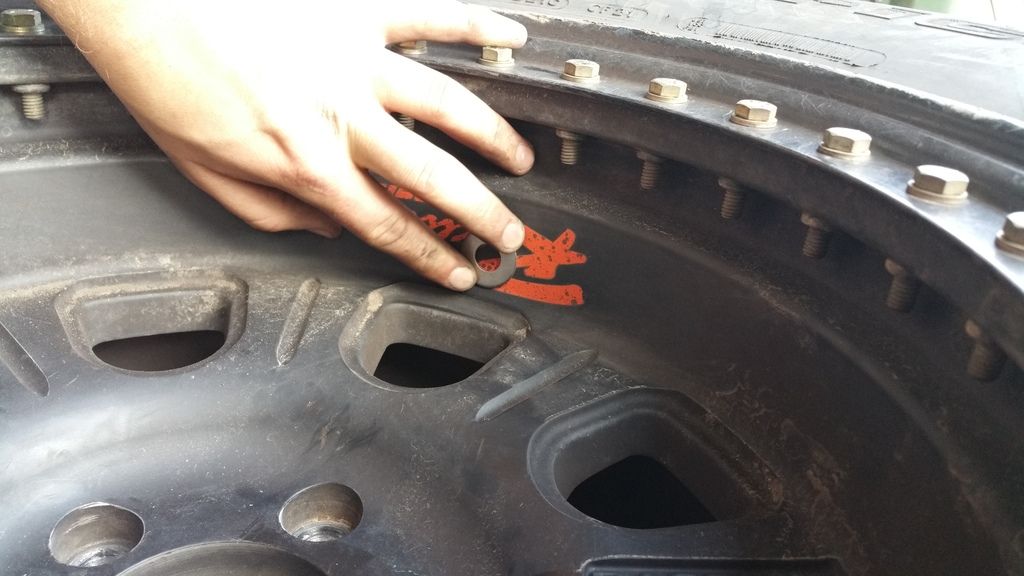
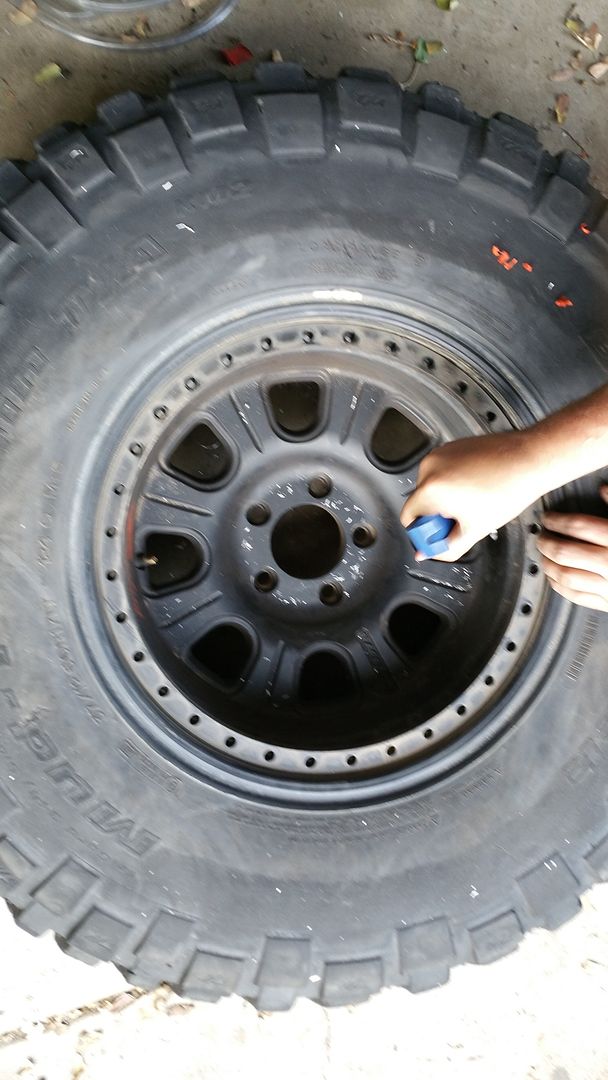
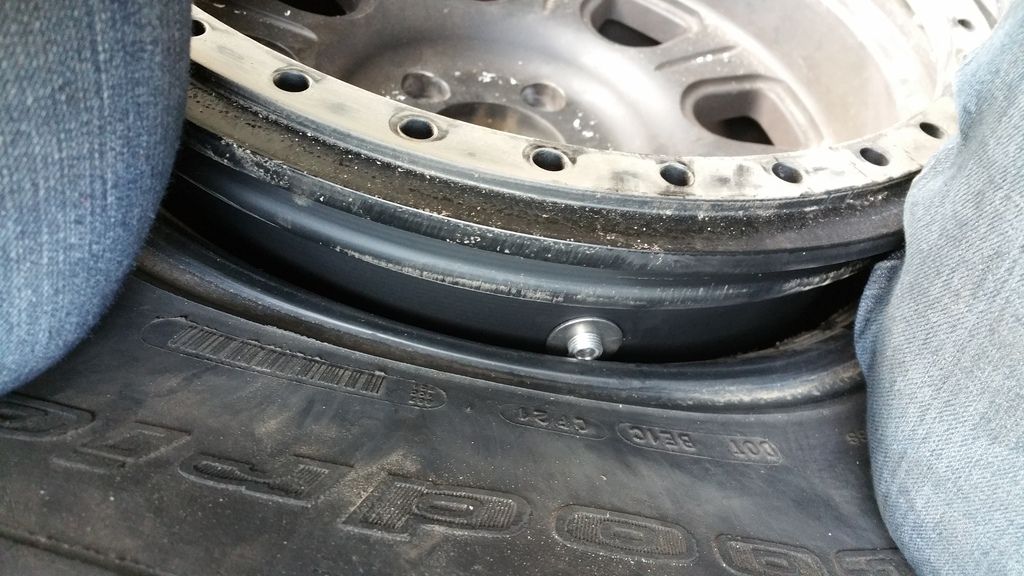
First thing I did was make sure I had the space on the wheels for the valves to fit. Racelines are nice because they have a flat surface on the inside and it is a good distance from the rock ring. I used the washer from the valve to make sure it had enough room and didn’t sit on any lips and was as flush as possible. Seems the best way is to mount the valve directly opposite of the regular tire valve. This way you can easily see the air gauge and air down/up the monster valve.
Note: (If you do not have a big enough flat surface to work with the original, Monster valves may work better)

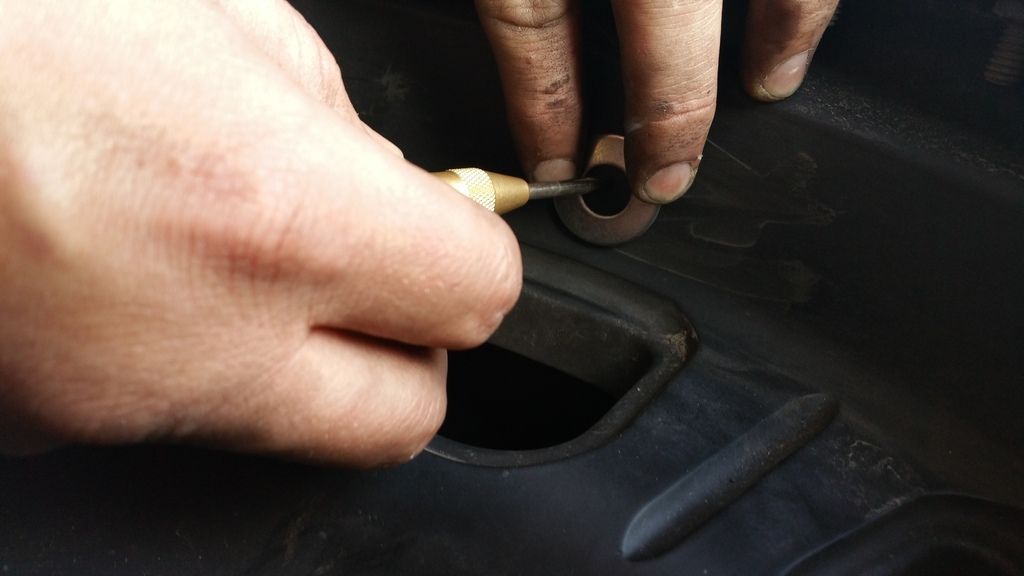
Next I took my handy auto punch and marked my hole inside the washer. This way I knew the space I had and didn’t drill a ˝ hole for nothing.
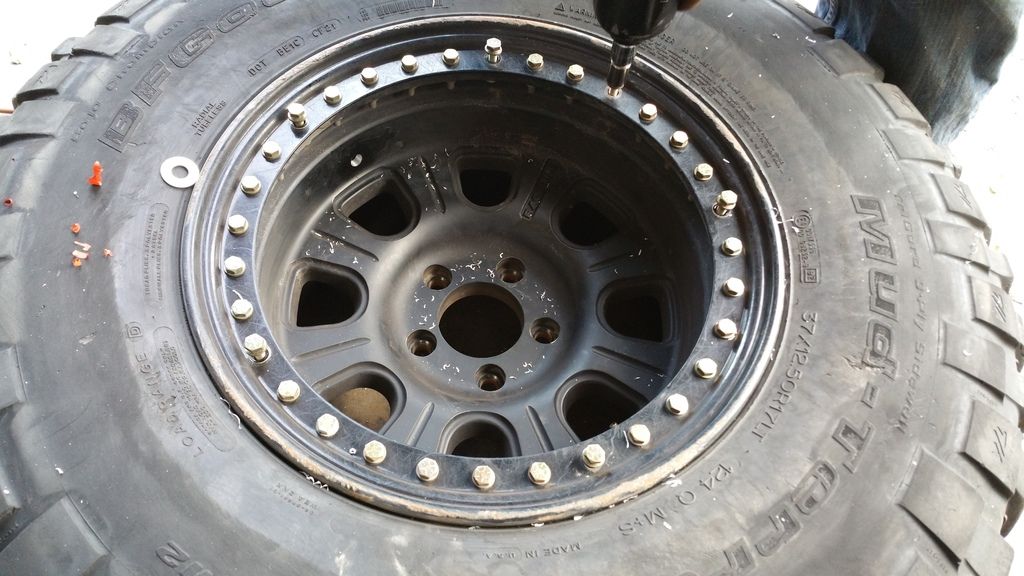
Now for the fun/idiotic part…Drilling my nice beadlocks… I left the air in the tire so it would push the shavings out. Luckily my wife understands what the use of the valves are and was ok with drilling the wheels and even helped plug the holes between drill bit changes.
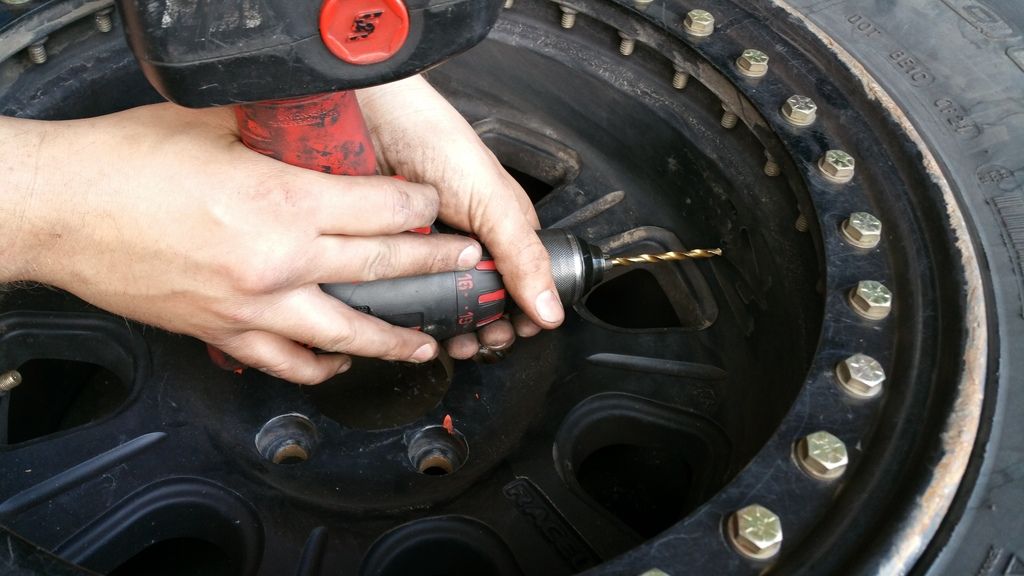
I started with a small bit and worked my way up to ˝. Luckily there was just enough air in the tire to drill the ˝ inch hole.
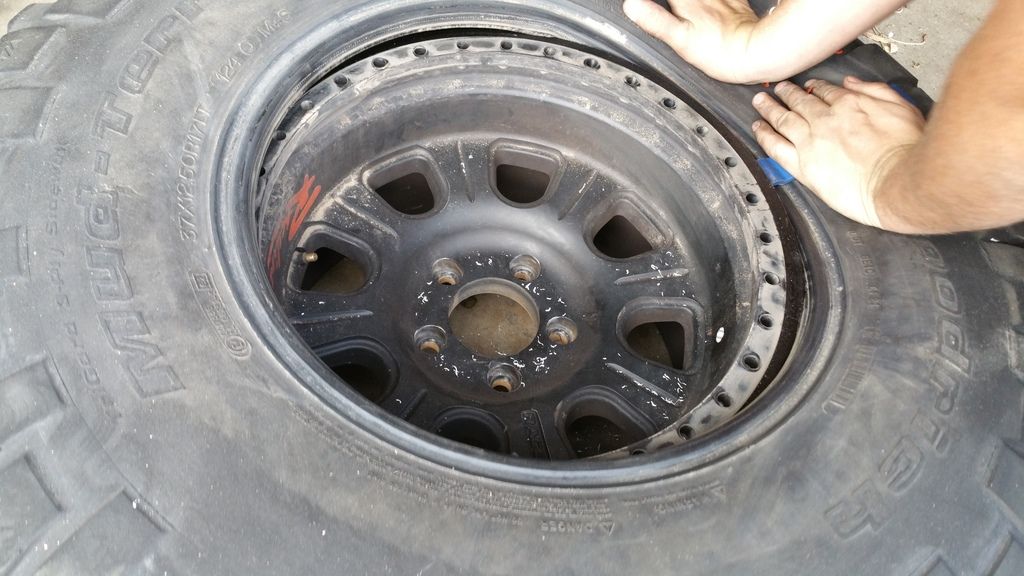
Next was time to remove the ring and get the tire out of the way. I used a cordless impact and took my time. Im sure there are other ways to do it and I shouldn’t have used my 300+ torques of Snap On power on these bolts. But hey I took my time and it worked out.
Once the bolts were out and the ring was off, we got the tire out of the way to get to the backside of the rim to put the washer and nut on. I used red lock tight as I do no not want them to move nor do I plan removing them. (TIP: If you can, get some weight on the tire to push it down enough to get a clear shot of the back of the valve. I dropped the nut and washer in the tire once and it was no fun getting it as it is aluminum and the magnetic retriever no worky.)
Once you get the nut started the only real tricky part is getting the nut tight and the rubber washer flush but not so that it deforms and cracks. Talking with Powertank, I was told they don’t have to be very tight, just as long as the rubber washer looks compressed. This was a lil difficult for me as there were no pictures to go by.
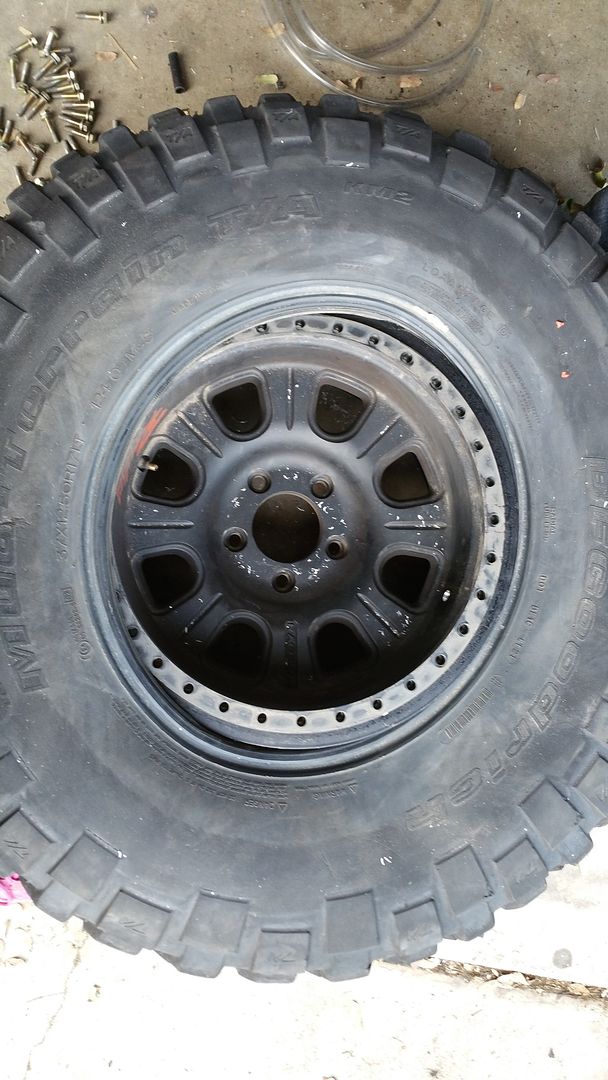
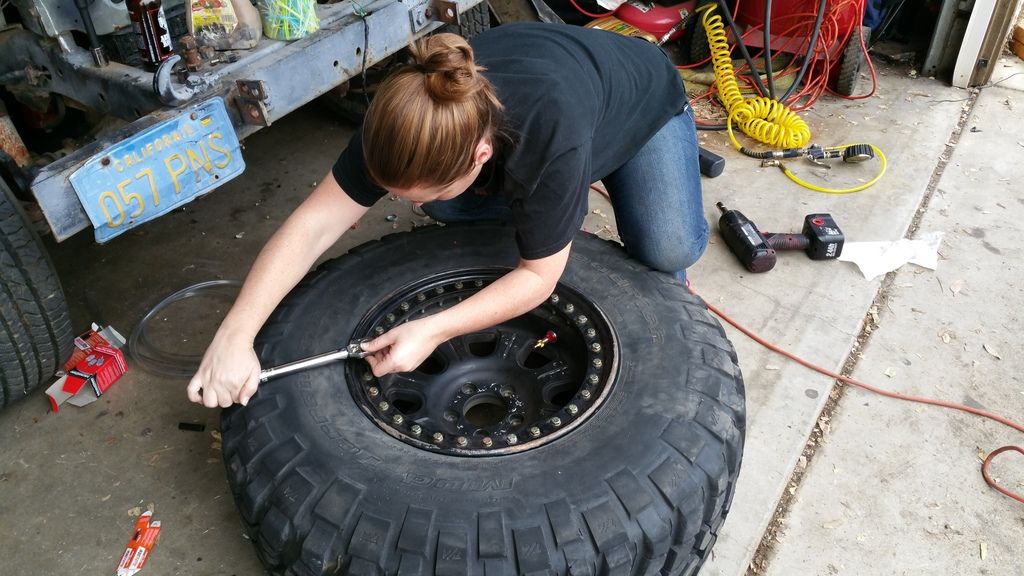
Once everything is tight and the rubber washer looks good, it’s time to put the tire back on the rim. For beadlocks this was the longest part as we had to torque all the ring bolts and make sure the ring was center. If you run beadlocks and put them together you know this is the step to take your time.
If you’re not sure or have never built a beadlock there are tons of write ups and pictures.
My wife learned, so can you!
Raceline recommends 16-18 ft lbs. We used an inch lb. torque wrench and converted the numbers. Since the torque on the bolts is pretty low the 3/8 drive torque wrench didn’t give a clear “click” so that’s why we went with the inch lbs.
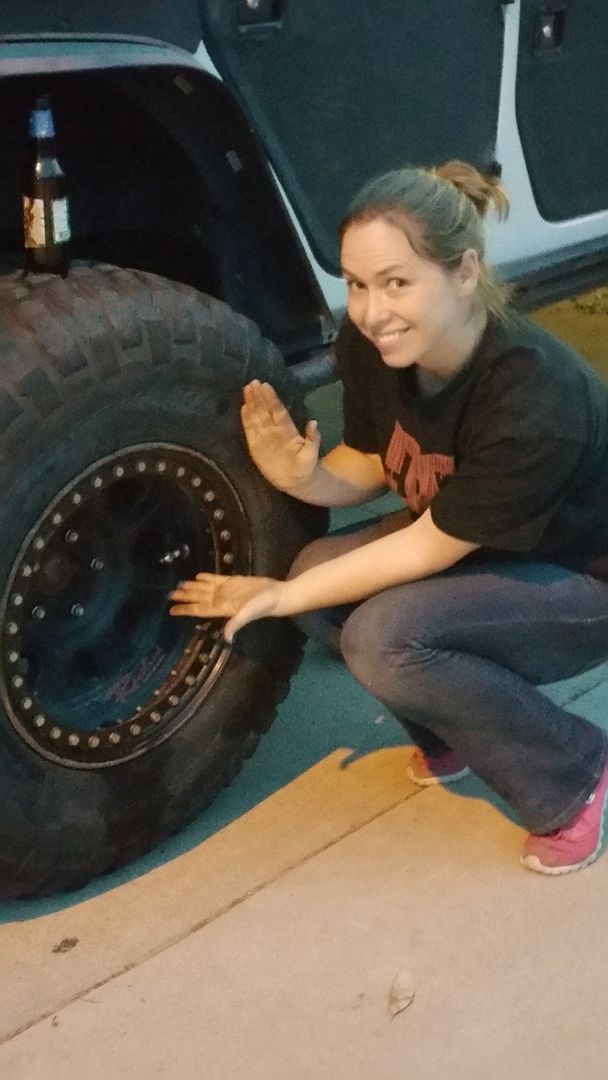
Once done and no leaks, admire you work with a cold beverage!
Once back together air up the tire. We run 30 lbs. Once full take a spray bottle of soapy water and spray the bead and the monster valve and look for bubbles.
If you see bubbles around the ring then the tire is either not center on the rim, or the ring is offset from improper torqueing.
If the valve is leaking, make sure the red collar is tight, or you may need to break the tire back down and tighten the valve nut.
Even though the instructions don’t call for it, I am considering running a bead of RTV around the base of the rubber washer to keep sand and mud and crap from getting underneath it some way some how.
All together each wheel took about 15 to 20 mins. Once the first one was done the rest went easy and as I said before the most time consuming part for me was the torqueing of the beadlock ring.
I wanted to run these for some time as I have seen the original valves in action and how they were installed. I know some people don’t care about the time it can take to air down or back up. But for myself I like the option of a quick air down and up, because it gives me time for beer!
So on to the Monster Valves. These things move some air whether it’s in or out! I have seen multiple installs of the tried and true original valves that you drill and tap a hole without removing the bead. They work amazing in tight places and with some patience install easily. But I could not find much on the Monster Valve 2’s. They are relatively new, but still nothing on install or process. So why not?? Let’s give them a try and see how they are.
As you can see they are very similar to the original, only they have a nut and washer that goes on the inside of the rim, which is why you need to pop the bead to get the tire out of the way. They are very light and machined fantastically and also come with simple instructions.
The tools below are just for the Monster Valves. Depending on your wheels you will need more tools.
Tools needed:
Drill
Drill bits up to a 1/2 inch
3/4 inch wrench
Spray bottle with soapy water
Beer of choice

So for myself, it was easy as I am running beadlocks and I can easily break the bead with some tools and get the tire out of the way. I hesitated because the wheels are also kind of pricey and I’m about to drill a ˝ hole in it. But you only live once (or something) and the instructions assured me it will seal since they were basic and did not have multiple steps that are harder to read than IKEA instructions.
First thing I did was make sure I had the space on the wheels for the valves to fit. Racelines are nice because they have a flat surface on the inside and it is a good distance from the rock ring. I used the washer from the valve to make sure it had enough room and didn’t sit on any lips and was as flush as possible. Seems the best way is to mount the valve directly opposite of the regular tire valve. This way you can easily see the air gauge and air down/up the monster valve.
Note: (If you do not have a big enough flat surface to work with the original, Monster valves may work better)


Next I took my handy auto punch and marked my hole inside the washer. This way I knew the space I had and didn’t drill a ˝ hole for nothing.

Now for the fun/idiotic part…Drilling my nice beadlocks… I left the air in the tire so it would push the shavings out. Luckily my wife understands what the use of the valves are and was ok with drilling the wheels and even helped plug the holes between drill bit changes.

I started with a small bit and worked my way up to ˝. Luckily there was just enough air in the tire to drill the ˝ inch hole.
Next was time to remove the ring and get the tire out of the way. I used a cordless impact and took my time. Im sure there are other ways to do it and I shouldn’t have used my 300+ torques of Snap On power on these bolts. But hey I took my time and it worked out.

Once the bolts were out and the ring was off, we got the tire out of the way to get to the backside of the rim to put the washer and nut on. I used red lock tight as I do no not want them to move nor do I plan removing them. (TIP: If you can, get some weight on the tire to push it down enough to get a clear shot of the back of the valve. I dropped the nut and washer in the tire once and it was no fun getting it as it is aluminum and the magnetic retriever no worky.)


Once you get the nut started the only real tricky part is getting the nut tight and the rubber washer flush but not so that it deforms and cracks. Talking with Powertank, I was told they don’t have to be very tight, just as long as the rubber washer looks compressed. This was a lil difficult for me as there were no pictures to go by.

Once everything is tight and the rubber washer looks good, it’s time to put the tire back on the rim. For beadlocks this was the longest part as we had to torque all the ring bolts and make sure the ring was center. If you run beadlocks and put them together you know this is the step to take your time.
If you’re not sure or have never built a beadlock there are tons of write ups and pictures.
My wife learned, so can you!
Raceline recommends 16-18 ft lbs. We used an inch lb. torque wrench and converted the numbers. Since the torque on the bolts is pretty low the 3/8 drive torque wrench didn’t give a clear “click” so that’s why we went with the inch lbs.

Once done and no leaks, admire you work with a cold beverage!

Once back together air up the tire. We run 30 lbs. Once full take a spray bottle of soapy water and spray the bead and the monster valve and look for bubbles.
If you see bubbles around the ring then the tire is either not center on the rim, or the ring is offset from improper torqueing.
If the valve is leaking, make sure the red collar is tight, or you may need to break the tire back down and tighten the valve nut.
Even though the instructions don’t call for it, I am considering running a bead of RTV around the base of the rubber washer to keep sand and mud and crap from getting underneath it some way some how.
All together each wheel took about 15 to 20 mins. Once the first one was done the rest went easy and as I said before the most time consuming part for me was the torqueing of the beadlock ring.
I wanted to run these for some time as I have seen the original valves in action and how they were installed. I know some people don’t care about the time it can take to air down or back up. But for myself I like the option of a quick air down and up, because it gives me time for beer!
Last edited by FlexyJK; 04-24-2015 at 06:43 AM.

 04-16-2015, 07:15 AM
#5
JK Enthusiast
Thread Starter
Join Date: Mar 2012
Location: Escondido, California
Posts: 466
Likes: 0
Received 0 Likes
on
0 Posts
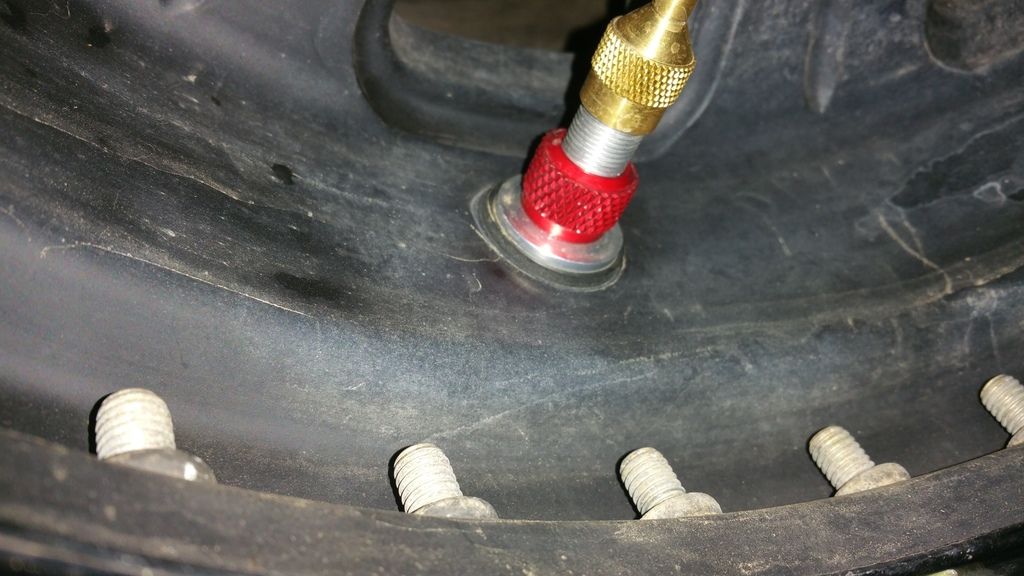
The stock valve is kept for regular air chucks that any gas station or service station will have for air for. They also allow the use of the Powertank air gauge that shows the air pressure of the tire as you deflate or inflate the tire. Without the stock valve and gauge you would have no way of knowing how much air is in the tire and when to close the valve. Powertank supplies a nice valve coupler that attaches to the Monster valve to inflate it. A regular air chuck is too small.
Also the stock valve is usually a pull type that seals.(I know there are other types of valves) Since the monster valves are much larger and require a flatter surface the stock location wouldn't work.
Powertank has a ton of info and specs on these, and im sure would be happy to answer any specific questions.
I understand the hesitation of drilling a wheel for another valve that it already has, but the stock valve is much smaller. Once you see the valves in action and how much time it no longer takes to deflate and inflate you will see the reasoning.
04-16-2015, 09:04 AM
#6
JK Super Freak
For fun here's a video of me drilling a giant hole in a perfectly good beadlock wheel while it's on the Jeep and pressurized. This is the recommended procedure for installing the original Monster Valves, which are threaded into the rim. The escaping air keeps metal bits from falling inside the rim. For the record, my wheels did not require rebalancing after installation of the Monster Valves. Also, retaining the original Shrader valve lets me fill up from a compressor or other standard method if my CO2 tank should run out of gas.
https://vimeo.com/125162475
Here's a video showing how quickly the combination of a CO2 PowerTank and Monster Valves can air up a tire from zero PSI. I typically run 10 PSI on the trail; airing up to 32 PSI takes about 22 seconds per tire.
https://vimeo.com/125164163
https://vimeo.com/125162475
Here's a video showing how quickly the combination of a CO2 PowerTank and Monster Valves can air up a tire from zero PSI. I typically run 10 PSI on the trail; airing up to 32 PSI takes about 22 seconds per tire.
https://vimeo.com/125164163
