Video monitor install - stock DVD player
 09-19-2007, 10:48 PM
#1
JK Enthusiast
Thread Starter
Join Date: Aug 2007
Location: San Diego
Posts: 246
Likes: 0
Received 0 Likes
on
0 Posts
Finally got the mount I needed and some other pieces so I decided to tackle my video monitor install tonight. Took about 2 hours from start to finish and that includes removing plastic pieces, drilling/mounting, wiring, testing and cleaning up. And it should be known that I'm not a professional installer and not really a DIY kind of guy, but stuff like this is fun and helps you understand your vehicle better.
I love the stock JK head unit and the fact that is has DVD... so I purchased a $100 LCD monitor on ebay to take full advantage. You can find LCD monitors in this size anywhere from $90-300 depending on brand and quality. Pyle is probably the cheapest and this Sony used to go for $300-400 but are now like $150 on ebay. It was a steal at $100 - I wish the guy had more of them!
the monitor is a Sony LCD with wireless video capability, came with wireless headphones, has 2 video in, 1 out (to another monitor or recording device), separate video breakout box, all cabling, great manual, and looks fantastic.
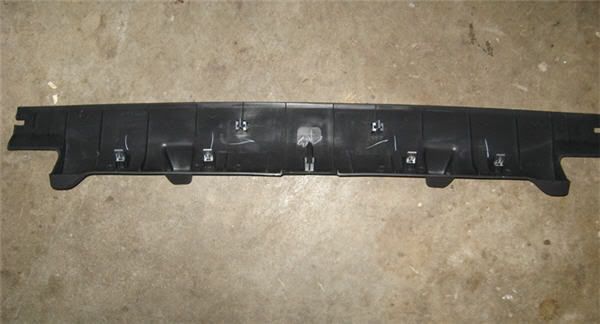
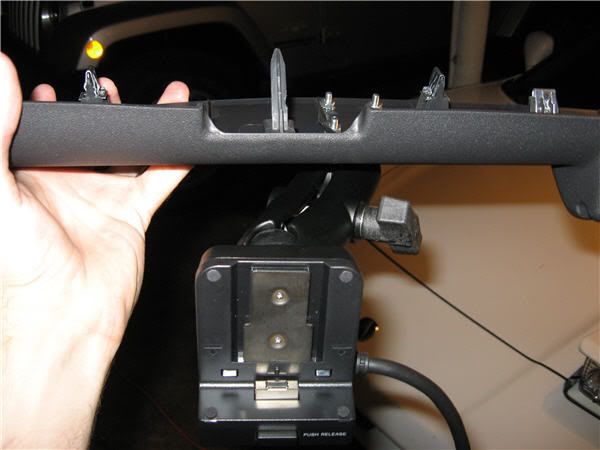
So I started with removing the plastic over the rearview as I want to mount my monitor above it. It basically pops off with a little down pressure as it is secured by the usual tabs:
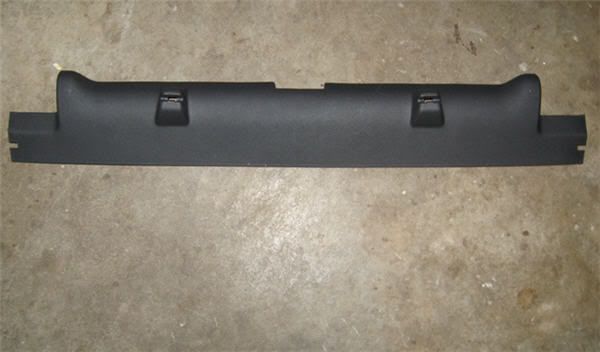
turned over so you can see position of the tabs:
exposed windshield frame:
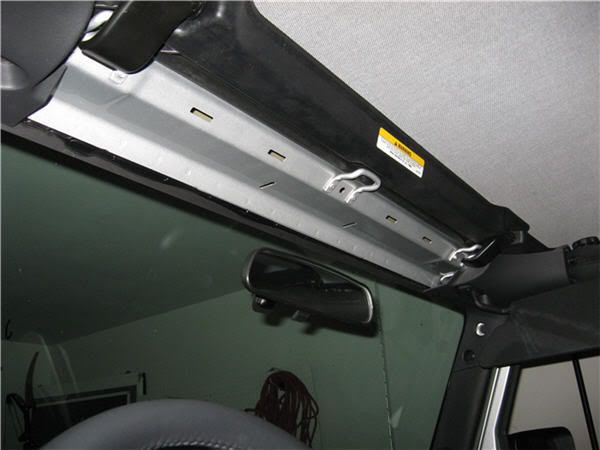
I used a universal ram mount with two ball ends for numerous configuration options:
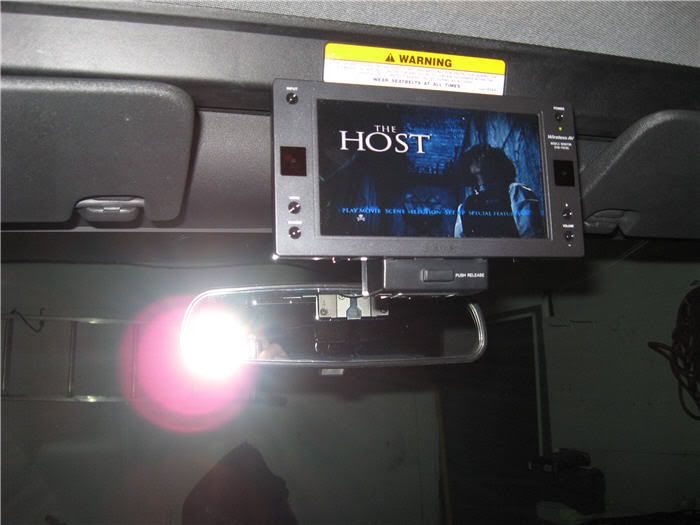
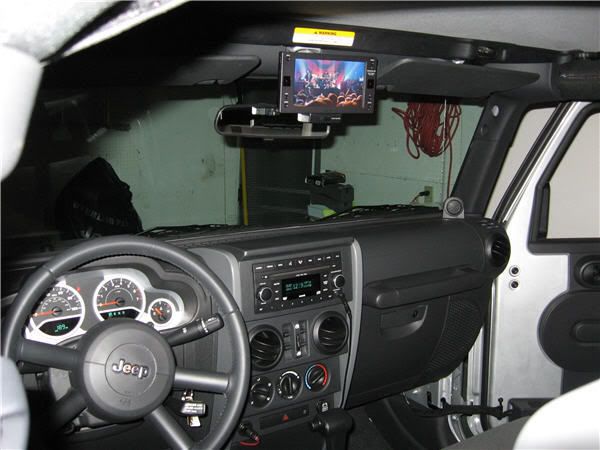
Re-installed the plastic now with the ram mount and sony monitor holder:

I plugged it in for a quick test and it is working great so far:
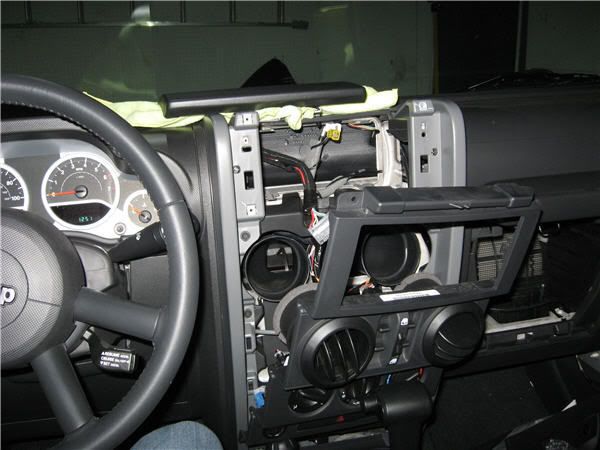
so now I start taking the dash apart. Always helps to know where the tabs are so you don't break or crack anything. top lid:

removing the dash face -- two screws at the top, two just below the power outlets (after you remove that lower cover in front of the shifter):
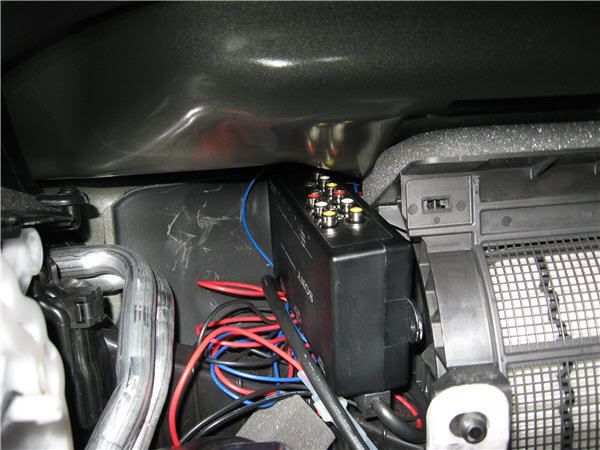
I stashed the separate video input/output box that the sony came with behind the glovebox - man there is a lot of room back there:
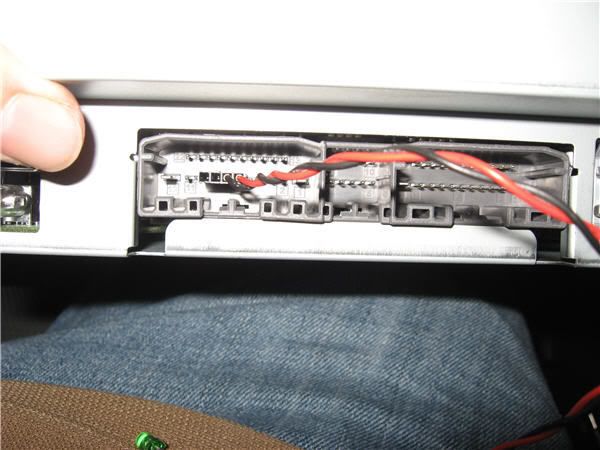
Head unit easily comes out by taking out 4 screws and simply pulling it out -- unplug the main wiring harness, antenna, and another plug and it comes all the way out.
I used a HDD LED cable from an old computer motherboard/case to easily plug into the video plugs 6 & 7 on the head unit (plug 6 is video and 7 is the ground plug):
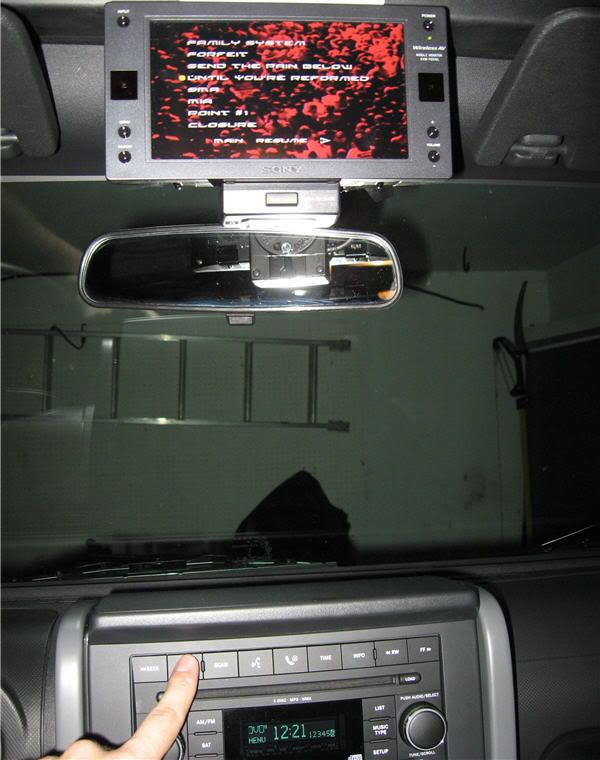
I attached my video cable to that (spliced it together) and then cleaned everything up, fired it up and put in a music DVD:

clean install shot --- I ran the main cable to the monitor up through the plastic along the windshield and down the passenger side into the glovebox:
it's fairly easy to navigate the DVD using the headunit controls:
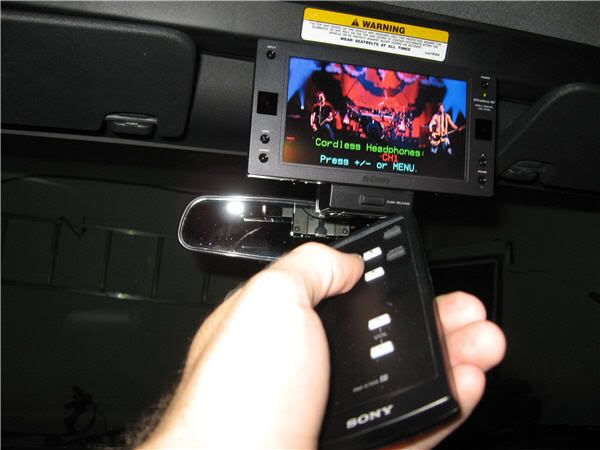
the LCD monitor remote lets me control everything else:
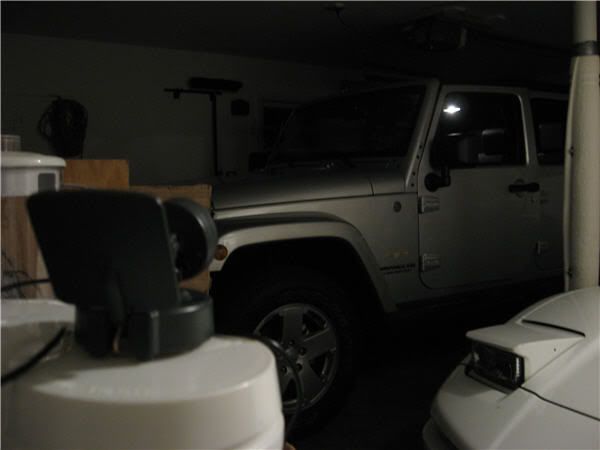
Then for kicks I wanted to try the wireless video feed so I had an x10 camera in the garage that was plugged in, switched to input 3/receiver on the monitor and low and behold, live video feed via wireless!
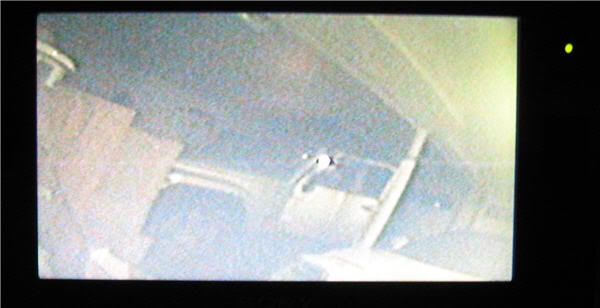
here is the wireless cam about 10 ft away:

shot from the cam over to the jeep:
Next steps:
I'll probably add a backup (and maybe other) cameras next and use input 2 on the sony but have a switch or another video switcher. Probably add an xbox and other devices at some point so a switcher will come in handy. I'll so remove the power plug and hard wire it behind the dash.
skill level: easy
time: 2-3 hours
tools: basic screwdriver and cloth to remove dash/plastic pieces, 7mm socket or screwdriver, wire stripper/crimper, video cable to cut/splice into head unit
Let me know if you'd like additional information or pictures.
I love the stock JK head unit and the fact that is has DVD... so I purchased a $100 LCD monitor on ebay to take full advantage. You can find LCD monitors in this size anywhere from $90-300 depending on brand and quality. Pyle is probably the cheapest and this Sony used to go for $300-400 but are now like $150 on ebay. It was a steal at $100 - I wish the guy had more of them!
the monitor is a Sony LCD with wireless video capability, came with wireless headphones, has 2 video in, 1 out (to another monitor or recording device), separate video breakout box, all cabling, great manual, and looks fantastic.
So I started with removing the plastic over the rearview as I want to mount my monitor above it. It basically pops off with a little down pressure as it is secured by the usual tabs:
turned over so you can see position of the tabs:
exposed windshield frame:
I used a universal ram mount with two ball ends for numerous configuration options:
Re-installed the plastic now with the ram mount and sony monitor holder:
I plugged it in for a quick test and it is working great so far:
so now I start taking the dash apart. Always helps to know where the tabs are so you don't break or crack anything. top lid:
removing the dash face -- two screws at the top, two just below the power outlets (after you remove that lower cover in front of the shifter):
I stashed the separate video input/output box that the sony came with behind the glovebox - man there is a lot of room back there:
Head unit easily comes out by taking out 4 screws and simply pulling it out -- unplug the main wiring harness, antenna, and another plug and it comes all the way out.
I used a HDD LED cable from an old computer motherboard/case to easily plug into the video plugs 6 & 7 on the head unit (plug 6 is video and 7 is the ground plug):
I attached my video cable to that (spliced it together) and then cleaned everything up, fired it up and put in a music DVD:
clean install shot --- I ran the main cable to the monitor up through the plastic along the windshield and down the passenger side into the glovebox:
it's fairly easy to navigate the DVD using the headunit controls:
the LCD monitor remote lets me control everything else:
Then for kicks I wanted to try the wireless video feed so I had an x10 camera in the garage that was plugged in, switched to input 3/receiver on the monitor and low and behold, live video feed via wireless!
here is the wireless cam about 10 ft away:
shot from the cam over to the jeep:
Next steps:
I'll probably add a backup (and maybe other) cameras next and use input 2 on the sony but have a switch or another video switcher. Probably add an xbox and other devices at some point so a switcher will come in handy. I'll so remove the power plug and hard wire it behind the dash.
skill level: easy
time: 2-3 hours
tools: basic screwdriver and cloth to remove dash/plastic pieces, 7mm socket or screwdriver, wire stripper/crimper, video cable to cut/splice into head unit
Let me know if you'd like additional information or pictures.
 09-20-2007, 06:23 AM
#3
JK Enthusiast
Thread Starter
Join Date: Aug 2007
Location: San Diego
Posts: 246
Likes: 0
Received 0 Likes
on
0 Posts
the monitor:
Sony XVM-F65WL headrest monitor 6.5 widescreen
ram mount:
RAM Mount Aluminum 2x 2.5' inch Base and Standard 3.0 inch B Size Arm
or you could go with a shorter arm and I think that would still work:
RAM Mount Aluminum 2x 2.5'' Base and Short 1.75'' A Size Arm
09-20-2007, 08:51 AM
#5
JK Enthusiast
Join Date: Oct 2006
Location: Northern California
Posts: 399
Likes: 0
Received 0 Likes
on
0 Posts
Squid, first of all, excellent write-up and the photos documenting each step is incredible! Now I'm not afraid to actually tackle this project! Thanks for taking the time to do the write-up!
BTW, where did you order the Ram mount from?
BTW, where did you order the Ram mount from?
Last edited by FzyPchz; 09-20-2007 at 09:18 AM.
09-20-2007, 09:27 AM
#6
JK Enthusiast
Thread Starter
Join Date: Aug 2007
Location: San Diego
Posts: 246
Likes: 0
Received 0 Likes
on
0 Posts
Yes! Just got back from lunch... we were watching Alice in Chains unplugged (of course I was focused on driving).
But yes, works great -- there is a parking brake wire that came with the monitor but it is optional. I'm reallly surprised the head unit doesn't disable the video output.
I'm very impressed with the stock head unit and this setup overall considering the cost and how easy it was.
If you don't have the DVD head unit, I see some for sale for pretty cheap now and then as people go aftermarket.
edit: as for the ram mount, I thought I got it on ebay but I don't see it in my list, so I must have ordered it from another vendor. I'll check when I get home. Ordered to much stuff this week I guess, can't keep track.
09-20-2007, 11:40 AM
#7
JK Enthusiast
Join Date: Feb 2007
Location: Edison NJ
Posts: 456
Likes: 0
Received 0 Likes
on
0 Posts
Just Kidding- Its REAL EASY- When I did my write up a while back- I wasn't sure of the wiring in the rear- I got a few diagrams from other forums and 1 was wrong 2 were right.
PIN 6&7 are the key ones
Squid Nice write up- looks like mine but alot easier- I bought the target monitor and took it all apart to make it look slim - later went to a slim monitor.
Trending Topics
09-20-2007, 12:04 PM
#8
JK Enthusiast
Thread Starter
Join Date: Aug 2007
Location: San Diego
Posts: 246
Likes: 0
Received 0 Likes
on
0 Posts
BE AFRAID!! Be VERY AFFRAID!!!
Just Kidding- Its REAL EASY- When I did my write up a while back- I wasn't sure of the wiring in the rear- I got a few diagrams from other forums and 1 was wrong 2 were right.
PIN 6&7 are the key ones
Squid Nice write up- looks like mine but alot easier- I bought the target monitor and took it all apart to make it look slim - later went to a slim monitor.
Did you see all that space behind the glove box? You could have gone with longer wires with that breakout box but since you went slim, it's all good I guess. I'm going to put my auto-sensing video switcher back behind the glove box too, I think, when I add a backup camera and other components.
