
A simple Guide to Shocks

Thread Starter
JK Jedi

Joined: Oct 2010
Posts: 6,222
Likes: 376
From: Southwest Reno, NV
A simple guide to shocks
I see a lot of threads asking; what shocks should I get? Most of the answers that are given are like most the the lift threads out there: I have ****** shock and it is awesome along with a poser shot of their rig. I don't think most people understand how a shock works and the importance of the location of the shock mounts in relation to tire size, bump stops, and coil length.
Name: IMG_1463.jpg
Views: 943
Size: 37.4 KB
"I love my King shocks, they ride better then stock"
poser shot
A shock in its most simplest form is just a way to control the bounce of the springs in a suspension by the use of oil moving through a valve inside the shock attached to the end of the ram. The valve inside a shock is a disc with several holes in it so the fluid can move from one side to the other. The valve is adjusted with thin washers of different diameters (called a stack) to control the speed and flow of the fluid.
Name: IMG_1277.jpg
Views: 945
Size: 19.6 KB
Bilstein 7100 valve
Adding compressed nitrogen into the shock will keep the oil from creating air bubbles as the oil moves thru the valve, this foaming of the oil makes the shock less effective because the foamed oil becomes compressible. It can also make a shock more responsive by requiring more force to move the oil thru the valve as the ram is pushed in and will increase the rebound rate or the speed at which the ram will extend after being compressed. The higher the nitrogen pressure the harder the shock is to compress and the faster the shock will rebound. Some people will describe this as the stiffness of the shock. Valving will also have an affect on how stiff a shock feels. Many of the shocks of this type are vehicle specific like the ome nitro sport or the bilstein 5100 that are built for the factory mounting locations and weight of the vehicle and use a valve set up that will work well over a range of weight for that vehicle.
An air shock will use compressed nitrogen to set the ride height and does not need any springs. The compression of the nitrogen is what controls bounce and rebound rate. Air shocks may have a hard time handling heavy vehicles and weight ratings should be considered before running a dedicated air shock.
A shock with a remote reservoir will have either a hard connected extra tube or a tube connected via a hose. This reservoir will be filled with oil and most will have a scrader valve so the nitrogen pressure can be adjusted. Never use air from a compressor to fill a shock, the air and oil can mix and degrade the performance of the shock by allowing the oil to turn to foam.
The advantages of the reservoir shock is that they have an extra oil capacity that will keep the shock oil cooler and can allow a shock to have a smaller main body if clearances are tight. As the shock oil moves thru the valve pressures build and the oil becomes heated and as the oil gets hot, it gets thinner and will move faster thru the valve degrading performance. This is know as shock fade. Adding nitrogen to the shock also helps prevent the oil from gassing and creating air bubbles that can lead to shock fade.
A shock with a remote reservoir will typically have more travel with the same size body as a non-reservoir shock due to the fact they move the divider piston to the reservoir and that allows for a longer shaft to fit. They are not just for �Baja buggies� Most of the reservoir shocks out there are re-build able and re-valve able as well as being adjustable by the means of the nitrogen pressure. A special no loss air fill tool is needed to adjust the pressure in the shocks due to the fact they have very little actual nitrogen in them.
Coil overs are simply a shock that has a treaded body that allows for hardware to be installed on the outside that will let you run the coils around the shocks. Coil overs can be a standard shock or may have a reservoir. The advantage of the coil over design is that you have the capability of running multiple coils with different rates to further fine tune your suspension to your rig. Think progressive rate coils some companies offer in the standard coil.
You also have an easy way to adjust the height of your suspension with coil overs by simply screwing the top coil ring up or down on the treaded body of the shock. This lets you level and fine tune your suspension to compensate for lager tires and heavy components such as winches and body armor without buying other components like leveling pucks. You also don't have to worry about coils coming unseated from over extending like on the factory set up. If you are looking at new shocks now and think you might want to get coil overs later when more funds are available you can simply buy a threaded body shock without the hardware and coils and simply add that stuff at a later time. Fox, king, bilstein, sway a way all sell threaded body shocks that are coil over ready.
Coil overs will require cutting and welding a new shock tower up front and adding them to the rear can be a challenge but several companies have new weld on upper mounts and a few have recently come out with a bolt on upper mount. The main problem using them in back is they are open to damage from backing into rocks and such if you are using the factory mount locations. Tribe and gen-right also make kits that actually will cut thru the tub and the upper mount would be inside the jeep. Most coil over shocks are custom made for each vehicle and it is good to know how much your rig weighs and how it is distributed on the vehicle so proper coil rates can be achieved as well as a description of how you will be using the jeep so the valving is optimized for that use. Due to the fact that they are custom built it typically takes 2-3 weeks to get coil over shocks.
Name: broken shock.jpg
Views: 915
Size: 70.1 KBName: IMG_0948.jpg
Views: 914
Size: 27.7 KBName: IMG_0949.jpg
Views: 913
Size: 26.6 KB
12" king coil over vs 10" Bilstein 5100 heim joint vs rubber bushing and this would be a threaded bodied shock without the coils.
Bypass shocks are shocks that look rather strange, they have up to 7 small tubes that protrude from the body of the shock. These tubes have a screw or knob on the end of them that will adjust the amount of fluid that can travel thru the shock. These shocks are available in a standard shock body as well as hybrid coil over bodies. This type of shock is really only used in highly specialized race vehicles although off road evolution offers then in one of their kits. They are very expensive and offer a huge amount of adjustment but even the most experienced off roaders will do with out them on a jeep trail rig.
Air bump stops work like a small air shock that has a scrader valve that allows you to adjust the nitrogen and control the compression of the stop. It will help to keep you from bottoming out your suspension with cushion rather than a bang, They are nice for low center of gravity builds that have limited up travel that tend to bottom out easy. Air bumps are mounted with a can that is welded to the frame and adjustment in bumps top would be done by adding a solid plate or puck to the top of the axle. The air bump stop does the same thing as a regular foam or rubber bump stop which is to protect your shocks from bottoming out, restricting tire up travel to prevent rub, and cushioning full up travel in your suspension.
Name: IMG_1435.jpg
Views: 903
Size: 28.2 KB
King 2" air bump stop.
Since I mentioned bump stops I should also address limiting straps which is over looked in most suspensions. A limiting strap is a heavy duty cloth strap that attaches to the frame and to the axle and keeps your suspension from over extending which can cause damage to your shocks and your driveshaft. You will typically mount a limiting strap so your shocks will only extend 1/2� from their max travel. Limiting straps will stretch so allow for stretch when mounting. 1" of stretch is the rule of thumb most use but long limiting straps may need to allow for extra stretch.
Name: IMG_1415.jpg
Views: 914
Size: 64.8 KB
Limiting strap doing its job. The wheel is about 12" off the ground and there is no stress on the shock.
When you add a lift to a vehicle or change the tire size your shocks are typically affected by it, either by limiting your down travel or having too much up travel. Most lift companies will address this by simply telling you to buy a longer shock and some will use adjustment brackets. If you have access to a welder and torch you can adjust the bottom mounts to make your rig fit your shocks instead of getting longer shocks. If you have 3� of clearance between your bump stops so your tires don't rub and you have 6� of ram showing on the shock you have the potential to gain 3� of droop simply by raising the axle mount up by 3� If you have 4� between your bump stops and only 3� of ram showing you can lower the axle mount down an inch and half and keep the shocks from over compressing. Moving the mounts is a cheap way to fine tune your shock travel without buying new shocks if you have the access to cutting and welding tools. Adjustments can also be made to the upper mount but it is a bit more difficult and is best done with a spacer extension.
I have seen a trend over the last year or so of people putting more expensive shocks on their rigs from several different manufactures (to each his own do what you want on your rig) and I think that they are over looking a couple of things on them. The fact that they have a scrader valve for nitrogen adjustment and most are buying a sealed throw away shock instead of buying a shock that can be dis-assembled and repaired should a ram break or a seal develop a leak. When spending $600+ on shocks I would make sure they have these options. For example a bilstein 5100 series shock uses an crimp to seal the tube and if something happens to it you can send it in for warrantee and run with only 3 shocks until it comes back or throw it away and buy a new one. For a bit more you can get into the 7100 series that you can rebuild yourself with a $20 seal kit and a couple of special tools. In fact you can buy every part of the 7100 shock from bilstein. King and fox shocks have readily available parts as well. If you are not tool friendly then you may not care about it but when you break down on a Saturday or on an extended trip you could be up and running in about an hour if you carry some extra parts and do the work yourself.
Name: IMG_1270.jpg
Views: 903
Size: 35.8 KBName: IMG_1272.jpg
Views: 907
Size: 38.3 KB
Rebuild kit for a 7100 and a dis-assembled 7100 shock The no loss air fill tool is shown in the top of the photo.
How do I pick the right size shocks.
If you really want to squeeze every bit of suspension travel from your shocks it will require setting the lower mount to the Ideal location and will require a torch and welder as well as several jack stands and a floor jack.
Start by jacking up your jeep as high as you can so you can achieve full droop of the front axle, place the jeep on jack stands and put the floor jack under the center as good as you can so the axle will lift straight up. Remove the coils and shocks and jack the axle strait up until you hit the bump stops. At this point you should have 3-5" of clearance above the tires to the fenders to allow a stuffed wheel to continue up and in when the opposite wheel is a full droop. If you don't have this clearance you need to extend your bump stops or you need to trim the fenders for more up clearance. Measure the distance between the upper and lower mounts, this is your collapsed shock length.
Next droop the axle all the way down until the driveshaft makes contact with the exhaust crossmember. It is easier to do this if you remove the wheels. Keep an eye on your brake and esp lines. This is your max potential droop. Again measure between mounts for your extended length.Name: IMG_1548.jpg
Views: 736
Size: 42.4 KBName: IMG_1549.jpg
Views: 741
Size: 50.8 KB
Now jack up the axle about 1" this is where you install a limiting strap at the differential to keep the the driveshaft from making contact with the exhaust cross pipe. This will also protect your shocks from over extending.
Name: IMG_1555.jpg
Views: 743
Size: 39.0 KB
Now at this point if you are lucky you can find the shock of your choice with collapsed/extended that matches the measurement you have just taken.
If not you can move the bottom mount up or down so you can fit your shock. This is a poly shock mount.
Name: IMG_1552.jpg
Views: 736
Size: 38.8 KB
decreased up travel, gains droop.
Name: IMG_1553.jpg
Views: 736
Size: 48.3 KB
Increase up travel, decrease droop
Name: IMG_1554.jpg
Views: 734
Size: 53.8 KB
Mine fell in between
If you are feeling really good about cutting and welding you can swap out your shock tower, if you do this you will want to mount it as high as you can so you can get a really long travel shock. I am sure you have seen buggies with upper shock mount that come thru the hood and have massive amounts of travel, unfortunately in the jk with all the stuff mounted in the engine compartment it is really hard to move the upper mount much higher then what the factory mount is. You can gain about 2" before you have to look at moving the fuse block.
You may want to add another limiting strap on the passenger side to protect the shock due to the fact it will be able to droop more when the driver side is stuffed with the driver offset of the driveshaft. You will want to set this strap so your shocks have about 1" more travel then the straps will allow. The straps will stretch some. If you want you can stuff the driver side wheel up to the bump stop and droop the passenger side and you will find you could put a longer travel shock on that side, but remember you will still be limited on the collapsed length if thinking about running two different sized shocks.
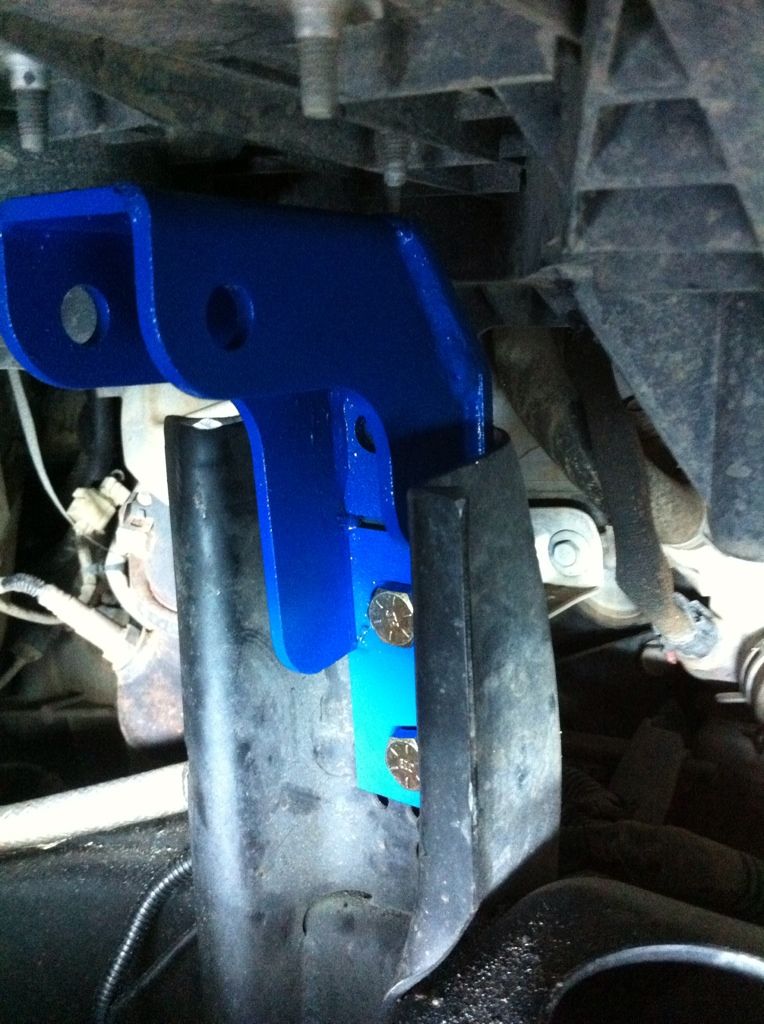
For guys running stock axles with at least a 2" lift you can trim the rear lower control arm mount and raise the shock mount to gain some ground clearance under the rear axle, this will require cutting and welding. You may also need to adjust your bump stops as well.
Name: IMG_0859.jpg
Views: 371
Size: 55.7 KB
I am using the theory of just enough lift to clear tires for a low center of gravity build. Adding extra height in the suspension above tire clearance will only result in loss of down travel. I plan on doing a tread on that conversation in due time.
This link will connect you to the CRAWL-pedia with some great info on valving and tuning your shocks.
Off-Road Shock Tuning Guide | How To Tune and Valve Off-Road Racing Shocks
Sorry about the photos, I cut and pasted this from another forum since you can not refer people to other links on other forums out there. I will have to go back and add the photos when I get the time.
Attached Images Attached Images
I see a lot of threads asking; what shocks should I get? Most of the answers that are given are like most the the lift threads out there: I have ****** shock and it is awesome along with a poser shot of their rig. I don't think most people understand how a shock works and the importance of the location of the shock mounts in relation to tire size, bump stops, and coil length.
Name: IMG_1463.jpg
Views: 943
Size: 37.4 KB
"I love my King shocks, they ride better then stock"
poser shot
A shock in its most simplest form is just a way to control the bounce of the springs in a suspension by the use of oil moving through a valve inside the shock attached to the end of the ram. The valve inside a shock is a disc with several holes in it so the fluid can move from one side to the other. The valve is adjusted with thin washers of different diameters (called a stack) to control the speed and flow of the fluid.
Name: IMG_1277.jpg
Views: 945
Size: 19.6 KB
Bilstein 7100 valve
Adding compressed nitrogen into the shock will keep the oil from creating air bubbles as the oil moves thru the valve, this foaming of the oil makes the shock less effective because the foamed oil becomes compressible. It can also make a shock more responsive by requiring more force to move the oil thru the valve as the ram is pushed in and will increase the rebound rate or the speed at which the ram will extend after being compressed. The higher the nitrogen pressure the harder the shock is to compress and the faster the shock will rebound. Some people will describe this as the stiffness of the shock. Valving will also have an affect on how stiff a shock feels. Many of the shocks of this type are vehicle specific like the ome nitro sport or the bilstein 5100 that are built for the factory mounting locations and weight of the vehicle and use a valve set up that will work well over a range of weight for that vehicle.
An air shock will use compressed nitrogen to set the ride height and does not need any springs. The compression of the nitrogen is what controls bounce and rebound rate. Air shocks may have a hard time handling heavy vehicles and weight ratings should be considered before running a dedicated air shock.
A shock with a remote reservoir will have either a hard connected extra tube or a tube connected via a hose. This reservoir will be filled with oil and most will have a scrader valve so the nitrogen pressure can be adjusted. Never use air from a compressor to fill a shock, the air and oil can mix and degrade the performance of the shock by allowing the oil to turn to foam.
The advantages of the reservoir shock is that they have an extra oil capacity that will keep the shock oil cooler and can allow a shock to have a smaller main body if clearances are tight. As the shock oil moves thru the valve pressures build and the oil becomes heated and as the oil gets hot, it gets thinner and will move faster thru the valve degrading performance. This is know as shock fade. Adding nitrogen to the shock also helps prevent the oil from gassing and creating air bubbles that can lead to shock fade.
A shock with a remote reservoir will typically have more travel with the same size body as a non-reservoir shock due to the fact they move the divider piston to the reservoir and that allows for a longer shaft to fit. They are not just for �Baja buggies� Most of the reservoir shocks out there are re-build able and re-valve able as well as being adjustable by the means of the nitrogen pressure. A special no loss air fill tool is needed to adjust the pressure in the shocks due to the fact they have very little actual nitrogen in them.
Coil overs are simply a shock that has a treaded body that allows for hardware to be installed on the outside that will let you run the coils around the shocks. Coil overs can be a standard shock or may have a reservoir. The advantage of the coil over design is that you have the capability of running multiple coils with different rates to further fine tune your suspension to your rig. Think progressive rate coils some companies offer in the standard coil.
You also have an easy way to adjust the height of your suspension with coil overs by simply screwing the top coil ring up or down on the treaded body of the shock. This lets you level and fine tune your suspension to compensate for lager tires and heavy components such as winches and body armor without buying other components like leveling pucks. You also don't have to worry about coils coming unseated from over extending like on the factory set up. If you are looking at new shocks now and think you might want to get coil overs later when more funds are available you can simply buy a threaded body shock without the hardware and coils and simply add that stuff at a later time. Fox, king, bilstein, sway a way all sell threaded body shocks that are coil over ready.
Coil overs will require cutting and welding a new shock tower up front and adding them to the rear can be a challenge but several companies have new weld on upper mounts and a few have recently come out with a bolt on upper mount. The main problem using them in back is they are open to damage from backing into rocks and such if you are using the factory mount locations. Tribe and gen-right also make kits that actually will cut thru the tub and the upper mount would be inside the jeep. Most coil over shocks are custom made for each vehicle and it is good to know how much your rig weighs and how it is distributed on the vehicle so proper coil rates can be achieved as well as a description of how you will be using the jeep so the valving is optimized for that use. Due to the fact that they are custom built it typically takes 2-3 weeks to get coil over shocks.
Name: broken shock.jpg
Views: 915
Size: 70.1 KBName: IMG_0948.jpg
Views: 914
Size: 27.7 KBName: IMG_0949.jpg
Views: 913
Size: 26.6 KB
12" king coil over vs 10" Bilstein 5100 heim joint vs rubber bushing and this would be a threaded bodied shock without the coils.
Bypass shocks are shocks that look rather strange, they have up to 7 small tubes that protrude from the body of the shock. These tubes have a screw or knob on the end of them that will adjust the amount of fluid that can travel thru the shock. These shocks are available in a standard shock body as well as hybrid coil over bodies. This type of shock is really only used in highly specialized race vehicles although off road evolution offers then in one of their kits. They are very expensive and offer a huge amount of adjustment but even the most experienced off roaders will do with out them on a jeep trail rig.
Air bump stops work like a small air shock that has a scrader valve that allows you to adjust the nitrogen and control the compression of the stop. It will help to keep you from bottoming out your suspension with cushion rather than a bang, They are nice for low center of gravity builds that have limited up travel that tend to bottom out easy. Air bumps are mounted with a can that is welded to the frame and adjustment in bumps top would be done by adding a solid plate or puck to the top of the axle. The air bump stop does the same thing as a regular foam or rubber bump stop which is to protect your shocks from bottoming out, restricting tire up travel to prevent rub, and cushioning full up travel in your suspension.
Name: IMG_1435.jpg
Views: 903
Size: 28.2 KB
King 2" air bump stop.
Since I mentioned bump stops I should also address limiting straps which is over looked in most suspensions. A limiting strap is a heavy duty cloth strap that attaches to the frame and to the axle and keeps your suspension from over extending which can cause damage to your shocks and your driveshaft. You will typically mount a limiting strap so your shocks will only extend 1/2� from their max travel. Limiting straps will stretch so allow for stretch when mounting. 1" of stretch is the rule of thumb most use but long limiting straps may need to allow for extra stretch.
Name: IMG_1415.jpg
Views: 914
Size: 64.8 KB
Limiting strap doing its job. The wheel is about 12" off the ground and there is no stress on the shock.
When you add a lift to a vehicle or change the tire size your shocks are typically affected by it, either by limiting your down travel or having too much up travel. Most lift companies will address this by simply telling you to buy a longer shock and some will use adjustment brackets. If you have access to a welder and torch you can adjust the bottom mounts to make your rig fit your shocks instead of getting longer shocks. If you have 3� of clearance between your bump stops so your tires don't rub and you have 6� of ram showing on the shock you have the potential to gain 3� of droop simply by raising the axle mount up by 3� If you have 4� between your bump stops and only 3� of ram showing you can lower the axle mount down an inch and half and keep the shocks from over compressing. Moving the mounts is a cheap way to fine tune your shock travel without buying new shocks if you have the access to cutting and welding tools. Adjustments can also be made to the upper mount but it is a bit more difficult and is best done with a spacer extension.
I have seen a trend over the last year or so of people putting more expensive shocks on their rigs from several different manufactures (to each his own do what you want on your rig) and I think that they are over looking a couple of things on them. The fact that they have a scrader valve for nitrogen adjustment and most are buying a sealed throw away shock instead of buying a shock that can be dis-assembled and repaired should a ram break or a seal develop a leak. When spending $600+ on shocks I would make sure they have these options. For example a bilstein 5100 series shock uses an crimp to seal the tube and if something happens to it you can send it in for warrantee and run with only 3 shocks until it comes back or throw it away and buy a new one. For a bit more you can get into the 7100 series that you can rebuild yourself with a $20 seal kit and a couple of special tools. In fact you can buy every part of the 7100 shock from bilstein. King and fox shocks have readily available parts as well. If you are not tool friendly then you may not care about it but when you break down on a Saturday or on an extended trip you could be up and running in about an hour if you carry some extra parts and do the work yourself.
Name: IMG_1270.jpg
Views: 903
Size: 35.8 KBName: IMG_1272.jpg
Views: 907
Size: 38.3 KB
Rebuild kit for a 7100 and a dis-assembled 7100 shock The no loss air fill tool is shown in the top of the photo.
How do I pick the right size shocks.
If you really want to squeeze every bit of suspension travel from your shocks it will require setting the lower mount to the Ideal location and will require a torch and welder as well as several jack stands and a floor jack.
Start by jacking up your jeep as high as you can so you can achieve full droop of the front axle, place the jeep on jack stands and put the floor jack under the center as good as you can so the axle will lift straight up. Remove the coils and shocks and jack the axle strait up until you hit the bump stops. At this point you should have 3-5" of clearance above the tires to the fenders to allow a stuffed wheel to continue up and in when the opposite wheel is a full droop. If you don't have this clearance you need to extend your bump stops or you need to trim the fenders for more up clearance. Measure the distance between the upper and lower mounts, this is your collapsed shock length.
Next droop the axle all the way down until the driveshaft makes contact with the exhaust crossmember. It is easier to do this if you remove the wheels. Keep an eye on your brake and esp lines. This is your max potential droop. Again measure between mounts for your extended length.Name: IMG_1548.jpg
Views: 736
Size: 42.4 KBName: IMG_1549.jpg
Views: 741
Size: 50.8 KB
Now jack up the axle about 1" this is where you install a limiting strap at the differential to keep the the driveshaft from making contact with the exhaust cross pipe. This will also protect your shocks from over extending.
Name: IMG_1555.jpg
Views: 743
Size: 39.0 KB
Now at this point if you are lucky you can find the shock of your choice with collapsed/extended that matches the measurement you have just taken.
If not you can move the bottom mount up or down so you can fit your shock. This is a poly shock mount.
Name: IMG_1552.jpg
Views: 736
Size: 38.8 KB
decreased up travel, gains droop.
Name: IMG_1553.jpg
Views: 736
Size: 48.3 KB
Increase up travel, decrease droop
Name: IMG_1554.jpg
Views: 734
Size: 53.8 KB
Mine fell in between
If you are feeling really good about cutting and welding you can swap out your shock tower, if you do this you will want to mount it as high as you can so you can get a really long travel shock. I am sure you have seen buggies with upper shock mount that come thru the hood and have massive amounts of travel, unfortunately in the jk with all the stuff mounted in the engine compartment it is really hard to move the upper mount much higher then what the factory mount is. You can gain about 2" before you have to look at moving the fuse block.
You may want to add another limiting strap on the passenger side to protect the shock due to the fact it will be able to droop more when the driver side is stuffed with the driver offset of the driveshaft. You will want to set this strap so your shocks have about 1" more travel then the straps will allow. The straps will stretch some. If you want you can stuff the driver side wheel up to the bump stop and droop the passenger side and you will find you could put a longer travel shock on that side, but remember you will still be limited on the collapsed length if thinking about running two different sized shocks.
For guys running stock axles with at least a 2" lift you can trim the rear lower control arm mount and raise the shock mount to gain some ground clearance under the rear axle, this will require cutting and welding. You may also need to adjust your bump stops as well.
Name: IMG_0859.jpg
Views: 371
Size: 55.7 KB
I am using the theory of just enough lift to clear tires for a low center of gravity build. Adding extra height in the suspension above tire clearance will only result in loss of down travel. I plan on doing a tread on that conversation in due time.
This link will connect you to the CRAWL-pedia with some great info on valving and tuning your shocks.
Off-Road Shock Tuning Guide | How To Tune and Valve Off-Road Racing Shocks
Sorry about the photos, I cut and pasted this from another forum since you can not refer people to other links on other forums out there. I will have to go back and add the photos when I get the time.
Attached Images Attached Images
Last edited by TheDirtman; Jan 19, 2014 at 06:31 AM.


Trending Topics
JK Jedi

Joined: Sep 2012
Posts: 4,364
Likes: 107
From: missoula,mt

JK Newbie
Joined: Apr 2010
Posts: 61
Likes: 0
From: Joshua, TX
I think this is my 1st post. I have a JKU on order...1st Jeep since my CJs from 15-20 yrs ago...and things have changed.
Dirtman, I have read your lift thoughts and your guide to shocks...most helpful. And thou I would probably never post "what lift should I?" because I post so little in generAL, it was informative and made me decide to go with a BB to start with and see & grow from there.
But this thread has left me with few questions.
1- I reckon I can take from this that Bilstein 5100s are good shocks for most people...but it also seems to imply all those "cheap" $40 white bodied SUper-Sky-Comp-Master shocks may be plenty good enough for most people. $80 for a 5100 is by no means chump change buts its far from $150+ for the likes of a 7100.
2- I loved the explaination of how to get correct shock lenght but it leads to more. Would it be better to get a BB with EXTs (which is +$100 or so) to use the stock shocks until all that measuring can be performed or put that $100 to 4 5100s for the 2.5" BB and and then move the lower mounts to make custom to the rig/lift/tire setup later when the the analysis can be performed? (I guess the answer is dependant on whether the 5100s for the 2.5" BB at stock mts is truly the correct shock to end with when following it up by doing custom work.)
Further info for consideration, I can weld & Fab. I did build custom shock mounts and oter suspension stuff for my CJs but that was a totally differnet animal. And I plna to add limiting straps. I am concerned with the exhaust/DS thing and your stance on straps convinced me this is the solution.