
2007 JKU Door Hinge Repaint with Pics of Corrosion
 06-07-2015, 05:49 AM
#1
JK Enthusiast
Thread Starter
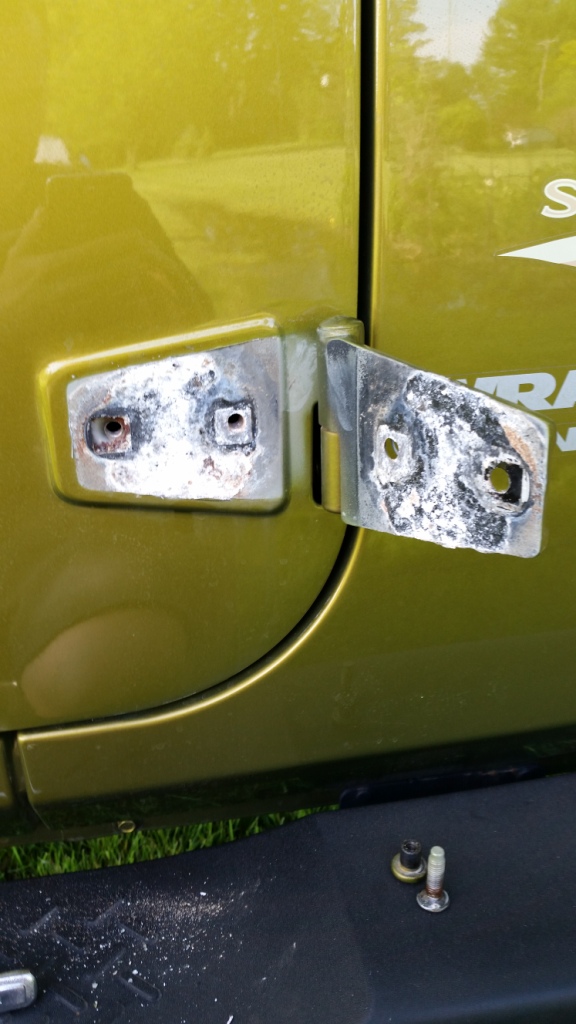
So I had to do somthing with my door hinges since the corrosion was so bad on one hinges on the bottom almost the entire paint flaked right off and exposed the bright white corroded aluminum underneath.
On a sick note this corrosion is really pretty cool, it is an electrochemical cell at work, (I am a chemist who works in polymer chemistry not electrochemistry) and to see the transfer of electrons like this is pretty cool to me...but I would prefer it not happen to my Jeep!!
Anyway, I removed the hinges, used some Rustoleum self etching primer, then I used the Duplicolor bed armor truck bed liner. I needed something that was hard to screw up because I absolutely hate painting.
The bottom hinges were corroded much more than the tops. I have read some people talk about how the hinges are bonded to the door with an adhesive, in my case only one hinge one bonded and I used a credit card to pop it loose, it didn't take much effort and it was still corroded underneath. This particular hinge showed no corrosion on the outside, but as you can see in the pic of the top hinge below it was still messed up between the aluminum and steel. The other hinges were not bonded at all.
 06-07-2015, 07:26 AM
#3
JK Newbie
Join Date: Aug 2014
Posts: 16
Likes: 0
Received 0 Likes
on
0 Posts
Really nice I wAs thinking about pulling mine off and getting my them lineX coated. I was also going to do the body side hinge too to prevent the chipping. Did you do anything to the doors for the pitting?
06-07-2015, 08:42 AM
#4
JK Enthusiast
Thread Starter
Thanks,
I am fortunate enough to work in the adhesive industry so I used an adhesive that we have that is specially designed to bond dissimilar substrates, steel and aluminum, and it also prevents corrosion, even galvanic corrosion. I cleaned and primed the area on the door as well as the back of the hinge. Then I made a gasket in the shape of the hinge from the adhesive material, I applied it to the hinge and let the material squeeze out a little when I bolted it to the door. Hopefully that will seal, fill in the pitting, and prevent future corrosion.
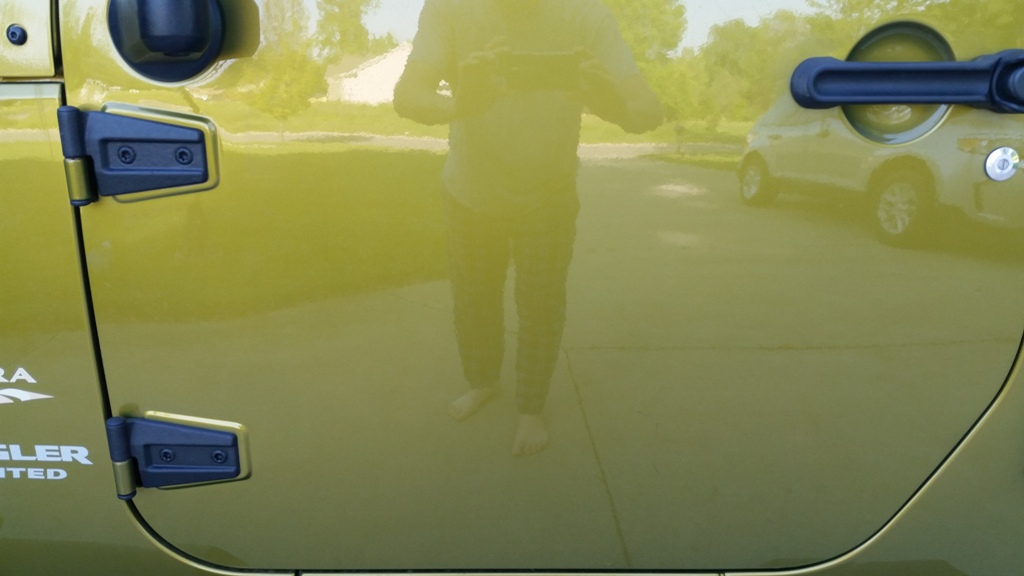
I was thinking about painting the body side hinge black as well, but now that I have it on it doesn't look too bad, I think I am going to just leave it alone. I really can't stand painting, I mean I HATE painting, so the less the better for me!!
I am fortunate enough to work in the adhesive industry so I used an adhesive that we have that is specially designed to bond dissimilar substrates, steel and aluminum, and it also prevents corrosion, even galvanic corrosion. I cleaned and primed the area on the door as well as the back of the hinge. Then I made a gasket in the shape of the hinge from the adhesive material, I applied it to the hinge and let the material squeeze out a little when I bolted it to the door. Hopefully that will seal, fill in the pitting, and prevent future corrosion.
I was thinking about painting the body side hinge black as well, but now that I have it on it doesn't look too bad, I think I am going to just leave it alone. I really can't stand painting, I mean I HATE painting, so the less the better for me!!
06-07-2015, 10:45 AM
#6
JK Enthusiast
Thread Starter
I haven't seen, or looked for anything for that matter, on the market specifically for this type of application. If I come across something I'll let you know.
Last edited by bman; 06-07-2015 at 10:54 AM.
06-07-2015, 11:08 AM
#7
JK Junkie
For someone who hates painting it looks like you did a nice job. 
Did you remove the hinge to paint it and then paint the bolt heads separately or did you mask the door and paint in place? Also, did you do one hinge completely and re-install it to prevent door adjustment problems or did you do all 4 at once?
It may be a good idea to do this to my 2014 before it looks like yours...lol.
Last edited by 14Sport; 06-07-2015 at 01:19 PM.
Trending Topics
06-07-2015, 01:06 PM
#8
JK Enthusiast
Thread Starter
Thanks,
I removed all of the bottom hinges first, so as not to get the door out of adjustment. I am not sure if it fully work as I "heard" the door move when I broke the second bolt loose, but that just may have been the insert with the threads moving and not the door itself, I was really paying attention to the door and I didn't see it adjust at all. I painted the bottoms installed them and then removed the top hinges.
In hindsight I would have changed the way I tackled this job now that I have done it once. After removing the bottom hinges, I sandblasted, cleaned, primed and then shot them with bedliner. I also taped off the back of the hinge where it contacts the door because I was using the adhesive and I didn't want to add the thickness of the bedliner and the adhesive between the hinge and the door.
When I painted the bedliner on I taped off the back like I said and the first couple of coats I painted on I had the hinge face down to make sure I covered the paint fully over the round part above where the pin is connected so as to fully paint all of the area of the hinge that is not in contact with the door. At this point if I were to do it again I think I might now install the hinge then tape it off and paint it while it is installed.
I flipped the hinge over after painting the back side and hit it with a 3 coats on the front then installed it. When I tightened them down it distorted the bedliner under the hinge bolt (smooshed it out!!) and it looked like crap, I had to peel it off and touch it up. This is also where using the bedliner came in handy as touch up was a breeze, you can touch up the bedliner at any time, there is no re-coat window and it looks great. I did touch up the inside of the torx bolts after I tightened them and that looks good now as well, tightening the bolts didn't screw up the paint as much as I thought it was going to.
Also I did do this while I was putting in some extra time at work yesterday, so I was in a hurry to get the hinges installed and go back home. If you do this in your garage you can leave them off overnight and the paint might harden up enough so it doesn't distort when you put the hinge back in. Or you can avoid this altogether and paint them on the jeep.
06-07-2015, 01:29 PM
#9
JK Junkie
That makes sense. I've painted stuff and waited 24 hours and still had it distort on re-assembly. One of the benefits (sarcastic) of living in a high humidity state. I'm going to put this on my to-do list, at least the backsides of the hinges and unpainted door area, knowing that it will take a long enough dry time to put my JK out of commission for close to a week. Fortunately, I have other transportation that I can use for work.
Thanks for the info. I appreciate it.
Thanks for the info. I appreciate it.