Jeep Wrangler JK: How to Install Auxiliary Outlets
You can never have enough electrical outlets in your Jeep. Learn how to install one the right way in this step-by-step tutorial.
This article applies to the Jeep Wrangler JK (2007-Present).
Your Jeep Wrangler JK comes with standard auxiliary outlets, but you could always use more. Off-roading can lead you to some far away places, and your portable power plant better have enough outlets. Another drawback of the standard outlets are the lower amp ratings. Sometimes you just need to draw a little more current without baking a fuse. This tutorial will show you how to install an auxiliary power outlet wired directly to the battery with higher gauge wire for maximum flexibility.

Materials Needed
- Spool of 12 gauge wire (black and red preferable)
- Waterproof inline fuse (10A)
- 12v accessory outlet
- Shrink wrap tubing
- Crimp-on ring terminals
- Soldering iron and solder
Step 1 – Determine wire type and path
You will need to first determine the power requirements for the electrical device you plan to use with this outlet. You can find this information on the manufacturer's website. For the purpose of this tutorial, we will be using a CB radio that draws between five and nine amps of current.
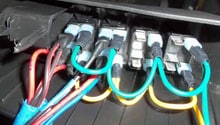
The 12 gauge wire is a good heavy duty wire that won't generate much heat for this load. The wire will be installed directly from the battery to the outlet, so take a look at the wire path from the battery to the location that you plan to install the outlet. In most cases, you will need to locate an entry point from the engine compartment through the firewall. Most vehicles have smaller access ports like the one shown in Figure 1.
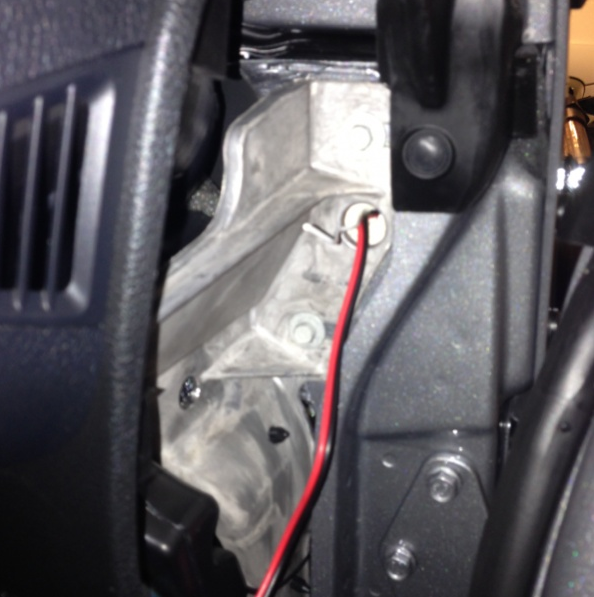
For this tutorial, we will be installing the outlet on the lower driver's side of the vehicle.
Step 2 – Prepare the wiring
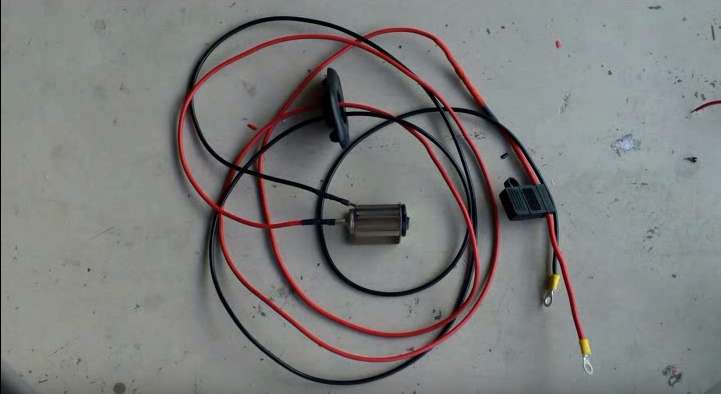
Now that we know the wire type and the path to the outlet, run the wire to determine the length you will need to cut. You will be cutting two identical lengths of wire: one red as well as one black for power and ground connections as shown in Figure 2.
Take the wire to your workbench to solder all the necessary connections.
Step 3 – Solder the connectors and inline fuse
The accessory outlet most likely has a smaller gauge wire already connected to it. Remove those connectors and solder them to the larger gauge wire as shown in Figure 3. Use shrink wrap tubing to cover the connectors and protect them from dirt and moisture. Test to make sure the connectors slide on tightly to the terminals of the accessory outlet.

Next, solder the ring connectors to the other end of each wire and shrink tube those ends as well. These will connect directly to the battery terminals.
Finally, you will need to connect the inline fuse close to the positive terminal of the battery. Cut the wire about a foot from ring connector and solder one end of each wire to the inline fuse. Shrink tube both ends to complete the wire connections.

Step 4 – Run the wire from the battery to the outlet
Feed the wire through the firewall and along the wire path to the battery as shown in Figure 5. Be sure to connect the outlet first, and keep both wires away from the battery terminals.

Connect the black ground wire to the outer post of the outlet, and then the red positive wire to the center of the outlet base as shown in Figure 6.

Now fasten the ring connector of the black wire to the negative battery terminal first, and then repeat the process for the red wire and the positive terminal as shown in Figure 7.

Step 5 – Test the outlet
The wiring is now complete.
Test the outlet by plugging in any 12v car accessory and verify that you have power.

Featured Video: Installing a 12v Power Accessory Outlet
Related Discussion
- Auxiliary Fuse Box - JK-Forum.com