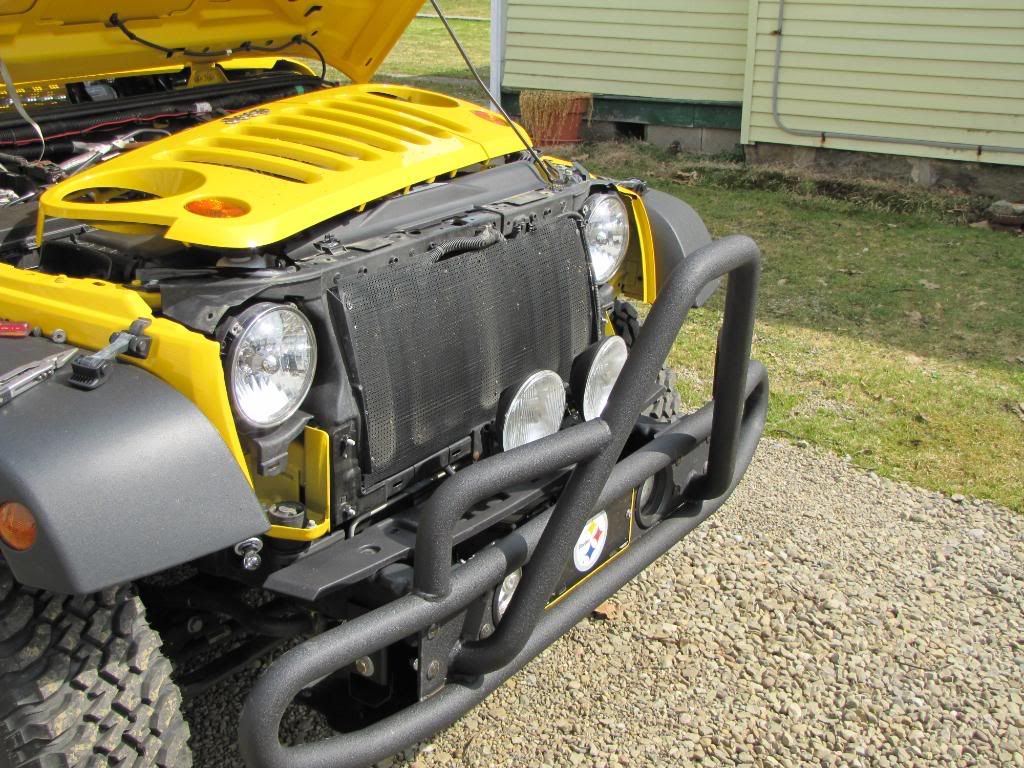
Jeep Wrangler JK: How to Replace Radiator
A leaky, damaged, or plugged radiator will reduce cooling efficiency and can lead to engine overheating. Replacing the radiator is a straightforward job that can be accomplished in an afternoon and leave you with peace of mind that your cooling system is operating as it should.
This article applies to the JK Jeep Wrangler (2007-Present).
The radiator is a key component of the cooling system and is responsible for maintaining coolant temperatures as the vehicle is in operation. Almost every radiator fitted on production vehicles today use plastic end-tanks crimped to an aluminum core. Over time, the plastic tanks are susceptible to cracking and the crimped seams tend to leak, requiring a new radiator to be installed. Many JK owners regularly drive off-road and face tough terrain and extreme temperatures. Debris and road hazards found on trails can quickly turn a radiator into scrap. Additionally, extremely hot temperatures combined with treacherous climbs can see owners wanting additional cooling for their Wrangler. Whether you need to replace a damaged or leaking radiator, or simply want to upgrade to a new and improved unit, this article will outline the radiator replacement procedure for the JK Jeep Wrangler.

Materials Needed
- 1/4" drive ratchet and extension
- Universal joint
- 8mm and 10mm sockets and wrenches
- Phillips and flat head screwdrivers
- Pliers
- Catch pan
- Funnel
- Length of 1/4" hose
- Coolant (optional)
- Panel clip pliers
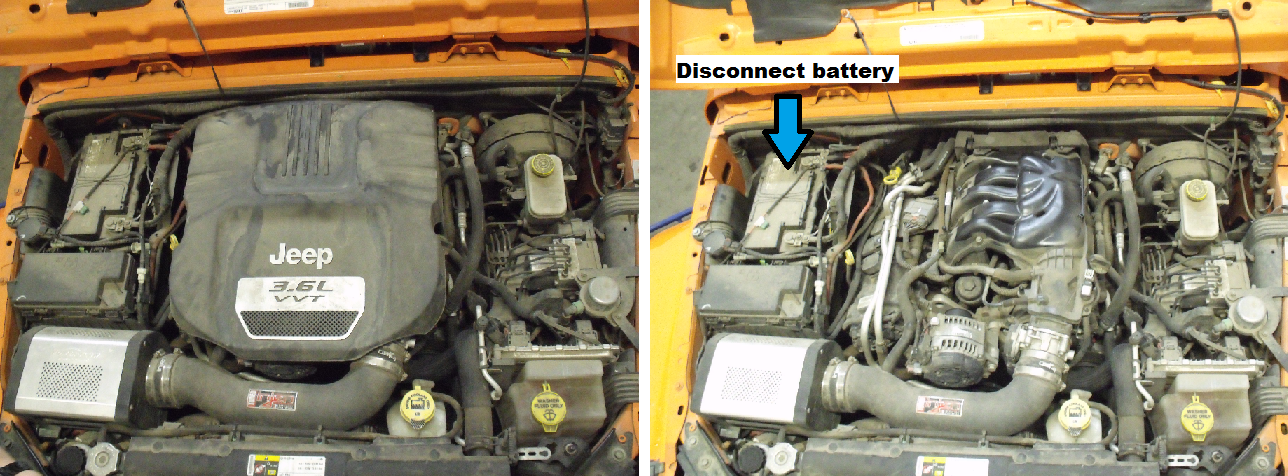
Step 1 – Disconnect battery and remove grille
- For safety purposes, disconnect the battery before beginning to remove the radiator.
- Remove the front grille. The grille is held in place with either six push pins or scrivet fasteners along the top edge. Remove the (6) fasteners and disconnect the indicator lamps before lifting the grille off of the vehicle. It is best to pull the grille along the bottom edge to allow the (4) clips to easily pop free.
- With the grille free, remove the plastic shroud that is positioned between the bumper and sub-frame. Remove the Phillips screws and maneuver the shroud out of the vehicle.
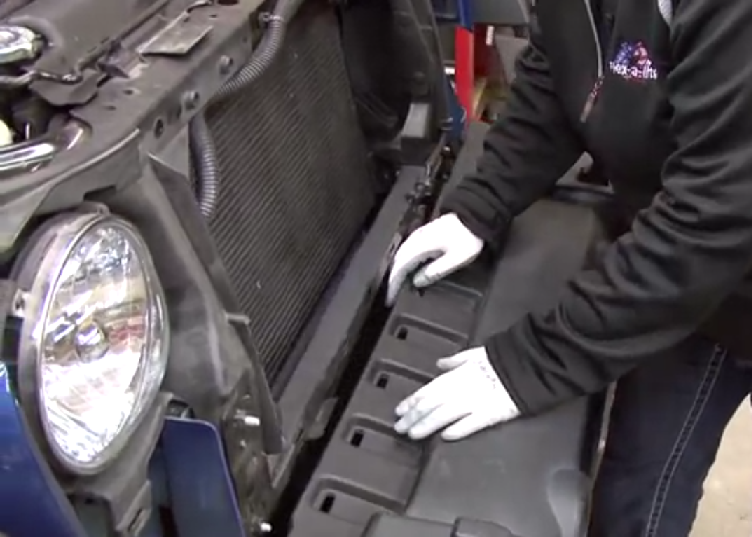
- Remove the top radiator shroud by removing the (4) push pin fasteners. Similarly, disconnect the bottom radiator shroud by removing the (5) push pin fasteners, two of which are located on each lower side of the radiator.
Step 2 – Drain coolant
With the radiator drain cock now accessible, proceed with draining the cooling system.
(Related Article: How to Change Coolant - JK-Forum.com)
Step 3 – Remove airbox
While the coolant is draining, proceed with removing the airbox.
- Disconnect the intake air temperature sensor electrical plug.
- Loosen the hose clamp securing the intake tube to the throttle body.
- Remove the PCV hose from the airbox assembly.
- Remove the airbox assembly and intake tube from the vehicle.

Step 4 – Disconnect A/C condenser
- The A/C condenser is attached to the radiator with (4) bolts. Using a 10mm wrench or universal joint and ratchet, remove these bolts to free the condenser.
- Remove the A/C hardline bracket from the radiator using an 8mm wrench or socket.

Pro Tip
Be gentle handling the A/C condenser, as even the tiniest of pinholes can allow gas to escape and eventually hinder A/C functionality.
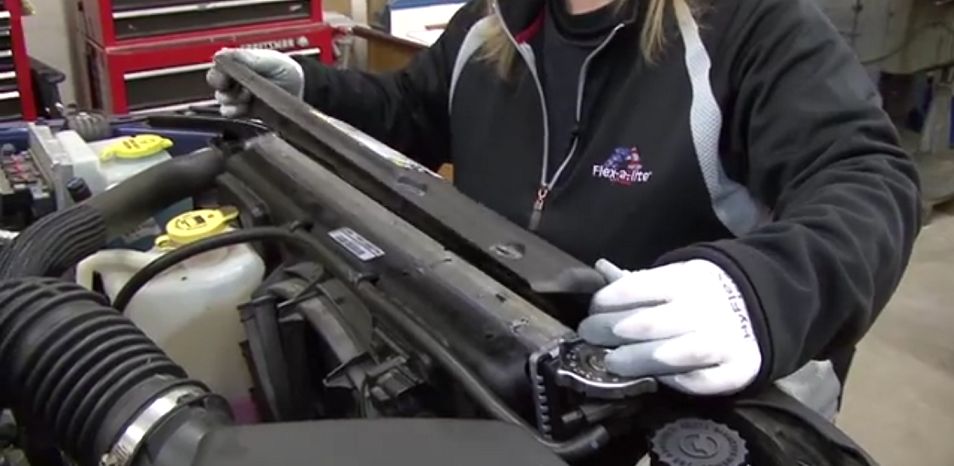
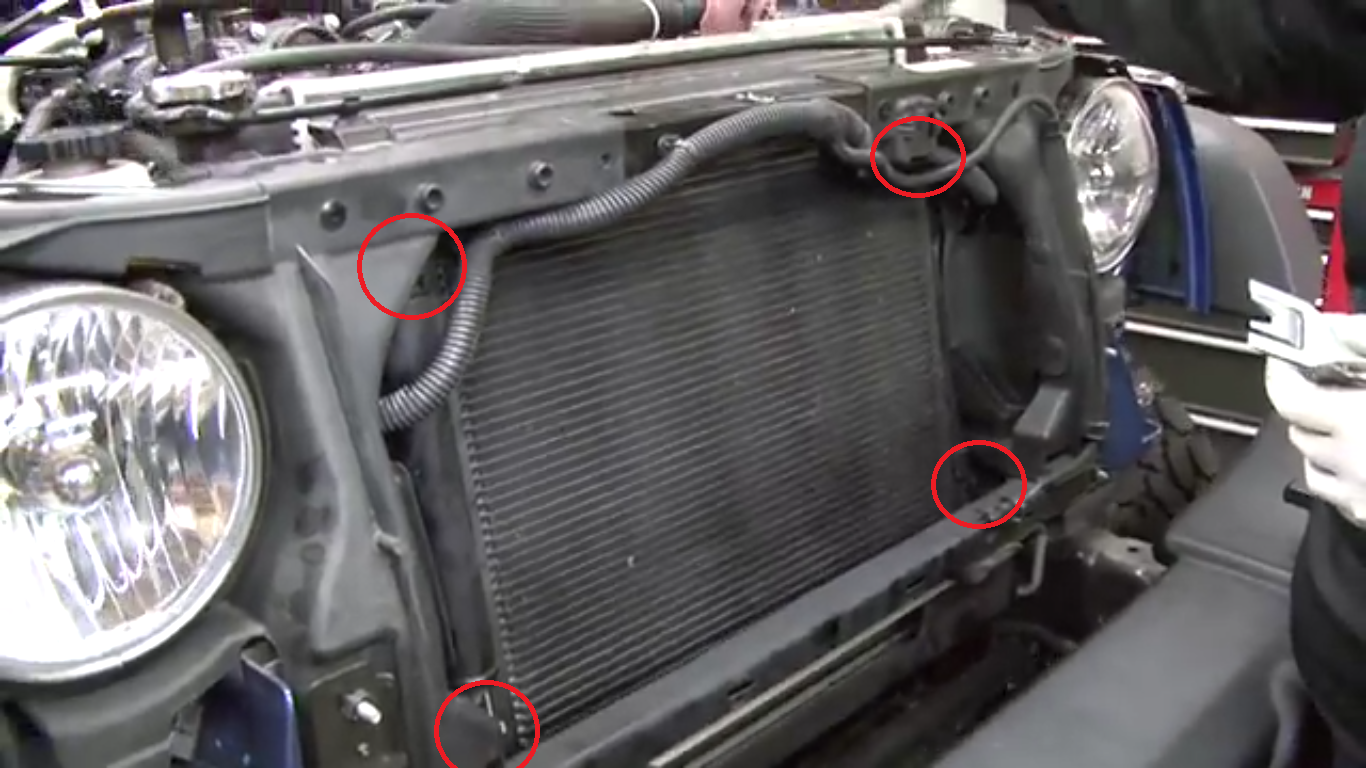
Step 5 – Remove coolant reservoir and radiator
- Using a pair of pliers, loosen the upper radiator hose clamp and disconnect the hose from the radiator inlet neck. Similarly, remove the lower hose from the radiator.

- Disconnect the coolant overflow hose from the radiator filler neck and slide the hose out of the fan shroud clips. With the hose free, lift the coolant reservoir off of the fan shroud and out of the engine bay.
- Disconnect the electrical plug from the electric cooling fan.
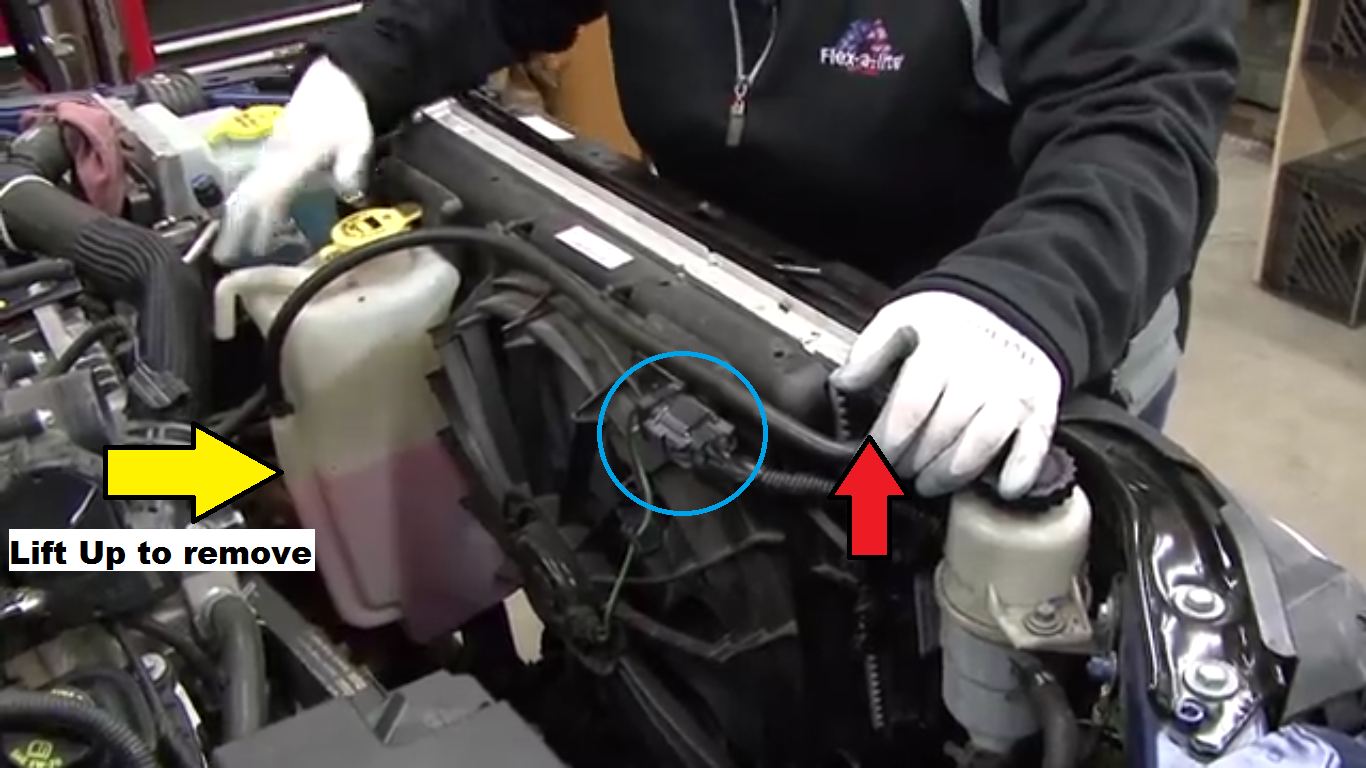
- Remove the (2) 10mm radiator fastening bolts located on each side of the radiator.
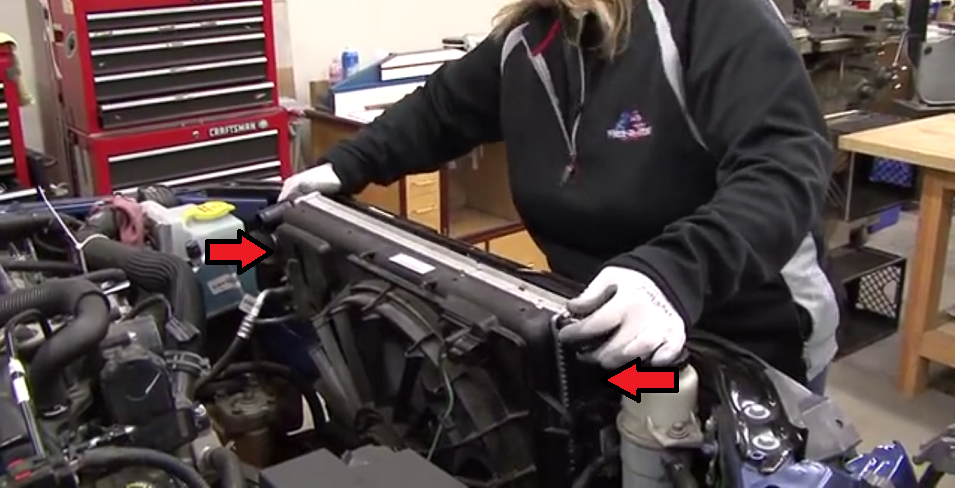
- With all fasteners removed, proceed with removing the radiator and fan assembly from the engine bay.
Pro Tip
The radiator can be maneuvered out of the engine bay without needing to remove the (2) rubber side radiator flaps; however, some individuals prefer to remove the flaps by simply removing the (4) push pin clips.
Step 6 – Installation
Installation of the new radiator is the reverse of the removal procedure. If installing an aftermarket radiator or cooling fan, refer to the manufacturer's instructions, as the aftermarket components may differ from the stock pieces.
- Using an 8mm wrench, remove the (2) bolts securing the electric fan assembly to the radiator and transfer it to the new radiator.
- Transfer the rubber isolator grommets from the old radiator if they are not included with your new radiator.

- Slide radiator into place in the engine bay and reinstall the rubber radiator flaps if necessary.
- Tighten the radiator mounting bolts and reconnect the electric cooling fan plug.
- Attach the coolant reservoir to the fan shroud and reconnect the coolant overflow hose.
- Attach both upper and lower hoses to the radiator, making sure the clamps are properly positioned.
- Reattach the A/C condenser and hardline bracket to the radiator.
- Install the airbox assembly. Be sure the intake tube is securely tightened to the throttle body and the PCV hose is connected to the airbox. Reconnect the IAT sensor electrical plug.

Step 7 – Fill with coolant and check for leaks
- Before installing the grille, fill the cooling system with either the coolant collected from Step 2 or with new coolant.
- Reconnect the battery and start the engine.
- With the engine running, inspect for any coolant leaks.
Step 8 – Install grille and shrouds
If there are no coolant leaks present, the remaining components can be reinstalled on the vehicle.
- Attach the upper and lower radiator shrouds using the push pin fasteners.
- Install the plastic shroud between the bumper and sub-frame.
- Install the grille, ensuring the lower clips pop securely into place
- Connect the indicator lamps.
Featured Video: How to Install Mishimoto Radiator
Related Discussions
- Good Replacement Radiator?- JK-Forum.com
- Leak From Top of Radiator - JK-Forum.com