The starter is the only means of getting your engine up and running. A faulty starter that does not consistently crank the engine each time the key is turned can fail at any time. Replace your starter before you are left stranded with a car that won't start.
By Joseph Coelho - November 16, 2015
Contributors: John Yrigoyen
This article applies to the JK Jeep Wrangler (2007-Present).
Starter motors and solenoids are quite robust that can generally last for years; however, it is not uncommon for them to act up or completely fail. When the key is turned to start the vehicle, power from the battery is sent to the starter solenoid, which then energizes the starter to engage the ring gear and crank the engine over. Unfortunately, starters can fail from a variety of reasons, such as cranking for prolonged periods with low battery voltage, poor electrical connections, excessive vibrations, or in the case of Jeeps that are used off-road, impact damage and water ingestion (corrosion). In many cases, vehicles that will not start are improperly diagnosed as having a bad starter. Before you decide to bite the bullet and replace the starter, check the battery and electrical connections to ensure they are not the cause of the problem. If your starter is indeed the culprit behind your starting issues, follow the replacement procedure outlined below to get your JK Jeep Wrangler up and running again.
Materials Needed
10mm, 13mm, 15mm, and 16mm wrenches and sockets
3/8" drive ratchet (standard and stubby)
Pliers
Torque wrench
Floor jack and jack stands (optional)
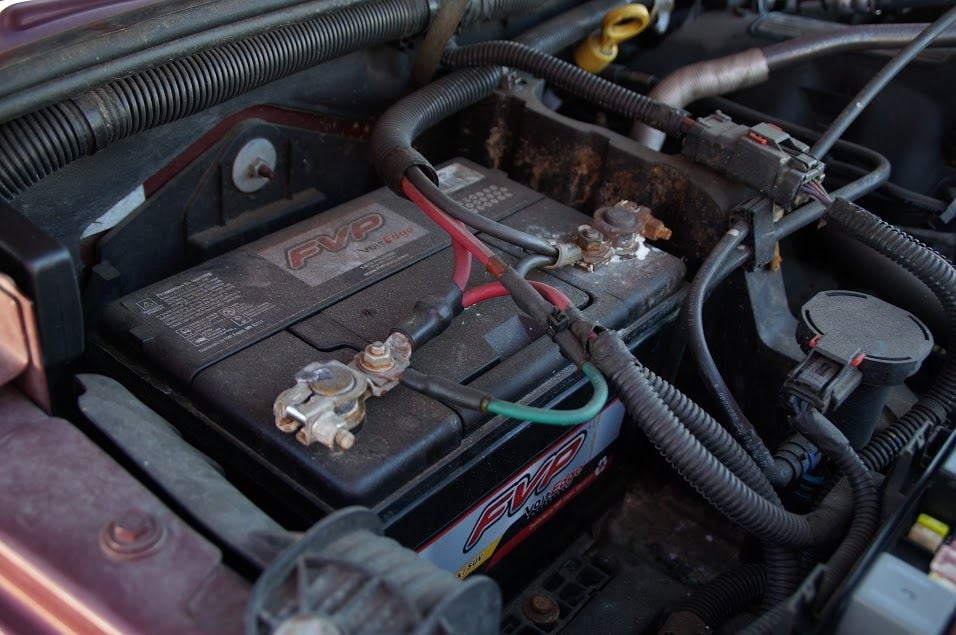
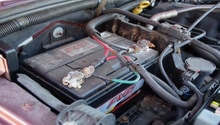
Step 1 – Disconnect battery
Before attempting to remove the starter, disconnect the battery. This will prevent any wires on the starter solenoid from shorting against the engine or chassis during starter removal.
Figure 1. Disconnecting the negative battery cable.
Step 2 – Lift and support vehicle (optional)
In most cases, the Wrangler has enough ground clearance to easily slide underneath it to replace the starter. That being said, some individuals prefer a little more elbow room when working under the vehicle. If preferred, lift the car with a floor jack and support it with jack stands.
Figure 2. Lifting and supporting the vehicle.
Step 3 – Remove starter
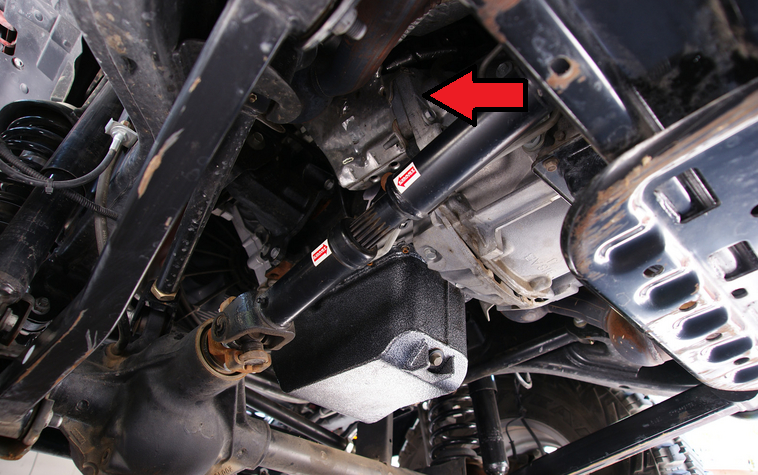
The starter is located on the driver's side of the vehicle, just above the drive line. It is often covered by a small heat shield.
Figure 3. 2011 JK Wrangler starter location.
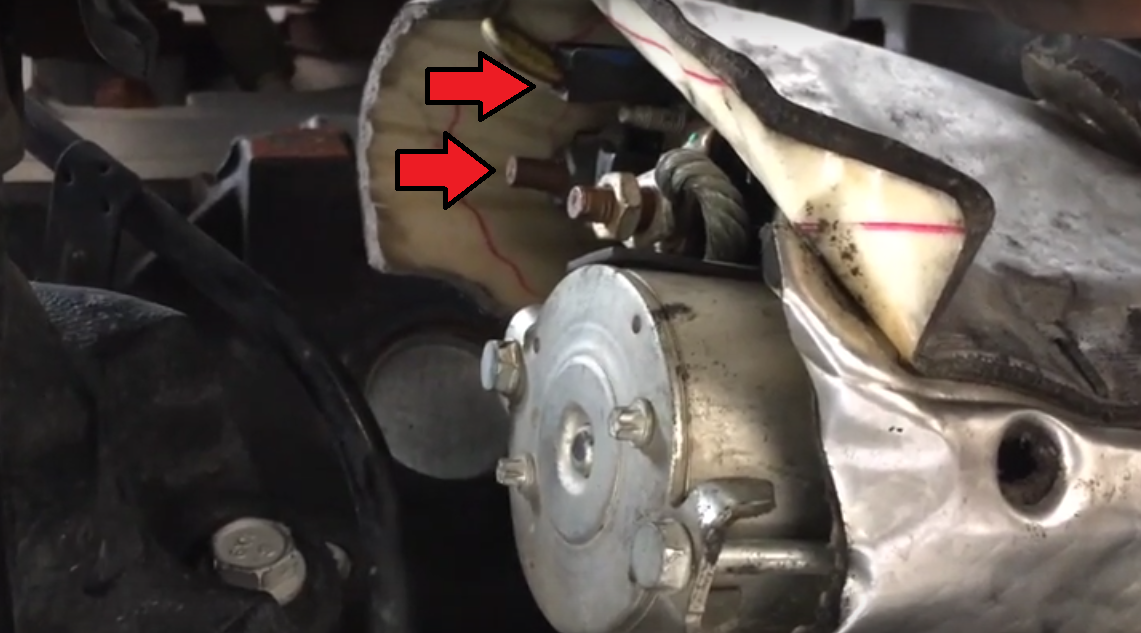
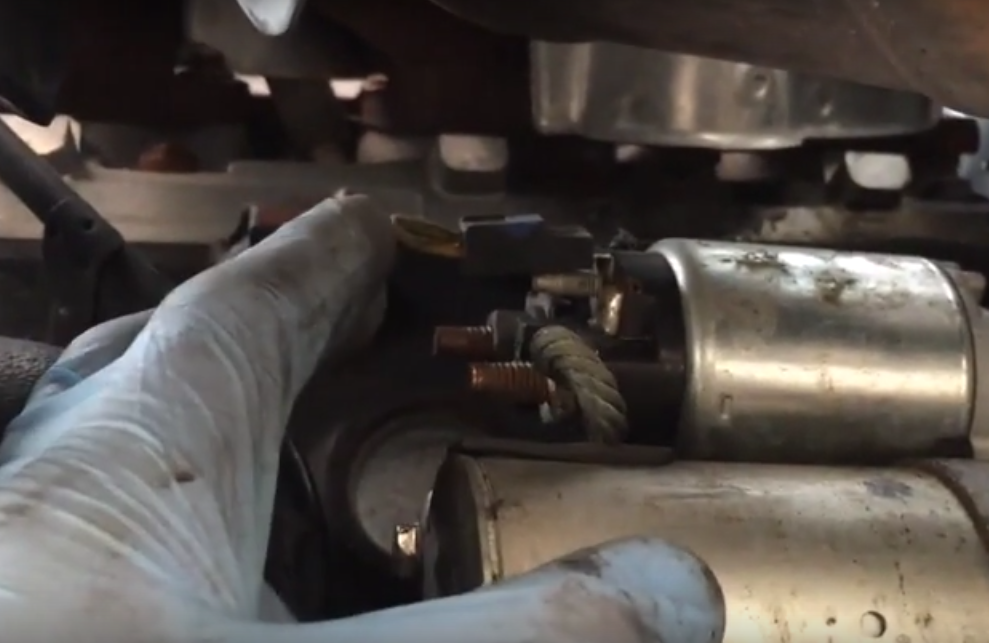
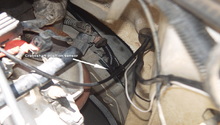
The starter solenoid has two wires that need to be disconnected before the starter can be removed. Disconnect the electrical plug and remove the larger battery cable from its mounting stud with a 13mm socket. Take note of which stud it is on to ensure it is correctly installed during installation of the new starter.
Figure 4. Electrical connections at starter solenoid.
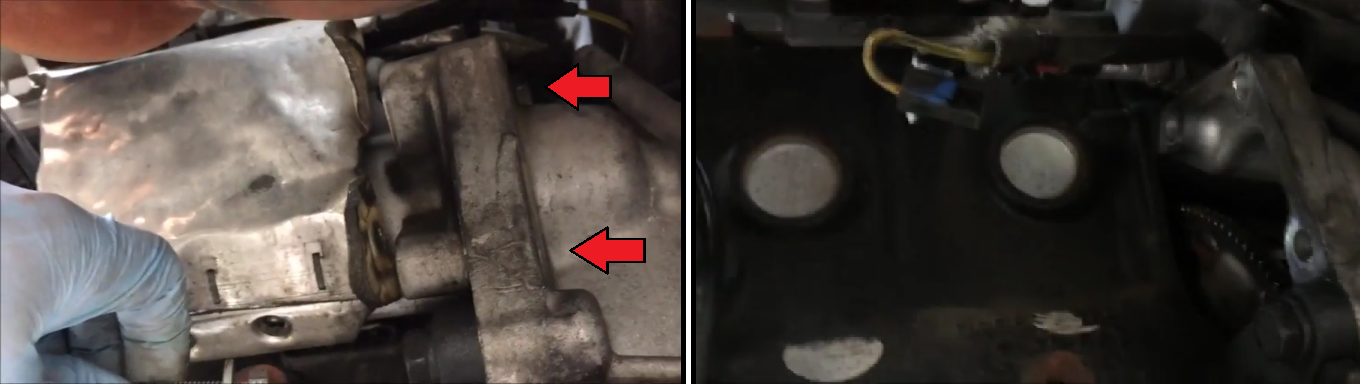
The starter has two bolts that secure its place, with the bottom bolt also supporting the heat shield. Begin by removing the bottom bolt with a 16mm socket. Next, while supporting the starter, remove the top bolt with a 15mm socket. With both bolts removed, the heat shield and starter can be removed.
Figure 5. Starter fastening bolts and starter removed from engine.
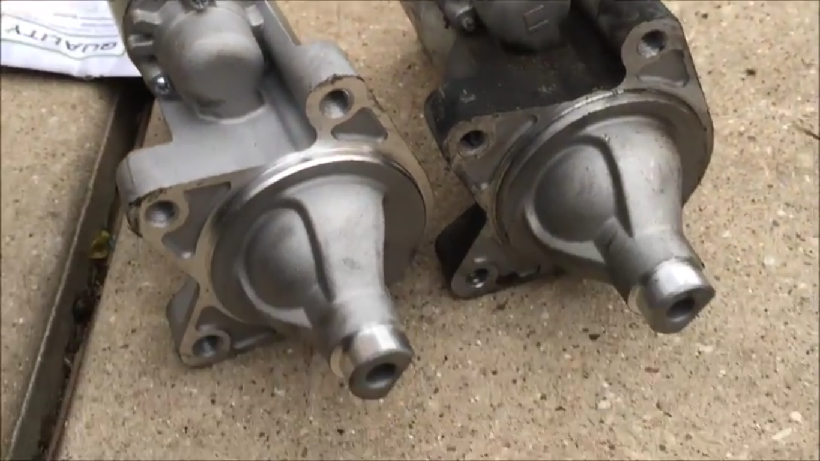
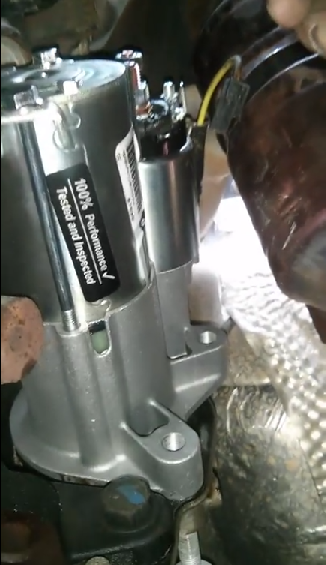
With the old starter removed, compare it to your new starter to ensure they are the same. Also, swap the heat shield onto your new starter.
Figure 6. Starter comparison.
Step 4 – Install new starter
Installation of the new starter is the reverse of the removal procedure.
Slide the starter into place and start both mounting bolts by hand to be sure the starter is properly aligned. Note that there are three threaded mounting holes in the starter, but only the top and bottom holes are used.
Figure 7. New starter placed into position.
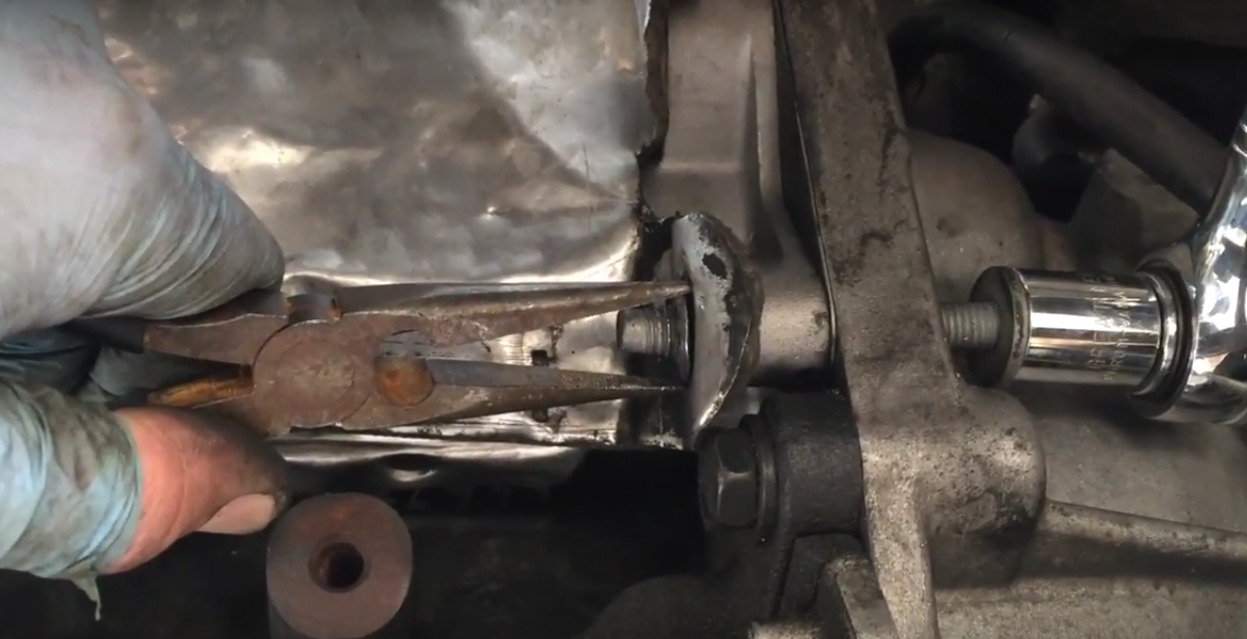
Slide the heat shield over the starter and proceed with tightening the mounting bolts to 25 to 28 ft/lbs. Pay close attention when tightening the bottom bolt to be sure it threads into the nut on the backside of the heat shield, as this keeps the heat shield in place. A pair of pliers or similar may be needed to keep the nut from spinning.
Figure 8. Mounting bolt threading into heat shield nut.
With the starter in place and tightened down, reconnect the electrical wiring to the solenoid.
Figure 9. Connecting electrical wiring to solenoid.
Step 5 – Connect battery and start vehicle
With the starter in place, reconnect the battery and start the vehicle to ensure proper starter operation. If the starter does not operate, check the electrical connections at the starter and battery.
Figure 10. Testing the starter by starting the car.Featured Video: 2008 Wrangler Starter Replacement
Why Won't My Car Start?
Does your engine fail to crank over when you turn the key?
This article applies to the JK Jeep Wrangler (2007-Present).
The JK Jeep Wrangler uses a fair share of modern electrical system ...
How to Install a Push Button Starter
Why use a key to start your Jeep when you could be using a push button?
This article applies to the Jeep Wrangler JK (2007-Present).
Many new vehicle models have push button ...
How to Make a Hard Top Cart
The Jeep Wrangler JK gives you the option of removing the hard top (doors, too). Removing the top can provide more fun, more exhilaration, and more of an outdoor, free-style ...
How to Replace Camshaft Position Sensor
You can replace the crankshaft position sensor very easily, in your driveway, using basic tools.
This article applies to the Jeep Wrangler JK (2007-Present).
Edwin H. Hall ...
Starter Modifications
So you've got the Jeep Wrangler you've been dreaming about. Now what?
This article applies to the Jeep Wrangler (2007-present).
Everybody has opinions on the best modifications to make to ...
How to Replace Catalytic Converter
The harsh off-road environment that Wrangler drivers thrive in can be tough on emissions systems and catalytic converters.
This article applies to the Jeep Wrangler JK ...