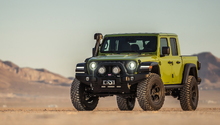
Jeep Wrangler JK: Lift Kit Reviews and How-to
There are so many choices in lift kits available to JK owners that the choices can be overwhelming.
This article applies to the Jeep Wrangler JK (2007-Present).
Lift kits add significant ride height and wheel well clearance to your Jeep. They not only make your Jeep look like a classic off-road machine, they get out there and over the rocks. With the brutality of rock hopping, you want to make sure that you get the best bang for your buck when shopping for a lift kit. You need something not only durable, but something that you can depend upon to get you in and out of situations that others fear to tread.
How do you know which kit is right for you? Once you make the decision on which kit to go with, what's next? Do you pay nearly twice the price to have a pro install it, or do you save the extra money and do it yourself? Those answers can be found here, so read on and learn how to install a lift kit as well as get the latest reviews to help you decide on the right lift for your JK.
Table of Contents
How to Install a Lift Kit

Materials Needed
- 3/8" ratchet and socket set or impact wrench (optimal)
- Hydraulic floor jack
- Jack stands (extra tall)
- Possibly might need track bar, driveshaft and shocks depending upon the kit
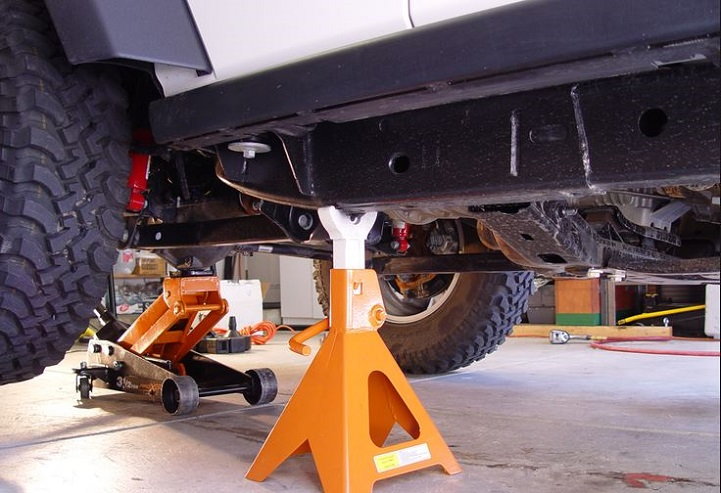
Step 1 – Lift your Jeep
This seems like a no-brainer, but you need to get your Jeep up and high. While it is still on the ground, break free the lugs on the tires so they don't spin, then raise your Jeep. If you have access to a lift, all the better; if not, you'll need a floor jack to get it lifted and some jack stands to set it on, at their highest setting. Always use jack stands when working under your JK, especially when you are working on the suspension. Always use the manufacturer's recommended jack stand locations.
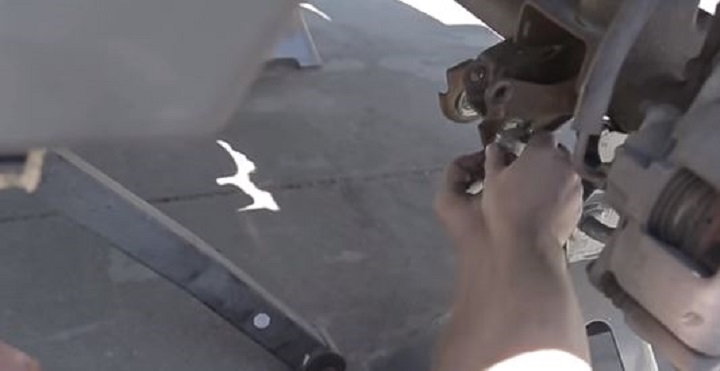
Step 2 – Remove the tires, wheels and track bar
Basically, all the old suspension components need to be removed first.
- Remove the transmission crossmember.
- Un-mount the shock beds from the front wheels. You will have to use a wrench by hand for this task.
- Remove the track bar and make sure to keep your mounting bolts and components, unless you are sure your kit comes with new ones.
- Remove the wheels.

Figure 2. Remove skid plate and then the transmission crossmember. 
Figure 3. Remove the track bar, then the springs and shock towers.
Step 3 – Remove the springs and shock towers
Once the tires are off, removing the springs and shock towers are pretty straightforward.
- Take out the shocks by removing the lower mounting bolt, as you should have already removed the tower mounting bolt.
- Once the shocks are out, the springs should be able to slide right off by lifting up and off the lower bed, then slide down out of the tower.

Step 4 – Install the new lift kit
Depending upon which lift kit you purchase, you may need to add either the supplied longer control arms or the included link ends, whichever is required with your lift.
Step 5 – Don't forget the bump stop spacer
If you are adding larger tires with your lift, be sure to use the included bump stop spacers to avoid tearing up your wheel well when hopping rocks. This will prevent the top of your tire from smashing into the top of the fender, tearing it up.
Step 6 – Install the new coils and shocks
Your lift kit contains some heavy duty spring coils that are much taller as well as much thicker than the OEM coils that you removed. This heavy duty rig is designed to not only make you sit much higher, but its compression is much tougher, allowing for the heavy hits you will take jumping over rocks. Some kits also come with heavy duty shocks; if yours did not, this is something to seriously consider when lifting your Jeep. When the shocks and the springs are installed, you will need to replace the track bar using the materials provided in your kit. Once you have the front end completed, it is a very much similar process for lifting the rear.
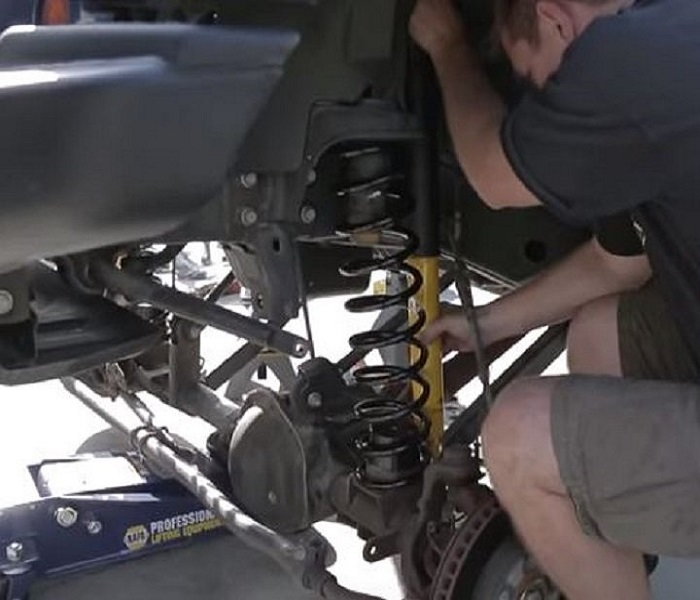
Figure 7. The new coils as well as shocks should easily slide in and mount up perfectly. 
Figure 8. Make sure to reinstall your track bar according to manufacturer specifications.
Featured Videos: Lift Kit Installation
-
Jeep Wrangler JK 4.5 Lift Kit Installation
-
Driveway DIY! Jeep Wrangler Unlimited Lift Kit Install
Lift Kit Review
There are a myriad of choices when looking for a lift kit. You have many options from slight lifts that give you an inch or two rise, up to a monster 6 inches. Some kits are just bare bones, while others include a ton of components to change out. Depending upon the kit you choose will determine how long it will take for you to change it out yourself. You may opt for a bare bones kit if you are on a limited time and budget, or a massive kit if you have the time and mechanical inclination of taking on a weekend DIY job. Some popular kits among JK owners are listed below to help your decision making go a little easier.
Skyjacker |
Teraflex |
AEV |
Rough Country | |
|---|---|---|---|---|
Price |
$940 | $4,500 | $2,000 | $350 |
Lift Size |
4" |
6" |
3.5" to 4.5" |
3" |
Ride Quality |
Soft | Hard | Soft | Bouncy |
Tire Fitment |
Up to 35" | Up to 38" | Up to 37" | up to 35" |
Best Value: Rough Country
Skyjacker
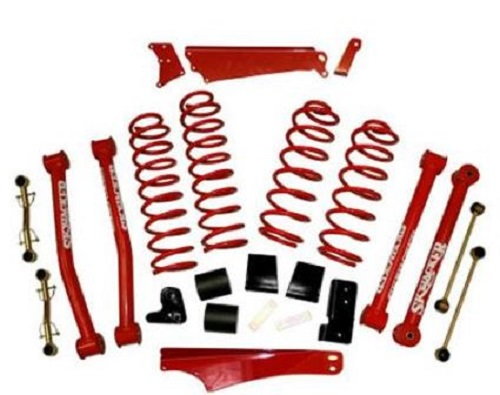
Price – $940
Lift Size – 4 inches
Ride Quality – Soft
Tire Fitment – 35 inches
A very popular lift among JK owners is the Skyjacker. Skyjacker makes lifts from 2.5 through 4 inches. Anything over the 2.5 inch lift will require an additional driveshaft and the unit described here does not include shocks, which can be obtained in a larger kit from Skyjacker or you can furnish your favorite aftermarket shocks. The fitment is great and it is an easy install. The front end will sag a little if you have extra hardware mounted, such as a winch rig. In such cases, you will need to add some spacers. Recommended for the rock hopper who wants a nice lift at a reasonable price point and likes a smoother, softer ride.
Teraflex
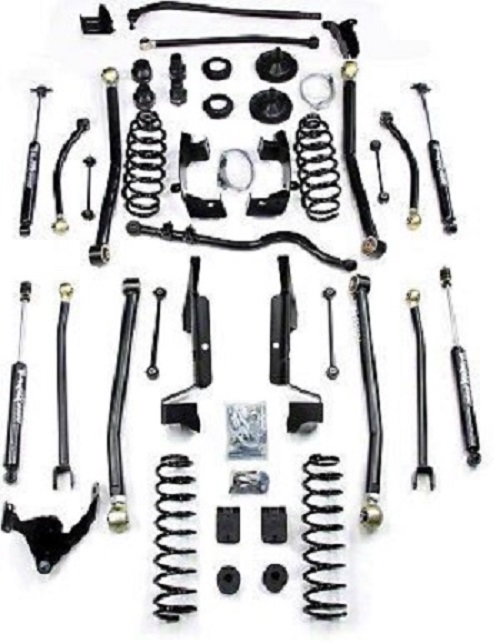
Price – $4,500
Lift Size – 6 inches
Ride Quality – Hard
Tire Fitment – 38 inches
Teraflex will give you one of the tallest rides available. With this large kit, you will need to have a lot more mechanical know-how than the other kits if you plan on doing this job on your own. Additional cutting and welding will likely be required as will be modifications to your driveshaft, unless you plan on purchasing a new aftermarket heavy duty driveshaft. Teraflex also makes shorter lifts for the JK that have received high ratings from JK owners. The 6" lift, while many JK owners will feel is excessive, will get you in and out of areas those others won't dare to run. While it is a rough rider, if you are looking at running in areas that this lift will excel, the ride probably isn't your biggest concern. Recommended for the serious off-roaders who love to sit as high as possible and take massive jumps.
AEV

Price – $2,000
Lift Size – 3.5 to 4.5 inches
Ride Quality – Soft
Tire Fitment – 37 inches
The AEV lift kits come with rave reviews from their owners. Most negative comments are in regards to a shop not installing them correctly. As far as workmanship and ride handling, the AEV can't be beat. They offer a high quality soft ride capable of almost any rock hopping adventure you want to embark. Recommended for those who want a high quality ride capable of bringing miles of smiles for the daily driver and also likes to venture off-road.
Rough Country

Price – $350
Lift Size – 3 inches
Ride Quality – Bouncy
Tire Fitment – 35 inches
Rough Country is the most economical lift out there. The low price point is very seductive to many folks. This kit gets some low marks from many JK owners who are unhappy with the ride feel on both on and off-road applications. It is really bouncy and rolls quite a bit. If you are a novice to DIY jobs, this kit is extremely easy and quick to install. If you aren't concerned too much with ride feel and are just getting your feet wet with off-roading, this may be the starter kit for you. Recommended for the novice rock hopper who just wants to see what it is all about without dropping a large amount of cash on a high quality kit.
Related Discussions
- Lift Kit Reviews - JK-Forum.com
- Rough Country 3.5 Inch Lift Kit Review - JK-Forum.com
- AEV Lift Kit, Are You Still Happy? - JK-Forum.com