Rear Seat Angle Adjustment Write-Up
 06-18-2008, 07:11 PM
#1
JK Enthusiast
Thread Starter
Join Date: Feb 2007
Location: Orlando - FL
Posts: 251
Likes: 0
Received 0 Likes
on
0 Posts
Adjusting the back seat angle to the rear
June 18, 2008
Parts:
Quantity (25) ˝” Galvanized flat washers
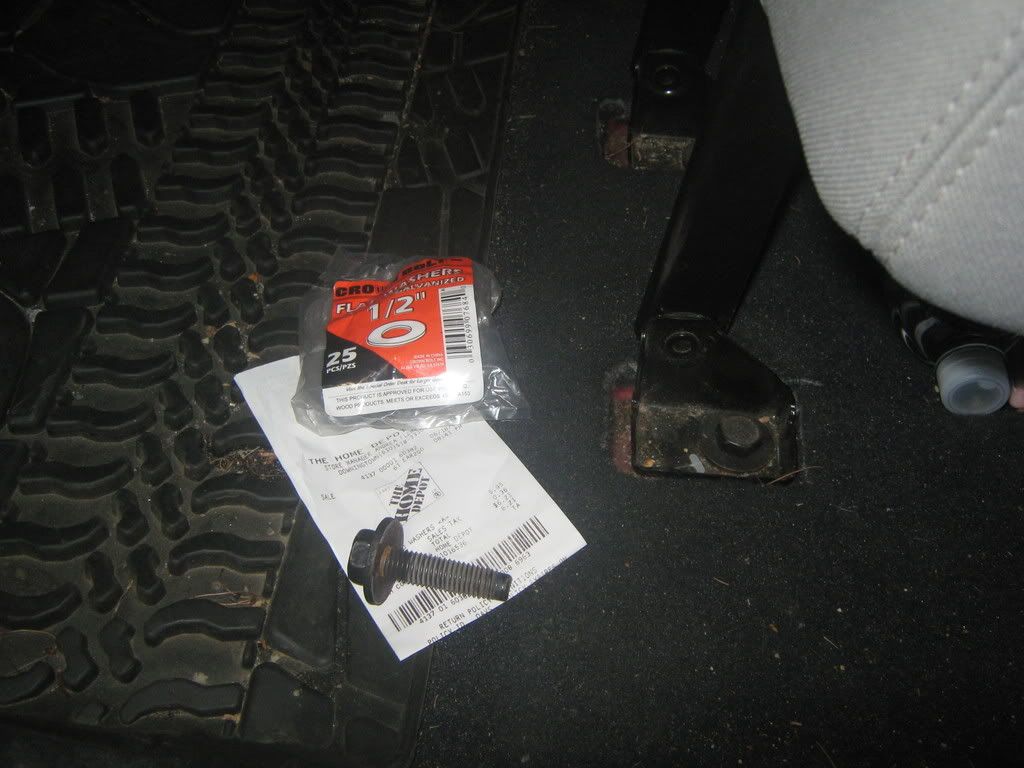 Cost:
Cost:
$6.61 at local depot
Time:
1 hour
Tools:
18mm socket with ˝” drive extension and breaker bar, or impact.
Procedure:
1. Remove all (4) of the bolts holding the seat cushion mount to the floorboard. This will require significantly more effort than expected, and the bolts are about 2.5” long.
2. Prop the seat cushion up to ease removal of seat bracket bolts.
3. Remove the (3) lower seat bracket bolts completely. This is where the breaker bar comes in handy.
4. Loosen the (3) rear seat bracket bolts approx half way.
 5. Insert (3) flat washers at each of the (3) lower seat mount bolts – behind the mounting bracket. Insert and finger tighten bolt.
6. Insert (4) flat washers at each of the (4) seat cushion mount. Insert bolt and finger tighten.
7. Check seat angle and seat belt clearances. Add or remove additional washers as desired.
8. Tighten all mounting bolts and nuts fully.
9. After 30 days re-tighten all bolts.
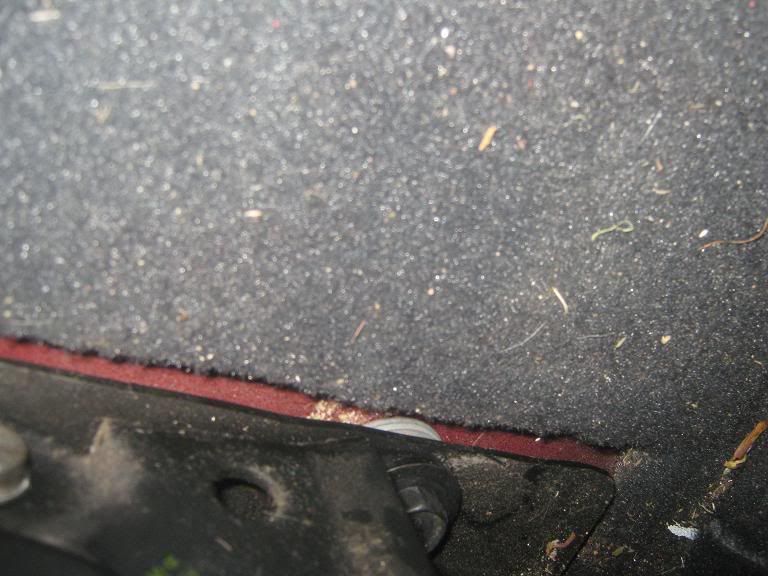
Before & After pix:
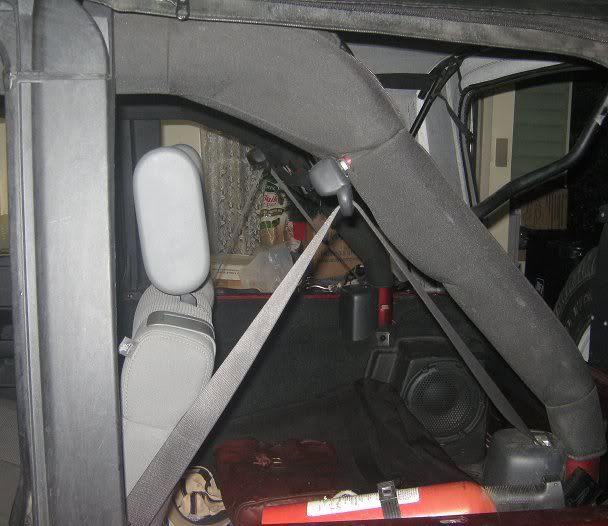
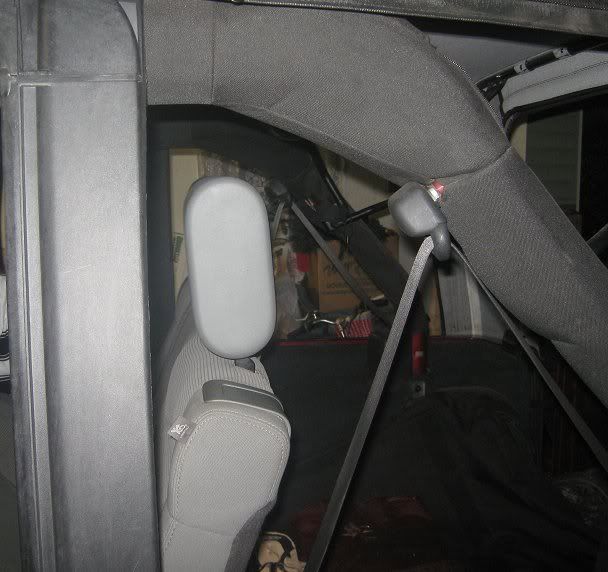
Note the distance between the "YES Essentials" tag and the soft-top support bracket has increased by an inch to 1.5 inches. It doesn't sound like much, but feels like an improvement.
Feedback:
• With a primary driver that likes to lean his seat back a fair bit, this seating adjustment allows rear seat passengers a little more space, and provides a more comfortable seating angle for longer trips.
• Also allows rear seat passengers a slightly better view of the sky instead of the soundbar.
• Under thigh support is slightly better and no longer feels like you’re about to slide off the seat when braking.
June 18, 2008
Parts:
Quantity (25) ˝” Galvanized flat washers
$6.61 at local depot
Time:
1 hour
Tools:
18mm socket with ˝” drive extension and breaker bar, or impact.
Procedure:
1. Remove all (4) of the bolts holding the seat cushion mount to the floorboard. This will require significantly more effort than expected, and the bolts are about 2.5” long.
2. Prop the seat cushion up to ease removal of seat bracket bolts.
3. Remove the (3) lower seat bracket bolts completely. This is where the breaker bar comes in handy.
4. Loosen the (3) rear seat bracket bolts approx half way.
6. Insert (4) flat washers at each of the (4) seat cushion mount. Insert bolt and finger tighten.
7. Check seat angle and seat belt clearances. Add or remove additional washers as desired.
8. Tighten all mounting bolts and nuts fully.
9. After 30 days re-tighten all bolts.
Before & After pix:
Note the distance between the "YES Essentials" tag and the soft-top support bracket has increased by an inch to 1.5 inches. It doesn't sound like much, but feels like an improvement.
Feedback:
• With a primary driver that likes to lean his seat back a fair bit, this seating adjustment allows rear seat passengers a little more space, and provides a more comfortable seating angle for longer trips.
• Also allows rear seat passengers a slightly better view of the sky instead of the soundbar.
• Under thigh support is slightly better and no longer feels like you’re about to slide off the seat when braking.
 06-18-2008, 07:54 PM
#2
JK Junkie
Join Date: Aug 2007
Location: Gilbert, AZ
Posts: 2,944
Likes: 0
Received 0 Likes
on
0 Posts
Really like this, the kids are ok with it, but any adults that sit back there always coment that it's a bit upright. I take it this does not impact the latching at all? Also, did you use any locktite on the bolts?
06-18-2008, 08:07 PM
#3
JK Freak
Join Date: Mar 2008
Location: Deeetroit , MI
Posts: 534
Likes: 0
Received 0 Likes
on
0 Posts
Josephus, NICE JOB! i've been waiting for someone to figure out an easy way to recline those things. question about safety, is the mount still strong as if it were still stock? i have kids and comfort is important, but safety is the most important to me.
thanx! looks great!
thanx! looks great!
 06-23-2008, 08:43 AM
#6
JK Enthusiast
Join Date: Jun 2007
Location: MA
Posts: 258
Likes: 0
Received 0 Likes
on
0 Posts
Josephus, NICE JOB! i've been waiting for someone to figure out an easy way to recline those things. question about safety, is the mount still strong as if it were still stock? i have kids and comfort is important, but safety is the most important to me.
thanx! looks great!
thanx! looks great!
06-23-2008, 09:00 AM
#7
JK Enthusiast
Join Date: May 2008
Location: Edmonton, Alberta
Posts: 463
Likes: 0
Received 0 Likes
on
0 Posts
I assume Step 5 is to keep the seat bottom at the same (or similar) angle, and could be skipped, resulting in a more 'office chair reclined' feel, rather than just a more angled seatback.
In terms of safety, I would probably buy new bolts that are 4-washer-thickness longer, so you've got the same amount of threads keepin the seat down.
In terms of safety, I would probably buy new bolts that are 4-washer-thickness longer, so you've got the same amount of threads keepin the seat down.
Trending Topics
06-23-2008, 09:23 AM
#8
JK Junkie
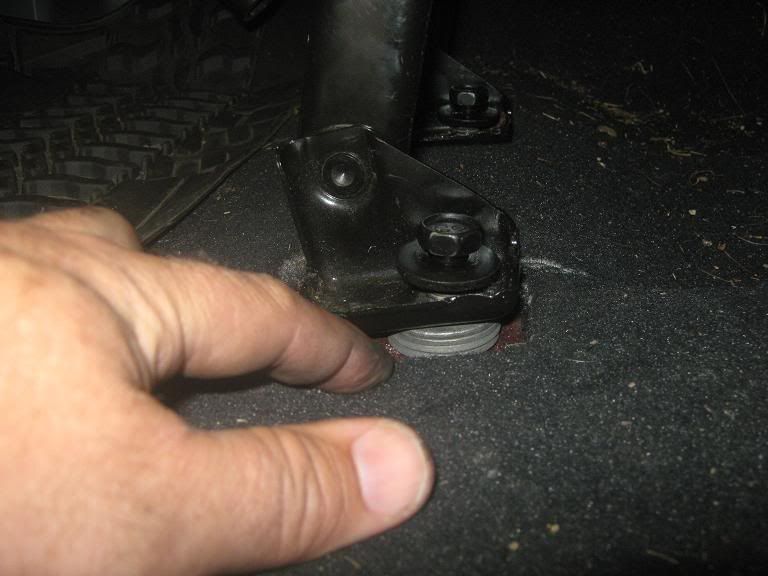
excellent idea. my only comment, The bracket that holds the seat shown here:
instead of washers, I would like to see a small block of 6061 aluminum that is the same size as the footprint of the bracket. It looks like over time, the bracket could bend, weakening the bracket. maybe we can asker the aftermarket to design a block that does the same job..
Excellent idea, and thanks for the post
 06-24-2008, 08:45 AM
#10
JK Freak
Join Date: May 2008
Location: toronto, ontario canada
Posts: 549
Likes: 0
Received 0 Likes
on
0 Posts