


My 2016 75th Anny Edition Project


Thread Starter
JK Enthusiast

Joined: Mar 2007
Posts: 159
Likes: 0
From: Sin City, NV
 My 2016 75th Anny Edition Project
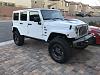
This thread is for my 2016 75th Anniversary Edition JKU. I bought it new on 4 Feb 2017 with 48 miles on it. The Jeep came with a 3.5" Rubicon Express lift kit and 315/70/17 Pro Comp Xtreme MT2's.
The first thing I installed was a set of tail light guards.
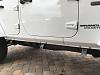
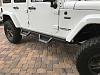
Then I removed the factory rock rails in favor of a set of dual purpose rock rails with steps (the kids were having a hard time getting in the back).
They are "MAGNUM RTS71JP" steps and can be found on Amazon. I know there are a lot of options but these seemed to fit my needs the best.
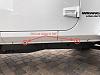
Here are some pictures of the install process. They required a little adjustment and drilling out a few holes (depending on how tight you want them to fit to the body line) but all in all were not that hard to install.
The first thing I installed was a set of tail light guards.
Then I removed the factory rock rails in favor of a set of dual purpose rock rails with steps (the kids were having a hard time getting in the back).
They are "MAGNUM RTS71JP" steps and can be found on Amazon. I know there are a lot of options but these seemed to fit my needs the best.
Here are some pictures of the install process. They required a little adjustment and drilling out a few holes (depending on how tight you want them to fit to the body line) but all in all were not that hard to install.
Thread Starter
JK Enthusiast
Joined: Mar 2007
Posts: 159
Likes: 0
From: Sin City, NV
I also installing the following:
Grab handles in the front and rear
Routing the antenna for the CB
Rear gear tray
Sway bar disconnects
Pillar Lights
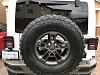
I also had to re adjust the Smittybilt tire carrier by shimming it down by the mount to get it level. It now works like it should with zero rattles or binding.
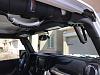
The grab handles are just an off brand special from Amazon. They fit great but the rear hardware was too short for my liking (but a trip to the hardware store fixed that).
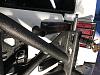
I mounted the CB antenna to the tire carrier. (I had to drill a new hole as the original one interfered with the Hi-Lift jack mounting hardware). I then routed the cable through the bare grommet in the door, then followed the factory wiring in the door. Then I just ran the cable under the carpet to the center counsel. That is where my CB will be located.
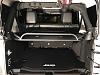
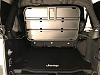
I also got the gear tray from Amazon. It fits great and was easy to install. It is also big enough that when it is down and locked it covers most of the cargo area.
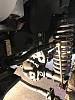
For the sway bar disconnects I went with the Metalcloak ones.
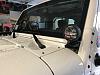
The light mounts are also Amazon specials. They did come with foam pads on the back to protect the paint and had a hole in the back to route the wire loom through. The lights I used are the Warn 3.5"'s
Grab handles in the front and rear
Routing the antenna for the CB
Rear gear tray
Sway bar disconnects
Pillar Lights
I also had to re adjust the Smittybilt tire carrier by shimming it down by the mount to get it level. It now works like it should with zero rattles or binding.
The grab handles are just an off brand special from Amazon. They fit great but the rear hardware was too short for my liking (but a trip to the hardware store fixed that).
I mounted the CB antenna to the tire carrier. (I had to drill a new hole as the original one interfered with the Hi-Lift jack mounting hardware). I then routed the cable through the bare grommet in the door, then followed the factory wiring in the door. Then I just ran the cable under the carpet to the center counsel. That is where my CB will be located.
I also got the gear tray from Amazon. It fits great and was easy to install. It is also big enough that when it is down and locked it covers most of the cargo area.
For the sway bar disconnects I went with the Metalcloak ones.
The light mounts are also Amazon specials. They did come with foam pads on the back to protect the paint and had a hole in the back to route the wire loom through. The lights I used are the Warn 3.5"'s
Thread Starter
JK Enthusiast
Joined: Mar 2007
Posts: 159
Likes: 0
From: Sin City, NV
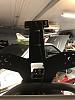
When I installed the Smittybilt tire carrier last week it never seemed to look or fit right. It did not sit level, so to fix that I used a piece of flat bar aluminum and placed it between the mount bracket and the frame towards the top of the bracket. Doing that pretty much fixed everything. I can fully open and close the door without any binding and I can push and close the rear door about as easily as when the tire was mounted on the tailgate. When it is closed it is solid and does not rattle.
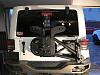
I also had to reroute the brake light wire to prevent it from getting stretched too tight.
Everything mounted up.
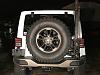
I also had to reroute the brake light wire to prevent it from getting stretched too tight.
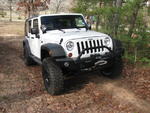
Everything mounted up.

JK Newbie
Joined: Feb 2017
Posts: 5
Likes: 0
From: Mundelein, IL
When I installed the Smittybilt tire carrier last week it never seemed to look or fit right. It did not sit level, so to fix that I used a piece of flat bar aluminum and placed it between the mount bracket and the frame towards the top of the bracket. Doing that pretty much fixed everything. I can fully open and close the door without any binding and I can push and close the rear door about as easily as when the tire was mounted on the tailgate. When it is closed it is solid and does not rattle.
Attachment 666897
I also had to reroute the brake light wire to prevent it from getting stretched too tight.
Attachment 666898
Everything mounted up.
Attachment 666899
Attachment 666897
I also had to reroute the brake light wire to prevent it from getting stretched too tight.
Attachment 666898
Everything mounted up.
Attachment 666899