


WxNerd2015's Never Ending Build -

Thread Starter
JK Enthusiast
Joined: Sep 2015
Posts: 419
Likes: 22
From: Madison Heights, MI
 Small Preview of Morimotos
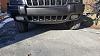
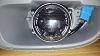
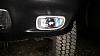
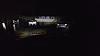
Just wanted to provide a quick update/preview for y'all on the Morimoto Fogs as there is not too much out there! I have been in touch with Ben from Rubitrux and he is currently retrofitting these fogs into his WJ and has shared some pics with me so that I can share em with you! He still needs to finish cutting/painting the lens covers for the fog light ports and reinstall them, but a pretty neat project and the light output is extremely nice! Here's the picks:
This last one is the light output from just a single fog light! Now, it is on an incline, which Ben asked me to note, and the fog needed to be adjusted down slightly, but still, that is pretty impressive for a fog I think!
I will update soon when I get mine in with a full write-up, comparison, review, etc.
This last one is the light output from just a single fog light! Now, it is on an incline, which Ben asked me to note, and the fog needed to be adjusted down slightly, but still, that is pretty impressive for a fog I think!
I will update soon when I get mine in with a full write-up, comparison, review, etc.
Last edited by WxNerd2015; Mar 1, 2016 at 06:51 PM.
Thread Starter
JK Enthusiast
Joined: Sep 2015
Posts: 419
Likes: 22
From: Madison Heights, MI
JW Speaker Freebies!
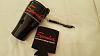
Check out what I got! My fiancé just got back from a career fair over in Wisconsin and one of the companies over there was JW, as that is there backyard! Well, she's pretty good to me and knows me all too well! (and is a Jeeper herself!) And she brought me back a few small JW freebies! Haha! 
Thread Starter
JK Enthusiast
Joined: Sep 2015
Posts: 419
Likes: 22
From: Madison Heights, MI
JW Speaker 8700 J Series Headlights and Morimoto XB LED Fog Lights Installation
For starters, I will start out by saying, I am very pleased with both of these light options, and these are impressive! The light output from these lights is truly amazing, and really does provide an added bit of safety to the Jeep as well! The Fog lights from Morimoto have such a wide viewing angle and are extremely bright with a great cut-off line, and the JWs throw so much light down the road, but the nice cut-off line with just a little extra spill over are able to light the road way better than the stock lights, but don't blind on coming drivers either! And the built in anti-flicker technology is a huge plus! I will finish off my quick summary by saying, this is absolutely one of the easiest installs I have done, with replacing all the lights only requiring to remove a few parts and only taking two hours!
So to start the installation Guide, here are the two products which I am installing, both which came from Rubitrux with a great deals:
JW Speaker 8700 J Series Headlights
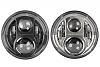
Free Shipping on JW Speaker Evolution J 8700 LED Wrangler JK Headlights; Pair
Morimoto XB LED Fog Lights w/ Smoked Lenses and the H16/5202 Adapter (for 2010+ Wranglers)
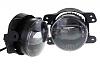
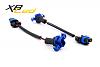
Free Shipping on Morimoto XB LED Fog Lights!
And here is the before picture before the installation started:
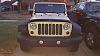
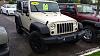
So now for the installation:
Step 1: Open the hood up and look for the 6 clips along the top edge of the grill. They will look something like this:
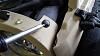
Step 2: With a knife/flat head screwdriver/trim removal tool, pry up the center of the clip like shown below, but do not force it too much to as it is a plastic piece and these pieces can easily break. For me purpose, I used a 5/32 flathead bit.
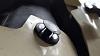
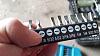
Step 3: Once you have the center pried up on all 6 of the clips, go ahead and pull the clips out of the grill. When pulled out, they will look like this:
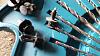
Step 4: With all of the clips removed, you then need to find the sockets for the turn signals and release the bulbs and pull then out of the grill.
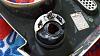
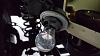
Step 5: Once the turn signals are removed, go ahead and pull he bottom part of the grill out of the snap clips which were holding it in place. Once again, these can be fragile pieces, so be gentle/careful with them, but you will have to give a good tug to get them released. The bottom side of the frame that the grill was attached to on the Jeep will look like this:
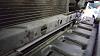
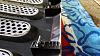
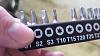
Step 6: I then grabbed a T15 torque bit, as that is the what is holding the bracket around the headlight in:
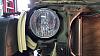
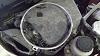
Step 7: There is a ring around the outside of the headlight which "sandwiches" the headlight to the "bucket" or housing which is holding the headlight and containing the aiming of all the headlights. Go ahead and locate the 4 screws around he chrome ring and remove them:
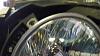
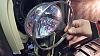
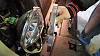
So to start the installation Guide, here are the two products which I am installing, both which came from Rubitrux with a great deals:
JW Speaker 8700 J Series Headlights
Free Shipping on JW Speaker Evolution J 8700 LED Wrangler JK Headlights; Pair
Morimoto XB LED Fog Lights w/ Smoked Lenses and the H16/5202 Adapter (for 2010+ Wranglers)
Free Shipping on Morimoto XB LED Fog Lights!
And here is the before picture before the installation started:
So now for the installation:
Step 1: Open the hood up and look for the 6 clips along the top edge of the grill. They will look something like this:
Step 2: With a knife/flat head screwdriver/trim removal tool, pry up the center of the clip like shown below, but do not force it too much to as it is a plastic piece and these pieces can easily break. For me purpose, I used a 5/32 flathead bit.
Step 3: Once you have the center pried up on all 6 of the clips, go ahead and pull the clips out of the grill. When pulled out, they will look like this:
Step 4: With all of the clips removed, you then need to find the sockets for the turn signals and release the bulbs and pull then out of the grill.
Step 5: Once the turn signals are removed, go ahead and pull he bottom part of the grill out of the snap clips which were holding it in place. Once again, these can be fragile pieces, so be gentle/careful with them, but you will have to give a good tug to get them released. The bottom side of the frame that the grill was attached to on the Jeep will look like this:
Step 6: I then grabbed a T15 torque bit, as that is the what is holding the bracket around the headlight in:
Step 7: There is a ring around the outside of the headlight which "sandwiches" the headlight to the "bucket" or housing which is holding the headlight and containing the aiming of all the headlights. Go ahead and locate the 4 screws around he chrome ring and remove them:
Last edited by WxNerd2015; Mar 12, 2016 at 06:57 PM.
Thread Starter
JK Enthusiast
Joined: Sep 2015
Posts: 419
Likes: 22
From: Madison Heights, MI
JW Speaker 8700 J Series Headlights and Morimoto XB LED Fog Lights Installation Cont.
Step 8: Once the headlight retainer ring is removed, make sure you have a hand ready to hold the headlight as it will not be held in the bucket by anything. But when you pull the headlight out, you can see the green plug with the red lock on it for the Headlights

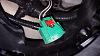
Step 9: To release the the plug from the headlight, push the red clip on the plug away from the headlight to unlock it, like shown below:
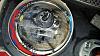
Step 10: Once the red clip is released, you can go ahead and separate the plug fro the headlight:

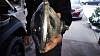
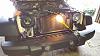
Step 11: Now go ahead and grab you new JW Speaker headlight to install. Plug the plug into the stock connector, as with these lights, it's truly plug and play, and there are groves in both the stock connector and the JW plugs to guide you on the correct way to plug them into the housing.

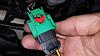
Step 12: Once you plug the new light in, make sure you test the connection so that all is secured and to know that all is functioning properly, with the low beam and the high beam.
Step 13: Once you have verified that your connection is good, line the headlight up with the guide tabs on the back of the housing into the groves on the headlight bucket. These are there to help make sure that the light goes in straight/vertical without too much hassle! The light fits extremely tight into the housing, and I had to give mine just a little bit of force to get them into the bucket, but do not push too hard as this are more plastic pieces that cane easily break! And with the headlight seated properly in the bucket, grab the headlight retainer ring and line up with the original holes and tighten the ring back down. Now you will have one headlight installed!
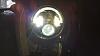
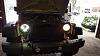
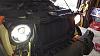
Step 14: With one headlight installed, I took the chance to reaim the one headlight to match it as close as I could to the stock headlight. The JWs beam cut-off was just a bit higher than the stock, so I had to aim the light down just a bit more. The adjustment screw is on the outside of the headlight, and also uses a T15 Torque bit. To aim the light up, you turn the screw clockwise, and to aim down, you turn the screw counterclockwise.
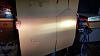
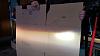
Step 15: With the aiming completed, I went ahead and followed the same steps listed above to install the driver's side headlight.

With those steps, the headlight installation is now complete, and if that is all you were installing, you would reverse the steps listed above (Steps 1-5) to reassemble the grill and button everything back up. But for me, I also did the fog lights at the same time! So my process continued!
To start off the fog light part of this installation, I will start by saying, there are a few possible ways to go about installing the fog lights, but my choice was to go with removing the least amount of parts possible. The three ways that you can do this part of the installation are to remove the entire front bumper, which requires removing the grill, as well as the "chin guard"/skid plate under the front bumper, and the cover on top between the grill and the bumper. This way give you the easiest access to the back side of the bumper and allows you to install easier, but requires you to remove the most amount of parts. The second option is to go and remove the chin guard under the front bumper, as this will give you the best visual access to the back side of the bumper without removing too much, but if you Jeep is a 2010+, then most likely there is not enough space to get the stock fog light housings out through this area and you may have to remove track bars and sway bars, which I did not want to get in to. The third option, and the one that I went with, was to just remove the cover between the grill and the bumper on top, as to fully access it, you had to remove the grill, and with doing the headlight install, that was already off! So, to continue the install process...
Step 16: You locate the cover on the top side of the bumper, and find the two torque had screws in clips holding the piece down. They will look like this:

Step 17: You need to remove the screws from the clips, and then pull the clips out. Now these are plastic screws, and the heads are easily stripped/ruined, so these you need to try and be extra careful with. For me, the one on the driver's side of the Jeep came out nice and easy, just like a normal screw, and then I was able to pop the clip right out. However, on the passenger side one, the head became stripped instantly and I had to use my 5/32 Flathead bit from before and carefully pry the edge of the screw up. This was not the best method, but it worked and I did minimal damage to the screw so I could still use it to put back into the clip!
Step 18: With the clips out of the holes, the cover is now free to move. So the next step is to remove this cover. This is done by sliding the cover forward, tilting the back side of it up past the frame on the front of the Jeep, and then pulling the back up to get it free.
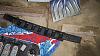
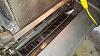
Step 9: To release the the plug from the headlight, push the red clip on the plug away from the headlight to unlock it, like shown below:
Step 10: Once the red clip is released, you can go ahead and separate the plug fro the headlight:
Step 11: Now go ahead and grab you new JW Speaker headlight to install. Plug the plug into the stock connector, as with these lights, it's truly plug and play, and there are groves in both the stock connector and the JW plugs to guide you on the correct way to plug them into the housing.
Step 12: Once you plug the new light in, make sure you test the connection so that all is secured and to know that all is functioning properly, with the low beam and the high beam.
Step 13: Once you have verified that your connection is good, line the headlight up with the guide tabs on the back of the housing into the groves on the headlight bucket. These are there to help make sure that the light goes in straight/vertical without too much hassle! The light fits extremely tight into the housing, and I had to give mine just a little bit of force to get them into the bucket, but do not push too hard as this are more plastic pieces that cane easily break! And with the headlight seated properly in the bucket, grab the headlight retainer ring and line up with the original holes and tighten the ring back down. Now you will have one headlight installed!
Step 14: With one headlight installed, I took the chance to reaim the one headlight to match it as close as I could to the stock headlight. The JWs beam cut-off was just a bit higher than the stock, so I had to aim the light down just a bit more. The adjustment screw is on the outside of the headlight, and also uses a T15 Torque bit. To aim the light up, you turn the screw clockwise, and to aim down, you turn the screw counterclockwise.
Step 15: With the aiming completed, I went ahead and followed the same steps listed above to install the driver's side headlight.
With those steps, the headlight installation is now complete, and if that is all you were installing, you would reverse the steps listed above (Steps 1-5) to reassemble the grill and button everything back up. But for me, I also did the fog lights at the same time! So my process continued!
To start off the fog light part of this installation, I will start by saying, there are a few possible ways to go about installing the fog lights, but my choice was to go with removing the least amount of parts possible. The three ways that you can do this part of the installation are to remove the entire front bumper, which requires removing the grill, as well as the "chin guard"/skid plate under the front bumper, and the cover on top between the grill and the bumper. This way give you the easiest access to the back side of the bumper and allows you to install easier, but requires you to remove the most amount of parts. The second option is to go and remove the chin guard under the front bumper, as this will give you the best visual access to the back side of the bumper without removing too much, but if you Jeep is a 2010+, then most likely there is not enough space to get the stock fog light housings out through this area and you may have to remove track bars and sway bars, which I did not want to get in to. The third option, and the one that I went with, was to just remove the cover between the grill and the bumper on top, as to fully access it, you had to remove the grill, and with doing the headlight install, that was already off! So, to continue the install process...
Step 16: You locate the cover on the top side of the bumper, and find the two torque had screws in clips holding the piece down. They will look like this:
Step 17: You need to remove the screws from the clips, and then pull the clips out. Now these are plastic screws, and the heads are easily stripped/ruined, so these you need to try and be extra careful with. For me, the one on the driver's side of the Jeep came out nice and easy, just like a normal screw, and then I was able to pop the clip right out. However, on the passenger side one, the head became stripped instantly and I had to use my 5/32 Flathead bit from before and carefully pry the edge of the screw up. This was not the best method, but it worked and I did minimal damage to the screw so I could still use it to put back into the clip!
Step 18: With the clips out of the holes, the cover is now free to move. So the next step is to remove this cover. This is done by sliding the cover forward, tilting the back side of it up past the frame on the front of the Jeep, and then pulling the back up to get it free.
Thread Starter
JK Enthusiast
Joined: Sep 2015
Posts: 419
Likes: 22
From: Madison Heights, MI
JW Speaker 8700 J Series Headlights and Morimoto XB LED Fog Lights Installation Cont.
Step 19: With the cover removed, you now have access to the back side of the bumper, and where the fog lights are attached to. There are 4 screws holding each fog light in, basically one on each of the 4 corners. Inside the bumper, it looks like this:
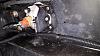
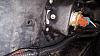
Step 20: Now, the downside to the way that I have done this, is that it is very hard to actually get a full view into the back of the bumper, as you have some space, but just a little bit more and you would really be able to see the entire assembly. Tis way, we had to guess and feel around for the precise locations of stuff, as well as using a small mirror, but it is possible, just a little trickier. So with having access into the bumper, the screws through the black housing into the bumper are what you are removing. And once these are removed, you will be able to pull the fog light housing up, still plugged into the Jeep wiring.
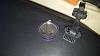
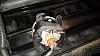
Step 21: With the fog lights pulled out of the housing, you bumper will now look like this:
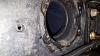
Step 22: Now with the fog light assembly out, go ahead and pull the plug out of the back of the stock housing to fully remove the stock fog light. Then you are clear to start the installation of the new fog lights.
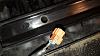
Step 23: Now, the first step to getting the new fogs in is that if you have a 2010+ Wrangler, you need an adapter harness unless you want to splice the OEM harness to attach the fog lights. I chose the adapters which were only an additional $15 for me, and fairly easy for me to install! The key with these is that you take the orange OEM plug on the Jeep, and plug that into the blue end of the adapter. There are grooves which will help you line up how you should plug these in.
Step 24: With the Morimoto fog lights, they do not install the plug from the factory with the leads in it, so when the lights come, they are just bare leads, and then the plastic plugs are included, you just have to install yourself. With this, grab the other end of the adapter harness (the black/orange end) and plug the leads into the sockets and go turn the fog lights on. For me, the initial test had the light not turn on, as I matched black wire to black wire and Red to Red, so I reversed the wires and tested again, and then it worked. Here is what the leads on the fog light look like before the plug is attached:

Step 25: So to install the plugs on the end of leads for the fog lights, one of the keys is to figure out which way the plug will attach to the adapter harness, as you want to make sure that the way you found the leads worked in Step 24, stays the same in the plug, and the plug once again has grooves so it can only be plugged in one way. Once you get the leads inserted properly, go ahead and plug the plug into the orangle/black end of the adapter, and check again to make sure that all is functioning properly.
Step 26: Now one of the other keys to this install is that the fog lights are seated within their own housing which has a vertical light adjustment, and when mine came, they were angled a bit too high. So I held the light in the fog light hole, and then pulled it back out, and used the white adjustment screw to line this up at the appropriate height before I scored them, as the adjust screw is on the bottom and once installed is hard to get to.

Step 27: Once you have all this settled, go ahead and start the installation of the fog lights to the bumper themselves. For me, this ended up being quite tricky (probably the trickiest part of this entire install), as getting the fog lights seated properly is not too difficult as there are a couple of alignment pegs which fit into the housing of the fog light bracket, but getting the screws to start threading into the holes without being able to directly see them proved very hard, but not impossible.
***As a side note, the fog lights came with new hardware (screws/washers) however I ended up just using the stock screws to reattach the new fog lights as the hardware wasn't similar enough. The stock screws attached very strongly to these fog lights, and I feel very certain that they are completely secured.***
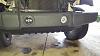
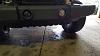
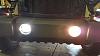
With one of the fog lights installed, this is what the Jeep looked it:
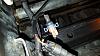
And here is what the final wiring in the bumper looked like:
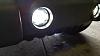
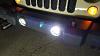
Step 28: Now, with one fog light installed, go ahead and repeat this process for the other light. The final product of those will look like this:
Step 29: Now go ahead and reverse the steps above to reassemble the cover over the bumper and the grill. Just make sure that when you reattach the grill, there is a centering peg to line up the bottom of the grill to get the clips to snap back in properly. Once you line the center peg up, there are two clips to snap in to above the turn signals roughly, so make sure those are lined up as well. Then gently use the side of you fist to pop all of the clips back in to the grill. Then, once those are all reattached and secured, go ahead and do the clips along the top part of the grill. once all is buttoned back up, it should look something like this:
Step 20: Now, the downside to the way that I have done this, is that it is very hard to actually get a full view into the back of the bumper, as you have some space, but just a little bit more and you would really be able to see the entire assembly. Tis way, we had to guess and feel around for the precise locations of stuff, as well as using a small mirror, but it is possible, just a little trickier. So with having access into the bumper, the screws through the black housing into the bumper are what you are removing. And once these are removed, you will be able to pull the fog light housing up, still plugged into the Jeep wiring.
Step 21: With the fog lights pulled out of the housing, you bumper will now look like this:
Step 22: Now with the fog light assembly out, go ahead and pull the plug out of the back of the stock housing to fully remove the stock fog light. Then you are clear to start the installation of the new fog lights.
Step 23: Now, the first step to getting the new fogs in is that if you have a 2010+ Wrangler, you need an adapter harness unless you want to splice the OEM harness to attach the fog lights. I chose the adapters which were only an additional $15 for me, and fairly easy for me to install! The key with these is that you take the orange OEM plug on the Jeep, and plug that into the blue end of the adapter. There are grooves which will help you line up how you should plug these in.
Step 24: With the Morimoto fog lights, they do not install the plug from the factory with the leads in it, so when the lights come, they are just bare leads, and then the plastic plugs are included, you just have to install yourself. With this, grab the other end of the adapter harness (the black/orange end) and plug the leads into the sockets and go turn the fog lights on. For me, the initial test had the light not turn on, as I matched black wire to black wire and Red to Red, so I reversed the wires and tested again, and then it worked. Here is what the leads on the fog light look like before the plug is attached:
Step 25: So to install the plugs on the end of leads for the fog lights, one of the keys is to figure out which way the plug will attach to the adapter harness, as you want to make sure that the way you found the leads worked in Step 24, stays the same in the plug, and the plug once again has grooves so it can only be plugged in one way. Once you get the leads inserted properly, go ahead and plug the plug into the orangle/black end of the adapter, and check again to make sure that all is functioning properly.
Step 26: Now one of the other keys to this install is that the fog lights are seated within their own housing which has a vertical light adjustment, and when mine came, they were angled a bit too high. So I held the light in the fog light hole, and then pulled it back out, and used the white adjustment screw to line this up at the appropriate height before I scored them, as the adjust screw is on the bottom and once installed is hard to get to.
Step 27: Once you have all this settled, go ahead and start the installation of the fog lights to the bumper themselves. For me, this ended up being quite tricky (probably the trickiest part of this entire install), as getting the fog lights seated properly is not too difficult as there are a couple of alignment pegs which fit into the housing of the fog light bracket, but getting the screws to start threading into the holes without being able to directly see them proved very hard, but not impossible.
***As a side note, the fog lights came with new hardware (screws/washers) however I ended up just using the stock screws to reattach the new fog lights as the hardware wasn't similar enough. The stock screws attached very strongly to these fog lights, and I feel very certain that they are completely secured.***
With one of the fog lights installed, this is what the Jeep looked it:
And here is what the final wiring in the bumper looked like:
Step 28: Now, with one fog light installed, go ahead and repeat this process for the other light. The final product of those will look like this:
Step 29: Now go ahead and reverse the steps above to reassemble the cover over the bumper and the grill. Just make sure that when you reattach the grill, there is a centering peg to line up the bottom of the grill to get the clips to snap back in properly. Once you line the center peg up, there are two clips to snap in to above the turn signals roughly, so make sure those are lined up as well. Then gently use the side of you fist to pop all of the clips back in to the grill. Then, once those are all reattached and secured, go ahead and do the clips along the top part of the grill. once all is buttoned back up, it should look something like this:
Last edited by WxNerd2015; Mar 13, 2016 at 10:29 AM.
Thread Starter
JK Enthusiast
Joined: Sep 2015
Posts: 419
Likes: 22
From: Madison Heights, MI
JW Speaker 8700 J Series Headlights and Morimoto XB LED Fog Lights Installation Cont.
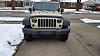
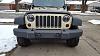
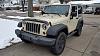
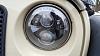
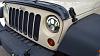
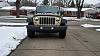
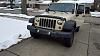
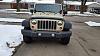
And here is the final look of the Jeep! The review on these light will come soon! But I am absolutely looking the look, and the function is just amazing! Definitely give both the headlights and the fog lights a BIG consideration to upgrade the lighting on your own Jeep! They are totally impressive!

Thread Starter
JK Enthusiast
Joined: Sep 2015
Posts: 419
Likes: 22
From: Madison Heights, MI
Tweaking the JWs
Well, I decided that I needed to do a little tweaking on the aim of the headlights after a few days of driving. And while that is possible without moving the grill, the hole is very small, and the screwdriver that I have was too big, so I ran to AutoZone and for $5 I got a T15 Torque screwdriver which is just the right size to get into the hole to reach the adjustment screw.
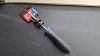
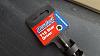
With this screwdriver, I then was able to adjust the headlight by following the grooves on the outside of each headlight housing instead of taking the entire grill off to get to the torque screws. And once again, as stated above, It is clockwise turn for adjusting it up, and counterclockwise turn for adjusting down.

With this screwdriver, I then was able to adjust the headlight by following the grooves on the outside of each headlight housing instead of taking the entire grill off to get to the torque screws. And once again, as stated above, It is clockwise turn for adjusting it up, and counterclockwise turn for adjusting down.

Thread Starter
JK Enthusiast
Joined: Sep 2015
Posts: 419
Likes: 22
From: Madison Heights, MI
The JWs fall a little bit more to the blue part of the spectrum, while the Morimotos fall a bit more to the pure white part of the spectrum. So, I know this will sound a little backwards, but this is how it appeared, but the JWs ended up showing a little more white on the door while the Morimotos were just a hint more purplish on the door. But as I stated above, when driving, and when looking head on at them, they look like they are a perfect match!
I am currently working on a post with all my comparison pictures, and I am going to take a video with my GoPro in the next week and post it up as well. But in my opinion, the JWs and Morimotos are perfect companions!