


WxNerd2015's Never Ending Build -

Thread Starter
JK Enthusiast
Joined: Sep 2015
Posts: 419
Likes: 22
From: Madison Heights, MI
 Rubitrux Decals
Had a few minutes of extra time when I got home from work yesterday, so I decided I would get my Rubitrux decals that they sent onto my Jeep! I know it's not really an "install" of anything, but just figured I would share my process of getting them on!
Here is the before picture:
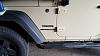
First, I grabbed some Windex and paper towel and cleaned the area I was going to be applying the decal to very thoroughly, and then made sure it was wiped completely dry as well.
Then, I line up a piece of painter's tape with the sport decal, which should be perfectly placed as it came from the factory, and either way, I want the new decal to line up properly with the existing ones. I also placed the tape marking off some of the space above the Sport decal so they would not end up too close.

I then got my level out, and figured out what the "level position" was of the sport decal, and fine tuned the tape to match that.


From there, I then grabbed the decal, and lined up it's bottom edge with the top edge of the tape, and took a quick measurement to make sure the decal was properly spaced horizontally to line up right. I then peeled the backing off of the decal, and first lightly placed it using the cover on the front of it (the white paper, not sure what to call it?). After making sure it was still lined up properly, I then started in the middle of the decal (right in between the "I" and the "T"), and using my thumb, I pressed the decal on, working in small movements and always going from the middle to the outside to make sure that there were no bubbles getting trapped. I then took a plastic, flat edged applicator, and ran that over with some pressure a few times to make sure that the decal had set.
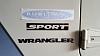
The next step was to then grab the corner of the white paper (I started at the upper left), and slowly begin to pull the backing/cover off. I made sure to take my time to make sure that all of the decal was sticking and nothing pulling up. Once it was all pulled off, the finished product looked like this:

And there ya have it! I went around and did the passenger side then too! And it looks perfect, just like it belongs there! And in my opinion, gives it a little more sporty look with the extra decal, but that is just personal taste/preference!

Here is the before picture:
First, I grabbed some Windex and paper towel and cleaned the area I was going to be applying the decal to very thoroughly, and then made sure it was wiped completely dry as well.
Then, I line up a piece of painter's tape with the sport decal, which should be perfectly placed as it came from the factory, and either way, I want the new decal to line up properly with the existing ones. I also placed the tape marking off some of the space above the Sport decal so they would not end up too close.
I then got my level out, and figured out what the "level position" was of the sport decal, and fine tuned the tape to match that.
From there, I then grabbed the decal, and lined up it's bottom edge with the top edge of the tape, and took a quick measurement to make sure the decal was properly spaced horizontally to line up right. I then peeled the backing off of the decal, and first lightly placed it using the cover on the front of it (the white paper, not sure what to call it?). After making sure it was still lined up properly, I then started in the middle of the decal (right in between the "I" and the "T"), and using my thumb, I pressed the decal on, working in small movements and always going from the middle to the outside to make sure that there were no bubbles getting trapped. I then took a plastic, flat edged applicator, and ran that over with some pressure a few times to make sure that the decal had set.
The next step was to then grab the corner of the white paper (I started at the upper left), and slowly begin to pull the backing/cover off. I made sure to take my time to make sure that all of the decal was sticking and nothing pulling up. Once it was all pulled off, the finished product looked like this:
And there ya have it! I went around and did the passenger side then too! And it looks perfect, just like it belongs there! And in my opinion, gives it a little more sporty look with the extra decal, but that is just personal taste/preference!
Thread Starter
JK Enthusiast
Joined: Sep 2015
Posts: 419
Likes: 22
From: Madison Heights, MI
New Stuff
Just ordered a couple small new editions to the Jeep from Amazon today! First, I park my Jeep in the garage, therefore, I have to take my CB antenna down every day when I get home, and put it back up every morning when I leave it I want to use it. Now, I am just fine with screwing the antenna in and out, but in the long run, I am sure it is not too good for the threads. So I came across a "push-n-twist quick disconnect" from Firestik, and for my pruposes, it seems like a good idea! So that should be here by tomorrow (gotta love prime 2 day free shipping!).
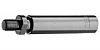
Amazon.com: FireStik K-1A Push-n-Twist quick disconnect: Automotive
I also decided that I wanted to add just a little touch of color to the rig, so I grabbed a pack of the Firestik CB End caps in Red! I think they will add a nice little touch to the Jeep, and they are a quick an easy install!

http://www.amazon.com/Firestik-Anten...ilpage_o01_s00
I will post up some pics when both of these get here and I have em on!
Amazon.com: FireStik K-1A Push-n-Twist quick disconnect: Automotive
I also decided that I wanted to add just a little touch of color to the rig, so I grabbed a pack of the Firestik CB End caps in Red! I think they will add a nice little touch to the Jeep, and they are a quick an easy install!
http://www.amazon.com/Firestik-Anten...ilpage_o01_s00
I will post up some pics when both of these get here and I have em on!
Thread Starter
JK Enthusiast
Joined: Sep 2015
Posts: 419
Likes: 22
From: Madison Heights, MI
Goodies Added!
Well, had the time to get my two cheap Amazon finds on the Jeep! First off, I added on the Firestik quick disconnect! You can see the link in the post above, but here is how the quick disconnect came:

The Installation was quick and easy for this. I screwed in and tightened down, with a wrench, the threaded end of the quick disconnect into the mount of the Jeep.
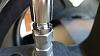
Once the disconnect is tightened down, I then grabbed my antenna and tightened in the antenna to the top of the disconnect the same way.
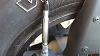
With the antenna tightened in, I then tested the separation of the quick disconnect, which could not really be done until everything was connected as this mount I think is more secure than just attaching the antenna. The mount is spring loaded, and it does require a bit of force to get it to compress, which I am very happy with, as I used to only hand tighten in my antenna as it had to come on and off a lot. Disconnect, here is what the mount and antenna look like:
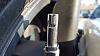
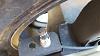
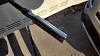
There is a grove on the side of the mount attached to the Jeep, and in the attachment on the antenna, there is a spring and a notch. The notch lines up with the groove on the mount and you push down (compressing the spring), twist clockwise, and then release, and to disconnect, you just do the reverse of that. Quite simple! Here are some additional pics:

I also changed the end cap on my Cb Antenna to a red end cap. Here is the before shot of the antenna end cap, as well as the new caps:
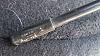

Changing these was quite simple as well. All you had to do was pull the existing cap off of the antenna, and then slide the new cap on! Simple as that! I think it looks cool too!

The Installation was quick and easy for this. I screwed in and tightened down, with a wrench, the threaded end of the quick disconnect into the mount of the Jeep.
Once the disconnect is tightened down, I then grabbed my antenna and tightened in the antenna to the top of the disconnect the same way.
With the antenna tightened in, I then tested the separation of the quick disconnect, which could not really be done until everything was connected as this mount I think is more secure than just attaching the antenna. The mount is spring loaded, and it does require a bit of force to get it to compress, which I am very happy with, as I used to only hand tighten in my antenna as it had to come on and off a lot. Disconnect, here is what the mount and antenna look like:
There is a grove on the side of the mount attached to the Jeep, and in the attachment on the antenna, there is a spring and a notch. The notch lines up with the groove on the mount and you push down (compressing the spring), twist clockwise, and then release, and to disconnect, you just do the reverse of that. Quite simple! Here are some additional pics:
I also changed the end cap on my Cb Antenna to a red end cap. Here is the before shot of the antenna end cap, as well as the new caps:
Changing these was quite simple as well. All you had to do was pull the existing cap off of the antenna, and then slide the new cap on! Simple as that! I think it looks cool too!
Thread Starter
JK Enthusiast
Joined: Sep 2015
Posts: 419
Likes: 22
From: Madison Heights, MI
Update
Just wanted to add a quick update on the lights I installed! Overall, I am so pleased and happy with these lights! They are absolutely amazing, and the improvement from stock is second to none! These have performed amazing in clear conditions, rain, fog, just about everything!
However, just wanted to share, today we had a spring snow storm moving through Michigan, with the temp sitting right about freezing, so it was a sticky/wet snow! I did some driving around with the lights on, and they performed good, however, where the light was not on (the high beam) there was a slight cover off ice that built on them. I was driving for about 30 minutes are so, and there was a thin layer of ice over most of the front, however, where the lights were lit (the low beam and fog), there was no build up of anything! This was just a simple test, and it wasn't too much of a snow storm, like in the middle winter, but still, just figured I would share!

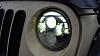
However, just wanted to share, today we had a spring snow storm moving through Michigan, with the temp sitting right about freezing, so it was a sticky/wet snow! I did some driving around with the lights on, and they performed good, however, where the light was not on (the high beam) there was a slight cover off ice that built on them. I was driving for about 30 minutes are so, and there was a thin layer of ice over most of the front, however, where the lights were lit (the low beam and fog), there was no build up of anything! This was just a simple test, and it wasn't too much of a snow storm, like in the middle winter, but still, just figured I would share!
Thread Starter
JK Enthusiast
Joined: Sep 2015
Posts: 419
Likes: 22
From: Madison Heights, MI
FINALLY! The flashlight is mounted!
Okay...okay...okay! I know this is just about one of the easiest installs to do, and easiest mods to the Jeep! But I have just been lazy and busy and have not gotten to it! So...FINALLY...without further ado...the my Mag-Lite LED 3D Cell Flashlight is mount on the side of my seat! I used the Mag-Lite wall mount brackets, the included screws, and washers and nuts. I first removed the plastic panel on the side of the seat, which was done by removing the torques screw as the front of the seat on the panel and then releasing the panel from it's clips and shift the panel backwards to get it off the back hook! I then drilled 4 holes in the plastic panel for the bracket to mount to, and I used the max size of washer that would fit to spread the load out as much as possible on the plastic and tightened the nuts down on the back of the washers. From there I then reinstalled the panel to the seat, and I was done! Extremely simple, and really cool looking! Very happy I did it! And I love the ACU Camo with the color of my Jeep! The Tan matches perfectly!
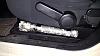


Thread Starter
JK Enthusiast
Joined: Sep 2015
Posts: 419
Likes: 22
From: Madison Heights, MI

Thread Starter
JK Enthusiast
Joined: Sep 2015
Posts: 419
Likes: 22
From: Madison Heights, MI
One More Small Touch!
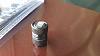
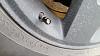
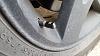
Grabbed these off of Amazon the other day! The ARB Value Stem Caps! Just tired of my Plastic ones that keep cracking and falling off! I don't know what it is with them, but they just don't stay well! So anyways, picked up some nicer ones for like $10 or something like that and free shipping, and I think they look pretty nice! And having metal caps shouldn't crack like the plastic ones!


Thread Starter
JK Enthusiast
Joined: Sep 2015
Posts: 419
Likes: 22
From: Madison Heights, MI
Freedom!
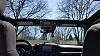
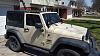
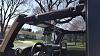
Finally winter seems to have left and this past weekend I was able to get at least the freedom panels off the Jeep fro the first time of the 2016 year! And man did it feel nice! Can't wait to get the soft top on soon!

Thread Starter
JK Enthusiast
Joined: Sep 2015
Posts: 419
Likes: 22
From: Madison Heights, MI
ARB Tire Pressure Gauge
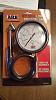
Well, picked this up off of Amazon too! Though this was supposed to be new, however smelled like smoke and had dust and finger prints all over it, so be careful buying from Amazon on this, however, I had no issue wiping it down and its gonna get dusty/dirty anyways! The ARB Gauge is the Large Dial one, which was larger than I expected! (You can see the measurement below) This is really nice to use and extremely accurate! Plus, my small pen gauge I think is broken now, so this was a really nice replacement! Plus, the nozzle that goes on the valve stem secures tightly instantly, and you don't have to remove it to let air out if needed as well! I am impressed and happy with my $20 spent!

Last edited by WxNerd2015; Apr 28, 2016 at 05:26 AM.