WxNerd2015's Never Ending Build -
 06-30-2017, 02:41 PM
#211
I am ashamed to admit it, with all the other work i have done, but this past weekend was the first time I had ever changed my own oil!  I just have always taken it to the Valvoline location by me and not thought twice about it. But I finally decided it was time to give it a try and do it myself! I ran to Autozone and got 6 quarts of 5W-20 and my filter and I was ready to go!
I quickly found out the disadvantage of doing my own oil change after one of the quick lube places though...I tried to remove the drain plug and it did not budge. I went and got a bigger wrench, still no luck, and then I gave the breaker bar one shot, and sure enough, in one turn, it rounded the enter drain plug off. I could no longer get any grip on it, and it had not bodges...WAAAAAY over torqued! So anyways, I went ahead and headed back over to Autozone and ended up with a set of grip sockets to give it a shot to remove, and over coarse, a new drain plug!
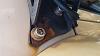
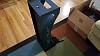
I was doubtful that these sockets would work that well, i wasn't fully understanding how they gripped but figured I had to give it a shot because I really did not have any other options. But man! Those things work great! I used the 13 mm grip socket, and slide right on the bolt snugly, like a normal socket would, but when I gave it a pull with the breaker bar, it dug into that drain plug head really good! I had to give a good bit of force, even with the breaker bar, that's how tight it was on there, but it gave a quarter turn finally and after that i could once again remove it by hand! And i am extremely impressed with the sockets! Here's what the Plug looked light after I got it out
I just have always taken it to the Valvoline location by me and not thought twice about it. But I finally decided it was time to give it a try and do it myself! I ran to Autozone and got 6 quarts of 5W-20 and my filter and I was ready to go! I quickly found out the disadvantage of doing my own oil change after one of the quick lube places though...I tried to remove the drain plug and it did not budge. I went and got a bigger wrench, still no luck, and then I gave the breaker bar one shot, and sure enough, in one turn, it rounded the enter drain plug off. I could no longer get any grip on it, and it had not bodges...WAAAAAY over torqued! So anyways, I went ahead and headed back over to Autozone and ended up with a set of grip sockets to give it a shot to remove, and over coarse, a new drain plug!
I was doubtful that these sockets would work that well, i wasn't fully understanding how they gripped but figured I had to give it a shot because I really did not have any other options. But man! Those things work great! I used the 13 mm grip socket, and slide right on the bolt snugly, like a normal socket would, but when I gave it a pull with the breaker bar, it dug into that drain plug head really good! I had to give a good bit of force, even with the breaker bar, that's how tight it was on there, but it gave a quarter turn finally and after that i could once again remove it by hand! And i am extremely impressed with the sockets! Here's what the Plug looked light after I got it out
But I just got a house a couple of weeks ago with a garage and I was so excited that I finally got to change my own oil again. I've changed it before on the Jeep, so I didn't expect any issues. Of course, I ran into the same issue you did; went to remove the drain plug, completely stuck. Breaker bar stripped it, same as you. I can't believe how much torque they put on these things. Anyways, I just left it and am going to retry this weekend with some of the gripper sockets you used. Hopefully they do the trick for me as well. Will report back if I had success. Thanks for sharing your experience!
 07-05-2017, 03:58 AM
#212
JK Enthusiast
Thread Starter
There's no shame in it really. Most of the other stuff you've done to your rig is far more complex than changing your oil. And those quick-change places are very convenient. I've always just changed my own out of preference and hearing horror stories (cracked oil pan, etc.), but living in an apartment with nowhere to do it for the past couple of years, I haven't been able to.
But I just got a house a couple of weeks ago with a garage and I was so excited that I finally got to change my own oil again. I've changed it before on the Jeep, so I didn't expect any issues. Of course, I ran into the same issue you did; went to remove the drain plug, completely stuck. Breaker bar stripped it, same as you. I can't believe how much torque they put on these things. Anyways, I just left it and am going to retry this weekend with some of the gripper sockets you used. Hopefully they do the trick for me as well. Will report back if I had success. Thanks for sharing your experience!
But I just got a house a couple of weeks ago with a garage and I was so excited that I finally got to change my own oil again. I've changed it before on the Jeep, so I didn't expect any issues. Of course, I ran into the same issue you did; went to remove the drain plug, completely stuck. Breaker bar stripped it, same as you. I can't believe how much torque they put on these things. Anyways, I just left it and am going to retry this weekend with some of the gripper sockets you used. Hopefully they do the trick for me as well. Will report back if I had success. Thanks for sharing your experience!
07-12-2017, 06:45 AM
#213
JK Enthusiast
Thread Starter
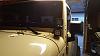
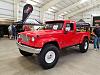
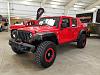
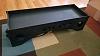
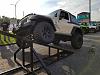
Hey guys, sorry, been missing for a while and actually done a few different projects and have some stuff to share, just haven't had much time to update! First off, I installed a hitch on my Jeep! The Hitch is the Rugged Ridge hitch and it also came with the trailer harness wiring (which I haven't installed yet). Here is the link to the where I got the hitch: Rugged Ridge 11580.51 Black Receiver Hitch Kit with Wiring Harness
This hitch is definitely a standard hit, but came at a good price from Rugged Ridge, and much better than the Mopar part, but still factory style and mounts up fairly easily! Install took me roughly an hour, as for about 30 minutes, I attempted to try and install the hitch without removing the rear bumper, which I am sure cane be done just fine with enough patients, but mine did run out. Additionally, the stock rear bumper is ridiculously easy to remove, so you might as well just get in there and remove it and save yourself the headache of trying to line bolts up right and dropping bolts, nuts, washers, etc. on your face and chipping your glasses and all that. If I were to do it again, I might consider a hitch with the nuts already welded on the piece that goes between the bumper and the hitch (the rearward facing edge), but with the hitch itself, I am very happy with fitment and quality and all that. By taking the bumper off as well, it gave me much easier access to get my torque wrench and torque the bolts to the recommended specs (85 ft/lbs). I didn't take pics as there wasn't too much to see and removing the rear bumper and installing a hitch have been covered in many write-ups and install guides already, and since the mounting locations are already there in the frame, it is ridiculously straight forward and easy to do!
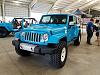
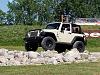
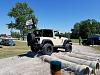
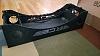
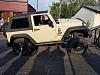
My main reason for the hitch though, as some of you may be asking why I was adding a hitch, is that we have some trips coming up soon "Up North" her in the Mitten and heading over to Lake Michigan and want to enjoy the Jeep, but definitely need the additional Cargo space that a hitch cargo rack can provide. I grabbed the hitch with the wiring though, because if I am installing the hitch, might as well prep it for towing with the wiring harness if needed! So here's some pics of the final installation:
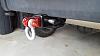
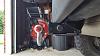
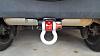
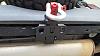
And if you might have noticed, there are a few additional pieces in the hitch too! Because...it's there, so why not use it and add to the look and function. So, I did add some additional accessories to my purchase, including the Factor55 Hitchlink 2.0 in Red, Trailer Hitch Receiver Lock, Curt 24x60 Folding Cargo Carrier, and Curt 45036 Loading Ball Mount. Each of those are linked to where I purchased them. But we also have another vehicle with a Class III hitch, so figured, a bunch of this can be interchangeable between them, so the cost benefit was there. I will post of some pics when i get the wiring done, as well as when i install the cargo basket to show how it fits! As stated though, I am extremely happy with this purchase and can't wait to try it out, plus, i just love the look of the shackle on the back like that! I think it's pretty cool! Anyways, stay tuned! I have a few more updates coming shortly as well! In addition to preparing for Jeep Fest this weekend in Frankenmuth, MI!
This hitch is definitely a standard hit, but came at a good price from Rugged Ridge, and much better than the Mopar part, but still factory style and mounts up fairly easily! Install took me roughly an hour, as for about 30 minutes, I attempted to try and install the hitch without removing the rear bumper, which I am sure cane be done just fine with enough patients, but mine did run out. Additionally, the stock rear bumper is ridiculously easy to remove, so you might as well just get in there and remove it and save yourself the headache of trying to line bolts up right and dropping bolts, nuts, washers, etc. on your face and chipping your glasses and all that. If I were to do it again, I might consider a hitch with the nuts already welded on the piece that goes between the bumper and the hitch (the rearward facing edge), but with the hitch itself, I am very happy with fitment and quality and all that. By taking the bumper off as well, it gave me much easier access to get my torque wrench and torque the bolts to the recommended specs (85 ft/lbs). I didn't take pics as there wasn't too much to see and removing the rear bumper and installing a hitch have been covered in many write-ups and install guides already, and since the mounting locations are already there in the frame, it is ridiculously straight forward and easy to do!
My main reason for the hitch though, as some of you may be asking why I was adding a hitch, is that we have some trips coming up soon "Up North" her in the Mitten and heading over to Lake Michigan and want to enjoy the Jeep, but definitely need the additional Cargo space that a hitch cargo rack can provide. I grabbed the hitch with the wiring though, because if I am installing the hitch, might as well prep it for towing with the wiring harness if needed! So here's some pics of the final installation:
And if you might have noticed, there are a few additional pieces in the hitch too! Because...it's there, so why not use it and add to the look and function. So, I did add some additional accessories to my purchase, including the Factor55 Hitchlink 2.0 in Red, Trailer Hitch Receiver Lock, Curt 24x60 Folding Cargo Carrier, and Curt 45036 Loading Ball Mount. Each of those are linked to where I purchased them. But we also have another vehicle with a Class III hitch, so figured, a bunch of this can be interchangeable between them, so the cost benefit was there. I will post of some pics when i get the wiring done, as well as when i install the cargo basket to show how it fits! As stated though, I am extremely happy with this purchase and can't wait to try it out, plus, i just love the look of the shackle on the back like that! I think it's pretty cool! Anyways, stay tuned! I have a few more updates coming shortly as well! In addition to preparing for Jeep Fest this weekend in Frankenmuth, MI!
07-19-2017, 03:22 AM
#214
JK Enthusiast
Thread Starter
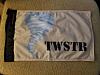
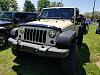
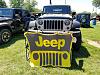
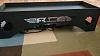
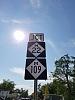
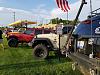
I finally got my custom ForeverWave flag! Check this out! Came out even better than I imagined and matches perfectly! I am so excited!
I also, if anyone noticed in my footer, added a new club to my profile! I was accepted into the Wolverine Wheelers here in SE MI! I got my new club decals as well, so gotta decide how I want to add em on too!
I also, if anyone noticed in my footer, added a new club to my profile! I was accepted into the Wolverine Wheelers here in SE MI! I got my new club decals as well, so gotta decide how I want to add em on too!
07-19-2017, 05:50 AM
#215
JK Enthusiast
Thread Starter
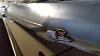
Well, this was a project that should have taken much less time than it did! I finally got some new windshield light brackets for my a-pillar lights because the bracket on the passenger side was getting very rusty, and besides, it was a cheap eBay bracket, so not exactly surprised this happened. I also was starting to get a rust streak on the paint of the Jeep from the bracket, so I wanted to stop this before it got any worse! Long story short, and I will go into it, but for the quick summary here, I bent the tabs holding the nut on the back of the windshield bracket and ended up needing to take the windshield down just to secure the new bracket to the windshield...it was a huge hassle! 7 hours to get there, and a total of 4 days then to finish the entire project (as this was not continuous work after the initial 7 hours). But anyway, let's dive into it!
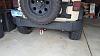
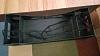
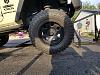
First off, i apologize, as once things started going wrong, there were not nearly as many pictures taken as I intended on, but I will still explain what I went through and such here. Here's what the old bracket looked like on the Jeep on the passenger side.
As you can see, pretty rusty, and definitely needed to have something done! And as this have always had a fitment issue anyways, i just decided it was time to upgrade to a higher quality and proper fitment bracket, which I could use all the proper hardware for as well. So I did some searching, and found a few different options for dual a-pillar mounts, but I was concerned that the Rigid Industries and Rock Hard 4x4 mounts that looked just like the eBay ones I have could come across the same fitment issue. I then looked into some options like the Rugged Ridge which use the pedestal mount and could actually be rotated, but they took up a lot more surface space, and I wanted to have a much more compact system. So after a lot more search, I found an option that got me very excited! I settled on the Off Camber Fabrications 182739 A Pillar Dual Light Mount Kit from Quadratec! It's just the small lower mount, not the entire windshield mount, that is a separate piece, but is a nice option to have the two piece separate.
These mounts were nice and compact, and they kept the lights in nearly the same sport that they were, just moved them outward slightly and got them further out of the way of the windshield, which was nice! I still had all the pedestal mount hardware from the light originally, so that part was no issue either.
I proceeded with removing the old brackets, and being very careful with the lights as I did not want to have to undo any wiring! The bracket came off very easy, and the lights detached easily from the bracket as well! From here, I them wanted to test fit the OCF brackets. So, for one, these brackets do come with a pad to place behind the bracket to protect the paint, which is very nice! So i grabbed the pad and bracket and started threading in the bolts! The upper bolt became stuck halfway in and would not turn with the wrench anymore. So I removed the bolts and brackets and just tried to thread the bolt itself into the hole, and...this is where everything went downhill. I gave it just a bit too much force, trying to get the bolt to turn a little more, and...bang, it just starts spinning in the hole and not going in or coming out...now I am really stuck! I bolt will not budge in either direction, and the only access I have is a little sliver at the edge of the bracket to try and jam something in there to hold the nut, but to no avail.
The issue is, from the upper hole on the front that holds the corner windshield bracket on, there is a square nut behind there, held in place by 4 tabs. I bent all of them. I think my initial issue came from having had to space the previous bracket out from the windshield some, and a lot of dirt, grime, and eventually rust dropped into this hold and gummed the nut up and made it impossible to turn past a certain point, and then all my force I used just moved the entire nut instead...
So at this point, I am extremely stuck, because I tried every method I could, and nothing would hold the nut good enough to get the bolt back out! So i decided the only way to get to this was to take the windshield down, however, I can't do this, because the bracket is still on the Jeep, and the bracket has to come off to lower the windshield but I can't do that until the nut is out, which it is stuck...talk about a rock and a hard place!


 So I ended up having to cut the head off the bolt, which I did not have a Dremel or cutoff wheel, so had to piece what I could back together on the Jeep, as I had taken a whole bunch of pieces off to limp it to the shop, where they ripped me off with charging $40 to cut the head off, but what could I do? I was stuck?
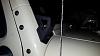
With that cut off, I was finally able to get the passenger side corner windshield bracket off...FINALLY! I proceeded following a few videos of how to remove the windshield on YouTube, there some pretty good ones that give enough info to figure it out! But it did involve removing all the side trim, the visors, my GraBars, and a few bolts, but locally the wiring was just long enough on the sPod to not have to remove anything there! Once all the proper bolts are removed, you push up with a good amount of force, BUT NOT TOO MUCH, on the windshield frame not the upper corner brackets! And you will hear the windshield frame release from the clip! It definitely helps to have a second person on the other side to do it at the same time! OH! And don't forget to first remove your windshield wipers as well before lower the windshield! Man there was a lot to remove to do this! But once all of that is done, I was able to drop the windshield and fully see the issue I caused!
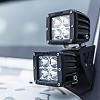
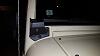
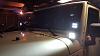
As you can see in the second picture, those tabs are supposed to make a box to hold the square not and be perpendicular to the metal they are attached to, but are no where close to that anymore. But with the nut free as well, I grabbed some vice grips and tried to remove the square nut from the bolt head...and of coarse, no luck! It's stuck on there good and not even budging a little! So off to Home Depot we go, and after an unsuccessful search and calls around, nobody carries metric threaded square nuts, and the dealer wasn't an option as it was Sunday! Even Amazon said it would be a month before I would receive them! So now it's time to improvise! I had an idea of, if I could get a wingnut with the correct thread pattern and wedge it in on an angle to the tabs and held it with some tape until it threaded far enough int the bolt, that that may just work! And really, this was my last option! So I did just that, and miraculously, everything stayed in place as I folded the windshield back up! And before putting anything else back together, grabbed my light mount bracket, and a new bolt, and started carefully threading the bolt in, as to not push the wingnut out of the edges of the tabs, as the wings fit perfectly into the gaps at the corners of the tabs! And once it got tight enough, the wingnut, with the pressure from the threads of the bolt, held itself in and I was able to proper tighten the bolt! As you can image, this is about 6-6 1/2 hours into what should have been a 1-2 hour project, but this felt like a huge victory! And I was so happy! Here's what the mount looked like on!
And with getting the bracket in place properly, I decided to call it a day and just work on getting the Jeep back to a derivable condition and button everything back up, along with placing the bracket on the other side! Oh, and with all this extra work, I forget to mention, I did have to undo the wiring to all the lights so I could remove them! But anyways, I was all buttoned back up and was able to drive the Jeep again and everything was back in it's place that needed to be on the Jeep!
So I came back the next day and started working on getting the lights attached to the "U-Brackets" so that I could use the pedestal mounts, but of coarse, having this project have every possible thing go wrong...The hardware that I had used to mount the upper lights (because the eBay LEDs I got were sent with the wrong hardware), would not work with the new mounting method! So back to Home Depot I go, and I was able to find the exact hardware I used to mount the lower lights for the upper lights, and that did do the trick! Issue was that the nut i had was too big for the gap to compress to the new bracket enough. It would on the other mount because the mount slide into the light slightly differently. but regardless, I managed to get the lights all mounted onto their brackets, and then the mounts for them on the Jeep without too much more issue!
To the last step, and foolish me, I thought I was finally done with issues with just having to wire the lights back up! Since this was already done basically, I just had to splice 8 wires back together, no big deal! However...I finish light number 3, and move to light number 4...and guess what? No more splices left! Yep...this project just would not end! So, packed it up for the night, and next day, on the way home from work, got some more splices and was able to finally finish this dang project!
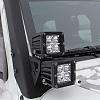
So...I apologize for the long rants and complaining and lack of pictures, but this project was definitely much more of a hassle than it should have been, but I am very happy it is done, and I am extremely happy with the end product! I know the lights, wiring, etc. are all the same, but the movement of the lights a little further to the outside of the Jeep, and moving the flood a bit lower and spots a bit higher has made a huge difference when I hit the lights! There is much less light throw on the hood in front of me, and much more throw on the spots down the road, as well as no interference on the passenger side wiper at all! I would highly recommend the OCF mounts! They are quality built and I really love how they look and fit! And I am very happy for that because I will never be removing these again, as it would just be a huge hassle! But once again, highly recommend!
And if any of you have any further questions or want to see something a bit more, go ahead and ask, as I am sure in my frustration, I am forgetting information just because I want to block most of this struggle out, and I know I did not take too many pictures!
First off, i apologize, as once things started going wrong, there were not nearly as many pictures taken as I intended on, but I will still explain what I went through and such here. Here's what the old bracket looked like on the Jeep on the passenger side.
As you can see, pretty rusty, and definitely needed to have something done! And as this have always had a fitment issue anyways, i just decided it was time to upgrade to a higher quality and proper fitment bracket, which I could use all the proper hardware for as well. So I did some searching, and found a few different options for dual a-pillar mounts, but I was concerned that the Rigid Industries and Rock Hard 4x4 mounts that looked just like the eBay ones I have could come across the same fitment issue. I then looked into some options like the Rugged Ridge which use the pedestal mount and could actually be rotated, but they took up a lot more surface space, and I wanted to have a much more compact system. So after a lot more search, I found an option that got me very excited! I settled on the Off Camber Fabrications 182739 A Pillar Dual Light Mount Kit from Quadratec! It's just the small lower mount, not the entire windshield mount, that is a separate piece, but is a nice option to have the two piece separate.
These mounts were nice and compact, and they kept the lights in nearly the same sport that they were, just moved them outward slightly and got them further out of the way of the windshield, which was nice! I still had all the pedestal mount hardware from the light originally, so that part was no issue either.
I proceeded with removing the old brackets, and being very careful with the lights as I did not want to have to undo any wiring! The bracket came off very easy, and the lights detached easily from the bracket as well! From here, I them wanted to test fit the OCF brackets. So, for one, these brackets do come with a pad to place behind the bracket to protect the paint, which is very nice! So i grabbed the pad and bracket and started threading in the bolts! The upper bolt became stuck halfway in and would not turn with the wrench anymore. So I removed the bolts and brackets and just tried to thread the bolt itself into the hole, and...this is where everything went downhill. I gave it just a bit too much force, trying to get the bolt to turn a little more, and...bang, it just starts spinning in the hole and not going in or coming out...now I am really stuck! I bolt will not budge in either direction, and the only access I have is a little sliver at the edge of the bracket to try and jam something in there to hold the nut, but to no avail.
The issue is, from the upper hole on the front that holds the corner windshield bracket on, there is a square nut behind there, held in place by 4 tabs. I bent all of them. I think my initial issue came from having had to space the previous bracket out from the windshield some, and a lot of dirt, grime, and eventually rust dropped into this hold and gummed the nut up and made it impossible to turn past a certain point, and then all my force I used just moved the entire nut instead...
So at this point, I am extremely stuck, because I tried every method I could, and nothing would hold the nut good enough to get the bolt back out! So i decided the only way to get to this was to take the windshield down, however, I can't do this, because the bracket is still on the Jeep, and the bracket has to come off to lower the windshield but I can't do that until the nut is out, which it is stuck...talk about a rock and a hard place!
So I ended up having to cut the head off the bolt, which I did not have a Dremel or cutoff wheel, so had to piece what I could back together on the Jeep, as I had taken a whole bunch of pieces off to limp it to the shop, where they ripped me off with charging $40 to cut the head off, but what could I do? I was stuck?With that cut off, I was finally able to get the passenger side corner windshield bracket off...FINALLY! I proceeded following a few videos of how to remove the windshield on YouTube, there some pretty good ones that give enough info to figure it out! But it did involve removing all the side trim, the visors, my GraBars, and a few bolts, but locally the wiring was just long enough on the sPod to not have to remove anything there! Once all the proper bolts are removed, you push up with a good amount of force, BUT NOT TOO MUCH, on the windshield frame not the upper corner brackets! And you will hear the windshield frame release from the clip! It definitely helps to have a second person on the other side to do it at the same time! OH! And don't forget to first remove your windshield wipers as well before lower the windshield! Man there was a lot to remove to do this! But once all of that is done, I was able to drop the windshield and fully see the issue I caused!
As you can see in the second picture, those tabs are supposed to make a box to hold the square not and be perpendicular to the metal they are attached to, but are no where close to that anymore. But with the nut free as well, I grabbed some vice grips and tried to remove the square nut from the bolt head...and of coarse, no luck! It's stuck on there good and not even budging a little! So off to Home Depot we go, and after an unsuccessful search and calls around, nobody carries metric threaded square nuts, and the dealer wasn't an option as it was Sunday! Even Amazon said it would be a month before I would receive them! So now it's time to improvise! I had an idea of, if I could get a wingnut with the correct thread pattern and wedge it in on an angle to the tabs and held it with some tape until it threaded far enough int the bolt, that that may just work! And really, this was my last option! So I did just that, and miraculously, everything stayed in place as I folded the windshield back up! And before putting anything else back together, grabbed my light mount bracket, and a new bolt, and started carefully threading the bolt in, as to not push the wingnut out of the edges of the tabs, as the wings fit perfectly into the gaps at the corners of the tabs! And once it got tight enough, the wingnut, with the pressure from the threads of the bolt, held itself in and I was able to proper tighten the bolt! As you can image, this is about 6-6 1/2 hours into what should have been a 1-2 hour project, but this felt like a huge victory! And I was so happy! Here's what the mount looked like on!
And with getting the bracket in place properly, I decided to call it a day and just work on getting the Jeep back to a derivable condition and button everything back up, along with placing the bracket on the other side! Oh, and with all this extra work, I forget to mention, I did have to undo the wiring to all the lights so I could remove them! But anyways, I was all buttoned back up and was able to drive the Jeep again and everything was back in it's place that needed to be on the Jeep!
So I came back the next day and started working on getting the lights attached to the "U-Brackets" so that I could use the pedestal mounts, but of coarse, having this project have every possible thing go wrong...The hardware that I had used to mount the upper lights (because the eBay LEDs I got were sent with the wrong hardware), would not work with the new mounting method! So back to Home Depot I go, and I was able to find the exact hardware I used to mount the lower lights for the upper lights, and that did do the trick! Issue was that the nut i had was too big for the gap to compress to the new bracket enough. It would on the other mount because the mount slide into the light slightly differently. but regardless, I managed to get the lights all mounted onto their brackets, and then the mounts for them on the Jeep without too much more issue!
To the last step, and foolish me, I thought I was finally done with issues with just having to wire the lights back up! Since this was already done basically, I just had to splice 8 wires back together, no big deal!
However...I finish light number 3, and move to light number 4...and guess what? No more splices left! Yep...this project just would not end! So, packed it up for the night, and next day, on the way home from work, got some more splices and was able to finally finish this dang project! So...I apologize for the long rants and complaining and lack of pictures, but this project was definitely much more of a hassle than it should have been, but I am very happy it is done, and I am extremely happy with the end product! I know the lights, wiring, etc. are all the same, but the movement of the lights a little further to the outside of the Jeep, and moving the flood a bit lower and spots a bit higher has made a huge difference when I hit the lights! There is much less light throw on the hood in front of me, and much more throw on the spots down the road, as well as no interference on the passenger side wiper at all! I would highly recommend the OCF mounts! They are quality built and I really love how they look and fit! And I am very happy for that because I will never be removing these again, as it would just be a huge hassle! But once again, highly recommend!
And if any of you have any further questions or want to see something a bit more, go ahead and ask, as I am sure in my frustration, I am forgetting information just because I want to block most of this struggle out, and I know I did not take too many pictures!
07-19-2017, 10:09 AM
#216
JK Enthusiast
Thread Starter
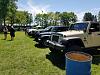
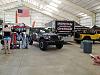
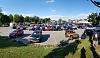
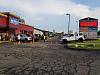
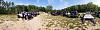
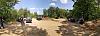
This past Saturday was the S&B Jeep Fest up in Frankenmuth, MI! This was the 3rd annual, and my second time attending! It was such a blast! I even let me fiance and my cousin both drive the Jeep on the coarse they have a little bit! But way more Jeeps than last year and loved the new venue too! Here's some of the pics from the day!

09-18-2017, 04:03 AM
#217
JK Enthusiast
Thread Starter
Hey Guys, sorry I have been missing so long! Traveling, Wedding Planning, man...it takes its told and leaves no time at all! Luckily, just over a month until the wedding, so after that I will definitely have more free time, but right now is the final push to the wedding and finishing off honeymoon plans too! But anyways, when to give some quick updates about the Jeep and other related stuff, but still, not too much too much to report!
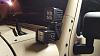
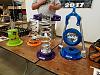
First off, I was able to get some new Jeep related goodies! First off, a new key rack from Jeep Fest! And man does it look great!

Also, stopped by the Ace Engineering Jeeps and Java/Garage Sale and picked a cool tool caddy!
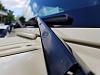
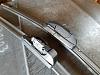
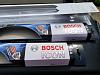
Lastly, I also got new wipers, as one, mine were getting pretty worn and weren't clearing all that great, so i was due, but also, had some sort of chunk of rubber fling up off the expressway while I was driving and smack the wiper arm and blade. It broke the clip on the wiper holding it to the arm, and left a small dent on the wiper arm. Nothing that needs to be replaced, but I didn't even see what the debris was it shot up so quick! Just glad it didn't hit the windshield and do damage!
First off, I was able to get some new Jeep related goodies! First off, a new key rack from Jeep Fest! And man does it look great!
Also, stopped by the Ace Engineering Jeeps and Java/Garage Sale and picked a cool tool caddy!
Lastly, I also got new wipers, as one, mine were getting pretty worn and weren't clearing all that great, so i was due, but also, had some sort of chunk of rubber fling up off the expressway while I was driving and smack the wiper arm and blade. It broke the clip on the wiper holding it to the arm, and left a small dent on the wiper arm. Nothing that needs to be replaced, but I didn't even see what the debris was it shot up so quick! Just glad it didn't hit the windshield and do damage!
09-18-2017, 05:24 AM
#218
JK Enthusiast
Thread Starter
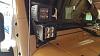
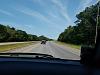
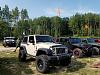
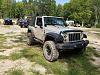
TWSTR has also been having some fun lately too and had some great trips! Here's some highlights of the trips:
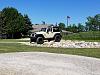
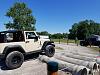
"Up North" here in Michigan to Sleeping Bear Dunes. And FYI, the cargo basket worked excellent, not shaking or rattling at all, and no extension needed with the stock hitch, could only open the trunk so far though, so if you want access to the trunk, you may want the extension, but other than that, I was pleasantly surprised and really happy!


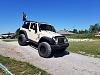
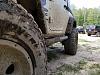
After that, TWSTR and I had some fun at the Detroit Burger Bar doing a little flexing, and no, not disconnected, but were just havin some fun, so didn't bother!

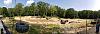
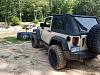
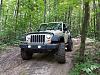
And lastly, had a great Trip with the Wolverine Wheelers up to Rocks and Valleys ORV Park in Harrison Michigan! First time there, and might be my new favorite park! Wasn't crowded at all, and the trails were great! Have a video of this coming shortly!

And I will post up some videos soon too!
"Up North" here in Michigan to Sleeping Bear Dunes. And FYI, the cargo basket worked excellent, not shaking or rattling at all, and no extension needed with the stock hitch, could only open the trunk so far though, so if you want access to the trunk, you may want the extension, but other than that, I was pleasantly surprised and really happy!
After that, TWSTR and I had some fun at the Detroit Burger Bar doing a little flexing, and no, not disconnected, but were just havin some fun, so didn't bother!
And lastly, had a great Trip with the Wolverine Wheelers up to Rocks and Valleys ORV Park in Harrison Michigan! First time there, and might be my new favorite park! Wasn't crowded at all, and the trails were great! Have a video of this coming shortly!
And I will post up some videos soon too!
09-30-2017, 03:17 PM
#219
JK Enthusiast
Thread Starter
Just had a crazy issue this morning! So I am getting my fianc�'s car ready for her trip, and my normal compressor was buried too far im the garage, so I just grabbed the hose for the compressor on my Jeep and used that to fill her tires up! I left my Jeep running while I did it, and when done, I turned the key off in the Jeep, and pulled it out of the ignition, then realized, the Jeep was still running with the ignition in off and the key out of the Jeep! I'll save too much longer of a story, but after 30 seconds, would shut off on its own! Tried driving it around, pulled the negative battery cable off to reset the computers, nothing worked! Then realized, there was no audio on the radio, and I had had a couple times this week that the audio shut off for a minute and then came back! I went to the amp I have in the trunk, and saw it didn't have power, and actually the power Wire and output wire for the sound bar Passenger side speaker were both 90% out of the connection on the amp and were arcing! Put them back in and tightened all connections, and the issue was fixed! Can't believe that was causing the Jeep not to shut off, but extremely dangerous and could have caused a much bigger issue, so happy I found it! Just a crazy experience!
01-25-2018, 03:50 AM
#220
JK Enthusiast
Thread Starter
Ok, so I have been missing for quite a while here now, but has been a very busy time for me. In October, I got married, and hen went on a few week honeymoon, I had some big projects at work and had to travel a bit, we have had the holidays, and my wife and I rescued a pup! Just been a lot happening, but I still have some good updates on the Jeep too! So There will be a few posts coming in over the next day here as I catch back up and jump back on the forum here! But just wanted to give a quick update as to what's coming shortly!