


WxNerd2015's Never Ending Build -

Thread Starter
JK Enthusiast
Joined: Sep 2015
Posts: 419
Likes: 22
From: Madison Heights, MI
 Bestop Trektop NX
Just wanted to show you a quick couple looks as what is coming next on my forum! Back in June I got a Bestop Trektop NX which I paid about $600 for, but I wanted to be able to have the top go on and off easier in the summer so I could actually enjoy my Jeep how it was meant to be enjoyed! But I still wanted to know that I had some sort of cover ready to go, just in case! So in the next few days hopefully, there will be a write up for the installation process, as well as a review and functions of the Trektop! Here's a few picks of how it looks though! And I would like to say, 5 months now down the road with this top, and I am extremely impressed!


Thread Starter
JK Enthusiast
Joined: Sep 2015
Posts: 419
Likes: 22
From: Madison Heights, MI
Just another little tidbit to add to my Jeep collection here! My fiance, for my birthday last March, got me a nice Jeep hat! She actually searched and found one the same colors as my Jeep! Since I am going with the whole black and tan look, she found my a Jeep hat with the exact matching colors! With the hat being black, and the letters the same tan as my Jeep! And as you can tell, it has been well worn already!

Thread Starter
JK Enthusiast
Joined: Sep 2015
Posts: 419
Likes: 22
From: Madison Heights, MI
Jeep 2011 Wrangler Stone & Bug Deflector Part #: 50169 Install
Well, ExtremeTerrain and UPS came through pretty fast yesterday! I got home from work and my WeatherTech Bug Guard/Rock Deflector was sitting on the porch!

First off, I opened up the box to see what all I got, and found just a few simple things, which is exactly what I was looking for! I found the deflector itself (wrapped in shrink wrap and ends protected by a bit of bubble wrap), the directions (which this is a pretty straight forward install so…no exactly needed, but good!), and a small bag with 4 screws/nuts/washers, 2 alcohol pads, and 2 pairs of bumpers (the clear silicone bubbles which you stick on the vehicle in places the deflector may bump/rub the vehicle.


So first off, I went and tore open the shrink wrap and took the deflector out to test fit and make sure all was ok before I actually got into the installation. The fit is extremely straight forward and I would even say almost idiot proof! Which is extremely good, as their directions are a bit lacking, and the diagrams absolutely suck, and most don’t even apply for the Wranglers as they are generic directions! WeatherTech has this engineering, design, and built perfectly to fit like a glove to the front of the Jeep! There is a lip at the front edge of the hood just on the underside, and there is a corresponding groove the deflector itself, and these two fit seamlessly together, making the front to back placement of the deflector a breeze and no brainer as all you have to do is just push the deflector up into the groove and it will be secured there! The only adjust you have to worry about is the horizontal placement of the deflector, making sure that it is even left and right, which is not that hard of a task to do either.
So with the test fit confirmed and everything seeming straight forward and ready to go, I started the install!
1. I grabbed some paper towel and Windex (as I did not have time to wash the whole Jeep, I just needed a few spots cleaned) and wiped down the areas where things would be stuck to, such as the top edge of the grill where the deflector could make contact with and I wanted to put a bumper on either side there, and the front edge of the hood and the underside of the front of the hood where the deflector will be stuck to with the automotive 3M tape.


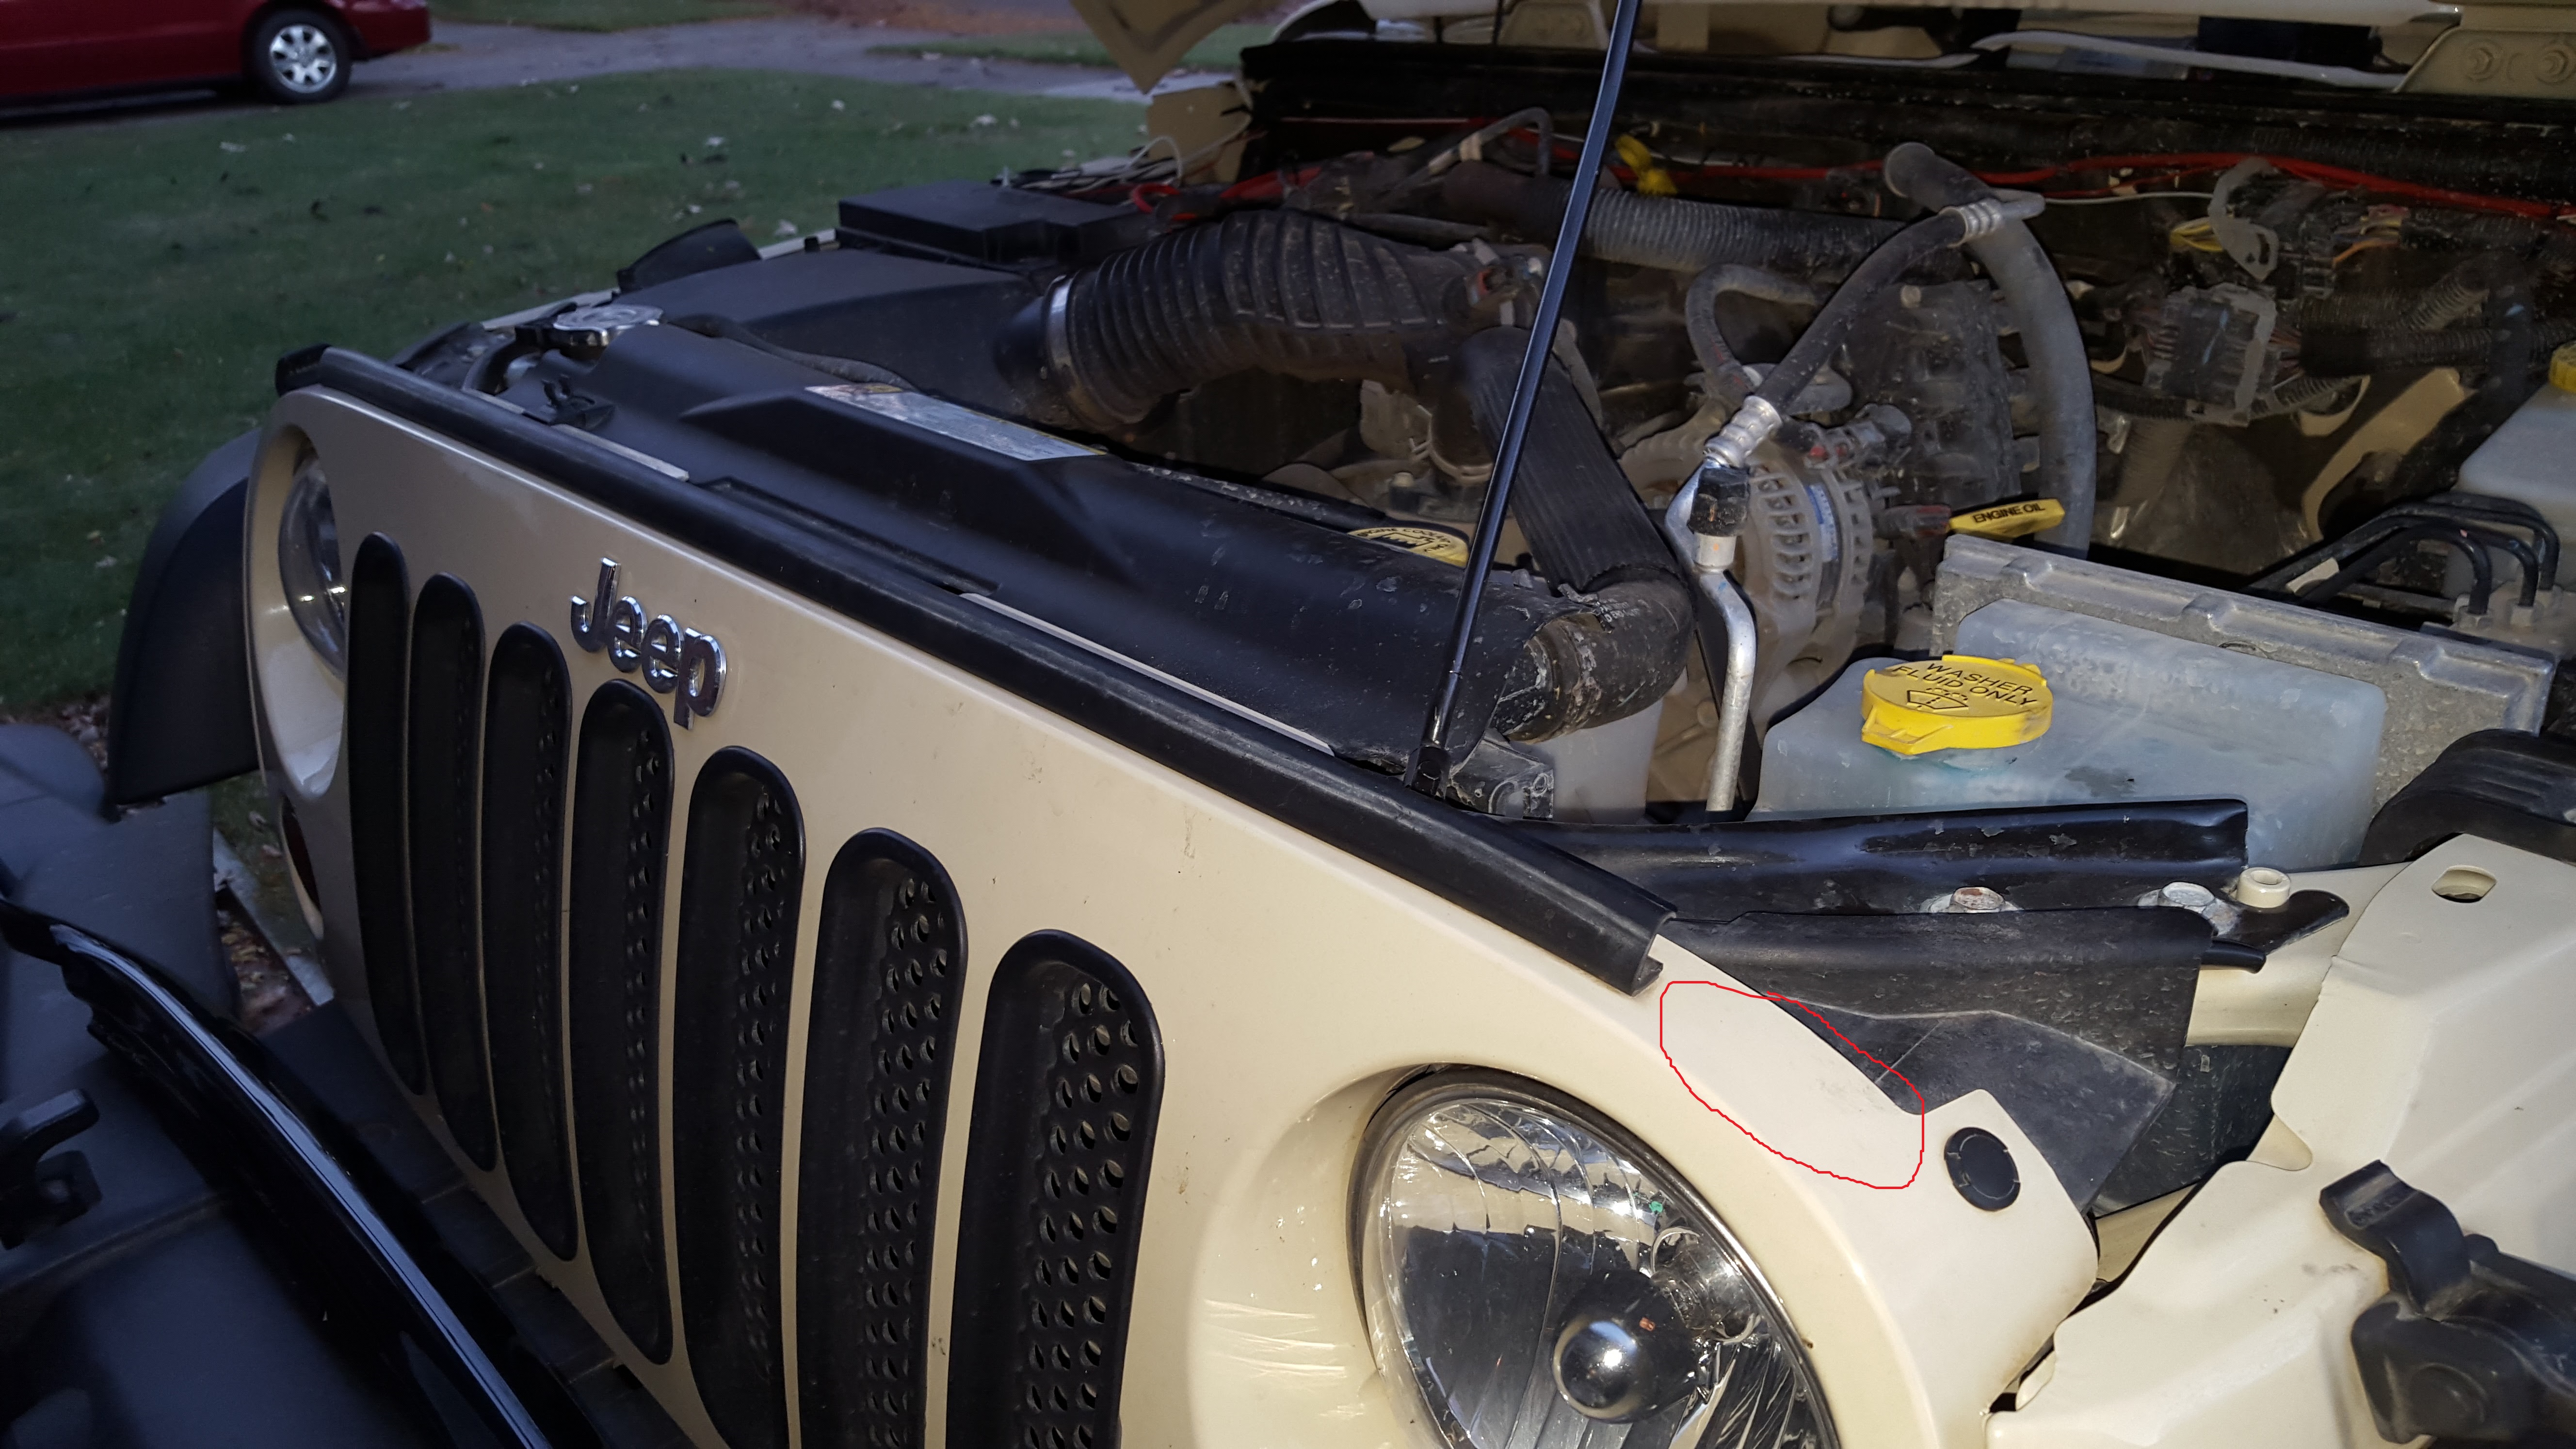
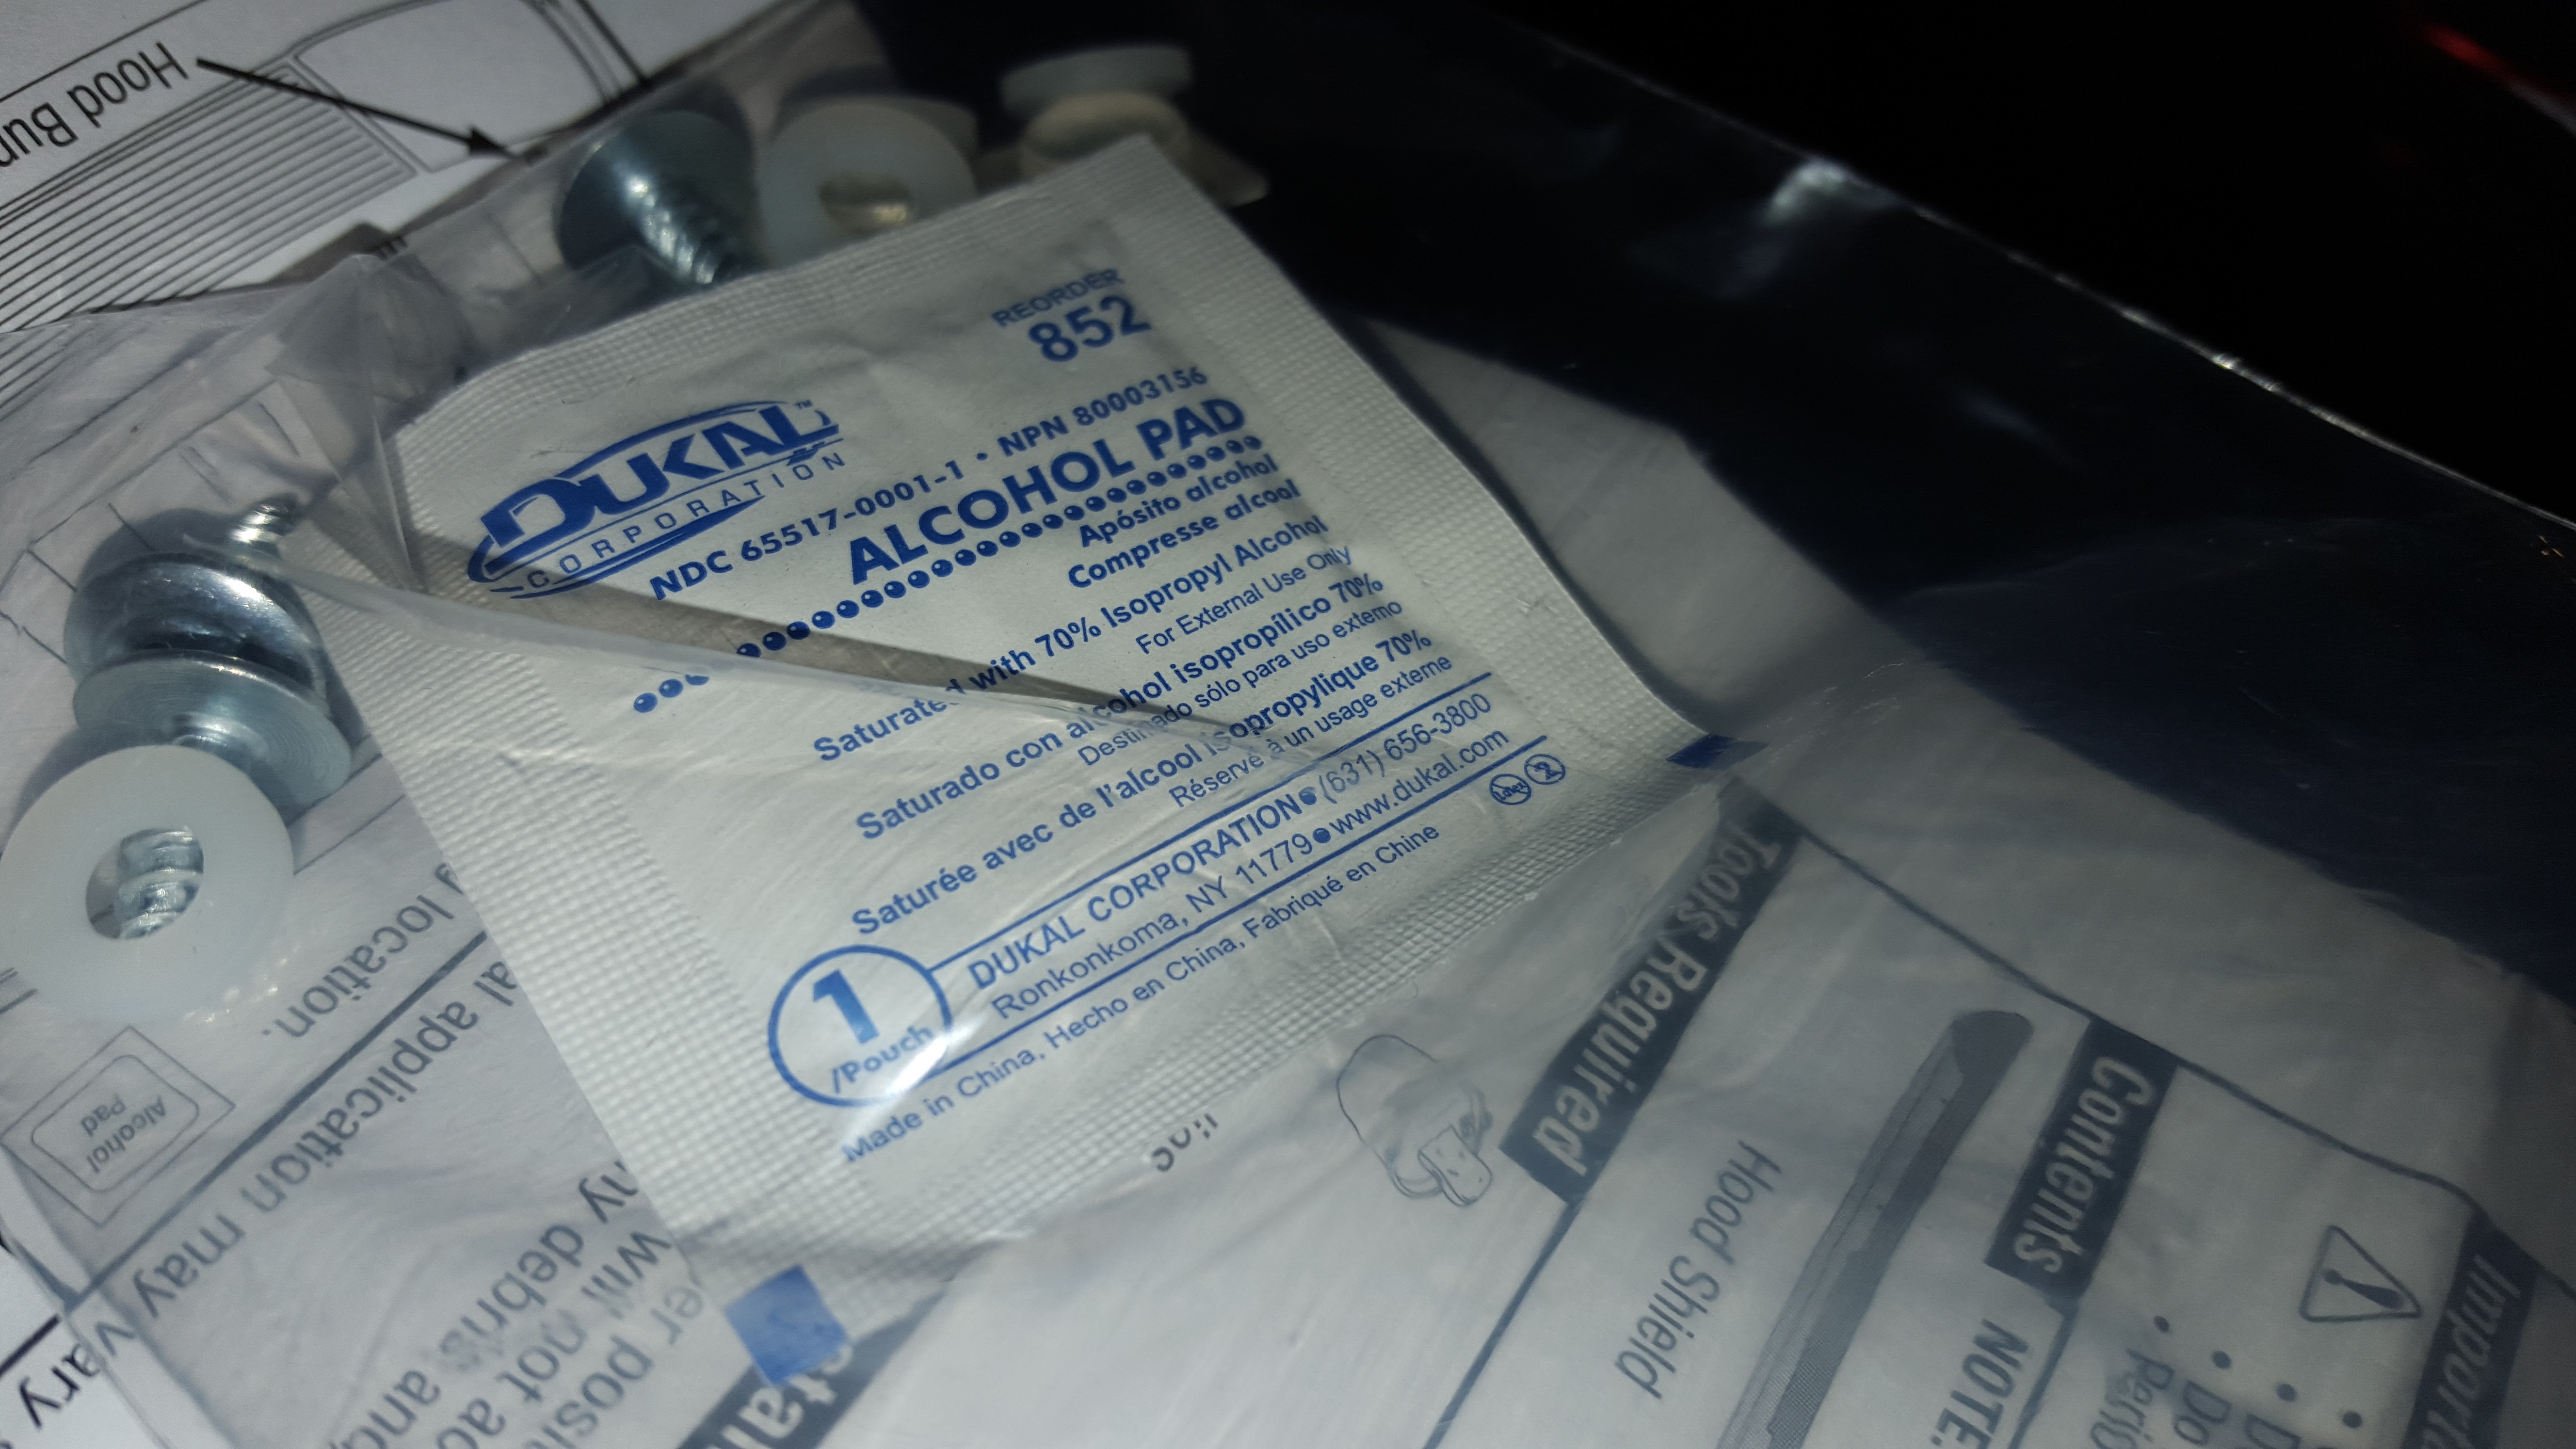
2. Once sprayed and wiped with Windex 3 or 4 times to ensure everything was completely clean, I took one of the include alcohol wipes and wiped down the areas that I just cleaned with Windex.
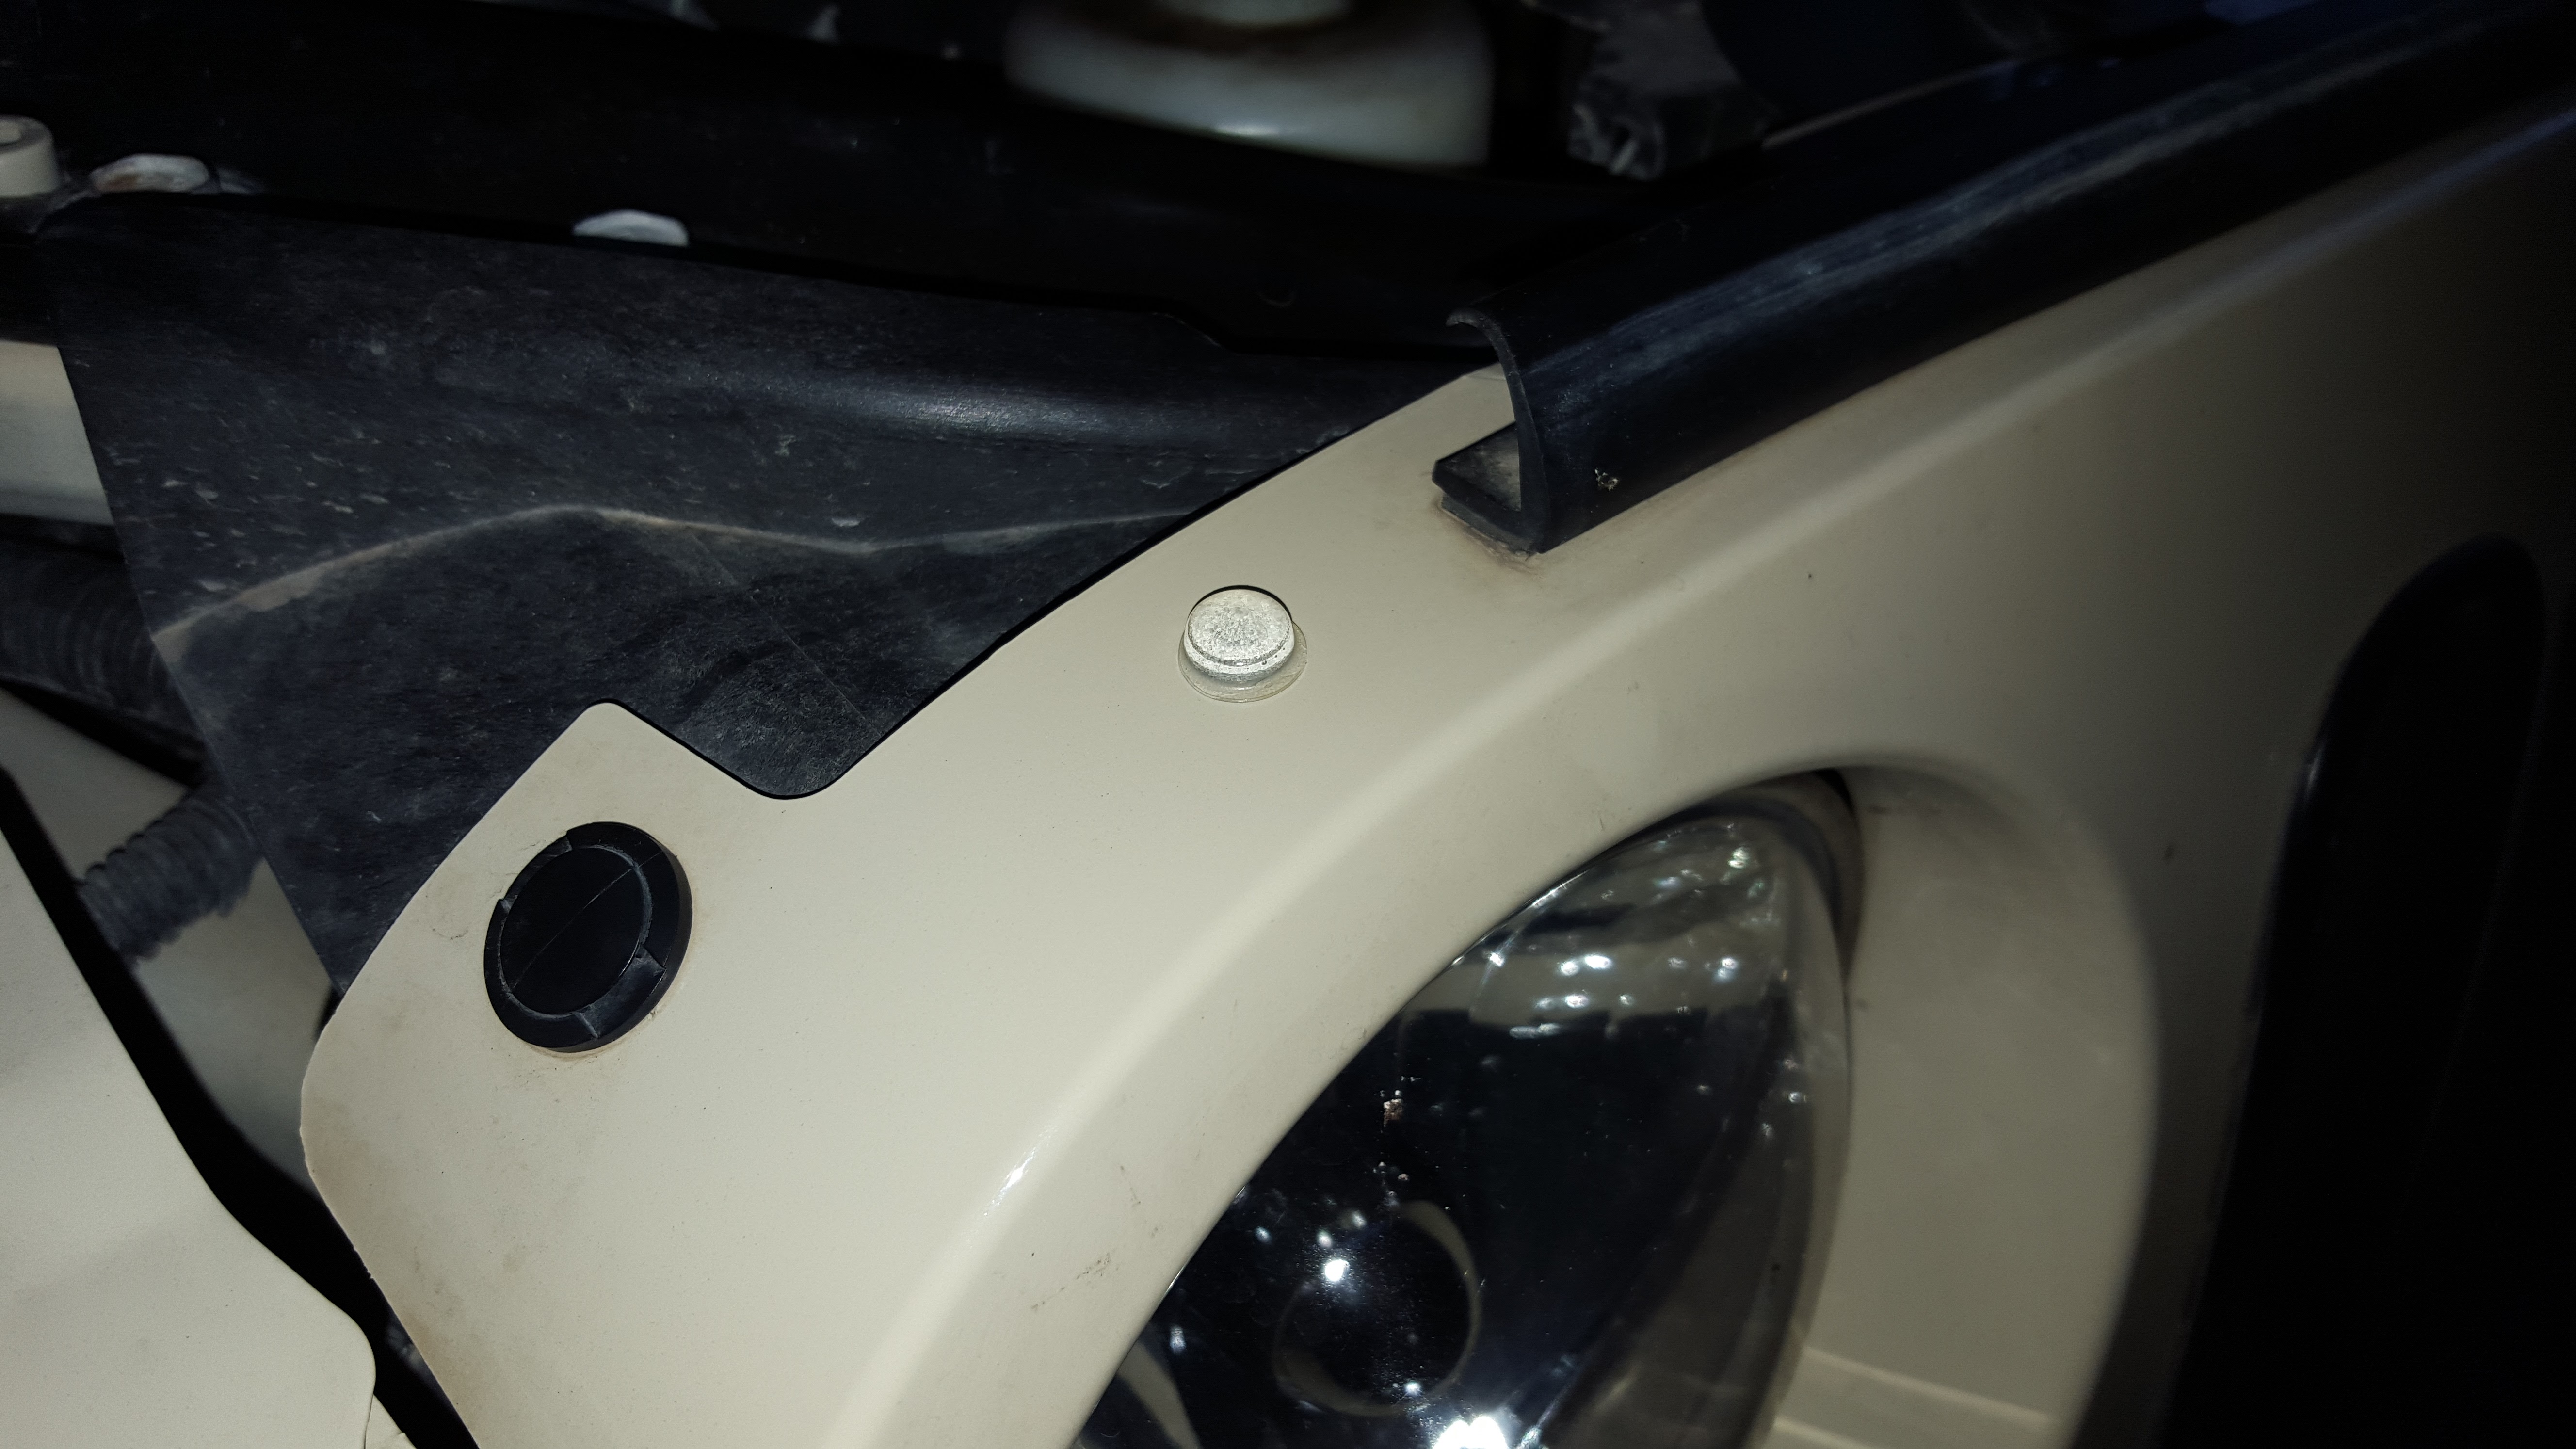
3. Completely sure now that those areas could not be any cleaner, I then grabbed one of the pairs the silicone “bubbles” and places one on either side of the weather stripping on the top edge of the grill, just to ensure that no rubbing will take place there.

4. I then grabbed the shipping box and stuck it under the hood so that I could lower the hood some and be working at a more convenient height for me and to get better leverage to make sure the deflector secures to the hood well.


5. I then test fit again with the deflector ensuring that all was in good shape and ready to go on.


6. I then pulled the backing off the Automotive 3M tape that came attached to the Deflector and very carefully lines up where I wanted to put the deflector on, as when that automotive 3M tape makes contact, it sticks really good!

7. Once I was happy and confident that I had the proper location, I push the deflector up into the proper groove and applied pressure to the tabs which had the 3M tape on then to the hood. With a hand on the top of the hood pushing down and my other hand pushing back up.
8. I applied pressure for around 30-60 second, and then gave a few pulls and wiggles on the deflector to see if it was secured to the hood, and it was solidly secured! It was not going anywhere!
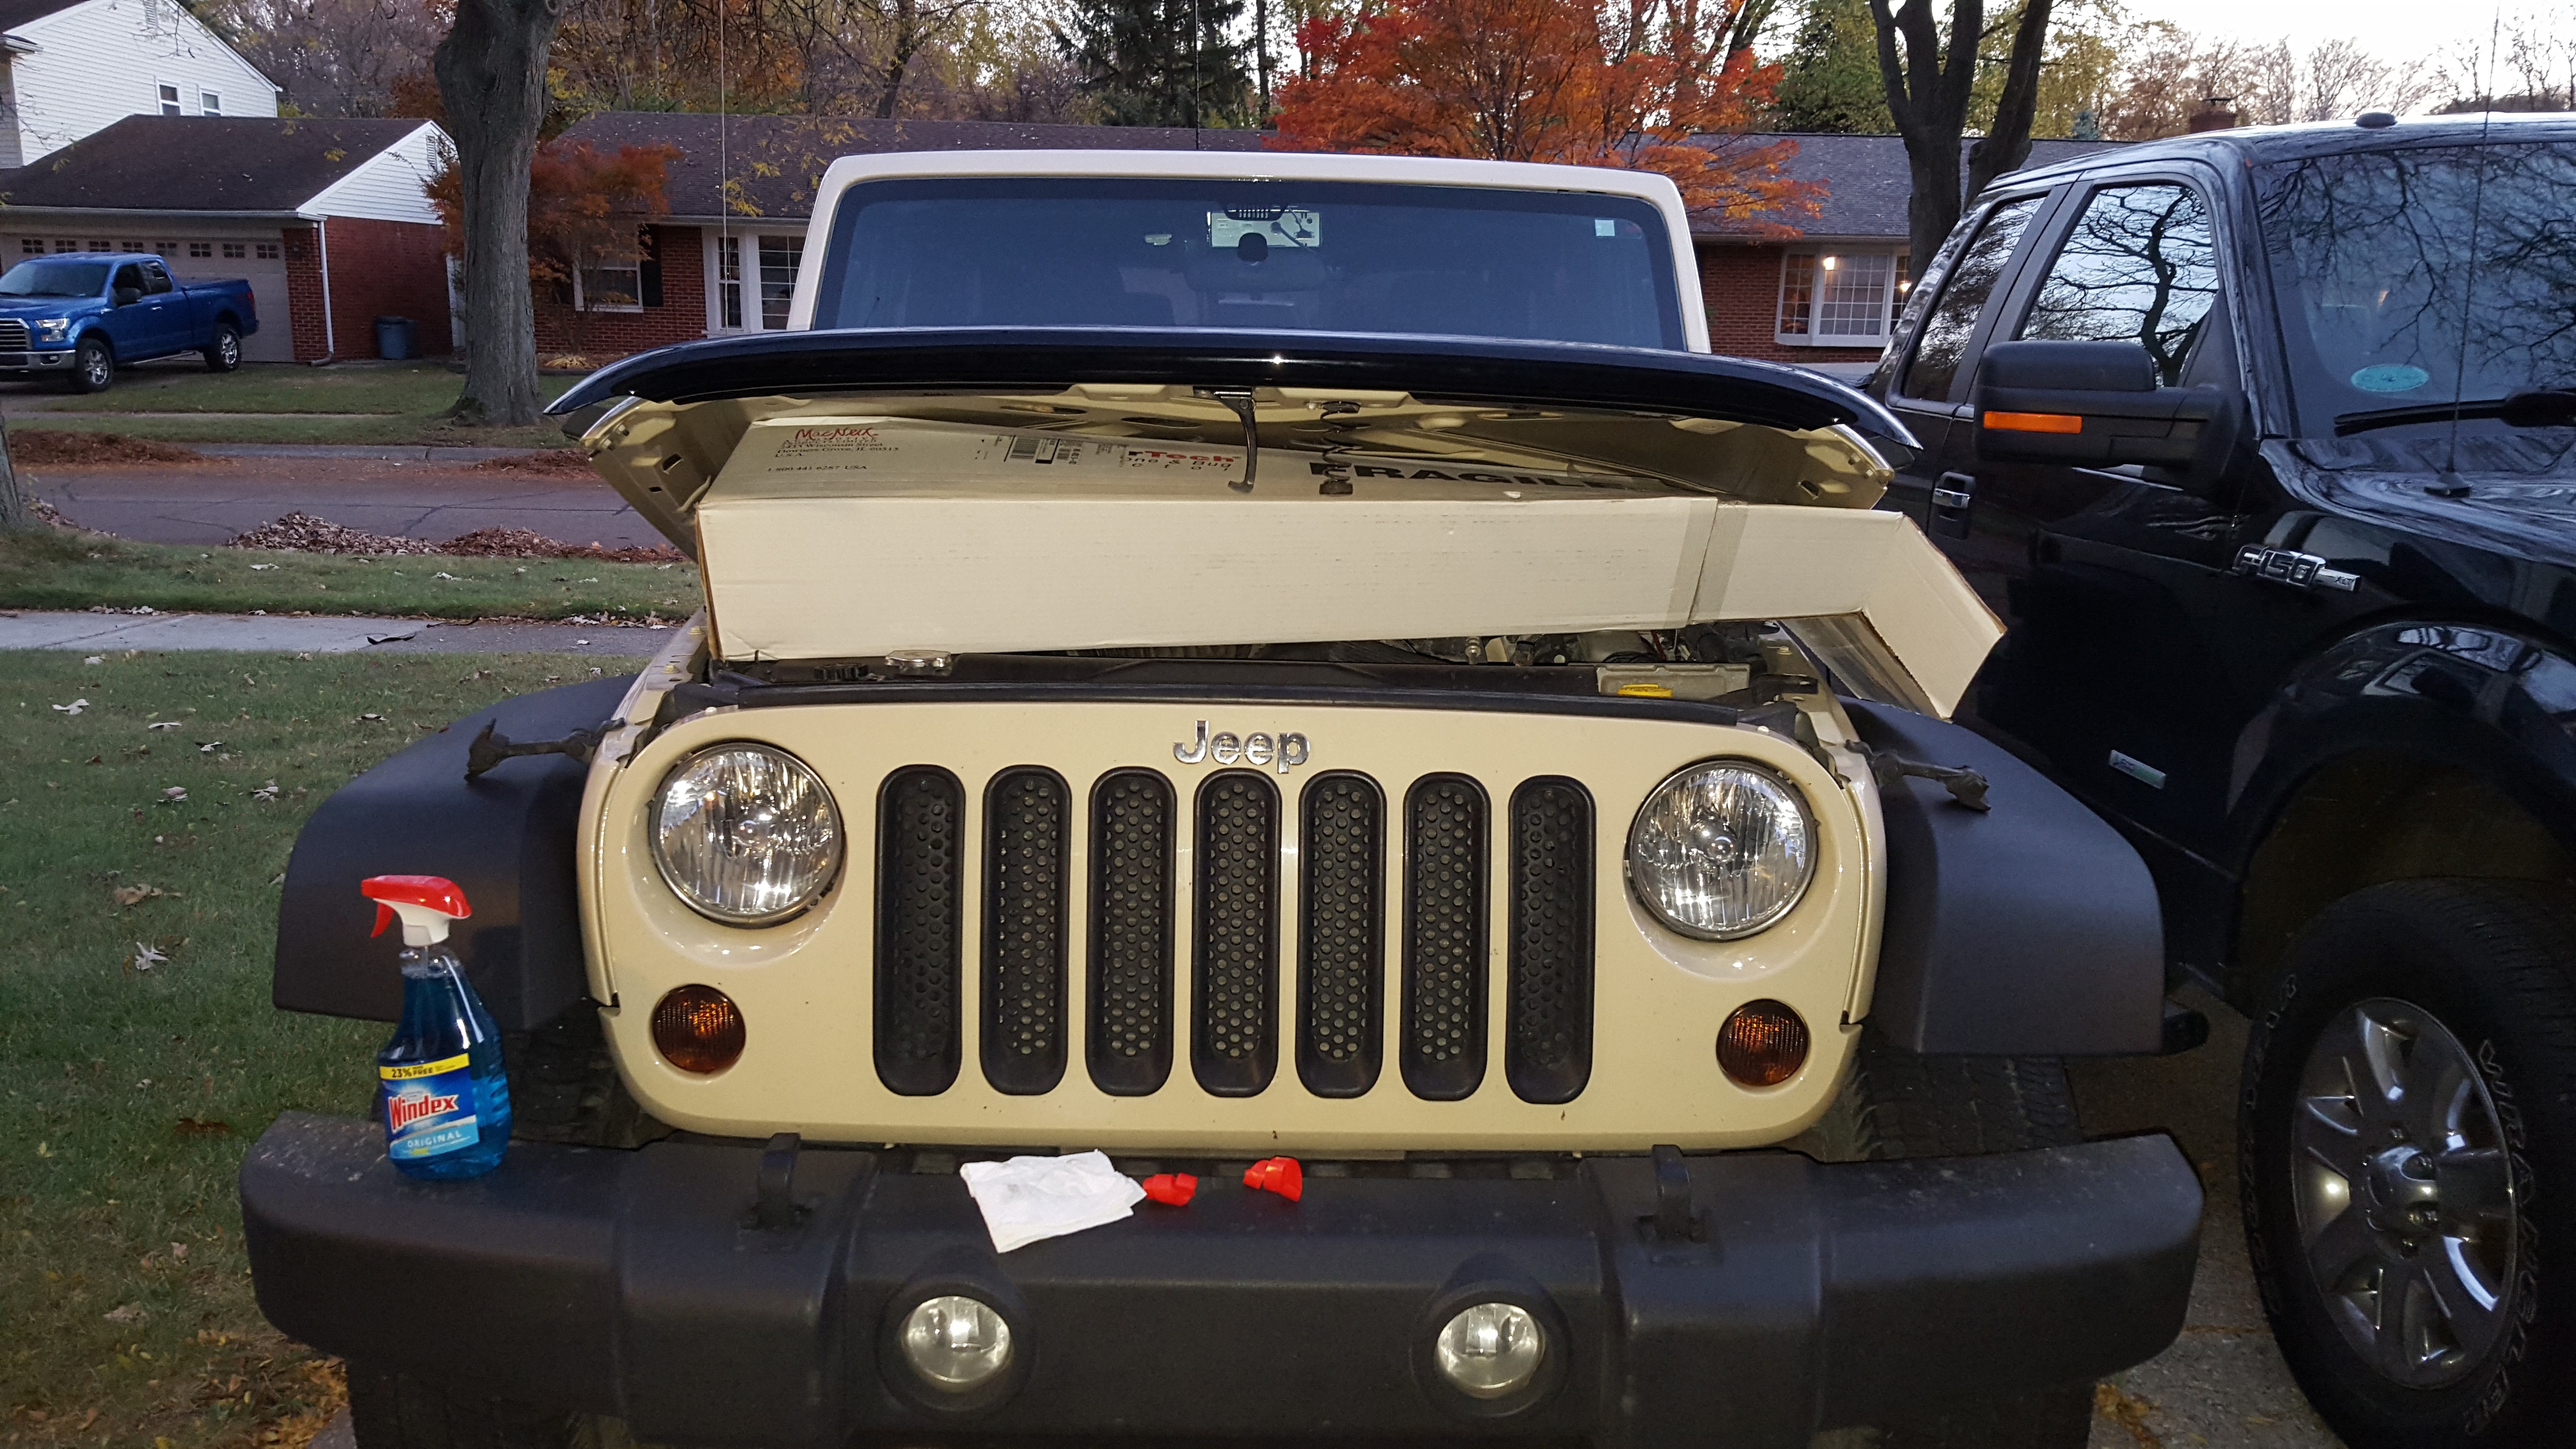
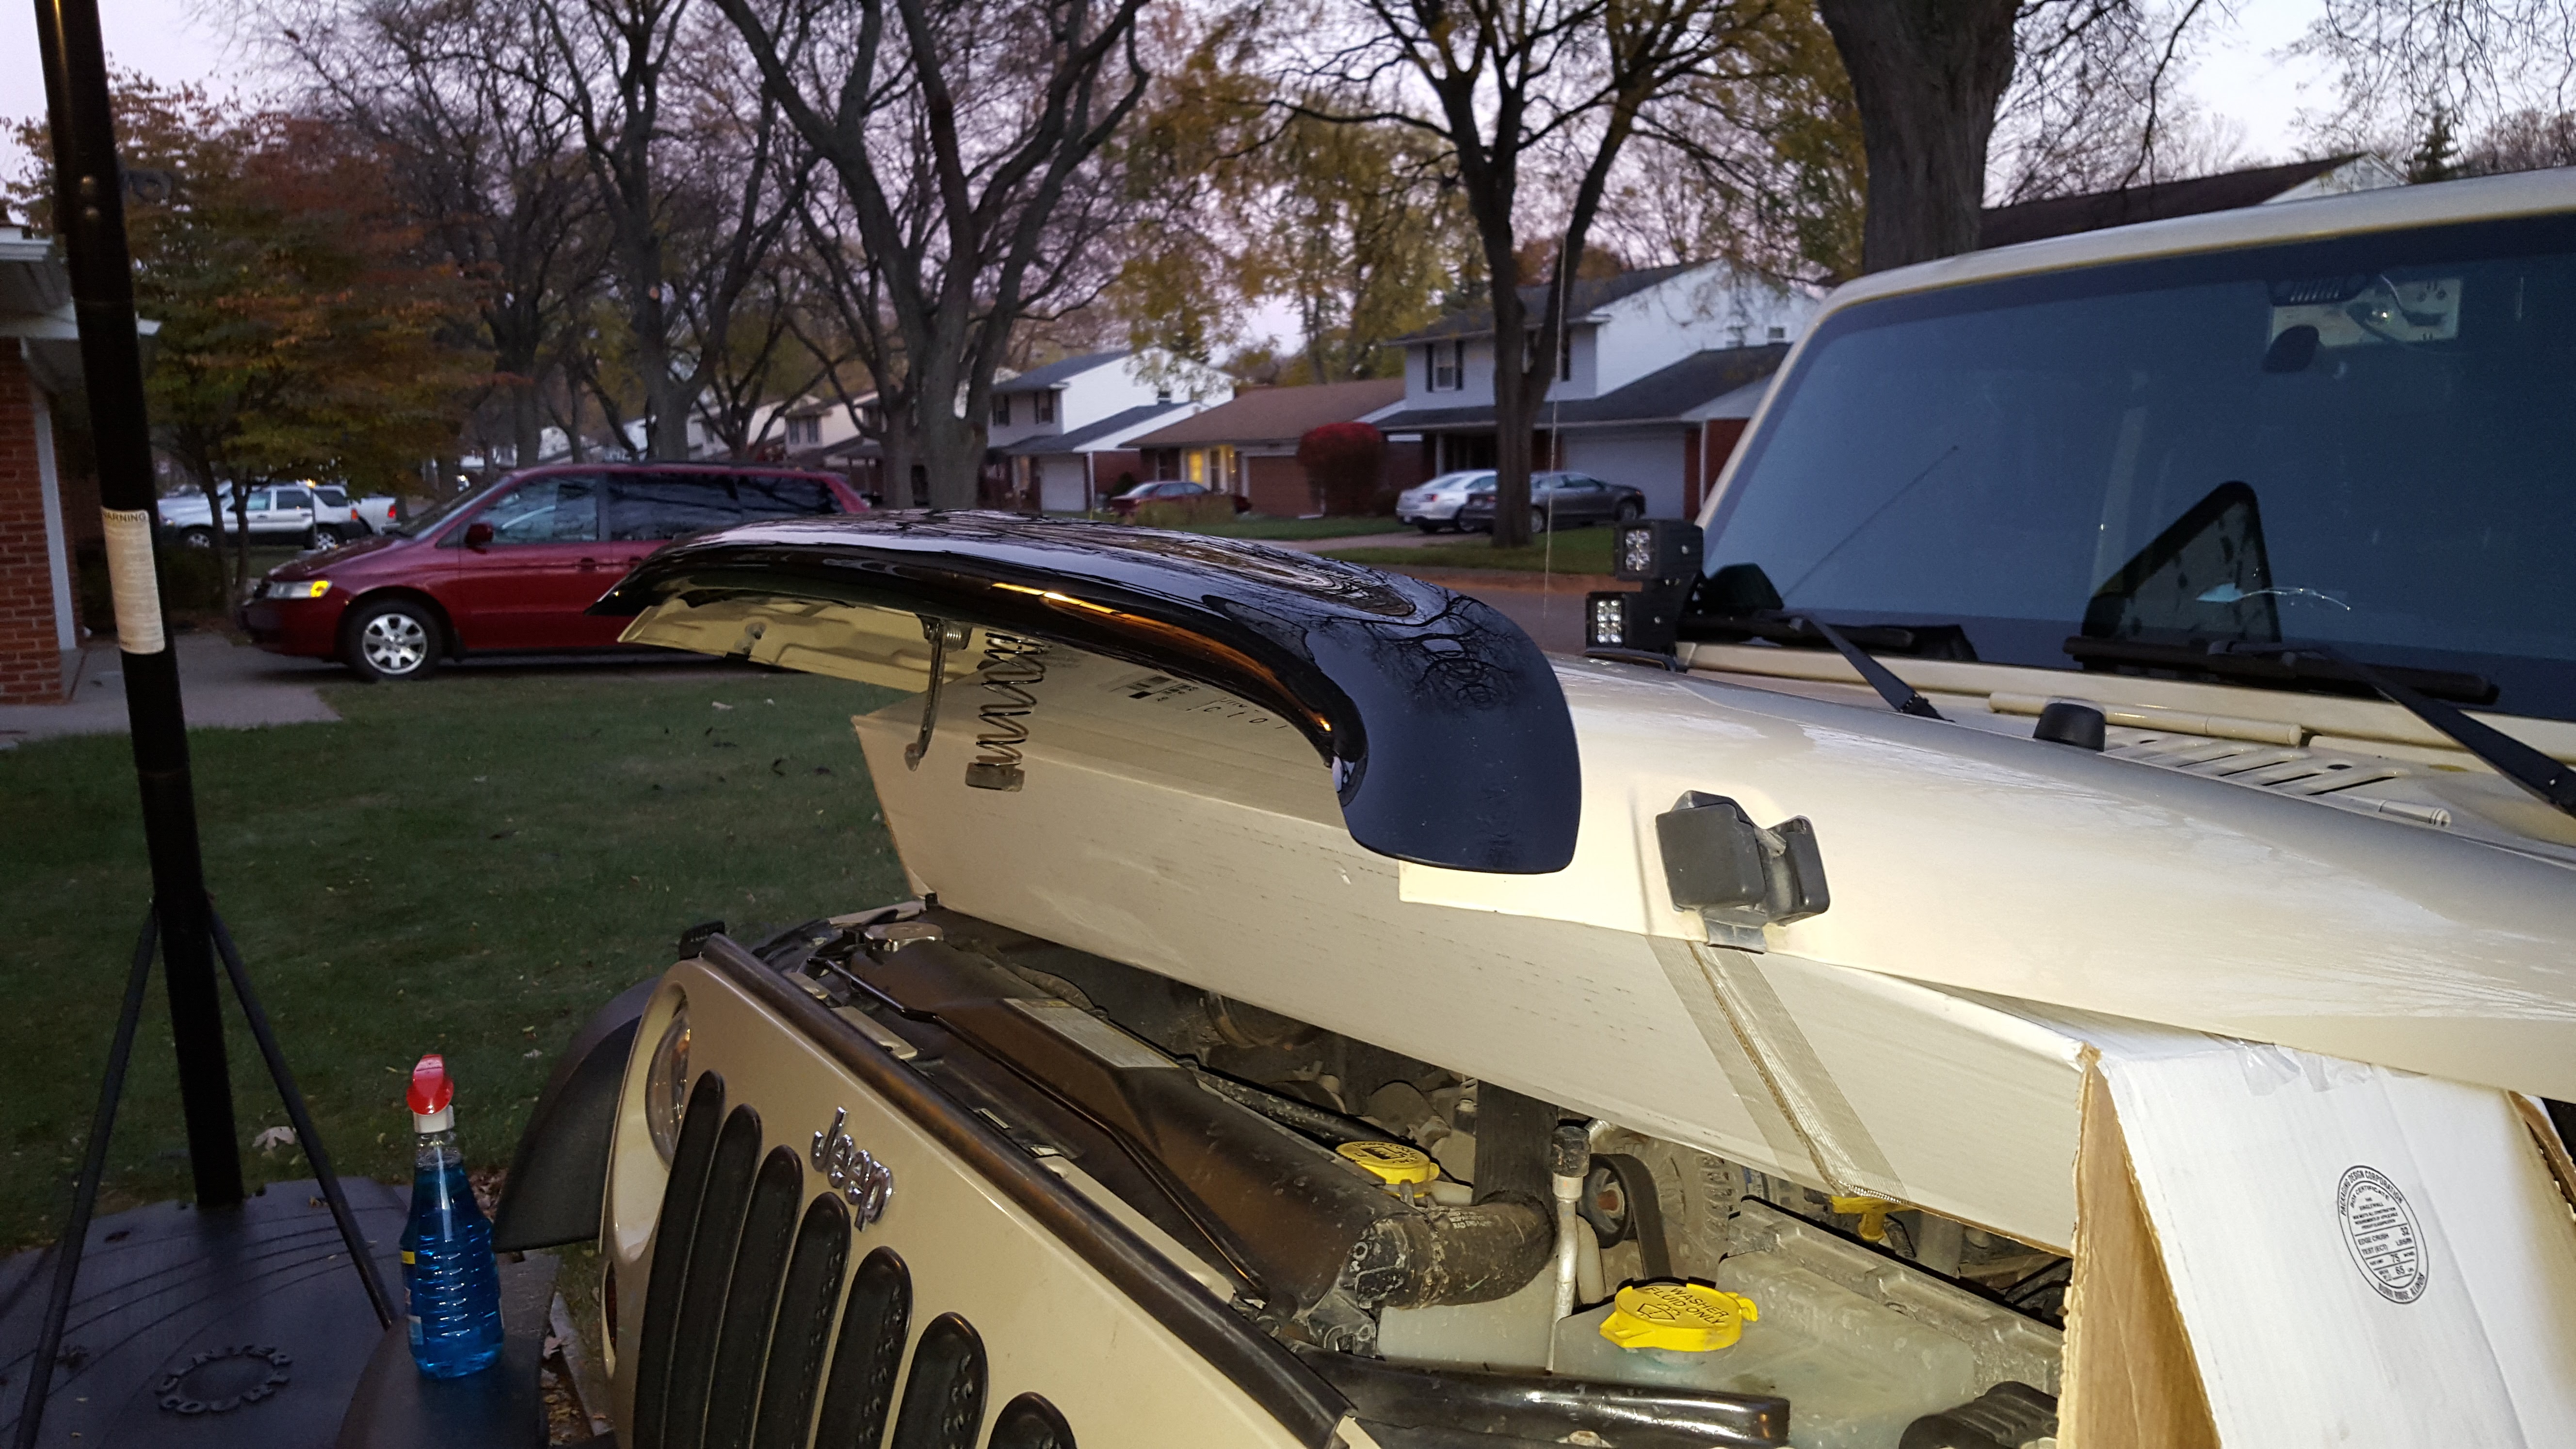


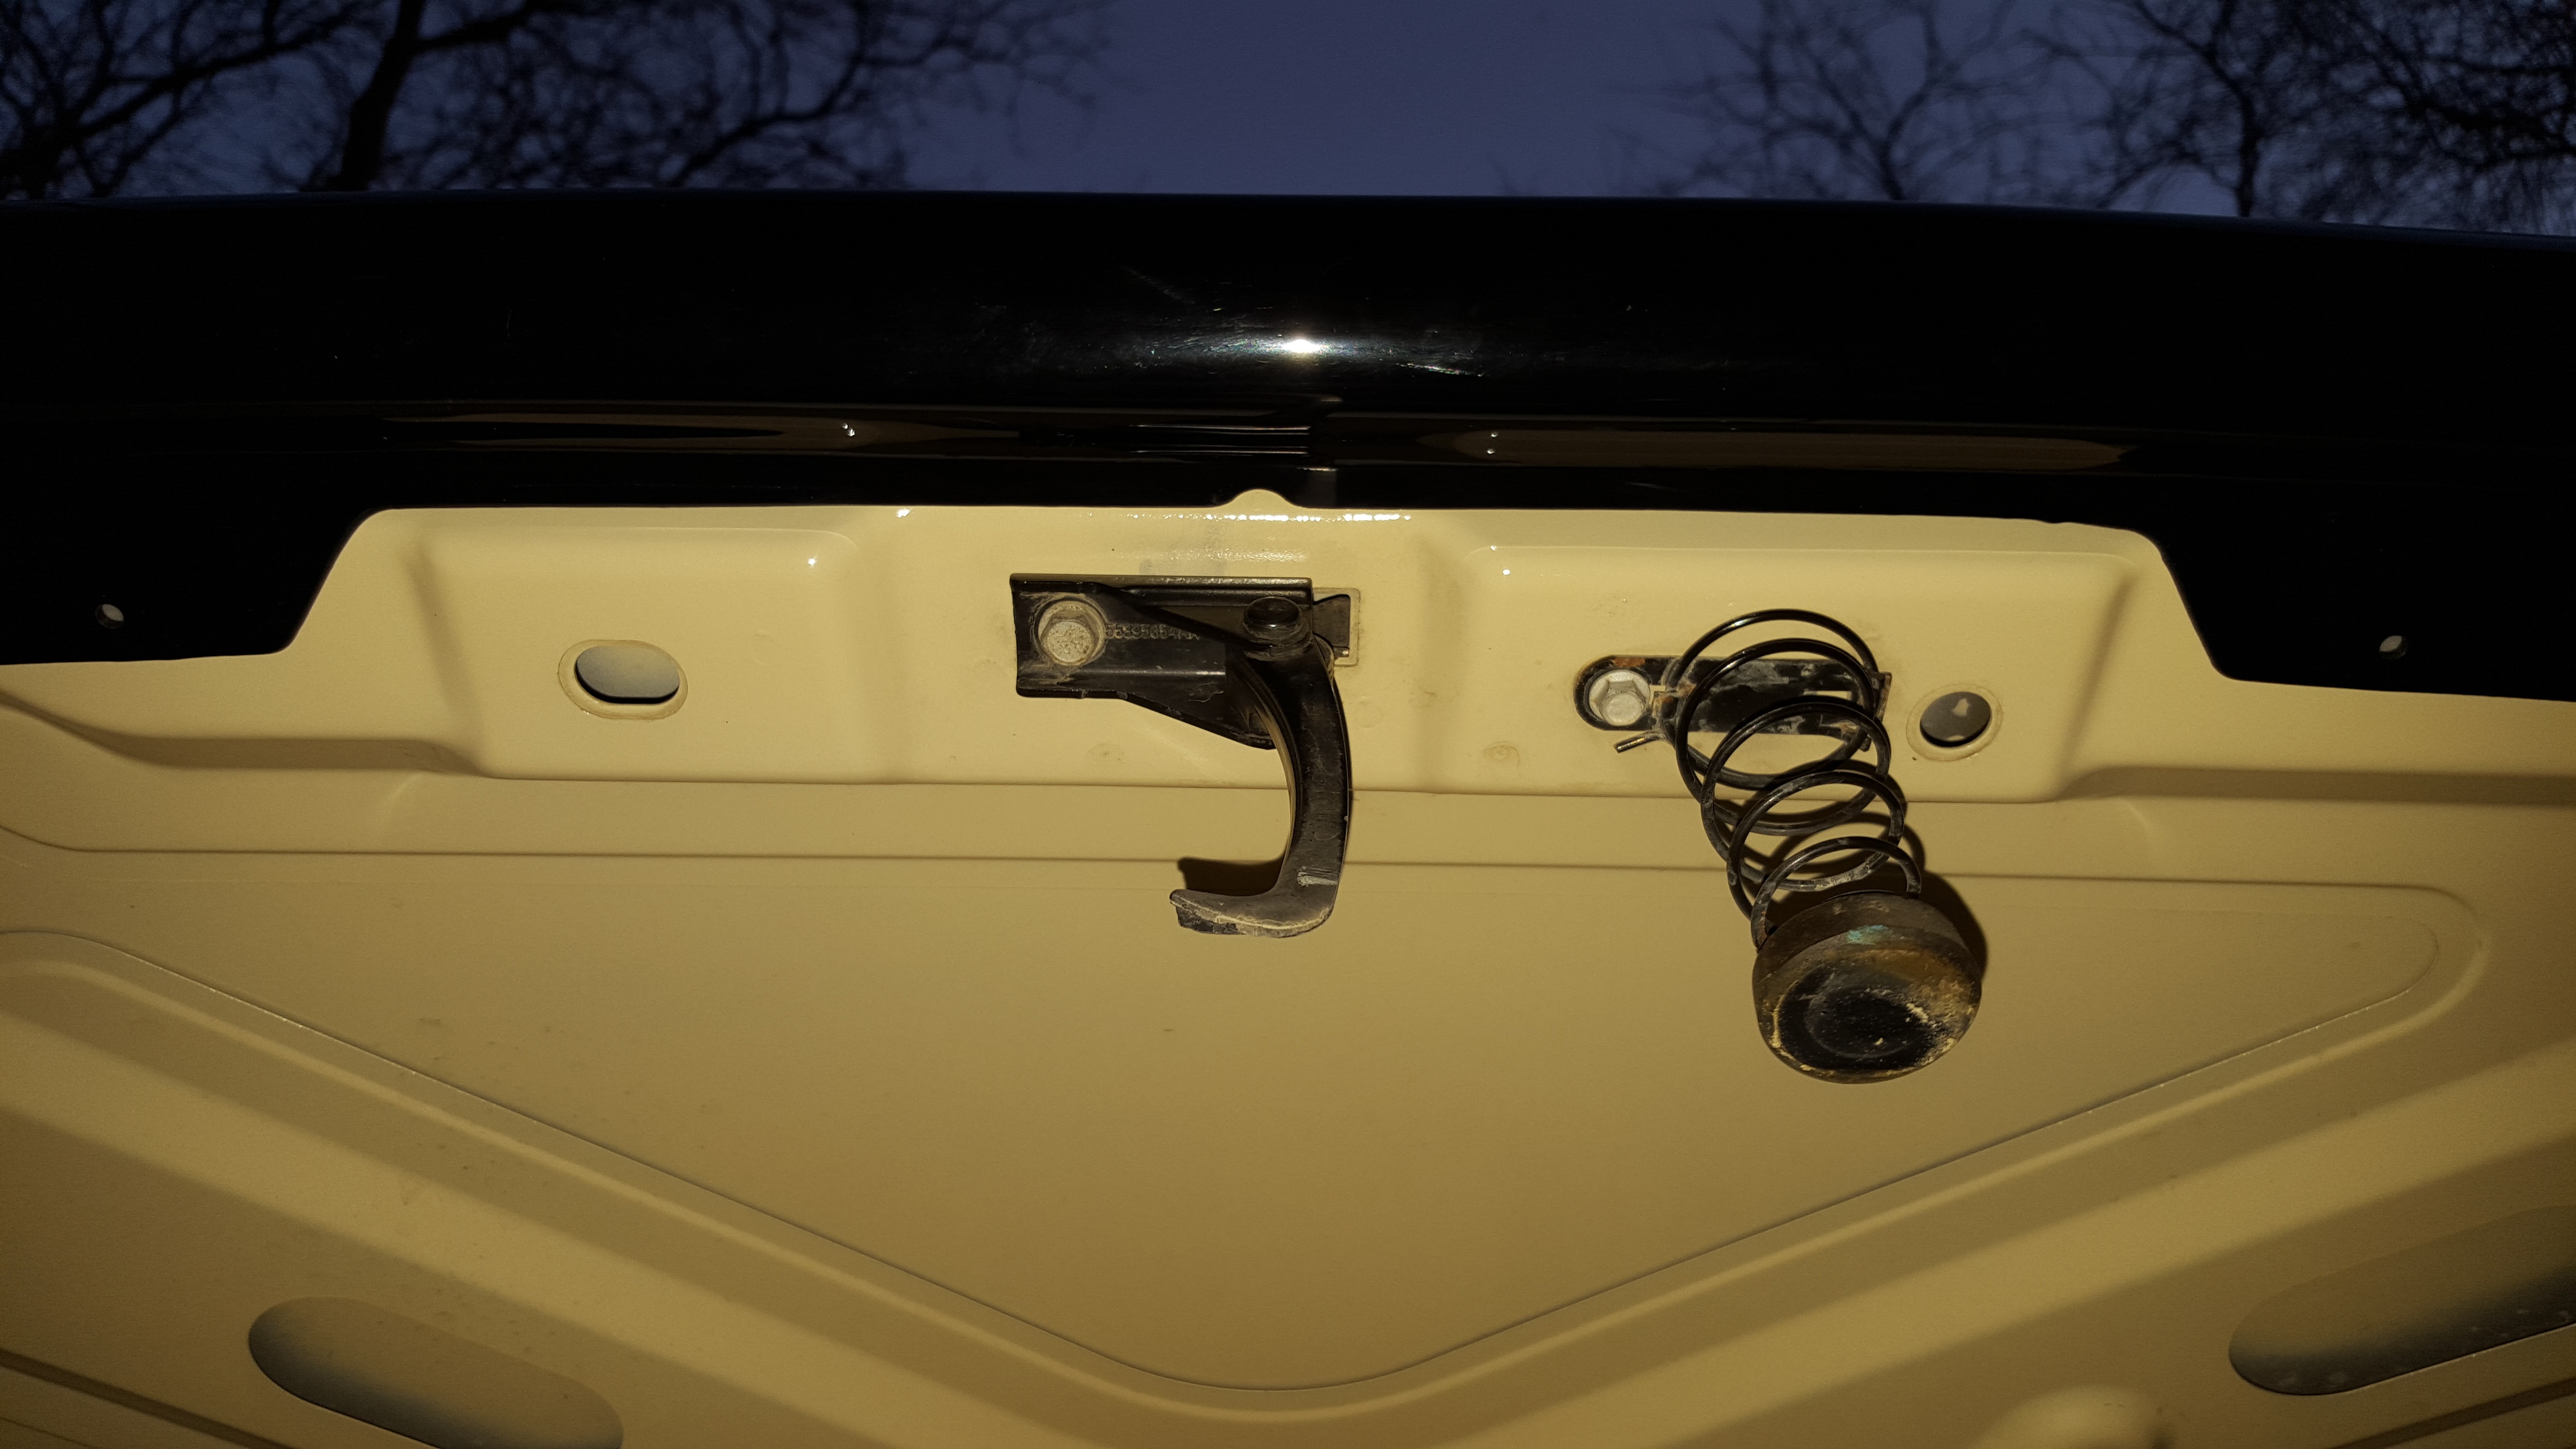
9. Now, the deflector did come with a few screws and washers to be able to further secure the deflector down, but these required some mild drilling into the underside of the hood, which I would much rather not do, and the fit with just the tape itself is more than strong enough that the screws are unnecessary! (I used the same tape to hold the fender flares on on my truck when I installed them, and those were on for a long time with no issues at all, as well as, when you close the hood and latch it down, there is an additional compression on the deflector which will add to the strength of the hold, so I would much rather avoid the drilling!)
Total Installation time was about 20 minutes, and that was with my extra work and stopping to take plenty of pictures along the way! So this is a quick, easy, simple, and relatively cheap mod to hopefully protect the Jeep some!
Overall, I am very pleased with the fitment, as it was a perfect, exact fit to the Jeep, and from WeatherTech, I would expect nothing less! The deflector’s top edge sits approximately 1” to 1.25” above the top of the hood surface, and has a pretty good incline to deflect. It sticks out from the front edge of the Jeep maybe .5” to .75”, so it is not compressed up against the front edge of the hood, and you can easily get in there to have access to clean, so that nothing will happen to the front edge of the hood! From the driver’s seat, you see about an inch on the deflector sticking up off the front edge of the hood, but it is not blocking any sort of view at all!


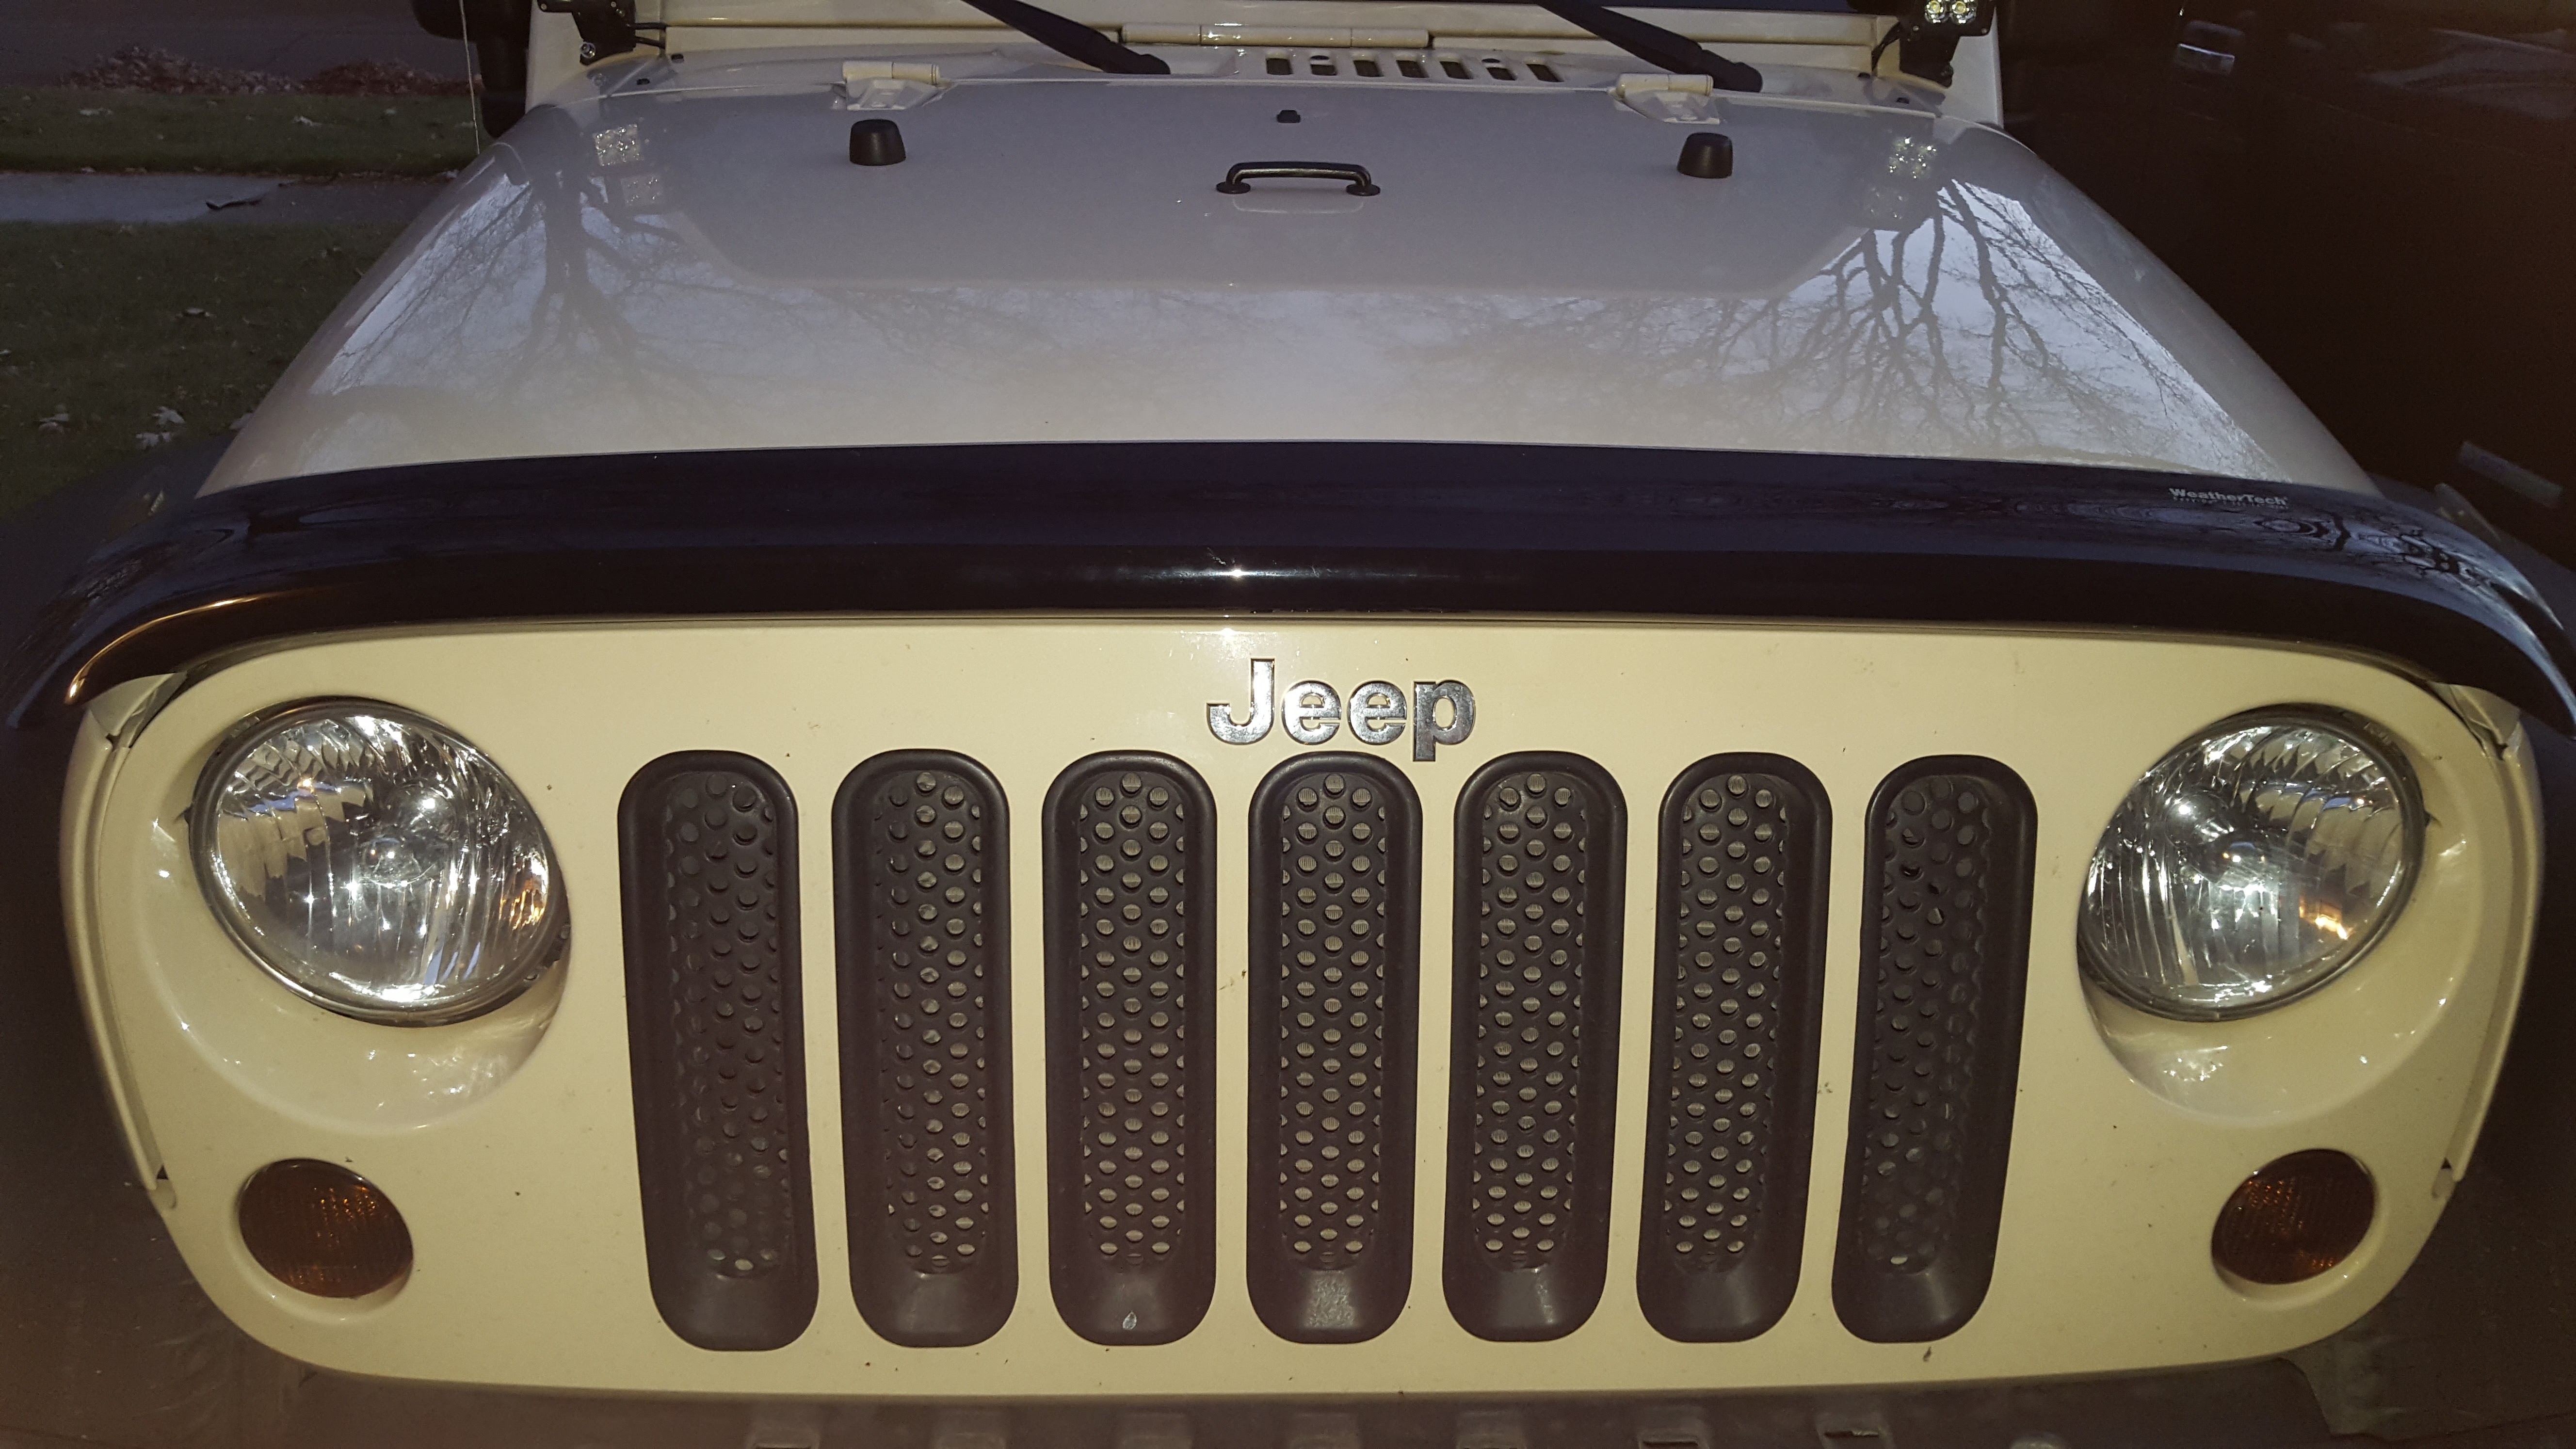


I am also thinking, and I can update the forum on this once I get some more drive time in, which I drive 50 miles a day for work, so that won’t be too long to get a good test in, but with the added deflector filling in the small gap under the front edge of the hood, as well as providing some extra air flow over the hood and not under it (aka more downforce on the hood), I am thinking that this may eliminate a good bit of the hood flutter that happens on the expressway sometimes or when you have a strong head wind! I do not know for sure though, just some ideas floating around in my head! Only time will tell on that!
But overall, the look is good, fit is excellent, quality is excellent, and we will see how it works! Let me know if you have any questions on the write-up and install!
First off, I opened up the box to see what all I got, and found just a few simple things, which is exactly what I was looking for! I found the deflector itself (wrapped in shrink wrap and ends protected by a bit of bubble wrap), the directions (which this is a pretty straight forward install so…no exactly needed, but good!), and a small bag with 4 screws/nuts/washers, 2 alcohol pads, and 2 pairs of bumpers (the clear silicone bubbles which you stick on the vehicle in places the deflector may bump/rub the vehicle.
So first off, I went and tore open the shrink wrap and took the deflector out to test fit and make sure all was ok before I actually got into the installation. The fit is extremely straight forward and I would even say almost idiot proof! Which is extremely good, as their directions are a bit lacking, and the diagrams absolutely suck, and most don’t even apply for the Wranglers as they are generic directions! WeatherTech has this engineering, design, and built perfectly to fit like a glove to the front of the Jeep! There is a lip at the front edge of the hood just on the underside, and there is a corresponding groove the deflector itself, and these two fit seamlessly together, making the front to back placement of the deflector a breeze and no brainer as all you have to do is just push the deflector up into the groove and it will be secured there! The only adjust you have to worry about is the horizontal placement of the deflector, making sure that it is even left and right, which is not that hard of a task to do either.
So with the test fit confirmed and everything seeming straight forward and ready to go, I started the install!
1. I grabbed some paper towel and Windex (as I did not have time to wash the whole Jeep, I just needed a few spots cleaned) and wiped down the areas where things would be stuck to, such as the top edge of the grill where the deflector could make contact with and I wanted to put a bumper on either side there, and the front edge of the hood and the underside of the front of the hood where the deflector will be stuck to with the automotive 3M tape.
2. Once sprayed and wiped with Windex 3 or 4 times to ensure everything was completely clean, I took one of the include alcohol wipes and wiped down the areas that I just cleaned with Windex.
3. Completely sure now that those areas could not be any cleaner, I then grabbed one of the pairs the silicone “bubbles” and places one on either side of the weather stripping on the top edge of the grill, just to ensure that no rubbing will take place there.
4. I then grabbed the shipping box and stuck it under the hood so that I could lower the hood some and be working at a more convenient height for me and to get better leverage to make sure the deflector secures to the hood well.
5. I then test fit again with the deflector ensuring that all was in good shape and ready to go on.
6. I then pulled the backing off the Automotive 3M tape that came attached to the Deflector and very carefully lines up where I wanted to put the deflector on, as when that automotive 3M tape makes contact, it sticks really good!
7. Once I was happy and confident that I had the proper location, I push the deflector up into the proper groove and applied pressure to the tabs which had the 3M tape on then to the hood. With a hand on the top of the hood pushing down and my other hand pushing back up.
8. I applied pressure for around 30-60 second, and then gave a few pulls and wiggles on the deflector to see if it was secured to the hood, and it was solidly secured! It was not going anywhere!
9. Now, the deflector did come with a few screws and washers to be able to further secure the deflector down, but these required some mild drilling into the underside of the hood, which I would much rather not do, and the fit with just the tape itself is more than strong enough that the screws are unnecessary! (I used the same tape to hold the fender flares on on my truck when I installed them, and those were on for a long time with no issues at all, as well as, when you close the hood and latch it down, there is an additional compression on the deflector which will add to the strength of the hold, so I would much rather avoid the drilling!)
Total Installation time was about 20 minutes, and that was with my extra work and stopping to take plenty of pictures along the way! So this is a quick, easy, simple, and relatively cheap mod to hopefully protect the Jeep some!
Overall, I am very pleased with the fitment, as it was a perfect, exact fit to the Jeep, and from WeatherTech, I would expect nothing less! The deflector’s top edge sits approximately 1” to 1.25” above the top of the hood surface, and has a pretty good incline to deflect. It sticks out from the front edge of the Jeep maybe .5” to .75”, so it is not compressed up against the front edge of the hood, and you can easily get in there to have access to clean, so that nothing will happen to the front edge of the hood! From the driver’s seat, you see about an inch on the deflector sticking up off the front edge of the hood, but it is not blocking any sort of view at all!
I am also thinking, and I can update the forum on this once I get some more drive time in, which I drive 50 miles a day for work, so that won’t be too long to get a good test in, but with the added deflector filling in the small gap under the front edge of the hood, as well as providing some extra air flow over the hood and not under it (aka more downforce on the hood), I am thinking that this may eliminate a good bit of the hood flutter that happens on the expressway sometimes or when you have a strong head wind! I do not know for sure though, just some ideas floating around in my head! Only time will tell on that!
But overall, the look is good, fit is excellent, quality is excellent, and we will see how it works! Let me know if you have any questions on the write-up and install!
Thread Starter
JK Enthusiast
Joined: Sep 2015
Posts: 419
Likes: 22
From: Madison Heights, MI
Gentex Homelink Mirror
Well, next upgrade it on it's way! As you know, I like to keep as close to the OEM look as I can, and the next mod is so I can ditch that bulky, old garage door opener which I can never seem to find a good place to keep! It doesn't stay on the visor, plus when the top off I do not feel secured with it there. My console and glove box are a bit full with other stuff, and my opener is not one of the smaller new ones but is extremely bulky and takes up too much space in there. The seat back pocket once again, when the top is off just does not seem secure to me. And the solution of zipping the opener into the roll bar cover again doe snot work for me because of the size and age of the opener and door itself, so I only had a couple real solutions left, and I finally got tired of the opener hogging one of the two front cup holders! I could do something like fiero88 did here on YouTube,
https://www.youtube.com/watch?v=bi7gSlmEXCs&index=9&list=PLc92kHHlACzy2DuMGMsLGEo9TxHJnITZa which I like, but then it is always active, and I am not sure how well covered it is for having the top off and having anything get in there (such as rain, dirt, etc.). Plus, this required a bit of cutting in the plastic trim, and if I can, I would rather stay away from too much cutting as those panels can be easy o cut, but easy to mess up and expensive to replace! So my last option that I had found was adding in some sort of Homelink module! We have a '13 SHO Taurus as my house which has the module in the visor and it works great and is very convenient. So I did some research, and found that you can get something like the modules below, which are meant to go inside somewhere, such as the visor or overhead console, and just the buttons stick out:

B4F2 HOMELINK ROLLING CODE GARAGE DOOR OPENER KIT SUNVISOR SUN VISOR OEM GM
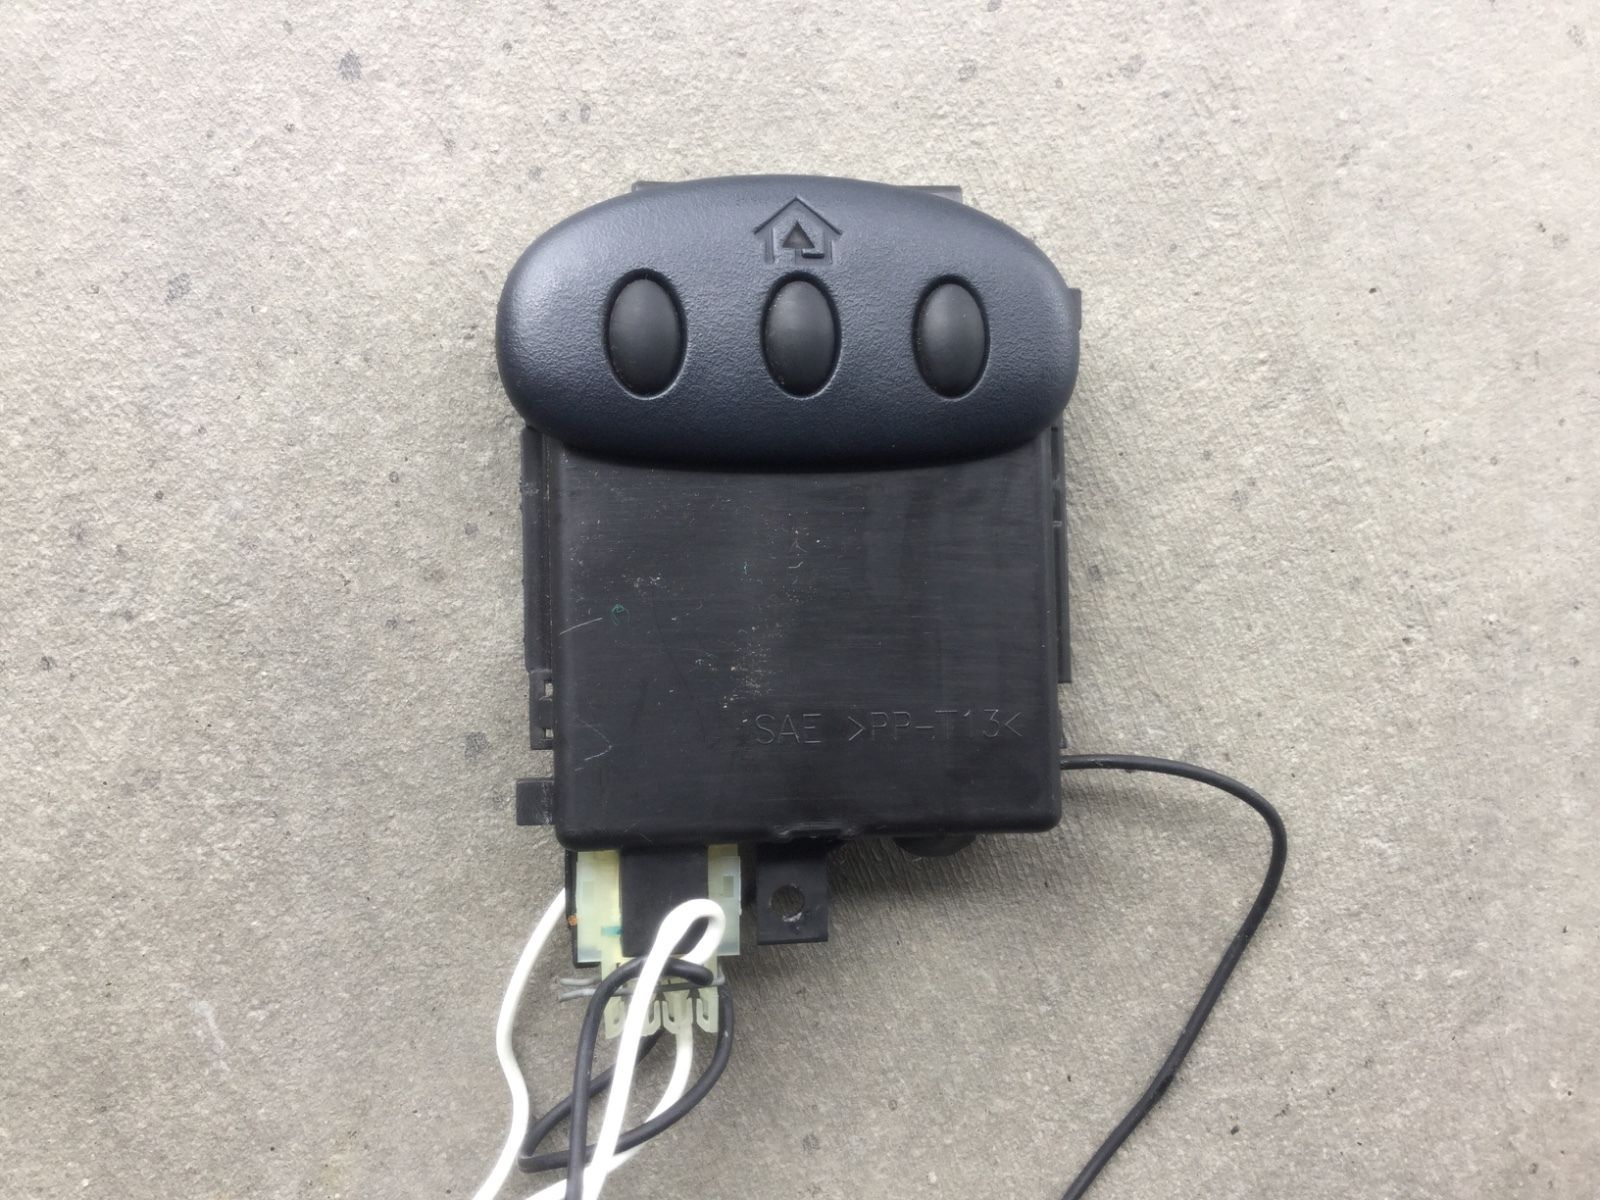
Homelink Universal Transmitter Rolling Codes Custom Remote Garage Door Opener | eBay
Which these are great options which can be added in a bunch of different area in the JK, and are only $10-$30 which is not bad at all, and you just have to run a ground wire and a power wire and it is all set! But once again, you had to do some cutting for the locations of the buttons coming through the plastic trim wherever you have put it, which I still did not want to do, plus, you have to make your own connection to run the wires as there is not connector to just plug in anywhere. But the big advantage of Homelink is that it is powered from the vehicles power, not a battery, so no need to worry about replacing a battery for the unit itself. But lastly, we get to the option which I picked, as I believe it will be the cleanest install and look the nicest for what I am looking for in my end game! I found that Gentex is the company who makes all the Homelink devices in all of the different vehicles which have it today, and they not only make the modules, but they also make Homelink mirrors, with different additions, such as Auto dimming, Temperature, Compass, and Vehicle/Manufacturer specific mirrors (such as GM with OnStar) which offer a nice OEM feel, and no cutting needed, just swap your current mirror for this mirror! Now, on initial research, I found that these mirrors where anywhere between $150-$350, whihc was a heck of a lot more than I was looking to spend on a garage door opener, and the $150 is still the stripped down version which only had Auto dimming. The version I wanted was around $240 which just had auto dimming and homelink as I already have built in compass and thermometer from the Jeep originally in the gauge cluster. But a little more searching on eBay, and I found a lot of Homelink mirrors for a lot cheaper! I was able to pick this mirror up with Auto Dimming and Homelink for $26, and then $30 for the needed harness for the power for both Auto Dimming and Homelink buttons and the ground:
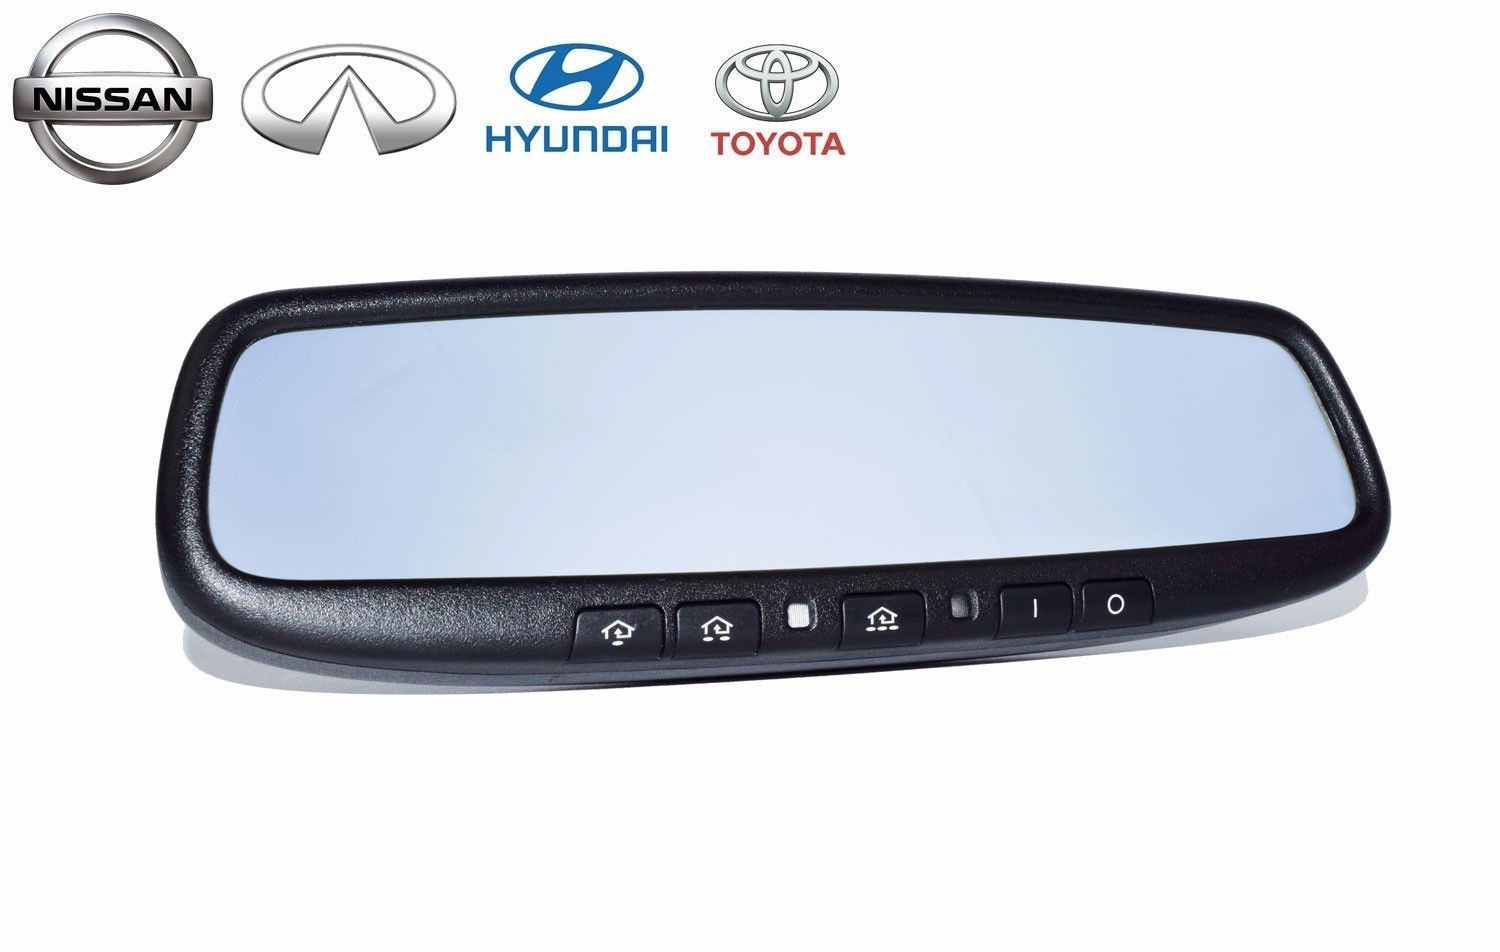
New Gentex Homelink Rear View Mirror with Auto Dimming | eBay

10 Pin Gentex GNTX 536 Homelink Compass Homelink Mirror Wiring Kit New | eBay
These are both shipped and hope to have them by the end of the week and will install in the next couple weeks! The key here is that a lot of these mirrors are listed as specific for one vehicle, when in reality, most of these mirrors will fit any standard wedge mount, which is what the JK has! So this meant I got a steal on a brand new mirror, and I can final ditch that dang garage door opener! Plus, no drilling/cutting, a nice and clean OEM look, but just a whole bunch of hassle for something that it seems Jeep has never even considered making even an option on the Wranglers, not even the higher end models! But for me, this will be my solution!
I will further update once I receive the mirror and get a chance to install it. From my understand, there is just one screw in the wedge mount on the mirror to remove, then you can slide the OEM mirror off the wedge mount, slide the new one on, put the screw back in, and then just plug the connector in and run the wires where you wish and splice the connections together. So as long at the mirror mount plays nice and running the wires is no issue, then this should be a pretty quick and simple install!
https://www.youtube.com/watch?v=bi7gSlmEXCs&index=9&list=PLc92kHHlACzy2DuMGMsLGEo9TxHJnITZa which I like, but then it is always active, and I am not sure how well covered it is for having the top off and having anything get in there (such as rain, dirt, etc.). Plus, this required a bit of cutting in the plastic trim, and if I can, I would rather stay away from too much cutting as those panels can be easy o cut, but easy to mess up and expensive to replace! So my last option that I had found was adding in some sort of Homelink module! We have a '13 SHO Taurus as my house which has the module in the visor and it works great and is very convenient. So I did some research, and found that you can get something like the modules below, which are meant to go inside somewhere, such as the visor or overhead console, and just the buttons stick out:
B4F2 HOMELINK ROLLING CODE GARAGE DOOR OPENER KIT SUNVISOR SUN VISOR OEM GM
Homelink Universal Transmitter Rolling Codes Custom Remote Garage Door Opener | eBay
Which these are great options which can be added in a bunch of different area in the JK, and are only $10-$30 which is not bad at all, and you just have to run a ground wire and a power wire and it is all set! But once again, you had to do some cutting for the locations of the buttons coming through the plastic trim wherever you have put it, which I still did not want to do, plus, you have to make your own connection to run the wires as there is not connector to just plug in anywhere. But the big advantage of Homelink is that it is powered from the vehicles power, not a battery, so no need to worry about replacing a battery for the unit itself. But lastly, we get to the option which I picked, as I believe it will be the cleanest install and look the nicest for what I am looking for in my end game! I found that Gentex is the company who makes all the Homelink devices in all of the different vehicles which have it today, and they not only make the modules, but they also make Homelink mirrors, with different additions, such as Auto dimming, Temperature, Compass, and Vehicle/Manufacturer specific mirrors (such as GM with OnStar) which offer a nice OEM feel, and no cutting needed, just swap your current mirror for this mirror! Now, on initial research, I found that these mirrors where anywhere between $150-$350, whihc was a heck of a lot more than I was looking to spend on a garage door opener, and the $150 is still the stripped down version which only had Auto dimming. The version I wanted was around $240 which just had auto dimming and homelink as I already have built in compass and thermometer from the Jeep originally in the gauge cluster. But a little more searching on eBay, and I found a lot of Homelink mirrors for a lot cheaper! I was able to pick this mirror up with Auto Dimming and Homelink for $26, and then $30 for the needed harness for the power for both Auto Dimming and Homelink buttons and the ground:
New Gentex Homelink Rear View Mirror with Auto Dimming | eBay
10 Pin Gentex GNTX 536 Homelink Compass Homelink Mirror Wiring Kit New | eBay
These are both shipped and hope to have them by the end of the week and will install in the next couple weeks! The key here is that a lot of these mirrors are listed as specific for one vehicle, when in reality, most of these mirrors will fit any standard wedge mount, which is what the JK has! So this meant I got a steal on a brand new mirror, and I can final ditch that dang garage door opener! Plus, no drilling/cutting, a nice and clean OEM look, but just a whole bunch of hassle for something that it seems Jeep has never even considered making even an option on the Wranglers, not even the higher end models! But for me, this will be my solution!
I will further update once I receive the mirror and get a chance to install it. From my understand, there is just one screw in the wedge mount on the mirror to remove, then you can slide the OEM mirror off the wedge mount, slide the new one on, put the screw back in, and then just plug the connector in and run the wires where you wish and splice the connections together. So as long at the mirror mount plays nice and running the wires is no issue, then this should be a pretty quick and simple install!
Last edited by WxNerd2015; Nov 9, 2015 at 06:24 AM.
Thread Starter
JK Enthusiast
Joined: Sep 2015
Posts: 419
Likes: 22
From: Madison Heights, MI
Cool Jeep Stuff
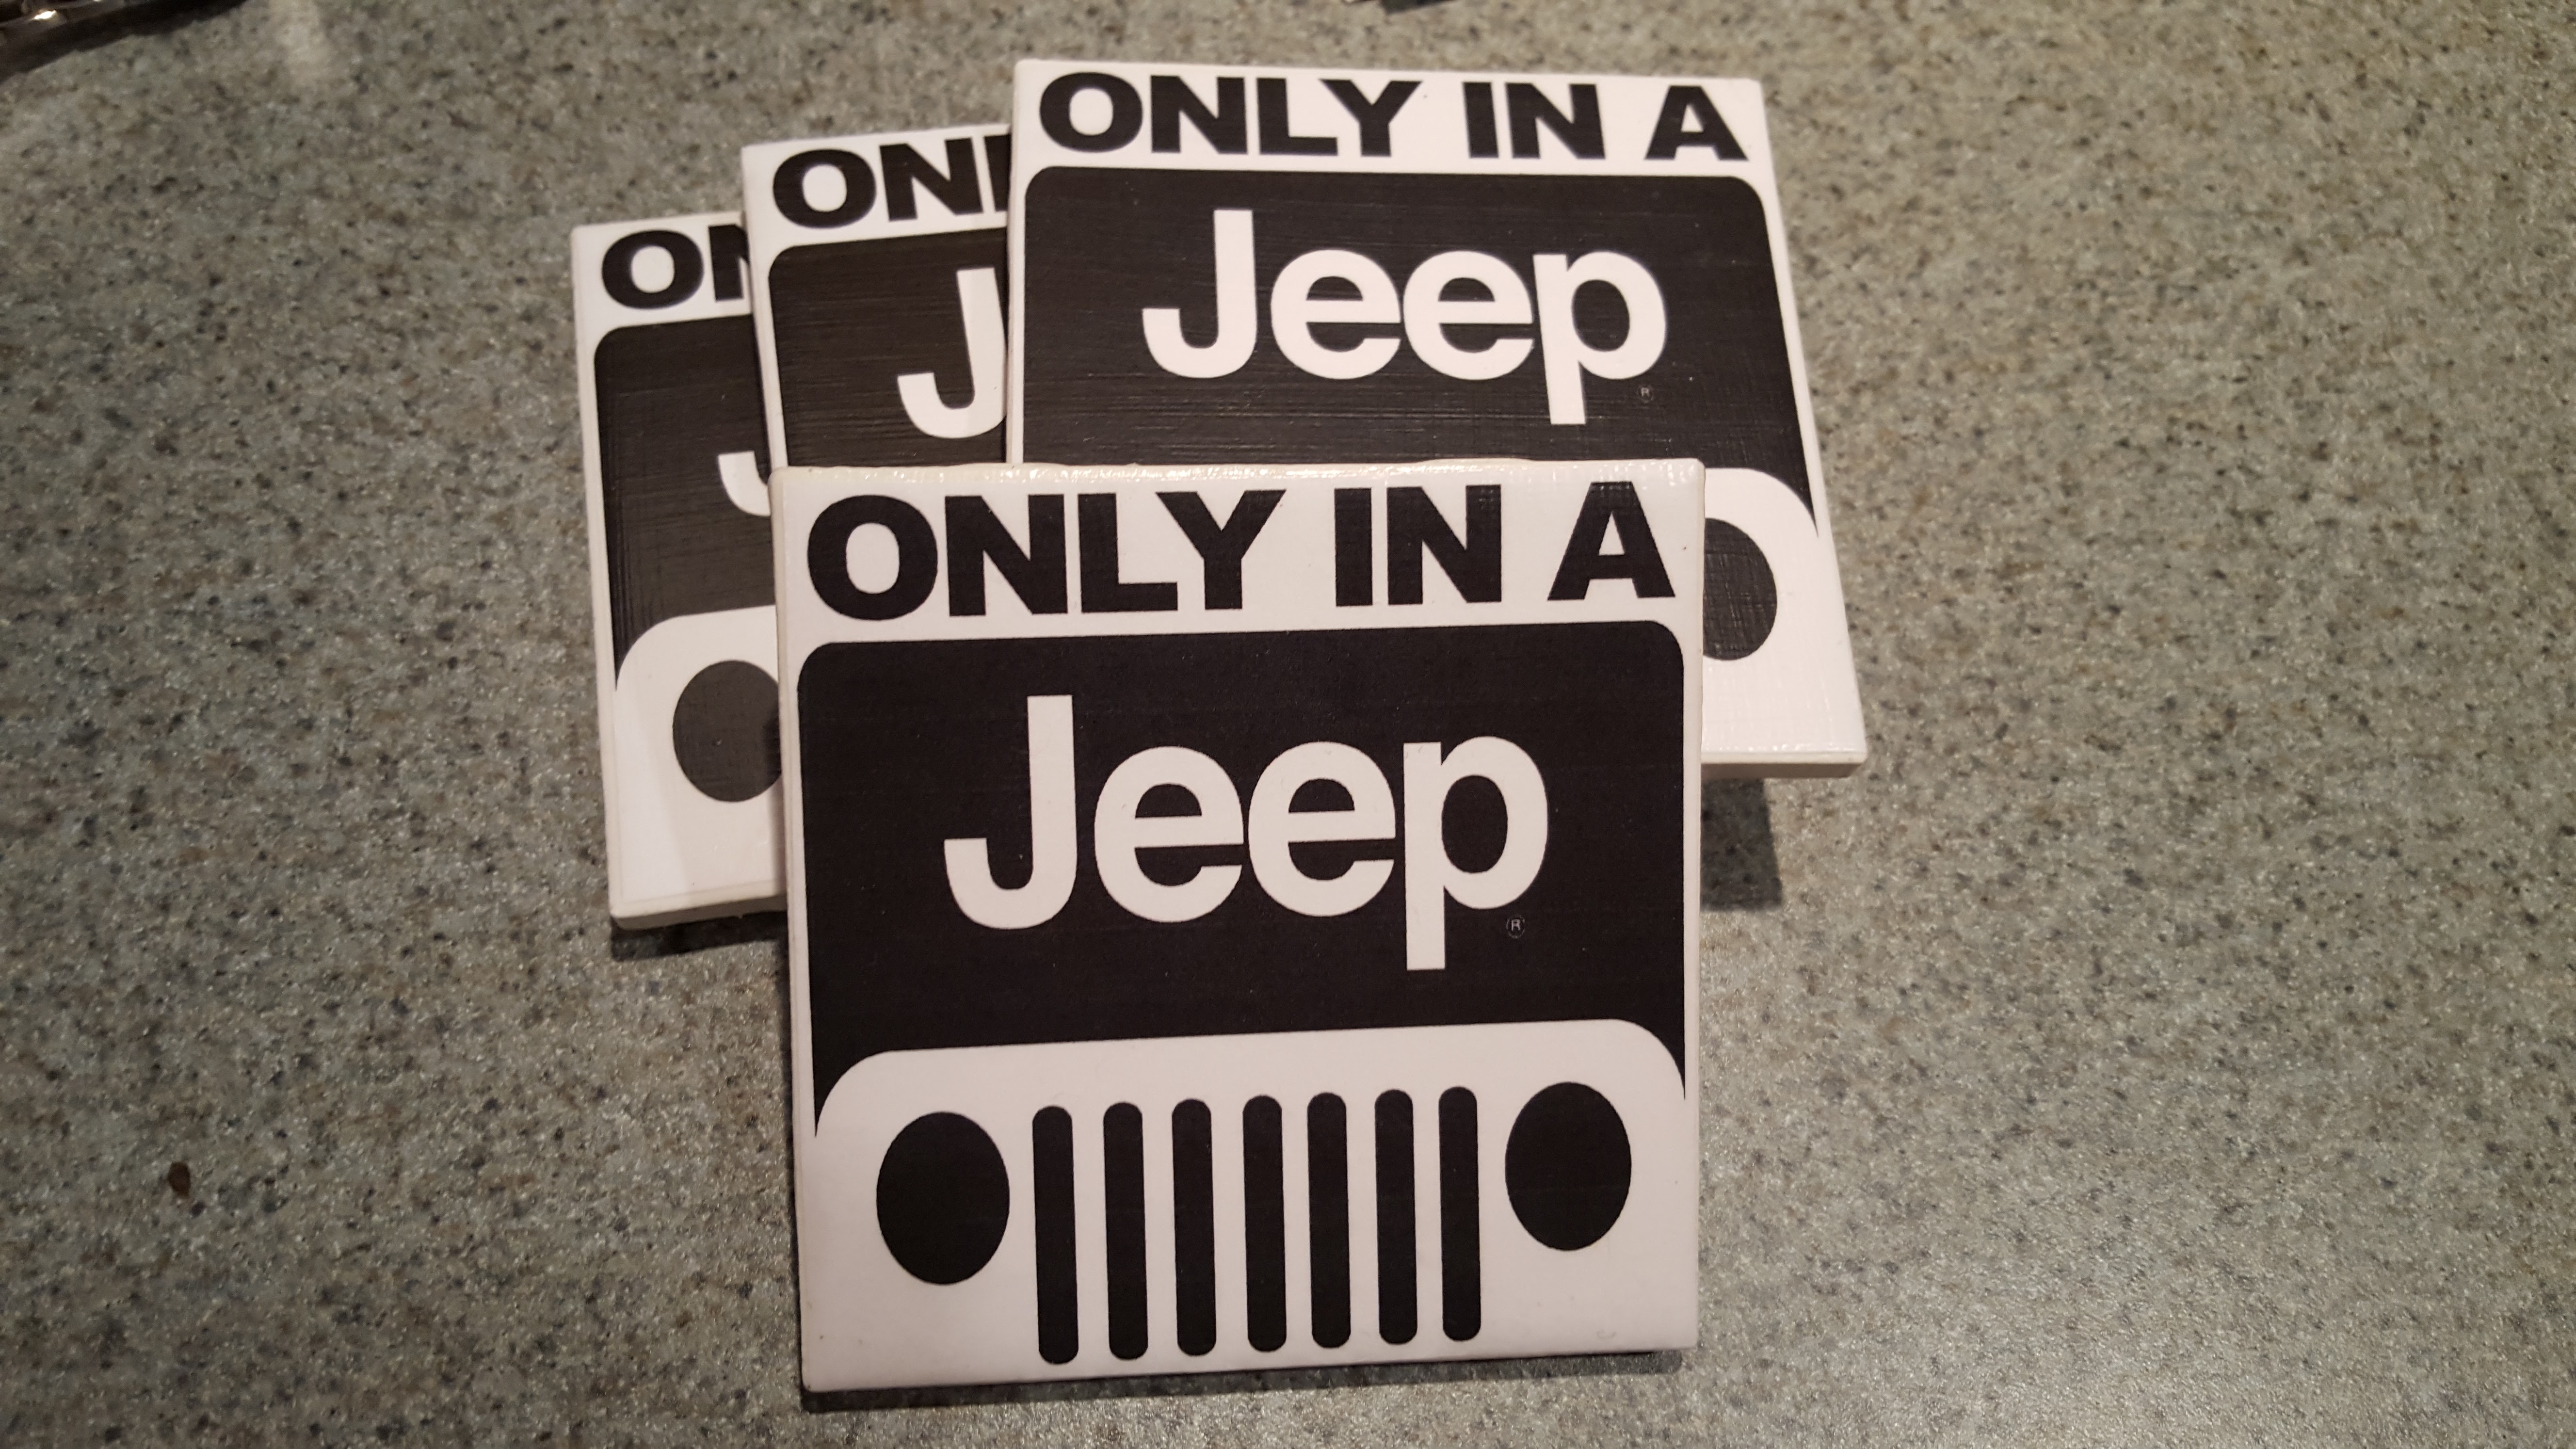
My mother was at a craft show this weekend and came across these coasters and thought they would be cool! Hey, it's Jeep! Of coarse it is! Just thought I would share em!

Thread Starter
JK Enthusiast
Joined: Sep 2015
Posts: 419
Likes: 22
From: Madison Heights, MI
Time To Get The Winter Clothes Out!
Well, didn't get my Trektop NX write-up done this weekend, but it is still coming and will be posted soon! This weekend, I removed the Trektop and switched back to hardtop for the winter months as I don't wanna damage the soft top with snow and ice, especially if I have a hard top that I can easily put back on! Removal of the Trektop took maybe 15-20 minutes to get everything including hardware off, and the hard top back on took another 15 minutes or so! Pretty quick process and now the Jeep is ready for a good winter here in Michigan!


Thread Starter
JK Enthusiast
Joined: Sep 2015
Posts: 419
Likes: 22
From: Madison Heights, MI
Gentex Homelink Mirror
Well, thank you postal service! My mirror was just delivered yesterday evening, and my expected date was not until the 13th! WAAAAY ahead of schedule, but I'm not complaining! Now I just am waiting on the harness to be able to power the functions on the mirror and I will be good to go! That expected delivery is the 16th of the month, but idk? It's just coming from the west side of Michigan here, and if the postal service works as fast as they did with the mirror, I could see it in the next few days! In the mean time, here are a few pictures of the mirror:

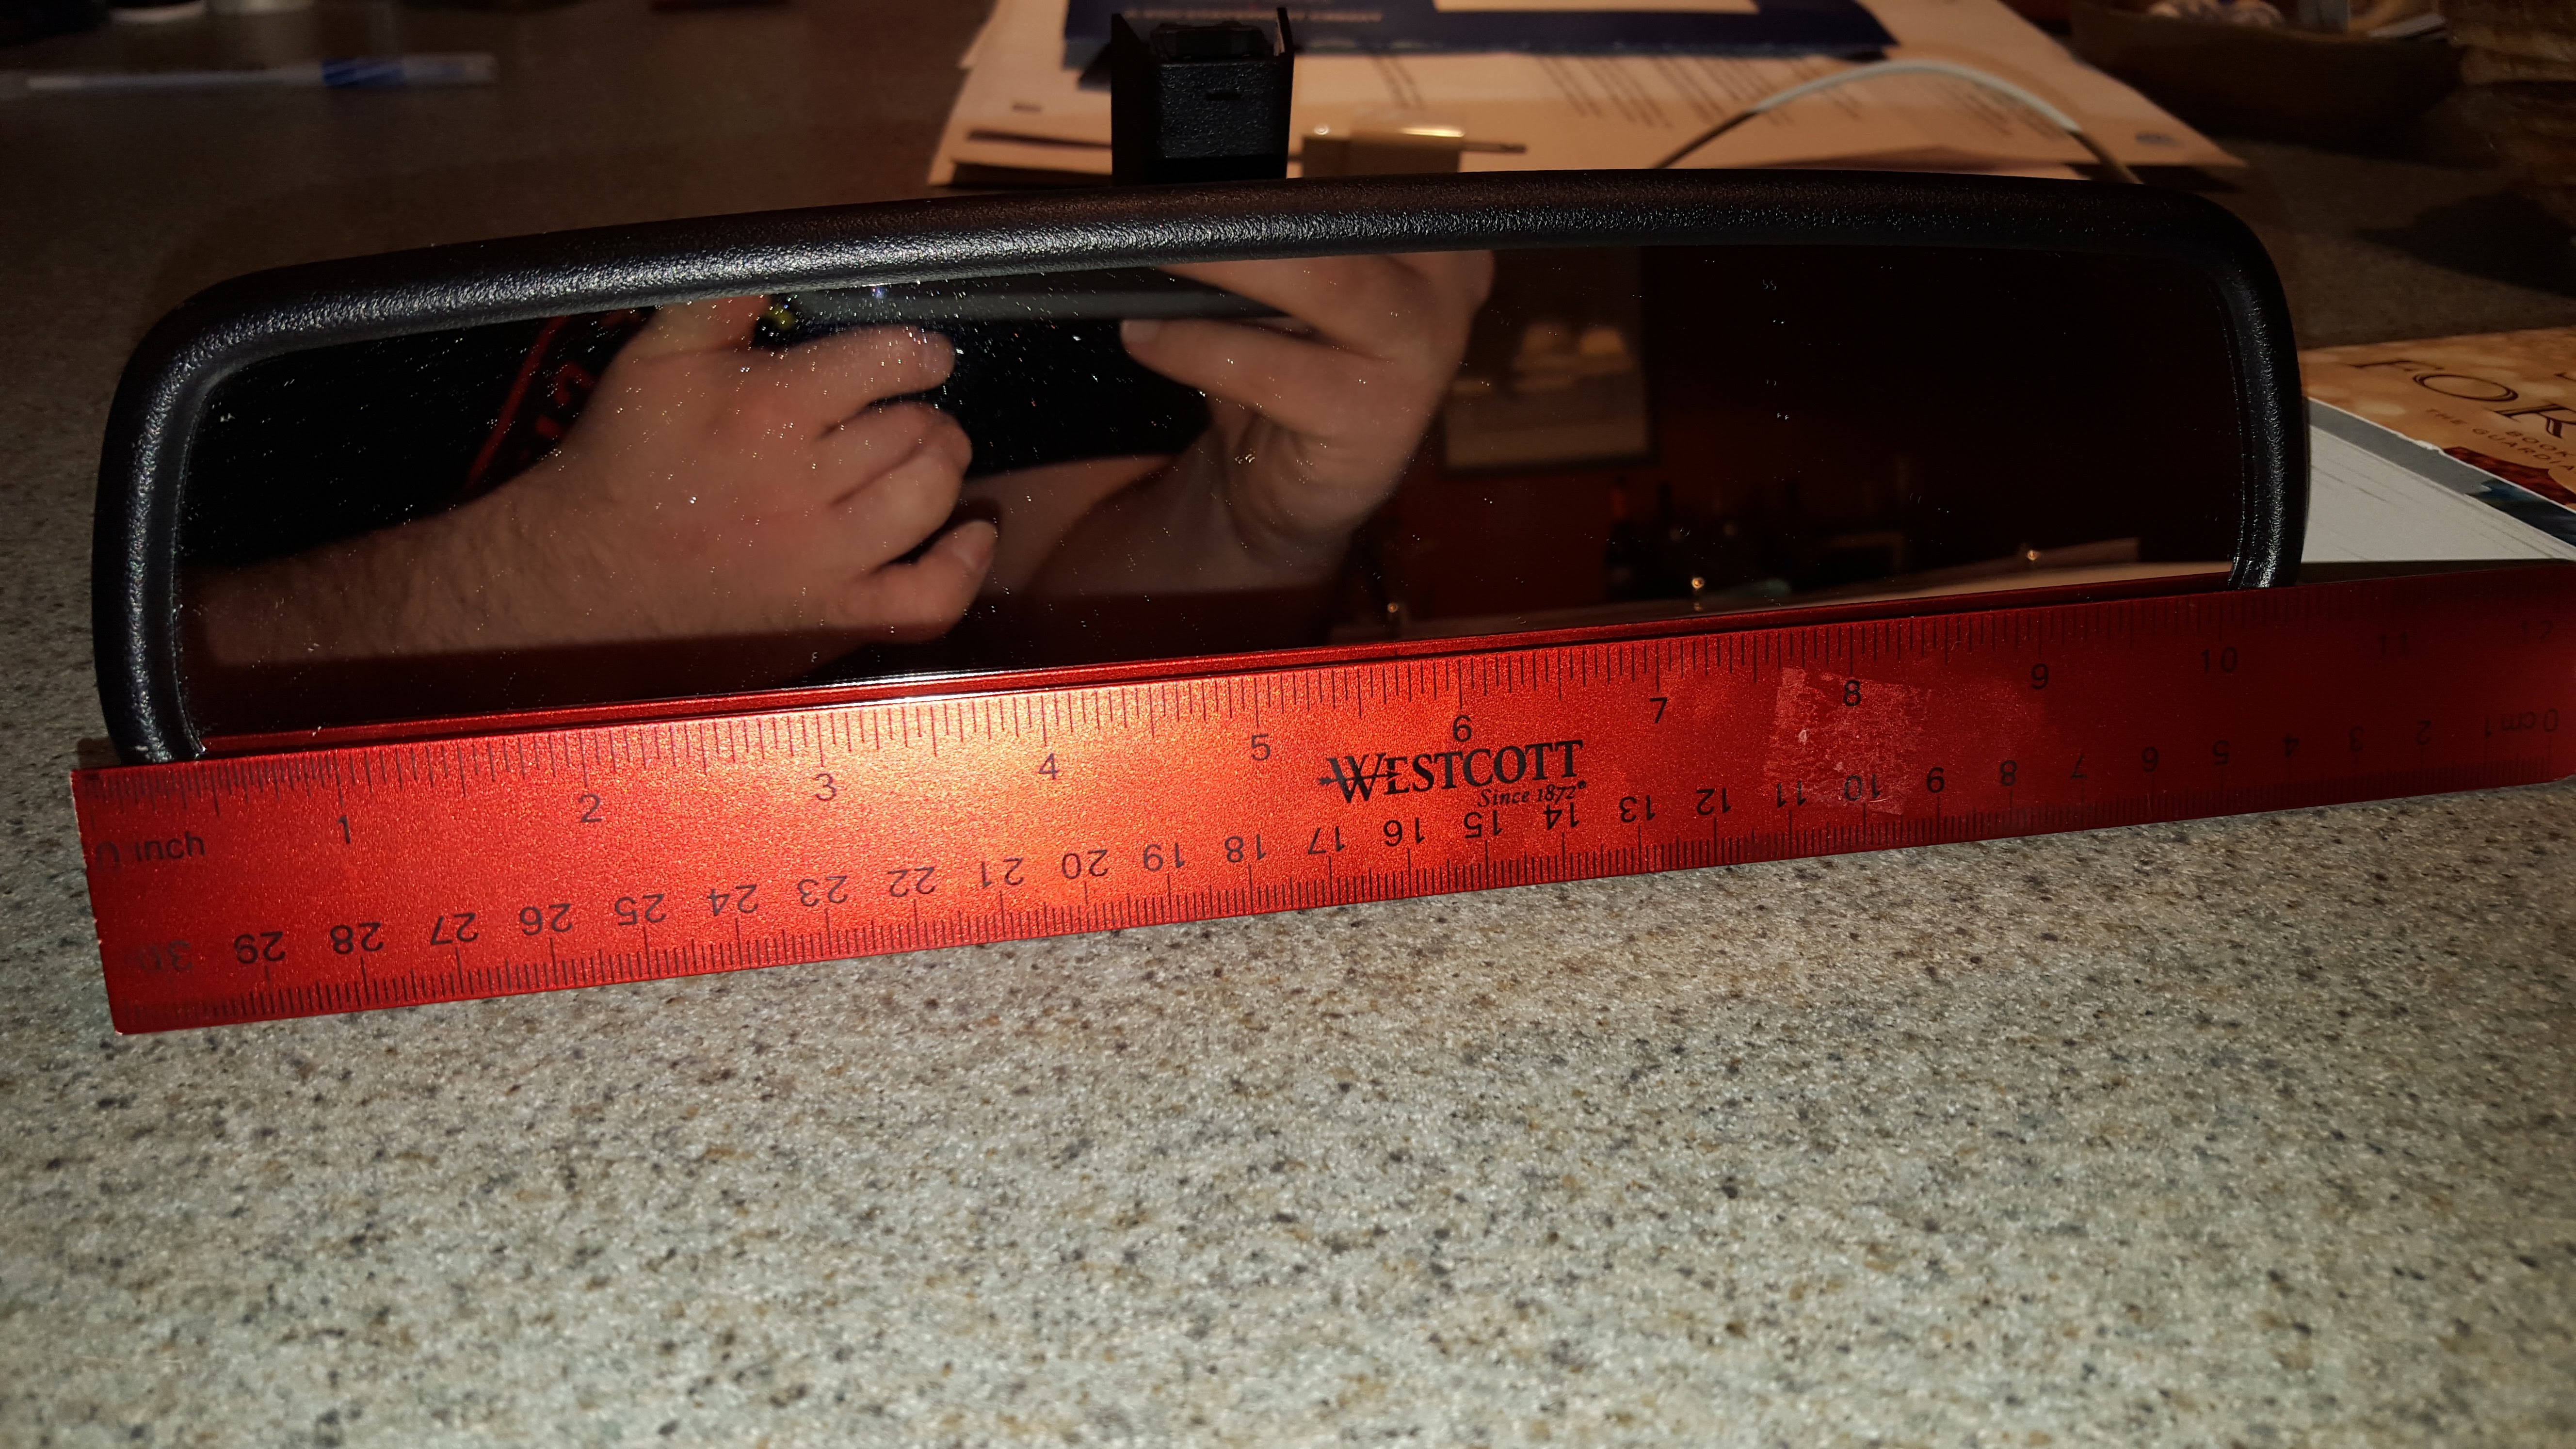
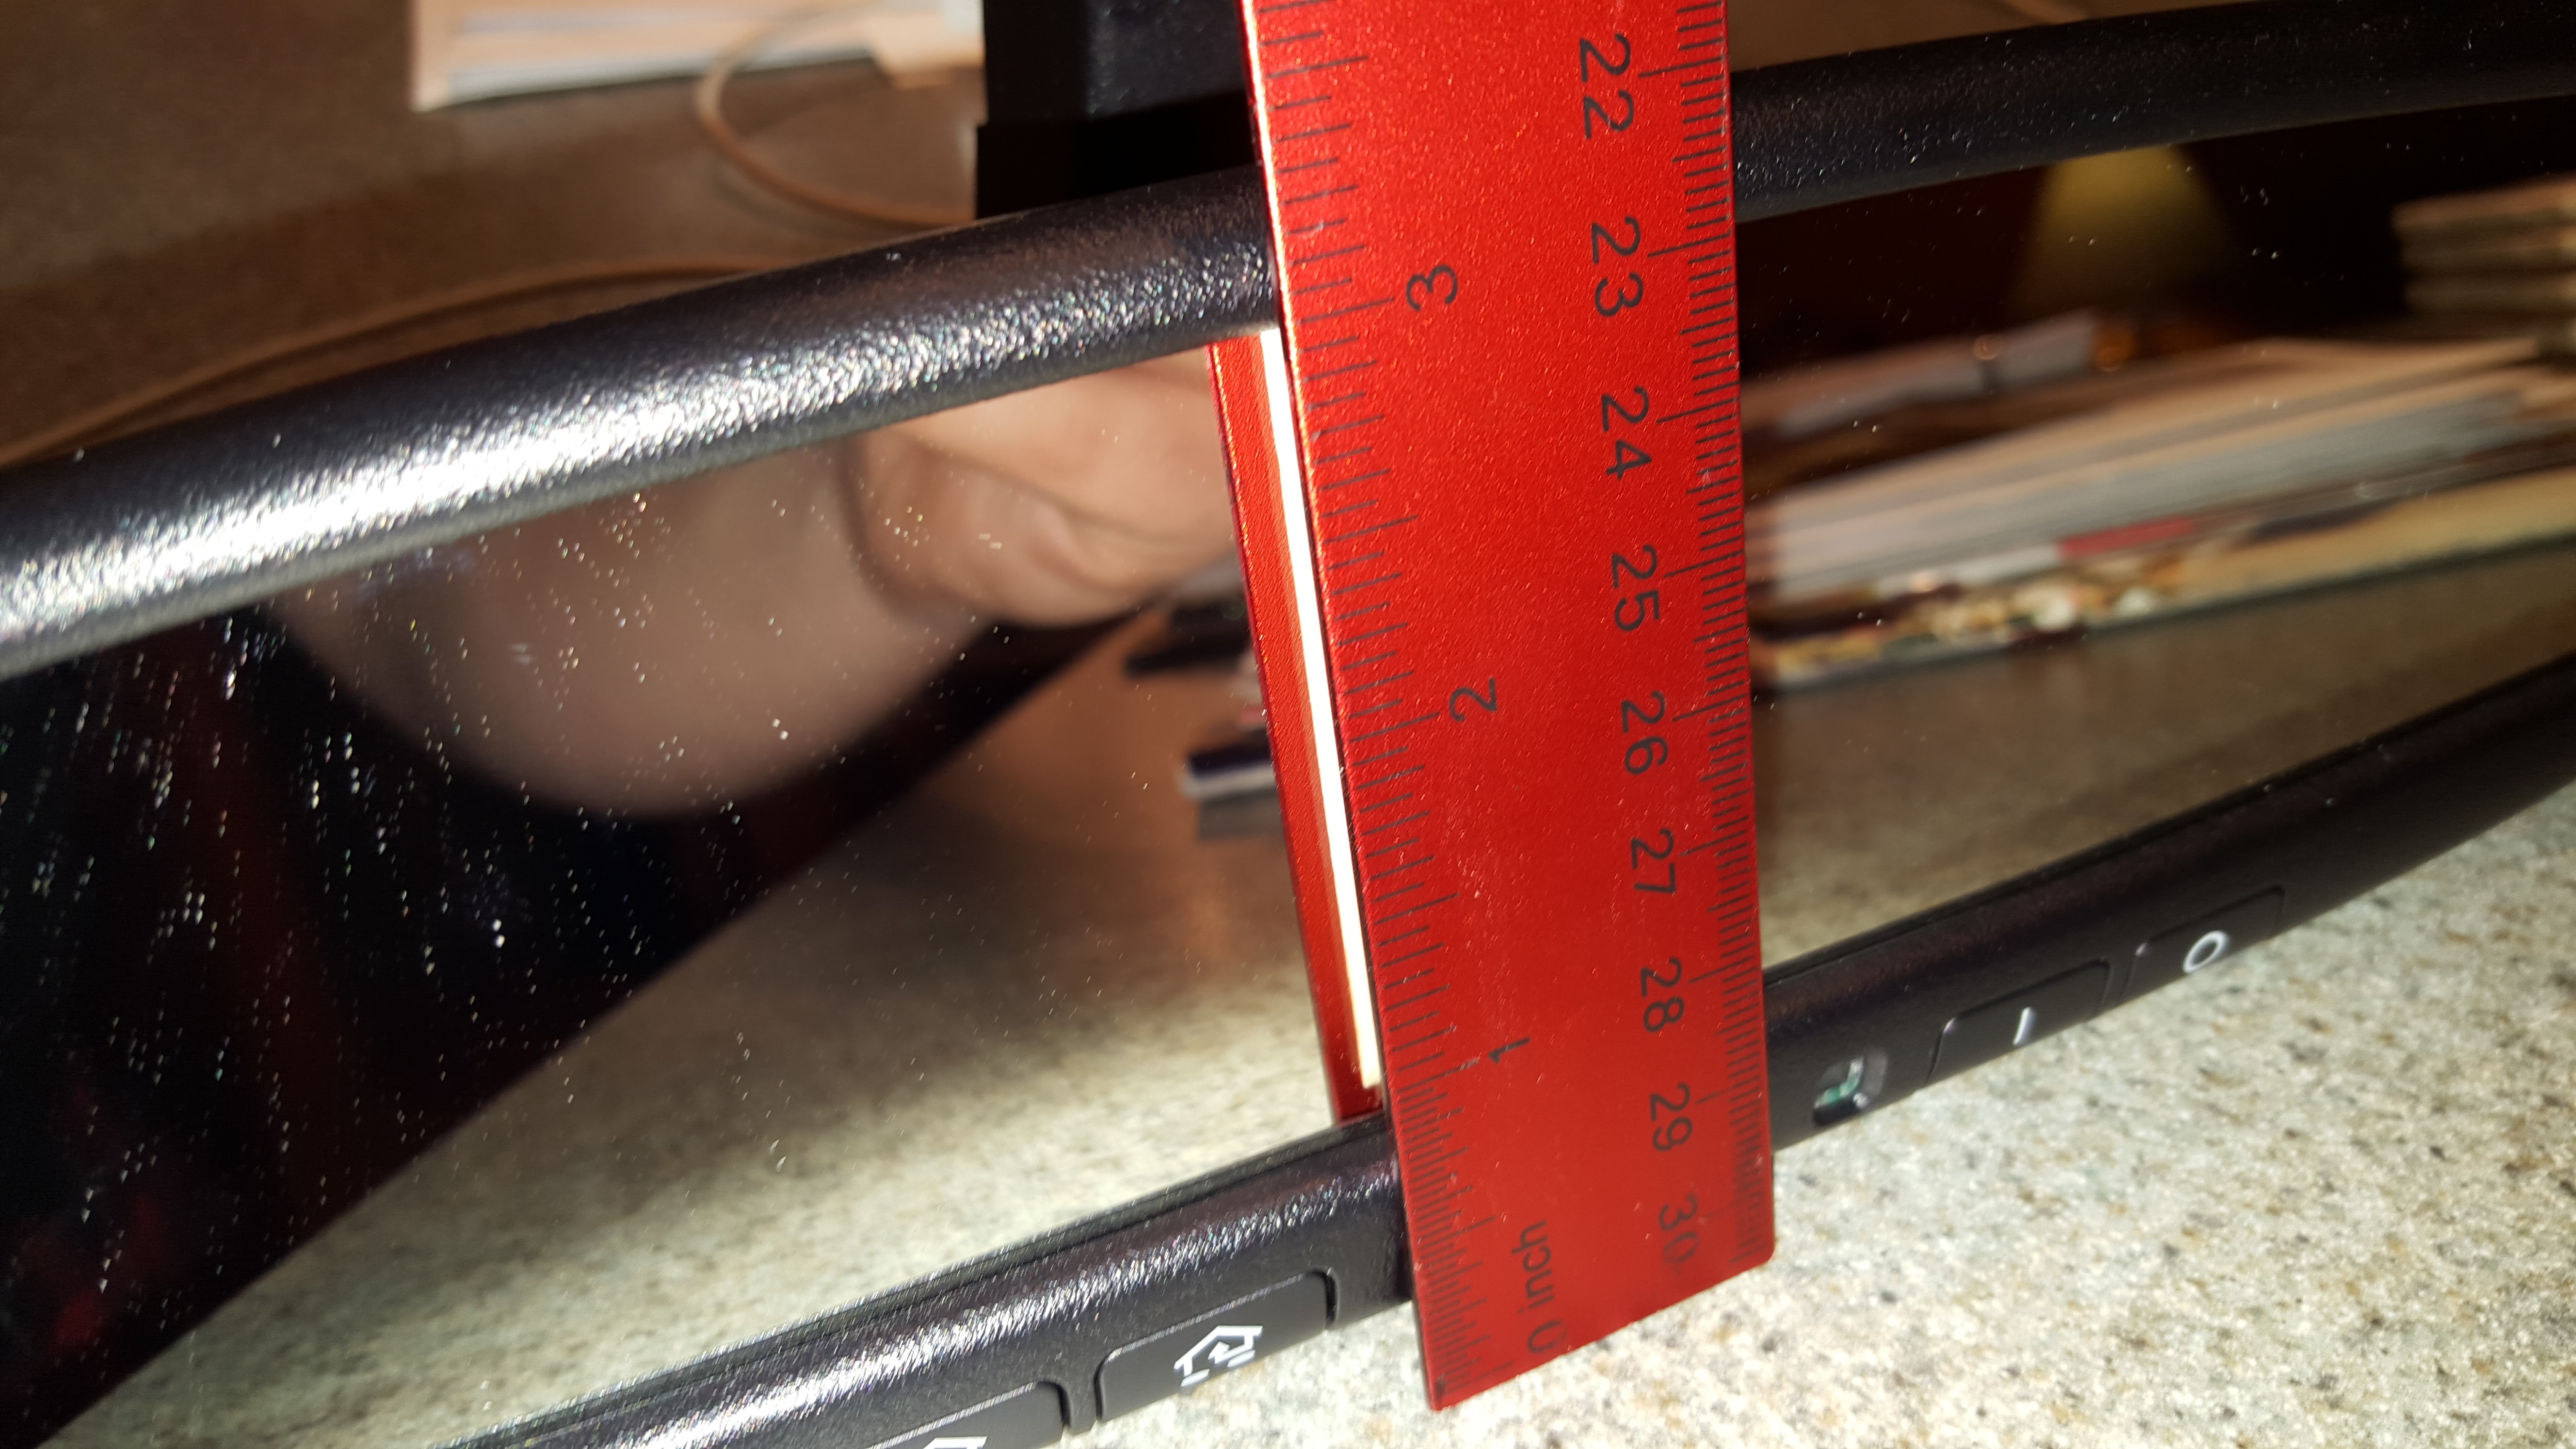


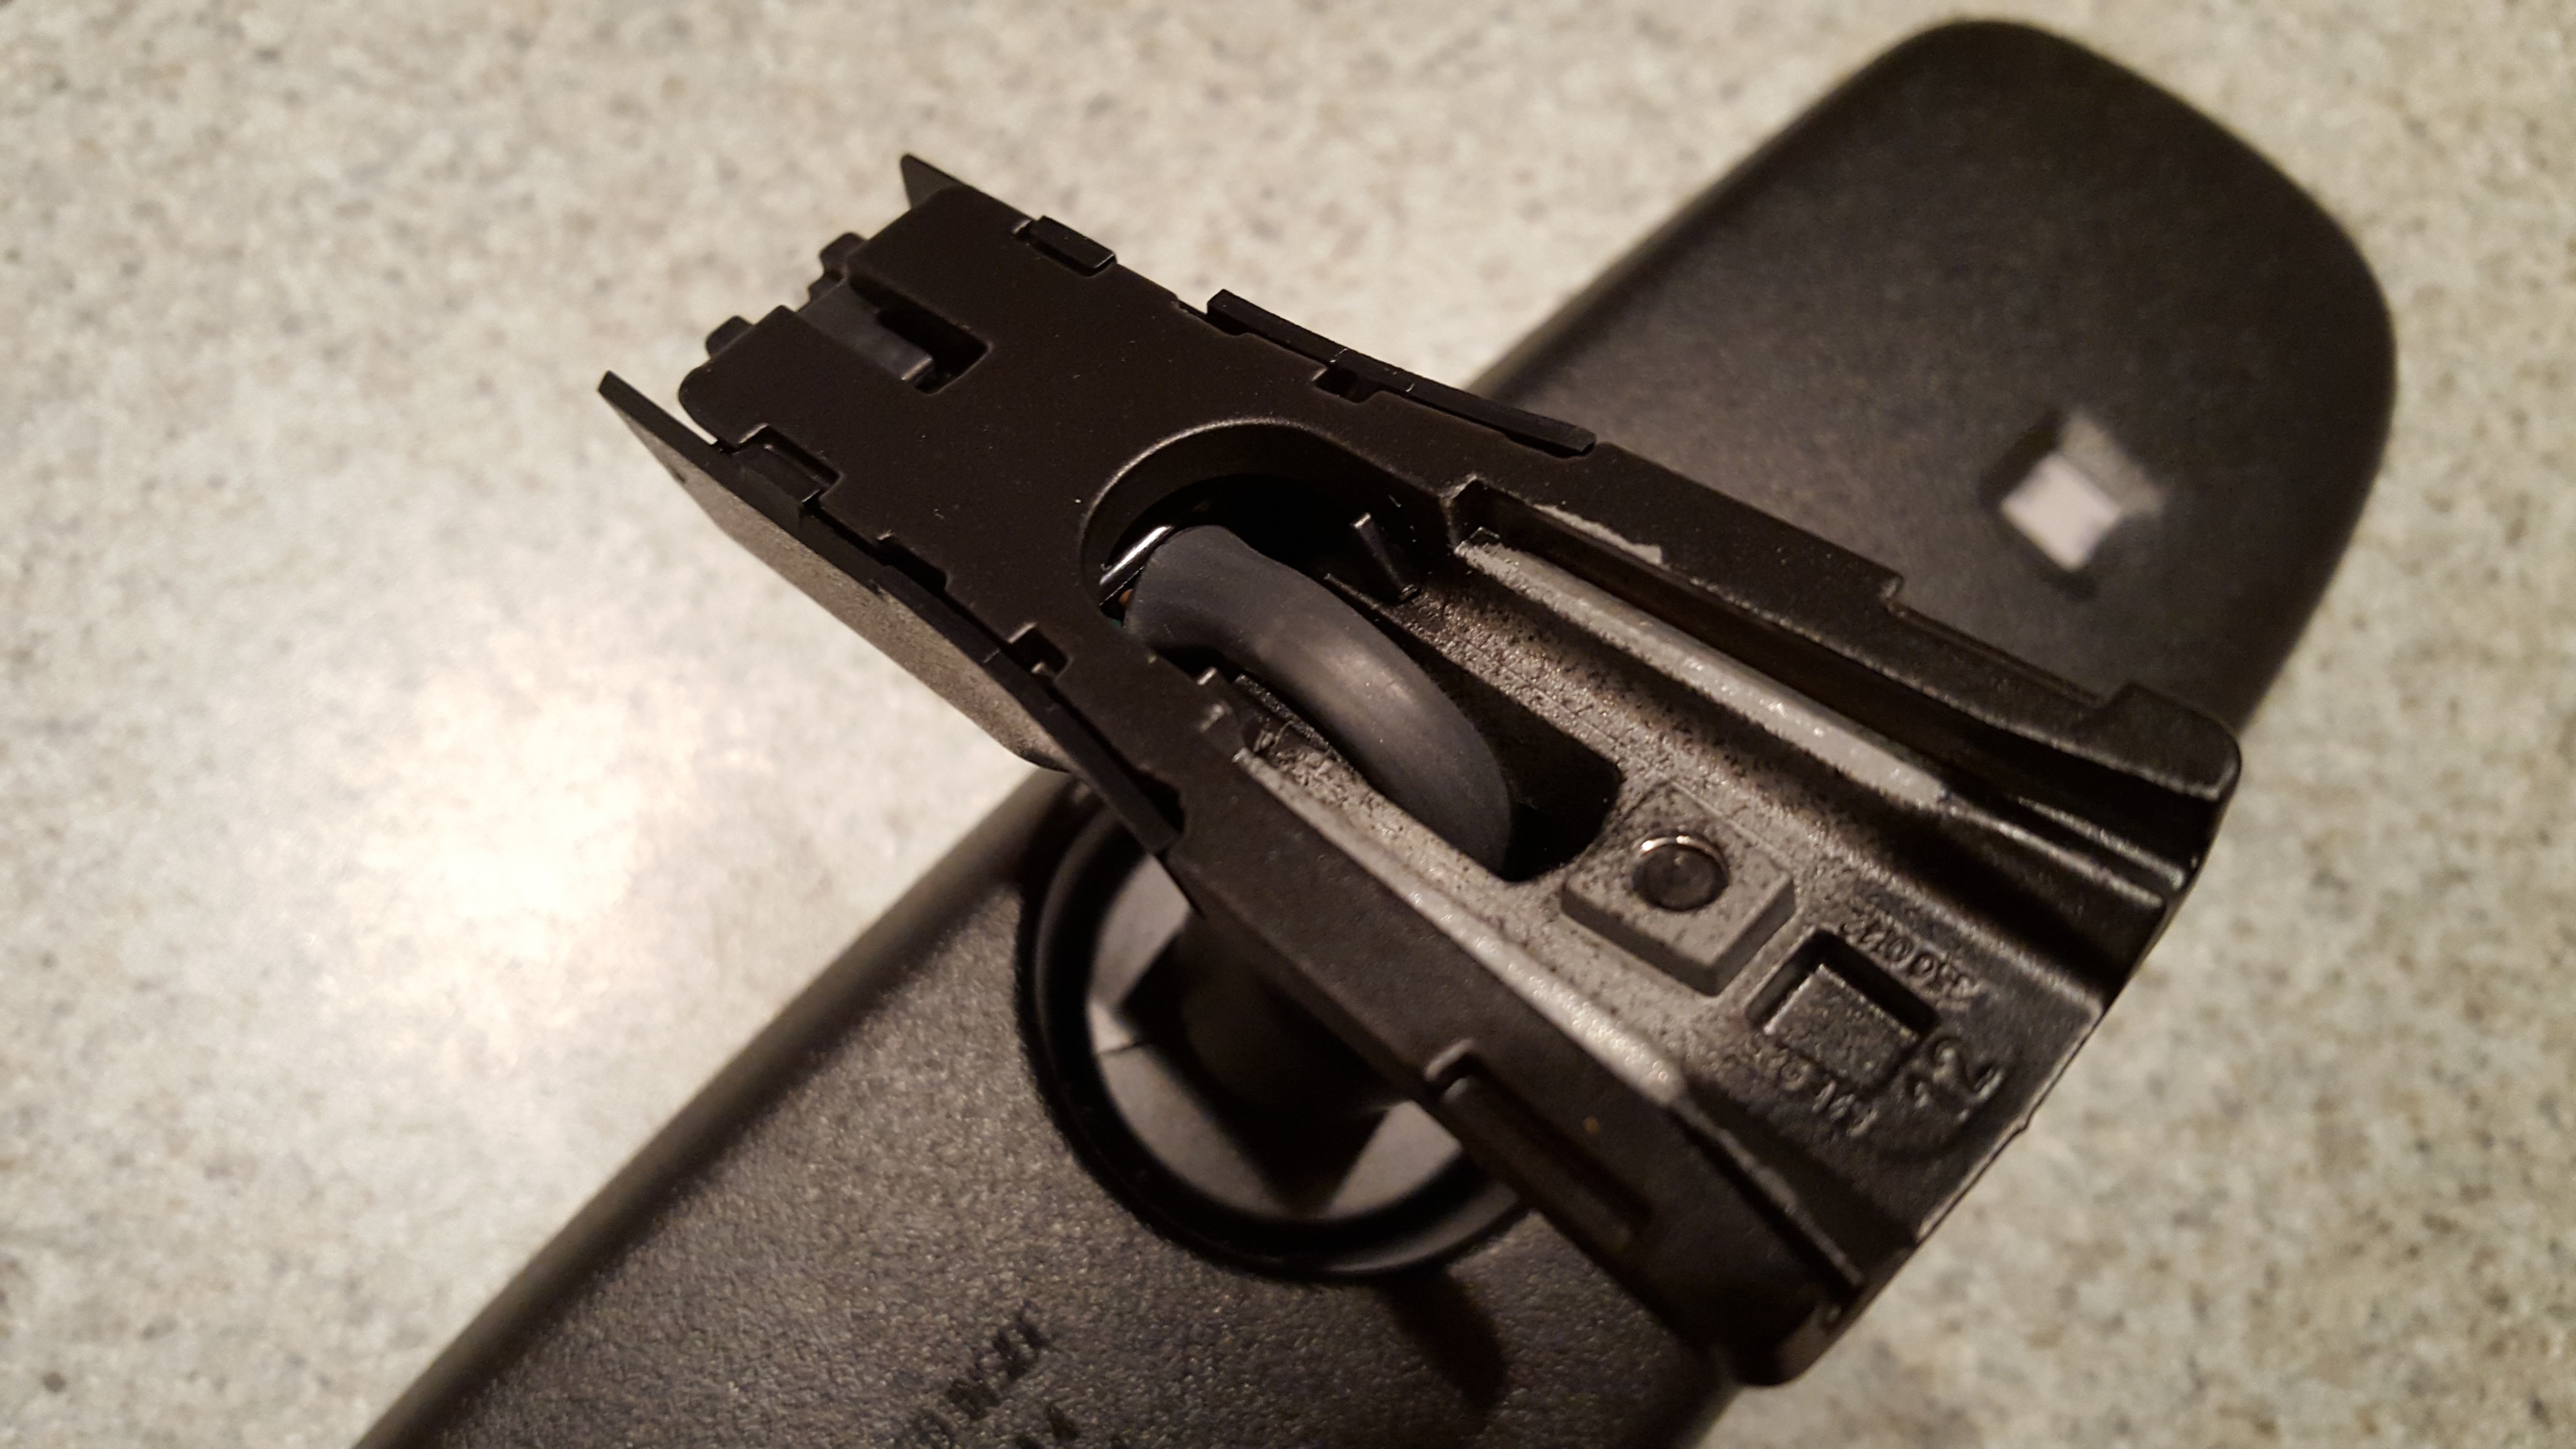
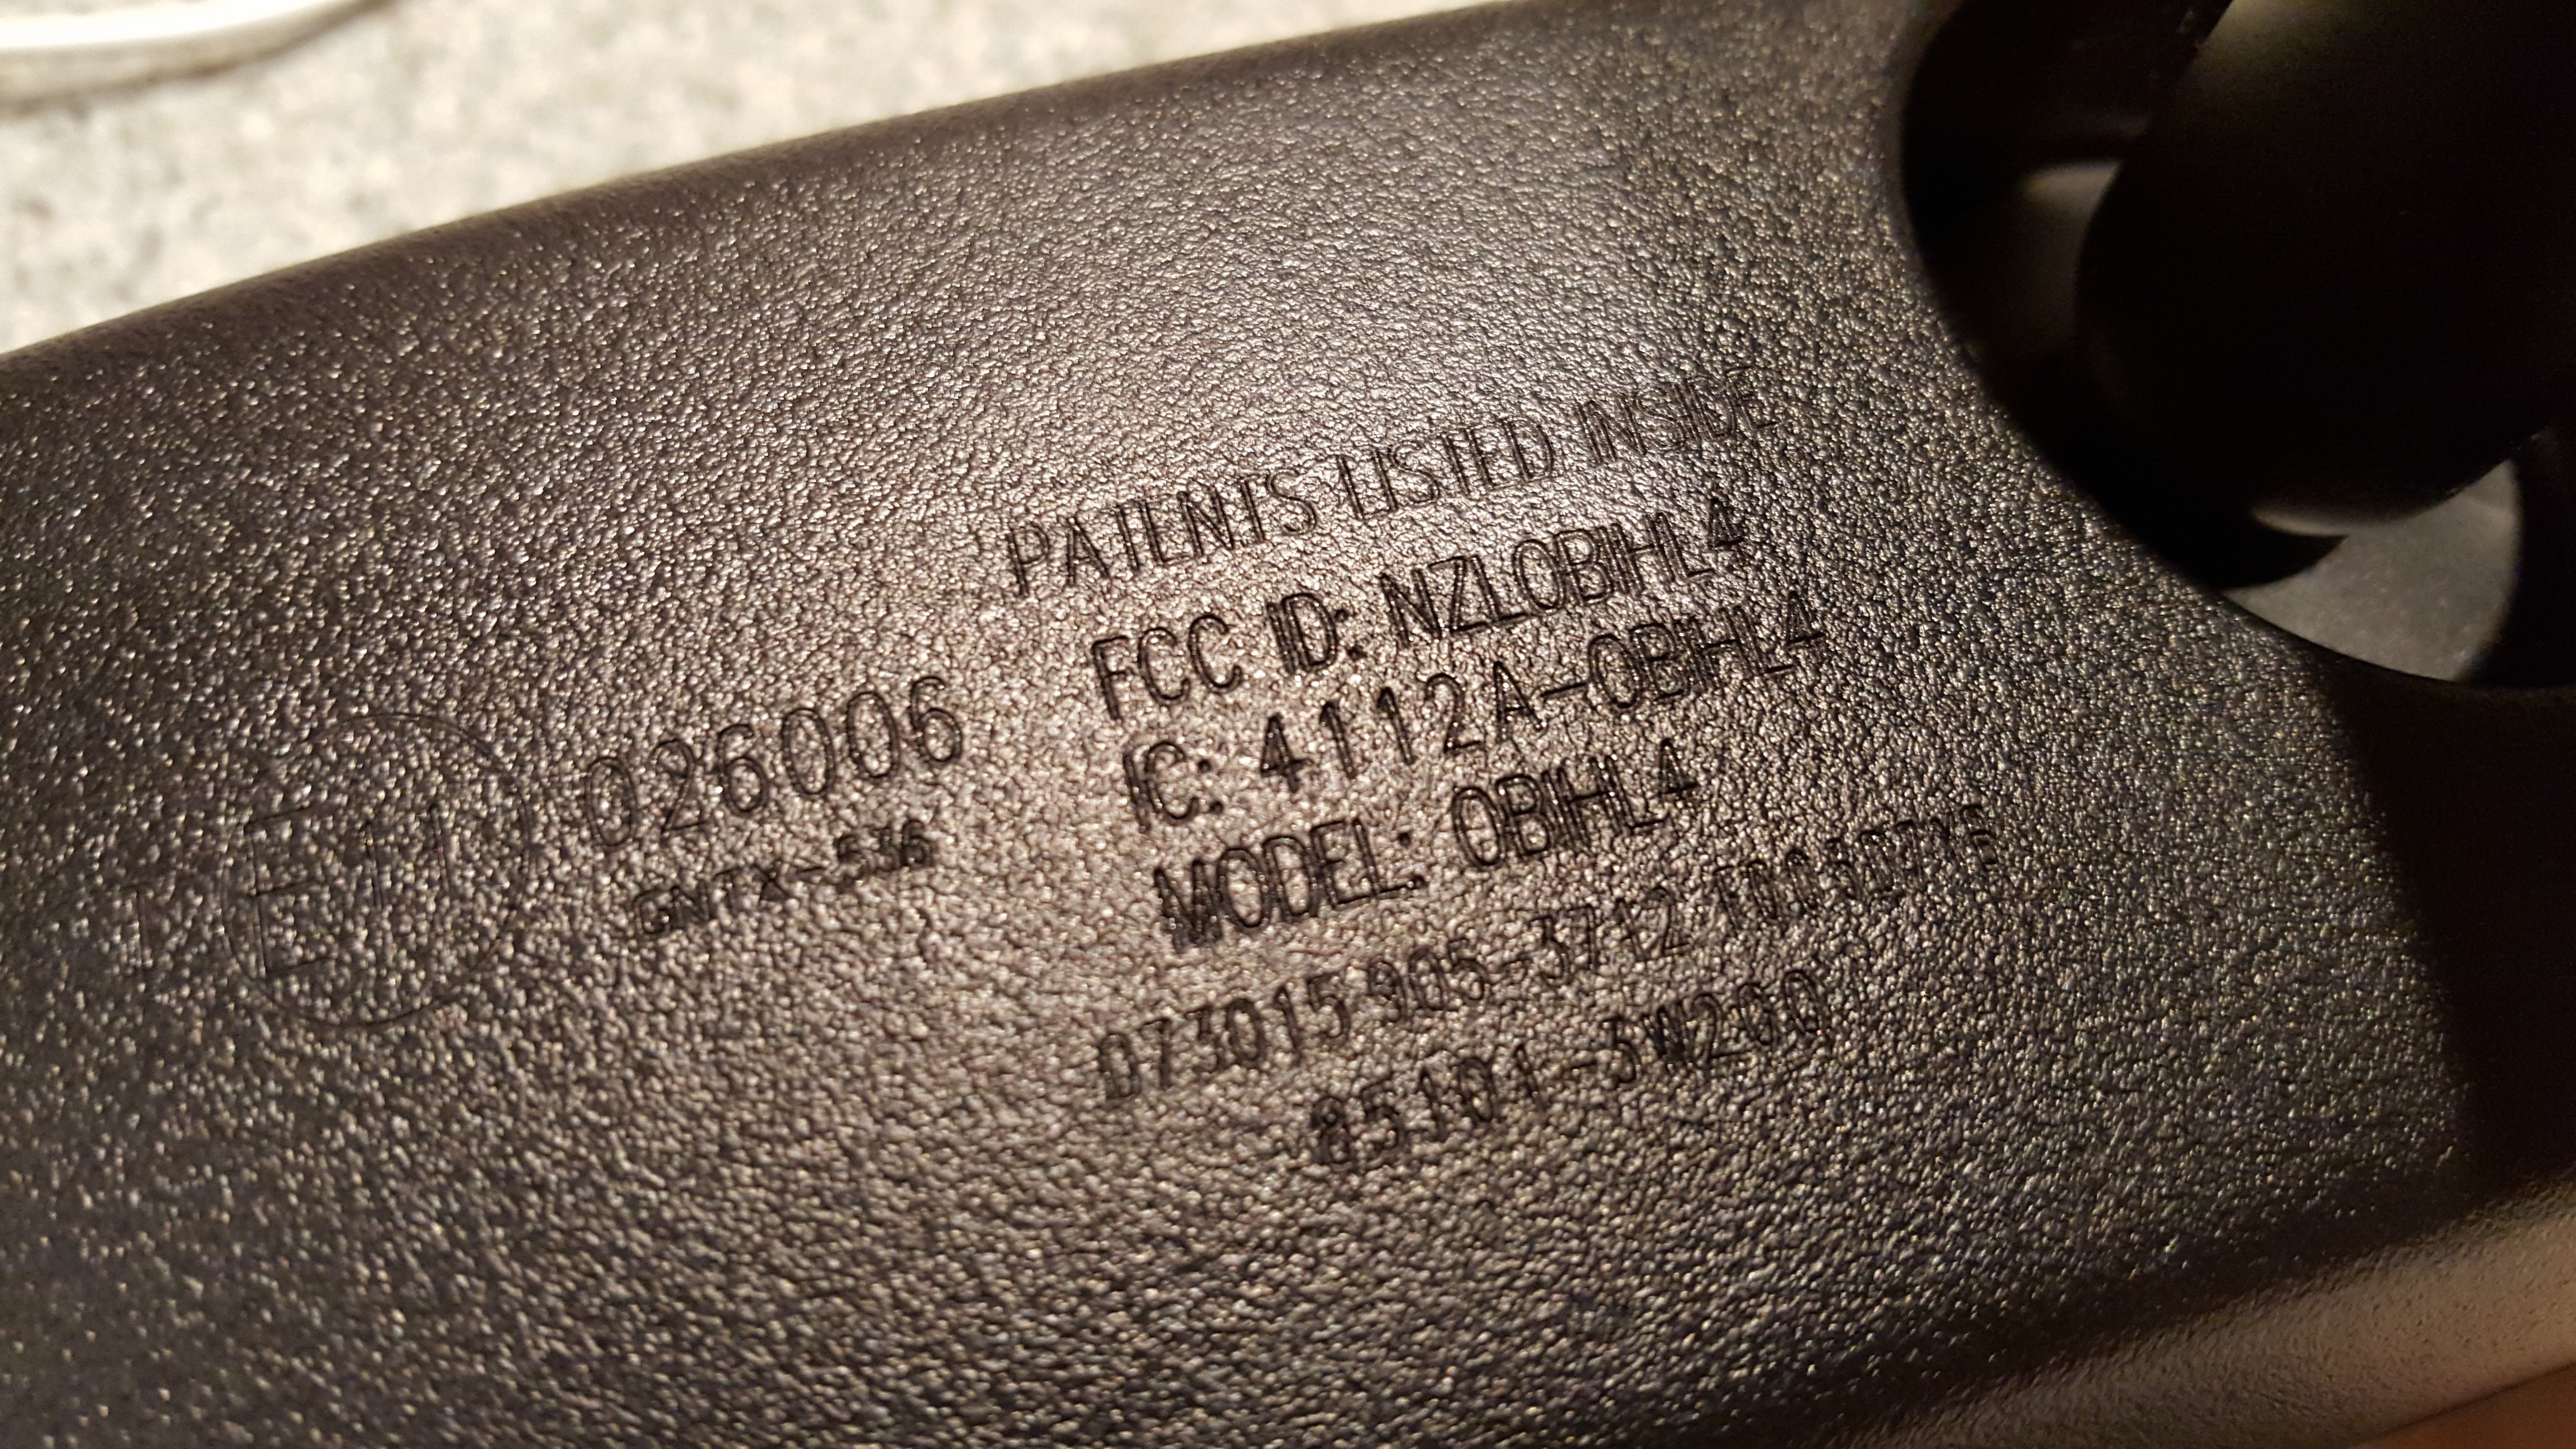
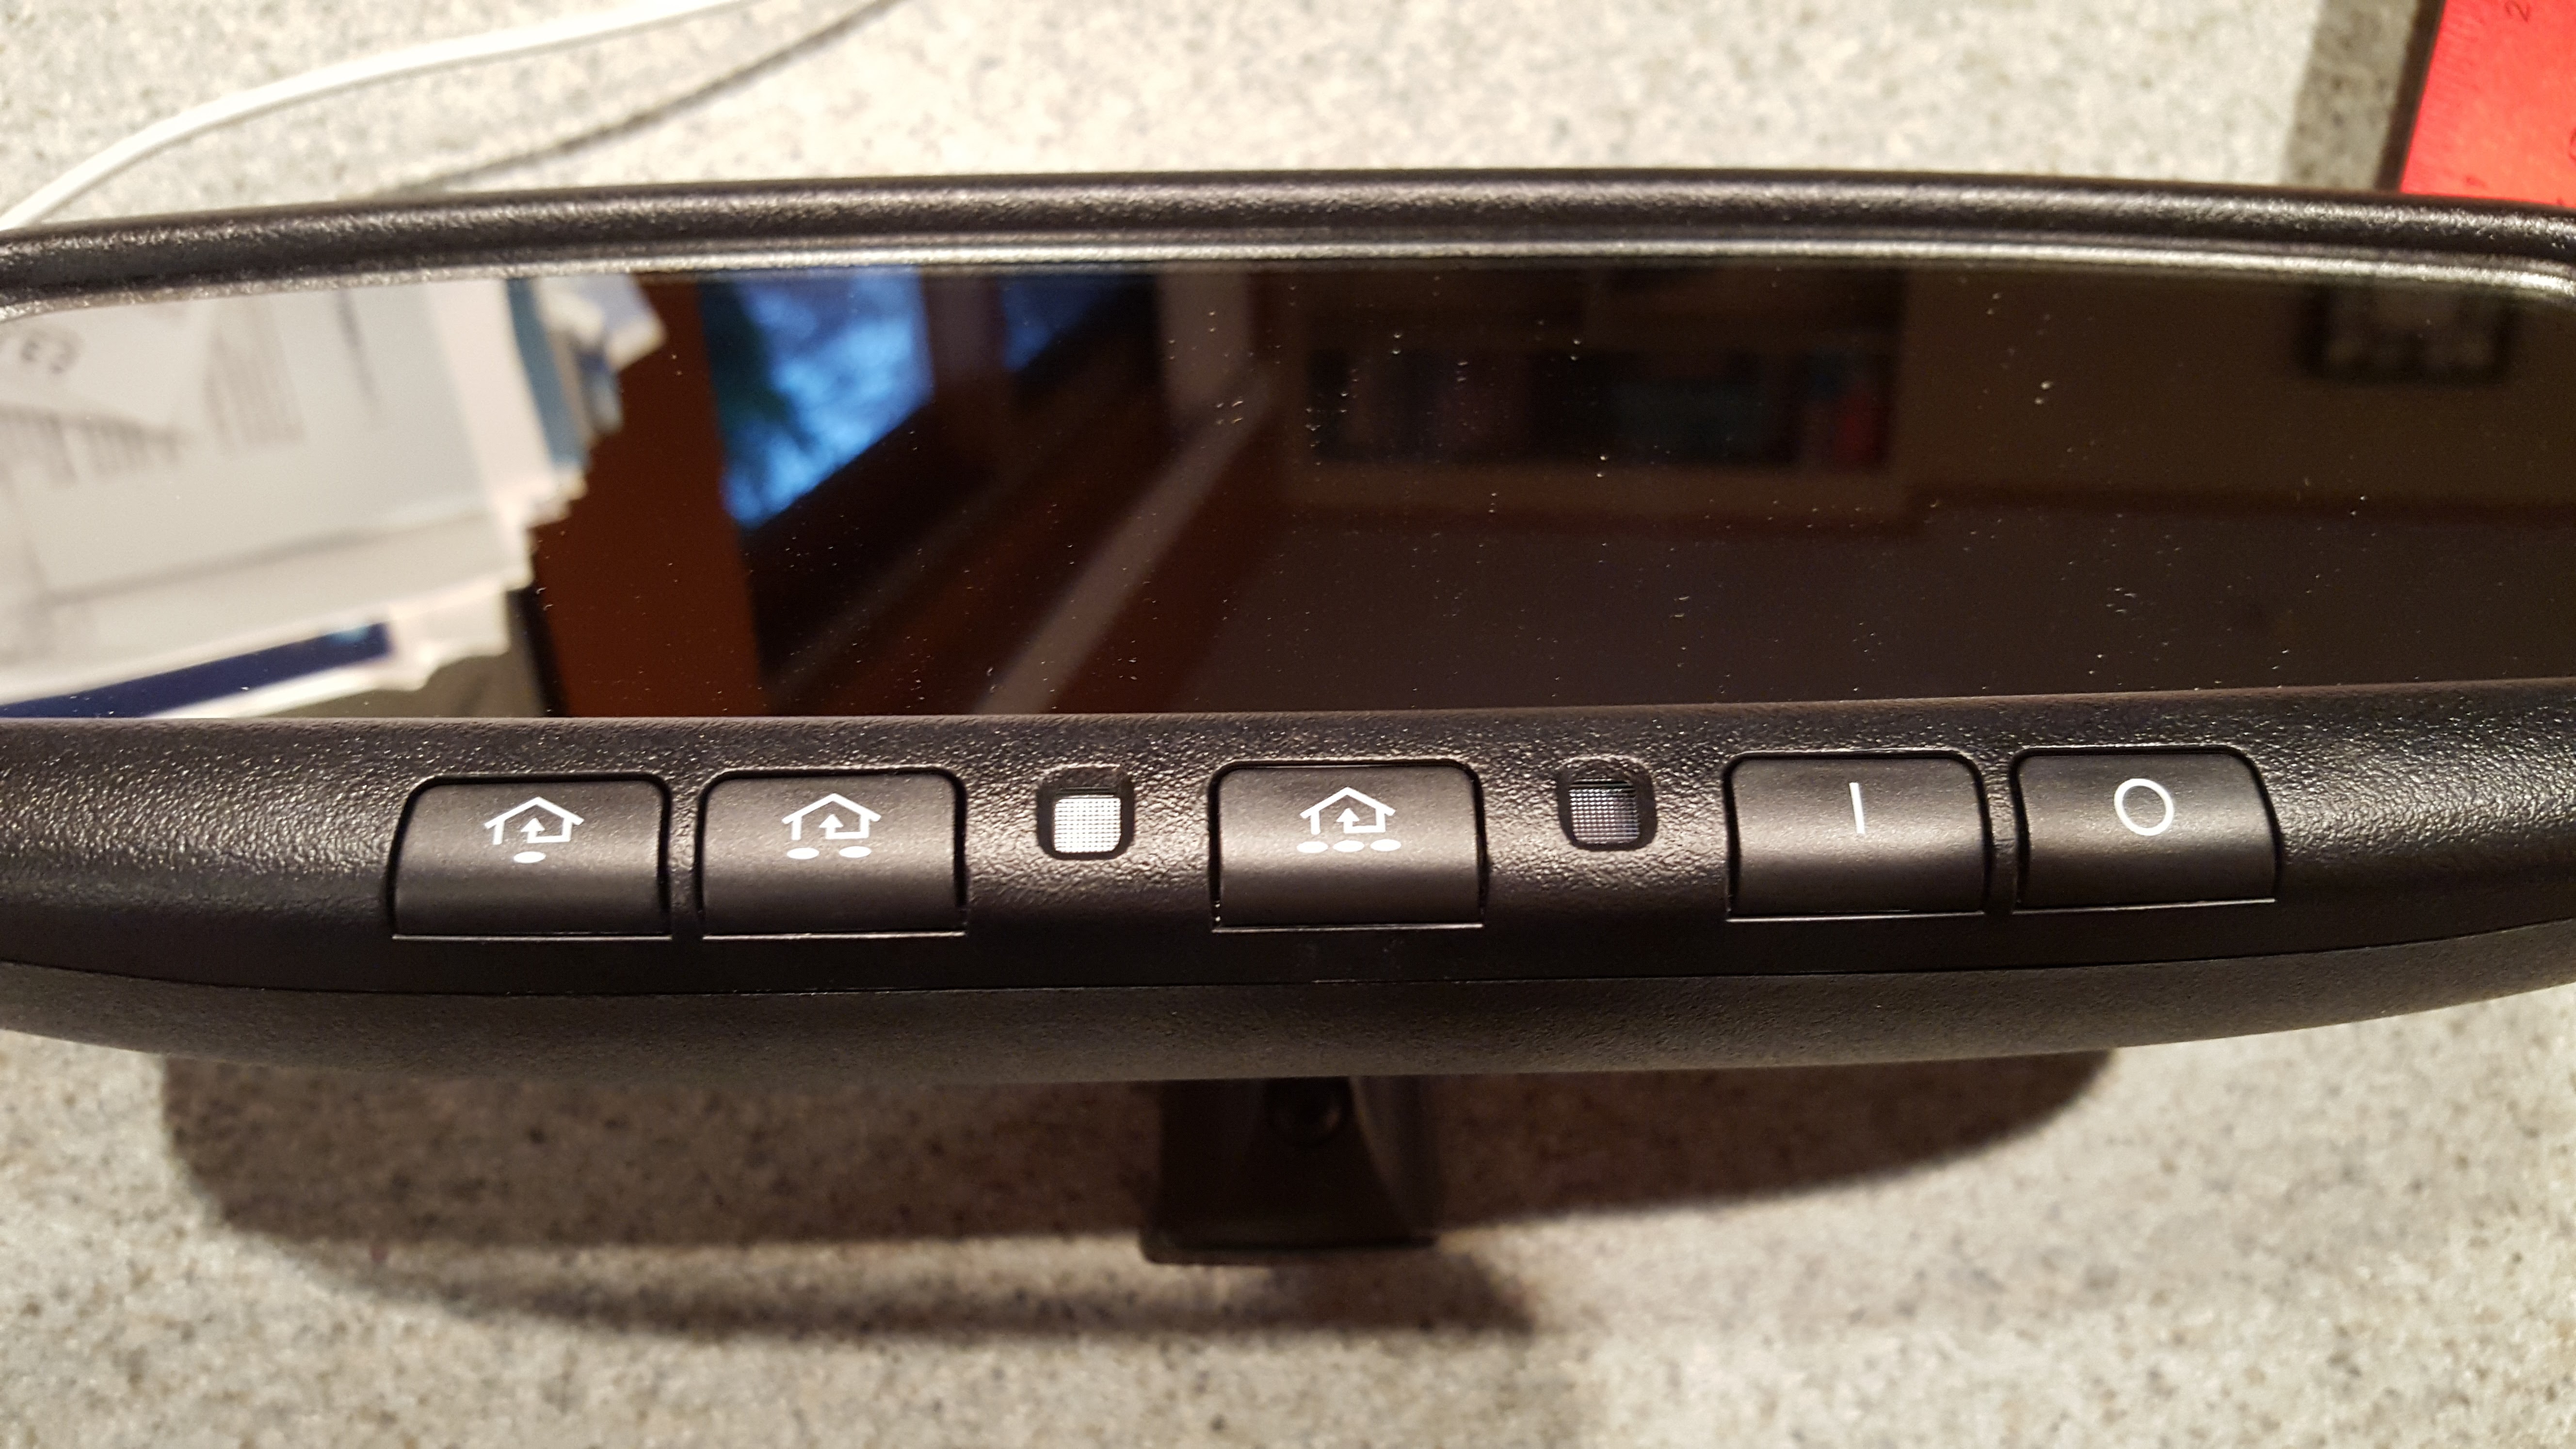
So this mirror is GNTX 536. It is noticeably wider than the stock mirror in my JK, maybe half an inch on either side. The height of the glass part of the mirror is roughly the same, however, the over all height is a bit taller to accommodate the added buttons below! Held it up for a test fit and seems as though it will fit well! Any questions, let me know!
So this mirror is GNTX 536. It is noticeably wider than the stock mirror in my JK, maybe half an inch on either side. The height of the glass part of the mirror is roughly the same, however, the over all height is a bit taller to accommodate the added buttons below! Held it up for a test fit and seems as though it will fit well! Any questions, let me know!
Thread Starter
JK Enthusiast
Joined: Sep 2015
Posts: 419
Likes: 22
From: Madison Heights, MI
Bestop Trektop NX Install (Not Black Twill Version)
Well, as promised, here is a write-up for the installation of the Bestop Trektop NX on the 2 door JK. I purchased and received this top once I got back from Oklahoma and installed it in June, so I have been enjoying it this past summer, but I wanted to get a write up on the installation done before the hardtop went back on for the coming winter months here in Michigan! This top has been on my Jeep for 4 and a half months now, and it has been way better than I expected it to be!
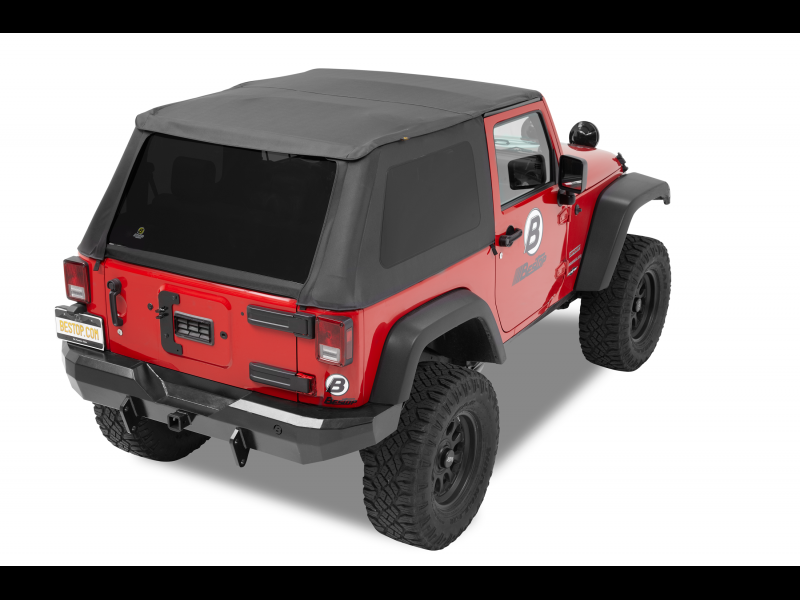
Bestop
The top is almost just as quiet as my hardtop was, the tinted windows match the tinted front windows perfectly, keeps the inside cool and dry, no leaks, never had any issues with flapping, fits tight/snug with solid construction, and very, very versatile. I would like to make a few comments about the install before I start though.
1. First off, this top does have very little hardware, which is great, so don’t think you are missing anything when the box is opened.
2. Second, this is an extremely tight fitting top, as it is frameless, so you will absolutely need to take all the pieces out and lay them in the sun for a while so they will warm up and be more flexible (Though careful when you go to grab them because depending on the sun coverage, they do get quite hot on the outside).
3. The rear window and side panels, when initially installed, will seem like they are way too far apart and small to actually work and go together, but they will stretch out a bit over time, and they are supposed to be that way as the tautness of the top is what gives it its strength.
4. The directions that come with the top from Bestop absolutely suck! They do not show much, it’s hard to tell exactly what pieces you need, and which direction brackets are supposed to go. So you can use the directions as I loose guide, but I highly recommend going to Bestop’s YouTube page and following along with the install video as it is much more descriptive and clear.
https://www.youtube.com/watch?v=kdphp8xtZ60&list=PLc92kHHlACzy2DuMGMsLGEo9TxHJnITZa&index=10 5. And lastly, make sure you have patients when installing the top and it will go on!
So with those comments out of the way, here is my guide for the installation of the Bestop Trektop NX:
1. Open the Bestop Trektop NX packaging and remove all the fabric panels and the top itself and lay them all out in the sun so they will warm and become more flexible. There will be 4 total pieces to lay out! (The back window, the top with front frame attached to it, and the left and right side panels)
2. Once those are warming, go through and make sure that all expected and needed hardware is there. (You should have the 4 fabric panels, Left and Right Door channels, 2 mounting brackets, 2 hinge brackets, 2 tailgate bar retainer clips, Front and Rear bow bars, $ pieces of foam tape, 4 hand screws for door surround attachments, and some miscellaneous screws, washers, and nuts for attachment of a few additional items, and the nylon straps with clips to attach the middle of the top to the sound bar and the back of the top to the tub)
3. Whether you have a soft top, or a hard top, the next step is to remove you current top, along with all the hardware that comes with it (with the exception of the tailgate bar clips if you have a soft top as those can be reused)

4. For me, I have a hard top from the factory, so my top removal required the releasing of the freedom panels in the front, and then the removal of the 6 torque screws which are holding the back of the hard top to the tub.
5. Once the torque screws are removed, go ahead and lift the hard top off, but keep in mind, it is heavier than it looks, due to all the glass, and make sure you are careful as you do not want to break anything here, such as glass, as that gets expensive to replace!
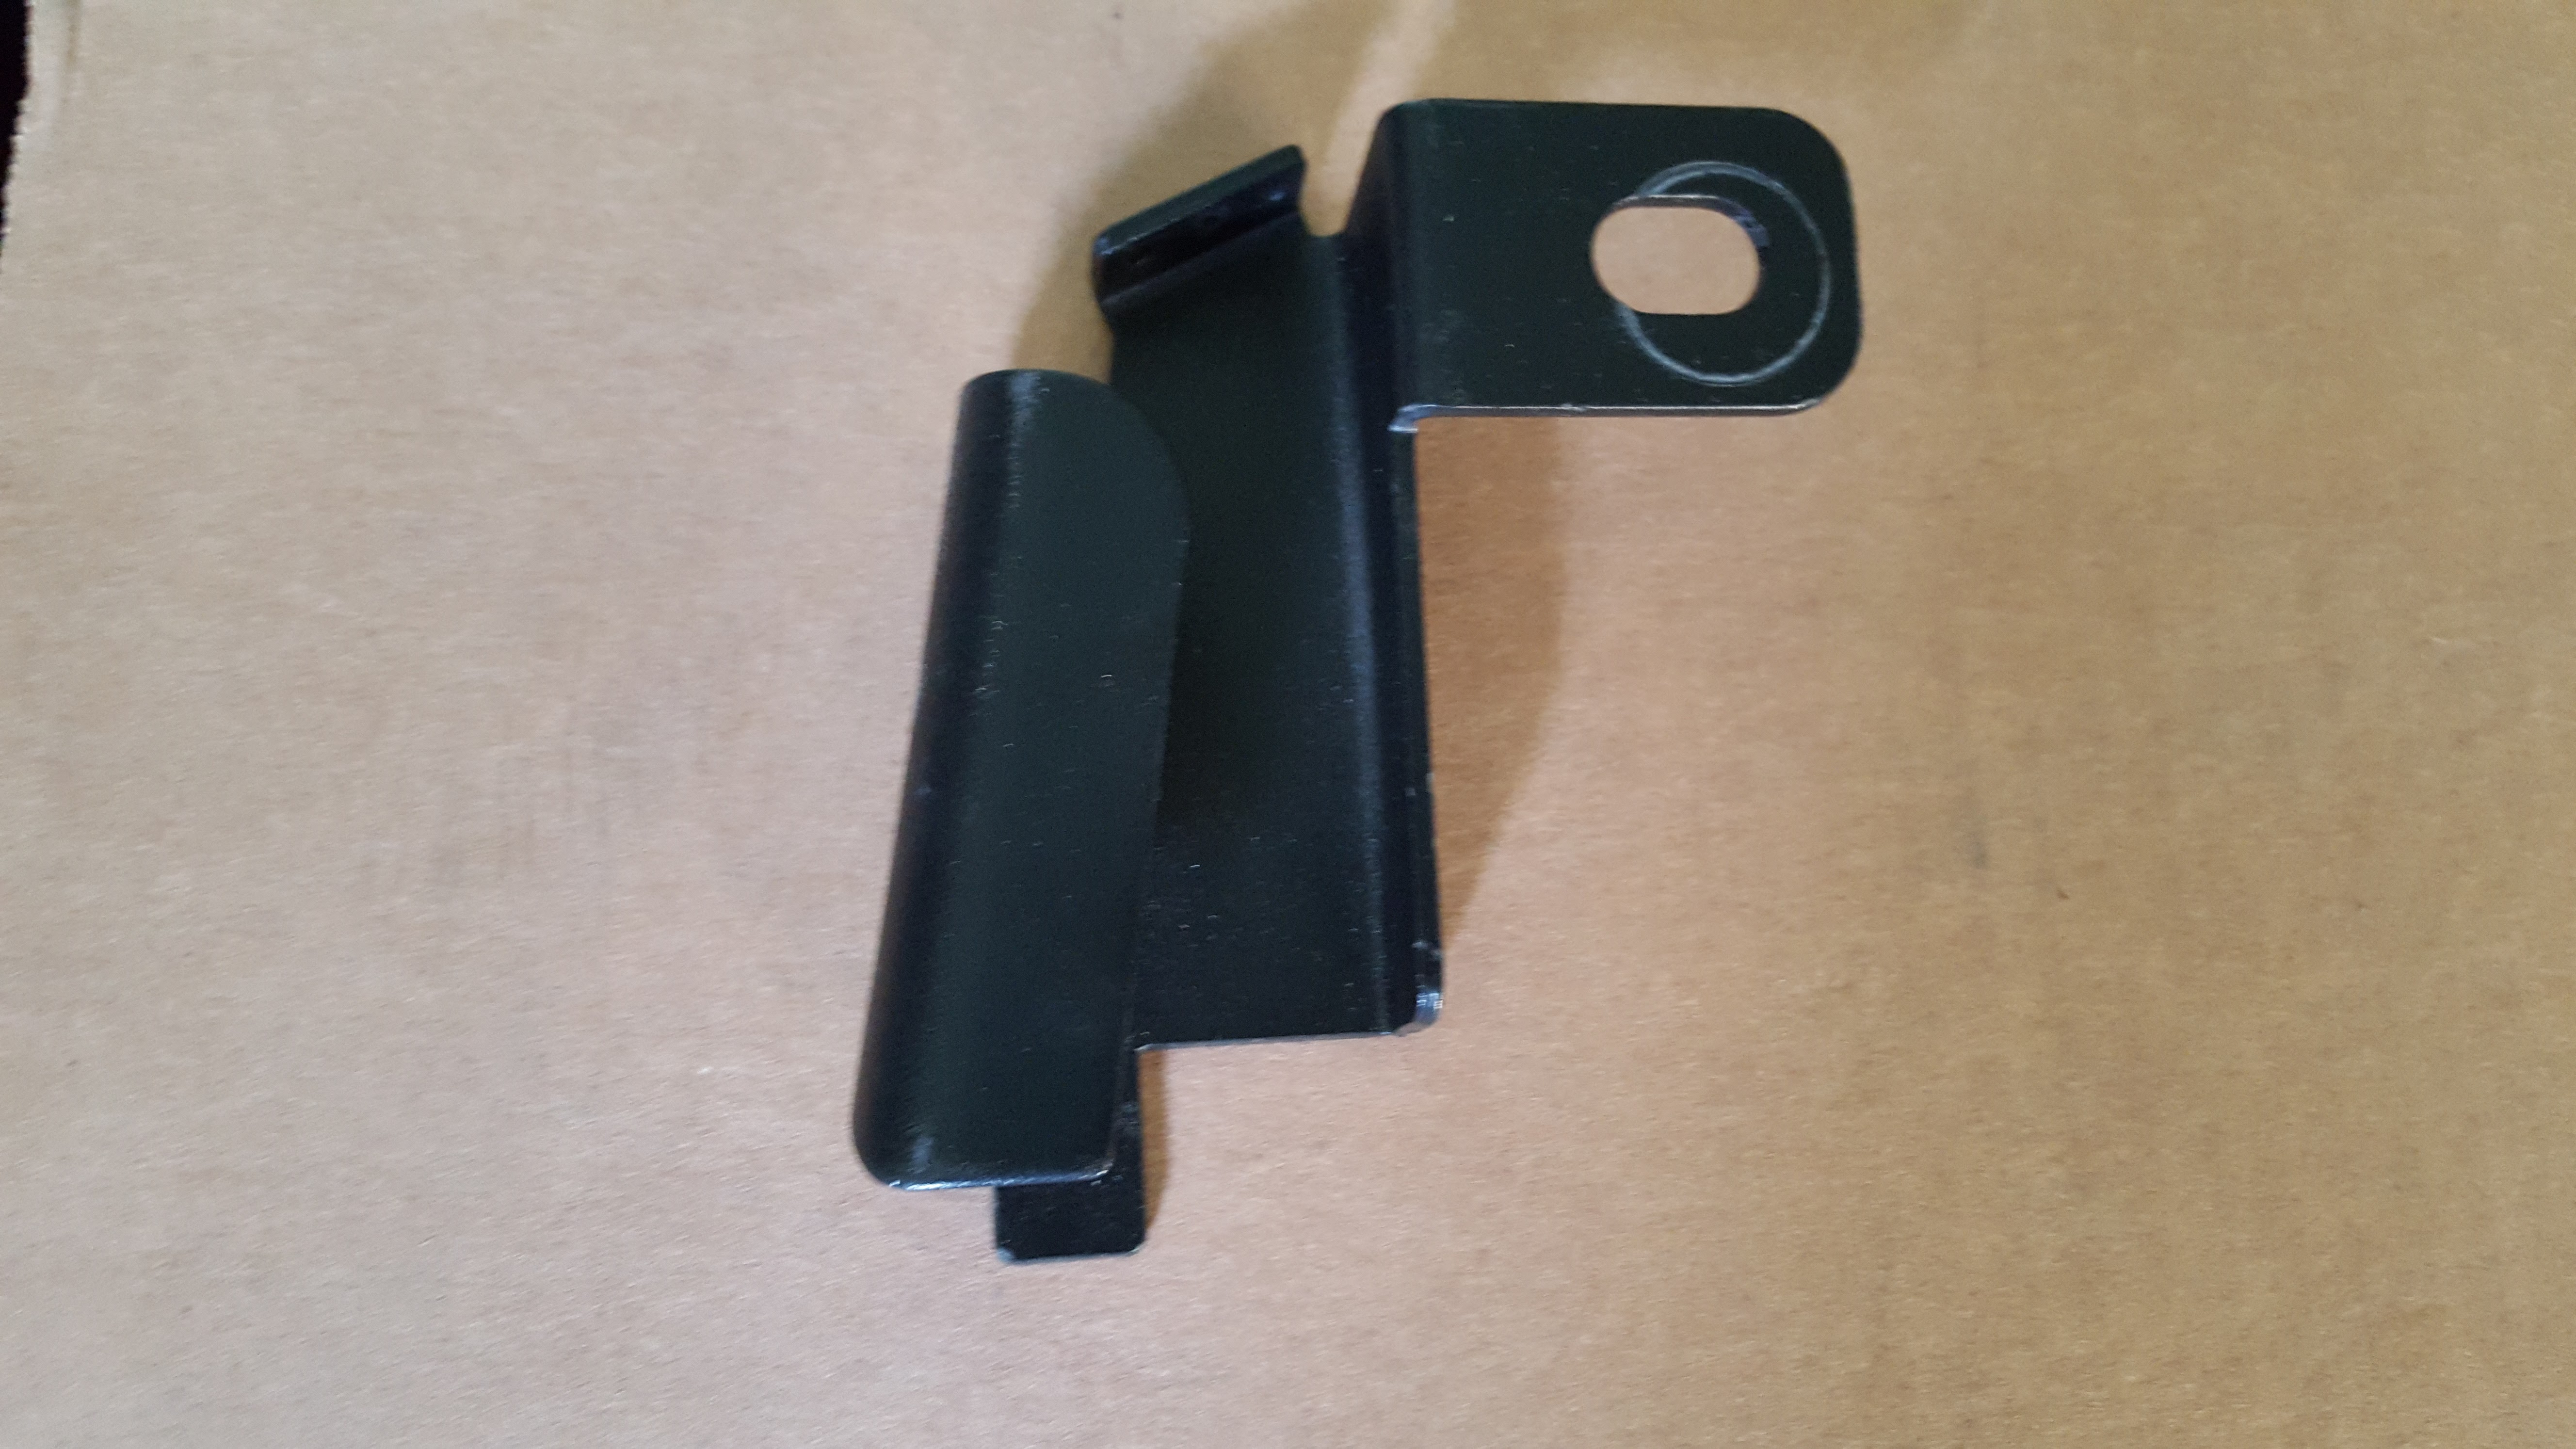
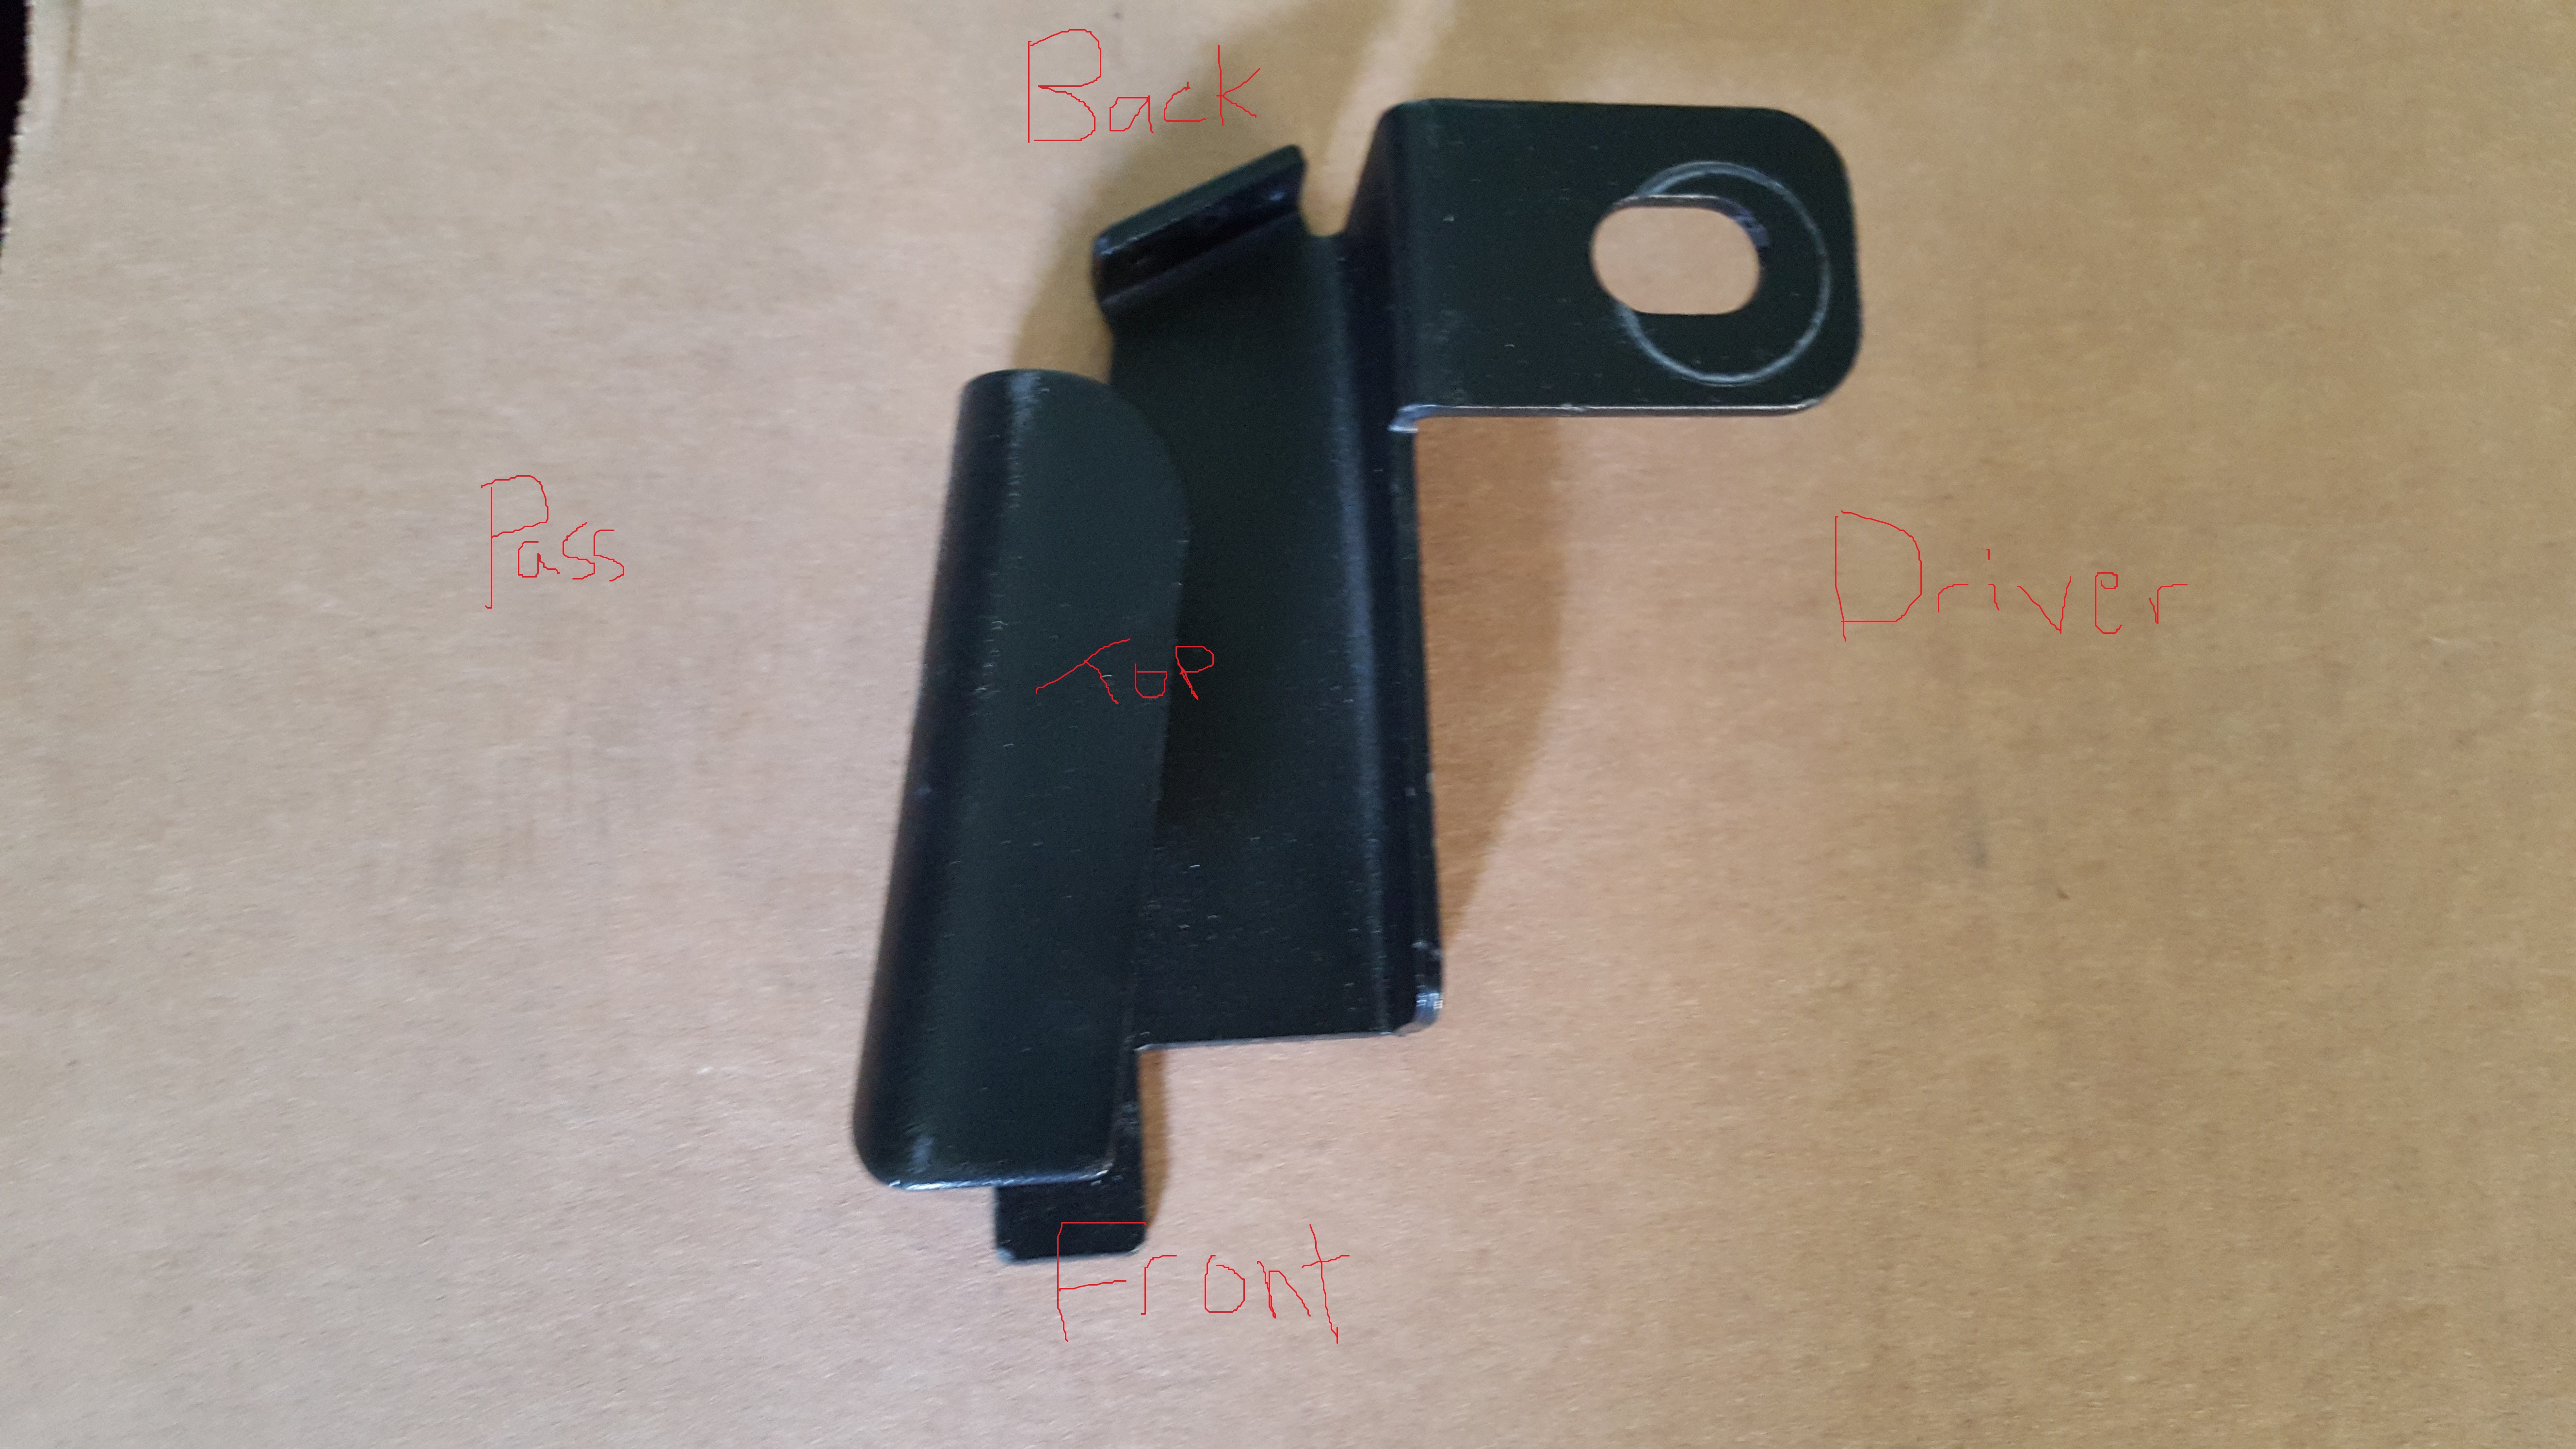
6. So once you have the top removed, the first thing that you need to do is make two small cuts in your roll bar cover just in front of the sound bar to the outside of the Jeep. This will be for where the brackets to support the front part of the top go. The brackets look like this:
7. To locate where to cut go to the top of the B-pillar area of the Jeep (aka follow the back edge of the door up to the top of the roll bar) and find the roll bar cover zipper which runs from in front of the sound bar, back towards the back of the vehicle.
8. Once you have the cover opened up and you have the roll bar exposed, You will see two bolts, locate the outer-most bolt, and line up with a location on the roll bar cover, and make your cut, which is as close to the same size, or just a slight bit smaller, than the piece of the bracket that is inserted through this whole.

9. Once your slit in the cover is made, go ahead and remove the bolt which you just located.
10. Insert the flat tab of the bracket, so that the bracket is going towards the front of the Jeep from that location, as well as so the open part of the bracket is facing up, through the roll bar cover and reinstall the bolt through both the bracket and into its original location and then zip the roll bar cover back up. See picture for correct placement and side (pictured below is the passenger side bracket):


11. Next, locate the door surrounds and the hinge brackets.


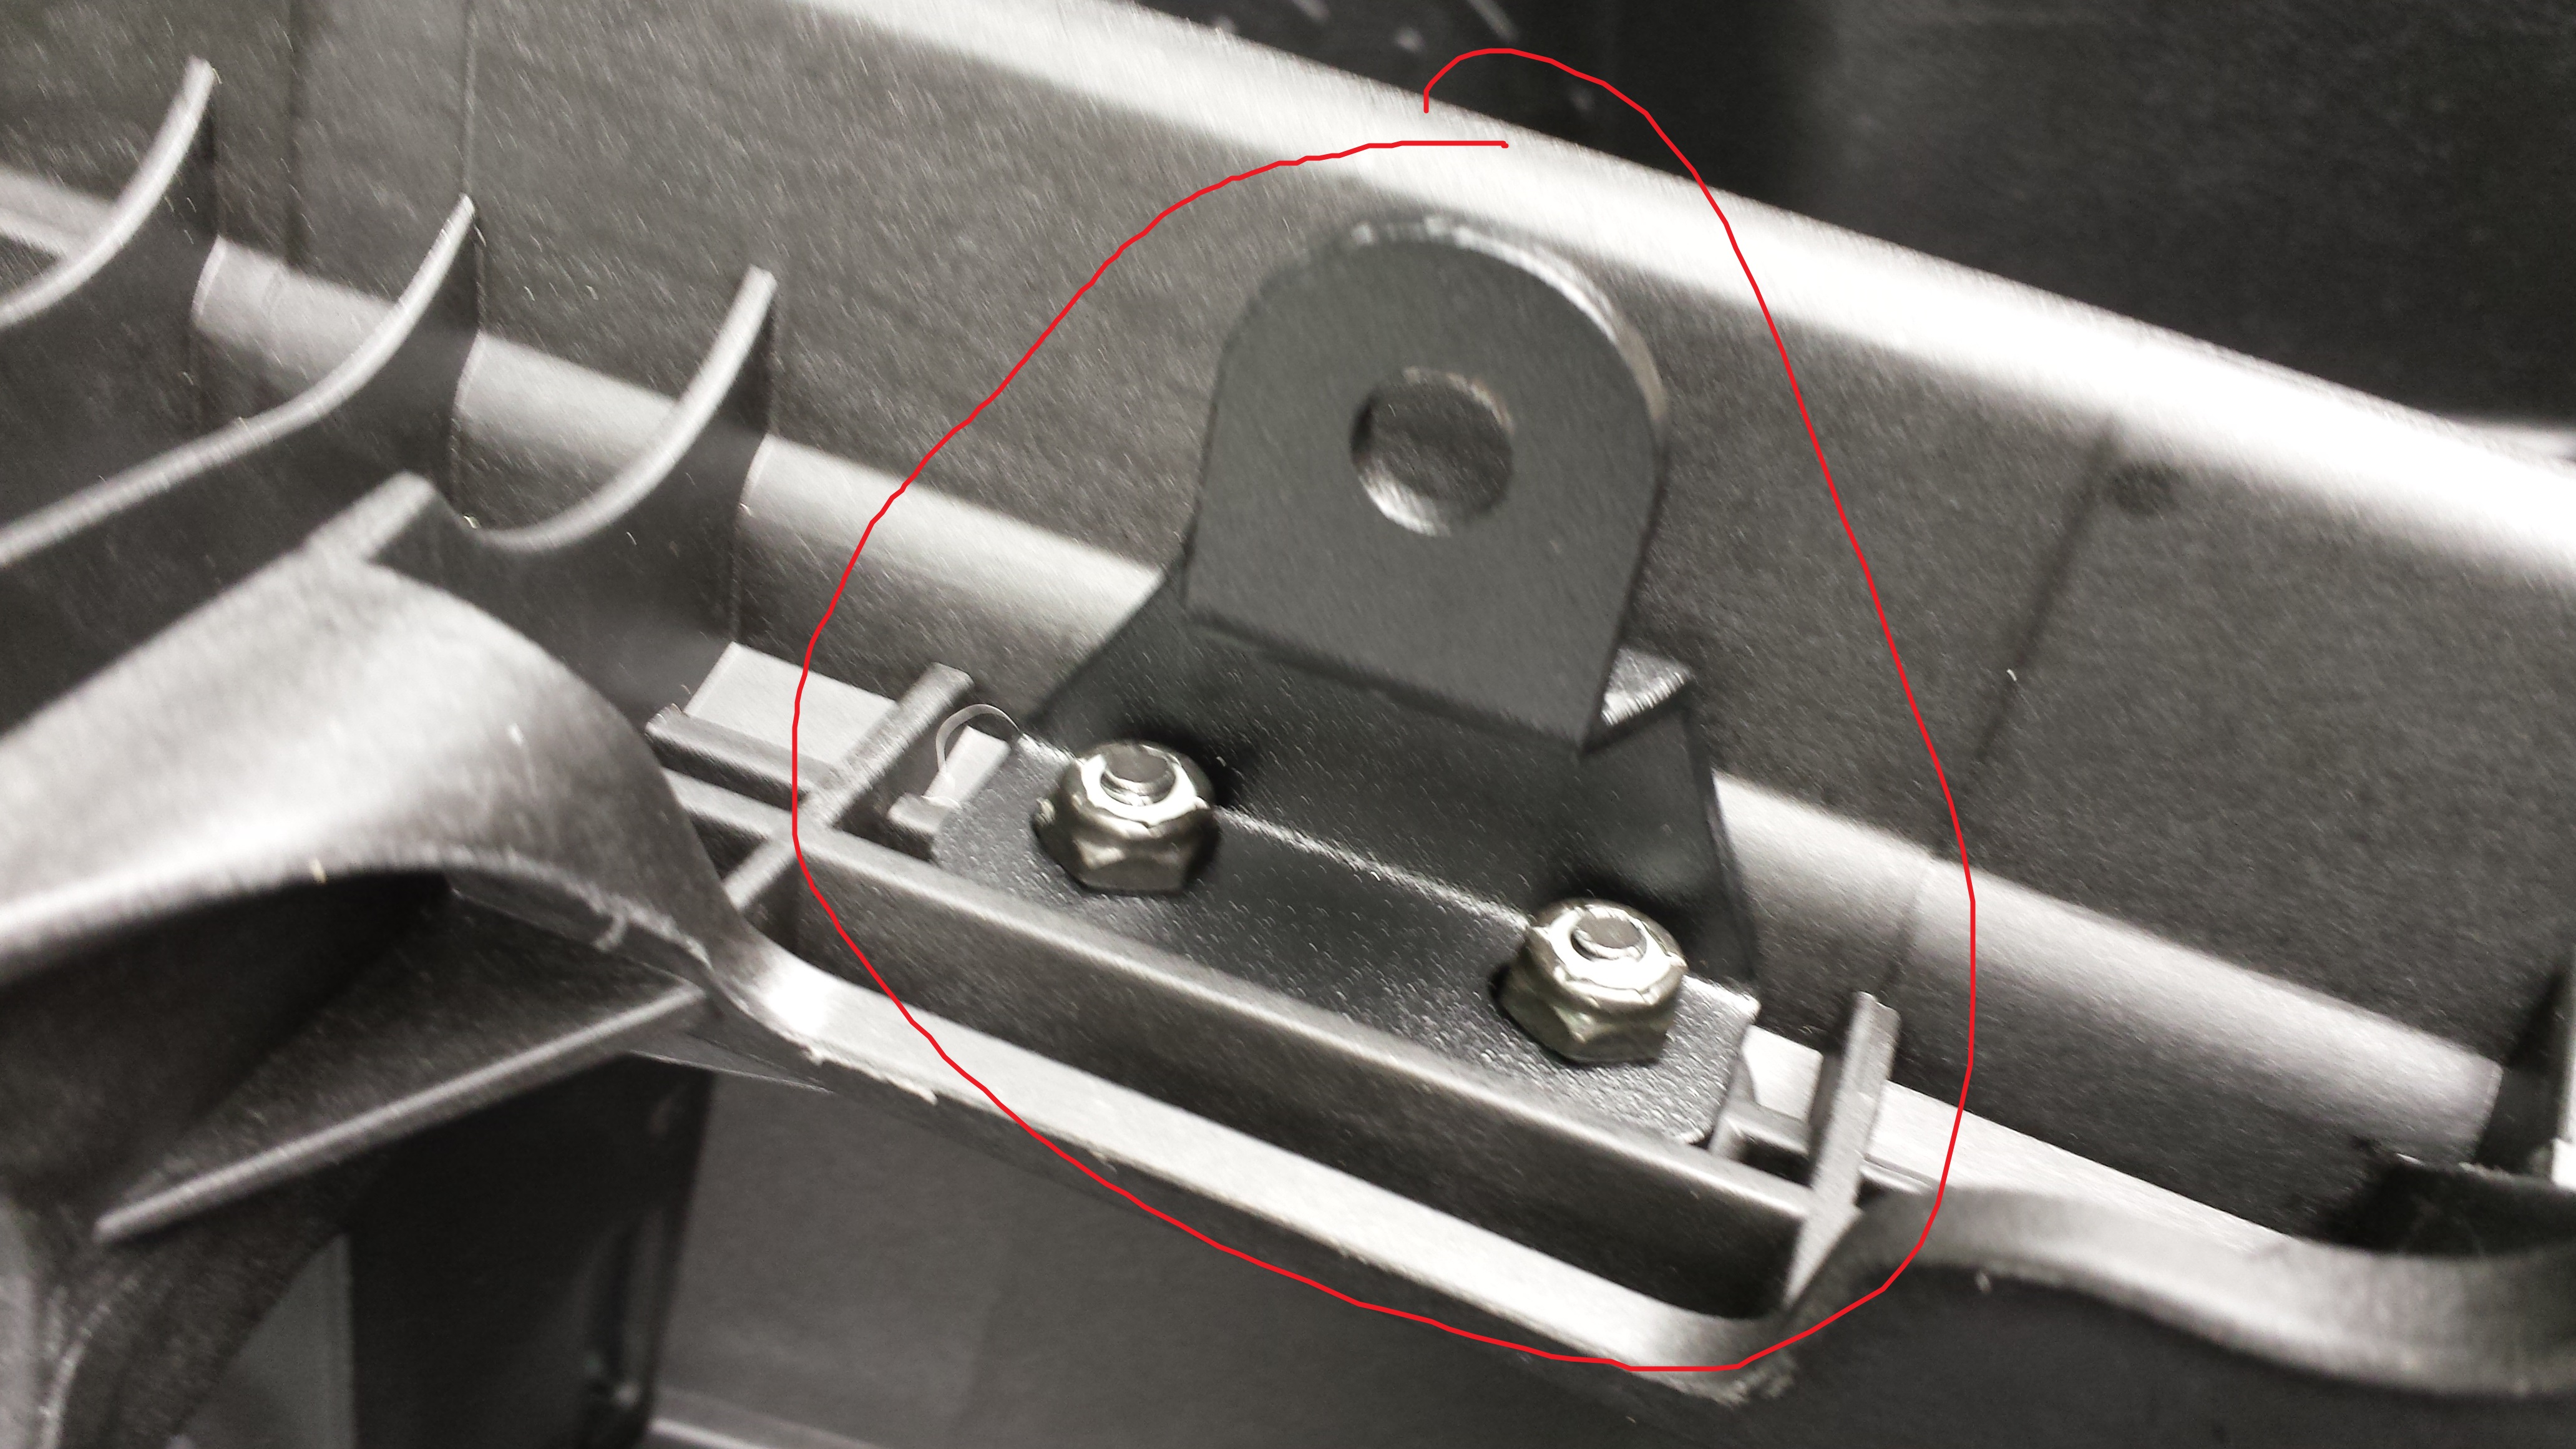
And the hinge bracket will not be attached as it is pictured here...that is a coming step!
12. Attach the hinge brackets to the top edge door surrounds in the cut-out location provided which has whole for two screws and nuts. Make sure that the upper part of the bracket with the singular hole is closer to the inside of the Jeep. Also, make sure that when you are attaching this bracket, the screws are inserted from below (aka looking up from the door jam area) and the nut are attached to the upper side of the door surround (or top side of the top piece of the door surround which will be facing the top when the top is closed). Make sure to get these tight, but do not tighten too much as the door surrounds are only plastic pieces.

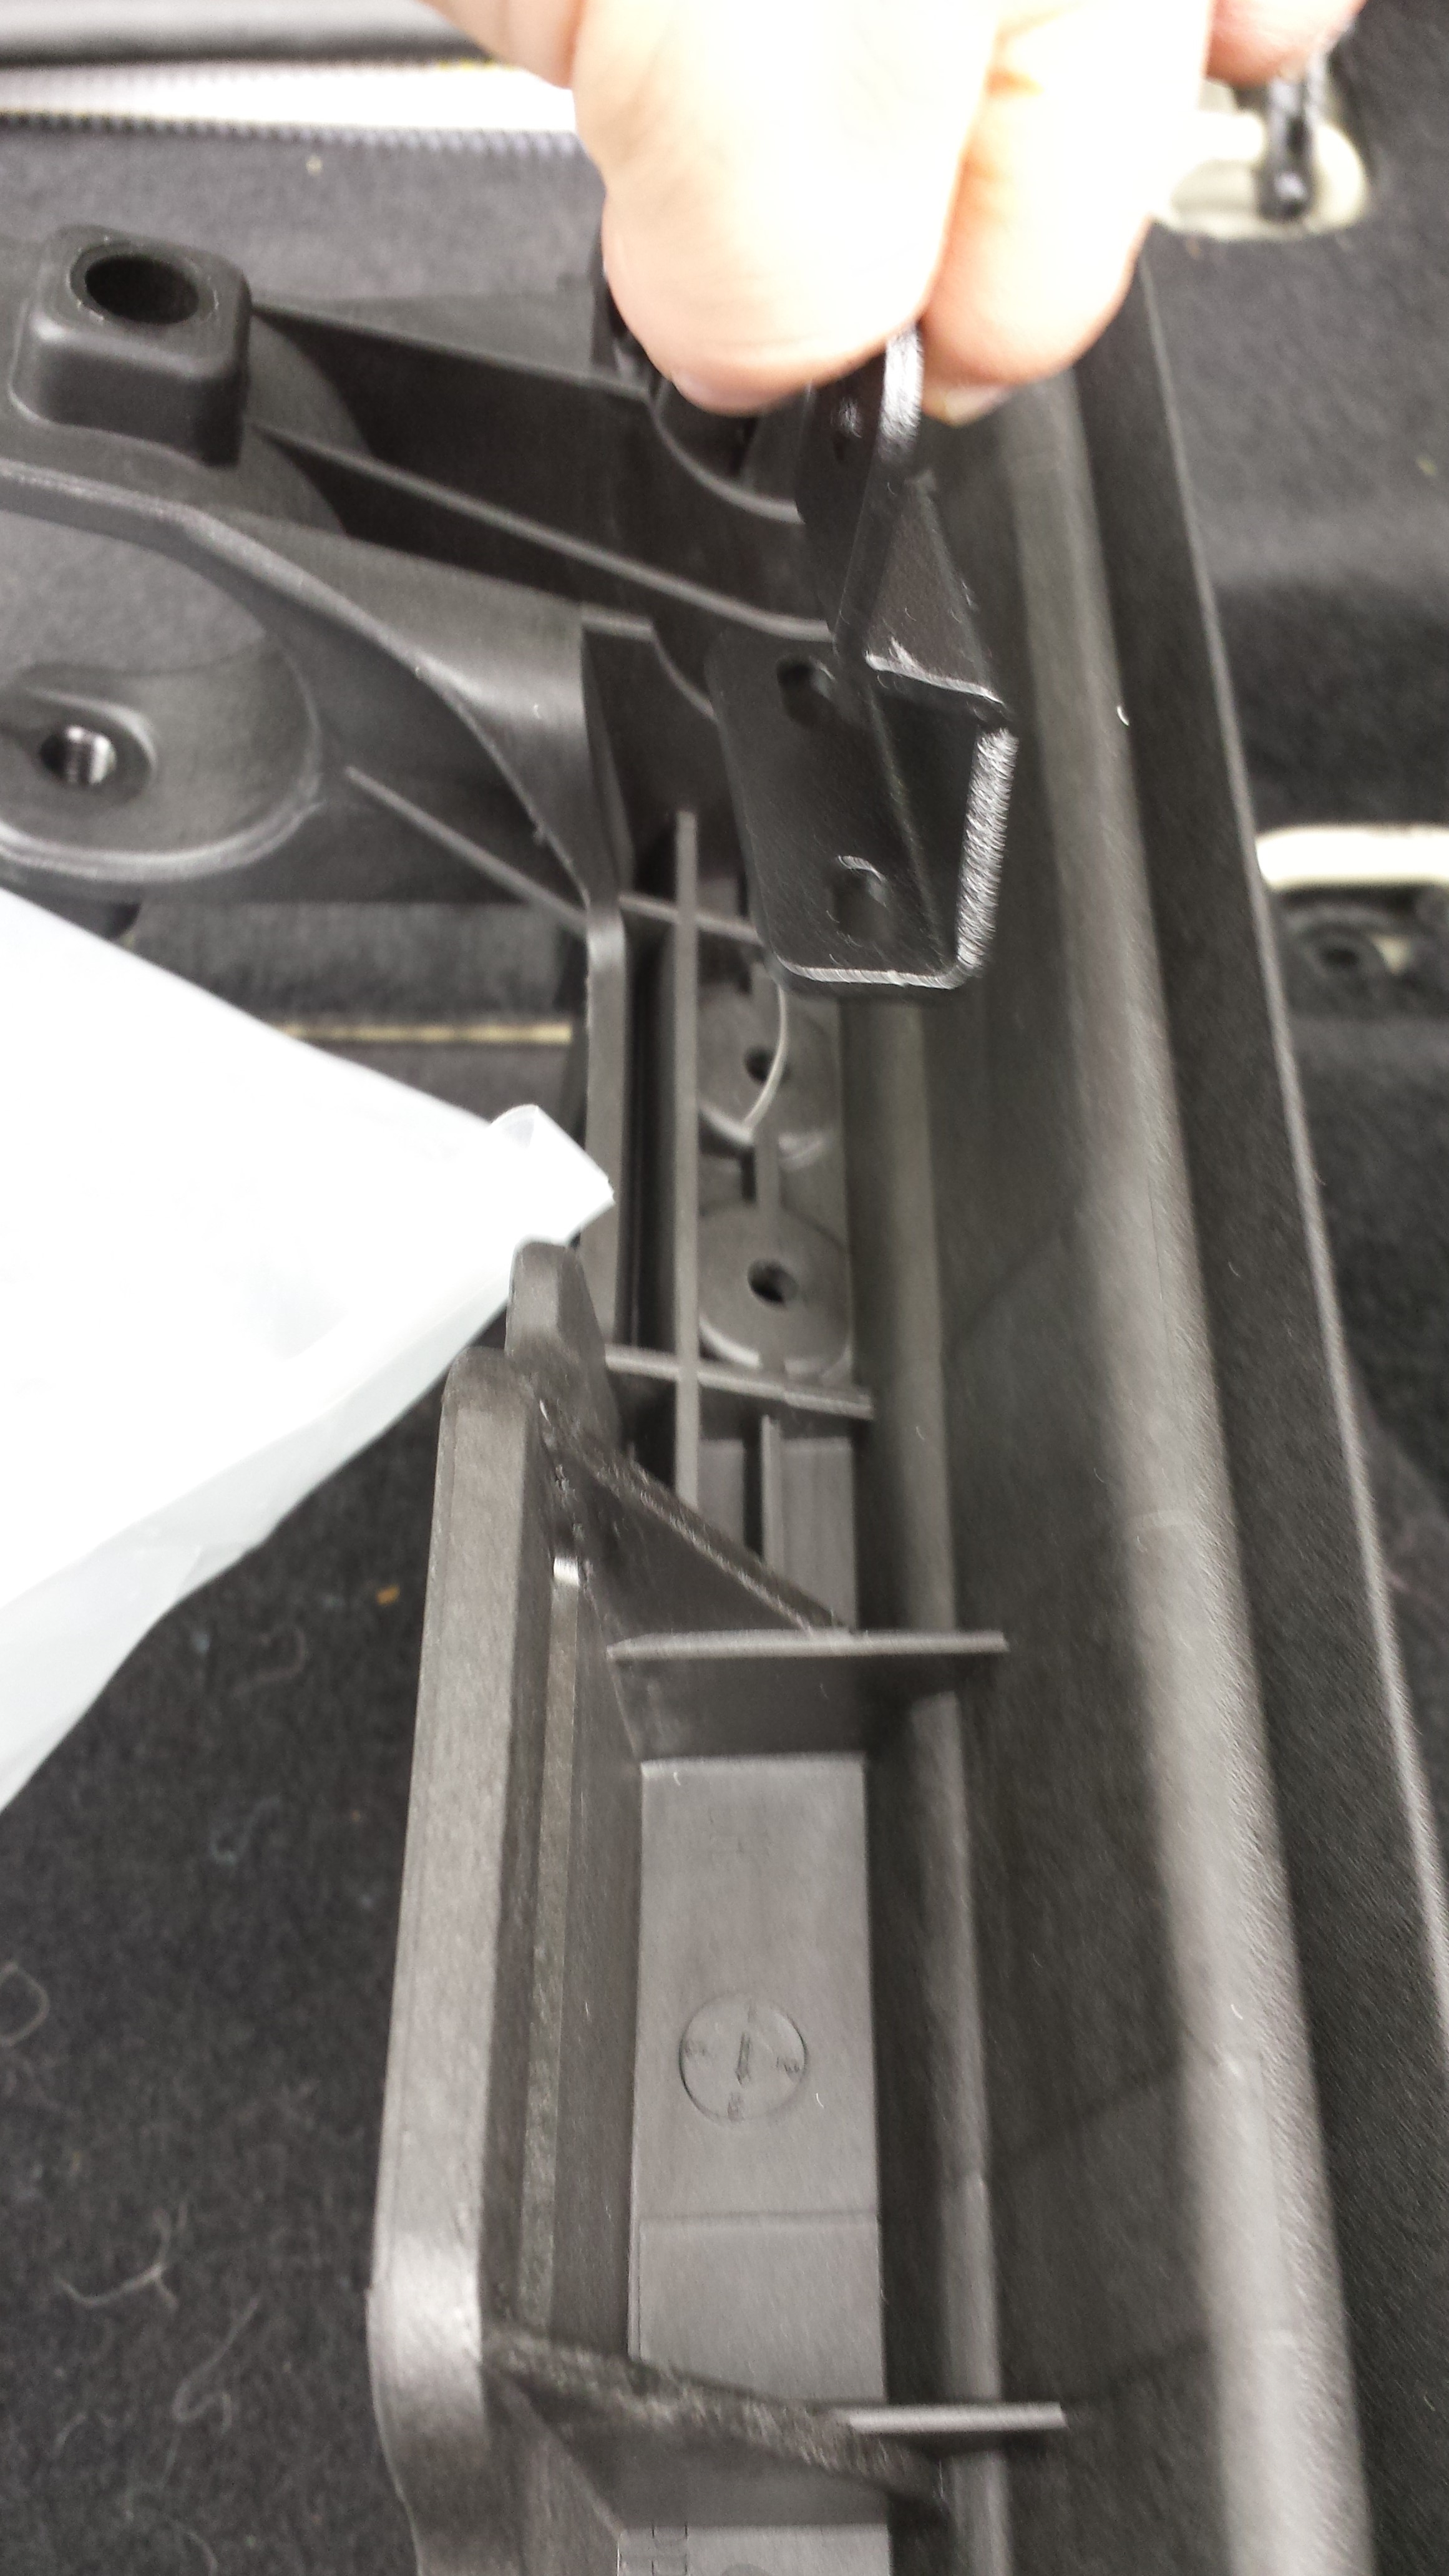


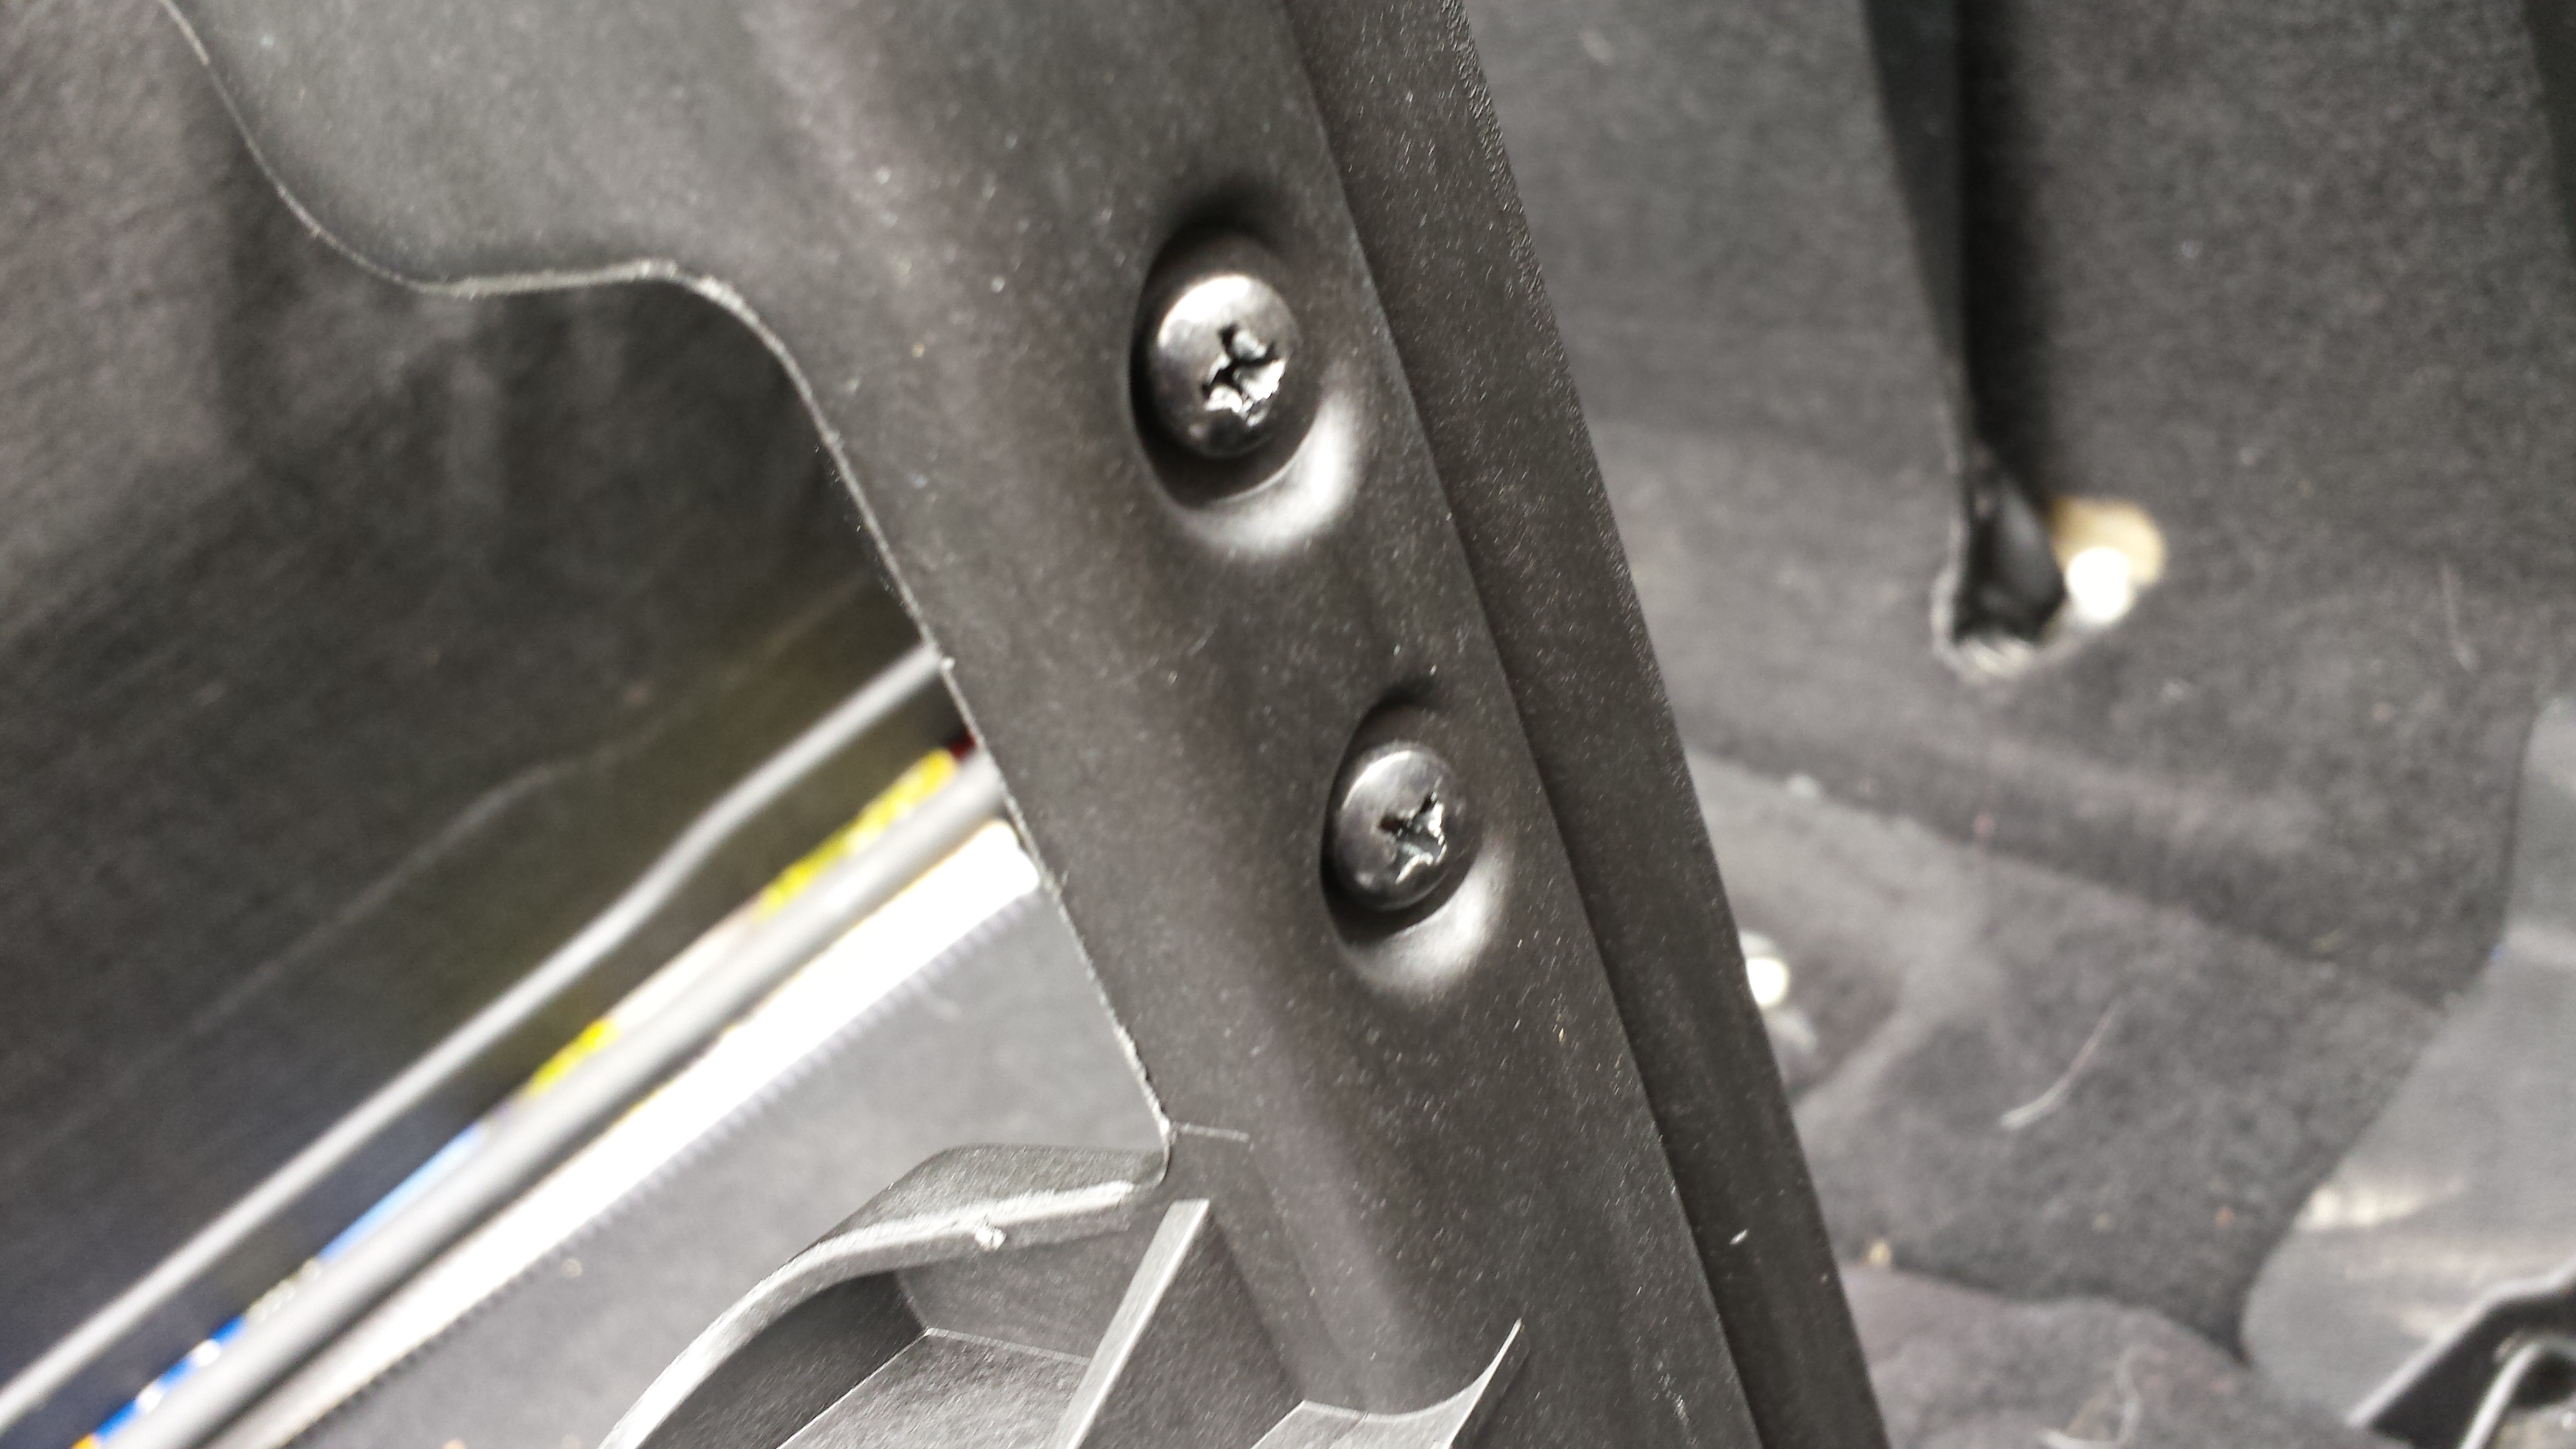
13. Once these brackets are attached, you can install the door surrounds to the Jeep. Make sure you first open the door. The piece of the door surround which has the Bestop logo faces outward and is the vertical piece which goes behind the back part of the door. You do not remove the weather seal at the edge of the tub behind the door, but just place the vertical part of the door surround directly onto it.


14. Then, rotate the horizontal top piece of the door surround and line it up to the roll bar. There are 2 “C” appendages that are coming off on one of the sides, those point towards the inside of the vehicle, and line up with the openings in the roll bar cover, and the holes that already exist in the roll bar.
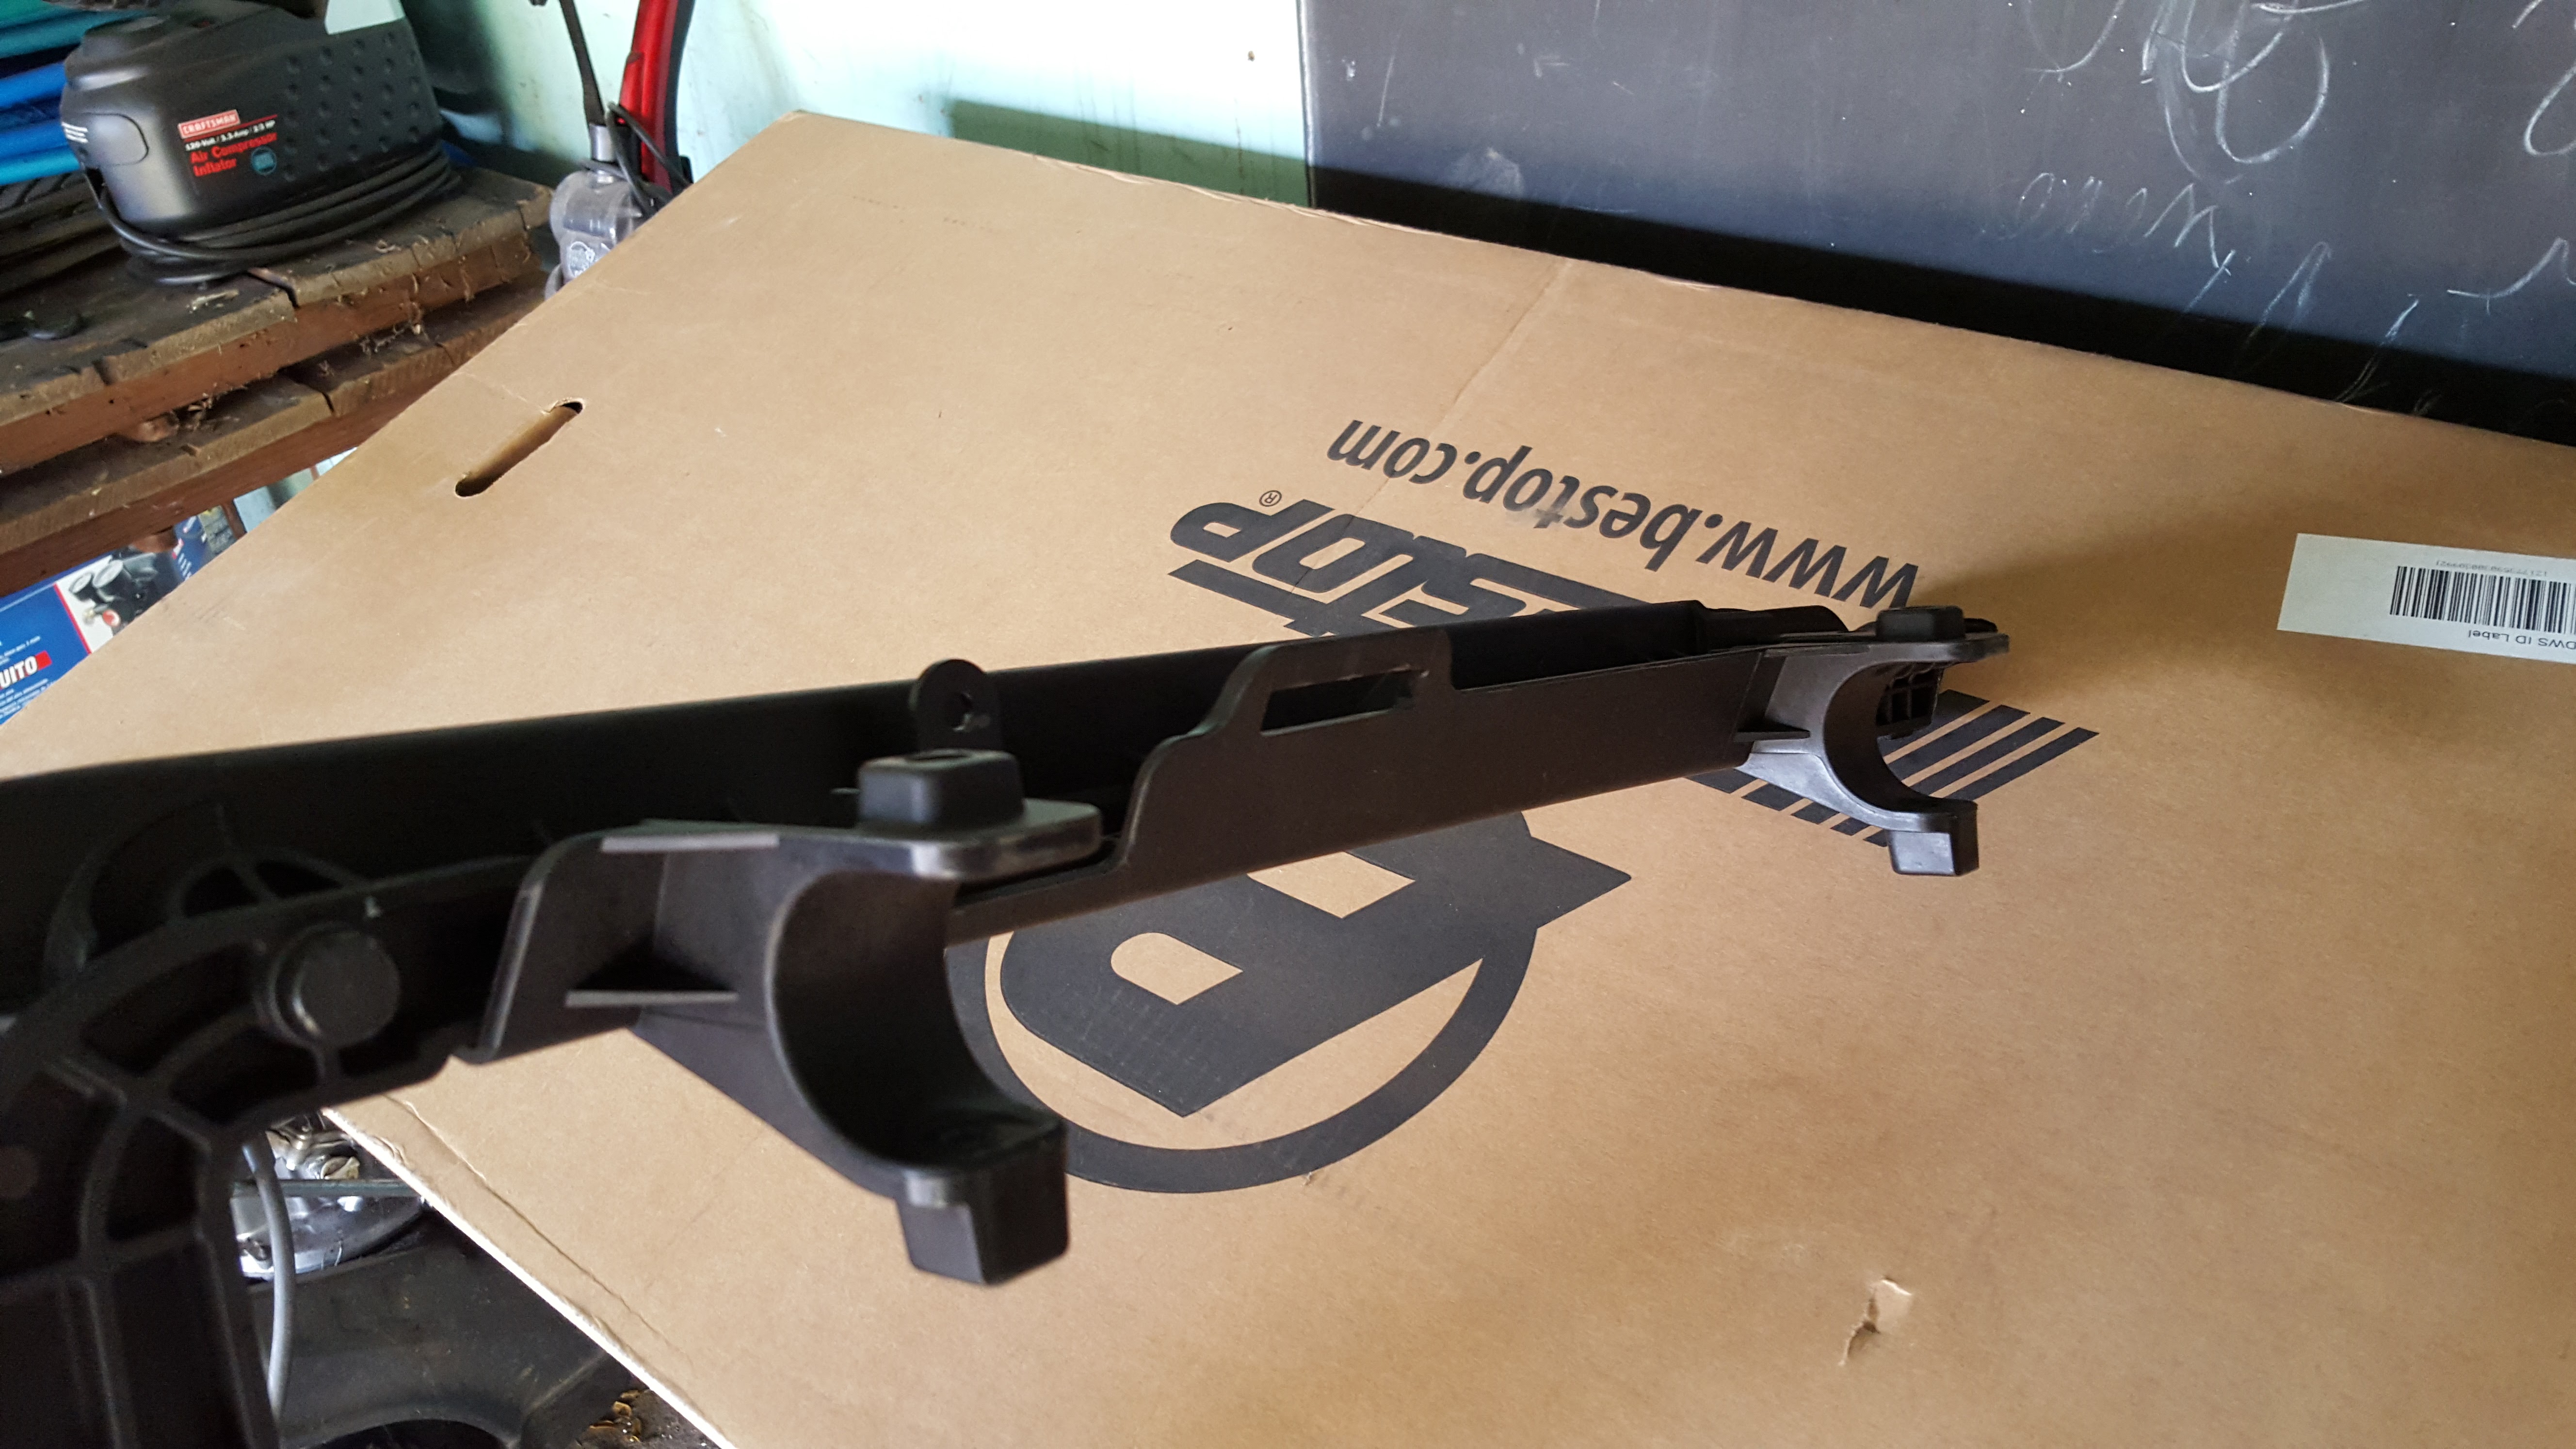

15. Once to have the mounts lined up, go ahead and push the upper part of the door surround “C” appendages so they are around the roll bar and lined up with the holes. And one will then go ahead and insert the screws with the quick removal heads from the top, through the upper part of the door surround, through the upper hole in the roll bar, through the bottom hole in the roll bar, and to the bottom part of the “C” of the door surround. (This part was extremely tricky to the screw to find the lower holes after it had already gone through the upper holes).

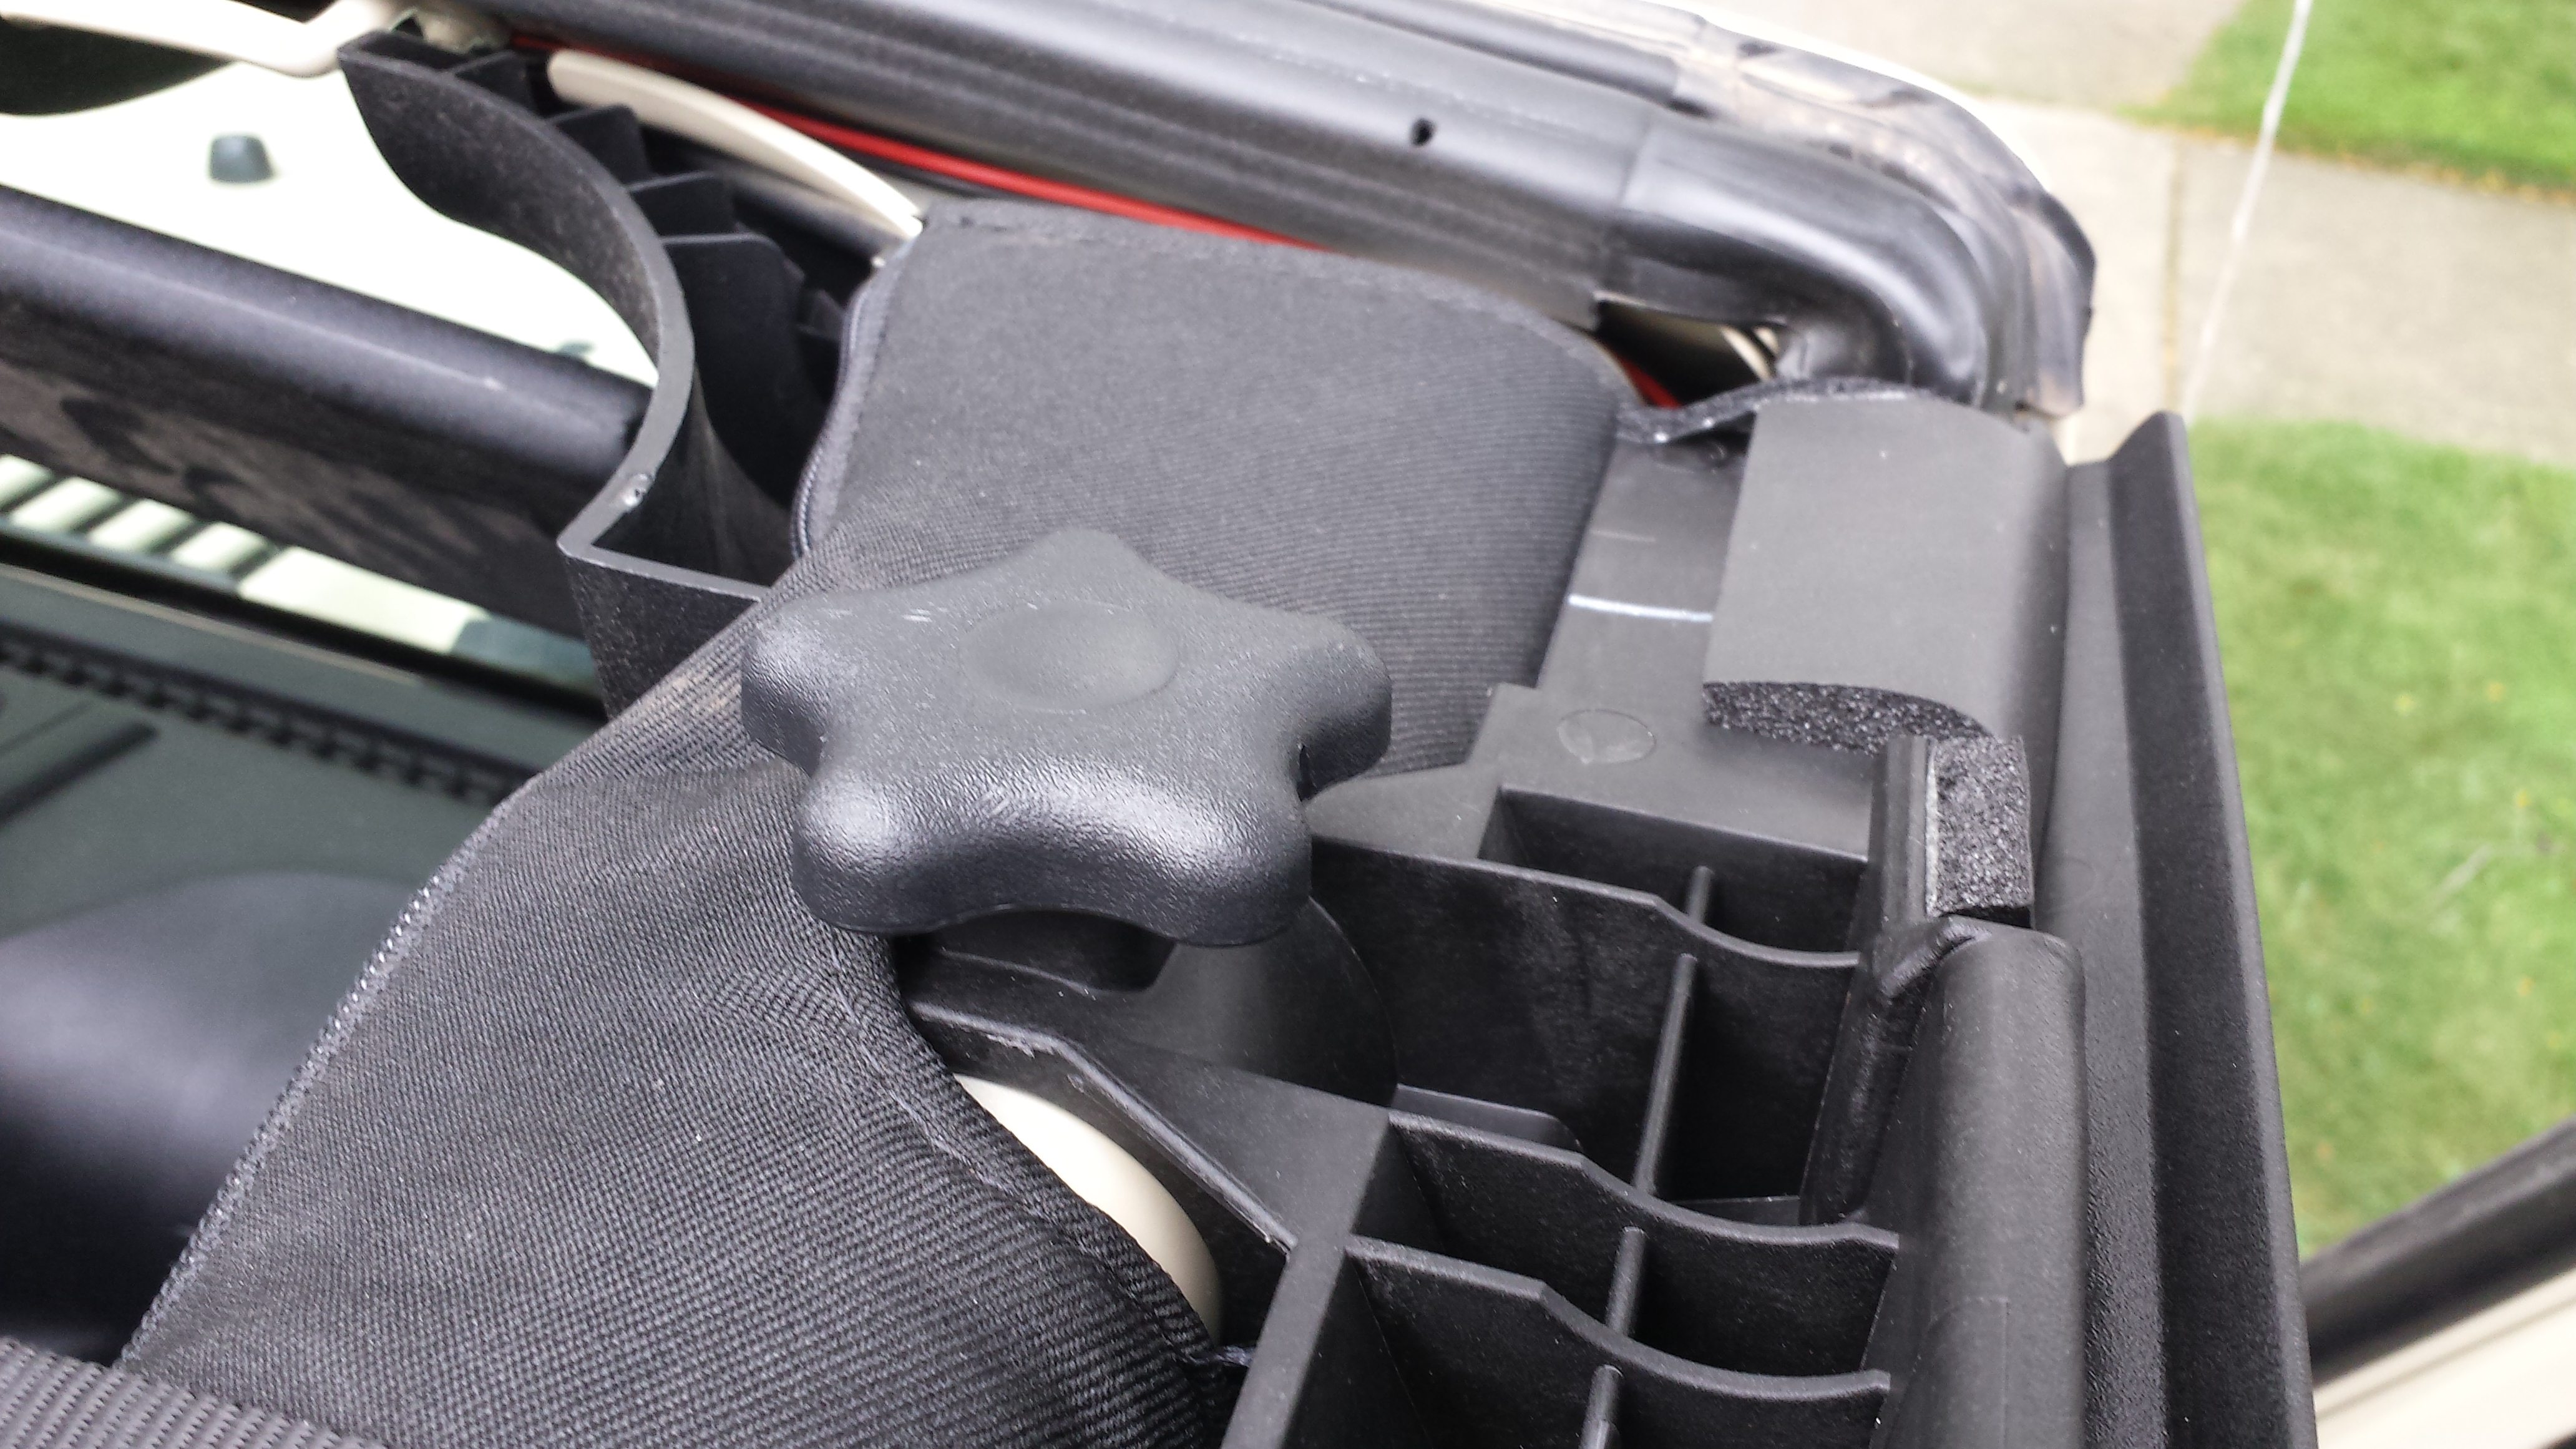

Bestop
The top is almost just as quiet as my hardtop was, the tinted windows match the tinted front windows perfectly, keeps the inside cool and dry, no leaks, never had any issues with flapping, fits tight/snug with solid construction, and very, very versatile. I would like to make a few comments about the install before I start though.
1. First off, this top does have very little hardware, which is great, so don’t think you are missing anything when the box is opened.
2. Second, this is an extremely tight fitting top, as it is frameless, so you will absolutely need to take all the pieces out and lay them in the sun for a while so they will warm up and be more flexible (Though careful when you go to grab them because depending on the sun coverage, they do get quite hot on the outside).
3. The rear window and side panels, when initially installed, will seem like they are way too far apart and small to actually work and go together, but they will stretch out a bit over time, and they are supposed to be that way as the tautness of the top is what gives it its strength.
4. The directions that come with the top from Bestop absolutely suck! They do not show much, it’s hard to tell exactly what pieces you need, and which direction brackets are supposed to go. So you can use the directions as I loose guide, but I highly recommend going to Bestop’s YouTube page and following along with the install video as it is much more descriptive and clear.
https://www.youtube.com/watch?v=kdphp8xtZ60&list=PLc92kHHlACzy2DuMGMsLGEo9TxHJnITZa&index=10 5. And lastly, make sure you have patients when installing the top and it will go on!
So with those comments out of the way, here is my guide for the installation of the Bestop Trektop NX:
1. Open the Bestop Trektop NX packaging and remove all the fabric panels and the top itself and lay them all out in the sun so they will warm and become more flexible. There will be 4 total pieces to lay out! (The back window, the top with front frame attached to it, and the left and right side panels)
2. Once those are warming, go through and make sure that all expected and needed hardware is there. (You should have the 4 fabric panels, Left and Right Door channels, 2 mounting brackets, 2 hinge brackets, 2 tailgate bar retainer clips, Front and Rear bow bars, $ pieces of foam tape, 4 hand screws for door surround attachments, and some miscellaneous screws, washers, and nuts for attachment of a few additional items, and the nylon straps with clips to attach the middle of the top to the sound bar and the back of the top to the tub)
3. Whether you have a soft top, or a hard top, the next step is to remove you current top, along with all the hardware that comes with it (with the exception of the tailgate bar clips if you have a soft top as those can be reused)
4. For me, I have a hard top from the factory, so my top removal required the releasing of the freedom panels in the front, and then the removal of the 6 torque screws which are holding the back of the hard top to the tub.
5. Once the torque screws are removed, go ahead and lift the hard top off, but keep in mind, it is heavier than it looks, due to all the glass, and make sure you are careful as you do not want to break anything here, such as glass, as that gets expensive to replace!
6. So once you have the top removed, the first thing that you need to do is make two small cuts in your roll bar cover just in front of the sound bar to the outside of the Jeep. This will be for where the brackets to support the front part of the top go. The brackets look like this:
7. To locate where to cut go to the top of the B-pillar area of the Jeep (aka follow the back edge of the door up to the top of the roll bar) and find the roll bar cover zipper which runs from in front of the sound bar, back towards the back of the vehicle.
8. Once you have the cover opened up and you have the roll bar exposed, You will see two bolts, locate the outer-most bolt, and line up with a location on the roll bar cover, and make your cut, which is as close to the same size, or just a slight bit smaller, than the piece of the bracket that is inserted through this whole.
9. Once your slit in the cover is made, go ahead and remove the bolt which you just located.
10. Insert the flat tab of the bracket, so that the bracket is going towards the front of the Jeep from that location, as well as so the open part of the bracket is facing up, through the roll bar cover and reinstall the bolt through both the bracket and into its original location and then zip the roll bar cover back up. See picture for correct placement and side (pictured below is the passenger side bracket):
11. Next, locate the door surrounds and the hinge brackets.
And the hinge bracket will not be attached as it is pictured here...that is a coming step!
12. Attach the hinge brackets to the top edge door surrounds in the cut-out location provided which has whole for two screws and nuts. Make sure that the upper part of the bracket with the singular hole is closer to the inside of the Jeep. Also, make sure that when you are attaching this bracket, the screws are inserted from below (aka looking up from the door jam area) and the nut are attached to the upper side of the door surround (or top side of the top piece of the door surround which will be facing the top when the top is closed). Make sure to get these tight, but do not tighten too much as the door surrounds are only plastic pieces.
13. Once these brackets are attached, you can install the door surrounds to the Jeep. Make sure you first open the door. The piece of the door surround which has the Bestop logo faces outward and is the vertical piece which goes behind the back part of the door. You do not remove the weather seal at the edge of the tub behind the door, but just place the vertical part of the door surround directly onto it.
14. Then, rotate the horizontal top piece of the door surround and line it up to the roll bar. There are 2 “C” appendages that are coming off on one of the sides, those point towards the inside of the vehicle, and line up with the openings in the roll bar cover, and the holes that already exist in the roll bar.
15. Once to have the mounts lined up, go ahead and push the upper part of the door surround “C” appendages so they are around the roll bar and lined up with the holes. And one will then go ahead and insert the screws with the quick removal heads from the top, through the upper part of the door surround, through the upper hole in the roll bar, through the bottom hole in the roll bar, and to the bottom part of the “C” of the door surround. (This part was extremely tricky to the screw to find the lower holes after it had already gone through the upper holes).
Thread Starter
JK Enthusiast
Joined: Sep 2015
Posts: 419
Likes: 22
From: Madison Heights, MI
Bestop Trektop NX Install (Not Black Twill Version)(Continued)
16. And once you are through all 4 holes, go ahead and tighten down the door surround and make sure that it is steady and secured.
17. Once the door surrounds are in, you can go ahead and install the tailgate bar brackets. These brackets are meant to allow the tailgate bar to lock into to secure the back window and make sure the top is tight. These attach to the lip of the tub just to the right and left side respectively of the tailgate. You place the side with the Bestop logo facing towards front of the Jeep. You then hook the lip on the back under the lip on the inside of the tub of the Jeep and you rotate it towards the back of the Jeep while push down. The brackets will just snap on.


18. Now that you have the door surrounds in, you can install the bow bar that goes over the front seats. This bar helps to prevent any sort of pooling or bowing of the top when something such as rain or snow is failing and accumulating. This is the bar that has the closed ends with the flat tips. It also has padding one side which is covered. Remove the white paper cover off the padding, and insert one of the flat ends into the loops in the middle of the top of the door surround.


19. Once you have one end in, push up in the middle of the bar to make it bow so that you can get just enough space to slide the other flap end into the hoop on the opposite side, and then slide the other flat end into the hoop.

20. Now it is time to get to the actual top. Grab the top portion of the Trektop, with the header bar attached and lay it out flat, with the outside/top side of the top face down. Locate the 4 pieces of foam tape which came with the hardware.

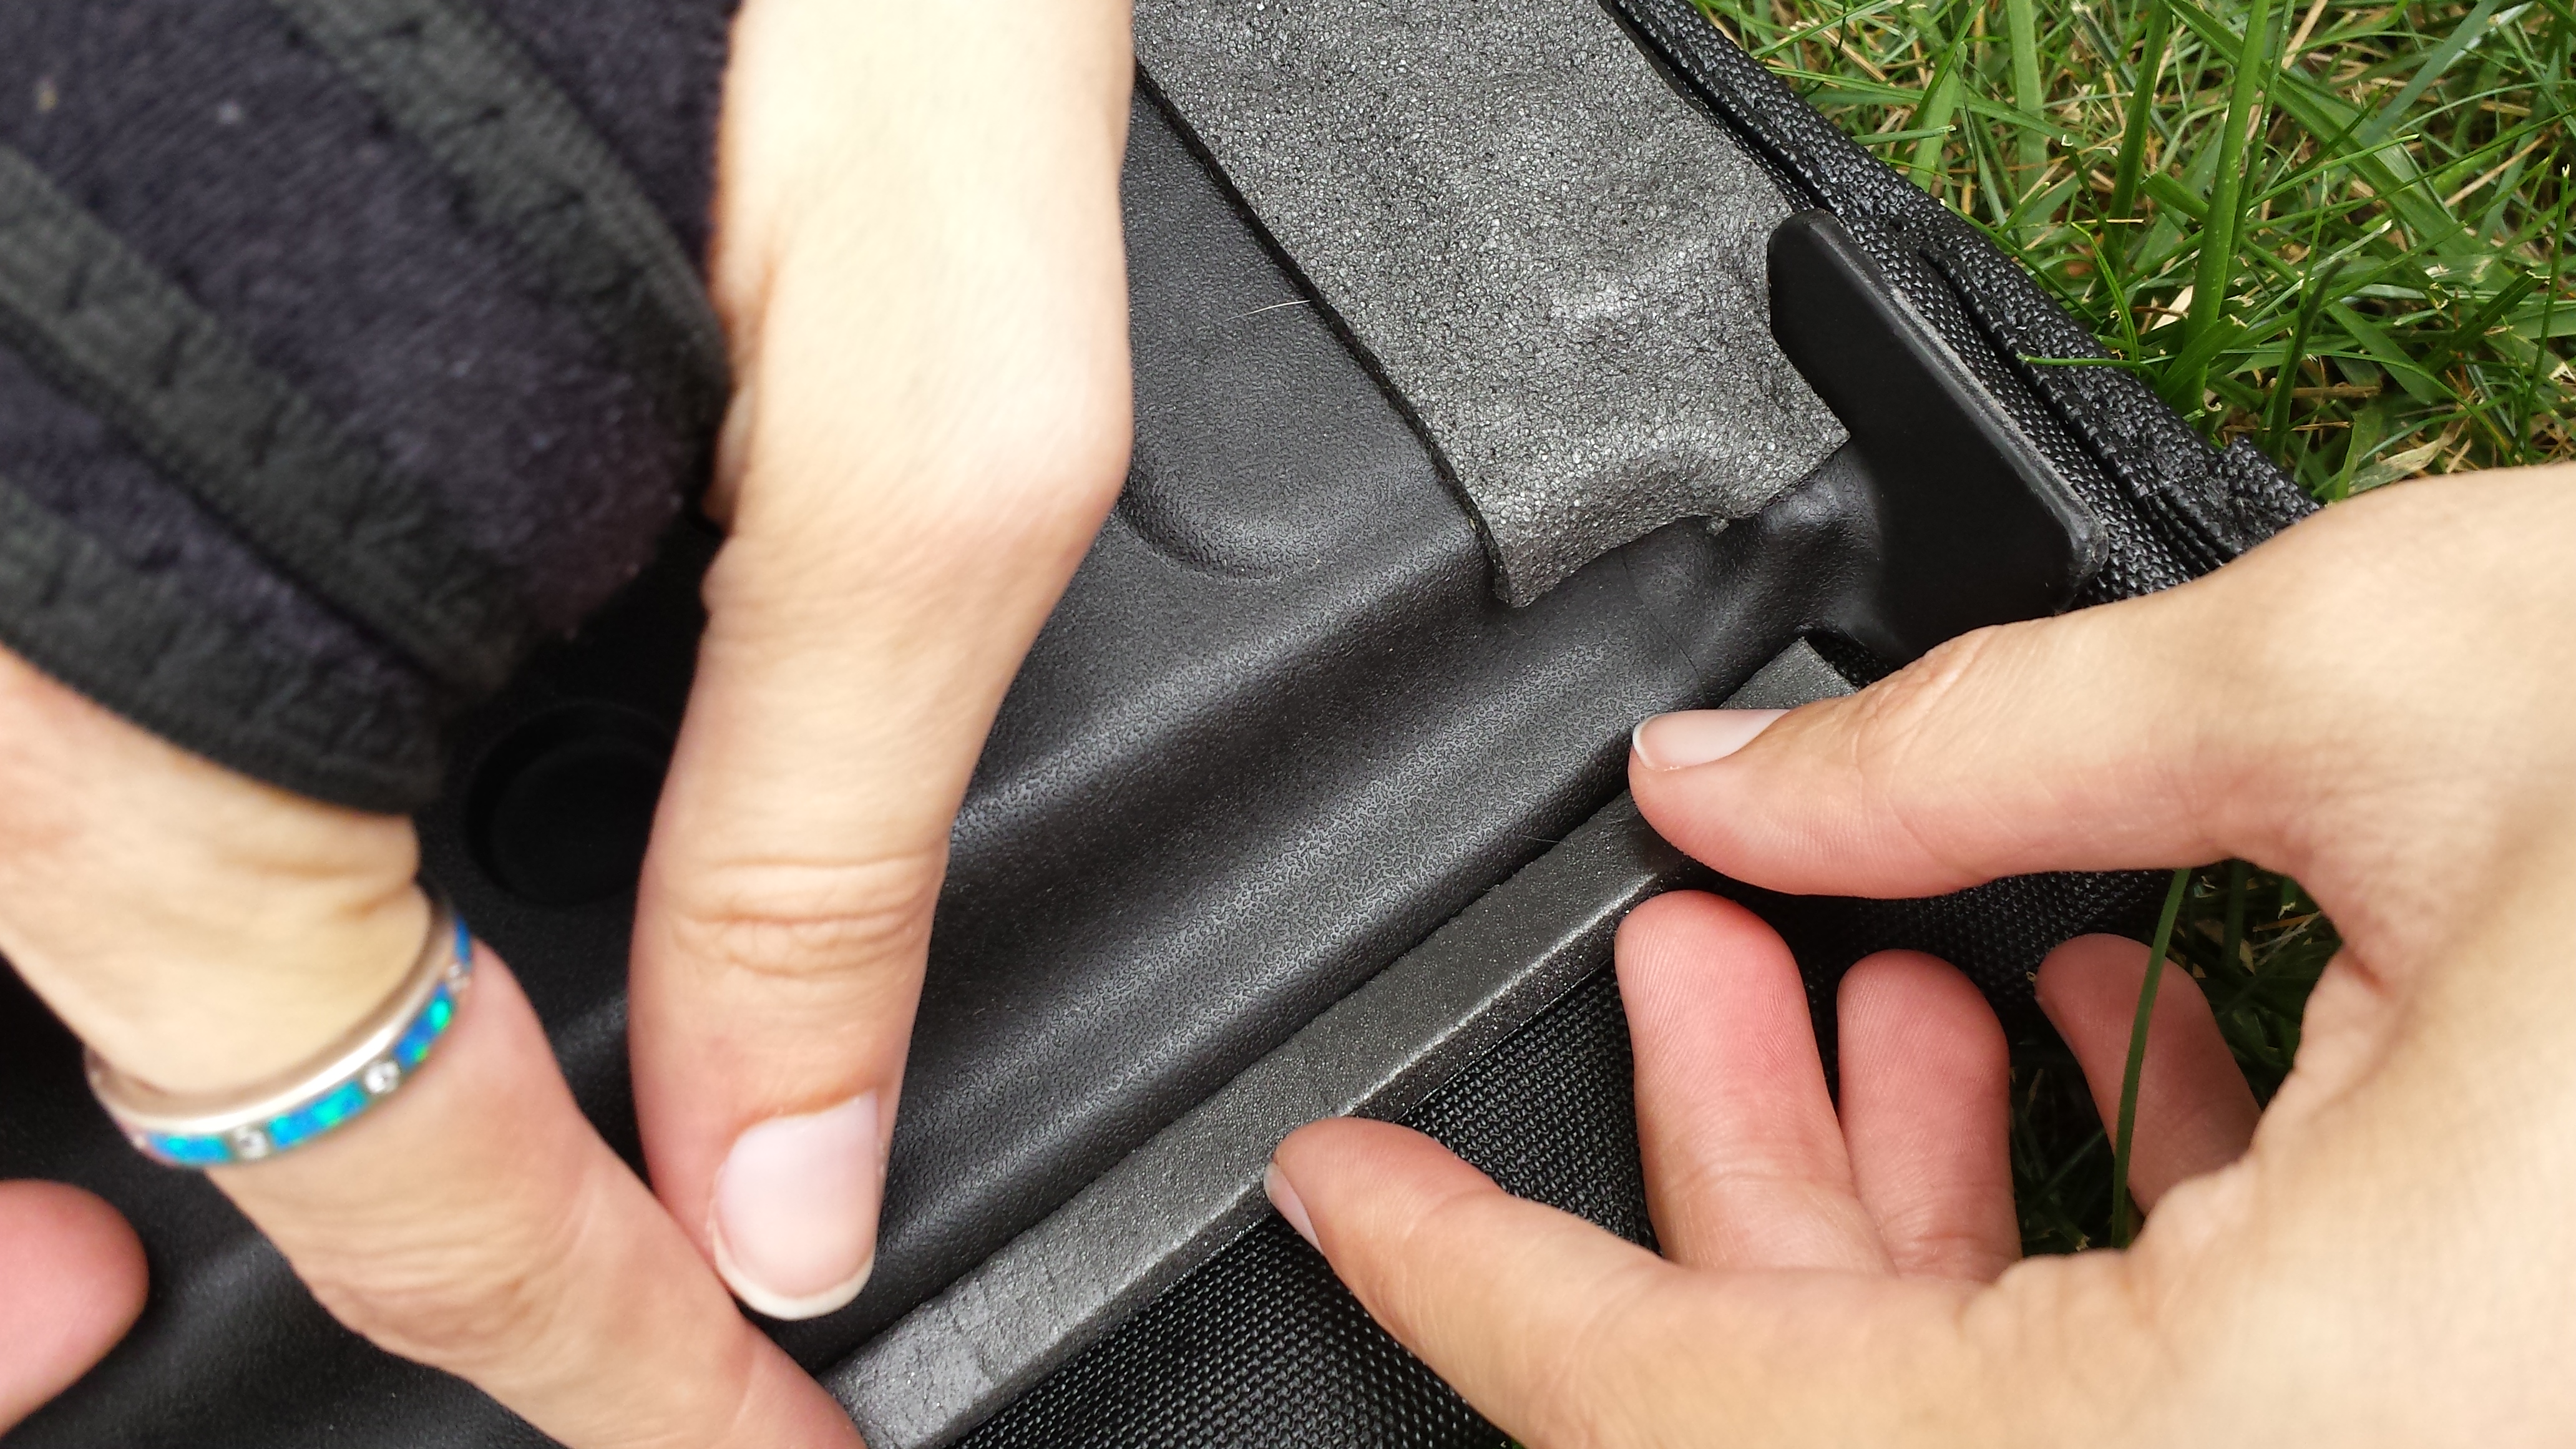
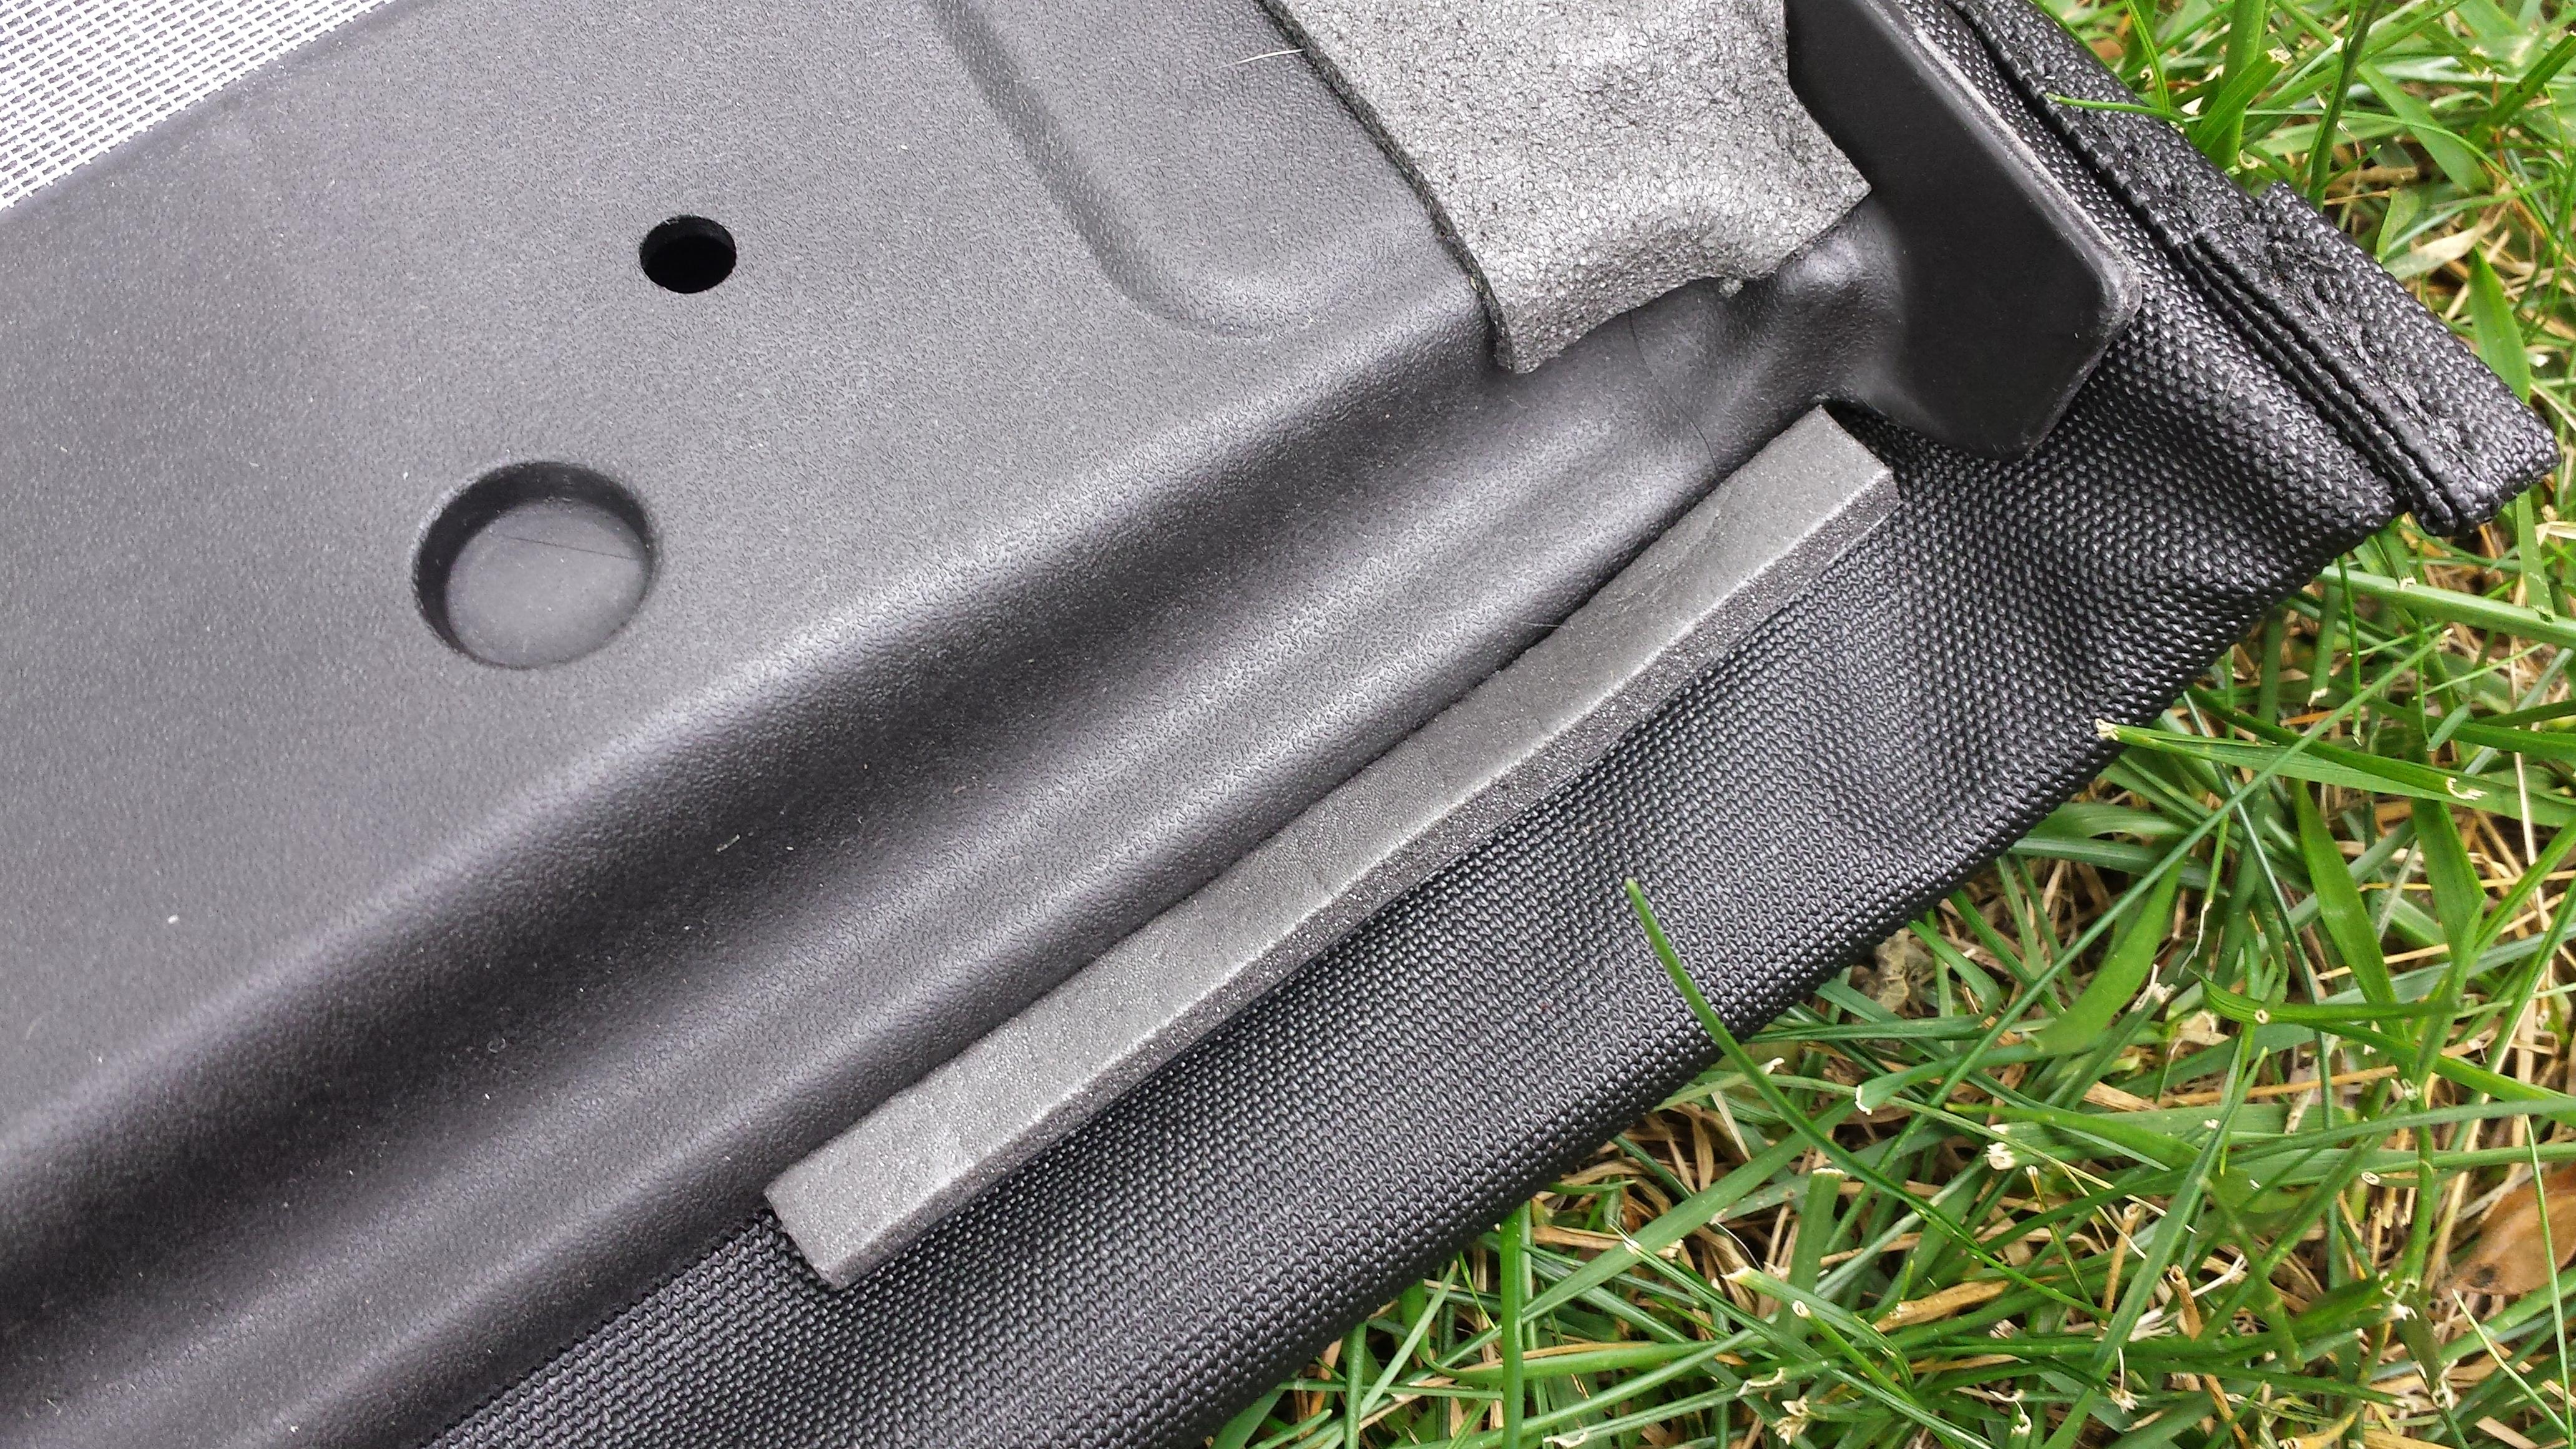
21. Locating the thicker pieces with the cutouts, line these pieces up with the notch in the top corner at the front edge of the header bar and towards the outside edge of the top, while the half circle cut out at the other end goes around the sunrider frame bar going towards the back of the top. Make sure you firmly and securely press the foam strips down to make sure they have a good seal.


22. Now, with the remaining 2 thinner pieces of foam, go to the front overhang of fabric in front of the header bar. Place these two strips carefully, along the both sides of the header bar, one again making sure they are securely attached.
23. Next up, pick the top piece of the Trektop that you were just working on up, flip it back over so that the outside/top side portion is facing up, and drape it over the top of the Jeep with the Header bar at the front of the cabin.
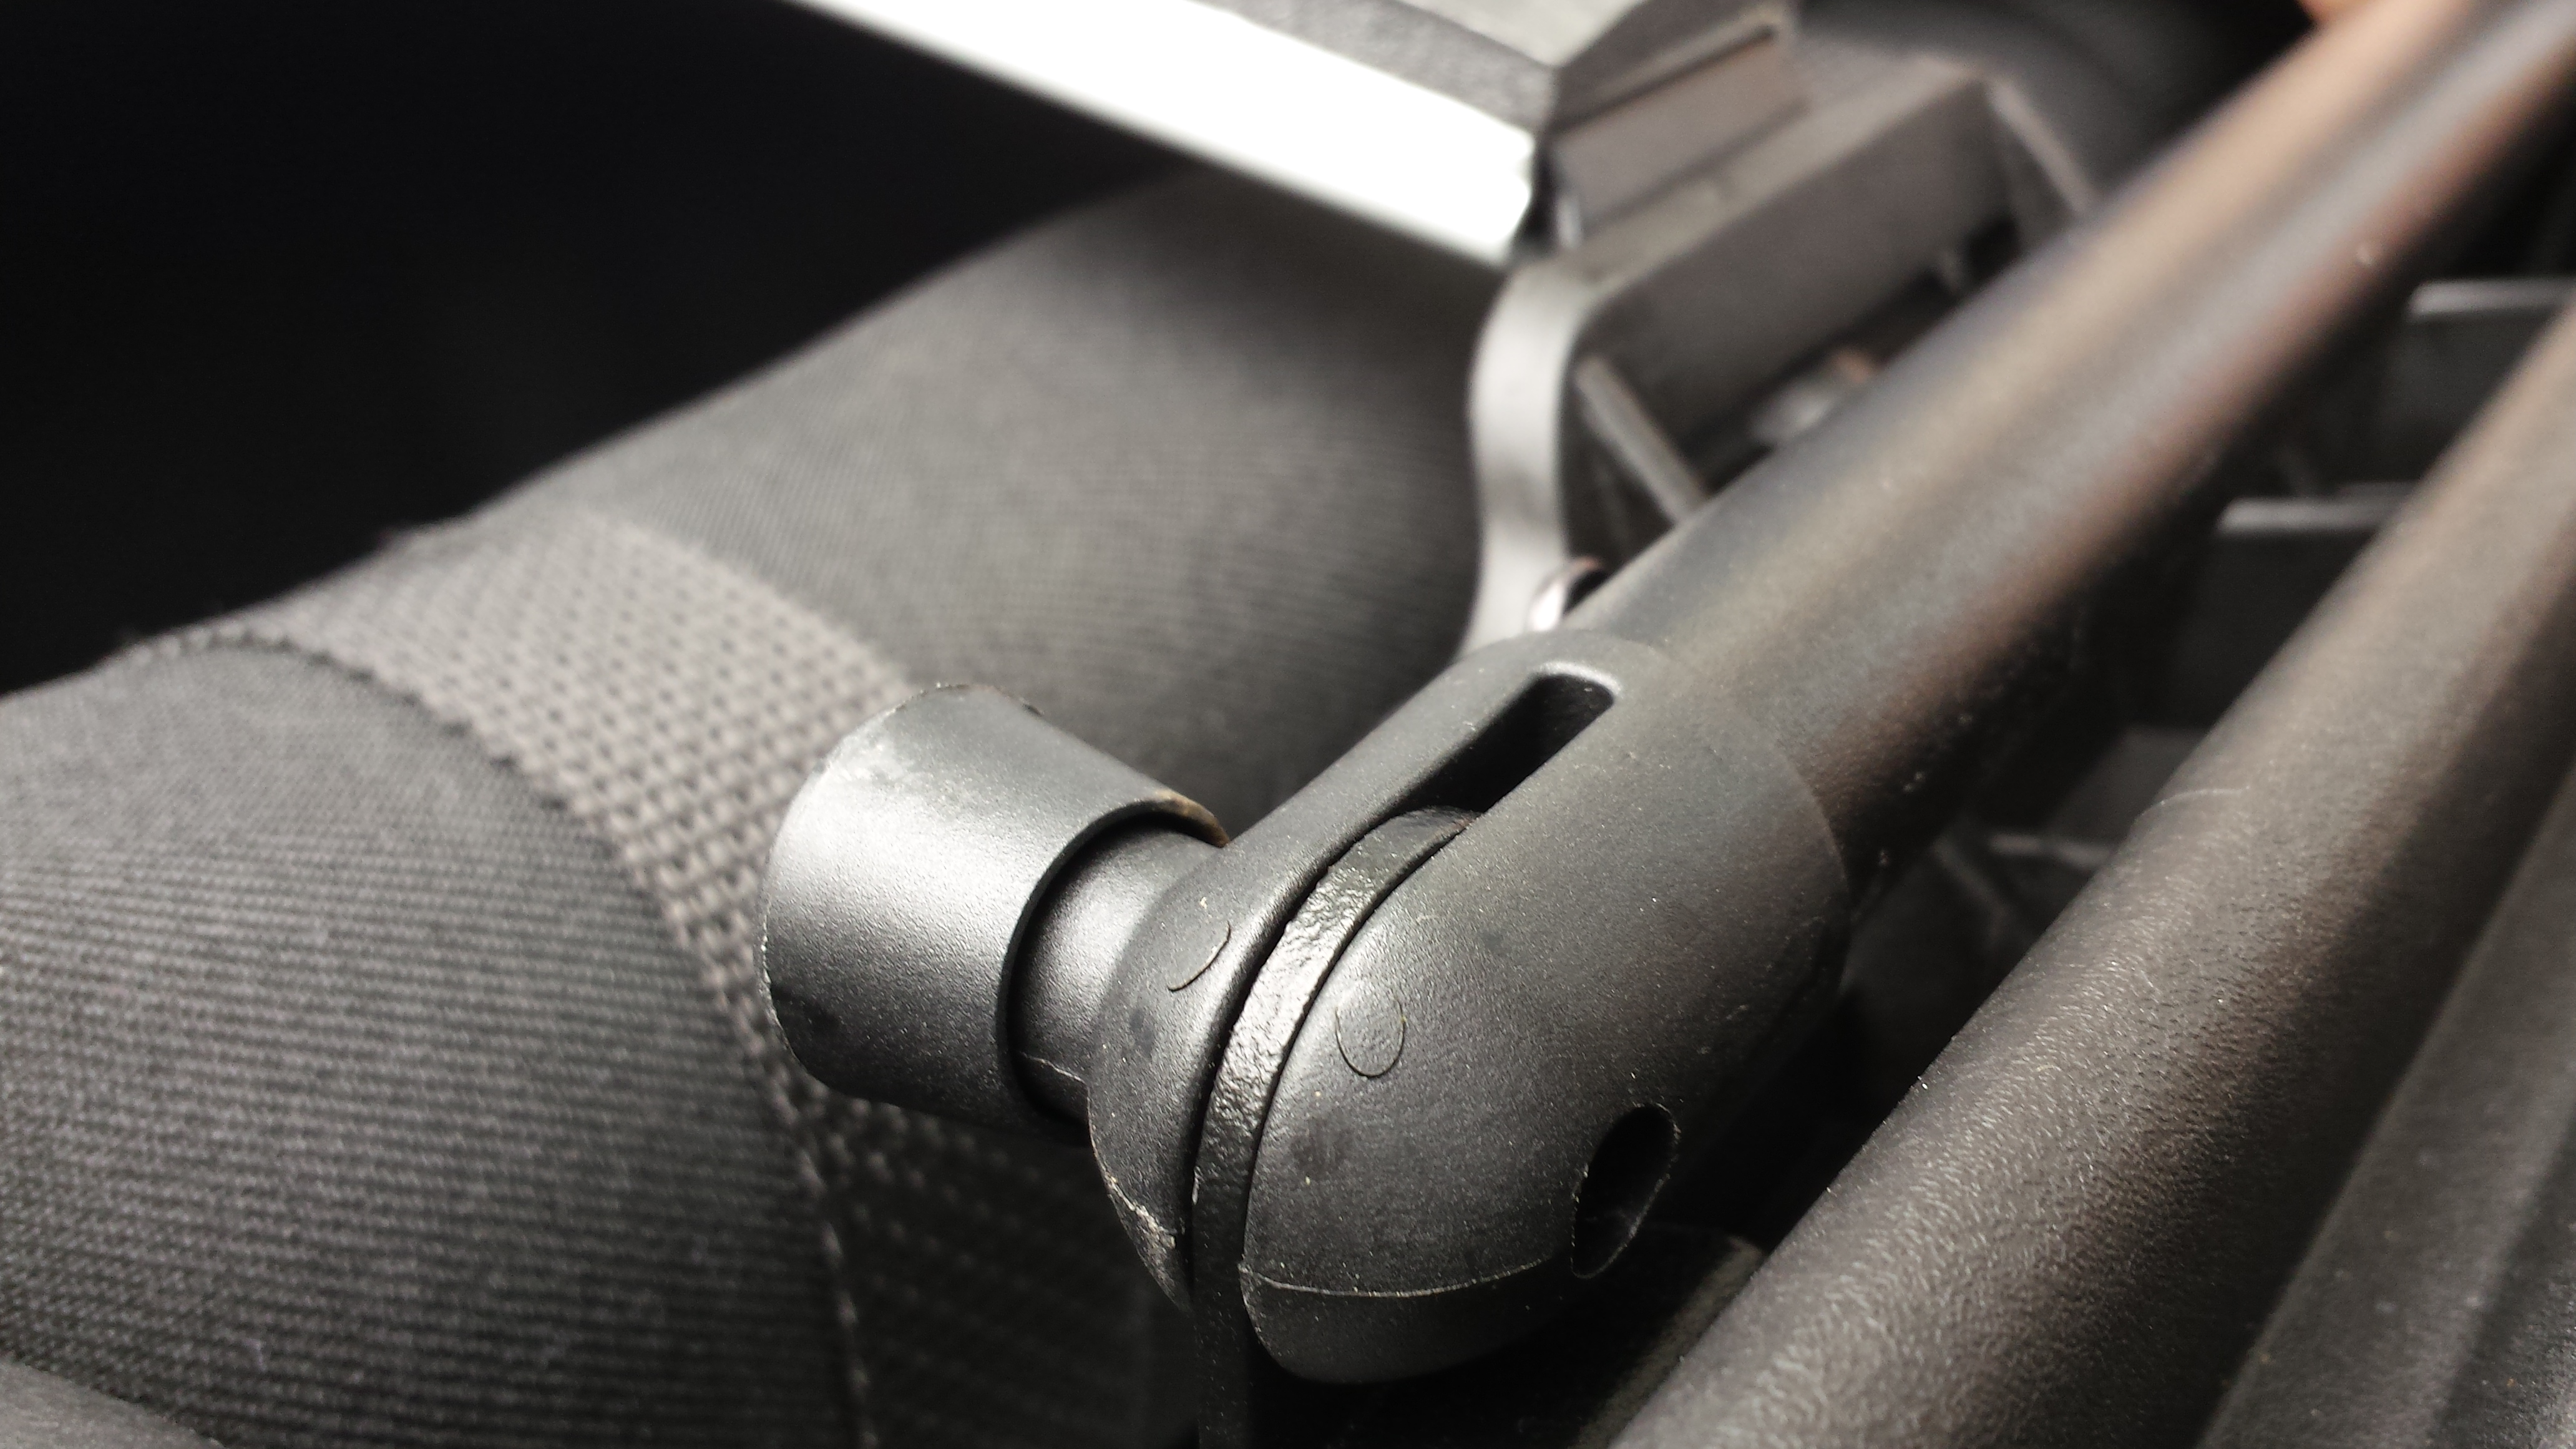
24. The framed portion in the front for the Sunrider has one connection it has to make to attach to the Jeep. You will locate the end of the bar that is not attached to the Header bar and has a pin connector in it. Line this end of the frame up so that the bracket you installed earlier on top of the door surrounds lines up with the opening in the back side of the bar.

25. Pull the pin connector out (towards the inside of the Jeep and slide the bar over the bracket and release the pin so that the bars are locked to the door surrounds, and the Sunrider portion of the Trektop and rotate.

26. Next, grab the other silver bar that came with the top, which has the open ends and no padding. Go to the back end of the Trektop on the side. You will see a small sleeve with a clip on either side. It does not matter on which side you start but insert the bar into one end of the sleeve and slide it all the way across until it is centered inside the sleeve across the top.


27. Once the bar is in, hook the clips on either side into the open ends of the support bar. These are there to secure it so that if you are running the top as a Safari top, then the bar won’t slide out!


28. No, open the Sunrider part of the top so that you have slack for the middle and back portion of the top.
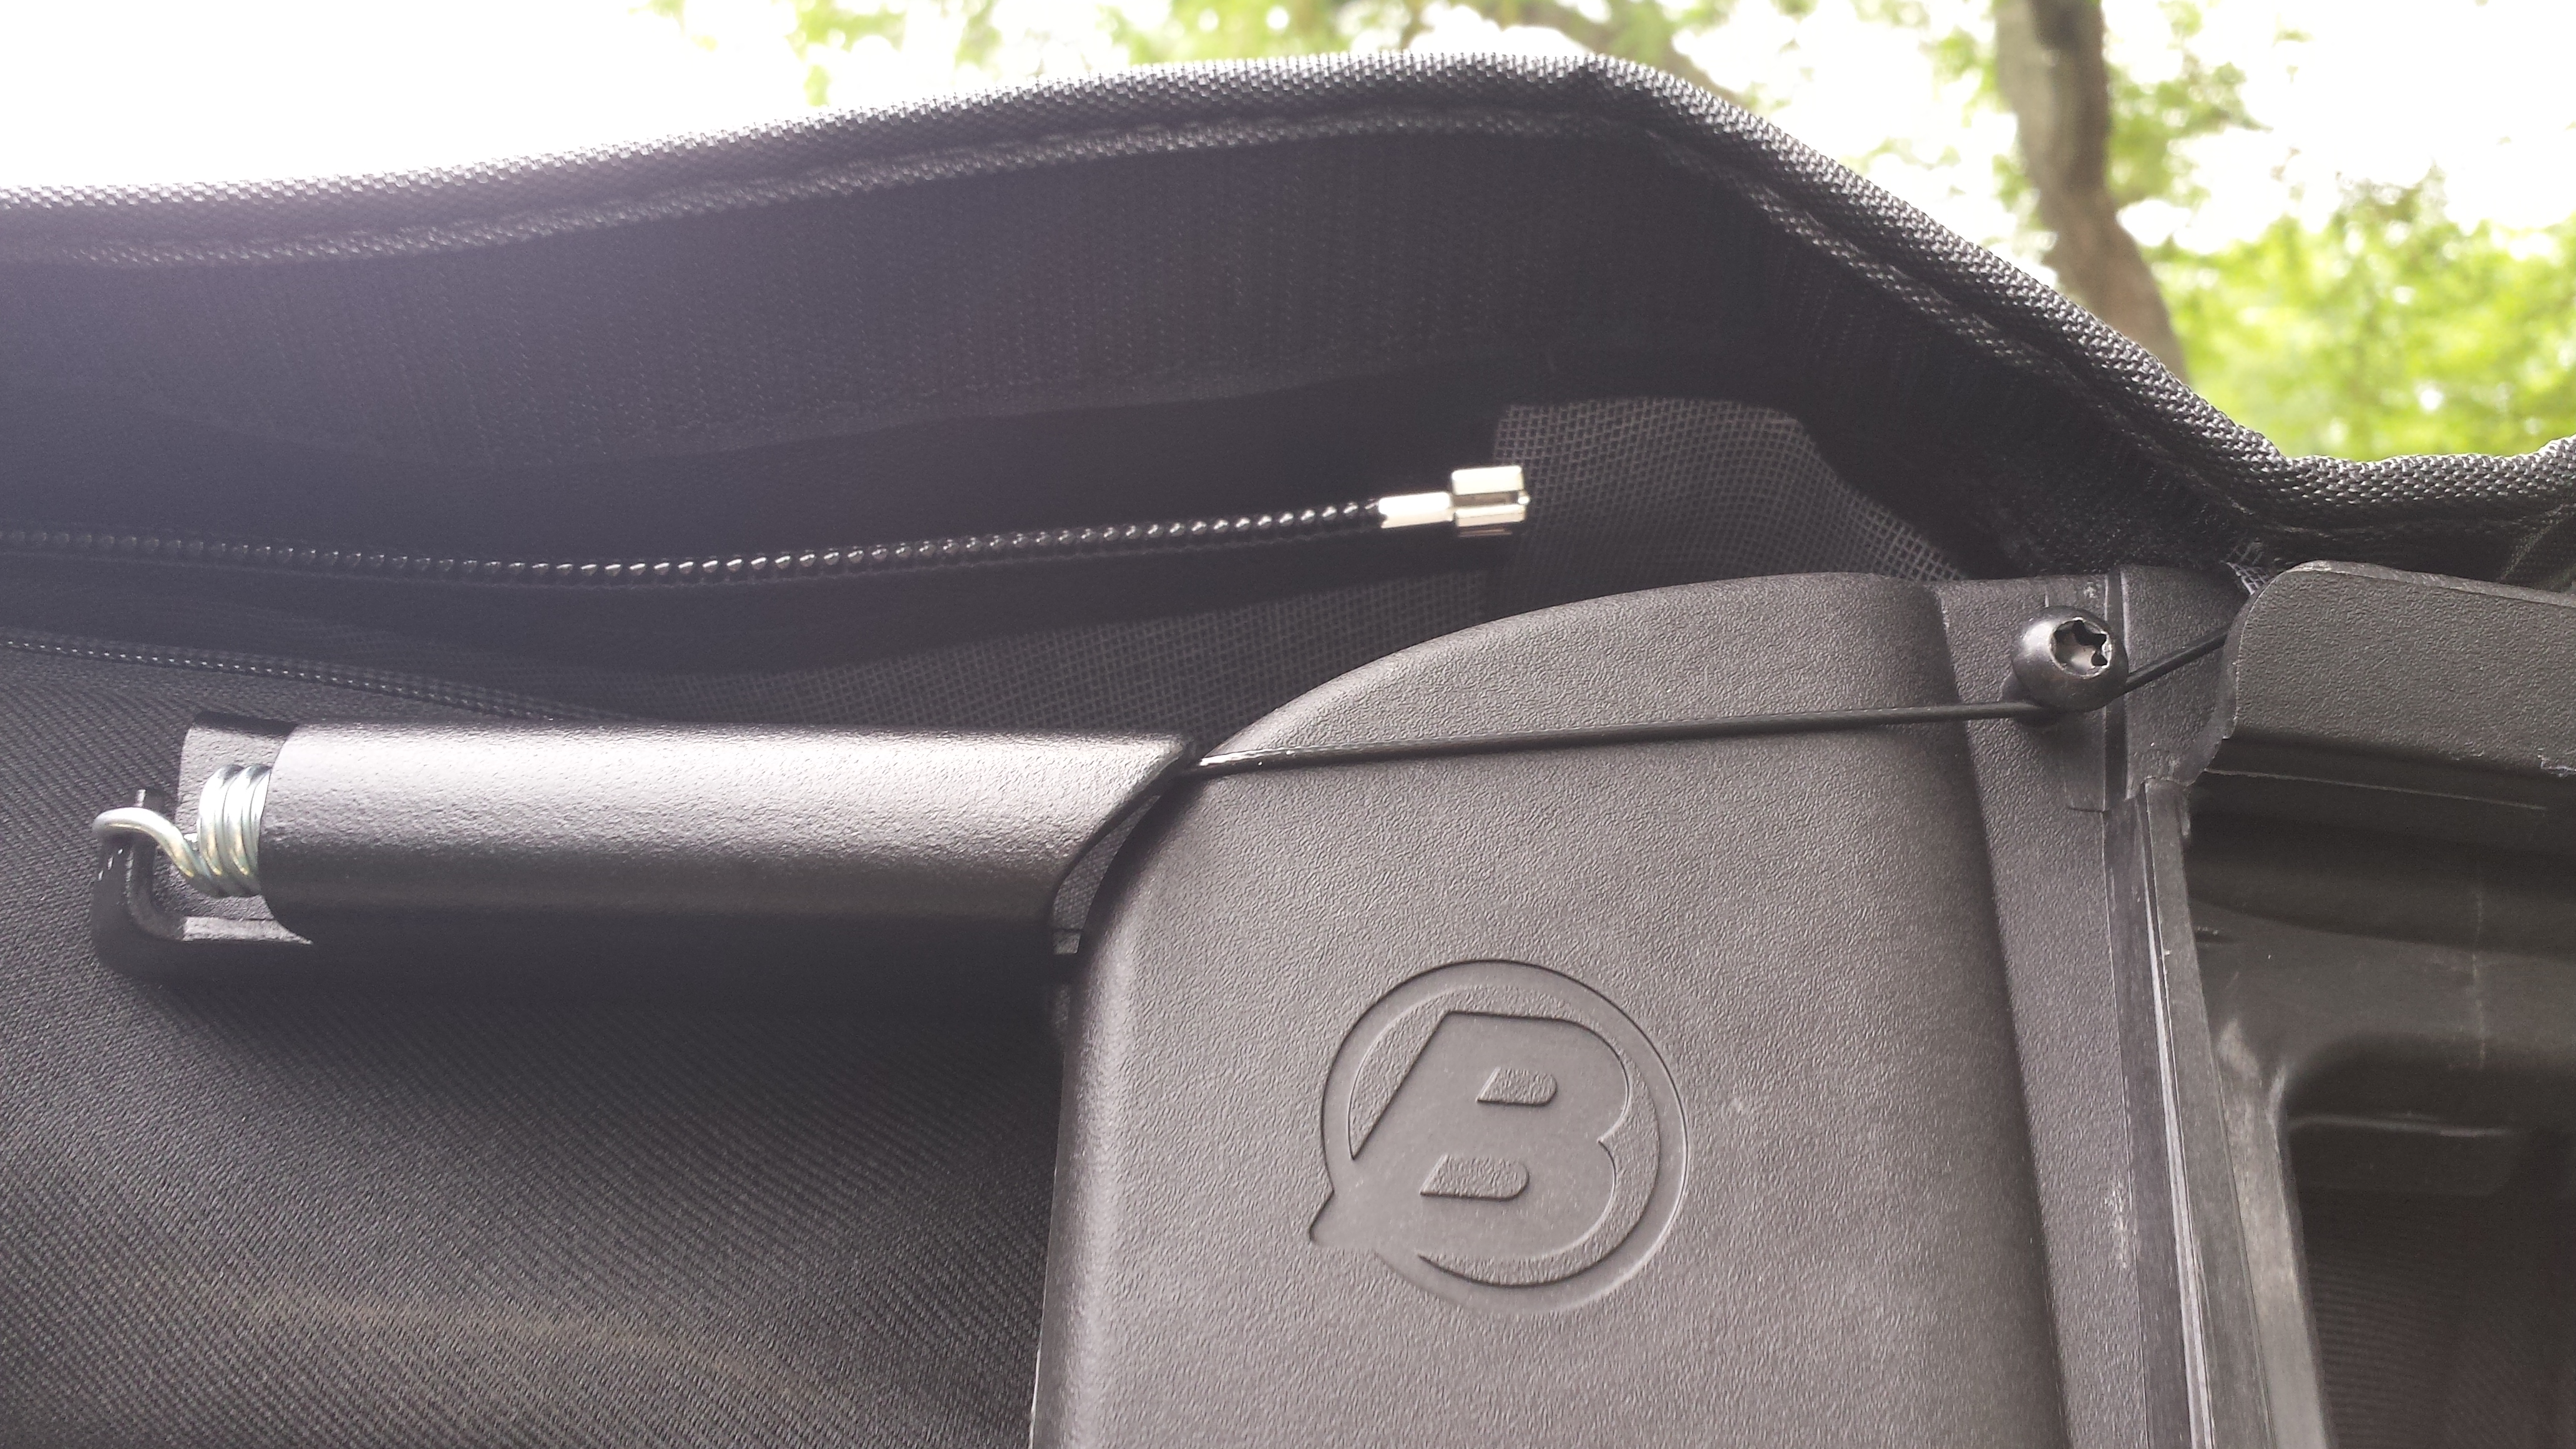
29. With the rear support bar install, just leave the top draped over the top of the Jeep as it is for now, and go back to the front portion of the top. You will see two springs with hooks, one on either side of the top, located about in line with the back portion of the door. These springs you will stretch to outer-most of the 3 holes located at the back of the bracket, and hook the spring to it.


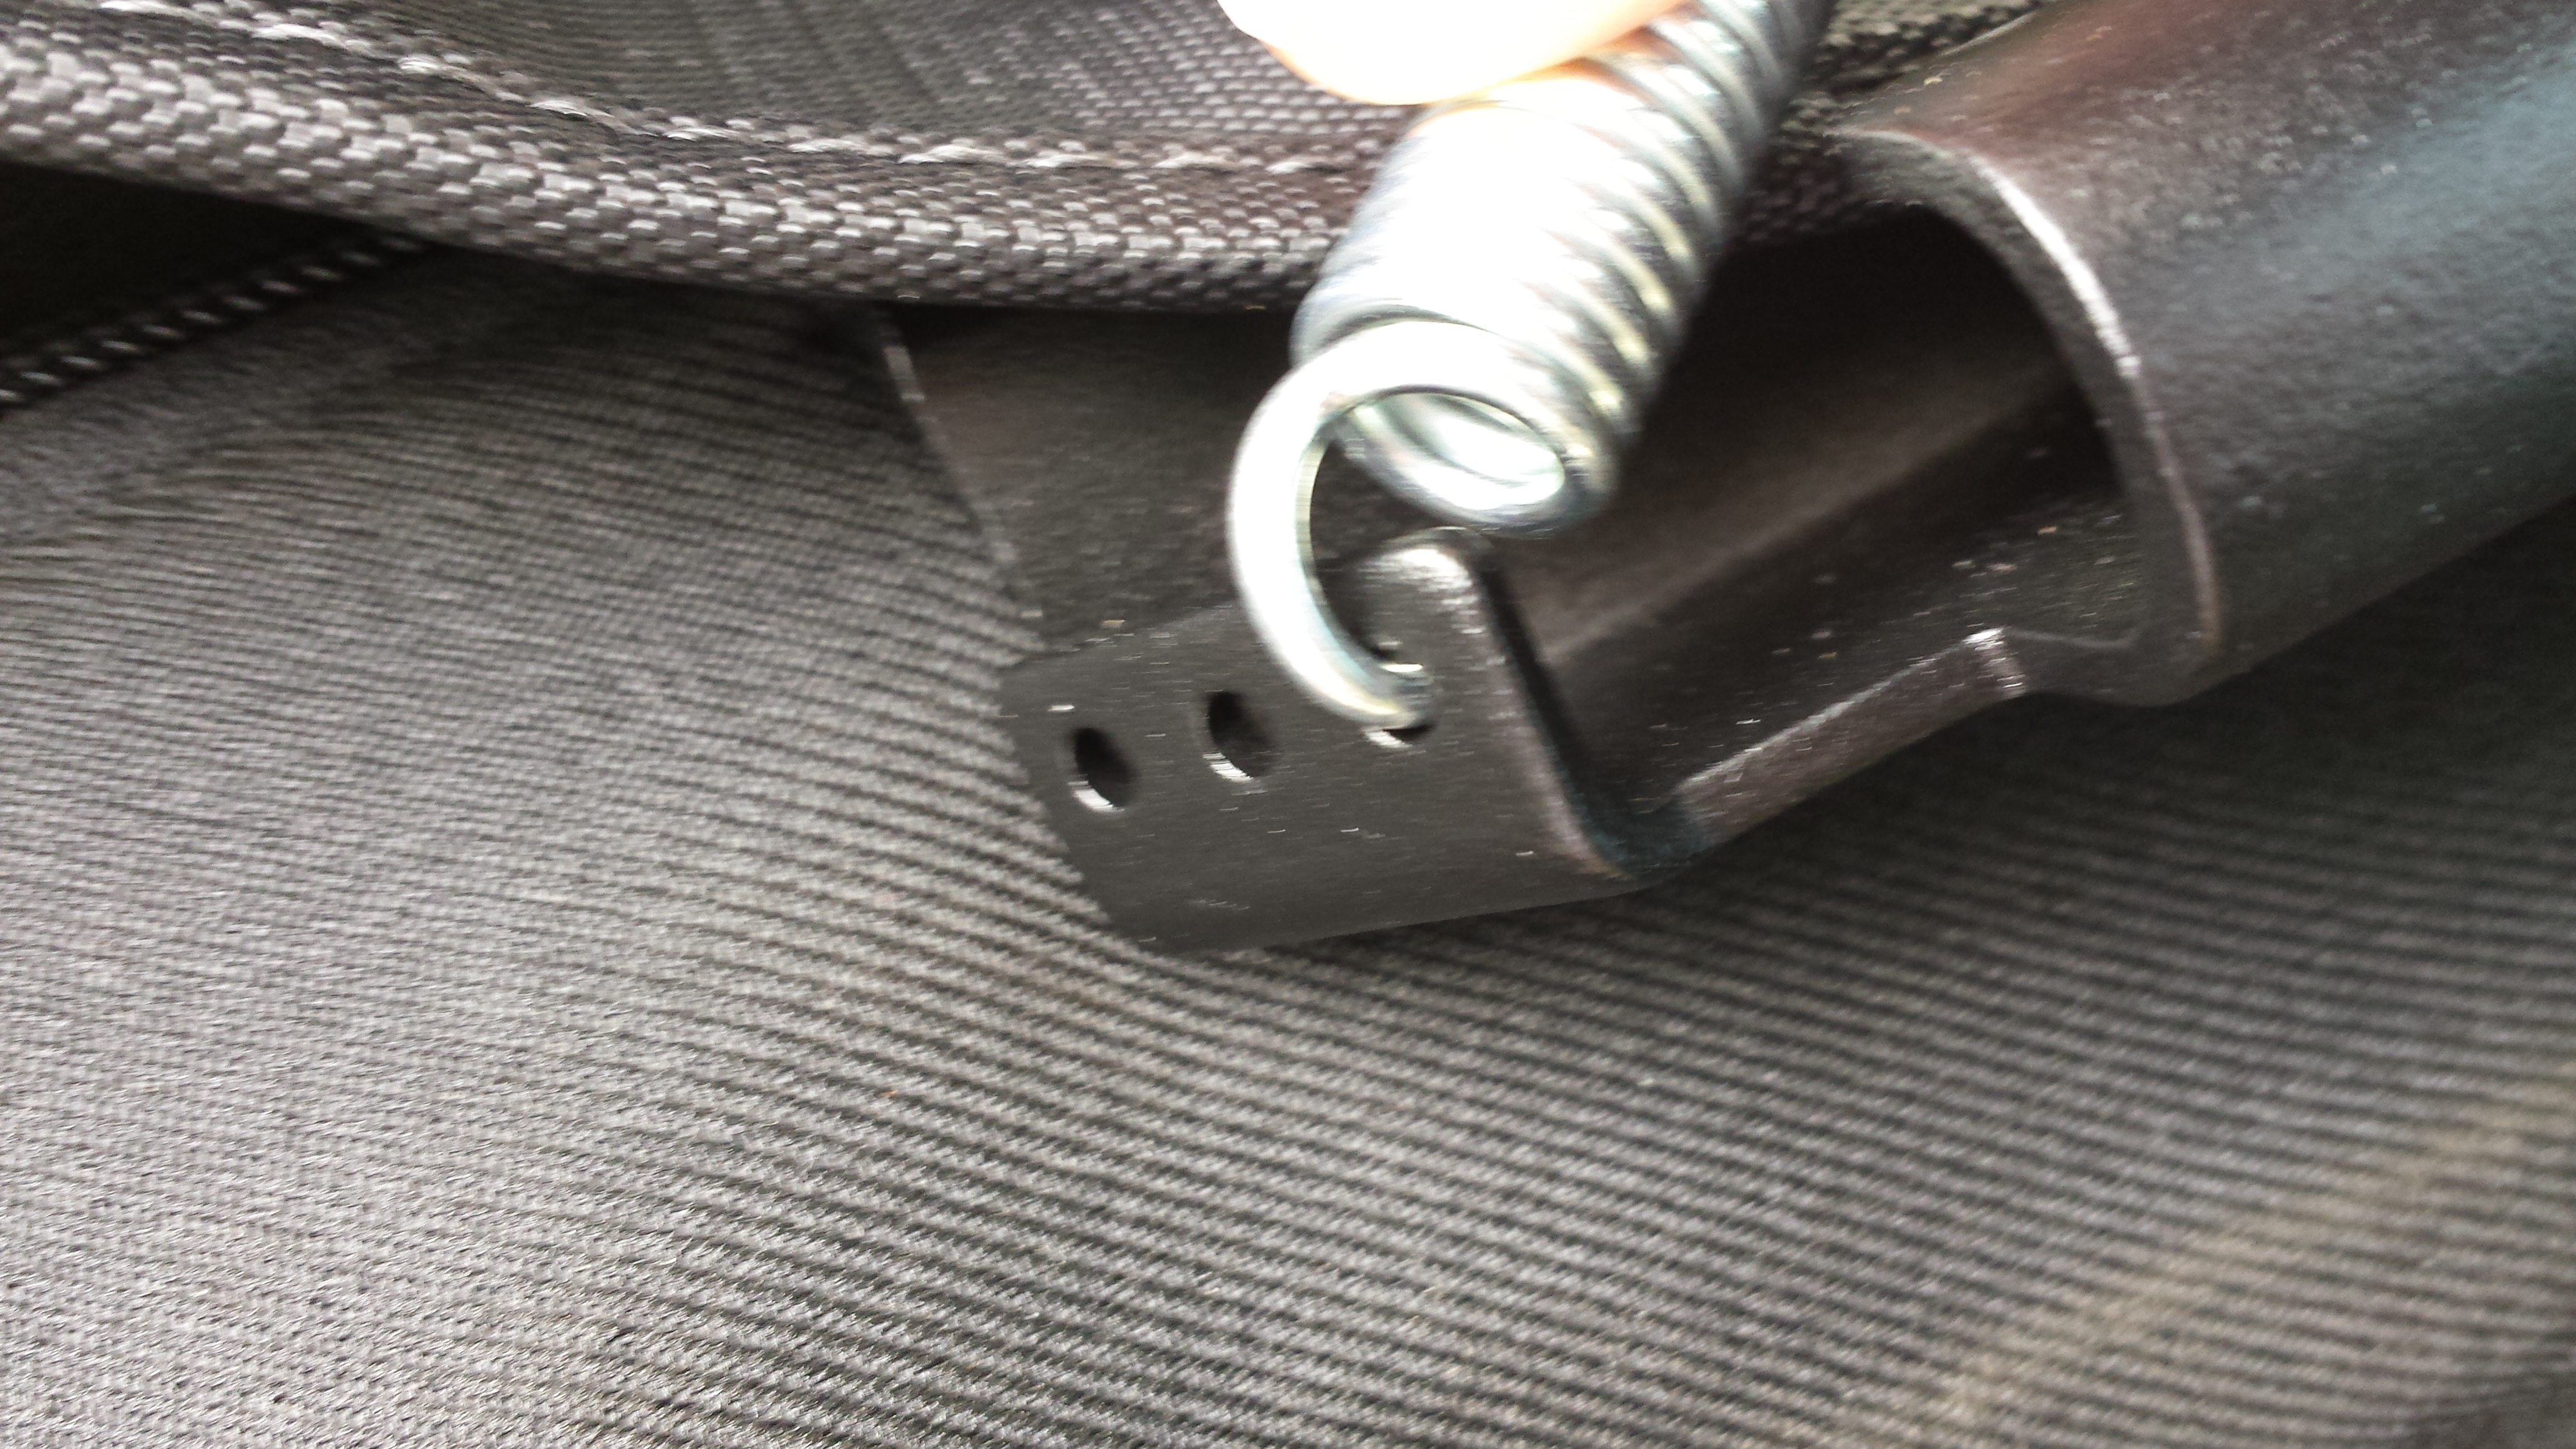
30. With the spring attached, then tuck the spring into the curved part of the bracket which is a cover for the spring. Then run the cable attached to the spring along the outside of the door surround, around the small screw head that is sticking out. This is the tensioner which keeps the top from slamming shut when closing the top. As well as it keeps the top a bit tighter when closed.

17. Once the door surrounds are in, you can go ahead and install the tailgate bar brackets. These brackets are meant to allow the tailgate bar to lock into to secure the back window and make sure the top is tight. These attach to the lip of the tub just to the right and left side respectively of the tailgate. You place the side with the Bestop logo facing towards front of the Jeep. You then hook the lip on the back under the lip on the inside of the tub of the Jeep and you rotate it towards the back of the Jeep while push down. The brackets will just snap on.
18. Now that you have the door surrounds in, you can install the bow bar that goes over the front seats. This bar helps to prevent any sort of pooling or bowing of the top when something such as rain or snow is failing and accumulating. This is the bar that has the closed ends with the flat tips. It also has padding one side which is covered. Remove the white paper cover off the padding, and insert one of the flat ends into the loops in the middle of the top of the door surround.
19. Once you have one end in, push up in the middle of the bar to make it bow so that you can get just enough space to slide the other flap end into the hoop on the opposite side, and then slide the other flat end into the hoop.
20. Now it is time to get to the actual top. Grab the top portion of the Trektop, with the header bar attached and lay it out flat, with the outside/top side of the top face down. Locate the 4 pieces of foam tape which came with the hardware.
21. Locating the thicker pieces with the cutouts, line these pieces up with the notch in the top corner at the front edge of the header bar and towards the outside edge of the top, while the half circle cut out at the other end goes around the sunrider frame bar going towards the back of the top. Make sure you firmly and securely press the foam strips down to make sure they have a good seal.
22. Now, with the remaining 2 thinner pieces of foam, go to the front overhang of fabric in front of the header bar. Place these two strips carefully, along the both sides of the header bar, one again making sure they are securely attached.
23. Next up, pick the top piece of the Trektop that you were just working on up, flip it back over so that the outside/top side portion is facing up, and drape it over the top of the Jeep with the Header bar at the front of the cabin.
24. The framed portion in the front for the Sunrider has one connection it has to make to attach to the Jeep. You will locate the end of the bar that is not attached to the Header bar and has a pin connector in it. Line this end of the frame up so that the bracket you installed earlier on top of the door surrounds lines up with the opening in the back side of the bar.
25. Pull the pin connector out (towards the inside of the Jeep and slide the bar over the bracket and release the pin so that the bars are locked to the door surrounds, and the Sunrider portion of the Trektop and rotate.
26. Next, grab the other silver bar that came with the top, which has the open ends and no padding. Go to the back end of the Trektop on the side. You will see a small sleeve with a clip on either side. It does not matter on which side you start but insert the bar into one end of the sleeve and slide it all the way across until it is centered inside the sleeve across the top.
27. Once the bar is in, hook the clips on either side into the open ends of the support bar. These are there to secure it so that if you are running the top as a Safari top, then the bar won’t slide out!
28. No, open the Sunrider part of the top so that you have slack for the middle and back portion of the top.
29. With the rear support bar install, just leave the top draped over the top of the Jeep as it is for now, and go back to the front portion of the top. You will see two springs with hooks, one on either side of the top, located about in line with the back portion of the door. These springs you will stretch to outer-most of the 3 holes located at the back of the bracket, and hook the spring to it.
30. With the spring attached, then tuck the spring into the curved part of the bracket which is a cover for the spring. Then run the cable attached to the spring along the outside of the door surround, around the small screw head that is sticking out. This is the tensioner which keeps the top from slamming shut when closing the top. As well as it keeps the top a bit tighter when closed.
Thread Starter
JK Enthusiast
Joined: Sep 2015
Posts: 419
Likes: 22
From: Madison Heights, MI
Bestop Trektop NX Install (Not Black Twill Version)(Continued)
31. Now climb into the Jeep, and on the underside/interior portion of the Trektop, there is a flap located just in front of the location of the sound bar. Grab the nylon straps with the hooks on the end from the hardware, and attach these to the flap.
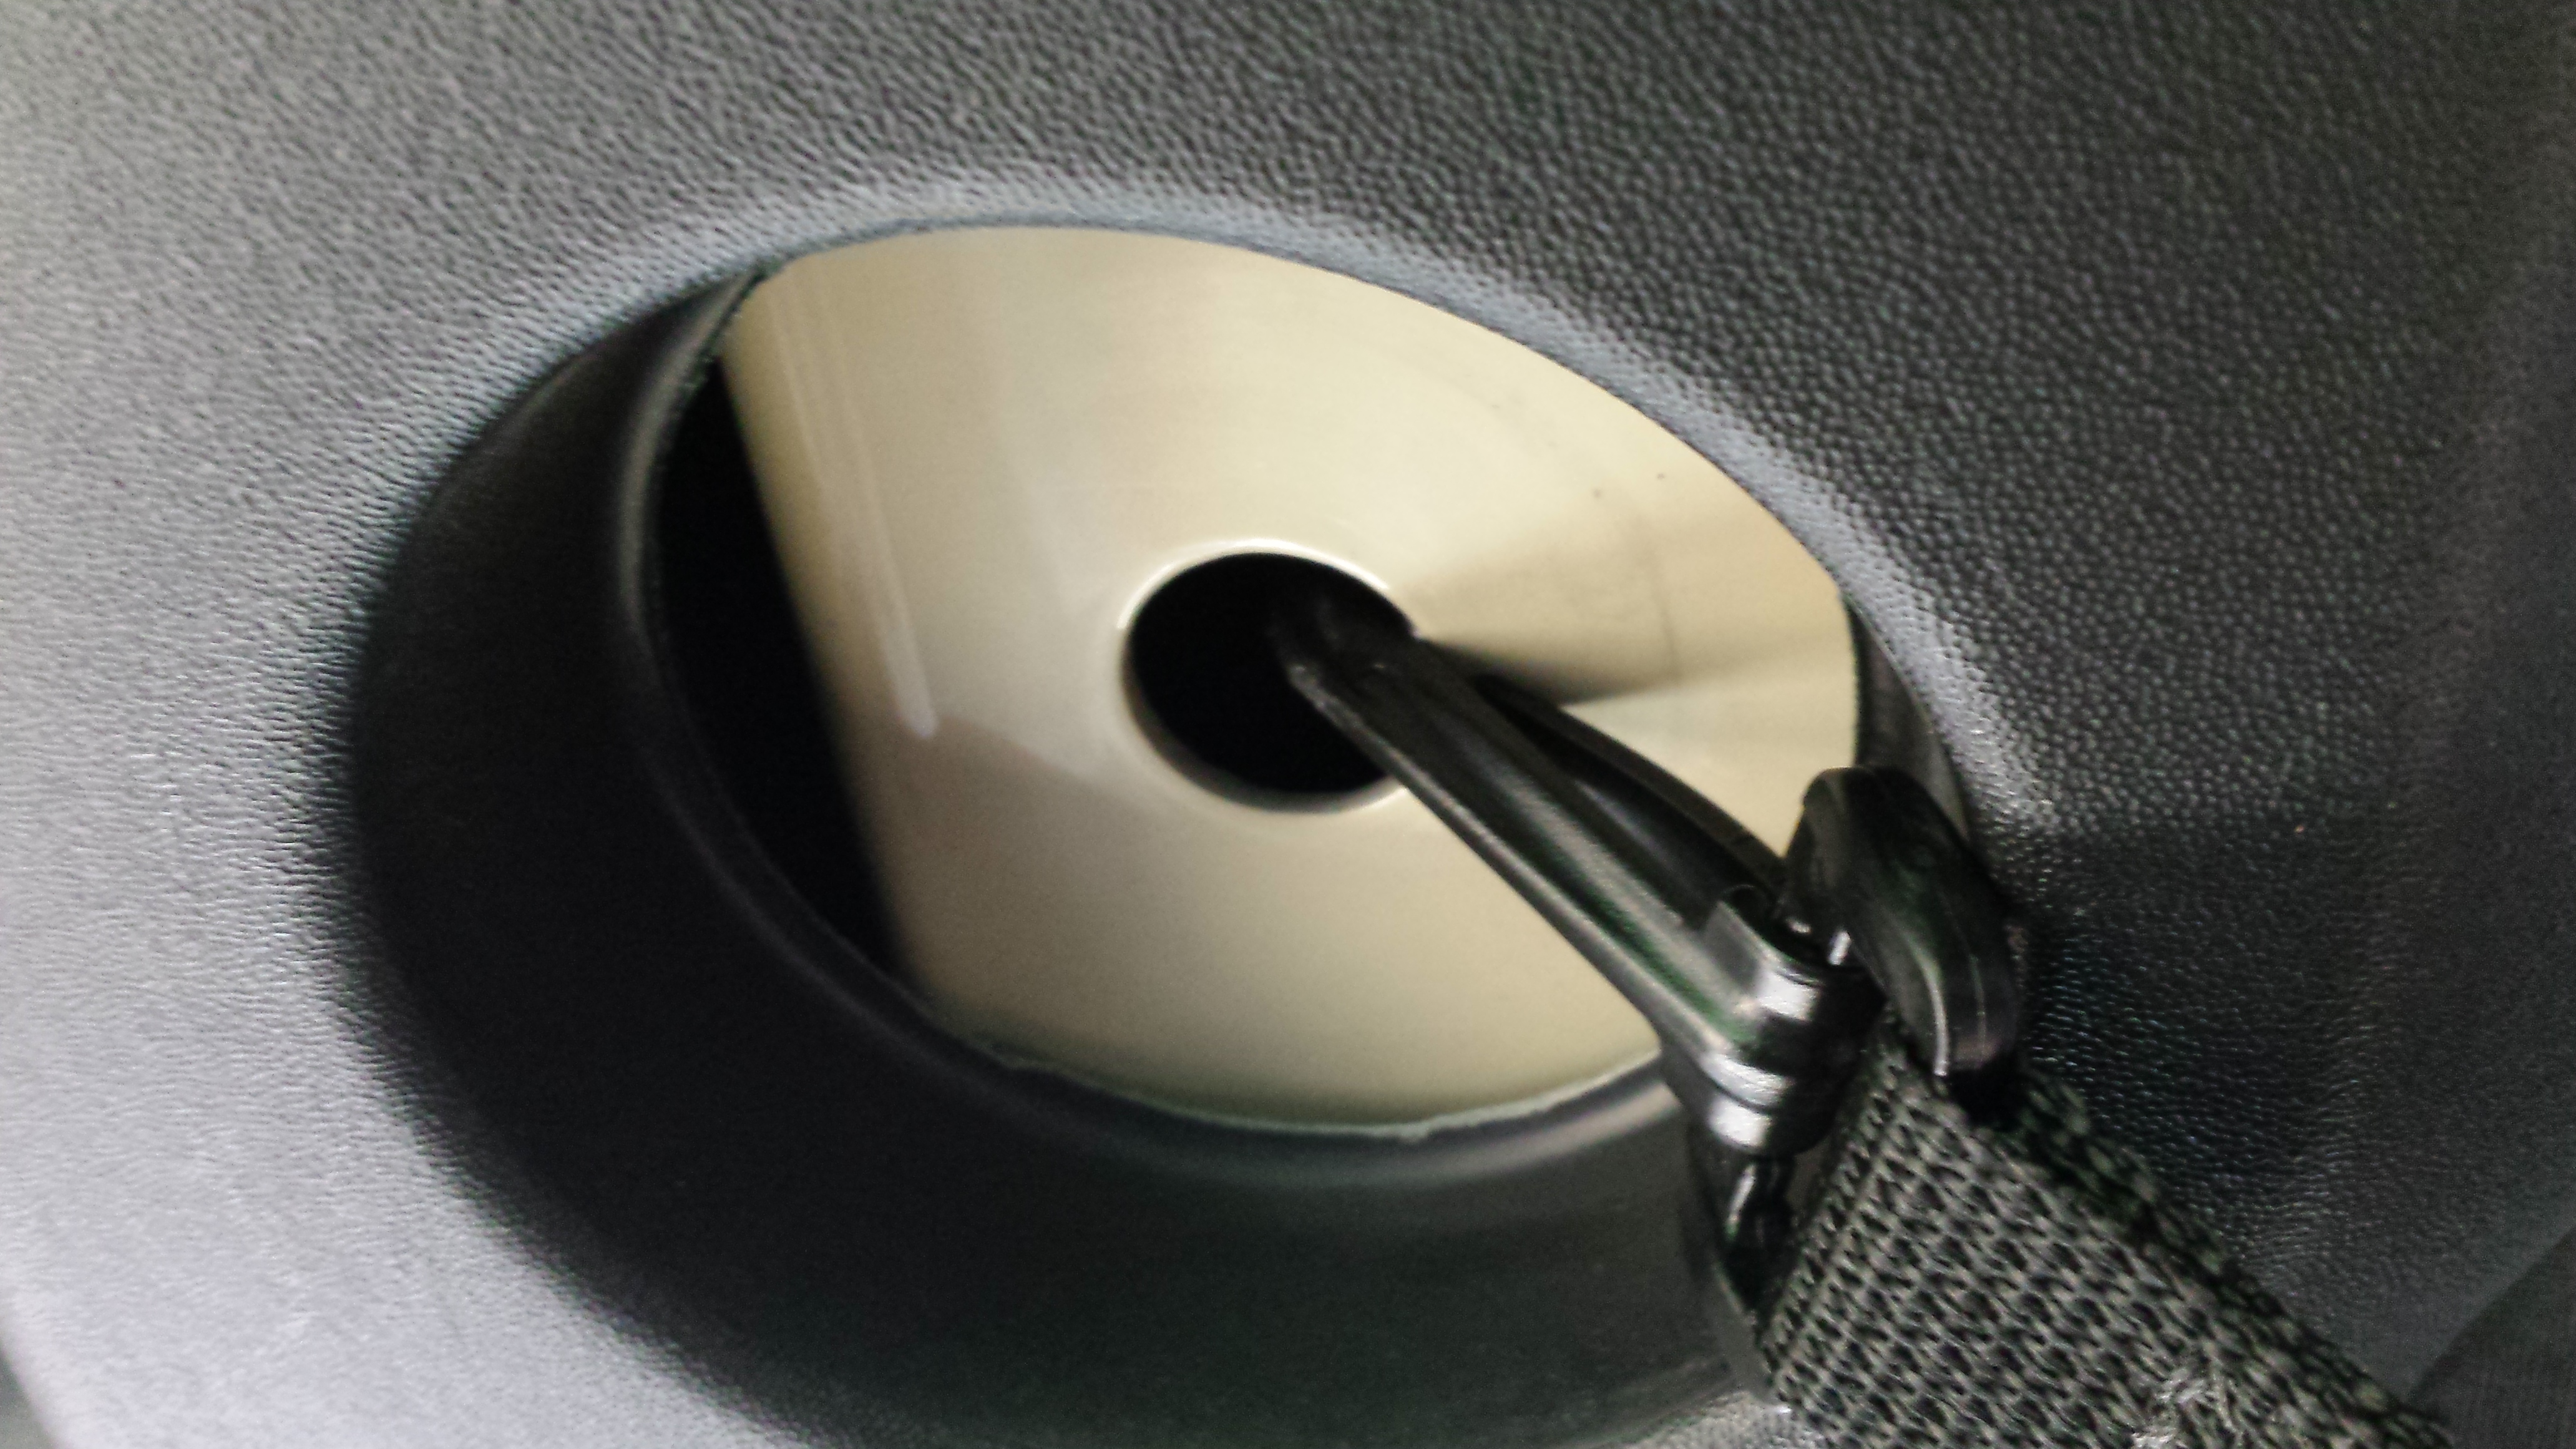

32. Once the straps are attached, you will hook these clips into the holes where the screws for the hardtop go on the sound bar. These are to help keep from having the middle portion of the top flap as well as to try and keep the back portion a bit tighter when the Sunrider is open.
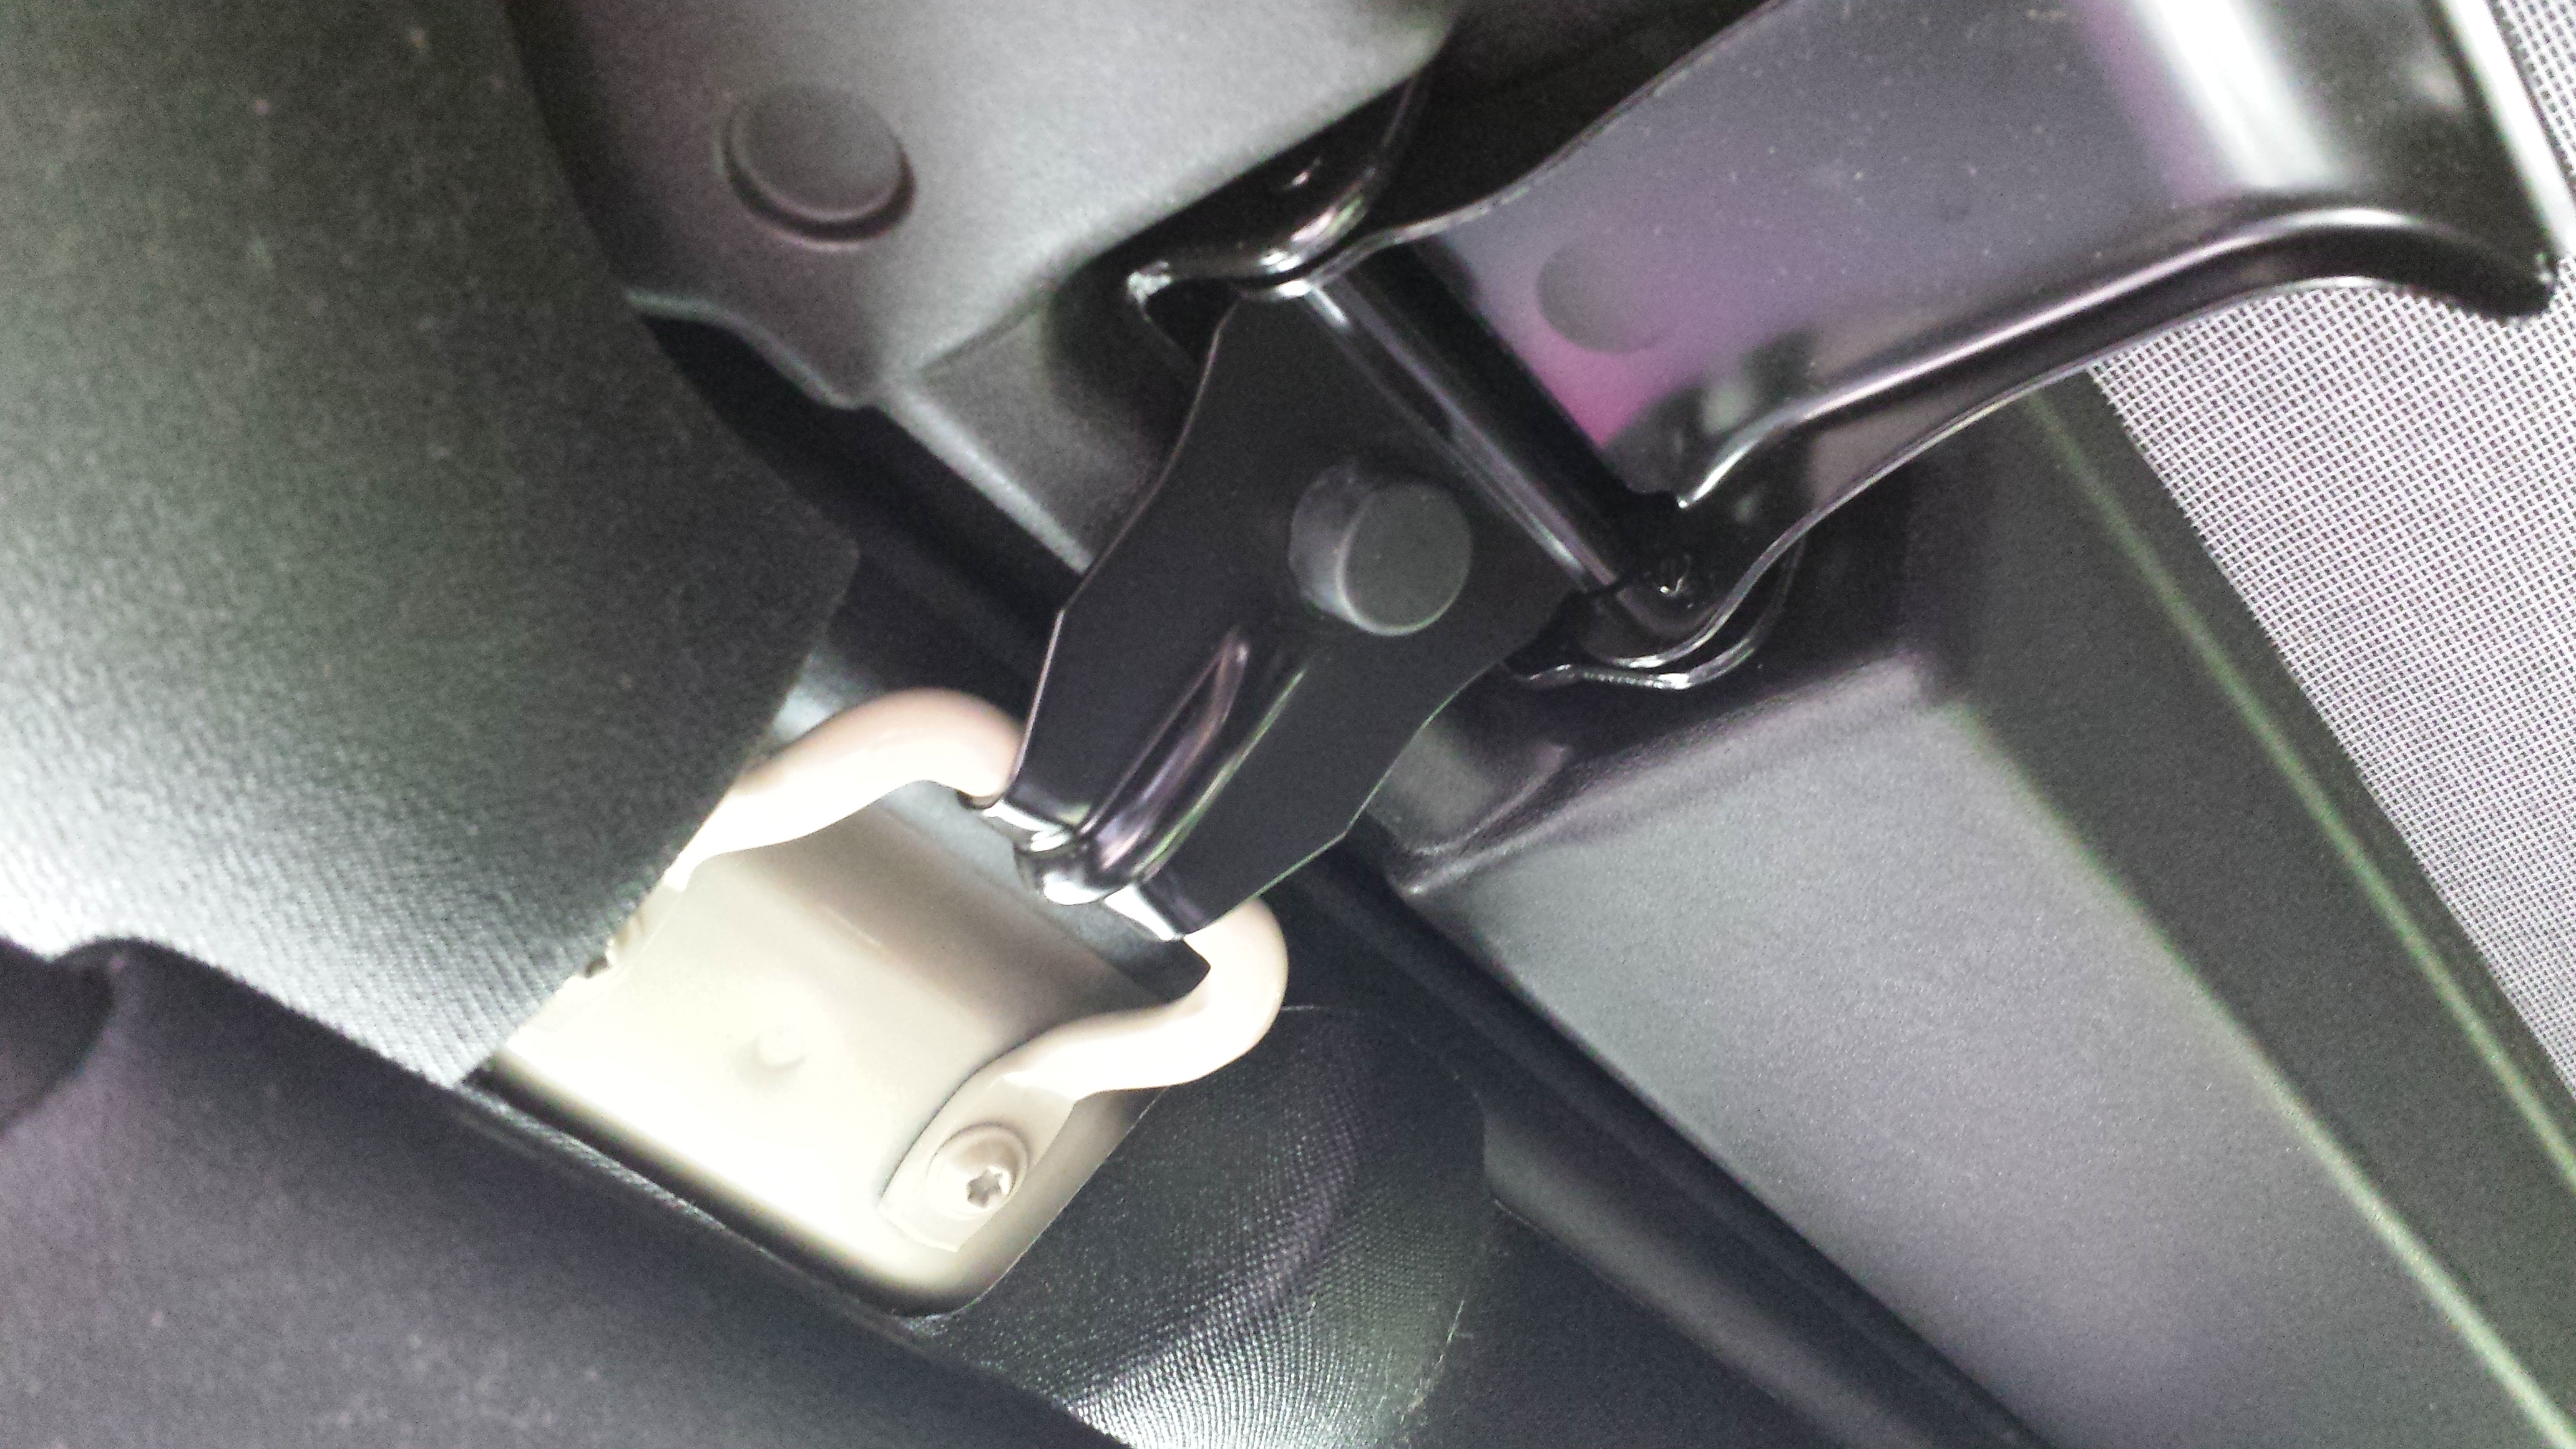
33. Once those hooks are attached to the sound bar, you can close the front portion of the top. Open the hooks up and attach them to the footman’s loops which they line up with. Do not tightly latch them though; just hook the open latch onto the footman’s loops.
34. Now, you will attach the back portion of the top down so that it is secure. There are two nylon straps with J hook plastic clips on the end that are handing off the back of the top, one on either side. Grab these and adjust the length to get them close to the proper length needed, but so they still have a little slack. (Side note, most people think that these straps are backwards as the extra strap is to the inside and the front part of the clip are to the inside, but this is on purpose so that the extra stays to the inside of the Jeep and not flying outside the Jeep.)
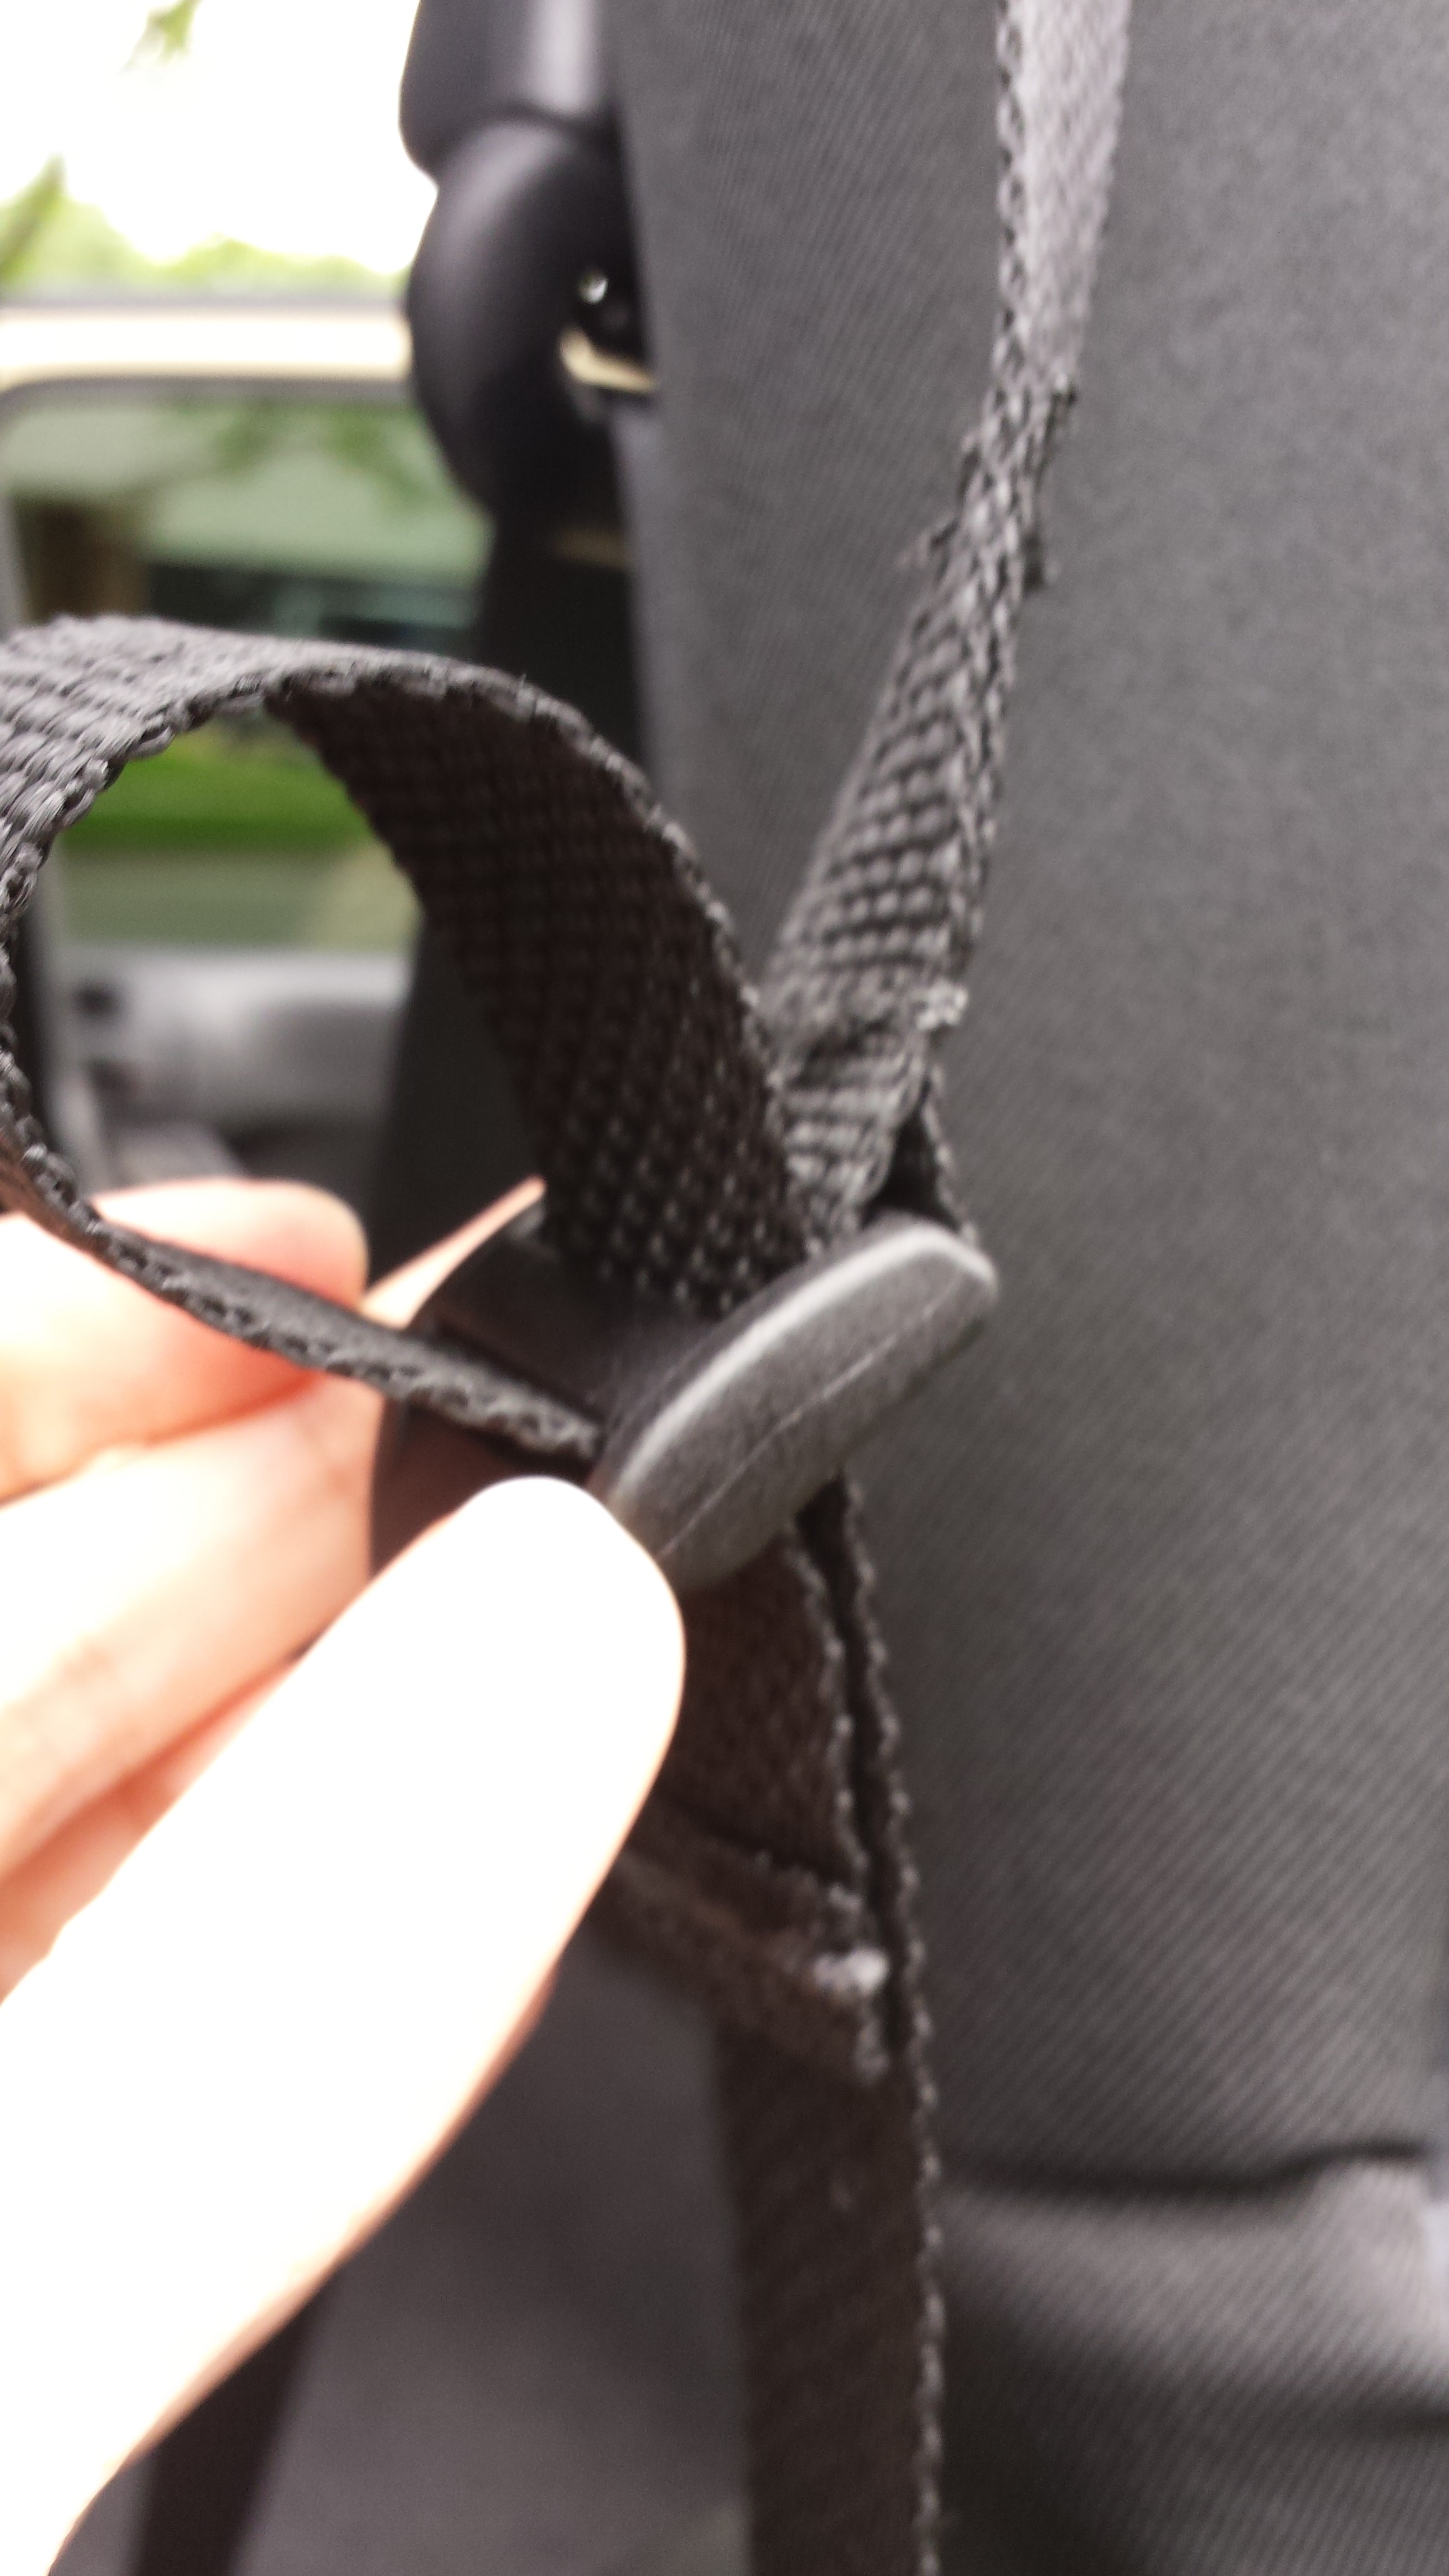
35. Go ahead and attach the J hooks under the lip on the inside of the tube. And once attached, tighten the straps the rest of the way so they are tight and the top is secured. And now you have a Safari top! And that is one of the ways which Bestop shows that you can run this top!
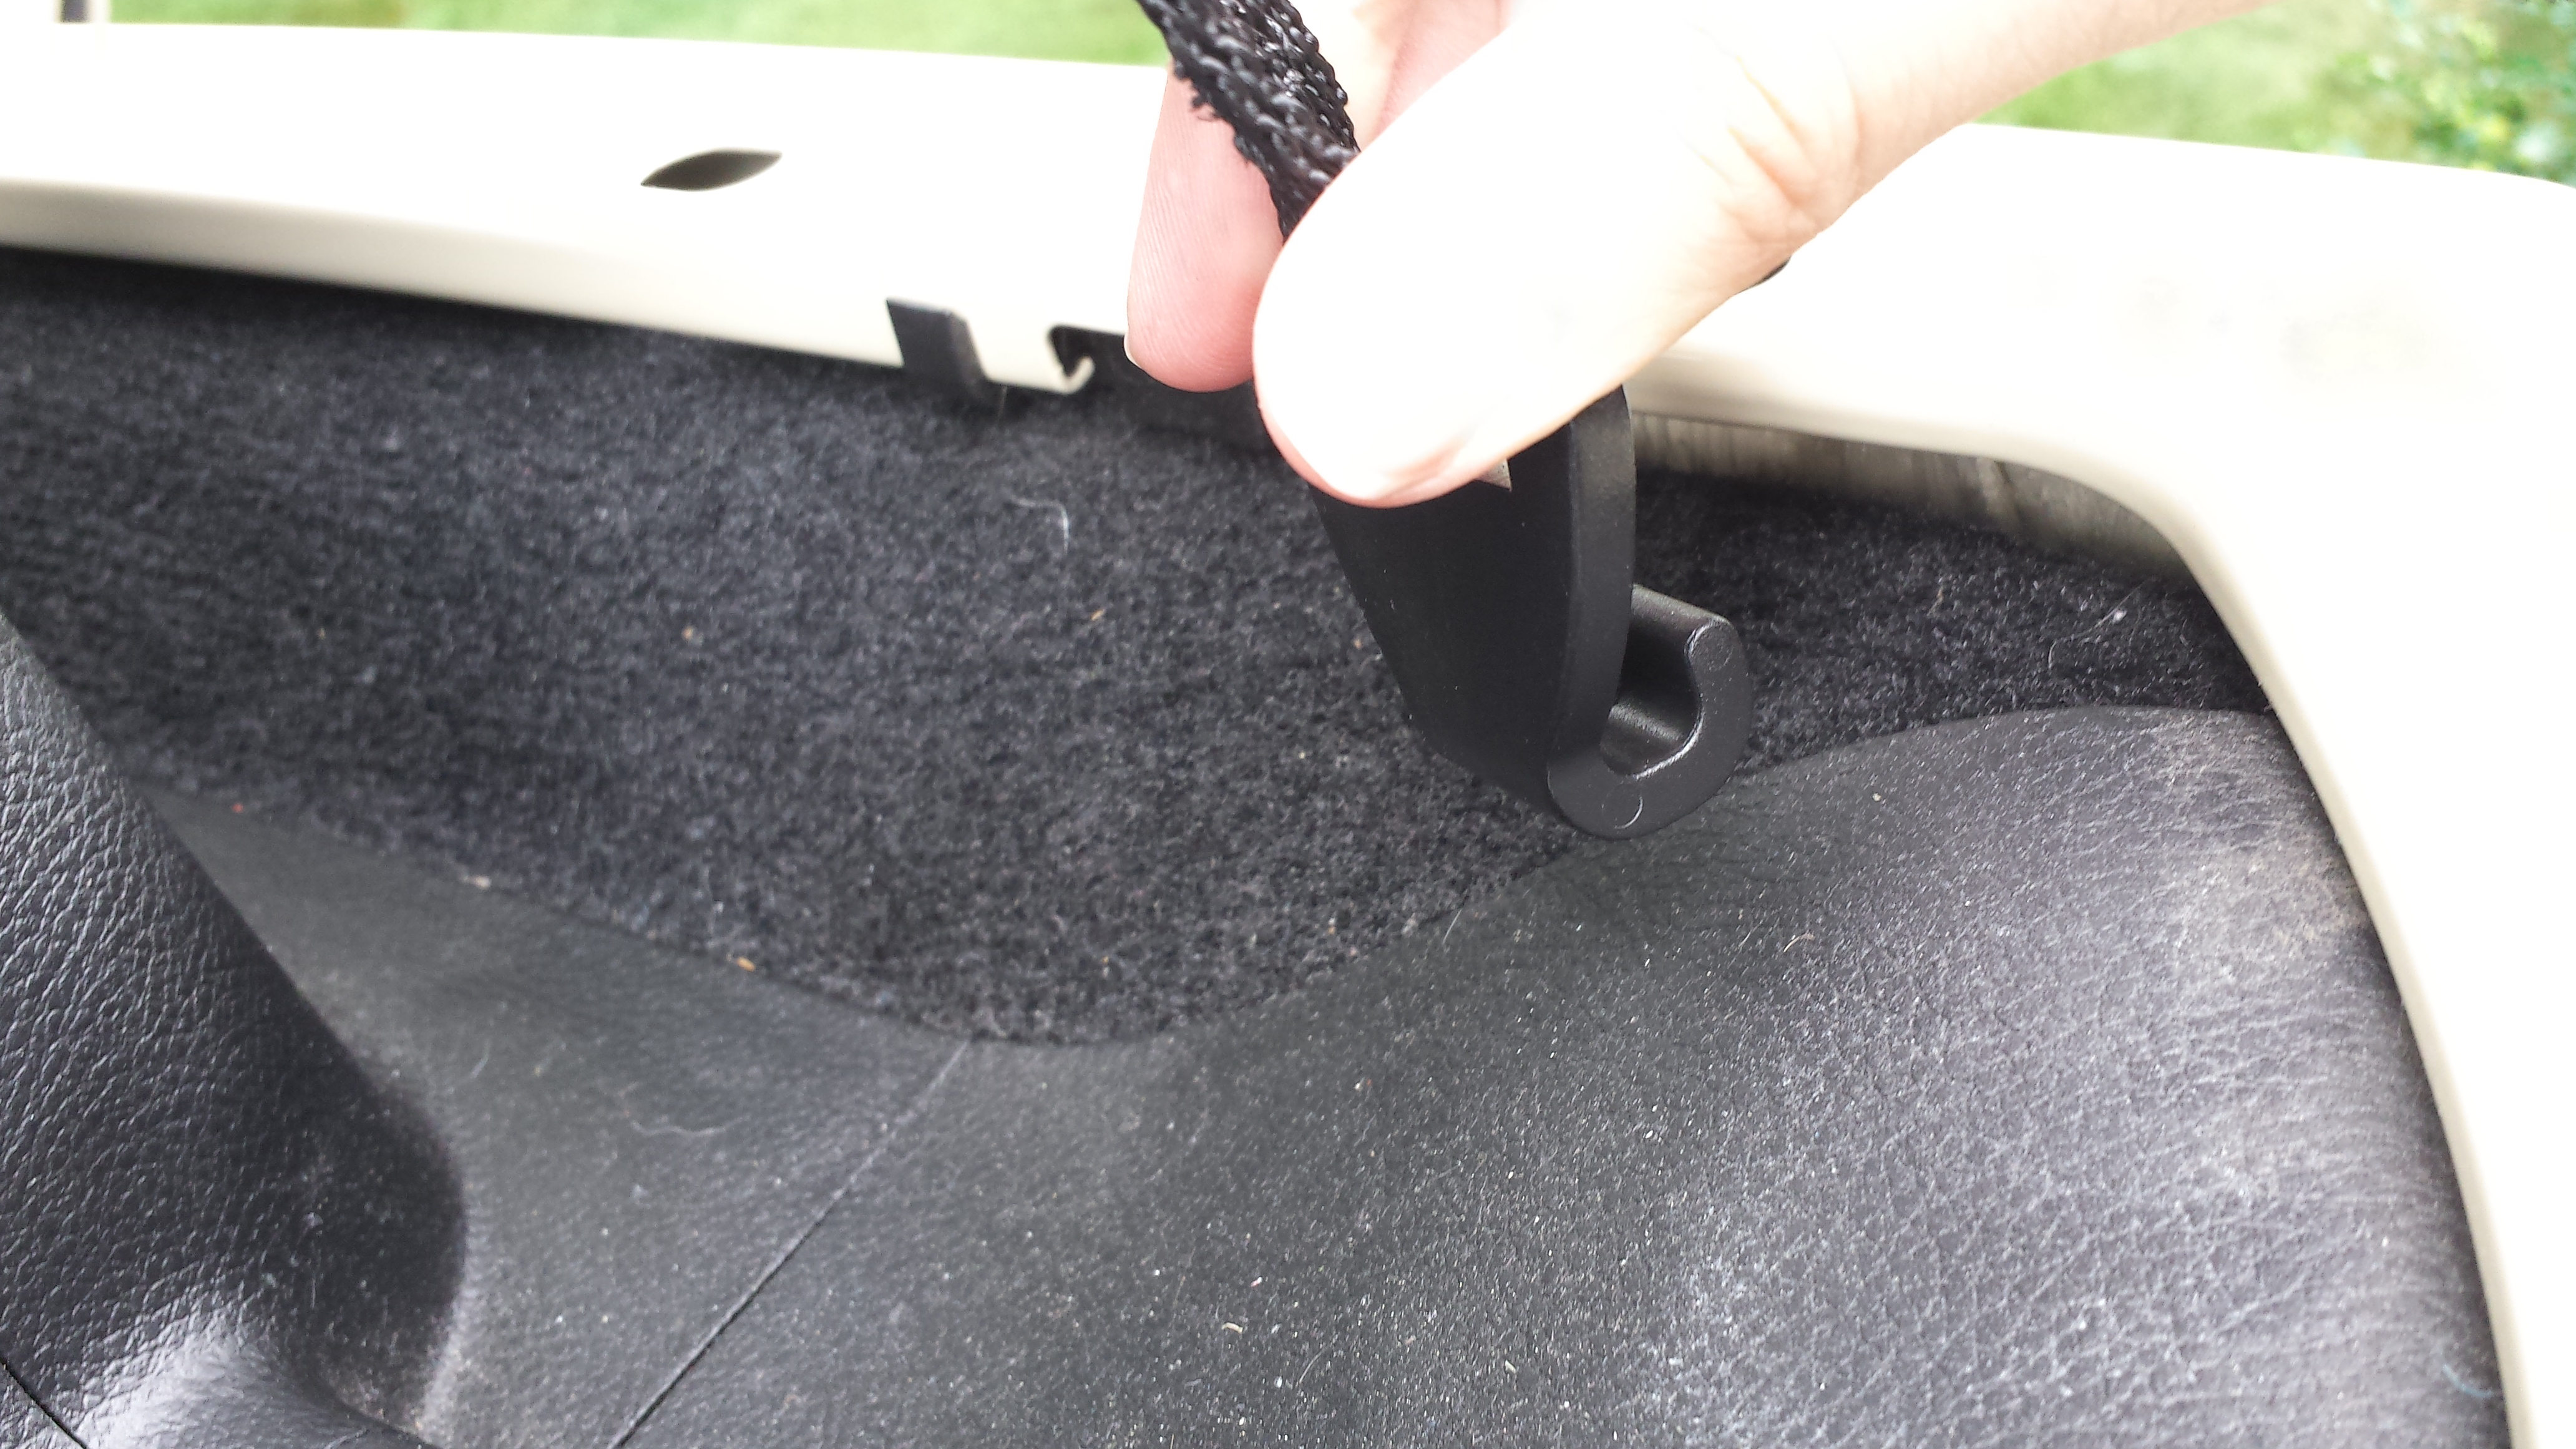


36. Now, to get the rest of the top put together and actually closed, you can go get the rear window panel, and locate the top edge (which is the edge with no fabric, but a channel. You will then locate the other side of the channel on the back edge of the Top, just under the overhang flap.
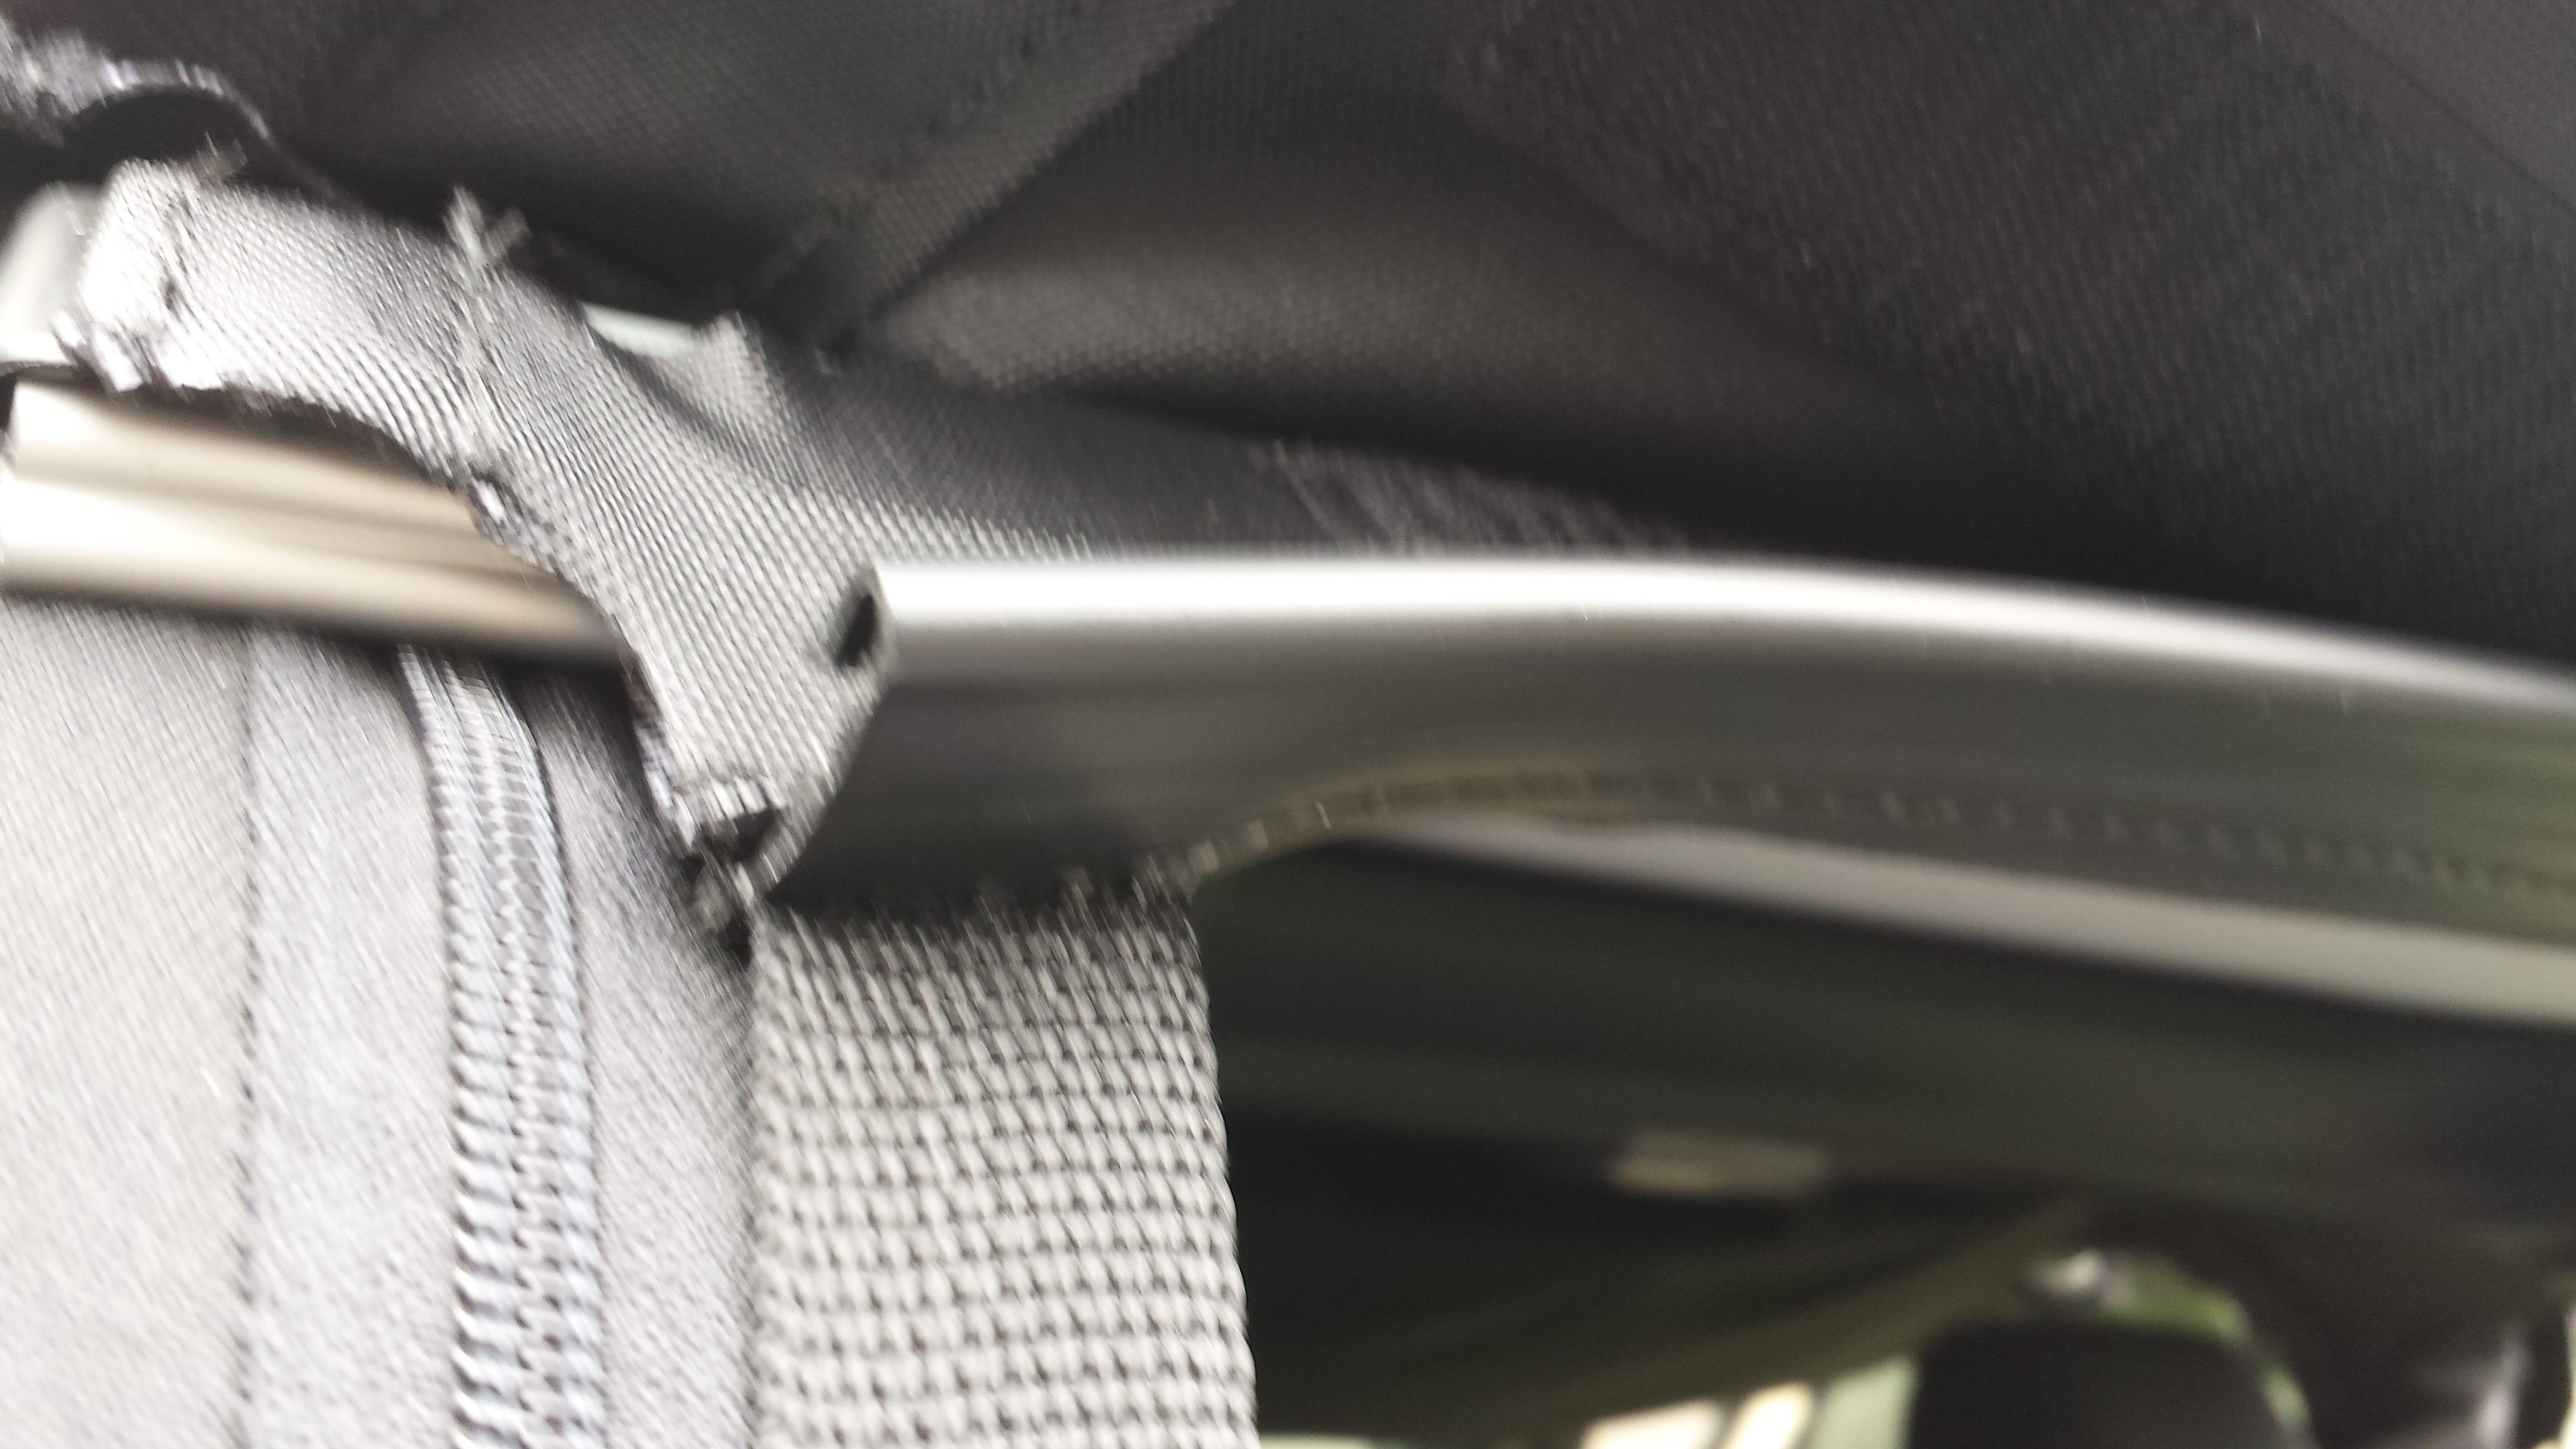
37. Start from one side, it does not matter which, and line the channels up. When you first insert the rear window into the channel on the top, you should hear a slight click, which is the sound that lets you know that it is securely in the channel and ready to be fully attached. Once you started the window and hear that click, you can then slide the window all the way into the channel, and attempt to roughly center it in the opening and just leave it hanging there.

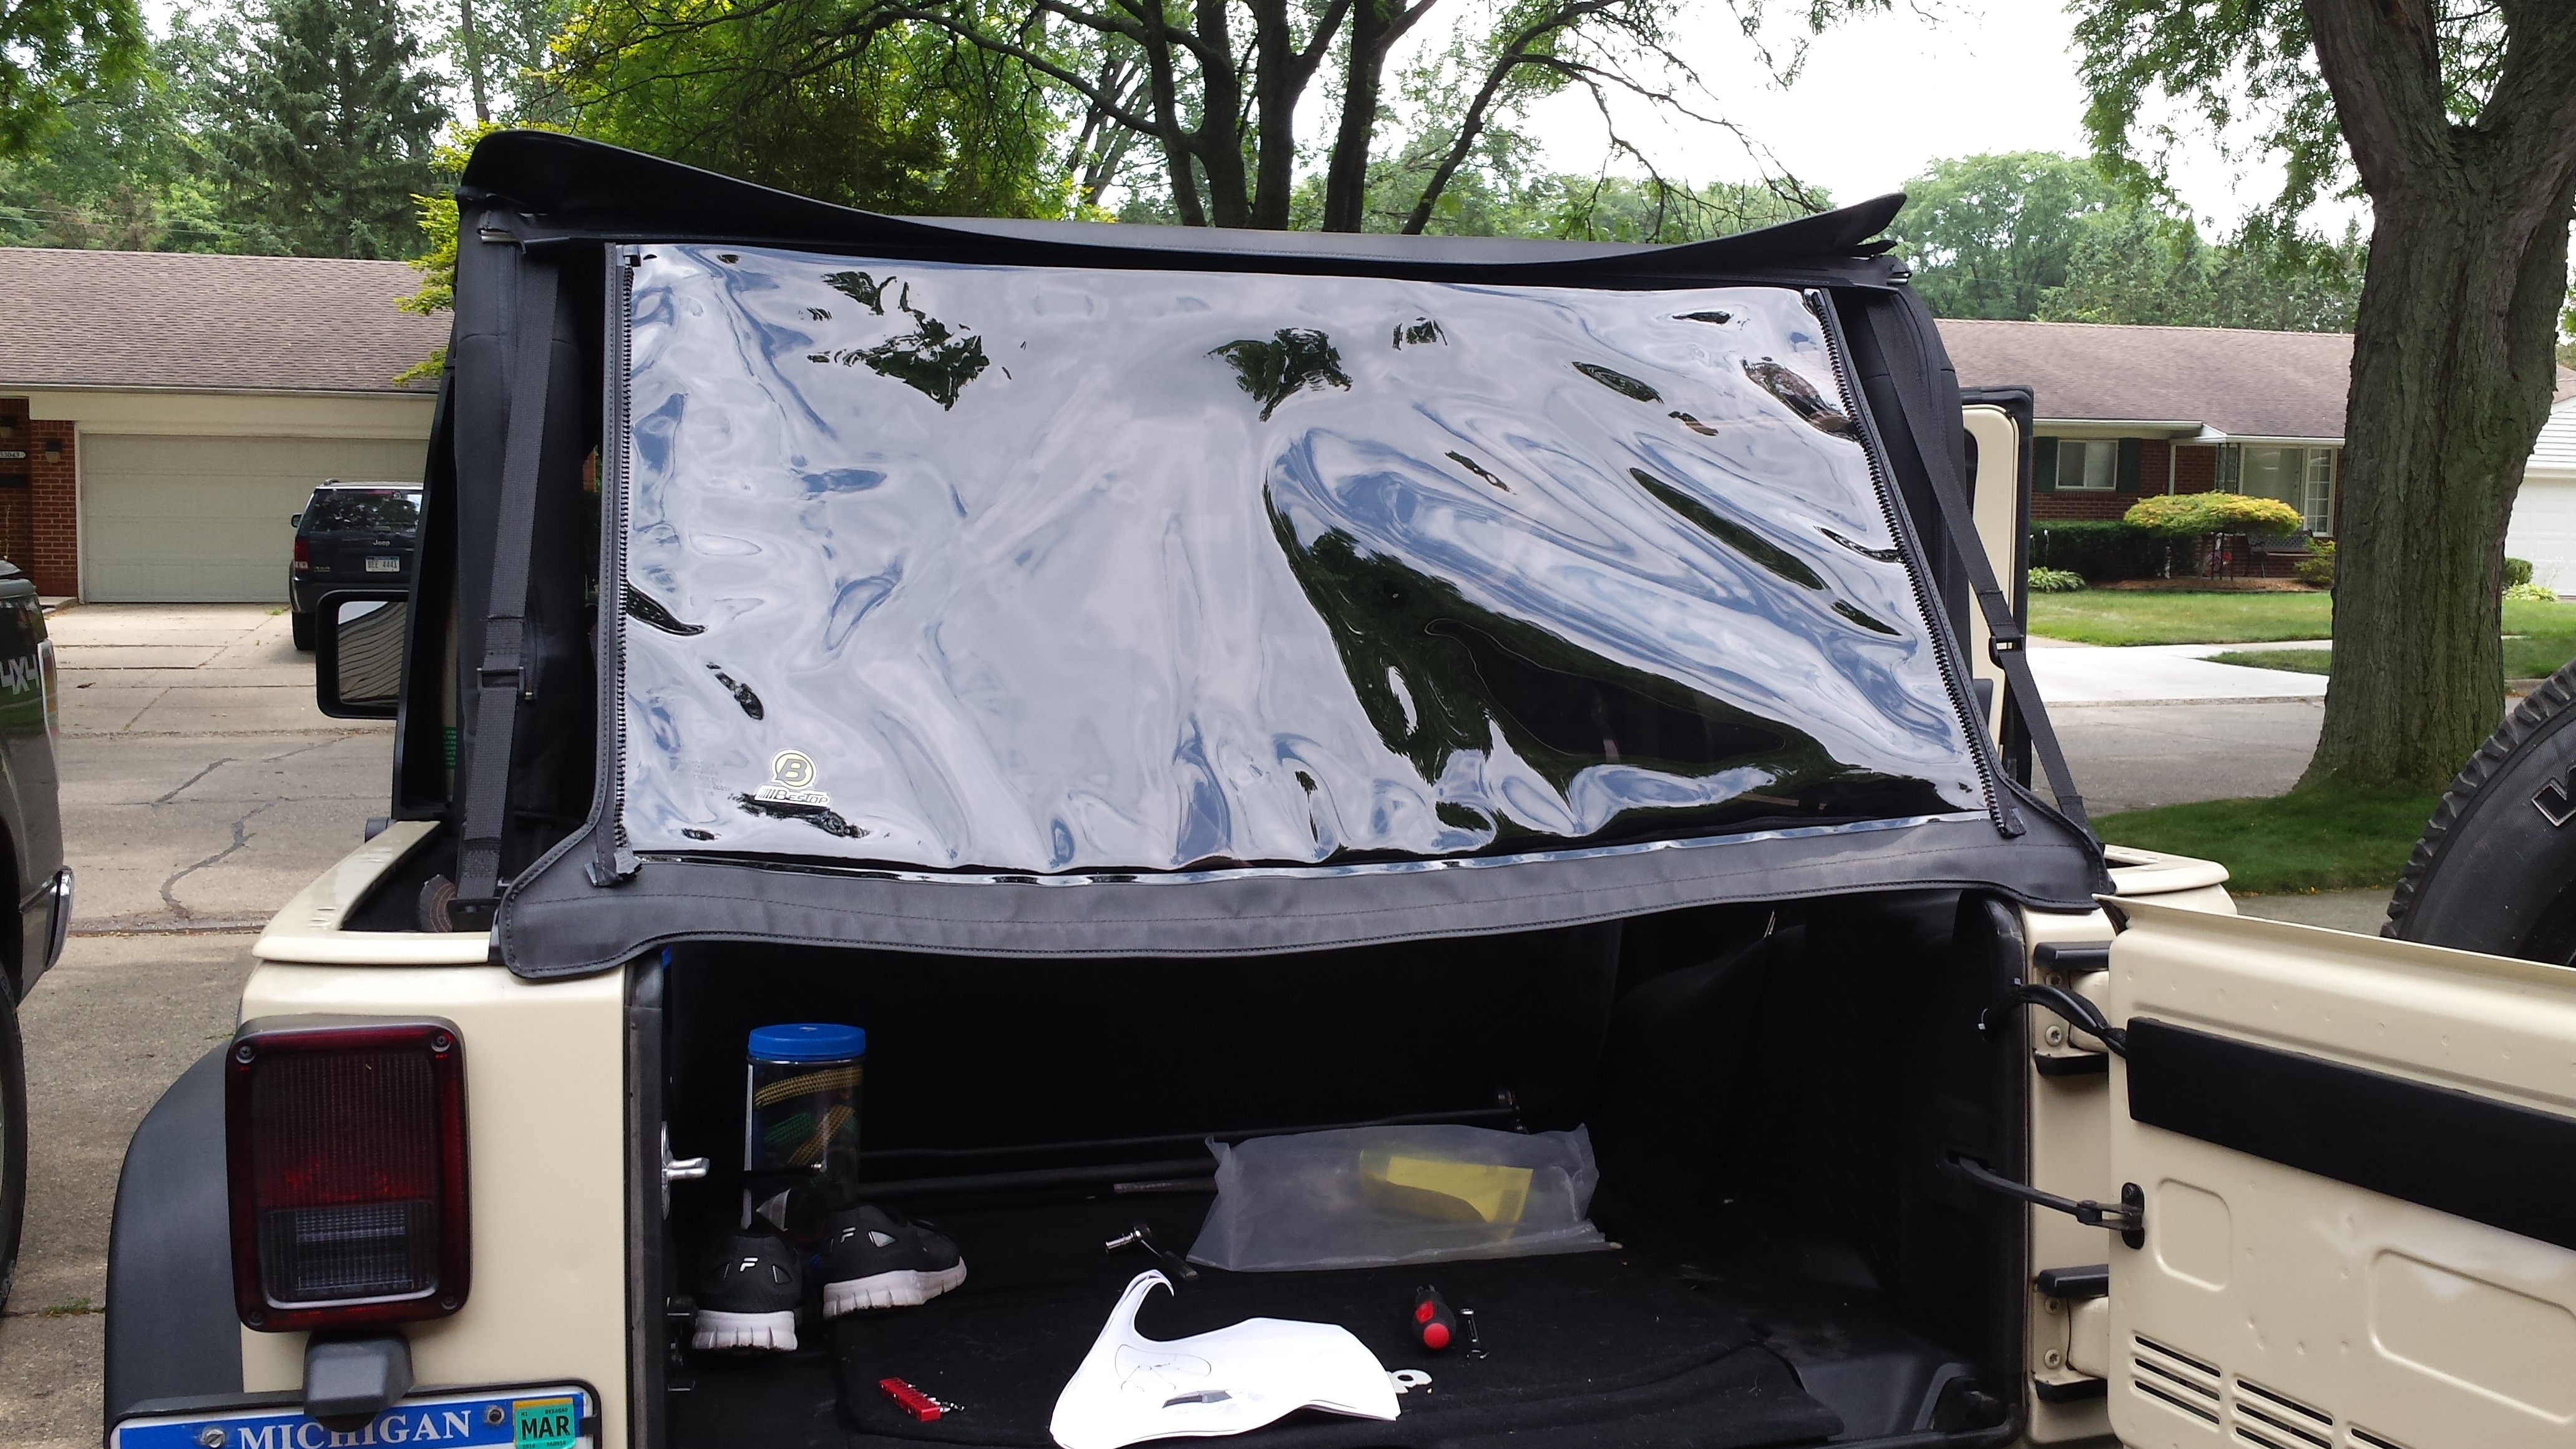
38. Go ahead and grab the side windows now and you can start to get those attached. To start the attachment of those, start at the top edge of the window panel, which has the zipper track. On one side, the zipper is attached to the window, and on the other side, the zipper is attached to the top. The side of the zipper track that is attached to the top is under a bit of an overhang flap, which is there to prevent water from running in. Lift this out flap up, and attach the zipper together.

39. On both windows, once the zipper is attached, only zip it about 2 inches and leave the rest unzipped for now, as it makes it easier to get the other zippers done, as well as some of the other portions in the channels they need to be in.
40. Next, go to the zippers that are located on either side of the rear window. Lift the overhang flaps which are on the back portions of the side panels which cover the rear windows, and attach the zippers on both sides there starting at the top. (As a tip to make this a little easier at times, if you need a little extra slack, you can release the Sunrider and open it up and this gives some extra slack to be able to make the connection a little easier). This is the portion where many people assume that this rear window is too small, as one side of the zipper is easy to get, but then the other side is extremely tight. (When I zipped one side, the other side was about 3 inches away from the other side and it looked like there was no way that this would attach, however with some moving of stuff around and an extra set of hands and some muscle, I was able to get the zipper together and start it just a few inches. Do not zip these zippers all the way yet either as it helps for attaching other parts still first.

41. Next you will go to the front edge of the side panels, located at the back edge of the front doors. On the door surrounds, there is a channel which tucks inside the seal of the door. With the doors open, grab the front edge of the side panels and attach to the channel. I found it easiest to start at the top and work my way down in slow, small increments.


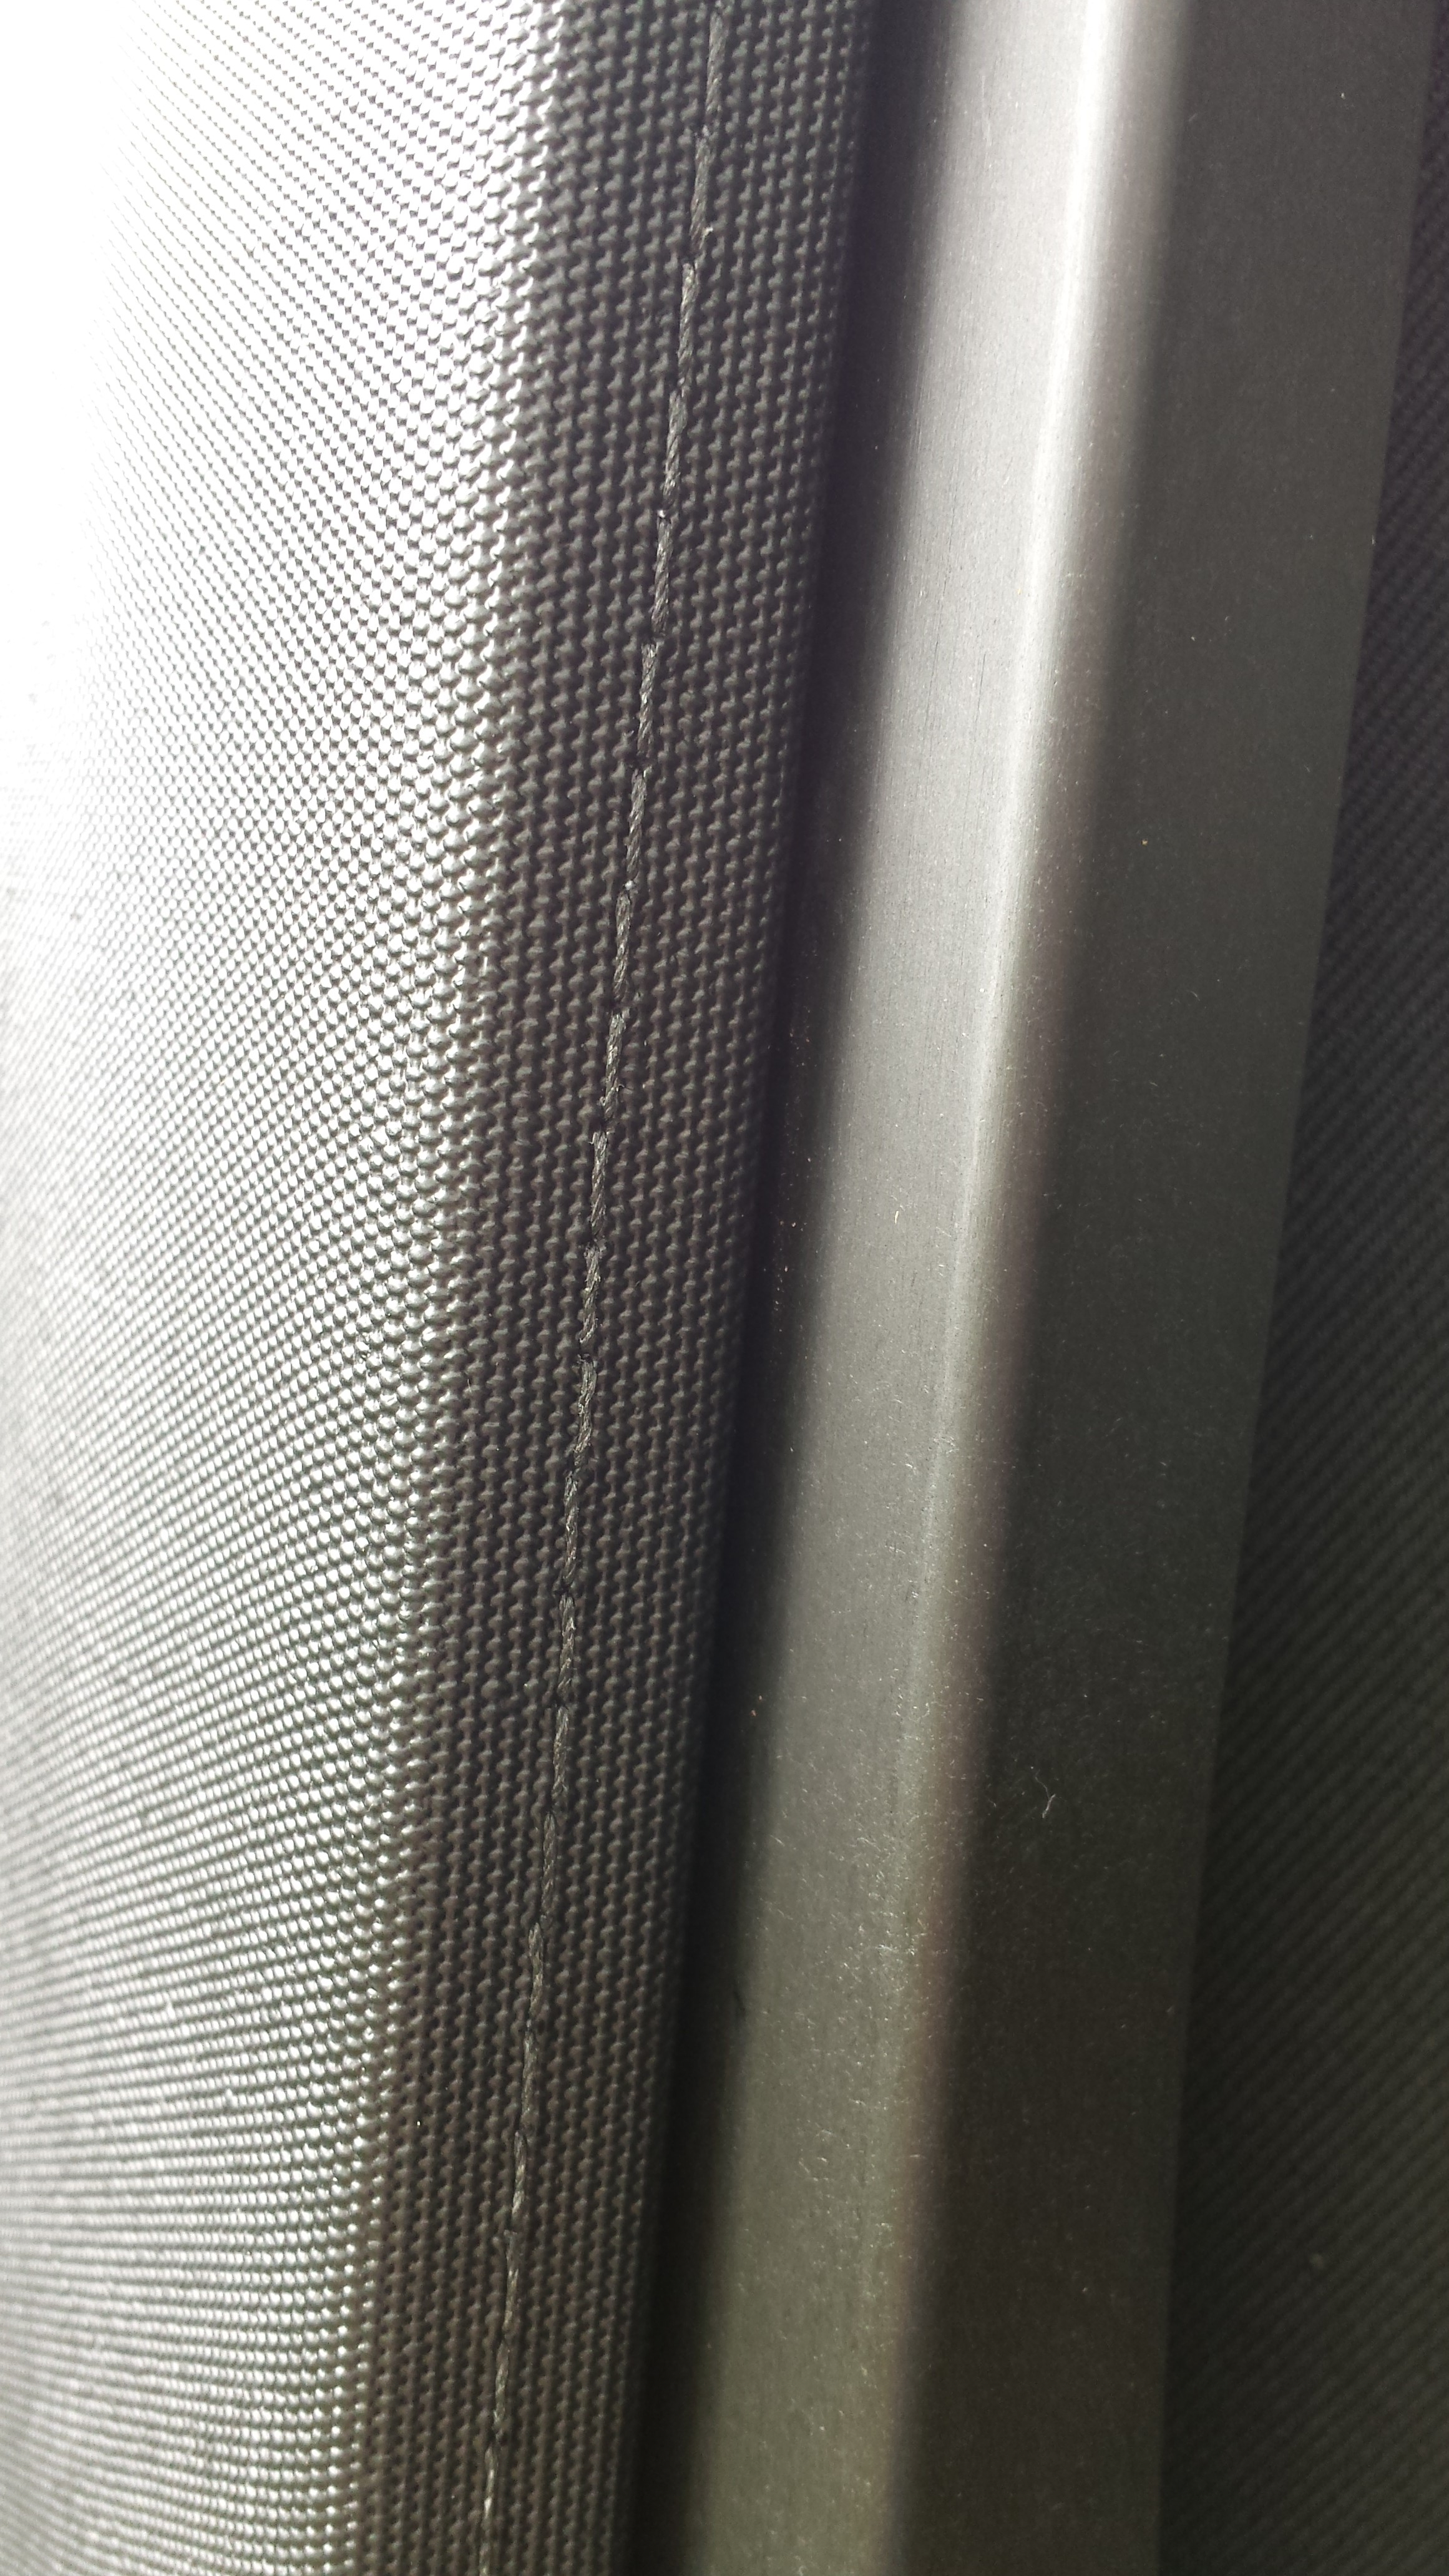
42. To attach the front of the side panels properly, you have to take the front edge and roll the front edge around and into the channel so that it is secured. You will know when the panel is all the way in, as the stitches on the front edge of the side panel should be in the door jam, facing the front of the Jeep, so that when you close the doors, you so not see any of the stitches. Also, make sure that your side panel is far enough down in that channel so that the bottom edge of the panel can be attached to the lip on the outer edge of the tub of the Jeep.

43. Now, you can go ahead and finish zipping the top edge of the panel all the way to the back of the Jeep. And if any of the zippers get too tight to get closed, do not force them, just let them sit and the top will relax some and stretch, and then you can finish the zippers.
44. With the top securely fastened now, take the bottom edge of the side panels and tuck the bottom lip on the panel, under the lip on the outside edge of the tub. With everything else already being tightened, this can make the top a bit tight and hard to get the channel tucked in. Just start a small section and you can move in very small increments pushing on the outside of the panel and it will pull the lip under to secure it as you move down. My tip is to start from the front and move towards the rear of the Jeep. Make sure you attach everything from the side panels, even around the back edge of the Jeep, just leaving the last small tab out that overlaps with the rear window.
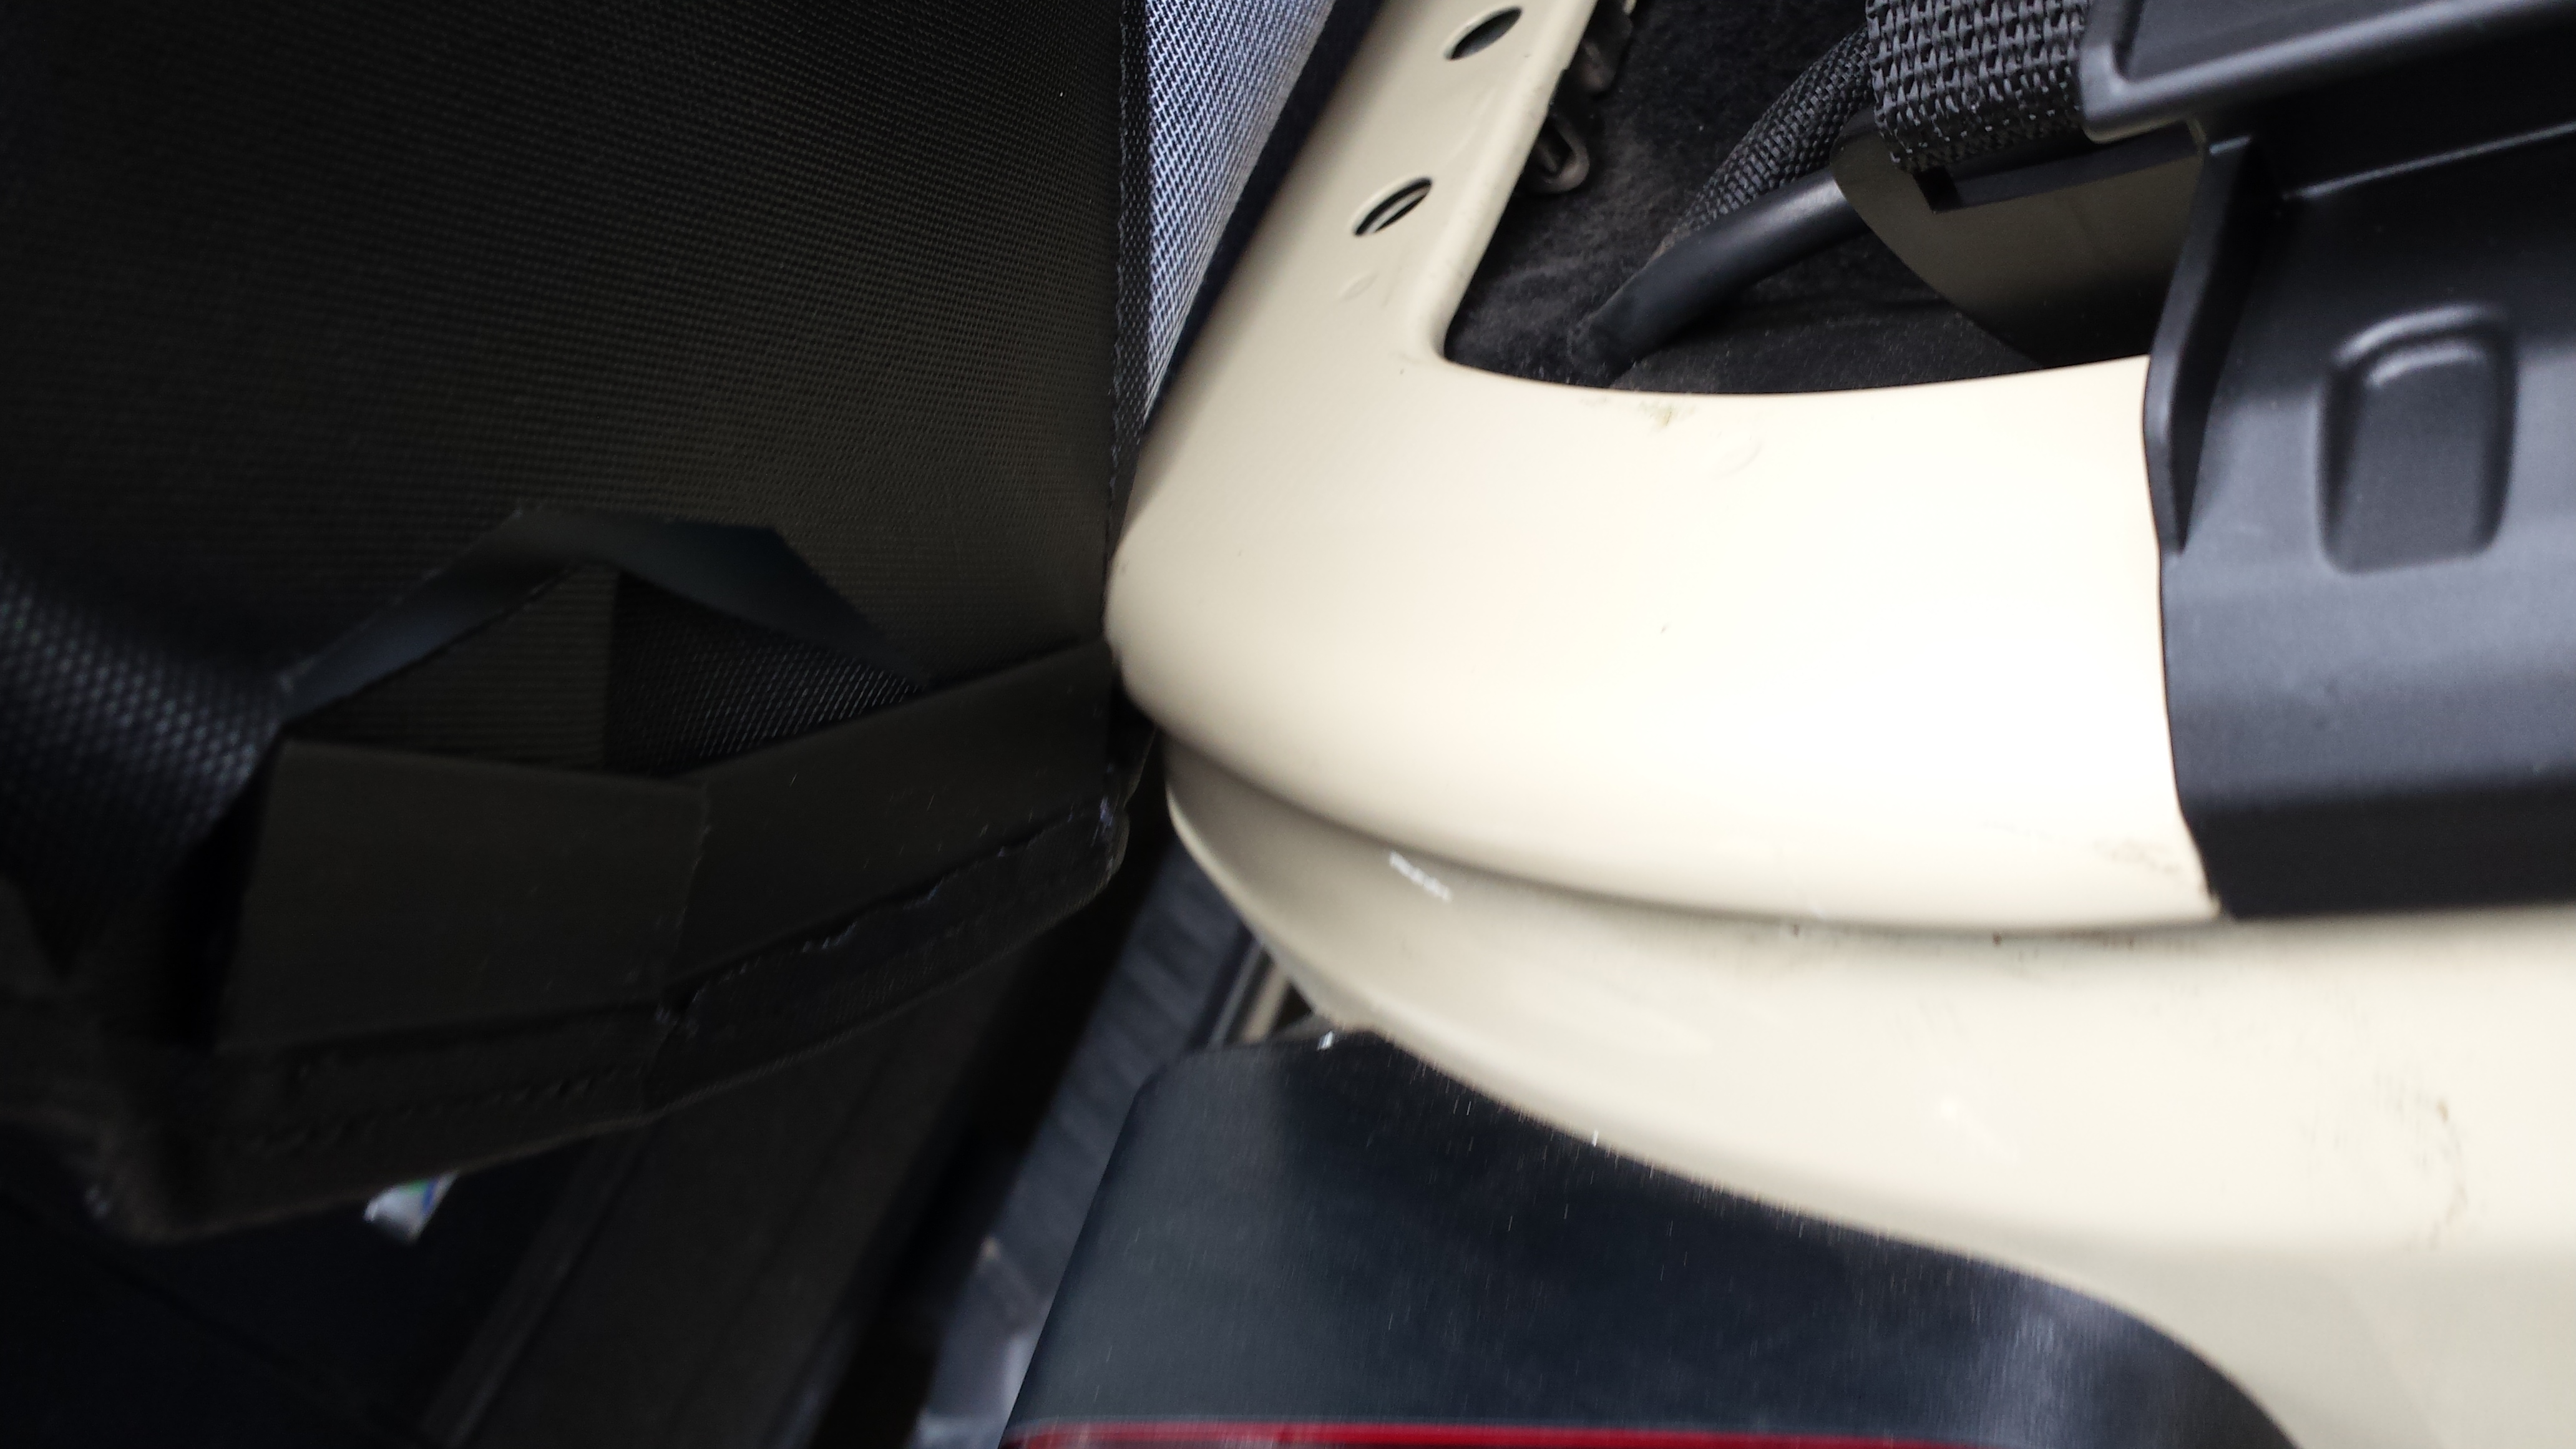

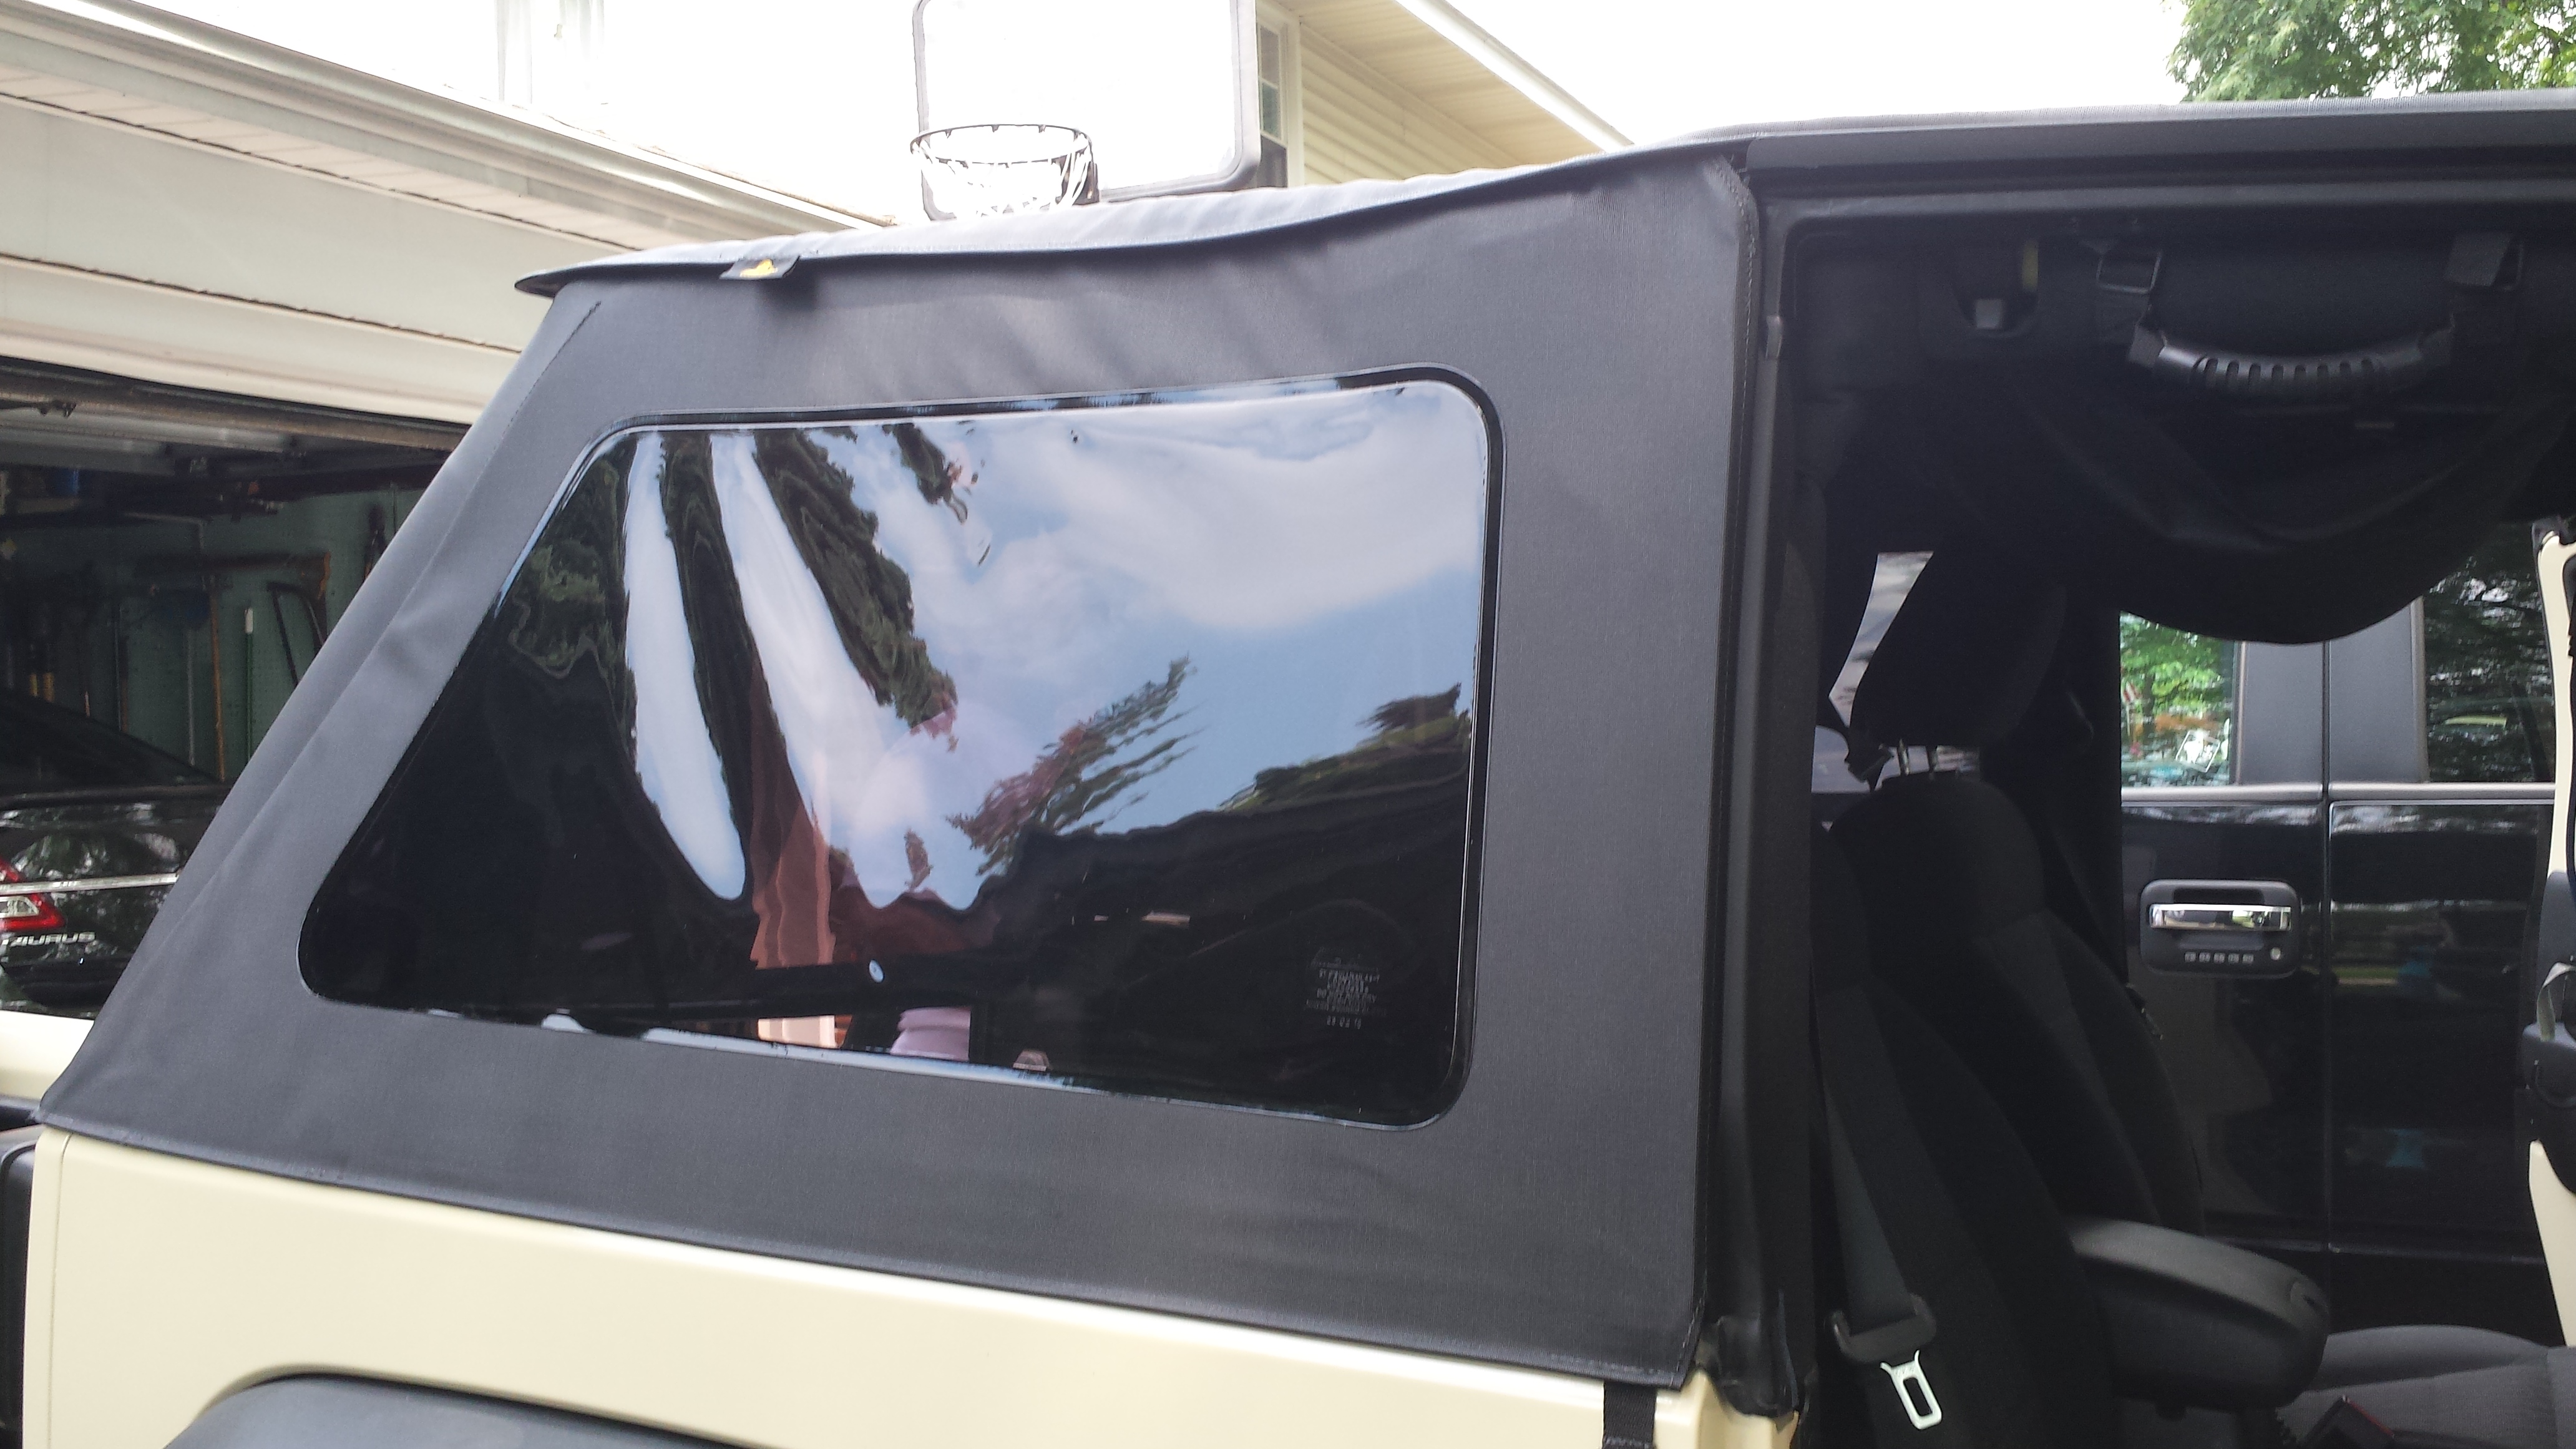
45. Now attach the tailgate bar to the rear window by holding the tailgate bar with the weather stripping pointed down, and sliding bottom edge of the rear window into the channel on the top of the tailgate bar. Once again, get this as centered as you can on the rear window.


32. Once the straps are attached, you will hook these clips into the holes where the screws for the hardtop go on the sound bar. These are to help keep from having the middle portion of the top flap as well as to try and keep the back portion a bit tighter when the Sunrider is open.
33. Once those hooks are attached to the sound bar, you can close the front portion of the top. Open the hooks up and attach them to the footman’s loops which they line up with. Do not tightly latch them though; just hook the open latch onto the footman’s loops.
34. Now, you will attach the back portion of the top down so that it is secure. There are two nylon straps with J hook plastic clips on the end that are handing off the back of the top, one on either side. Grab these and adjust the length to get them close to the proper length needed, but so they still have a little slack. (Side note, most people think that these straps are backwards as the extra strap is to the inside and the front part of the clip are to the inside, but this is on purpose so that the extra stays to the inside of the Jeep and not flying outside the Jeep.)
35. Go ahead and attach the J hooks under the lip on the inside of the tube. And once attached, tighten the straps the rest of the way so they are tight and the top is secured. And now you have a Safari top! And that is one of the ways which Bestop shows that you can run this top!
36. Now, to get the rest of the top put together and actually closed, you can go get the rear window panel, and locate the top edge (which is the edge with no fabric, but a channel. You will then locate the other side of the channel on the back edge of the Top, just under the overhang flap.
37. Start from one side, it does not matter which, and line the channels up. When you first insert the rear window into the channel on the top, you should hear a slight click, which is the sound that lets you know that it is securely in the channel and ready to be fully attached. Once you started the window and hear that click, you can then slide the window all the way into the channel, and attempt to roughly center it in the opening and just leave it hanging there.
38. Go ahead and grab the side windows now and you can start to get those attached. To start the attachment of those, start at the top edge of the window panel, which has the zipper track. On one side, the zipper is attached to the window, and on the other side, the zipper is attached to the top. The side of the zipper track that is attached to the top is under a bit of an overhang flap, which is there to prevent water from running in. Lift this out flap up, and attach the zipper together.
39. On both windows, once the zipper is attached, only zip it about 2 inches and leave the rest unzipped for now, as it makes it easier to get the other zippers done, as well as some of the other portions in the channels they need to be in.
40. Next, go to the zippers that are located on either side of the rear window. Lift the overhang flaps which are on the back portions of the side panels which cover the rear windows, and attach the zippers on both sides there starting at the top. (As a tip to make this a little easier at times, if you need a little extra slack, you can release the Sunrider and open it up and this gives some extra slack to be able to make the connection a little easier). This is the portion where many people assume that this rear window is too small, as one side of the zipper is easy to get, but then the other side is extremely tight. (When I zipped one side, the other side was about 3 inches away from the other side and it looked like there was no way that this would attach, however with some moving of stuff around and an extra set of hands and some muscle, I was able to get the zipper together and start it just a few inches. Do not zip these zippers all the way yet either as it helps for attaching other parts still first.
41. Next you will go to the front edge of the side panels, located at the back edge of the front doors. On the door surrounds, there is a channel which tucks inside the seal of the door. With the doors open, grab the front edge of the side panels and attach to the channel. I found it easiest to start at the top and work my way down in slow, small increments.
42. To attach the front of the side panels properly, you have to take the front edge and roll the front edge around and into the channel so that it is secured. You will know when the panel is all the way in, as the stitches on the front edge of the side panel should be in the door jam, facing the front of the Jeep, so that when you close the doors, you so not see any of the stitches. Also, make sure that your side panel is far enough down in that channel so that the bottom edge of the panel can be attached to the lip on the outer edge of the tub of the Jeep.
43. Now, you can go ahead and finish zipping the top edge of the panel all the way to the back of the Jeep. And if any of the zippers get too tight to get closed, do not force them, just let them sit and the top will relax some and stretch, and then you can finish the zippers.
44. With the top securely fastened now, take the bottom edge of the side panels and tuck the bottom lip on the panel, under the lip on the outside edge of the tub. With everything else already being tightened, this can make the top a bit tight and hard to get the channel tucked in. Just start a small section and you can move in very small increments pushing on the outside of the panel and it will pull the lip under to secure it as you move down. My tip is to start from the front and move towards the rear of the Jeep. Make sure you attach everything from the side panels, even around the back edge of the Jeep, just leaving the last small tab out that overlaps with the rear window.
45. Now attach the tailgate bar to the rear window by holding the tailgate bar with the weather stripping pointed down, and sliding bottom edge of the rear window into the channel on the top of the tailgate bar. Once again, get this as centered as you can on the rear window.