
My fender chop

Thread Starter
JK Super Freak
Joined: Dec 2008
Posts: 1,593
Likes: 2
From: Prescott, AZ
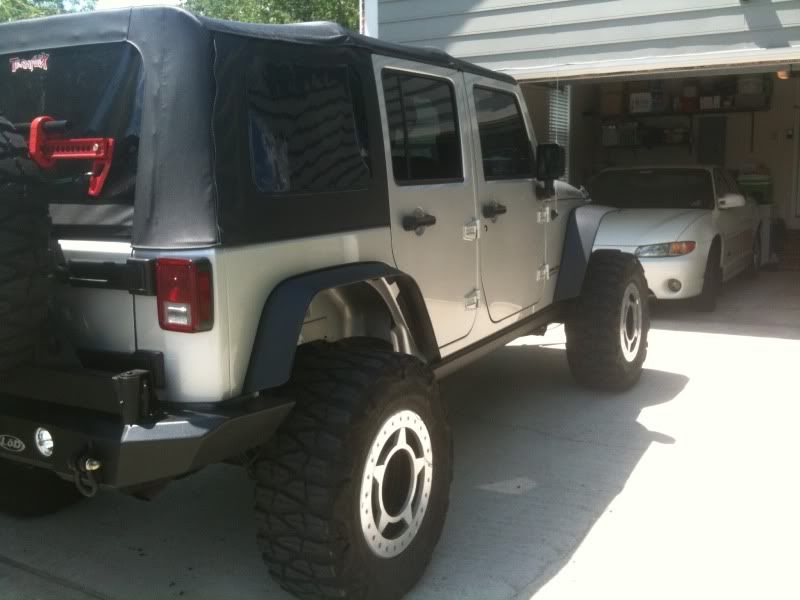
Well I finally got tired of just about ripping my fender flares off when getting big flex, so I trimmed my flares. Ever since I got the Spyderlock wheels with 3.5" BS my tires have rubbed the stock flares enough to pop the clips off. I used Eddie's write-up on project-jk. Took my time and I'm pretty happy how it turned out. I measured everything twice and cut once, so it took me about 4 hours, since I'm pretty meticulous and wanted it to come out right the first time.
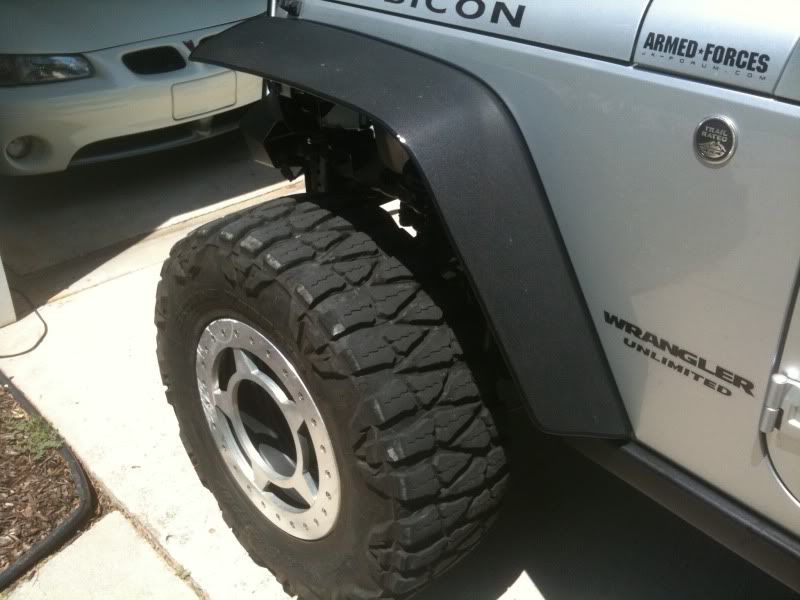
Just to add to Eddie's write-up. I did not use a dremel. I started with a dremel on the first front one, and it was melting the plastic to much for my comfort. Not that that's bad, just takes more time to clean up the cuts from the melted plastic. I used a pair of tin snips. VERY easy to follow along the edge of the tape I used to mark with, and it made nice, clean cuts that did not require any cleanup before applying the door edge trim. And mine are new and sharp so it took maybe 5 min for each flare. Also it is much easier to cut the flares if you remove them, which is very easy. Just tape out the shape you want before removing the flares. When you get the flares off, you must remove the clips from the fender that hold the flares on. Getting them off with a pair of pliers or needle nose can be a PITA. If you have an 8mm deepwell socket, slide it on the back side of the clips and they come right off instantly. For the clips on the rear flares, a set of needle nose with a 45 deg, or preferably a 90 bend,is the only way I can see getting the clips off once the flare is removed.
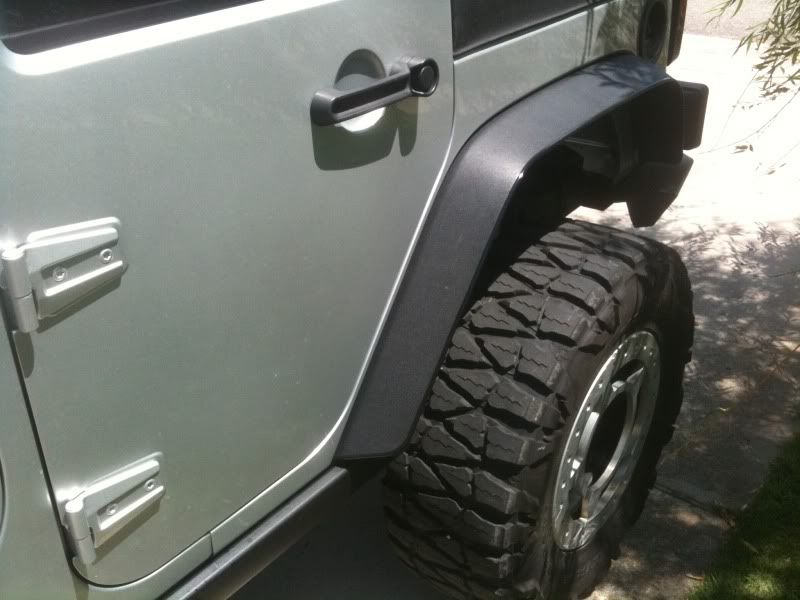
On to the pics.

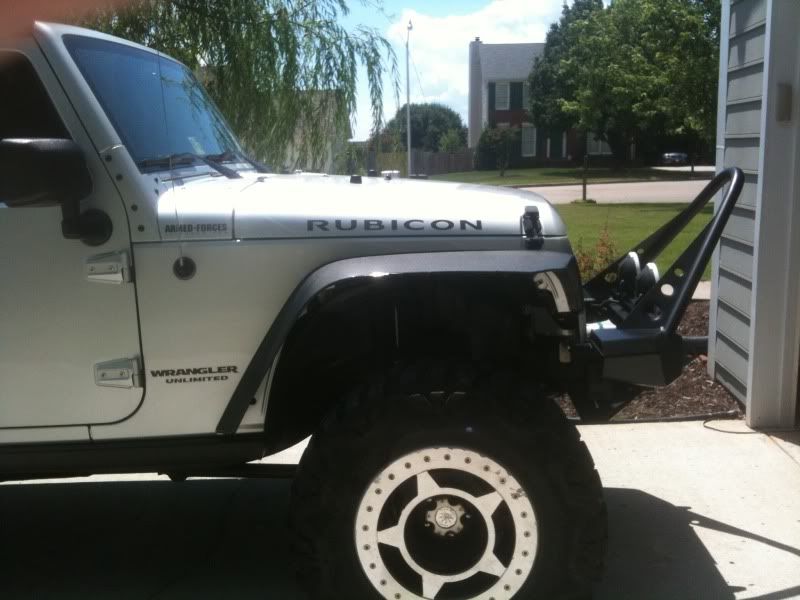
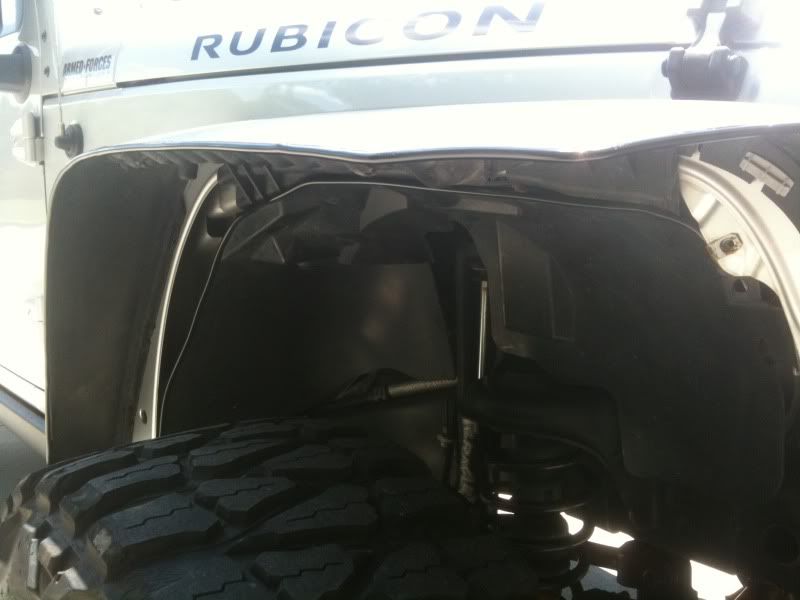
I might pull the bumpstops and see if I can get some more uptravel with my 35s without over compressing the springs or rubbing. It's def time for some 37s.
Just to add to Eddie's write-up. I did not use a dremel. I started with a dremel on the first front one, and it was melting the plastic to much for my comfort. Not that that's bad, just takes more time to clean up the cuts from the melted plastic. I used a pair of tin snips. VERY easy to follow along the edge of the tape I used to mark with, and it made nice, clean cuts that did not require any cleanup before applying the door edge trim. And mine are new and sharp so it took maybe 5 min for each flare. Also it is much easier to cut the flares if you remove them, which is very easy. Just tape out the shape you want before removing the flares. When you get the flares off, you must remove the clips from the fender that hold the flares on. Getting them off with a pair of pliers or needle nose can be a PITA. If you have an 8mm deepwell socket, slide it on the back side of the clips and they come right off instantly. For the clips on the rear flares, a set of needle nose with a 45 deg, or preferably a 90 bend,is the only way I can see getting the clips off once the flare is removed.
On to the pics.
I might pull the bumpstops and see if I can get some more uptravel with my 35s without over compressing the springs or rubbing. It's def time for some 37s.
Last edited by highoctane; Jun 24, 2010 at 12:12 PM.


Thread Starter
JK Super Freak
Joined: Dec 2008
Posts: 1,593
Likes: 2
From: Prescott, AZ
Thanks! I'm VERY happy with how it turned out. I highly recommend this mod to anyone considering a set of $500-$900 set of aftermarket flares. Use the money elsewhere!


Trending Topics
JK Enthusiast
Joined: May 2009
Posts: 121
Likes: 0
From: Hunstville, AL

Thread Starter
JK Super Freak
Joined: Dec 2008
Posts: 1,593
Likes: 2
From: Prescott, AZ
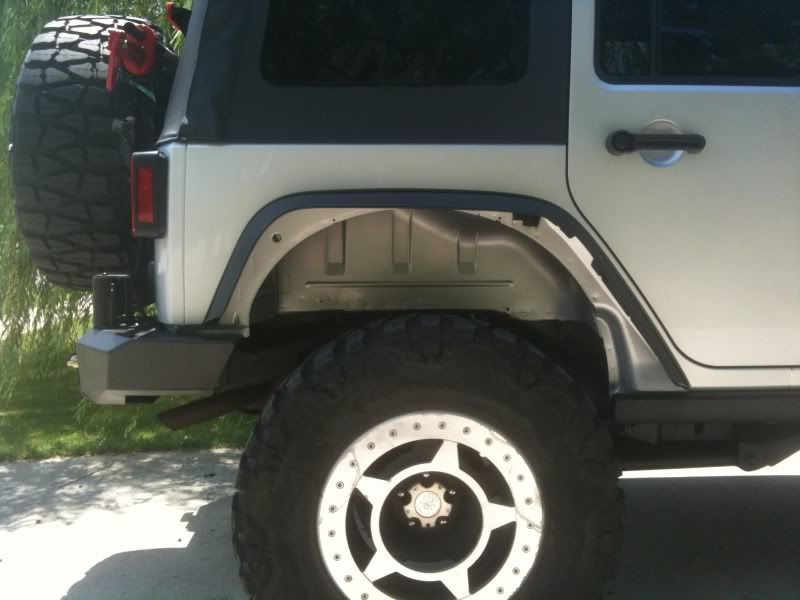
I still have to hit up the auto parts stores and see if anyone has an amber or orange led that will fit in the hole wheer the nutplate is that isn't used anymore, in the 6th pic. Gonna splice an led into the harness that plugged into the stock marker light.
JK Enthusiast
Joined: Feb 2010
Posts: 459
Likes: 0
From: Visalia, Ca
Looks really good. Im glad I did this too, but i still need to do my backs.
I went to a Diesel truck supply shop and picked up a 3/4" amber LED side marker it cost about $28 for 2
What are you going to do about the side-marker light?