
RR light bar with KCs installed - PICS!!!


Thread Starter
JK Super Freak
Joined: Oct 2007
Posts: 1,095
Likes: 0
From: Raleigh, NC
Well, after 2 months of waiting, it finally arrived - the Rugged Ridge light bar. I installed it last week but had been raining all week and finally got a chance to snap some pics at our mountain house. The install was VERY easy. It was a little more complicated for me since I have the Expedition One Rubi skid plate and the light bar brackets mount to the same mounting holes. I had to add a spacer and get some longer bolts, but the install was VERY easy and took 20 minutes. Of course, the lights took a little longer with running cables, installing relays, switches, bundling them and so on, but it was easy nonetheless.
The lights are KC Daylighters. 100W pencil beam in the center and 100W driving beams on the sides. Here are some pics. Enjoy!


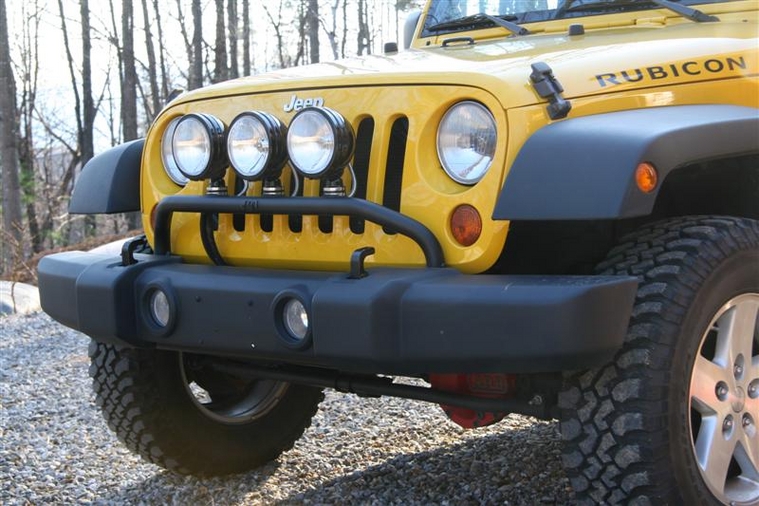


The build quality is excellent. The brackets are very sturdy with a great powdercoating and the holes aligned perfectly. The bar is also very sturdy and is the perfect height (for me). I looked at other light bars from MBRP, KC, Pro Comp and others, but in the end, the Rugged Ridge offered me the flexibility of 3 lights mounted higher above the bumper. (The MBRP was a close second! )
)
The lights are KC Daylighters. 100W pencil beam in the center and 100W driving beams on the sides. Here are some pics. Enjoy!
The build quality is excellent. The brackets are very sturdy with a great powdercoating and the holes aligned perfectly. The bar is also very sturdy and is the perfect height (for me). I looked at other light bars from MBRP, KC, Pro Comp and others, but in the end, the Rugged Ridge offered me the flexibility of 3 lights mounted higher above the bumper. (The MBRP was a close second!
)


JK Newbie
Joined: Dec 2008
Posts: 36
Likes: 0
From: overland park, ks
The instructions said no cutting but it looks like you have to cut the spacer panal that is behind the bumper to let the mounting bracket come through.
Is that correct? If not, let me know how you did it.
Thanks
Mike
Is that correct? If not, let me know how you did it.
Thanks
Mike

Trending Topics
Thread Starter
JK Super Freak
Joined: Oct 2007
Posts: 1,095
Likes: 0
From: Raleigh, NC
If it hadn't been for the added complication I had with my Expedition One Rubi skid plate using the same holes on the frame rail, I would have installed it in less than 30 minutes. Very easy to install and intuitive. The lights are a different story.
After having used them now for a few weeks, I can tell you that the build quality of the light bar is excellent. The mounting is very secure and solid. However, on rough roads, the lights vibrate a little sitting on the light bar, so it's obvious the light bar has a little play to it. I think the play comes from the bar being attached to the brackets, not from the brackets to the frame rails. I plan to get larger bolts to attach the bar to the brackets and possibly reduce or eliminate the vibrations.
Good luck.


