Winch Extension: How to make your own, a tutorial
#1
For something fun to do and have a piece of useable kit, I decided I would make my own winch extension with soft eyes.
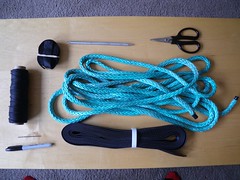
List of parts used:
7/16 Amsteel Blue
3/4 nylon tubular webbing
1 Bluewater Milspec Tubular webbing
#15 Tarred whipping twine
Splicing Fid
Lockstitch Needle
Marking Pen
Tape
Scissors
Step 1:
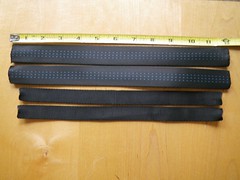
Cut the material needed for the softeyes. For extra protection I decided to double layer the eyes. Bluewater Milspec Climbing webbing was used for the outer layer. This was cut to 12 sections. The inner layer is comprised of standard Ύ nylon tubular webbing cut in 11 sections. The difference in lengths will allow the inner layer to stay nicely tucked under the outer layer making for a nicer appearance.

Step 2:
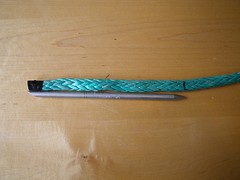
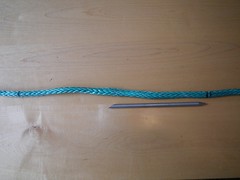
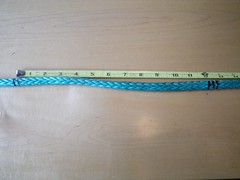
Mark your bury with a total of three Fid lengths. (Fid=21 X diameter of rope). First mark is one fid length from Bury end. I mark it with a single line. Next go two fid lengths from Mark One and make Mark Two.
Step 3:
Create your eye length. I used a length of 12 for this. Start at Mark Two and measure out your eye and make Mark Three. Diameter: 12/3.142 = 3.82. I mark this as Mark Three.
Step 4:
By putting Mark Two and Three together you will see the size of your eye and be able to properly note where Mark Four needs to be. Mark Four is where your Bury will exit for removal of the Fid and to a secondary taper of the rope. Make sure Mark Four is beyond the end of your bury. This can also be done by measuring out four fid lengths from Mark Three.
Step 5:
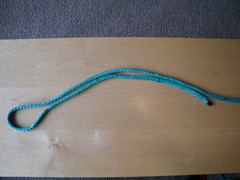
Creating the initial Taper. Start Mark One. Mark touching pairs of strands. Skip a pair. Mark a pair. Skip a pair. Mark a pair. When you have done this, pull out the marked strands. Cut them off. After that I make sure to actually retuck the cut ends so that the taper is nice and clean looking. This will allow the splice to move smoothly and prevents the cut ends from getting frayed out during the process.


Step 6:
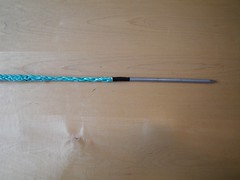
Attach the Fid.
Step 7:
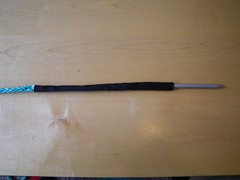
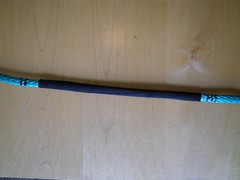
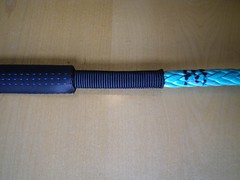
Run the webbing onto the rope. Start with the Ύ webbing. Pull it down the between Mark Two and Mark Three. Make sure the webbing is not twisted. As you can see it is twisted in the pictures. Just a simple twist and it will be nice and straight. Next repeat the process with the 1 webbing and side it over the 34 piece When done make sure the 1 webbing is overlapping the Ύ by ½ on both side and centered between Mark Two and Mark Three.
Step 8:
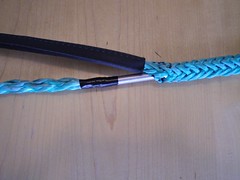
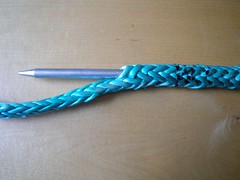
Now it is time to start the bury. Take your fid and insert it at Mark Three. Make sure you have not twisted the rope and your webbing on the eye will be nice and straight when the eye is pulled tight. Keep milking the fid down and exit at or beyond Mark Four.
Step 9:
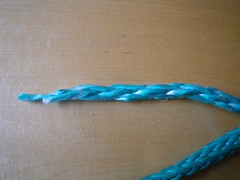
Secondary Taper. Take off the Fid that has just exited Mark Four. From the bury end cut three single strands in a row just a few inches from the end. This is very similar to the initial taper in Step 5, but dont skip strands. This step can be left out but I like taking the extra step.
Step 10:
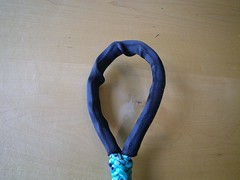
Pull the bury end through until the eye comes and round the ends of the webbing touch. This is basically making Mark Two and Mark Three lay on top of each other. From this point make sure to keep Mark Two and Mark Three lined up and start to milk the outer layer of rope down over the Bury. If your Mark Four was properly marked off the bury end will disappear inside the rope. IF not you will have to pull it out. Reattach the fid and bury it again only exiting further down. You will only make this mistake once.
Step 11:
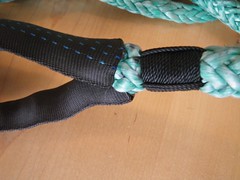
Now it is time for locking the splice. This could be done in many different ways. Standard lock stitch. Standard Whip Lock. However, I like the appearance and extra locking assurance of a Stitched Whip Lock. You will need approximately 72 of #15 Tarred Twine for this. Here is a link on how to tie this.
http://www.youtube.com/watch?v=AUrGYzXF9gI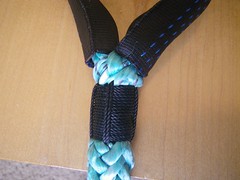
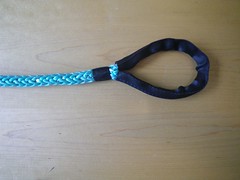
Step 12:
Now this step is a big one and extremely important. Go back to step one and do it again for the other end.
Step 13:
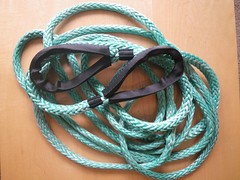
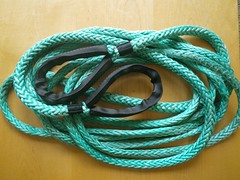
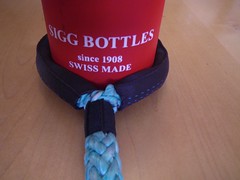
Enjoy your handy work. Show your kids. Impress your wife. Sadly, throw it in your recovery bag and never see it again until you need it.
Notes:
The 1 webbing came from REI
The Ύ webbing from strapworks.com
#15 Tarred Twine from Gourock. This is what comes in Vikings kit.
header
NOTICE:
What ever length of extension you need, know you will need six feet more. 56 of rope is needed to make a 50' extension with 3.82" eyes.
Extra resources:
Samson Rope Splicing Instructions:
Samson: The Strongest Name in Rope, Utility Products
Viking Splicing Kit:
Viking Offroad Rope Splicing Kit- for 5/16" & 3/8"
List of parts used:
7/16 Amsteel Blue
3/4 nylon tubular webbing
1 Bluewater Milspec Tubular webbing
#15 Tarred whipping twine
Splicing Fid
Lockstitch Needle
Marking Pen
Tape
Scissors

Step 1:
Cut the material needed for the softeyes. For extra protection I decided to double layer the eyes. Bluewater Milspec Climbing webbing was used for the outer layer. This was cut to 12 sections. The inner layer is comprised of standard Ύ nylon tubular webbing cut in 11 sections. The difference in lengths will allow the inner layer to stay nicely tucked under the outer layer making for a nicer appearance.


Step 2:
Mark your bury with a total of three Fid lengths. (Fid=21 X diameter of rope). First mark is one fid length from Bury end. I mark it with a single line. Next go two fid lengths from Mark One and make Mark Two.


Step 3:
Create your eye length. I used a length of 12 for this. Start at Mark Two and measure out your eye and make Mark Three. Diameter: 12/3.142 = 3.82. I mark this as Mark Three.

Step 4:
By putting Mark Two and Three together you will see the size of your eye and be able to properly note where Mark Four needs to be. Mark Four is where your Bury will exit for removal of the Fid and to a secondary taper of the rope. Make sure Mark Four is beyond the end of your bury. This can also be done by measuring out four fid lengths from Mark Three.

Step 5:
Creating the initial Taper. Start Mark One. Mark touching pairs of strands. Skip a pair. Mark a pair. Skip a pair. Mark a pair. When you have done this, pull out the marked strands. Cut them off. After that I make sure to actually retuck the cut ends so that the taper is nice and clean looking. This will allow the splice to move smoothly and prevents the cut ends from getting frayed out during the process.


Step 6:
Attach the Fid.

Step 7:
Run the webbing onto the rope. Start with the Ύ webbing. Pull it down the between Mark Two and Mark Three. Make sure the webbing is not twisted. As you can see it is twisted in the pictures. Just a simple twist and it will be nice and straight. Next repeat the process with the 1 webbing and side it over the 34 piece When done make sure the 1 webbing is overlapping the Ύ by ½ on both side and centered between Mark Two and Mark Three.


Step 8:
Now it is time to start the bury. Take your fid and insert it at Mark Three. Make sure you have not twisted the rope and your webbing on the eye will be nice and straight when the eye is pulled tight. Keep milking the fid down and exit at or beyond Mark Four.


Step 9:
Secondary Taper. Take off the Fid that has just exited Mark Four. From the bury end cut three single strands in a row just a few inches from the end. This is very similar to the initial taper in Step 5, but dont skip strands. This step can be left out but I like taking the extra step.

Step 10:
Pull the bury end through until the eye comes and round the ends of the webbing touch. This is basically making Mark Two and Mark Three lay on top of each other. From this point make sure to keep Mark Two and Mark Three lined up and start to milk the outer layer of rope down over the Bury. If your Mark Four was properly marked off the bury end will disappear inside the rope. IF not you will have to pull it out. Reattach the fid and bury it again only exiting further down. You will only make this mistake once.

Step 11:
Now it is time for locking the splice. This could be done in many different ways. Standard lock stitch. Standard Whip Lock. However, I like the appearance and extra locking assurance of a Stitched Whip Lock. You will need approximately 72 of #15 Tarred Twine for this. Here is a link on how to tie this.
http://www.youtube.com/watch?v=AUrGYzXF9gI


Step 12:
Now this step is a big one and extremely important. Go back to step one and do it again for the other end.

Step 13:
Enjoy your handy work. Show your kids. Impress your wife. Sadly, throw it in your recovery bag and never see it again until you need it.


Notes:
The 1 webbing came from REI
The Ύ webbing from strapworks.com
#15 Tarred Twine from Gourock. This is what comes in Vikings kit.
header
NOTICE:
What ever length of extension you need, know you will need six feet more. 56 of rope is needed to make a 50' extension with 3.82" eyes.
Extra resources:
Samson Rope Splicing Instructions:
Samson: The Strongest Name in Rope, Utility Products
Viking Splicing Kit:
Viking Offroad Rope Splicing Kit- for 5/16" & 3/8"
#3
Scott,
Thank you for the kind words. It was quite fun. I have tested the strength by winching to a tree winching to a tree with all four tires fully braked and skidding along. I am really happy with how this turned out.
I highly recommend that anyone that wants a winch extension just make their own once to get the experience. It works the exact same way when replacing a hook on the winch line. But on the winch line just use a lock stich instead of a whiplock.
The cheapest I have seen on bulk rope is from Redden Marine.
#4
JK Junkie
Very impressive. I opened this out of curiosity, but ended up reading the whole post. Well done!
Did you do a cost assessment between building and buying? I bought a 50' recovery rope with hard eyes made from amsteel blue. I don't know how the cost of each approach differs becuase I never thought about making one.
Did you do a cost assessment between building and buying? I bought a 50' recovery rope with hard eyes made from amsteel blue. I don't know how the cost of each approach differs becuase I never thought about making one.
#5
I'm not sure how cost effective it really is, but it is fun. Plus it is good practice incase you ever snap a rope on the trail.
From Redden Marine:
3/8 amsteel is $2.11 per foot. 56' = $118
1lb of #15 Braided Tarred Twine = $15.08 only use 12' = $0.45
30' of 1" webbing from REI = 12.95 only use 2' = $0.86
3/4" webbing from Strapworks = $0.17 per foot. 2' = $0.34
Initial outlay is $146
Cost for the finished product at 50' = $119.65.
With the exception of the 3/4" webbing you will be left with enough suplies to make many more extensions at any length you want. Just need to buy more rope. You would not even remotely need to double layer the eye like it did. You would use just the 1" or 3/4" webbing.
If you wanted to use tube thimbles you can be them all over the place at different prices. The really good Tube thimbles are not cheap though.
Here are the ones I would go with. They are the large gusseted style. Viking has them for $17 each. That would be $34 on top of the $118 for the rope. But you can find tube thimbles for cheaper.
Viking Offroad Gusseted Tube Thimble
Also, I should add that for the Extension I would use the up sized tube thimble of 7/16" to 1/2" rope just because it really allows the 3/8" to tuck in really far and keep it from harm plus offering a lager radius.
Last edited by Beowulf; 08-21-2012 at 05:04 PM.
#6
Looks like it is cost effective. But it is always nice to buy something that you know if CORRECT and is backed by a company that loves their products.
Masterpull with the nice gusseted tube thimbles: 50' = $237
Viking with Softeyes: 50' = $183.
Both of these come with a chaffe guard. You could always add a guard on the home made for between $0.17 to $0.43 per foot. 8' would range from $1.36 to $7.31
Masterpull with the nice gusseted tube thimbles: 50' = $237
Viking with Softeyes: 50' = $183.
Both of these come with a chaffe guard. You could always add a guard on the home made for between $0.17 to $0.43 per foot. 8' would range from $1.36 to $7.31


