
Installation and Pictures of the Smittybilt Oversize Tire Carrier 2743

Thread Starter
JK Enthusiast
Joined: Feb 2007
Posts: 105
Likes: 0
From: The Woodlands, TX
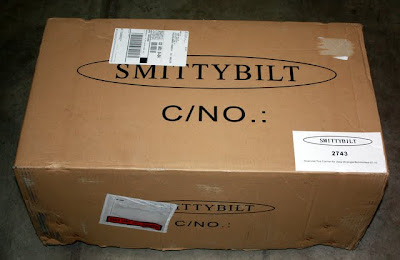
In my search to see how much weight I could get on my tailgate, I decided to try out Smittybilt�s oversize tire carrier system (part number 2743). This is a poor man�s ticket to getting your massive spare meats mounted on your tailgate without spending the money you�ve been saving for those fancy new shocks�at least that�s my excuse. For $100 I thought I�d give it a try�
Below is how the system was shipped and delivered. Seemed pretty skimpy on the packing materials for all that steel, but the parts looked decent when I unpackaged them.
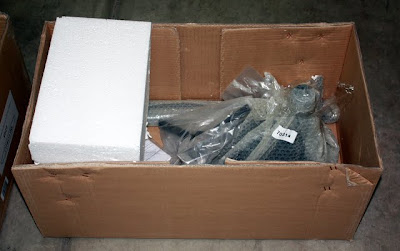
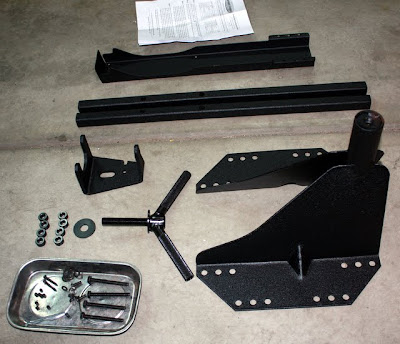
Below is how the system was shipped and delivered. Seemed pretty skimpy on the packing materials for all that steel, but the parts looked decent when I unpackaged them.
Thread Starter
JK Enthusiast
Joined: Feb 2007
Posts: 105
Likes: 0
From: The Woodlands, TX
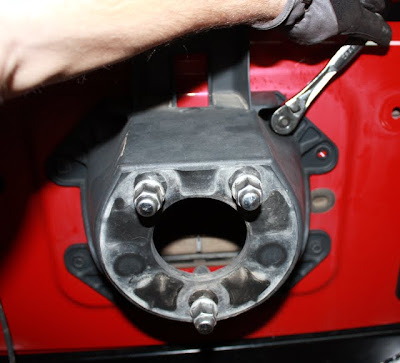
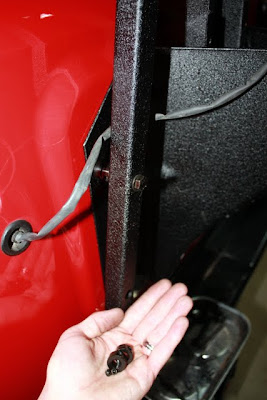
So, you start by taking your tail light bracket off the stock spare tire carrier. This amounts to removing 4 screws with a T-20 bit and disconnecting the wiring harness. Set aside the light assembly.


Then remove the 8 hex head bolts that mount the stock tire carrier to the tailgate. Removal requires a 13mm socket. After removing you can see the pressure relief vent. Since my JK is a 2007, no trimming of the vent is required. If you have a later model JK you may have to trim the vent slightly to provide clearance for the main tire bracket carrier.
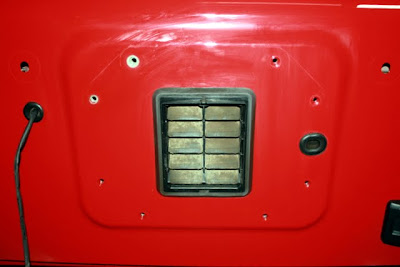
Then remove the 8 hex head bolts that mount the stock tire carrier to the tailgate. Removal requires a 13mm socket. After removing you can see the pressure relief vent. Since my JK is a 2007, no trimming of the vent is required. If you have a later model JK you may have to trim the vent slightly to provide clearance for the main tire bracket carrier.
Thread Starter
JK Enthusiast
Joined: Feb 2007
Posts: 105
Likes: 0
From: The Woodlands, TX
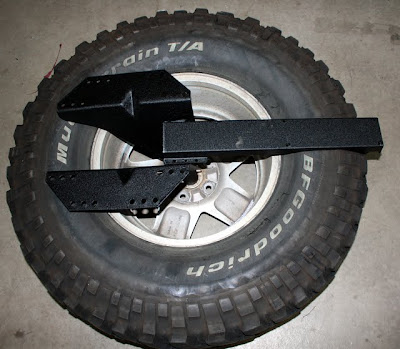
Next, position the main carrier and Smittybilt light bracket over your spare tire (which should be placed front side down) and pick the closest hole to mount the two pieces together. Here, you have 3 mounting choices depending on the size of the spare. The picture below shows my 37� x 12.5� x 17� BFG Mud Terrain with the bracket positioned so the tail light just clears the OD of the tire. Secure the two parts together with the two supplied pan head screws, lock washers, and nuts.
At this point you should also measure the distance from the OD of your tire to the bottom mounting holes. This measurement will tell you which holes to choose for mounting the carrier to your tailgate.
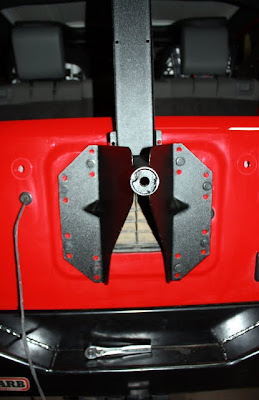
Take the assembly over to your tailgate and pick the closest hole pattern based on your previous measurement such that the tire will clear your bumper. Smittybilt says to use the bottom holes for 37� tires and the middle hole for 35� tires. I chose the bottom hole for my 37� spare, but this proved to leave too much space between the tire and bumper when coupled with my ARB bumper, which would clear a 35� tire with the stock bracket�Now, mount the new bracket using the inner 4 bolt holes, not all 8 like the stock bracket used.
At this point you should also measure the distance from the OD of your tire to the bottom mounting holes. This measurement will tell you which holes to choose for mounting the carrier to your tailgate.
Take the assembly over to your tailgate and pick the closest hole pattern based on your previous measurement such that the tire will clear your bumper. Smittybilt says to use the bottom holes for 37� tires and the middle hole for 35� tires. I chose the bottom hole for my 37� spare, but this proved to leave too much space between the tire and bumper when coupled with my ARB bumper, which would clear a 35� tire with the stock bracket�Now, mount the new bracket using the inner 4 bolt holes, not all 8 like the stock bracket used.
Thread Starter
JK Enthusiast
Joined: Feb 2007
Posts: 105
Likes: 0
From: The Woodlands, TX
The next step is to take the stock tail light and mount it to the new tail light bracket. This is done most easily by opening your tailgate for access to the rear of the tail light bracket. You�ll use the stock self-tapping screws for the bottom two holes, and the Smittybilt screws for the upper two holes (they�re longer).
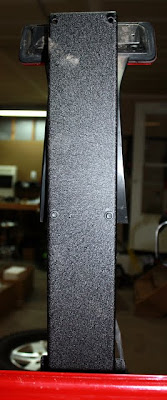
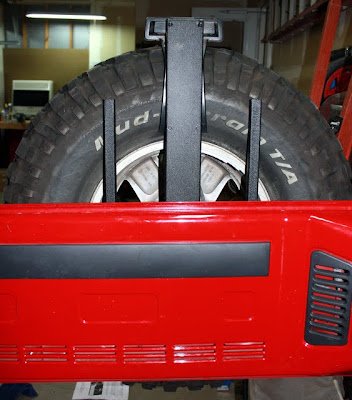
Now take the long square steel pieces of tubing, which serve to support the rear of the tire, and mount them to the outer 4 bolt holes. Use the spacers (two per bolt) to offset the square tubing from the bracket. Don�t forget to use a flat washer under the bolt head. You�ll notice the spacers are tapped in the side, and the kit ships with set screws. There is no discussion of how to implement the set screws in the documentation. Presumably you could use them if your backspacing isn�t quite correct�my tire ended up fitting very snugly against the support rods with the spacers alone sandwiched between the rod and bracket, so I didn�t use the set screws.
Now take the long square steel pieces of tubing, which serve to support the rear of the tire, and mount them to the outer 4 bolt holes. Use the spacers (two per bolt) to offset the square tubing from the bracket. Don�t forget to use a flat washer under the bolt head. You�ll notice the spacers are tapped in the side, and the kit ships with set screws. There is no discussion of how to implement the set screws in the documentation. Presumably you could use them if your backspacing isn�t quite correct�my tire ended up fitting very snugly against the support rods with the spacers alone sandwiched between the rod and bracket, so I didn�t use the set screws.
Thread Starter
JK Enthusiast
Joined: Feb 2007
Posts: 105
Likes: 0
From: The Woodlands, TX
At this point the spare is ready to go on the carrier. You�ll have to knock out the center cap of the wheel to place the tire on the carrier post. When mounting the wheel to the post, Smittybilt recommends keeping the top two mounting holes of the wheel bolt pattern level with the ground. The only thing left to do at this point is put the wheel capture bracket on the wheel and secure with the hold-down bar. Another cool provision is a cutout that lets you attach a lock to the carrier to prevent your spare from taking a walk�
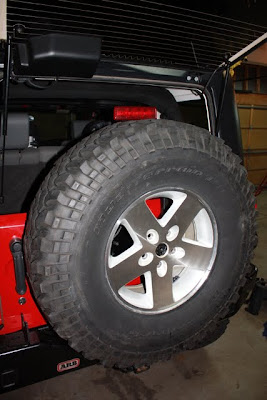
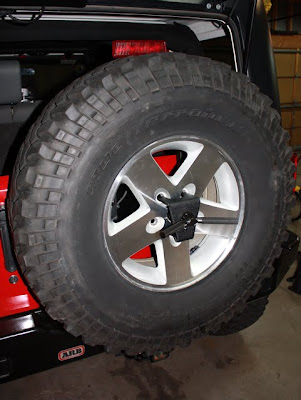
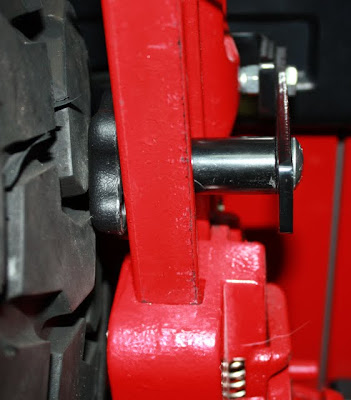
Here�s a picture showing how the support bars reinforce the tire to prevent it from moving. I gave the tire a good shake and all seemed very secure.
Here�s a picture showing how the support bars reinforce the tire to prevent it from moving. I gave the tire a good shake and all seemed very secure.
Thread Starter
JK Enthusiast
Joined: Feb 2007
Posts: 105
Likes: 0
From: The Woodlands, TX
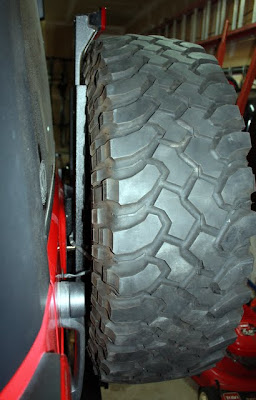
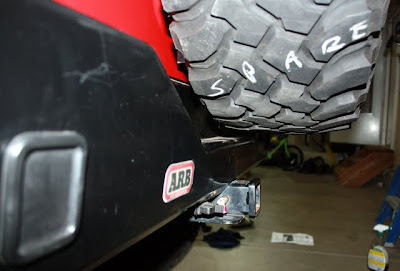
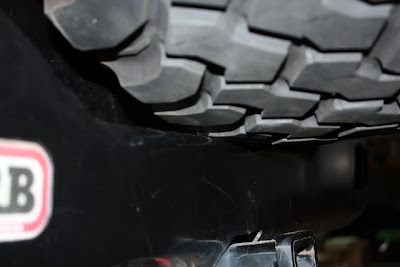
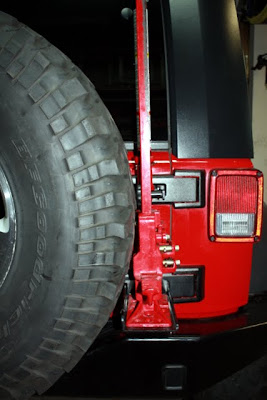
Notice I do have about an inch of clearance between the tire and the ARB bumper. I decided I thought my hinges might appreciate some support from the bumper, so I ended up removing the tire and repositioning the bracket down 1� to the 35� holes. At this position I was able to have a very small amount of tire touching the bumper, which provides some extra support to the tailgate without inhibiting the overall operation.
At this point the tire carrier installation is complete. I also have a hi-lift jack bracket mounted on the tailgate. In order for the 37� BFG�s to clear I had to rotate the upper hi-lift bracket support 180 degrees. Although tight, everything fit after repositioning this upper support.

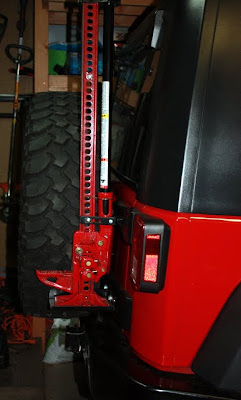
At this point the tire carrier installation is complete. I also have a hi-lift jack bracket mounted on the tailgate. In order for the 37� BFG�s to clear I had to rotate the upper hi-lift bracket support 180 degrees. Although tight, everything fit after repositioning this upper support.
Thread Starter
JK Enthusiast
Joined: Feb 2007
Posts: 105
Likes: 0
From: The Woodlands, TX
Overall, I�m very pleased with the quality and flexibility of the Smittybilt oversize tire carrier. It�s the only system I was able to find that could fit a 37� tire (in my case a 39� tire with ARB bumper) for under $100. The overall support the bracket gives to the sheet metal tailgate seems sufficient. Only time will tell if the hinges don�t like the setup 
At this point I�m very pleased with my purchase and can�t wait to get those fancy shocks with the money I�ve saved!

At this point I�m very pleased with my purchase and can�t wait to get those fancy shocks with the money I�ve saved!
Trending Topics
JK Super Freak
Joined: Jan 2010
Posts: 1,141
Likes: 0
From: joplin, MO
i would like an update as far as how the tire carrier holds up with the weight of that 37" while offroading. i am in your situation as well as not wanting to drop a grand on a bumper/carrier combo when i'm needing to put money into other mods to get ready for moab next year. let us know please if you notice ne sags in the tail gate at all or any rattle problems. just might have to get me a smitty bilt one.  thanks bro looks good for the money.

thanks bro looks good for the money.