
Leather Seat upholstery install replacement.

Thread Starter
JK Super Freak
Joined: Aug 2011
Posts: 1,209
Likes: 3
From: connecticut
Front seat write up
Tools 1.000.000ftlb pneumatic gun Or a good breaker bar W ratchet
18mm socket
15mm socket
T40 torx
T45 torx
Wire cutter
Hog ring pliers
Hog rings
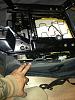
1. Remove (4) 18mm bolts using breaker bar super dupper hard to remove loaded with thread locker.
2. Remove seatbelt bolt with the T40 torx and remove the clip and the reclining handle.
3. Take seat out of the car
4. Remove (4) 15mm bolts that keep the back and bottom cushion together split the seat apart.
5. Remove head rest simply press the (2) buttons and pull it up and out.
6. Remove the headrest buttons just pull straight up it takes a little force but they do come out.
NOW YOU ARE DEADY TO REMOVE THE COVERS.
Seat back.
1. Pull apart the bottom plastic rail
2. Pull cover off note the black trips are Velcro.
3. Now remove the 5 hog rings with wire cutters. (This is a good time to wear eye protection. )
4.a optional seat heaters. Peal the (2) strips on the back to expose glue. Center on seat back and stick it on.
5. Slip part of the new cover on
6. Install new hog rings.
7. Now pull the rest of the cover on make sure the Velcro strips are on. And keep it nice and tight.
8. Put the plastic rail back on is a PITA. but it goes on if is warm outside makes it a little easier.
9. With a nice sharp blade cut the hole for the recliner knob. And headrest buttons.
Bottom cushion
1. Remove the seat cover by by pulling the plastic rails on the bottom of the seat frame.
2. Remove (11) hog rings and pull the seat cover off
3. Seat heater. Peal adhesive stops and install. Mark the dots where the hog rings go at this time is easier to do.
4. Instal new hog rings and pull new cover on seat frame
5. Cut holes for bolts and seat adjustment handles.
6. Bolt the bottom cushion and seat back together. And reinstall in jeep.
Q: Was it a PITA????
A: it was a major pain.
Q: was it worth it?
A: OMG yes the smell of napa leather is unbelievable
Q: leather on a jeep?? Is it hot in the sun and bad in the rain??
A: no burns on my butt but more important no burns on the fianc�s ass!! Rain who hasn't left the top off in poring rain?? But then again who hasn't done the same in a BMW any convertible their leather looks fine.
Good luck with your installs.
Ps. This install was done in march 2013 now 4 months later I love the leather is smells like the first day every time I get in the car and it burns my ass the same way lol j/k no burns yet so if this is keeping you from leather don't is not bad at all.
These are the Star Fabricating leather kit with the napa upgrade they are amazing!!!! Blows any other kits away by far in fit and finish they fit like a glove the leather doesn't sag or wrinkle anywhere.
Thank you Troy from Star Fabricating. Great customer service.
Step1.

Step 2

Step 4.


Step 5.


Step 6.


Seat back.
Step 1.

Step 2.

Step 3.


Step 4.


Step 6.

Step 9.


Bottom cushion.
Step 1.


Step 2.


Step 3.


Step 5.


Last but not least. Finished install


Sent from my iPhone using JK-Forum
Tools 1.000.000ftlb pneumatic gun Or a good breaker bar W ratchet
18mm socket
15mm socket
T40 torx
T45 torx
Wire cutter
Hog ring pliers
Hog rings
1. Remove (4) 18mm bolts using breaker bar super dupper hard to remove loaded with thread locker.
2. Remove seatbelt bolt with the T40 torx and remove the clip and the reclining handle.
3. Take seat out of the car
4. Remove (4) 15mm bolts that keep the back and bottom cushion together split the seat apart.
5. Remove head rest simply press the (2) buttons and pull it up and out.
6. Remove the headrest buttons just pull straight up it takes a little force but they do come out.
NOW YOU ARE DEADY TO REMOVE THE COVERS.
Seat back.
1. Pull apart the bottom plastic rail
2. Pull cover off note the black trips are Velcro.
3. Now remove the 5 hog rings with wire cutters. (This is a good time to wear eye protection. )
4.a optional seat heaters. Peal the (2) strips on the back to expose glue. Center on seat back and stick it on.
5. Slip part of the new cover on
6. Install new hog rings.
7. Now pull the rest of the cover on make sure the Velcro strips are on. And keep it nice and tight.
8. Put the plastic rail back on is a PITA. but it goes on if is warm outside makes it a little easier.
9. With a nice sharp blade cut the hole for the recliner knob. And headrest buttons.
Bottom cushion
1. Remove the seat cover by by pulling the plastic rails on the bottom of the seat frame.
2. Remove (11) hog rings and pull the seat cover off
3. Seat heater. Peal adhesive stops and install. Mark the dots where the hog rings go at this time is easier to do.
4. Instal new hog rings and pull new cover on seat frame
5. Cut holes for bolts and seat adjustment handles.
6. Bolt the bottom cushion and seat back together. And reinstall in jeep.
Q: Was it a PITA????
A: it was a major pain.
Q: was it worth it?
A: OMG yes the smell of napa leather is unbelievable
Q: leather on a jeep?? Is it hot in the sun and bad in the rain??
A: no burns on my butt but more important no burns on the fianc�s ass!! Rain who hasn't left the top off in poring rain?? But then again who hasn't done the same in a BMW any convertible their leather looks fine.
Good luck with your installs.
Ps. This install was done in march 2013 now 4 months later I love the leather is smells like the first day every time I get in the car and it burns my ass the same way lol j/k no burns yet so if this is keeping you from leather don't is not bad at all.
These are the Star Fabricating leather kit with the napa upgrade they are amazing!!!! Blows any other kits away by far in fit and finish they fit like a glove the leather doesn't sag or wrinkle anywhere.
Thank you Troy from Star Fabricating. Great customer service.
Step1.
Step 2
Step 4.
Step 5.
Step 6.
Seat back.
Step 1.
Step 2.
Step 3.
Step 4.
Step 6.
Step 9.
Bottom cushion.
Step 1.
Step 2.
Step 3.
Step 5.
Last but not least. Finished install
Sent from my iPhone using JK-Forum
Last edited by stangmike1; Aug 1, 2013 at 05:02 PM.

Thread Starter
JK Super Freak
Joined: Aug 2011
Posts: 1,209
Likes: 3
From: connecticut