
Y90's Rubicon Axle Swap Write Up

Thread Starter
JK Junkie
Joined: Dec 2007
Posts: 3,343
Likes: 3
From: Amherst, Ohio
This thread is a dedicated to a Rubicon axle swap, whether it be front, rear or both!
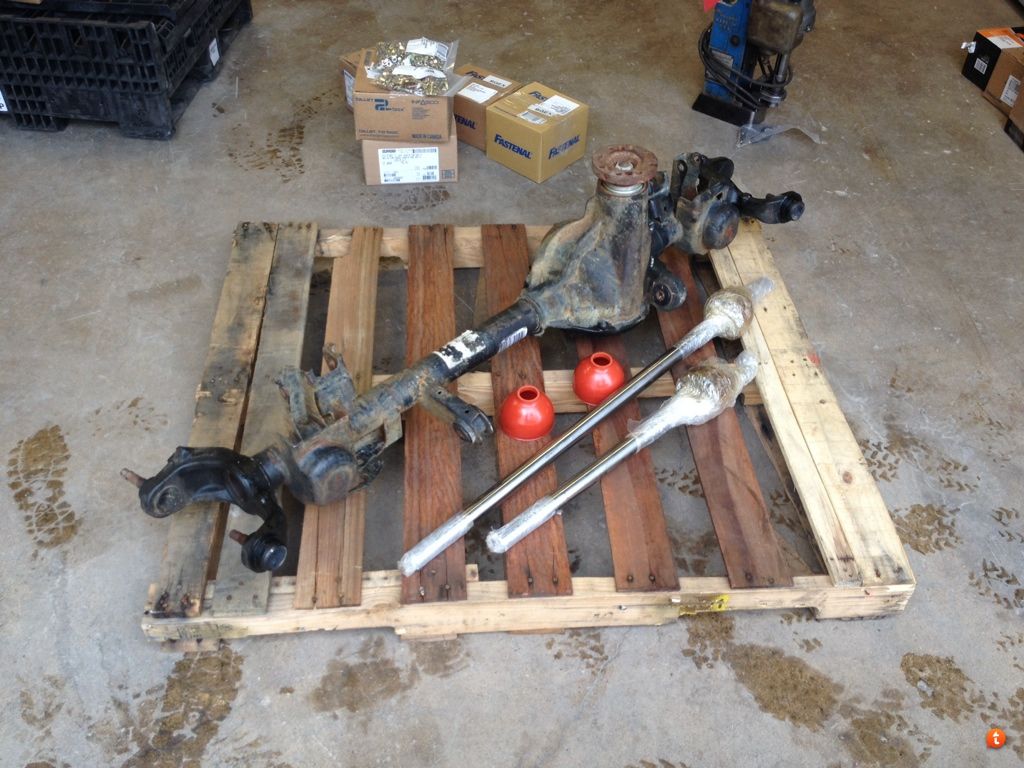
Tax season left some change in my pocket and as a stupid impulsive decision I got not only one, but two Rubicon axles. For those looking to upgrade their stock axles, do your research and be patient! My impulsive buys were only because they were good prices and I did a lot of digging. Brand new Rubicon crate axles can be found online for roughly $2700 for the front and $2000 for the rear if I remember correctly. For me, I bought each used for a total of $2200 shipped for both axles. The front was purchased with a new set of RCV axle shafts for extra coin.
If and when you upgrade, the best route to take is by using quality components and taking the time to do everything right the first time. I tried my best to follow this route.
My Materials:
1 Rear Rubicon Axle (w/ stock axle shafts)
1 Front Rubicon Axle (w/RCV axle shafts)
2 med. (or 1 Lg) Spool of 18g. Wire
2 Relay boxes
2 Switches
1 Box Female Micro Speaker Connectors (Autozone)
Misc. Wiring connectors / Electrical Tape / shrink tube
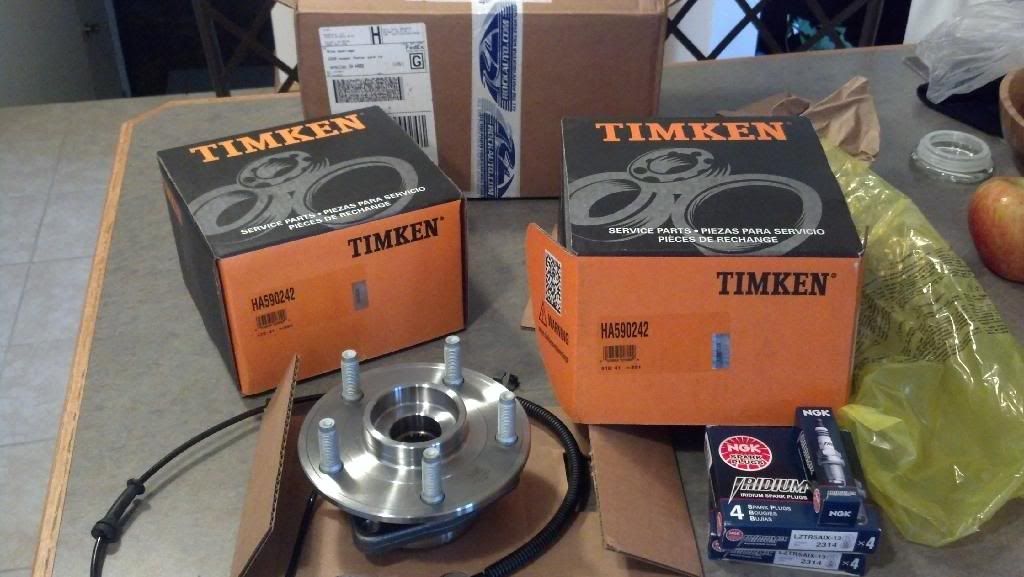
2 Timken Hub assemblies
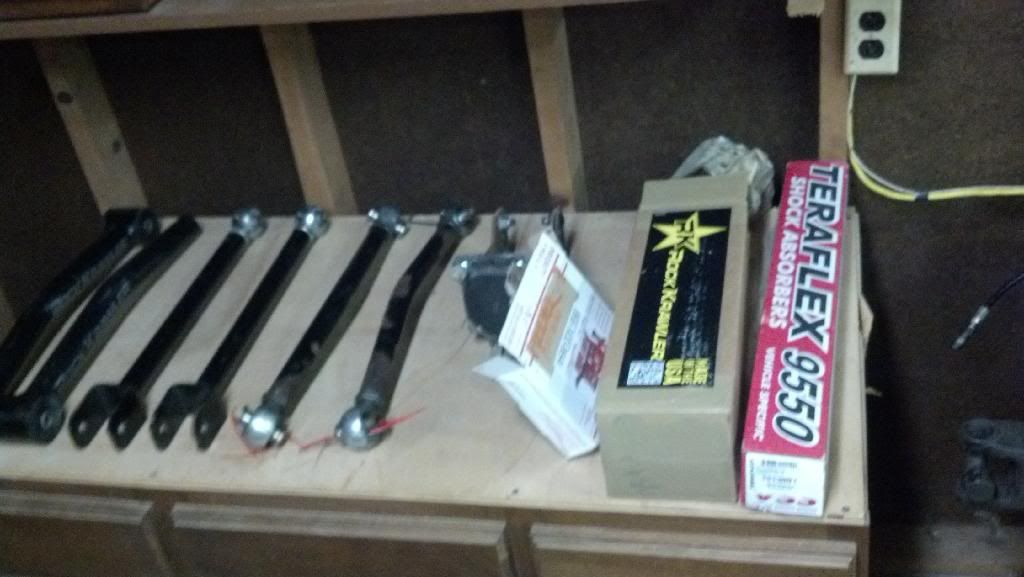
1 Artec Armor Kit
2 sets Synergy Ball Joints
------------------------------------------------------------
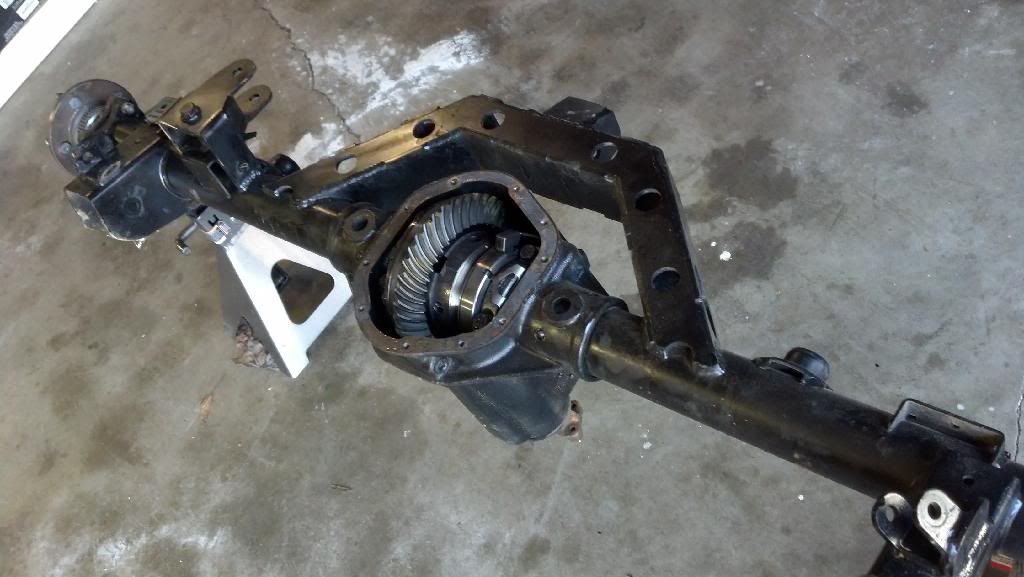
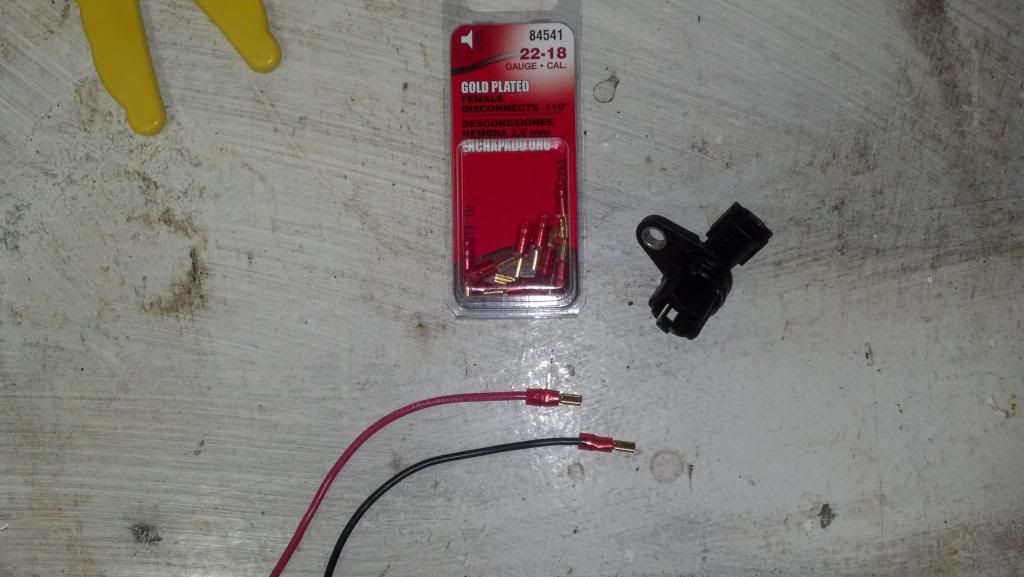
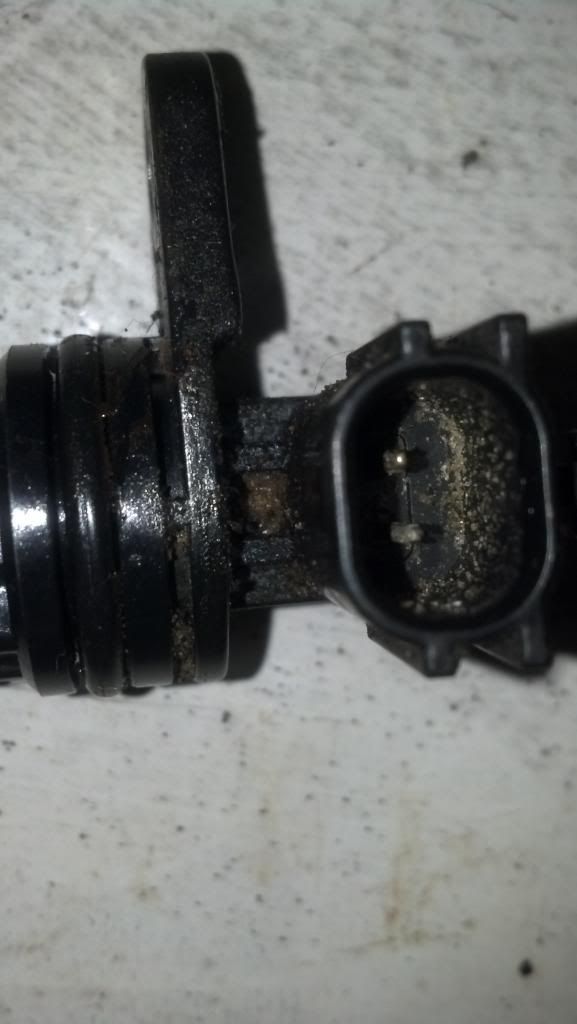
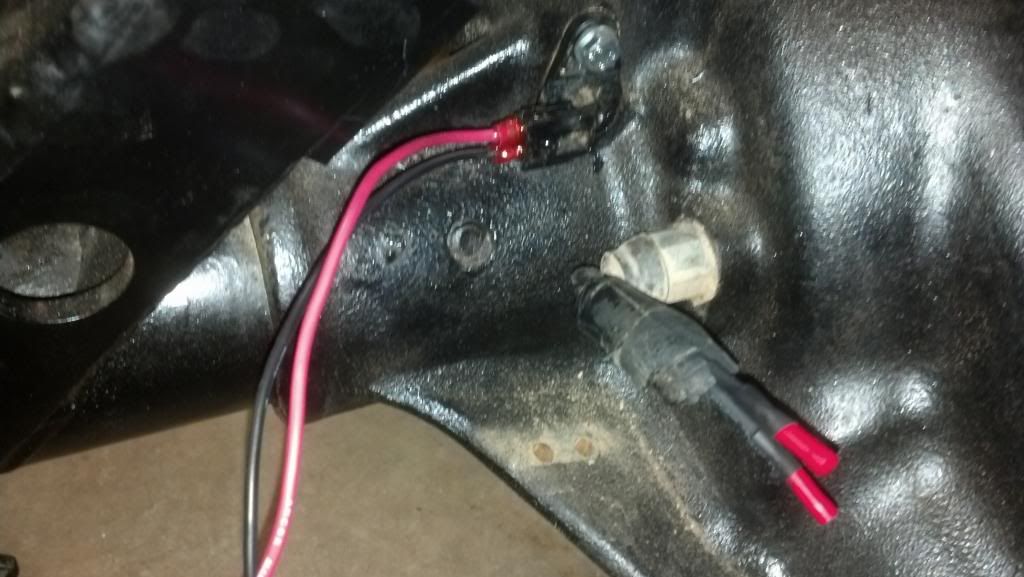
First thing�s first! Test your E-Lockers! Run a couple leads from the battery over to the axle and use a couple of the speaker connectors to activate the locker. The top black plastic connector is for the locker itself. One is power, one is ground, because the locker isn�t polarity specific, it doesn�t matter which goes where. This is easiest with the cover off to see it function and you�ll also hear the �click� when the locker is powered.
For the axle end, Pull the top black piece, which is actually a plug in a plug. Attach two of the speaker connector wires with wires connected onto the prongs in the top piece, and epoxy those in there. Like shown below. For the indicator plunger, just cut those and attach some slip connects.
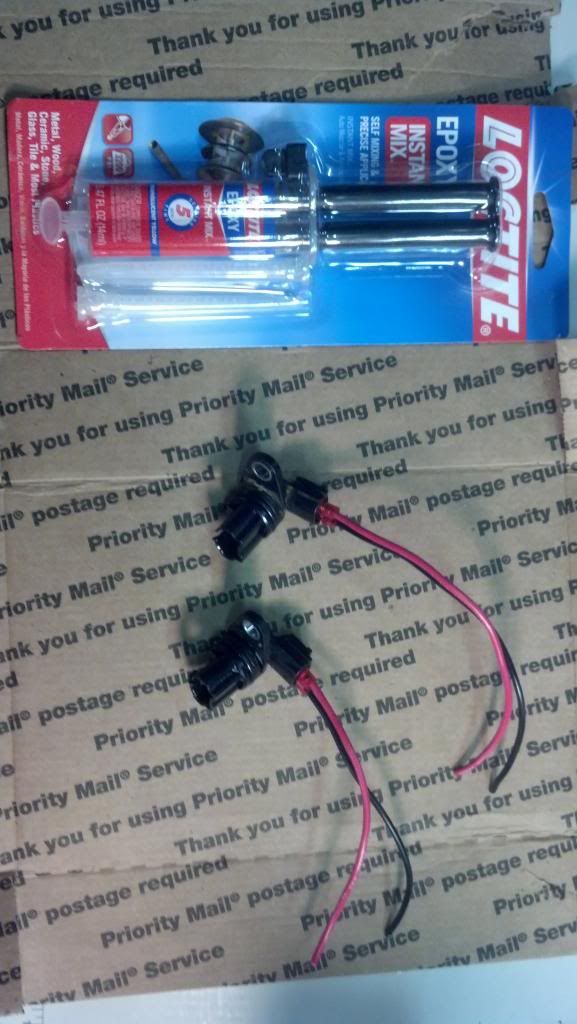
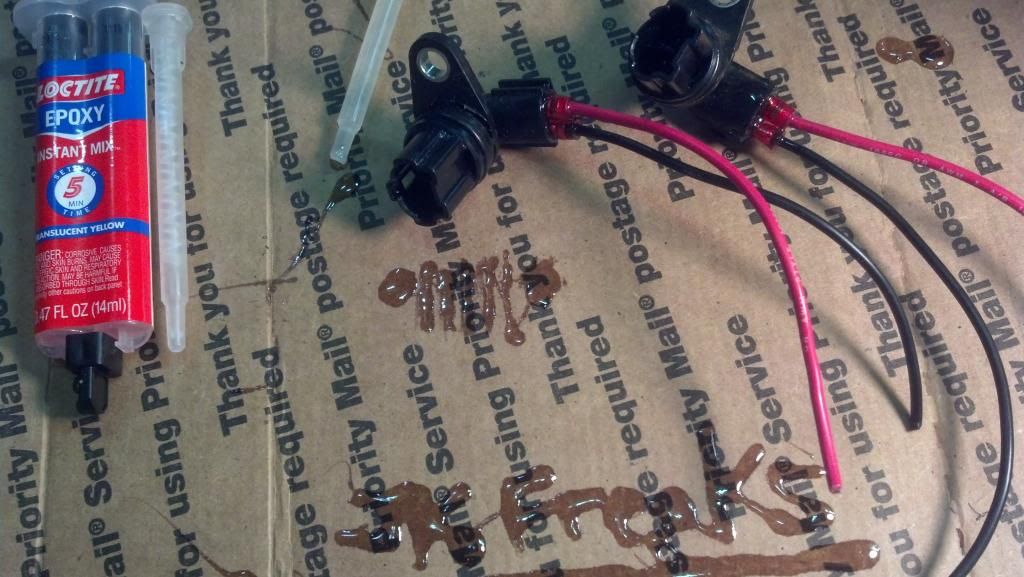
Installed they should look like this;
Pictures;
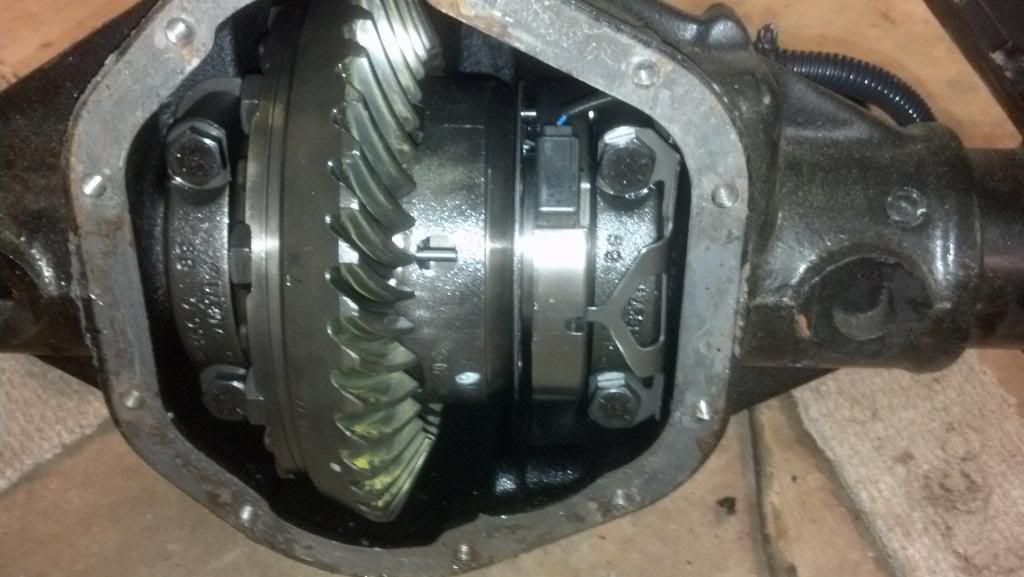
OFF:
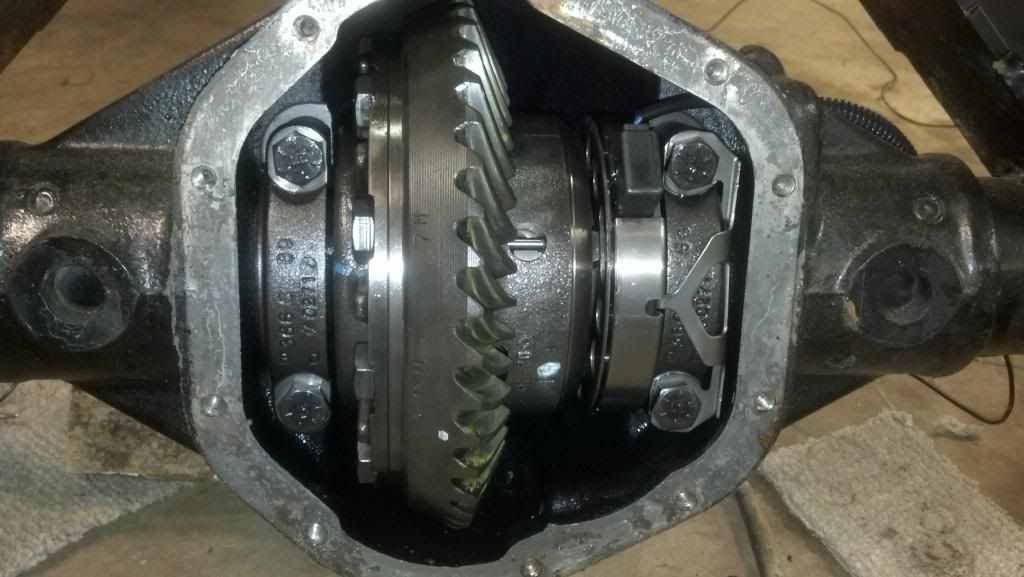
ON:
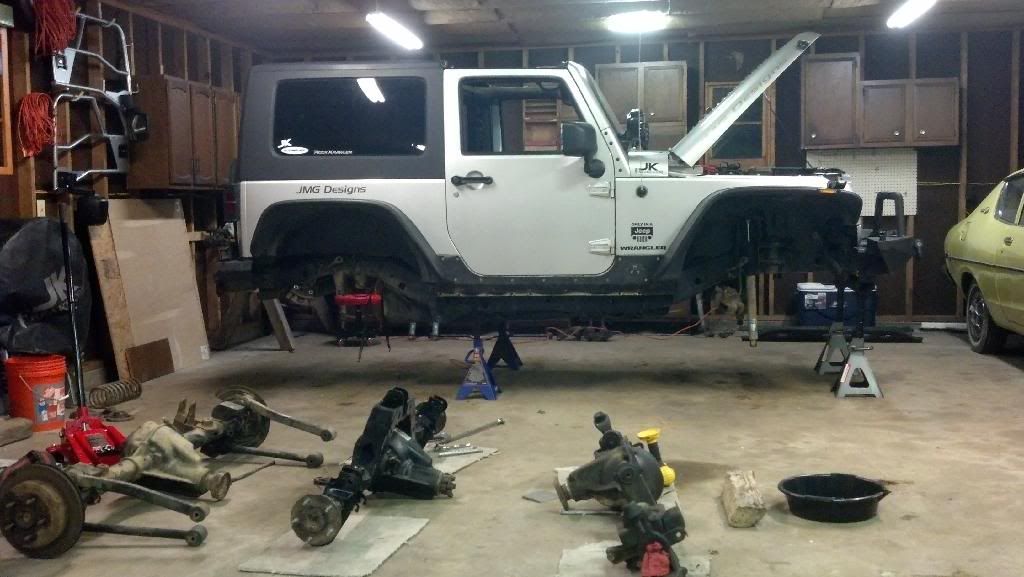
In good shape? Now Jack the Jeep up high enough to comfortably work on it. Best support I found for my two door was by placing jack stands under the front crash bar, and just before the rear lower control arms brackets.
Remove the tires/wheel off of the axle you�re swapping, remove the sway bar links, shocks, drive shaft and track bar. Drain your differential fluid and at this time it would be best to pull the hub assemblies (if working on the front) and axle shafts out.
Once the axle shafts and all other components are off, pull the control arms if you�re replacing or rebuilding joints. If using the stock arms you can leave them bolted to the frame end if the replacement axle is ready for installation.
Now that the stock axle should be completely disconnected from the Jeep, drag it out from under the Jeep and out of the way. With the axle out there is more space to run wiring.
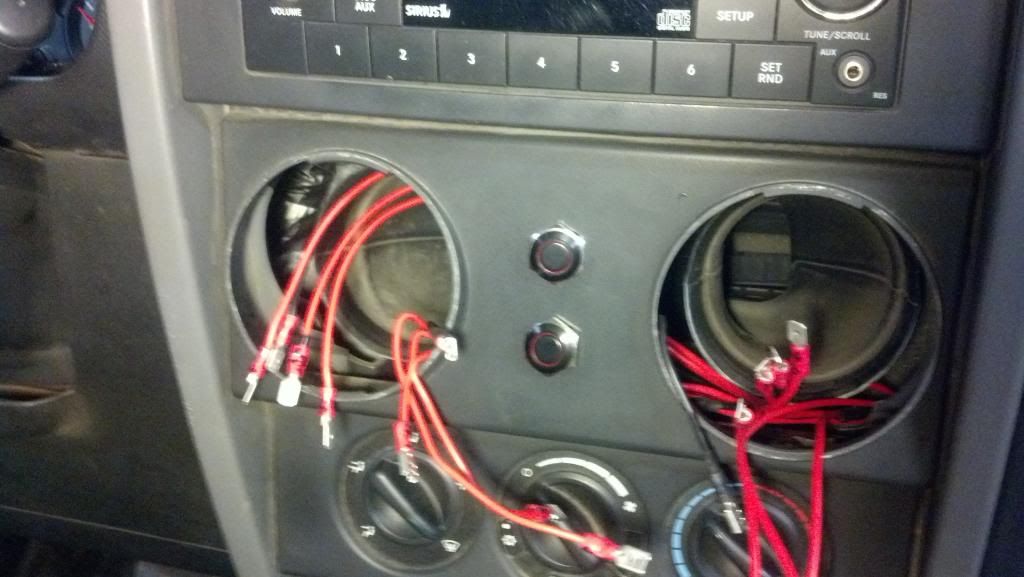
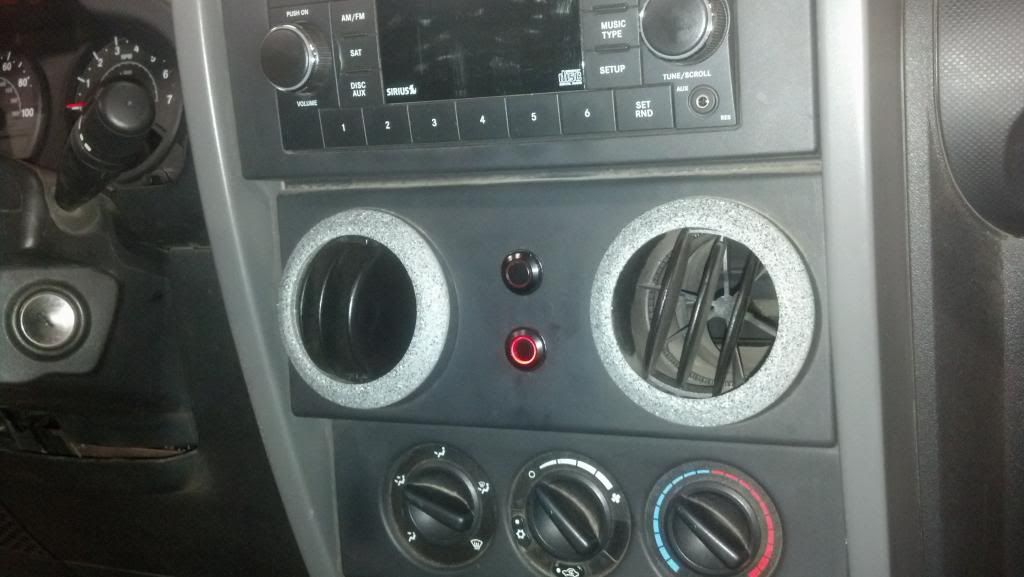
For the wires, I believe I ran two lengths of wire roughly 20�. Because I do not have power windows in my X, I chose the middle of the dash to place my switches. Because I wanted a low profile switch that wasn�t going to get bumped or draw too much attention, I chose some of these black push button LED switches. They are about the size of a nickel.
If using these switches, here is a diagram to show how to wire the switch as well as the LED to function as your locker indicator light. That way, if the locker malfunctions or does not engage, the light will not turn on letting you know there is a problem with either the power to the locker, or the locker itself.
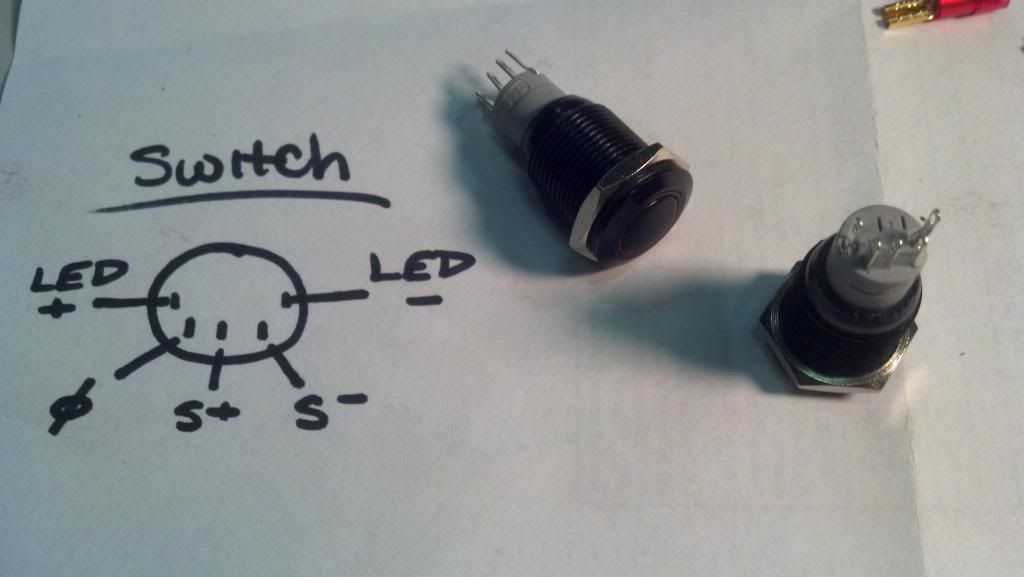
On these switches, the pins on the back are tiny. I took my wire, cut enough of the threas to have the wire fit through the end of the pin. I then used heat-shrink tube over those and lastly epoxied them to ensure they wouldn't move or loosen up. You can see this on the back of the switch below.
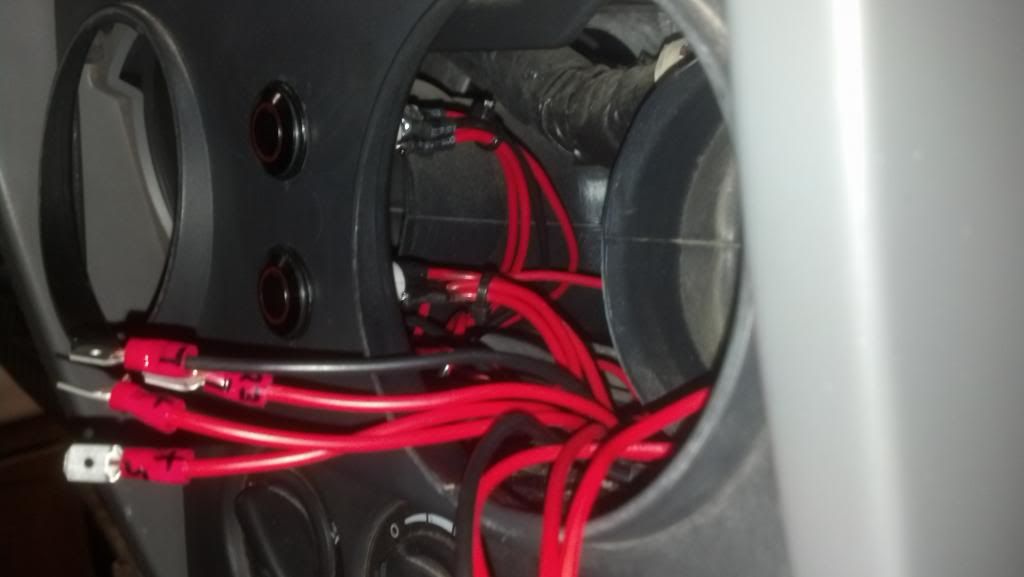
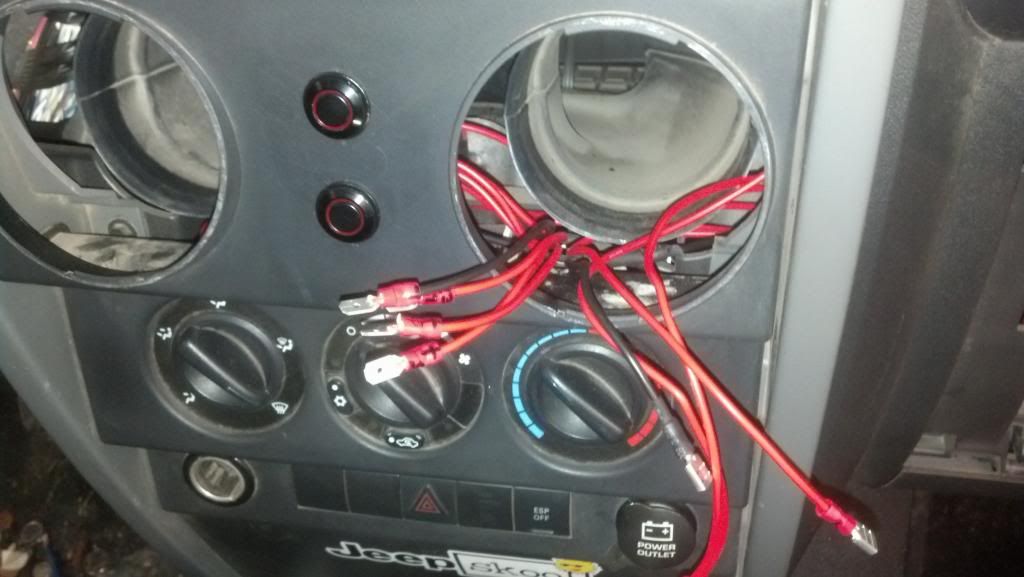
Now we can run some wiring. Hopefully this will save you some time! Because I placed my switch location in the middle of the dash, I knew I could hide the wiring easily, and keep it tucked out of the way.
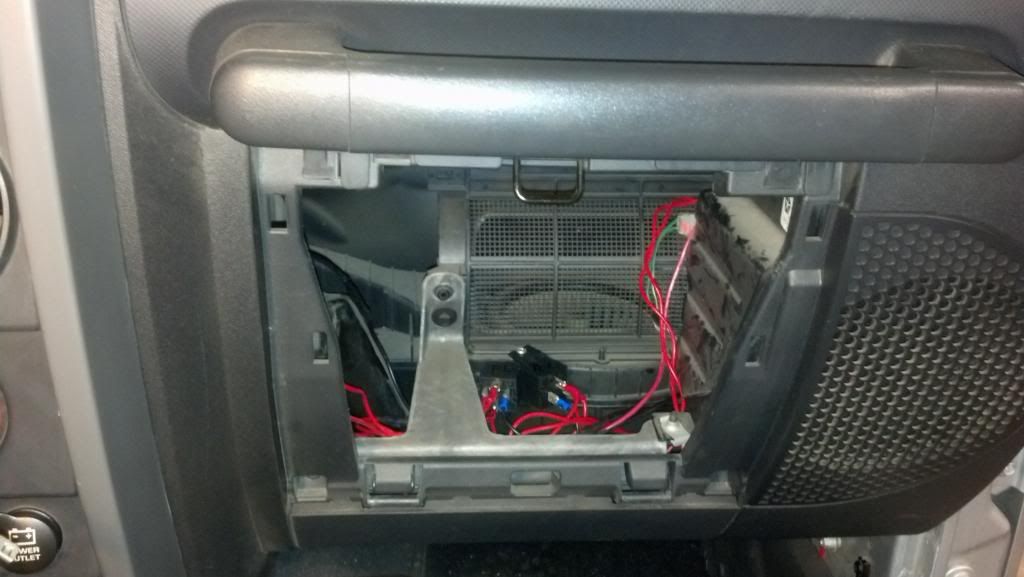
I popped the glove box out, and found two perfect spots to bolt the relays!
Tax season left some change in my pocket and as a stupid impulsive decision I got not only one, but two Rubicon axles. For those looking to upgrade their stock axles, do your research and be patient! My impulsive buys were only because they were good prices and I did a lot of digging. Brand new Rubicon crate axles can be found online for roughly $2700 for the front and $2000 for the rear if I remember correctly. For me, I bought each used for a total of $2200 shipped for both axles. The front was purchased with a new set of RCV axle shafts for extra coin.
If and when you upgrade, the best route to take is by using quality components and taking the time to do everything right the first time. I tried my best to follow this route.
My Materials:
1 Rear Rubicon Axle (w/ stock axle shafts)
1 Front Rubicon Axle (w/RCV axle shafts)
2 med. (or 1 Lg) Spool of 18g. Wire
2 Relay boxes
2 Switches
1 Box Female Micro Speaker Connectors (Autozone)
Misc. Wiring connectors / Electrical Tape / shrink tube
2 Timken Hub assemblies
1 Artec Armor Kit
2 sets Synergy Ball Joints
------------------------------------------------------------
First thing�s first! Test your E-Lockers! Run a couple leads from the battery over to the axle and use a couple of the speaker connectors to activate the locker. The top black plastic connector is for the locker itself. One is power, one is ground, because the locker isn�t polarity specific, it doesn�t matter which goes where. This is easiest with the cover off to see it function and you�ll also hear the �click� when the locker is powered.
For the axle end, Pull the top black piece, which is actually a plug in a plug. Attach two of the speaker connector wires with wires connected onto the prongs in the top piece, and epoxy those in there. Like shown below. For the indicator plunger, just cut those and attach some slip connects.
Installed they should look like this;
Pictures;
OFF:
ON:
In good shape? Now Jack the Jeep up high enough to comfortably work on it. Best support I found for my two door was by placing jack stands under the front crash bar, and just before the rear lower control arms brackets.
Remove the tires/wheel off of the axle you�re swapping, remove the sway bar links, shocks, drive shaft and track bar. Drain your differential fluid and at this time it would be best to pull the hub assemblies (if working on the front) and axle shafts out.
Once the axle shafts and all other components are off, pull the control arms if you�re replacing or rebuilding joints. If using the stock arms you can leave them bolted to the frame end if the replacement axle is ready for installation.
Now that the stock axle should be completely disconnected from the Jeep, drag it out from under the Jeep and out of the way. With the axle out there is more space to run wiring.
For the wires, I believe I ran two lengths of wire roughly 20�. Because I do not have power windows in my X, I chose the middle of the dash to place my switches. Because I wanted a low profile switch that wasn�t going to get bumped or draw too much attention, I chose some of these black push button LED switches. They are about the size of a nickel.
If using these switches, here is a diagram to show how to wire the switch as well as the LED to function as your locker indicator light. That way, if the locker malfunctions or does not engage, the light will not turn on letting you know there is a problem with either the power to the locker, or the locker itself.
On these switches, the pins on the back are tiny. I took my wire, cut enough of the threas to have the wire fit through the end of the pin. I then used heat-shrink tube over those and lastly epoxied them to ensure they wouldn't move or loosen up. You can see this on the back of the switch below.
Now we can run some wiring. Hopefully this will save you some time! Because I placed my switch location in the middle of the dash, I knew I could hide the wiring easily, and keep it tucked out of the way.
I popped the glove box out, and found two perfect spots to bolt the relays!
Thread Starter
JK Junkie
Joined: Dec 2007
Posts: 3,343
Likes: 3
From: Amherst, Ohio
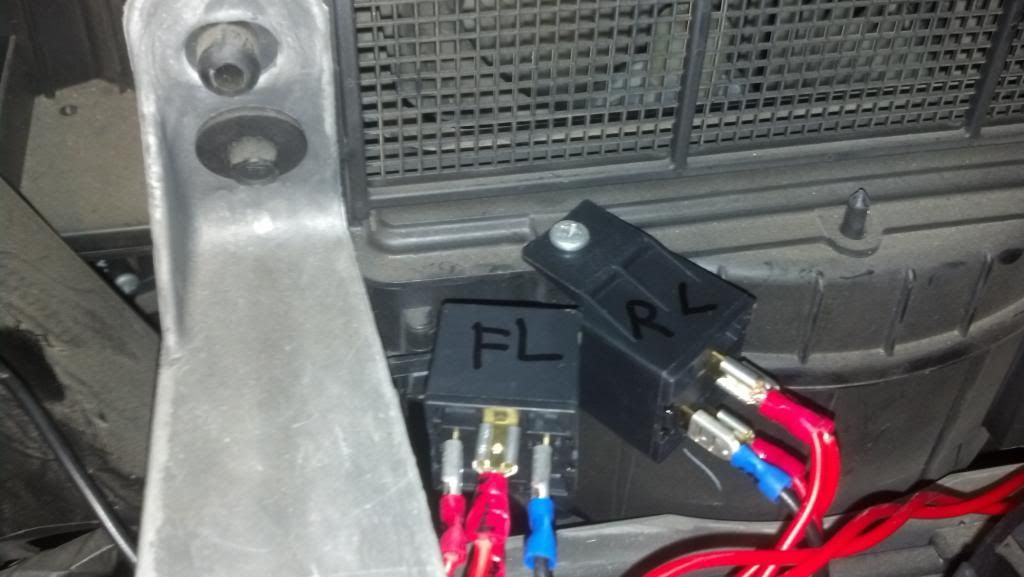
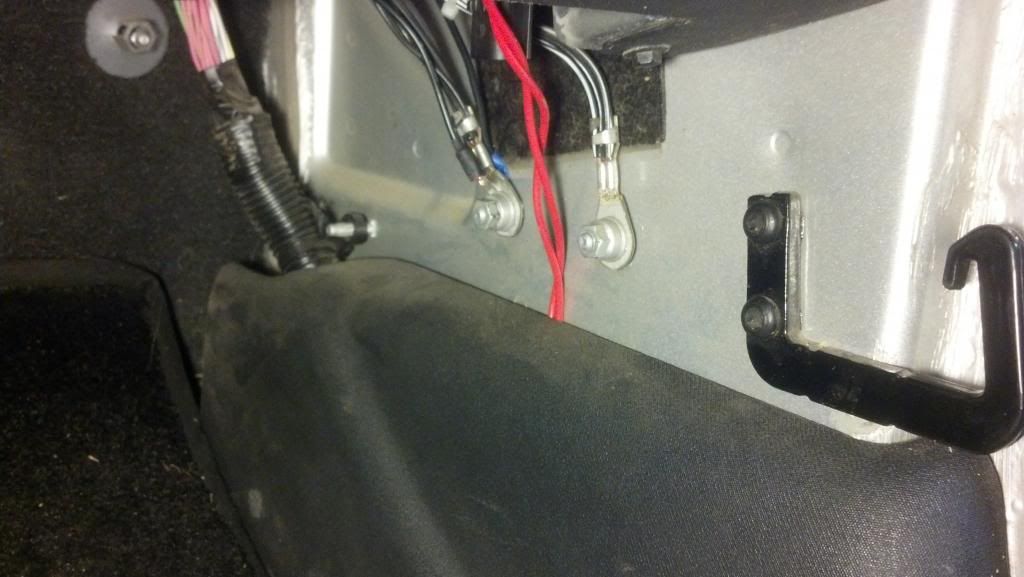
Run power from the battery to the switch and LED, and to the relay (30). Ground the relay (85), and run the switch ground wire to the relay (86). The 87 pin on the relay will go to power the locker and the indicator plunger, but we will need the ground from the indicator plunger to turn on our switch LED. Because of this, run a pair of wires to the passenger upper control arm mount. You will want to connect and label one wire to the switch LED ground, and split the end of the 87 wire to power the locker and indicator plunger.
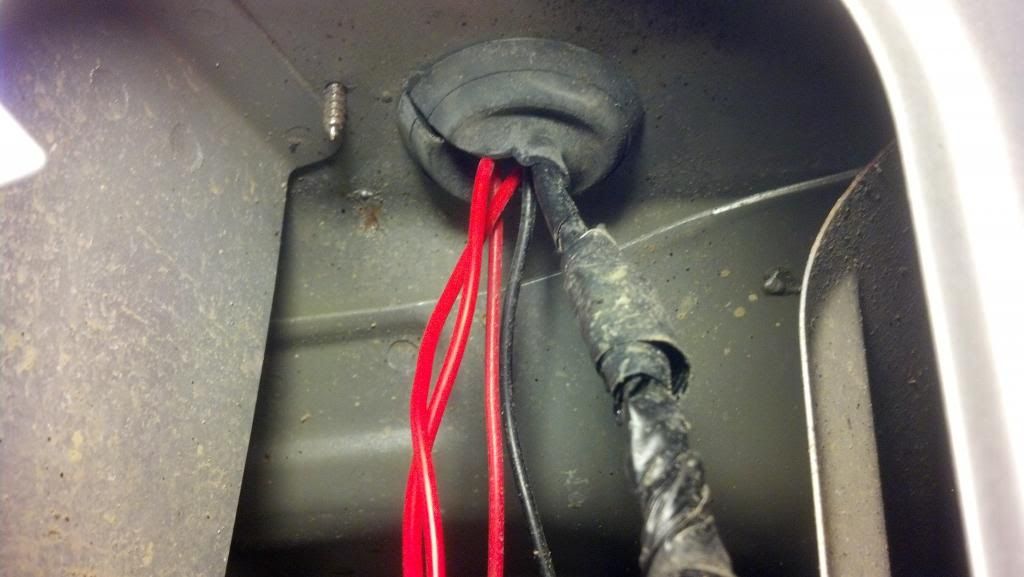
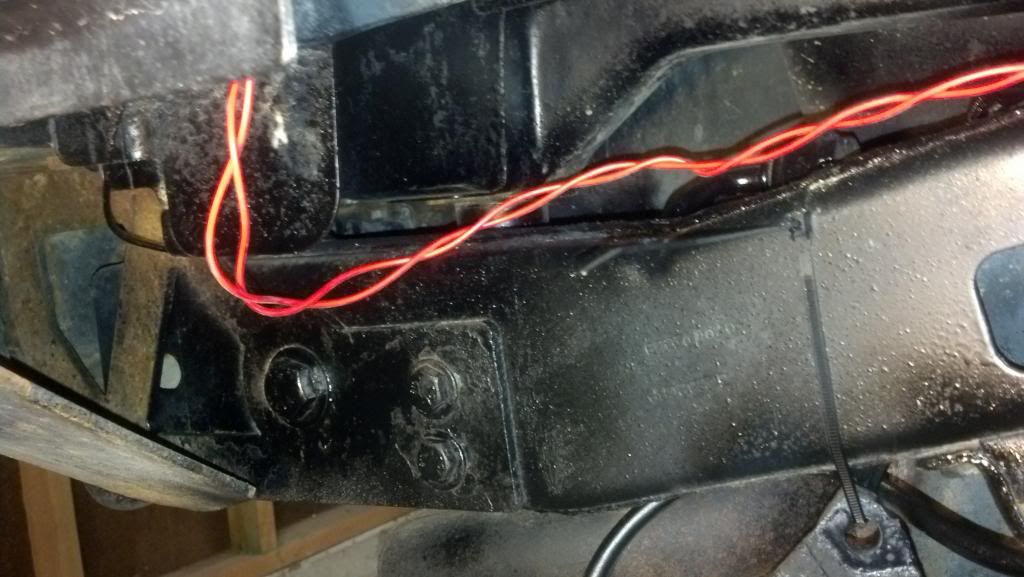
Do the same for the rear locker. I ran my wiring along the passenger side to the passenger rear corner. In the corner there is a rubber grommet that will gain entry to the tail light compartment. From there you can get to the wires from the bottom of that compartment under the body, and run the wires either down the breather tube or to the rear upper control arm mount and follow it to the diff housing.
Through the firewall;
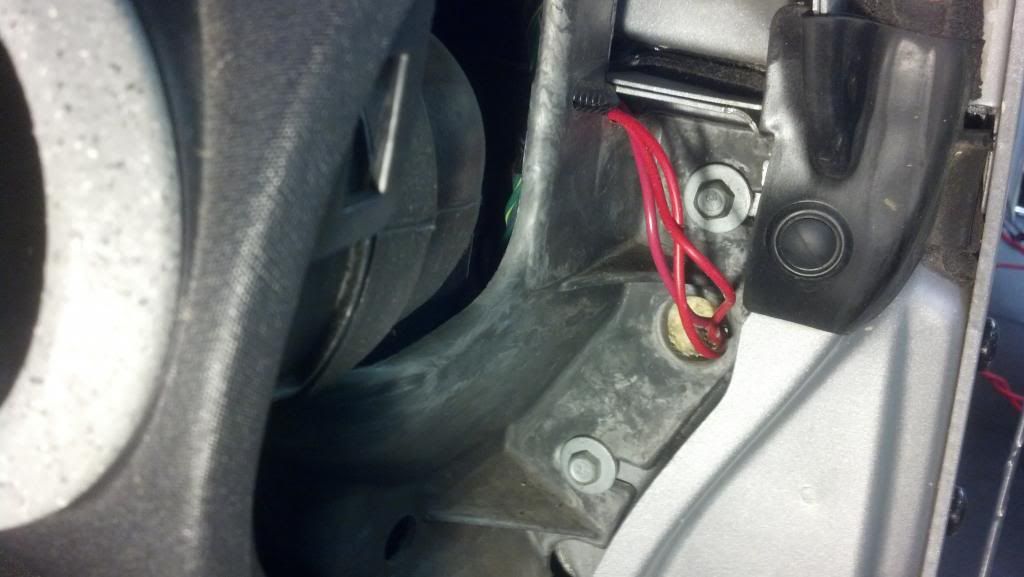
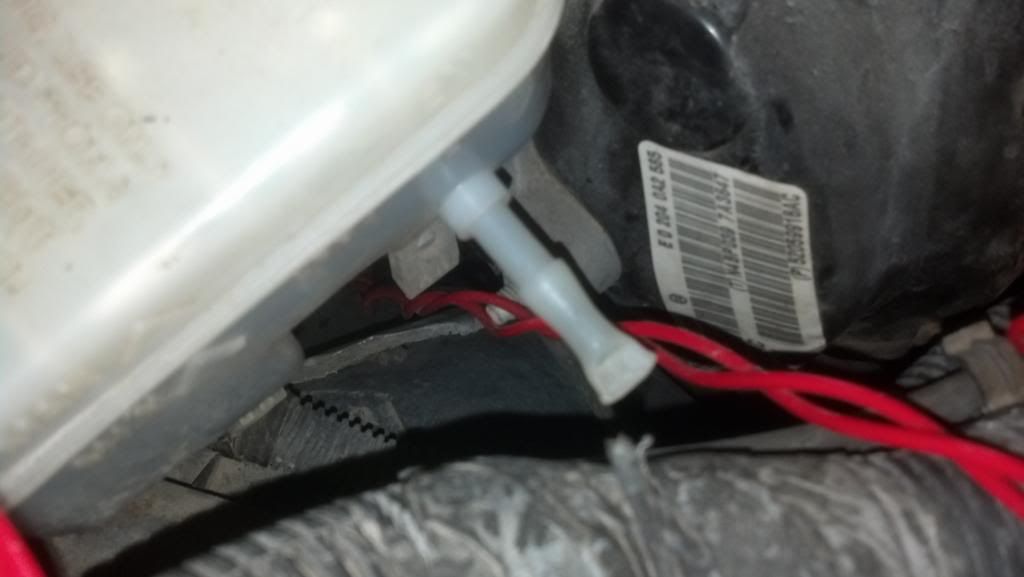
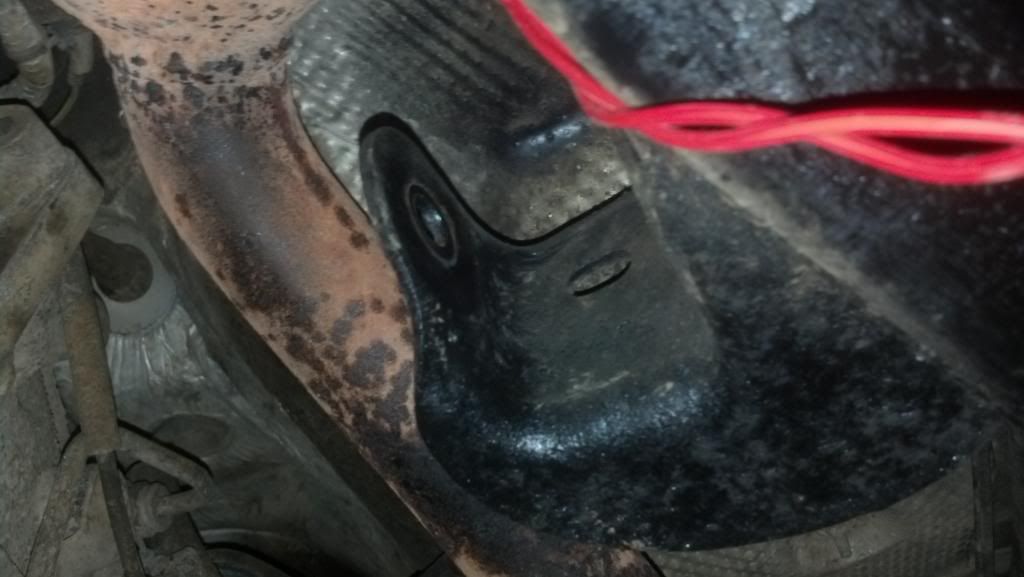
Front wiring goes across the engine bay and down the side by the brake booster to the front upper control arm mount.
Rear:
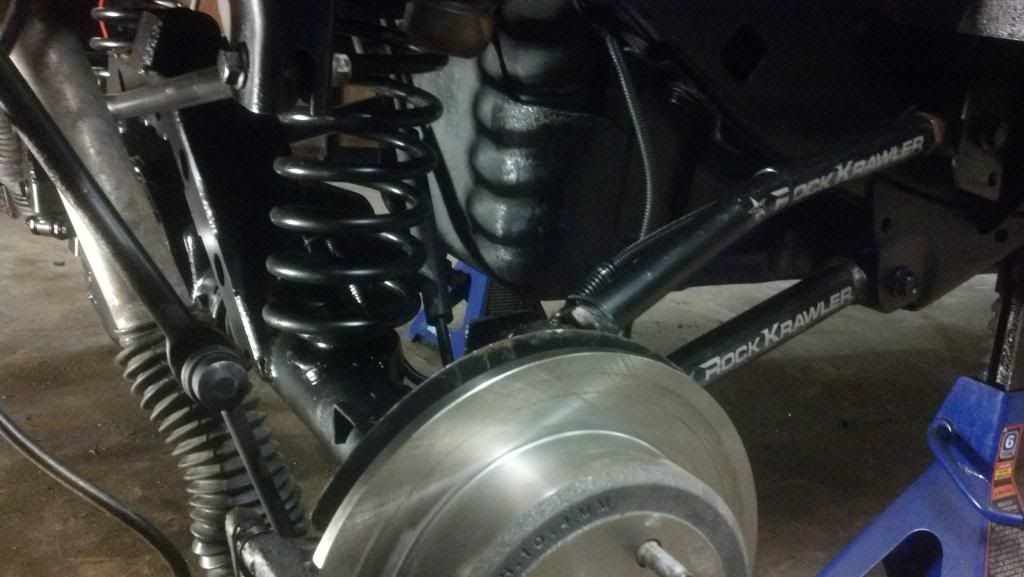
Since the locker has been tested and is working you can begin to install the axle(s). Start with the control arms and track bar, add in the coils, shocks and sway bar links. Finish up with the driveshaft and brakes. Sound easy? If you have everything ready to go and have the tools to do it with it should still take you an hour or few.
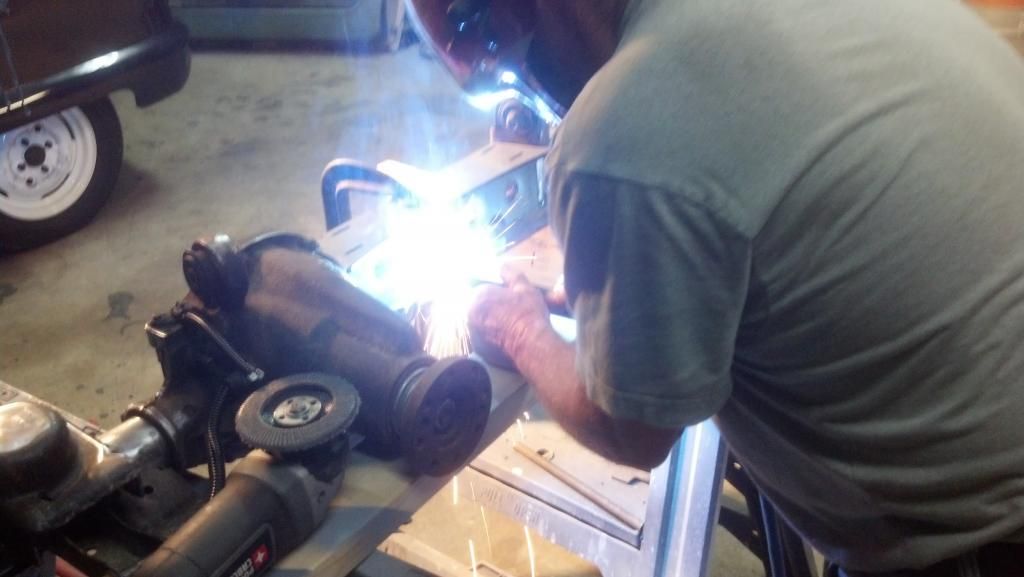
If your new (or new to you) Rear Rubicon axle comes with the brake caliper brackets that is great. Mine did not. You can easily transfer your stock caliper brackets by beating the brackets off the axle housing. This can only be done if your stock axle shafts are out. My driver side came out great! Passenger side below;
https://www.youtube.com/watch?v=w55D42qR3a0 I looked high and low for this caliper bracket/dust shield and nobody had this part, nor can I find it in OEM replacement parts anywhere. If you can find them please post up to save somebody the agony of seized parts. Once we got the axle shaft out, after an inspection, there was no true reason for it to be stuck in the housing like that�
If replacing the front axle, although the measurement shouldn�t have really changed, it is still recommended to get the Jeep aligned properly. Many would take this time to armor up, so we burned on C gussets and an Artec Armor kit along with new Synergy Ball Joints. In addition to the armor, I added new RK front upper arms and new RK rear arms.

Anyway, so you have your new axle installed under the Jeep, everything is back together and ready to roll. Now you can finish up the wiring.
Remember that 87 lead from the relay? That lead should be split at the end and run one to the indicator plunger (not side specific) and the locker (not side specific). The locker ground can just be grounded to the frame or any other suitable location. The indicator plunger ground needs to go to that second wire you should have labeled or should be color specific to the LED ground.
Hook those mothers up and test your switch and switch light or indicator light. When you hit the switch, it activates the relay (86-87) to send power to the locker AND indicator plunger. Locker engages through its ground and activates indicator plunger, which will go through your LED and finally to the LED ground (frame or body). That is your flow of electricity.
Make sure that once you�re back on the ground you torque your suspension bolts to spec!
Do the same for the rear locker. I ran my wiring along the passenger side to the passenger rear corner. In the corner there is a rubber grommet that will gain entry to the tail light compartment. From there you can get to the wires from the bottom of that compartment under the body, and run the wires either down the breather tube or to the rear upper control arm mount and follow it to the diff housing.
Through the firewall;
Front wiring goes across the engine bay and down the side by the brake booster to the front upper control arm mount.
Rear:
Since the locker has been tested and is working you can begin to install the axle(s). Start with the control arms and track bar, add in the coils, shocks and sway bar links. Finish up with the driveshaft and brakes. Sound easy? If you have everything ready to go and have the tools to do it with it should still take you an hour or few.
If your new (or new to you) Rear Rubicon axle comes with the brake caliper brackets that is great. Mine did not. You can easily transfer your stock caliper brackets by beating the brackets off the axle housing. This can only be done if your stock axle shafts are out. My driver side came out great! Passenger side below;
https://www.youtube.com/watch?v=w55D42qR3a0 I looked high and low for this caliper bracket/dust shield and nobody had this part, nor can I find it in OEM replacement parts anywhere. If you can find them please post up to save somebody the agony of seized parts. Once we got the axle shaft out, after an inspection, there was no true reason for it to be stuck in the housing like that�
If replacing the front axle, although the measurement shouldn�t have really changed, it is still recommended to get the Jeep aligned properly. Many would take this time to armor up, so we burned on C gussets and an Artec Armor kit along with new Synergy Ball Joints. In addition to the armor, I added new RK front upper arms and new RK rear arms.
Anyway, so you have your new axle installed under the Jeep, everything is back together and ready to roll. Now you can finish up the wiring.
Remember that 87 lead from the relay? That lead should be split at the end and run one to the indicator plunger (not side specific) and the locker (not side specific). The locker ground can just be grounded to the frame or any other suitable location. The indicator plunger ground needs to go to that second wire you should have labeled or should be color specific to the LED ground.
Hook those mothers up and test your switch and switch light or indicator light. When you hit the switch, it activates the relay (86-87) to send power to the locker AND indicator plunger. Locker engages through its ground and activates indicator plunger, which will go through your LED and finally to the LED ground (frame or body). That is your flow of electricity.
Make sure that once you�re back on the ground you torque your suspension bolts to spec!
JK Super Freak
Joined: Feb 2009
Posts: 1,236
Likes: 0
From: Pittsburgh, PA
Hey Yamaha99, any regrets wiring the axle plugs the way you did?
I'm about to wire my front the way you did with epoxy because I'd much rather not spend $100 on the harness just to cut off the ends.
I'm about to wire my front the way you did with epoxy because I'd much rather not spend $100 on the harness just to cut off the ends.