
Mirror relocation brackets help needed (rugged ridge)


Former Vendor
Joined: Nov 2009
Posts: 720
Likes: 1
From: Suwanee, GA
Jeep changed the supplier of the mirrors mid 2008. Because the relocation brackets were tooled off the original design we were stuck with a very expensive problem.
(1) do we spend more tooling money to develop a new design for the new mirrors and have two different part numbers?
(2) supply a drop in insert to allow the same tooling to work with early and later JK mirrors. Keep one part number, and save tooling cost that help to keep the retail cost down.
We took option #2 and that is why the brackets now have the plastic inserts.
Now to the sticking mirror heads.... Jeep also stopped painting the aluminum brackets under the plastic covers at the same time they got the new supplier. What happens is that the unpainted aluminum parts are "Rusting" together. The oxidation build up between the unpainted aluminum parts can be very hard to break. Not all JK's have this problem but we find a lot more as time allows them to rust together. We suggest that a good quality lubricant - rust buster be used on the two mating parts. WD40 is good but a product called PB Blaster is much better. Spray parts and allow to sit overnight. Apply another coating the next morning and allow it to sit overnight. This should break up the oxidization and allow the mirror head to be removed as noted in the instructions.
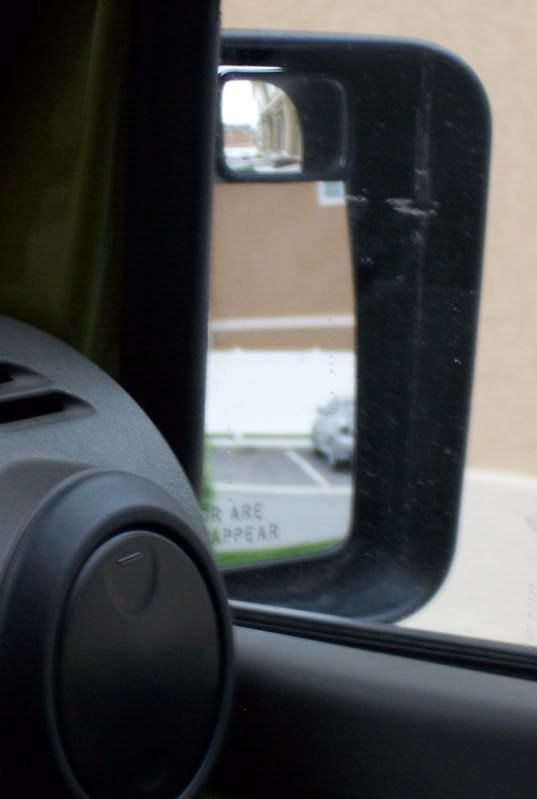
Now to the 1/4 mirror view on the passenger side... This one is a hard one to explain because everyone hates this and wonders why we allowed this to happen...
If you been around Jeeps for a long time you might already know that mirror relocation brackets on earlier models (YJ-TJ) allowed NO visibility on the passenger side with the doors on. It just how the mirrors have to sit on the A-pillar. We had to figure out a way to get some mirror visible with the JK but it proved to be a lot harder than you might think. We had several designs working. When we pushed the mirrors out three things happened.
(1) the Jeep started to look like Dumbo with big ugly ears stuck to the doors.
(2) to get a really clear view the mirror heads needed to be turned inward and this made contact with the doors when opened.
(3) the darn things made tooooo much wind noise.
In the end we compromised with the 1/4 view. It's 1,000 times better than earlier relocation brackets and it also looks good and makes no wind noise.
Besides what better excuse for taking your doors off.
(1) do we spend more tooling money to develop a new design for the new mirrors and have two different part numbers?
(2) supply a drop in insert to allow the same tooling to work with early and later JK mirrors. Keep one part number, and save tooling cost that help to keep the retail cost down.
We took option #2 and that is why the brackets now have the plastic inserts.
Now to the sticking mirror heads.... Jeep also stopped painting the aluminum brackets under the plastic covers at the same time they got the new supplier. What happens is that the unpainted aluminum parts are "Rusting" together. The oxidation build up between the unpainted aluminum parts can be very hard to break. Not all JK's have this problem but we find a lot more as time allows them to rust together. We suggest that a good quality lubricant - rust buster be used on the two mating parts. WD40 is good but a product called PB Blaster is much better. Spray parts and allow to sit overnight. Apply another coating the next morning and allow it to sit overnight. This should break up the oxidization and allow the mirror head to be removed as noted in the instructions.
Now to the 1/4 mirror view on the passenger side... This one is a hard one to explain because everyone hates this and wonders why we allowed this to happen...
If you been around Jeeps for a long time you might already know that mirror relocation brackets on earlier models (YJ-TJ) allowed NO visibility on the passenger side with the doors on. It just how the mirrors have to sit on the A-pillar. We had to figure out a way to get some mirror visible with the JK but it proved to be a lot harder than you might think. We had several designs working. When we pushed the mirrors out three things happened.
(1) the Jeep started to look like Dumbo with big ugly ears stuck to the doors.
(2) to get a really clear view the mirror heads needed to be turned inward and this made contact with the doors when opened.
(3) the darn things made tooooo much wind noise.
In the end we compromised with the 1/4 view. It's 1,000 times better than earlier relocation brackets and it also looks good and makes no wind noise.
Besides what better excuse for taking your doors off.
Last edited by Rugged_Ridge; Jan 14, 2010 at 05:00 AM.
JK Enthusiast
Joined: Apr 2007
Posts: 356
Likes: 0
From: Tucson, AZ
I did have a little problem with one of my mirrors. I backed the screw out from the underside leaving it about 1/2 threaded in. Gave a few love taps with a hammer and it popped out. The screw head kept it from falling on the floor 
It looked like the metal had a little corrosion on it and had a death grip on the housing.
It looked like the metal had a little corrosion on it and had a death grip on the housing.
JK Newbie
Joined: Oct 2009
Posts: 24
Likes: 0
From: denham springs, la
They were one of the first things I did to my jeep, cause riding naked is awesome. And I had to leave the mirror bracket on the jeep in order to get the mirrors off. They are awesome without doors...but suck when there back on. Now I ride with my passenger side stock and riverside modified.
Thread Starter
JK Newbie
Joined: Jun 2009
Posts: 84
Likes: 0
From: FL
Well..I happened to have a can of PB Blaster in the garage thank goodness..
SIDE NOTE: It's always been humorus to me to see a "time frame" and "expertise level" attached to any do it yourself instructions. These things usually come from the seller I've noticed..but they only take into account a perfect world. I'd love to see one that reads: "entry level with basic hand tools. Should take 30-45 minutes......if everything goes as planned, but we've gotten reports that this could take as long as eight hours, require six trips to the store and the help of two of your friends..one of which who is a mechanic". I sound like Andy Rooney..whatever..off my side note soapbox.
I sprayed the mirror after covering the plastic on the head portion in case the PB melted it. btw.. it didn't harm mine..just shined it up and came off with a wet towel. (Now next year when they change the chemical makeup of the mirror plastic..who knows ). I let it sit overnight (upright, so it would drain into the contact point - er uh.."death grip" point as mentioned earlier).
This afternoon I sat on the floor in my basement where it was warm and kinda like a little kid tried putting my feet on the mirror and holding onto the arm with my hands and pulling/twisting..oh..and the remains of the PB were on there still so it made it slippery. After a minute or two I pictured what could happen when this thing lets go.... yard sale. So I sprayed it again and waited about five minutes. This time I had the secret. Mirror face down on towel. Handy dandy Craftsman hammer (i.e. large socket wrench with rag wrapped around it to soften blow at contact point). Knee on mirror and a few good whacks at the base of the arm and WA-LA!! Off she went. skidding across the floor..mirror in pristine condition (I think)..
more to be posted after dinner (with pics if I can find my camera cable).
Okay..so it's been a couple days..I found the camera cable so you can see what I'm talking about. But first..the rest of the story (said Paul Harvey). The passenger side mirror bracket went on without incident. For thos wondering, Rugged Ridge (Omix-Ada) makes some nice stuff as far as I'm concerned (the neoprene seat vests are the next write up I'll be doing). The brackets AND the door hole filler plates both have full sized rubberized gaskets so as to protect your paint and reduce any chance of rattling noise (I was hoping for that, you can't see any in the pictures, nor does it say anything about them on any other distributors sites when describing the parts). You will need a ratchet and socket to get the bottom bolt in the bracket, a screwdriver T40 (Torx) won't angle into the bracket space from below properly from how I saw it.
A word to the wise..there is a "break-away" point on our mirrors people. This break away point is for car washes, parking lots, tight parking spaces, narrow streets, etc. (you get the point). When I removed my P side mirror I had been twisting to both ends of the centered break away point. When the mirror came off I didn't notice if it was back to center or at one end of the break point. I installed it with the extra plastic collar included for 08 (latter half of year build) and newer mirrors. (BTW - If you have a newer one just put the collar on the last 'tapered' portion of the metal mirror post when inserting into the new support arm.) I then tried to check the break point as directed. it turned in..but not out..so far in it actually came in contact with the door glass. (second note: even after lining up the mirror with the door glass..if a strong wind catches the door it can come in contact with the mirror..the factory door limiter starp has some give to it and it can be pushed open farther than just opening it all the way normally..it will be fine) I figured that I must have not had it centered and removed the mirror to place it again after centering. Well..it was centered. I replaced it and tried the break point (odd it's called that..how fitting)again..CRACK...wtf was that? Answer? Still not 100% sure but I'm willing to bet it was one of three plastic connect points from the mirror to the housing (you'll see in photos for drivers side). Now my mirror is permanently a little loose.  Bummer.
It still breaks away in both directions..one (toward the rear) much easier than toward the front. so much so I was afraid a strong wind would turn it back in. (Damn, I gotta lay off the spinach). The view from the drivers seat (I'm 6'0") is as mentioned everywhere on the sight.. ALMOST worthless.. you'll get used to it, but it's not the same by any means..I realize now how much I use that thing. It looks pretty cool. Really. The quality of fit and finish is pretty good..a couple of different angles here or there would be cool..but I think it would take away from the strength so overall again..I'd say the fit and finish are top notch IMHO (In My Humble Opinion - for those who were wondering what that meant). I will most likely be getting a spot mirror soon enough.. I think. I'll wait until it warms up, glue and cold mix poorly.
Drivers side later in thread. I'm too f'in cold to try any more now..yeah..I'm a P#$$%.
pics:
SIDE NOTE: It's always been humorus to me to see a "time frame" and "expertise level" attached to any do it yourself instructions. These things usually come from the seller I've noticed..but they only take into account a perfect world. I'd love to see one that reads: "entry level with basic hand tools. Should take 30-45 minutes......if everything goes as planned, but we've gotten reports that this could take as long as eight hours, require six trips to the store and the help of two of your friends..one of which who is a mechanic". I sound like Andy Rooney..whatever..off my side note soapbox.
I sprayed the mirror after covering the plastic on the head portion in case the PB melted it. btw.. it didn't harm mine..just shined it up and came off with a wet towel. (Now next year when they change the chemical makeup of the mirror plastic..who knows
). I let it sit overnight (upright, so it would drain into the contact point - er uh.."death grip" point as mentioned earlier). This afternoon I sat on the floor in my basement where it was warm and kinda like a little kid tried putting my feet on the mirror and holding onto the arm with my hands and pulling/twisting..oh..and the remains of the PB were on there still so it made it slippery. After a minute or two I pictured what could happen when this thing lets go.... yard sale. So I sprayed it again and waited about five minutes. This time I had the secret. Mirror face down on towel. Handy dandy Craftsman hammer (i.e. large socket wrench with rag wrapped around it to soften blow at contact point). Knee on mirror and a few good whacks at the base of the arm and WA-LA!! Off she went. skidding across the floor..mirror in pristine condition (I think)..
more to be posted after dinner (with pics if I can find my camera cable).
Okay..so it's been a couple days..I found the camera cable so you can see what I'm talking about. But first..the rest of the story (said Paul Harvey). The passenger side mirror bracket went on without incident. For thos wondering, Rugged Ridge (Omix-Ada) makes some nice stuff as far as I'm concerned (the neoprene seat vests are the next write up I'll be doing). The brackets AND the door hole filler plates both have full sized rubberized gaskets so as to protect your paint and reduce any chance of rattling noise (I was hoping for that, you can't see any in the pictures, nor does it say anything about them on any other distributors sites when describing the parts). You will need a ratchet and socket to get the bottom bolt in the bracket, a screwdriver T40 (Torx) won't angle into the bracket space from below properly from how I saw it.
A word to the wise..there is a "break-away" point on our mirrors people. This break away point is for car washes, parking lots, tight parking spaces, narrow streets, etc. (you get the point). When I removed my P side mirror I had been twisting to both ends of the centered break away point. When the mirror came off I didn't notice if it was back to center or at one end of the break point. I installed it with the extra plastic collar included for 08 (latter half of year build) and newer mirrors. (BTW - If you have a newer one just put the collar on the last 'tapered' portion of the metal mirror post when inserting into the new support arm.) I then tried to check the break point as directed. it turned in..but not out..so far in it actually came in contact with the door glass. (second note: even after lining up the mirror with the door glass..if a strong wind catches the door it can come in contact with the mirror..the factory door limiter starp has some give to it and it can be pushed open farther than just opening it all the way normally..it will be fine) I figured that I must have not had it centered and removed the mirror to place it again after centering. Well..it was centered. I replaced it and tried the break point (odd it's called that..how fitting)again..CRACK...wtf
was that? Answer? Still not 100% sure but I'm willing to bet it was one of three plastic connect points from the mirror to the housing (you'll see in photos for drivers side). Now my mirror is permanently a little loose. It still breaks away in both directions..one (toward the rear) much easier than toward the front. so much so I was afraid a strong wind would turn it back in. (Damn, I gotta lay off the spinach). The view from the drivers seat (I'm 6'0") is as mentioned everywhere on the sight.. ALMOST worthless.. you'll get used to it, but it's not the same by any means..I realize now how much I use that thing. It looks pretty cool. Really. The quality of fit and finish is pretty good..a couple of different angles here or there would be cool..but I think it would take away from the strength so overall again..I'd say the fit and finish are top notch
IMHO (In My Humble Opinion - for those who were wondering what that meant). I will most likely be getting a spot mirror soon enough.. I think. I'll wait until it warms up, glue and cold mix poorly.Drivers side later in thread. I'm too f'in cold to try any more now..yeah..I'm a P#$$%.
pics:
Last edited by SUNPRO; Jan 18, 2010 at 11:40 PM. Reason: Adding rest of information (write up)
JK Enthusiast
Joined: Dec 2009
Posts: 242
Likes: 0
From: Indiana
I put the relocation brackets on about a week after I got my jeep. I wasn't sure about the 1/4 mirror on the passenger side but it's worked fine. There's enough mirror there to see your blindspot.
JK Freak
Joined: Jun 2008
Posts: 583
Likes: 1
From: Brandon, MS
Well..I happened to have a can of PB Blaster in the garage thank goodness..
SIDE NOTE: It's always been humorus to me to see a "time frame" and "expertise level" attached to any do it yourself instructions. These things usually come from the seller I've noticed..but they only take into account a perfect world. I'd love to see one that reads: "entry level with basic hand tools. Should take 30-45 minutes......if everything goes as planned, but we've gotten reports that this could take as long as eight hours, require six trips to the store and the help of two of your friends..one of which who is a mechanic". I sound like Andy Rooney..whatever..off my side note soapbox.
I sprayed the mirror after covering the plastic on the head portion in case the PB melted it. btw.. it didn't harm mine..just shined it up and came off with a wet towel. (Now next year when they change the chemical makeup of the mirror plastic..who knows). I let it sit overnight (upright, so it would drain into the contact point - er uh.."death grip" point as mentioned earlier).
This afternoon I sat on the floor in my basement where it was warm and kinda like a little kid tried putting my feet on the mirror and holding onto the arm with my hands and pulling/twisting..oh..and the remains of the PB were on there still so it make it slippery. After a minute or two I pictured what could happen when this thing lets go.... yard sale. So I sprayed it again and waited about five minutes. This time I had the secret. Mirror face down on towel. Handy dandy Craftsman hammer (i.e. large socket wrench with rag wrapped around it to soften blow at contact point). Knee on mirror and a few good whacks at the base of the arm and WA-LA!! Off she went. skidding across the floor..mirror in pristine condition (I think)..
more to be posted after dinner (with pics if I can find my camera cable).
SIDE NOTE: It's always been humorus to me to see a "time frame" and "expertise level" attached to any do it yourself instructions. These things usually come from the seller I've noticed..but they only take into account a perfect world. I'd love to see one that reads: "entry level with basic hand tools. Should take 30-45 minutes......if everything goes as planned, but we've gotten reports that this could take as long as eight hours, require six trips to the store and the help of two of your friends..one of which who is a mechanic". I sound like Andy Rooney..whatever..off my side note soapbox.
I sprayed the mirror after covering the plastic on the head portion in case the PB melted it. btw.. it didn't harm mine..just shined it up and came off with a wet towel. (Now next year when they change the chemical makeup of the mirror plastic..who knows
). I let it sit overnight (upright, so it would drain into the contact point - er uh.."death grip" point as mentioned earlier). This afternoon I sat on the floor in my basement where it was warm and kinda like a little kid tried putting my feet on the mirror and holding onto the arm with my hands and pulling/twisting..oh..and the remains of the PB were on there still so it make it slippery. After a minute or two I pictured what could happen when this thing lets go.... yard sale. So I sprayed it again and waited about five minutes. This time I had the secret. Mirror face down on towel. Handy dandy Craftsman hammer (i.e. large socket wrench with rag wrapped around it to soften blow at contact point). Knee on mirror and a few good whacks at the base of the arm and WA-LA!! Off she went. skidding across the floor..mirror in pristine condition (I think)..
more to be posted after dinner (with pics if I can find my camera cable).

Oh yea, love the Jeep = beer avatar
JK Junkie
Joined: Jul 2008
Posts: 2,088
Likes: 2
From: Tooele (two-willa), Utah
Mine were a bitch to get off... but I took them off the door, saturated them in WD-40 and put them in a vise, tapped it really hard and pop, they came off. Just be careful, when they popped off, they flew! Luckily they didn't break.
I'm seriously looking into a modification to the passenger mirror, maybe space it out a bit. I personally don't care about the Dumbo look on that side... I'd rather have visibility. I'm thinking of a block that attaches to the Jeep, then the bracket to the block.
I'm seriously looking into a modification to the passenger mirror, maybe space it out a bit. I personally don't care about the Dumbo look on that side... I'd rather have visibility. I'm thinking of a block that attaches to the Jeep, then the bracket to the block.