Jeep Wrangler JK: How to Install ESP Kill Switch
Did you know your Jeep has ESP? No, it's not psychic, but the Electronic Stability Program thinks it is. Read on to learn how to take back control of your Jeep.
This article applies to the Jeep Wrangler JK (2007-Present).
The Jeep Wrangler JK comes standard with the Electronic Stability Program (ESP). It's designed to enhance the vehicle's stability by electronically detecting and assisting drivers in critical driving situations under adverse conditions. Sensors located throughout the vehicle send data related to steering, acceleration and yaw to help the system determine if the vehicle is going in the right direction as determined by the driver's steering pattern. If not, ESP kicks in with braking and engine interventions to correct oversteer/understeer and keep the vehicle on the road. This is a great safety feature on the road, but a nuisance when you hit the mud. This article will show you how to install an ESP kill switch to disable this feature with a single click.

Materials Needed
- 2 prong toggle or switch
- 2 butt connectors
- Wire cutters
- 14 or 16 gauge wire
Step 1 – Locate the correct sensor wire
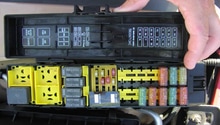
Open the driver's side front and rear doors for some working room and locate the main wire harness behind the center console. Gently cut through the outer casing to reveal the wire bundle as shown in Figure 1.
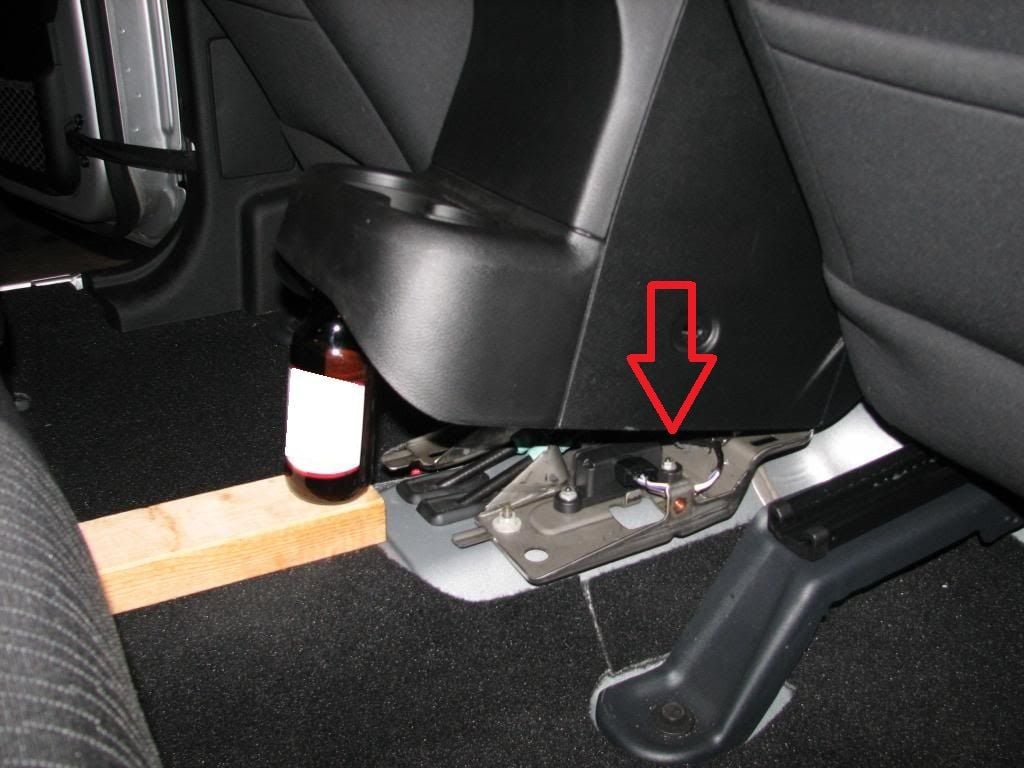
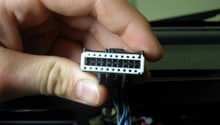
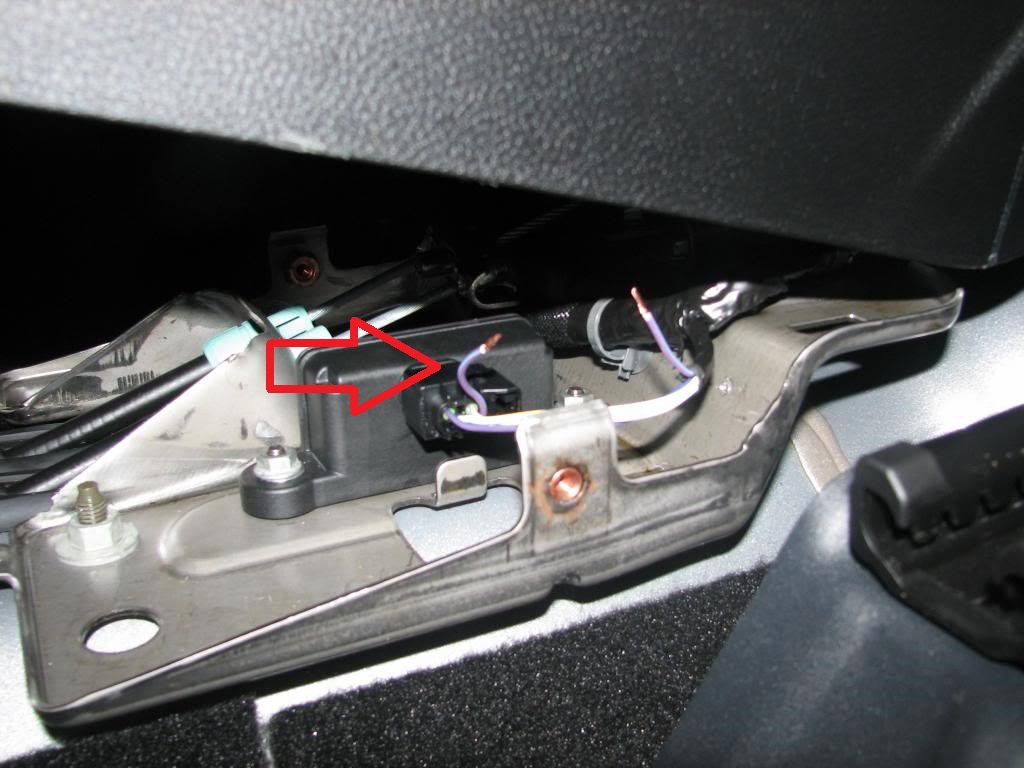
It is important to locate the correct wire, as there are both purple/blue and purple/light blue wires in this particular harness. You will need to work on the purple and light blue wire as shown in Figure 2.
Step 2 – Verify correct wire
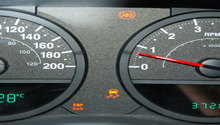
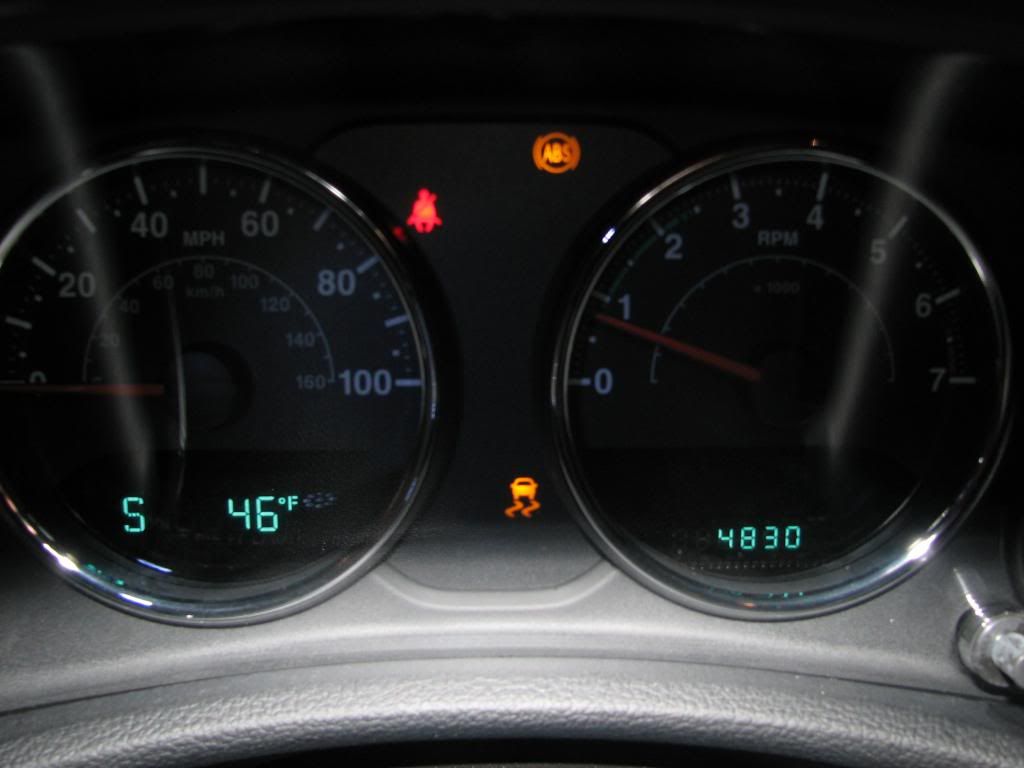
Before proceeding with the switch installation, cut the purple and light blue wire to verify if it's the correct one. Start the Jeep and take a look at the dash. There should be three lights illuminated: traction control, ABS and ESP OFF (shown in Figure 3). Then you know you cut the right one!
Step 3 – Install the kill switch
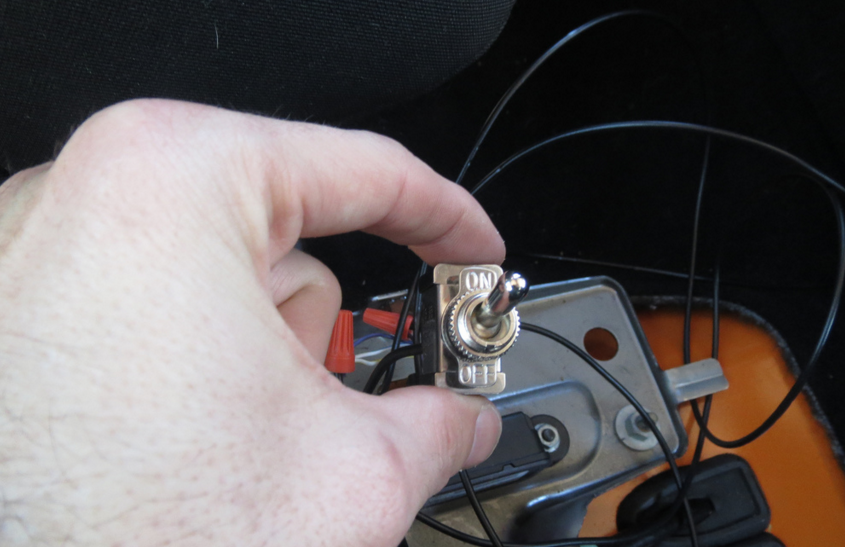
Now that we have the right wire, it's time to install the switch. This is a simple on/off toggle switch with two prongs (see Figure 4), so you just need to connect each end of the wire to the two prongs of the switch. Strip off enough of the insulation to get adequate wire around each prong, and slide a butt connector down each wire. Next, connect the wire to the prongs and put a drop of solder to make a good connection. Then slip the butt connector over each prong and tighten.
Step 4 – Test the switch
With the switch wired in place, set it to the on position to complete the circuit and verify that none of the indicator lights come on. Next, turn the switch off to open the circuit and you should see the three indicator lights illuminate; your kill switch is now functional. Keep in mind that any time you decide to flip the kill switch, you would have to turn the Jeep off and on to reset the system.
Related Discussions
- Another ESP Kill Switch Tutorial - JK-Forum.com
- ESP Kill Switch Writeup - JK-Forum.com