Rugged Ridge Switch Wiring Diagram
 06-18-2015, 12:30 PM
#21
JK Newbie
Join Date: Jun 2015
Location: Tampa, FL
Posts: 32
Likes: 0
Received 0 Likes
on
0 Posts
I don't dabble with wiring that much and recently got the Rugged Ridge Switch and was looking for instructions on wiring it. Found a great video that explains how to hook up the power to it properly.
Hope this helps
http://www.youtube.com/watch?v=6ndOlIgn1ys
Hope this helps
http://www.youtube.com/watch?v=6ndOlIgn1ys
 06-18-2015, 01:01 PM
#22
JK Junkie
I don't dabble with wiring that much and recently got the Rugged Ridge Switch and was looking for instructions on wiring it. Found a great video that explains how to hook up the power to it properly.
Hope this helps
http://www.youtube.com/watch?v=6ndOlIgn1ys
Hope this helps
http://www.youtube.com/watch?v=6ndOlIgn1ys
 It's like the second schematic I posted except the accessory draws more power than the little LED they used in the video so instead the ACC from the switch is used to trigger a relay. Safety is important.
And welcome to the forum, jimps.
06-19-2015, 05:14 AM
#23
JK Newbie
Join Date: Jun 2015
Location: Tampa, FL
Posts: 32
Likes: 0
Received 0 Likes
on
0 Posts
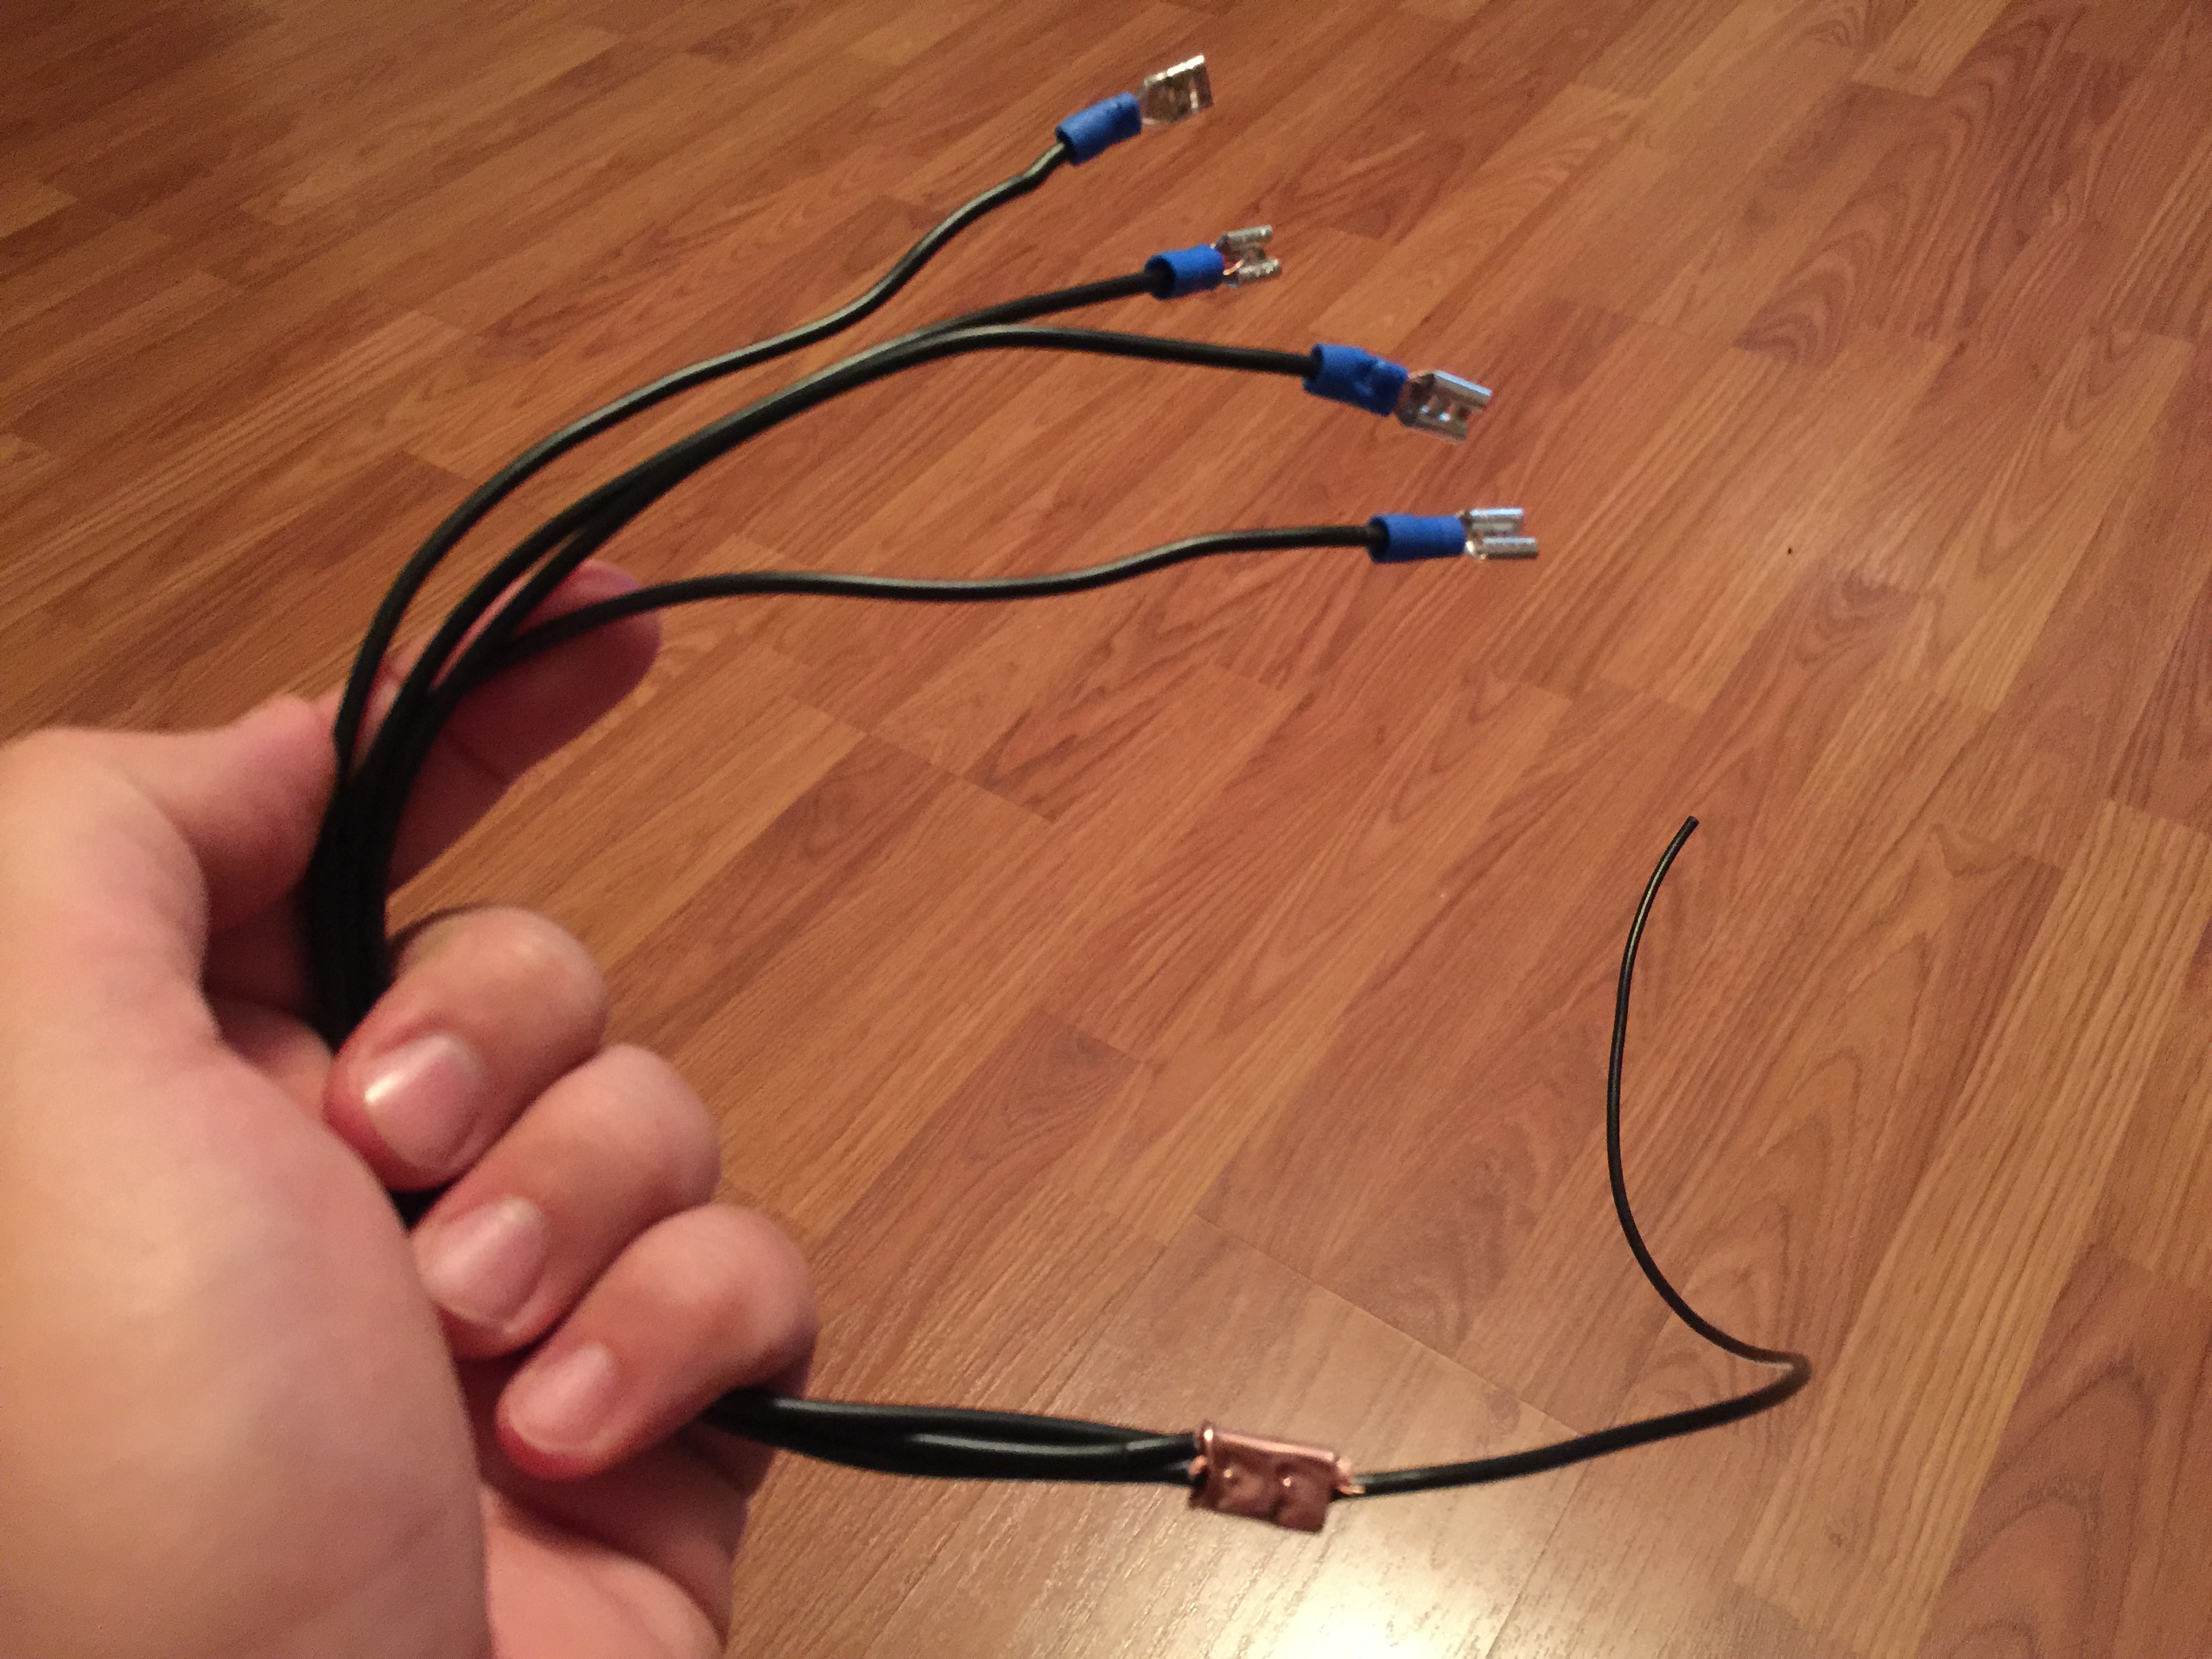
The positive and negative wires coming from the pillar I am going to bundle like this. Not sure if I need to change the gauge of the rat tail but I used 16 gauge all the way. I uploaded the picture without the finishing electrical tape or heat shrink I will use over the copper crimper.
06-19-2015, 05:38 AM
#24
JK Junkie
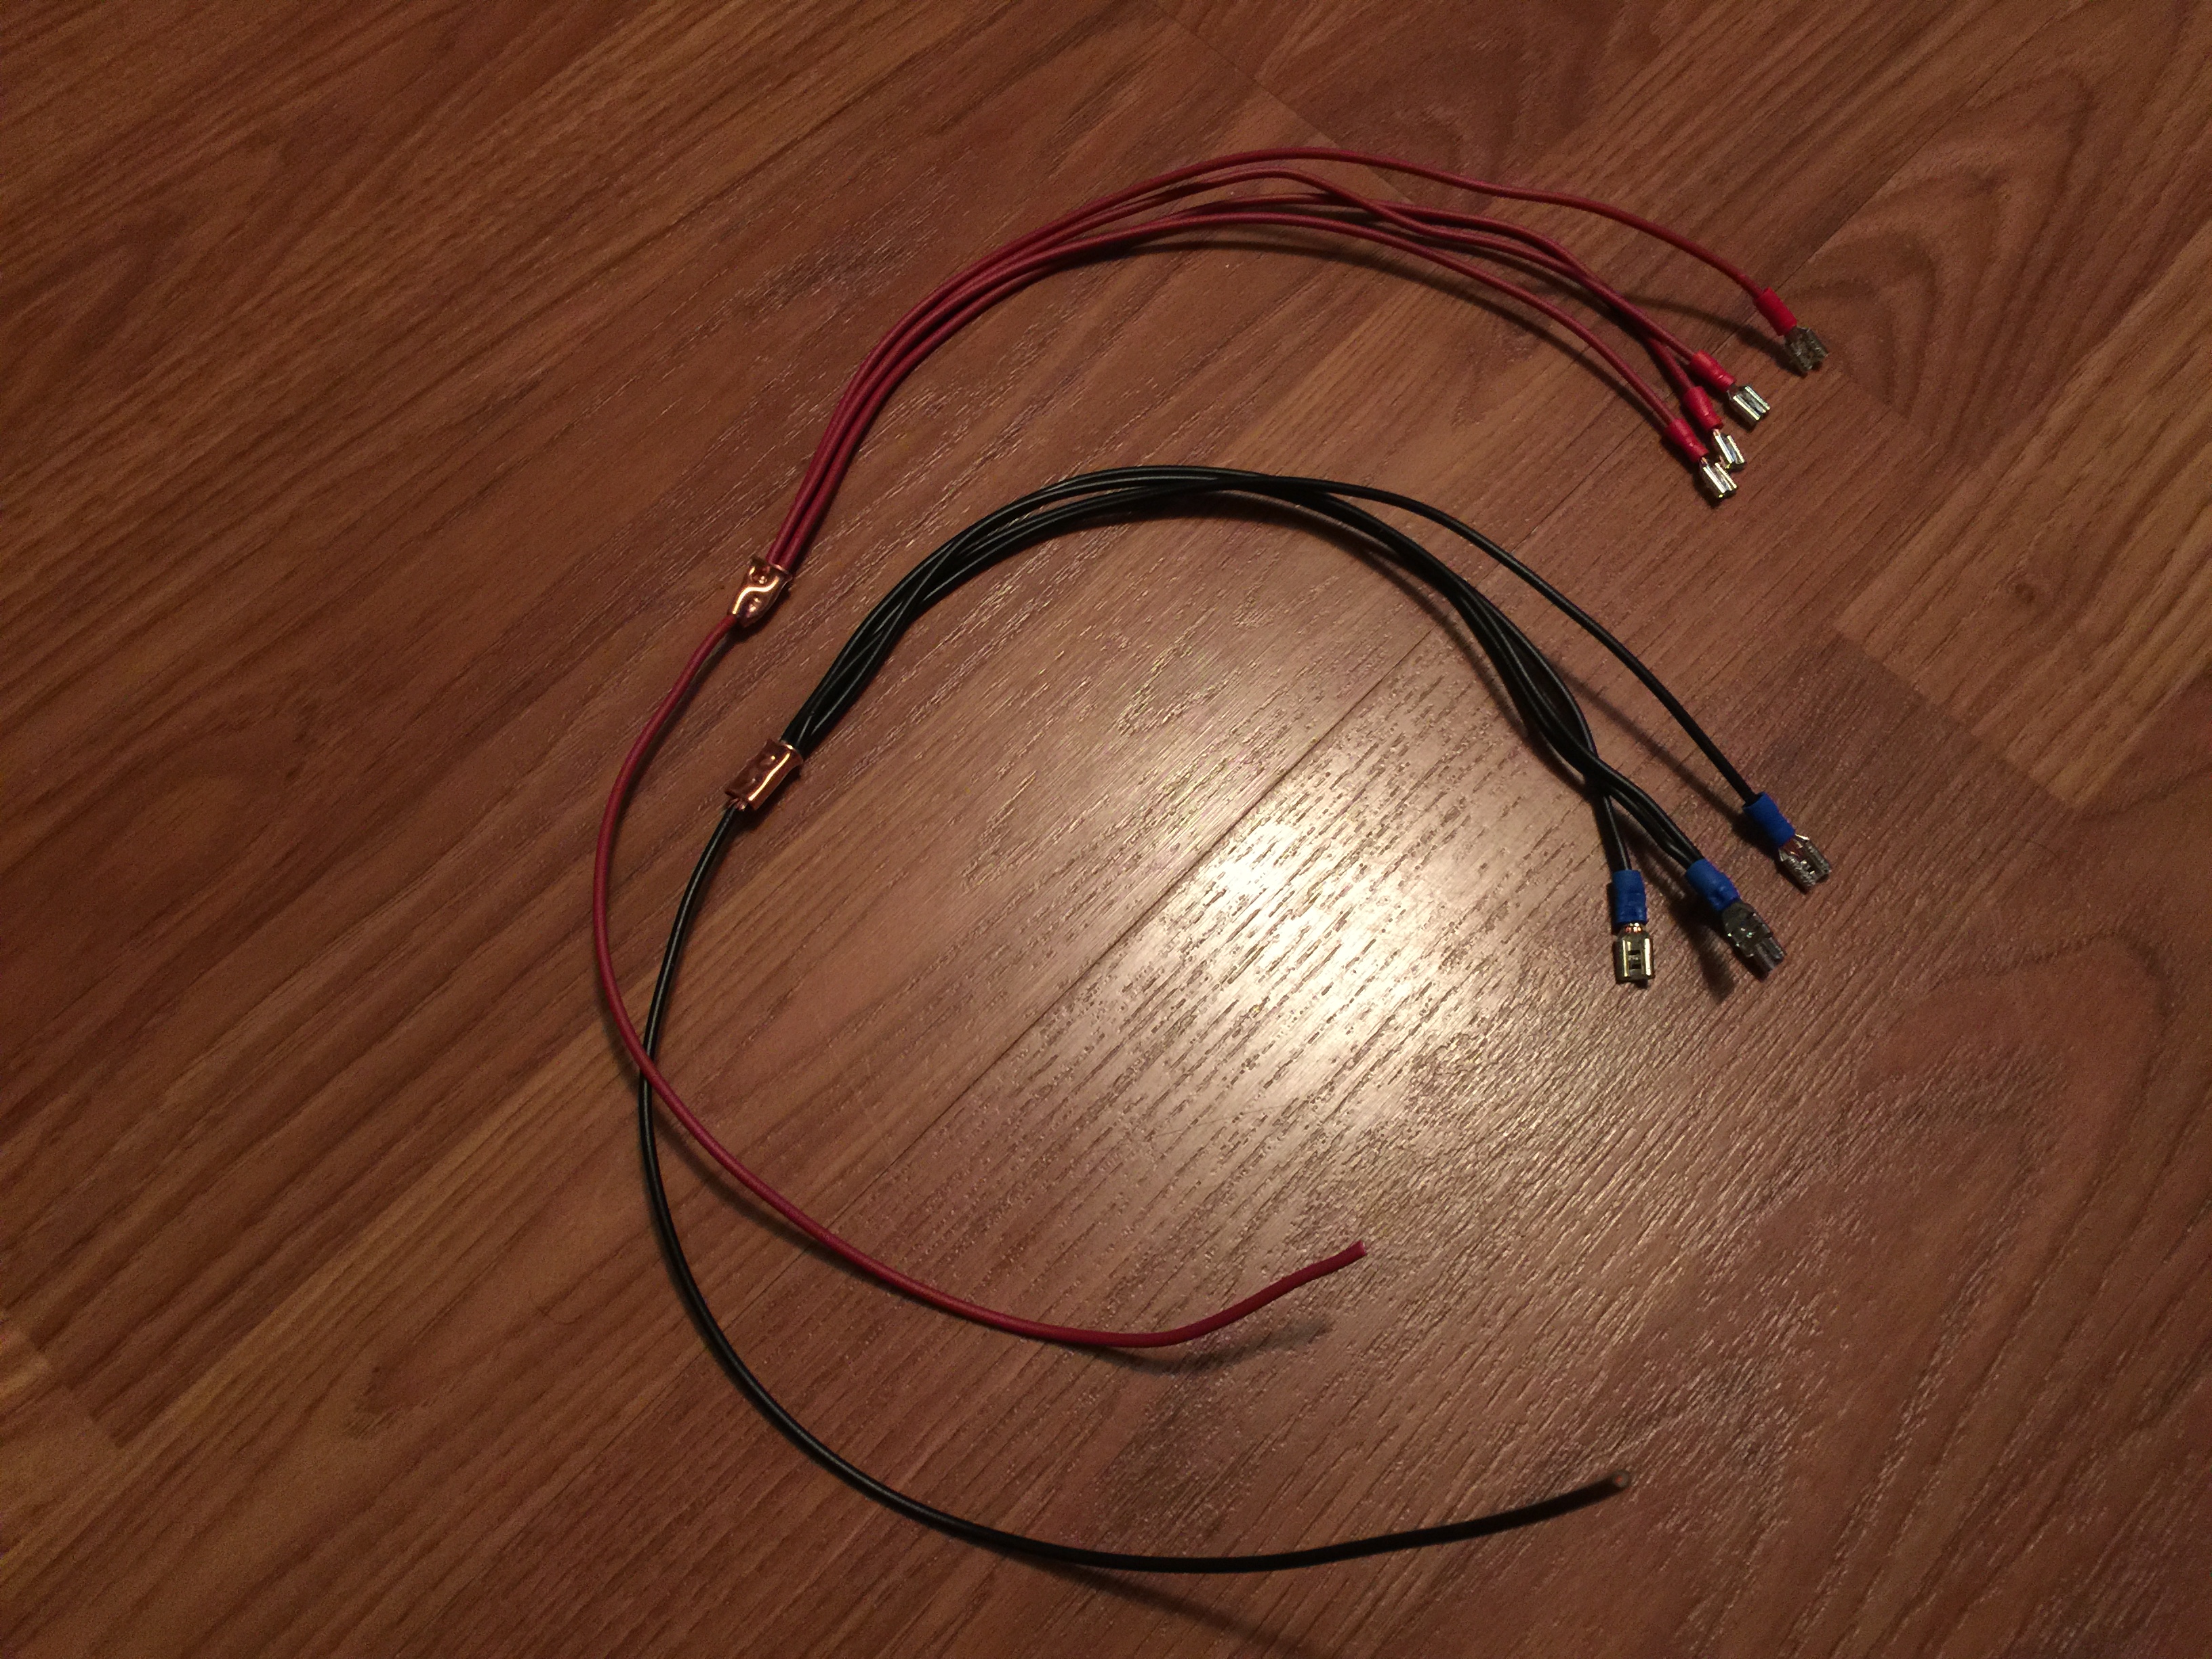
You have 4 switches in the pillar? Usually you just run one wire to the first switch and then jump the first to second, second to third, and third to fourth. Same with the ground. But that should work too. The control circuits do run on milliamps so 16 gauge should be fine. It's a good idea to put a 3A fuse on the control circuit as well.
06-19-2015, 07:09 AM
#25
JK Newbie
Join Date: Jun 2015
Location: Tampa, FL
Posts: 32
Likes: 0
Received 0 Likes
on
0 Posts
You have 4 switches in the pillar? Usually you just run one wire to the first switch and then jump the first to second, second to third, and third to fourth. Same with the ground. But that should work too. The control circuits do run on milliamps so 16 gauge should be fine. It's a good idea to put a 3A fuse on the control circuit as well.
I bought a bussman fuse/relay box from ebay with that 3 amp fuse that leads to this switch pod. The guy who made it said he has instructions so I feel confident putting this in.
To be honest, this is actually fun. My niece also has a 2015 jk 2door and what ever mods I do that she wants, I will do on hers. The experience I gain from mine will benefit her for sure. Haha!
06-19-2015, 07:14 AM
#26
JK Junkie
Thanks 14Sport. I didn't even think of daisy chaining it that way. I'll look for connectors that will let me do that. The less rats nest the better.
I bought a bussman fuse/relay box from ebay with that 3 amp fuse that leads to this switch pod. The guy who made it said he has instructions so I feel confident putting this in.
To be honest, this is actually fun. My niece also has a 2015 jk 2door and what ever mods I do that she wants, I will do on hers. The experience I gain from mine will benefit her for sure. Haha!
You should practice on your neice's Jeep so yours will be perfect.

Edit: I know I have a couple of pics posted where it shows daisy chaining some relays. I'll see if I can find them for you.
Last edited by 14Sport; 06-19-2015 at 07:20 AM.
06-19-2015, 07:35 AM
#27
JK Junkie
Found it. You can see where I daisy chained four relays together in this bench test in post #6.
https://www.jk-forum.com/forums/jk-e...1/#post4056557
https://www.jk-forum.com/forums/jk-e...1/#post4056557
06-19-2015, 08:34 AM
#28
JK Newbie
Join Date: Jun 2015
Location: Tampa, FL
Posts: 32
Likes: 0
Received 0 Likes
on
0 Posts
Found it. You can see where I daisy chained four relays together in this bench test in post #6.
https://www.jk-forum.com/forums/jk-e...1/#post4056557
https://www.jk-forum.com/forums/jk-e...1/#post4056557
 06-19-2015, 08:43 AM
#29
JK Junkie
06-19-2015, 09:38 AM
#30
JK Junkie
This might help you as well. It is the basic wiring schematic for wiring your own 4 switch box.
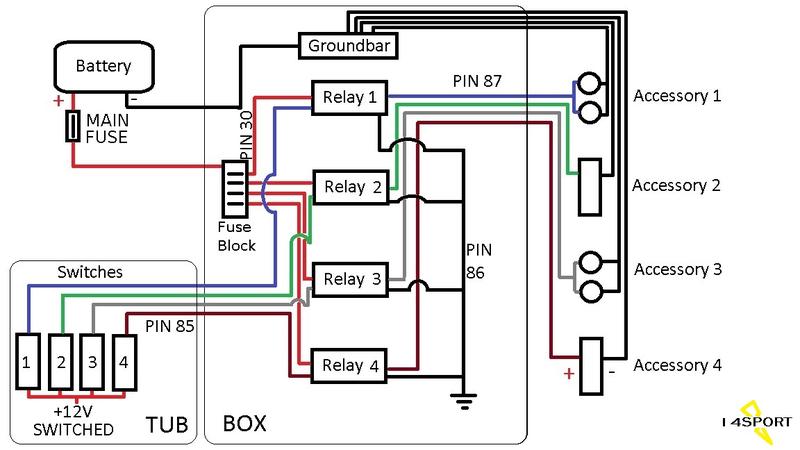
You don't have to return the accessory grounds back to the box. You can just ground them to the chassis to save wire.
You don't have to return the accessory grounds back to the box. You can just ground them to the chassis to save wire.